How to buy PVU to start in Plant vs Undead | Tutorial step by step

For some time now there has been a boom with blockchain games as they have been part of a way to monetize the hours spent doing something we all love, play videogames and if we already did it for free, getting involved in it and being able to monetize even more will attract us. Among the many games I have talked about, a game came out that sincerely caught my attention for bringing a fresh idea based on a game I loved (Plants vs. Zombies), but brought to the revolutionary world of tokenizing everything and being able to have fun playing, its name is "Plant vs Undead".

What is Plant vs Undead? Well, it is a concept similar to the game I already mentioned in which we can have our plants and with them besides being able to fight against waves of enemies, we will take care of them and that care will be rewarded with tokens called LE that are exchangeable to PVU and have a market value of currently 15-20 USD. As the market price to start acquiring through plants (not temporary) is quite high (approximately 100 PVU which is about 1500-2000 USD) and that is only for a plant there is also a cheaper way to start, which is the farmer mode. Basically, in it, you take care of the plants of other players and yours (plants temporally, not permanents) and for that, you are rewarded with LE and the minimum investment is 5 PVU (60 USD).
I don't want to delve too much into how it works or how much you earn since I will talk about that in another post but I have had the case of many friends who want to start and have no idea how to acquire the 5 PVU so this is why I decided to make a simple tutorial to acquire them. This process is similar to acquire the token of any blockchain game so it could be useful if you are looking for another one, I will start talking about how to acquire them from Hive but if in your case you already have the money in Binance you can skip the first two steps and start in the third one.
Having said that, let's start.
Step 1: Convert your money to Hive.
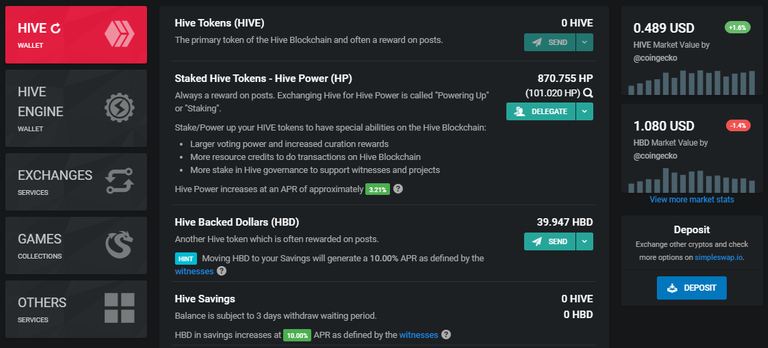
Well, this is probably not your case as many people store Hive themselves so if your money is already in Hive I invite you to move on to the next step, if not then stay.
The first thing is to go to the market part, I will use the PeakD platform but in hive.blog it works similarly. In your wallet click on the drop-down tab on the right and go to the "Market" section as illustrated in the picture above.
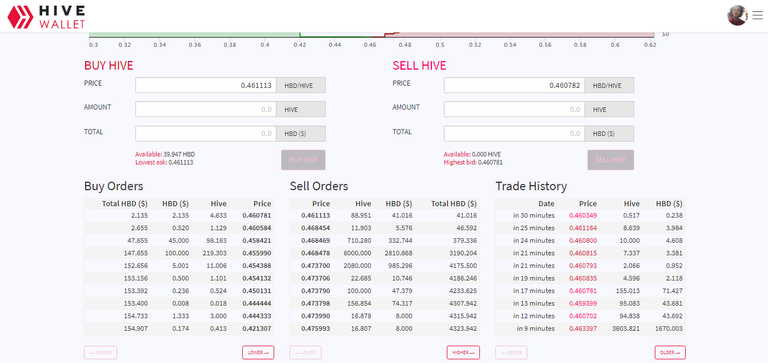
Here you will see many things that you probably don't understand, first make sure you are logged obviously and the second thing is to see what amount of HBD you will change, for this focus on the "Sell Orders" column and look for the operation that supports the amount in the HBD column ($), for example, if I have 100 HBD and the first option as shown in the picture doesn't support that amount then, in this case, the option to choose is the third one of 0.468469 which is the one I mark in the screenshot.
Automatically the previous orders will be executed and the remaining amount will be executed with that third-order so your money will be exchanged at a good market rate since the first ones are the lowest selling rates.
Step 2: Send your money to Binance.
Well, you switched your HBD to Hive like a pro and now you need to move your money to an Exchange to be exchanged, since Binance only supports Hive that's why we switched it. This step is really simple so we will go to Binance in our Spot Wallet.
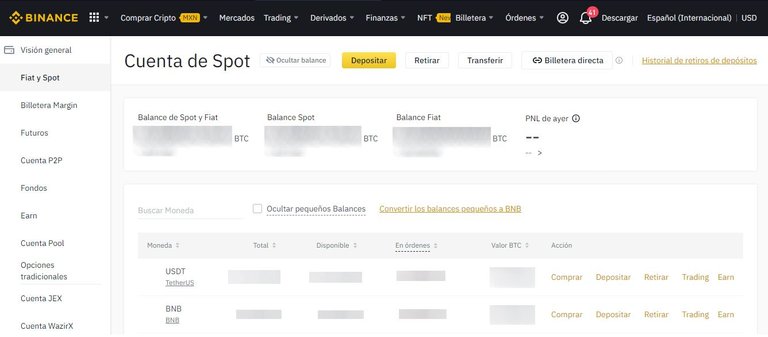
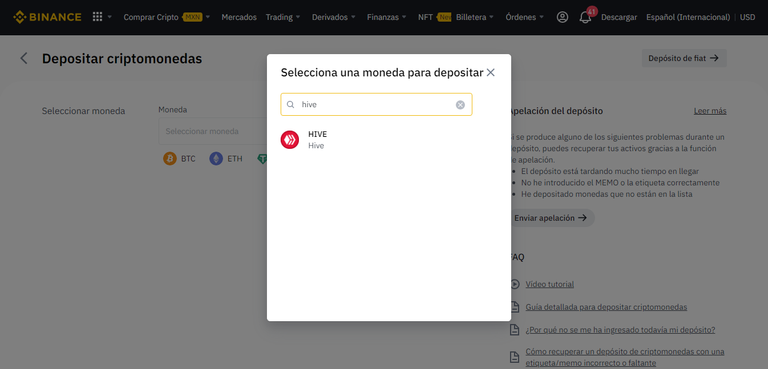
In the tab that appears above press "Deposit" and once entered the screen in the cryptocurrency to select we look for "Hive" and there it will appear, very nice as always and we will click on it. After that, it will give us a message we will give accept and we will proceed to give an address and memo, here I emphasize DON'T MISTAKE ANYTHING THEY GIVE YOU, IF YOU SEND THE MONEY TO ANOTHER ADDRESS OR WITH ANOTHER MEMO YOU WILL LOSE YOUR MONEY, so watch out for that.
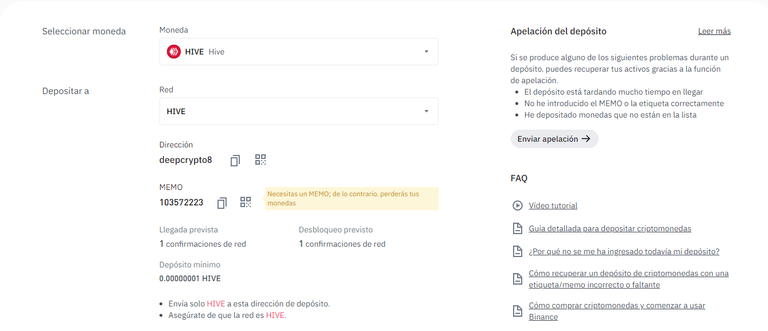
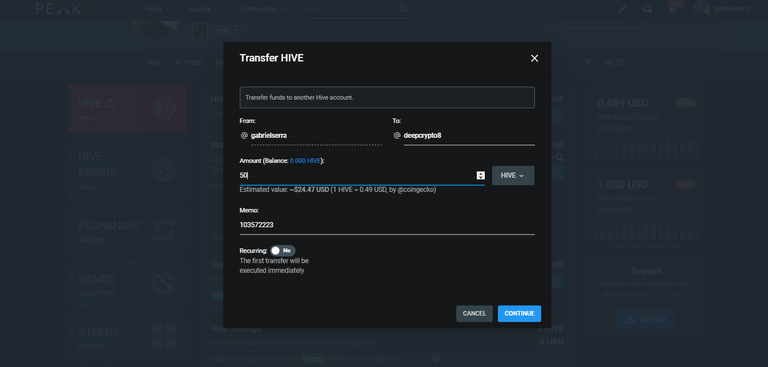
Once we have our memo, we would simply transfer it this way, obviously with the memo corresponding to your account since it is unique and it is the way that the Binance payment processor detects that it is for you.
Once we have verified that the memo is the same as the one they tell us in Binance and the address is correct, we just have to send it and wait for the deposit to be made. Approximately 3-5 minutes and you should be notified by mail and in the account, so we can skip to the next step.
Step 3: Change Hive > USDT and USDT > BNB.
Here is something that depends on each person's preference but in my opinion, it is preferable to exchange in BNB because if you are operating in the Binance Smart Chain network this will be the cryptocurrency in which you will pay your commissions for each movement so I recommend you to exchange it to BNB, although if you want you can exchange it for another one either BUSD or Tether itself and it will work the same but you must make sure you also have BNB in your Metamask wallet for the commissions.
To do this we go to the "Markets" tab on the top bar and select "Trade" from the first market that appears to take us to the trading part, I already have the option selected but when I ask you what type of trading you want to operate, the one that will be used in this tutorial is the Advanced Trading.
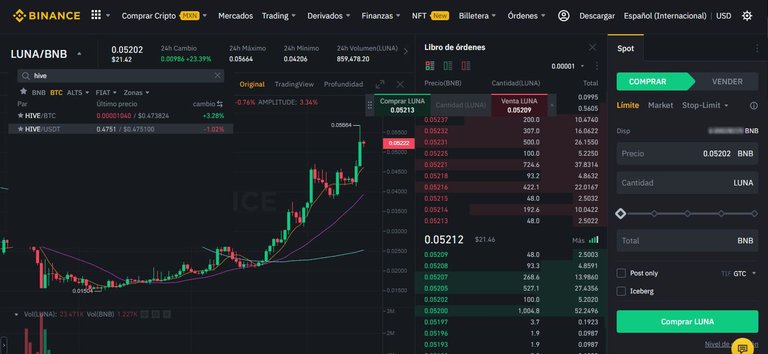
Ok, don't panic, that's the first thing because if you don't know the tab it can be intimidating but it is not at all. As I show in the picture above, in the tab where it says LUNA/BNB you search for Hive, there we will select HIVE/USDT since it is the direct match.
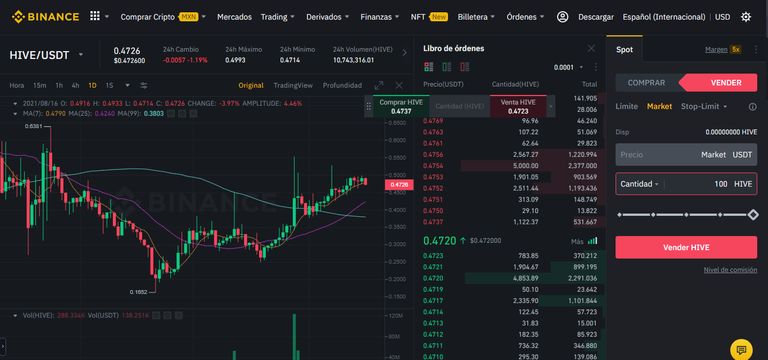
As I show above, we will go to the "Sell" tab since we want to sell Hives to buy USDT. This is up to each one's option but I usually go to the Market option and sell at the price set by the market at that moment, there you will select the amount of Hives you want to change and click on Sell HIVE.
The option is executed instantly so in a matter of seconds we should have our USDT in the available balance. Now as you can see above, we go to the same process as to change from HIVE to USDT, we look in the tab again, and instead of the "Sell" tab, we go to the "Buy" tab to be able to change those USDT for BNB.
The same process, Market, amount to be exchanged and click on Buy BNB, once you get used to it, it becomes routine and not complicated at all. Now with our BNB in our Spot wallet, it is time to send them to Metamask.
Step 4: Send your BNB to Metamask.
Here we are more than halfway done, the process of sending to Metamask is not difficult at all. First, if you are just starting you can download Metamask from here. Here I emphasize, please do not download anything from a strange link, always look for the official sites as there are many people creating ghost Apps to steal your data and your money.
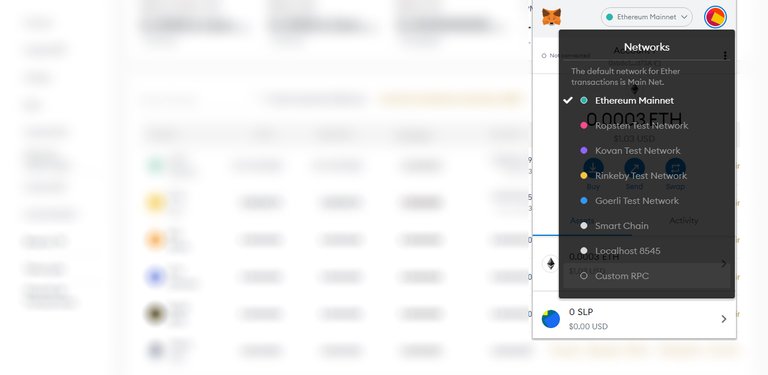
If you don't know how to create a Metamask wallet I leave you a link to do it, once created we will start with the main Ethereum Network (ERC20) and we want the Binance Smart Chain network (BEP20) which is where our token operates.
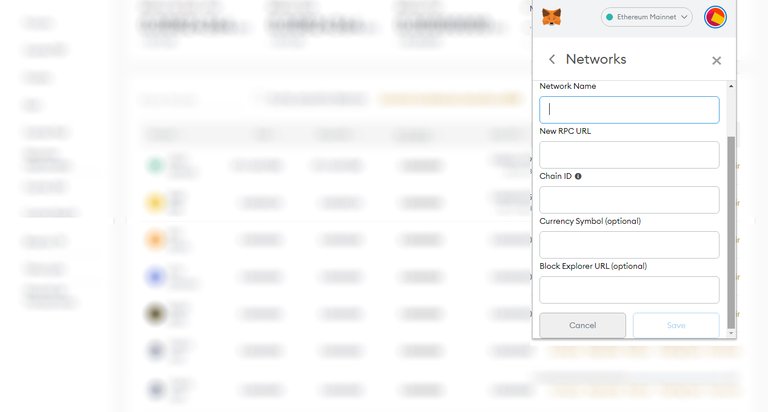
Where Ethereum Mainnet appears, click on it and go to Custom RPC to add another Network, add the next data and click on Save. We already have our BSC Network added, now we just need to add the Token.
| Network name: | Smart Chain |
|---|---|
| New RPC URL: | https://bsc-dataseed.binance.org/ |
| ChainID: | 56 |
| Symbol: | BNB |
| Block Explorer URL: | https://bscscan.com |
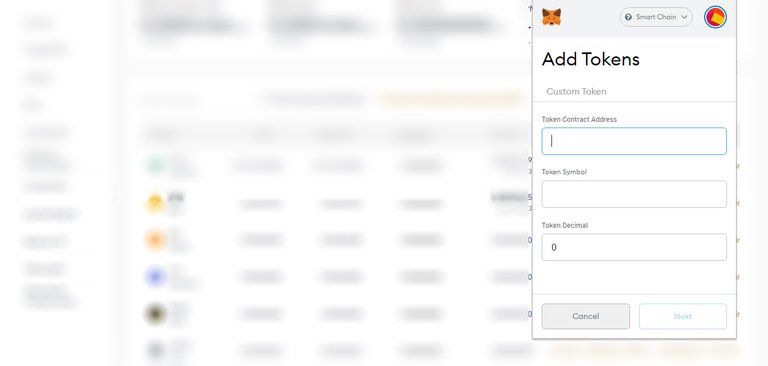
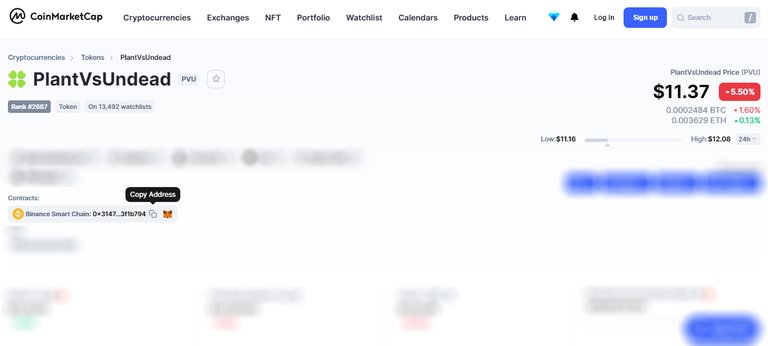
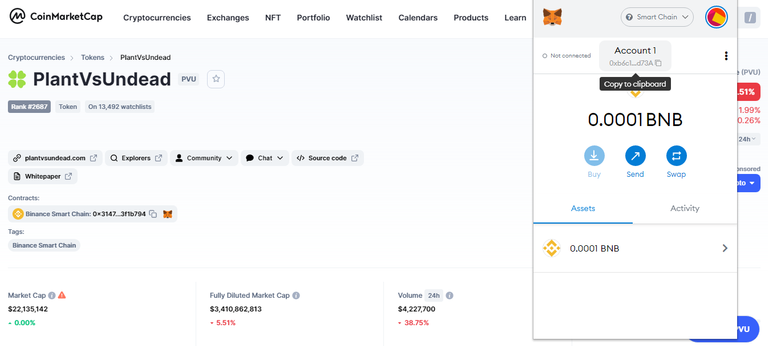
Click where it says "Add Token" and we will see the above, here we simply go to Coinmarketcap and where the token we want to add will appear the contract corresponding to that token, and click where it says Copy Adress. Paste where it says "Token Contract Adress" and it will be automatically detected, click Next and Save and the PVU token will be visible in our Metamask.
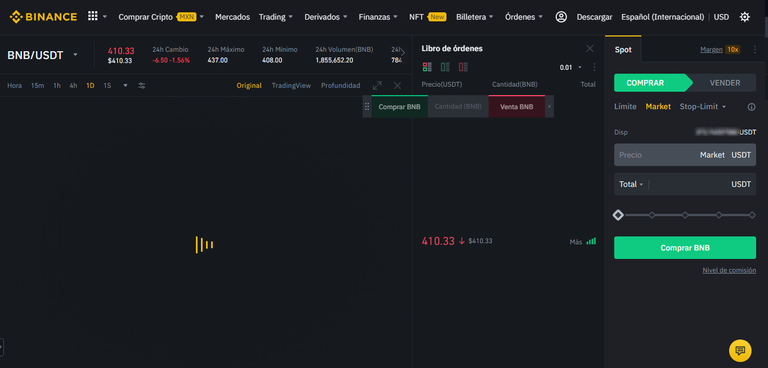
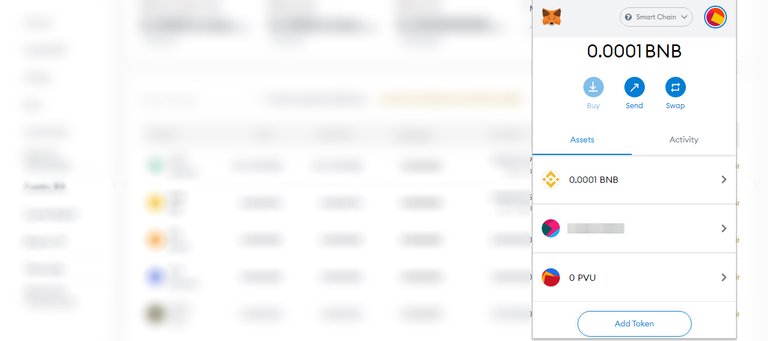
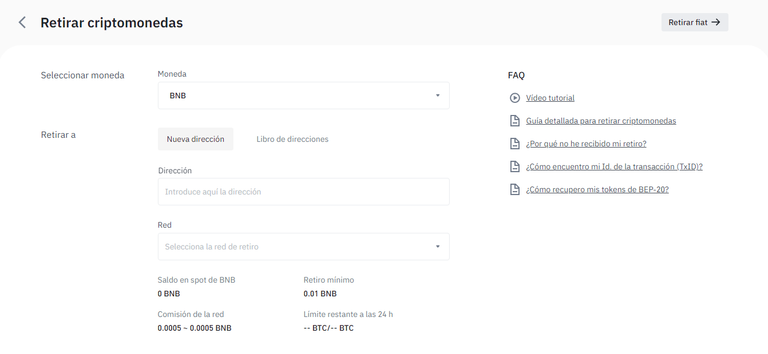
With the token added we simply go to the "Withdraw" tab next to Deposit to BNB as highlighted in the image below.
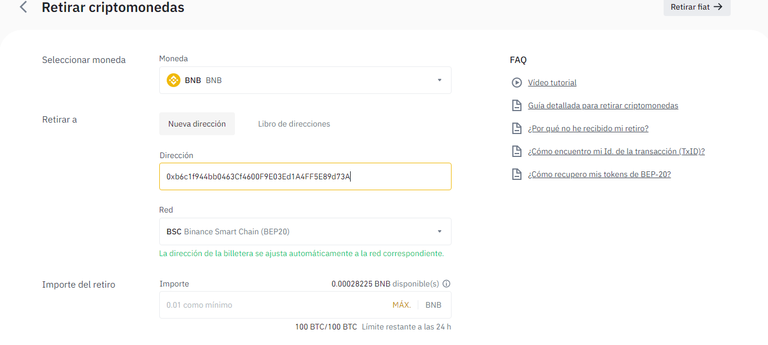
We will see the above, simply proceed to meticulously fill in each field. Where it says address we will put the Metamask address by simply clicking on Copy to clipboard as shown in the picture below and pasting it where it says "Address" in the Binance Withdrawal part.
Automatically the Network to be used will be detected which is BEP20 and we will pass to put the amount you want, you can give MAX if you only changed to BNB for it or another amount, but I strongly recommend you to pass more amount, about 3 USD more will be enough to pay the commissions.
After this we verify again that everything is in order, we make two-step confirmations as the code to the phone and mail, and then it should be sent successfully. Approximately our balance will be in Metamask in a few minutes and it is time to make the Swap to acquire our Tokens.
Step 5: Swap BNB to PVU.
Here the only thing to do is to make the change, so I usually use PancakeSwap for this, but if not you can change it to your preference. Something like this will appear, the first thing to do is to connect our Metamask wallet, for this we click on "Connect Wallet" and next, next and everything will be ready.
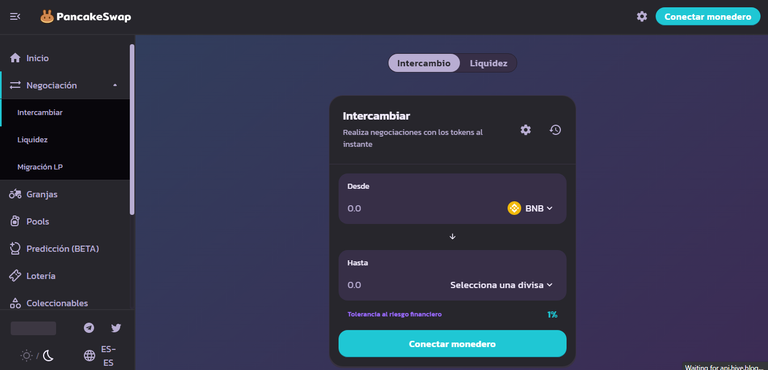
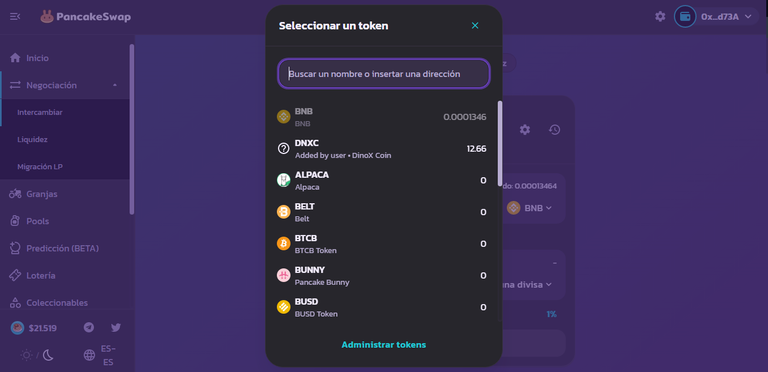
Here we will have to look for the token we want, at the bottom we will click on "Select a currency" and where it says Search for a name or address we will paste the contract of the token we want to add, in this case, it is PVU and it is the same one we added in Metamask from Coinmarketcap.
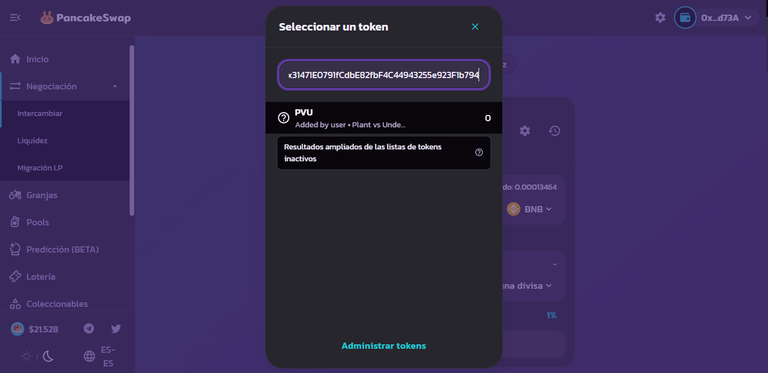
It will automatically pop up, click on PVU and enter the amount equivalent to 5 PVU which is the minimum, remember to leave some for the commission. Then click on Enable BNB and proceed to Swap. We will see a tab in Metamask in which we will proceed to click on Next and Confirm and the change should be done in a matter of minutes or seconds.
Step 6: Connecting our Metamask wallet to PvU.
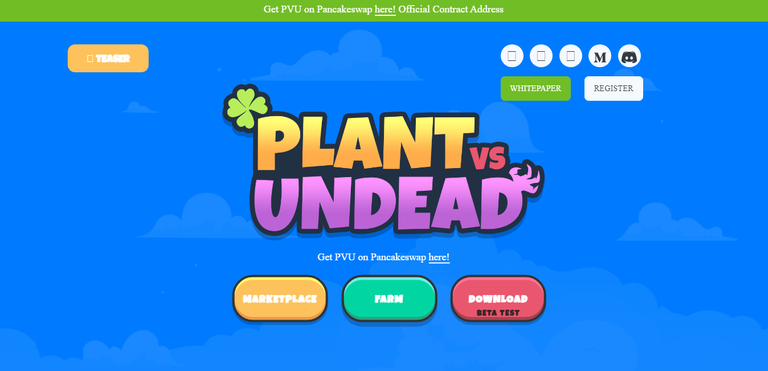
Once the swap is done, the process of connecting the wallet is easy and is done by going to the Plant vs Undead official website and clicking on "Farm".
We will see a Login screen, click on "Connect with Metamask". A window will pop up asking for some things, click Next, next, and sign. In most cases, you will have to log in by signing the connection and then just farming.
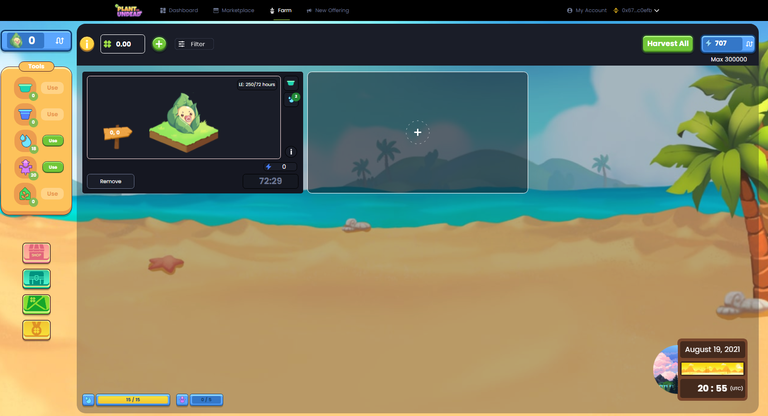
Currently, the game is with many new features in the so-called "Farm 2.0", now we can have temporary plants that those who are farmers will give us enough dividends in addition to being plant holders. The game has a lot of interesting things and really if you do not know it I invite you to take a look.
I hope it has been understood and has been helpful for those who want to enter and have no idea how to do it. It is something simple that sometimes we see as very complicated but after several attempts, it becomes something routine. If you made it this far thank you very much and see you in the next one.
https://twitter.com/Gdcsr13/status/1428943917286895628
The rewards earned on this comment will go directly to the person sharing the post on Twitter as long as they are registered with @poshtoken. Sign up at https://hiveposh.com.
Este es el que quiero jugar okey.
Mañana te conviertes en granjera 😎
Ta en inglés pero igual te comento en español porque soy yo. Gabo777 en un nuevo tutorial. Un tutorial bastante completo, y aunque a mí no me explicaste de forma técnica como acá en el post, logré comprenderte bastante bien, gracias por la ayuda hehe
JAJAJAJAJAJAJA A la orden pal desorden bb