Bolso juvenil || Youth backpack
Hola a todos, espero se encuentren muy bien. El día de hoy les enseñaré cómo elaborar un hermoso bolso juvenil.
Hello everyone, I hope you are feeling well. Today I will show you how to make a beautiful youth bag.

Este trabajo que les voy a mostrar es un proyecto que hice junto a mi mamá, ambas tratamos de tomar fotos claras para que la explicación del paso a paso sea sencilla de entender para ustedes por si se animan a realizarlo. Pero la verdad nos tomó un par de días terminarlo ya que nos afectó un poco la electricidad y además de eso cuando creíamos que teníamos todos los materiales descubrimos que nos hicieron falta otros a mitad de proyecto. Estas son cosas que nos pasan jaja pero disfrutamos mucho el proceso de hacer nuevos diseños o proyectos y poder publicar aquí el arte de la costura para todos ustedes.
This work that I am going to show you is a project that I did with my mom, we both tried to take clear pictures so that the step by step explanation is easy to understand for you in case you dare to do it. But the truth is that it took us a couple of days to finish it because we were a little affected by the electricity and also when we thought we had all the materials we discovered that we were missing others in the middle of the project. These are things that happen to us haha but we really enjoy the process of making new designs or projects and being able to publish here the art of sewing for all of you.

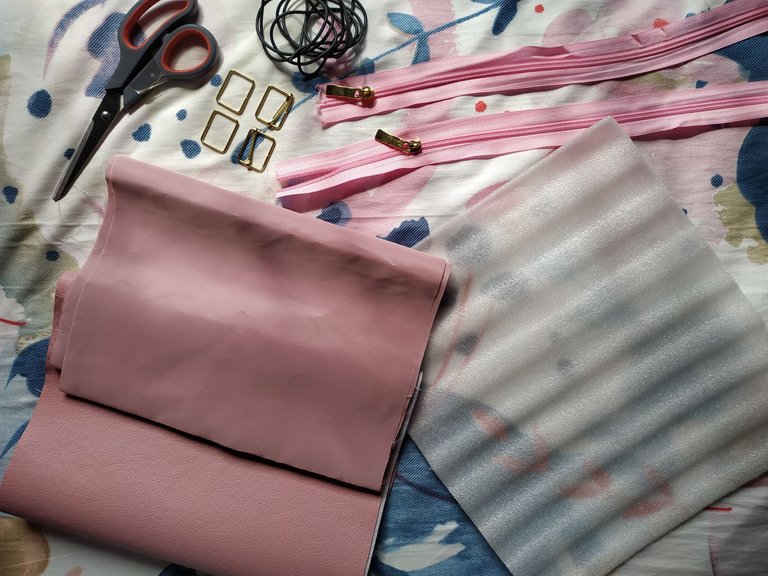
- Tela tipo sintético (Semi cuero, vinilo).
- Cierre 75 cm (Cremallera).
- Tela de forro (Tafeta).
- Moldes.
- Poli espuma.
- 2 trabillas y 2 cuadrantes.
- Tijeras, escuadras, cinta métrica, tiza, hilo poliéster y aguja número 16 0 18.
- 2 metros de vivo plástico, también conocido como espagueti.
- Tiras para tapar las orillas de la costura.
- Synthetic fabric (Semi leather, vinyl).
- Zipper 75 cm (Zipper).
- Lining fabric (Taffeta).
- Moulds.
- Poly foam.
- 2 loops and 2 squares.
- Scissors, squares, tape measure, chalk, polyester thread and needle number 16 or 18.
- 2 meters of plastic piping, also known as spaghetti.
- Strips to cover the edges of the seam.

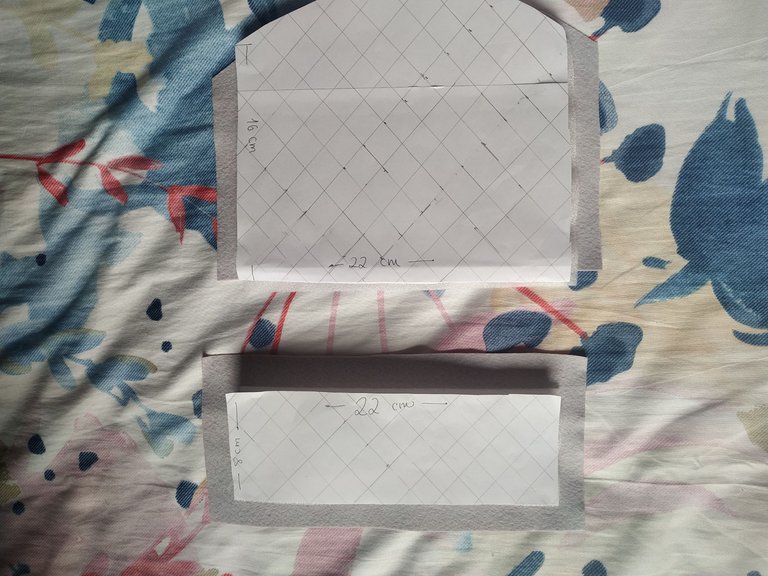
El primer paso es realizar nuestros moldes.
The first step is to make our molds.

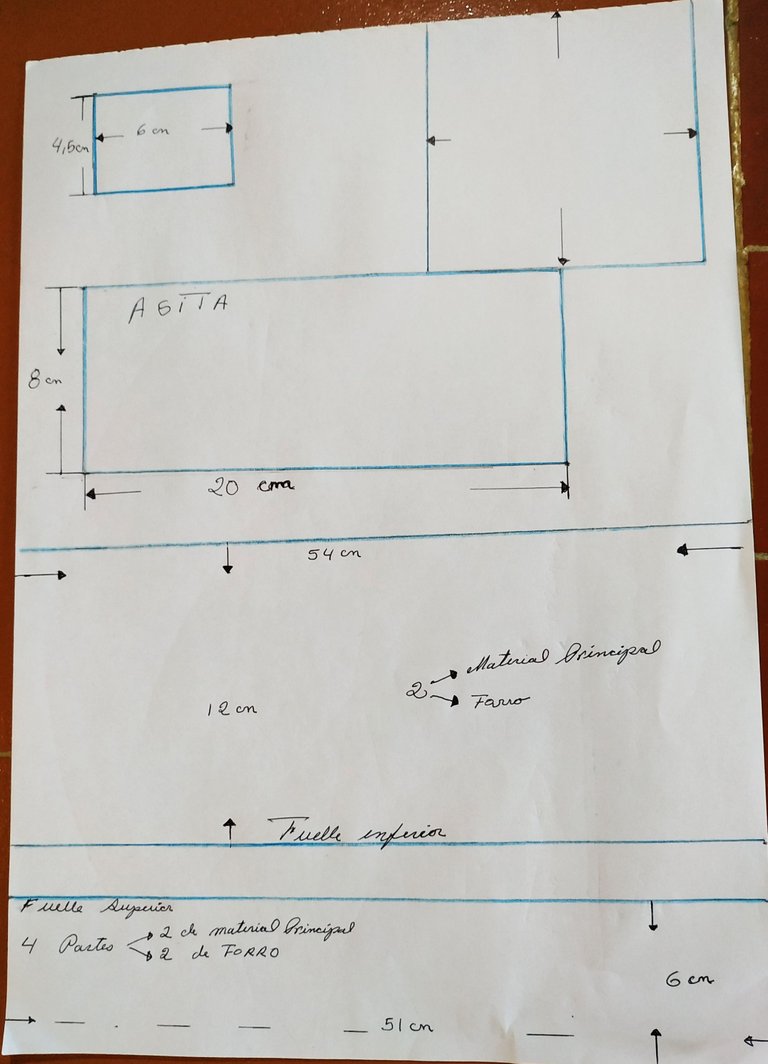
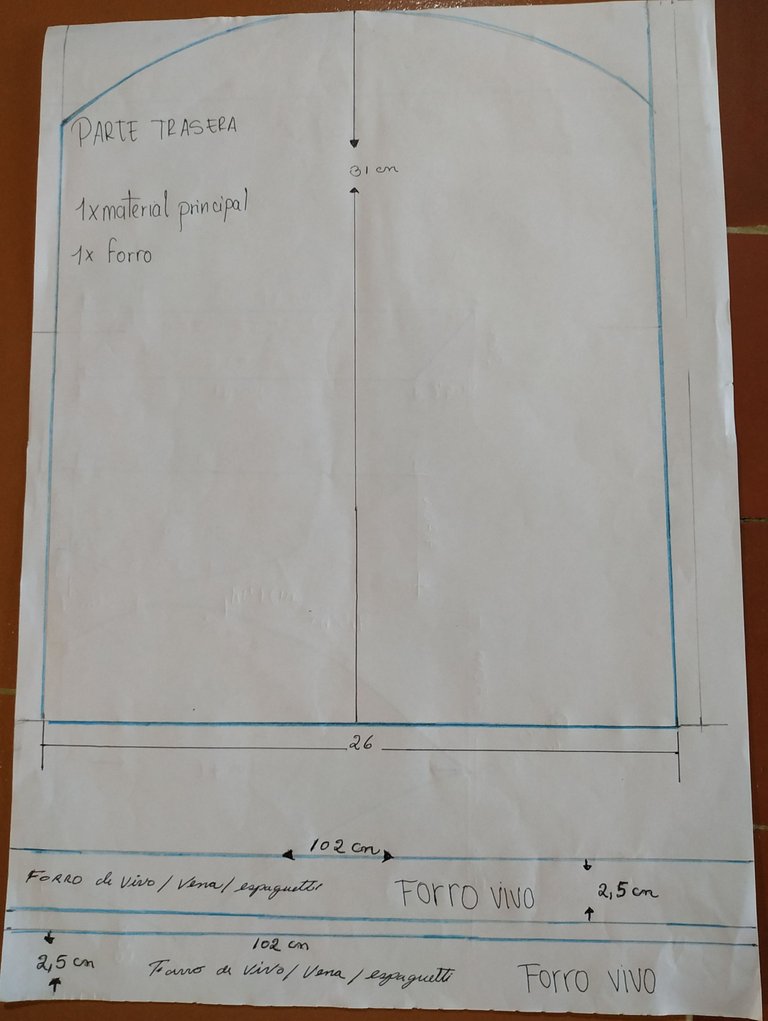
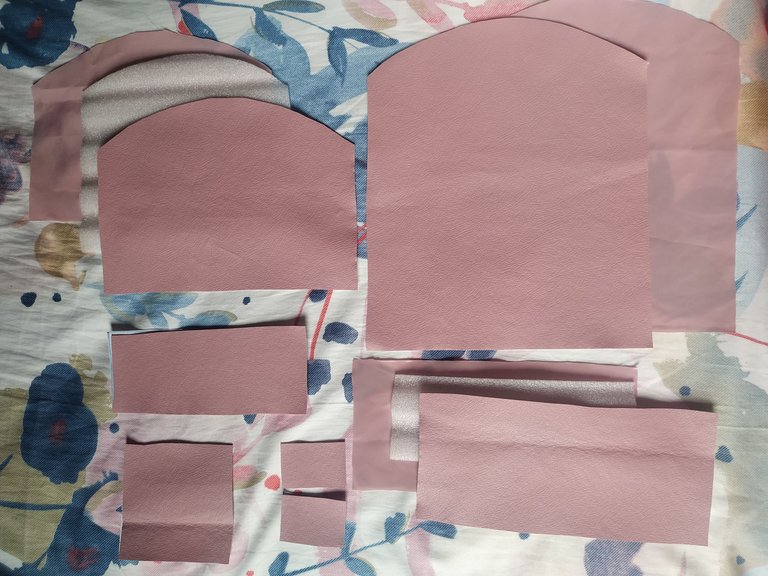
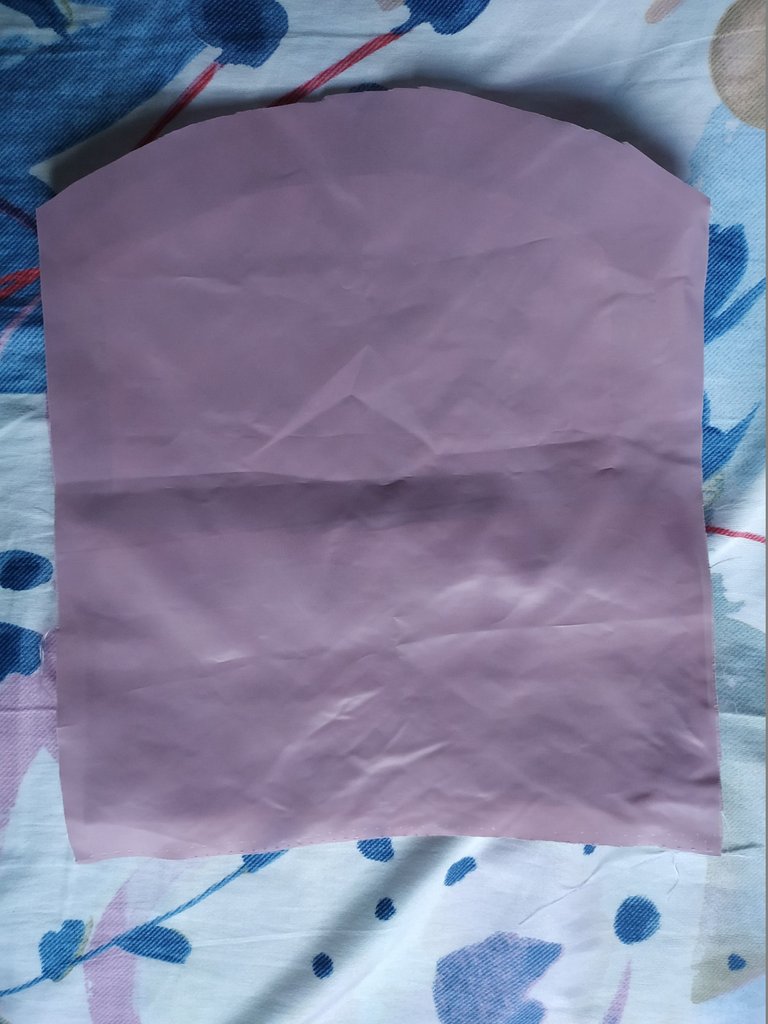
Luego vamos a colocar los moldes sobre el semi cuero y recortar, debemos colocar ordenadamente todas las partes.
Then we are going to place the molds on the semi leather and cut out, we must place all the parts in an orderly way.

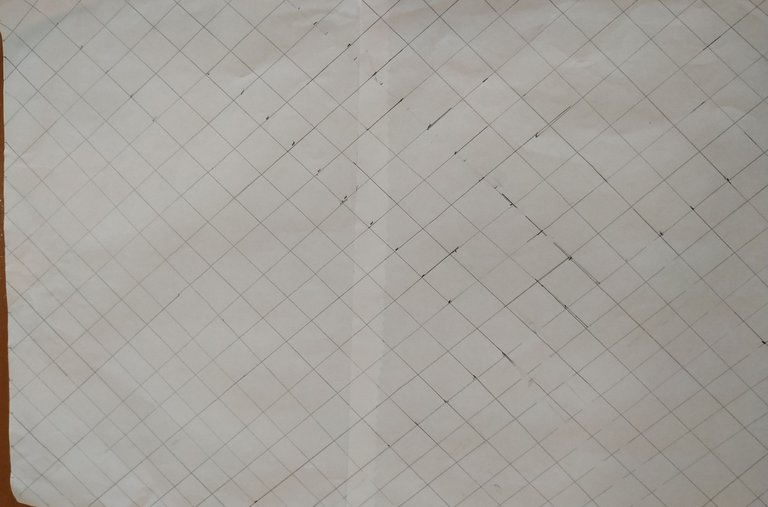
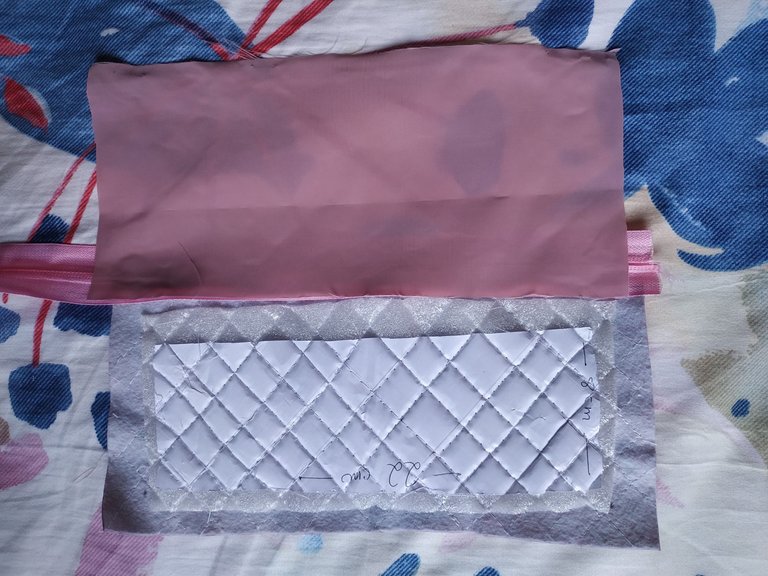
En una hoja de reciclaje se traza unas líneas diagonales con 2 centímetros de distancia para formar los cuadrados o diamantes.
On a sheet of recycled paper, draw diagonal lines 2 centimeters apart to form the squares or diamonds.
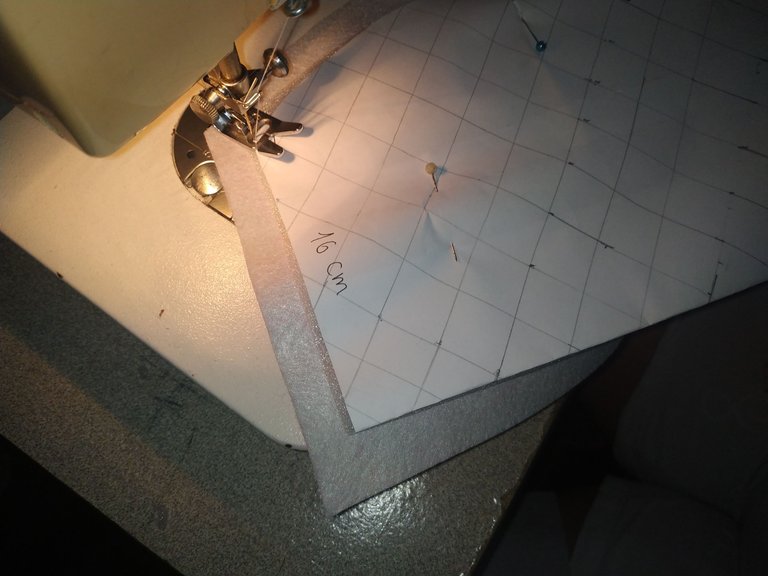
Luego en la parte delantera por el lado del revés del de la tapa del bolso, vamos a colocar la hoja con los cuadrados formados junto a la poliespuma.
Teniendo esto pasamos a coser por todos los lados de la hoja donde están formados los cuadrados o diamantes que marcamos.
Then, on the front side of the bag, on the reverse side of the bag lid, we will place the sheet with the squares formed with the polystyrene.
Now we sew on all sides of the sheet where the squares or diamonds we marked are formed.

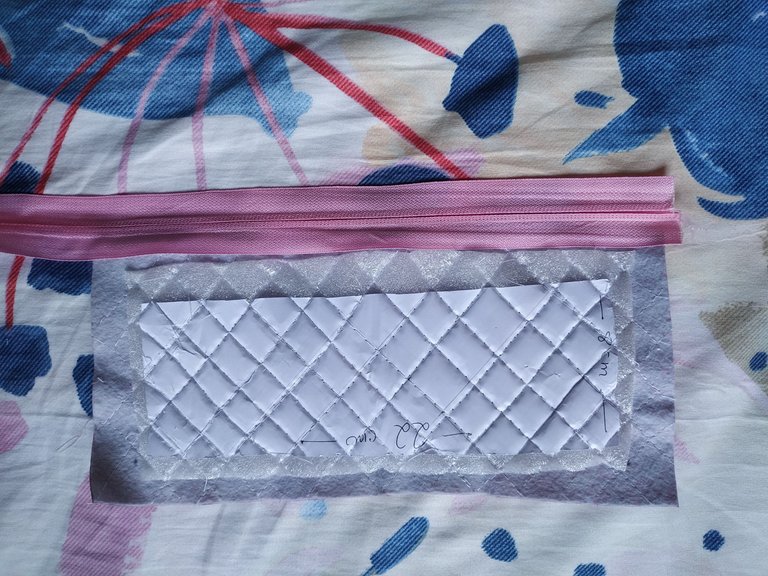
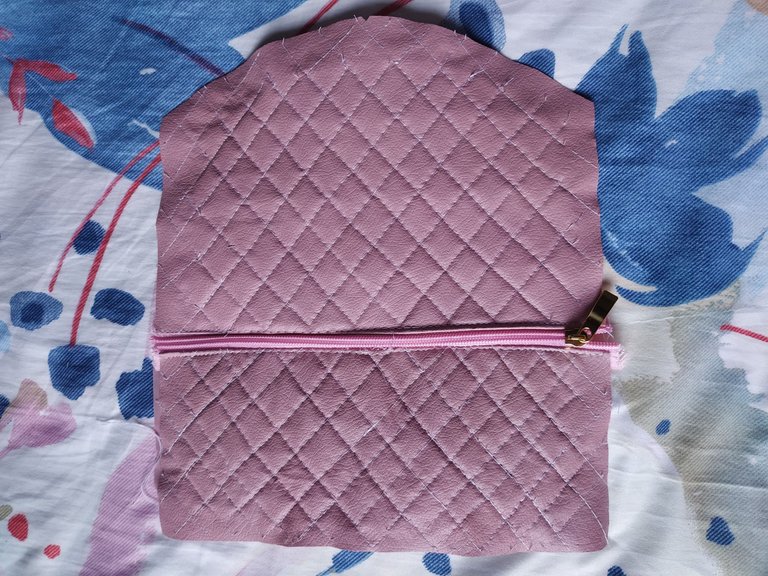
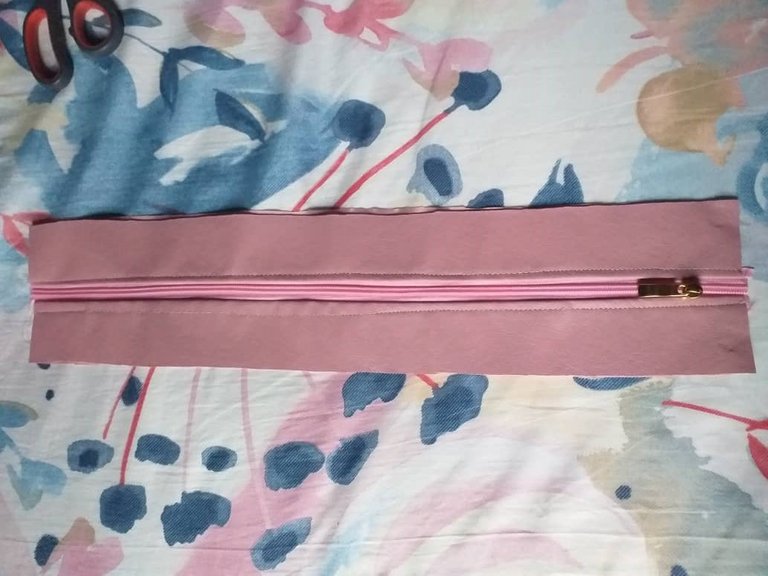
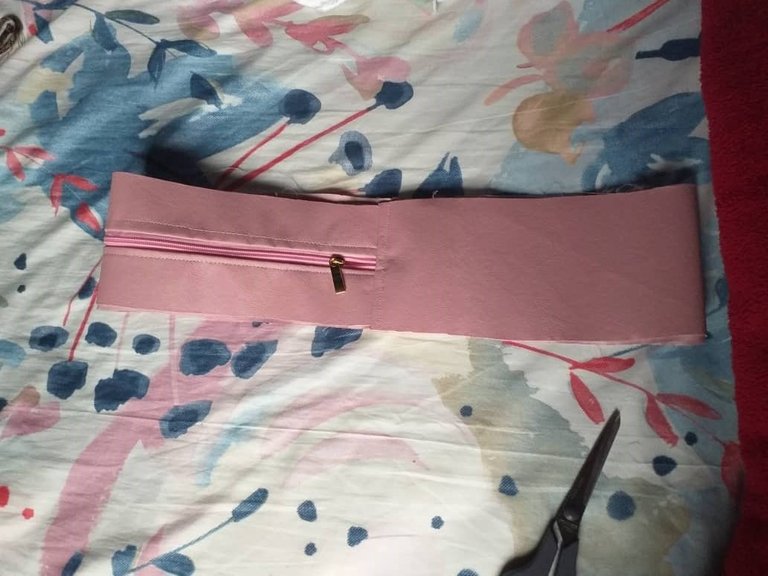
Procedemos a recortar la parte delantera o la tapa para hacer el bolsillo.
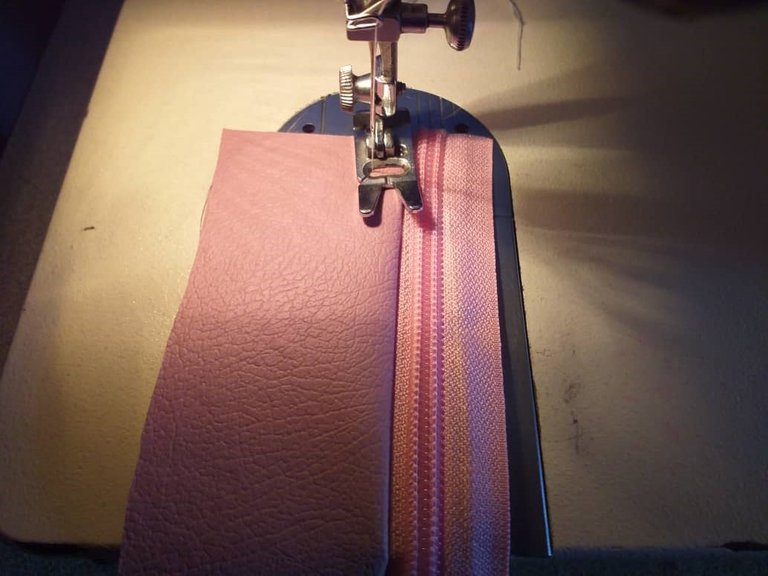
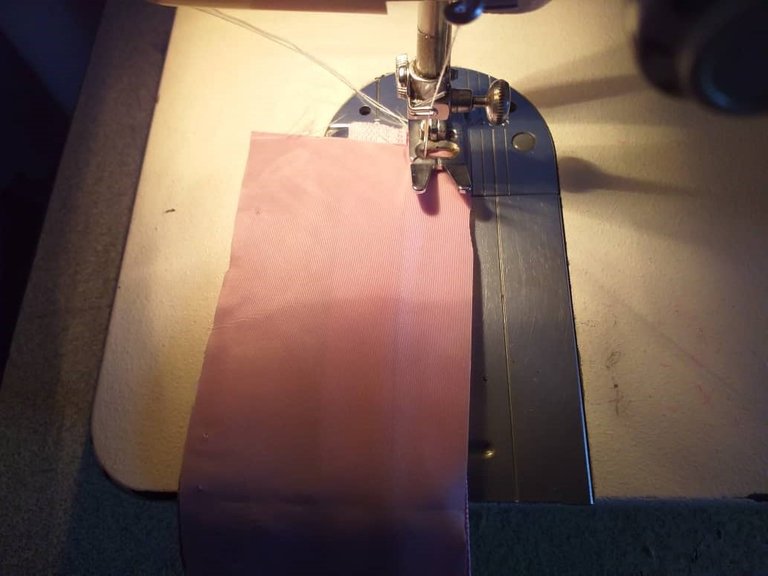
Colocamos el cierre de revés sobre el derecho de la parte del bolsillo y el forro y cosemos. También vamos a coser la otra parte del cierre a la parte superior de la tapa, y después le vamos a colocar la cremallera.
We proceed to cut the front part or the cover to about 10 or 12 cm to make the pocket. We place the back zipper on the right side of the pocket and the lining and sew. We are also going to sew the other part of the zipper to the top of the cover, and then we are going to place the zipper.
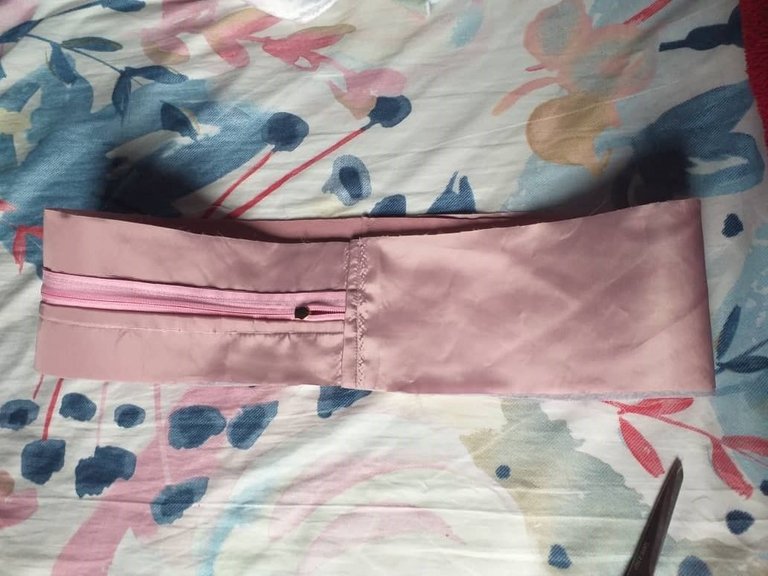
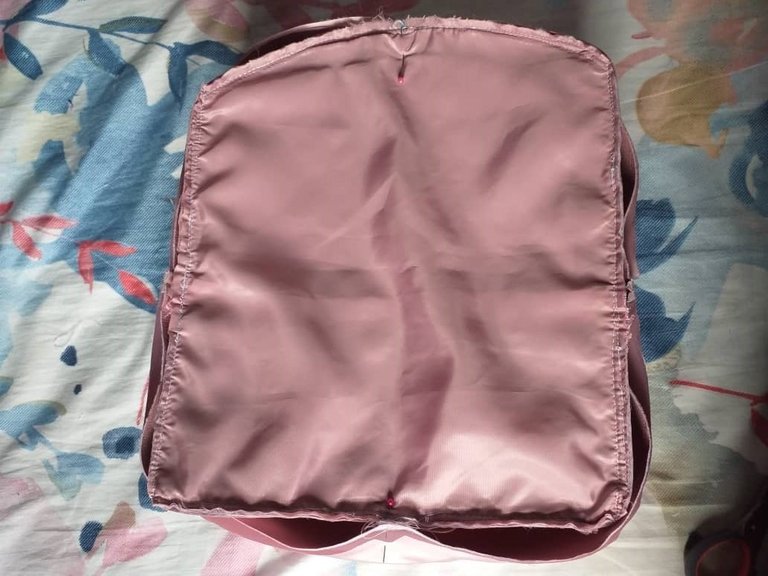
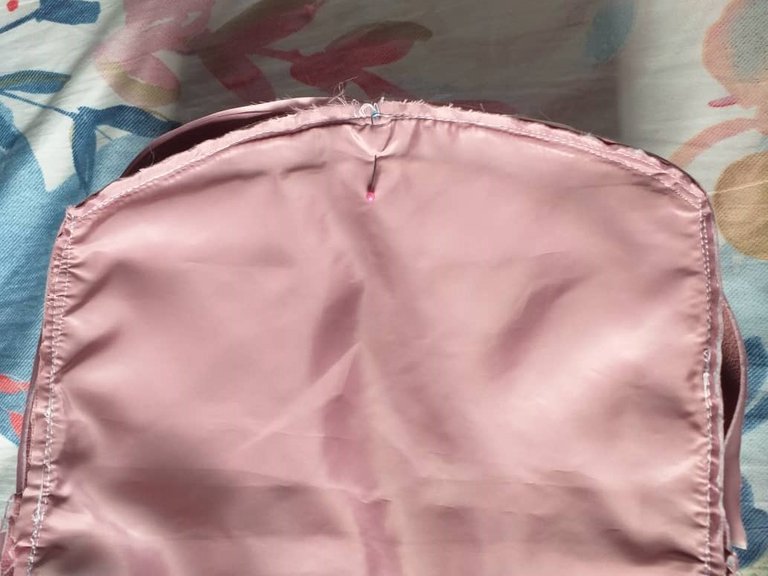
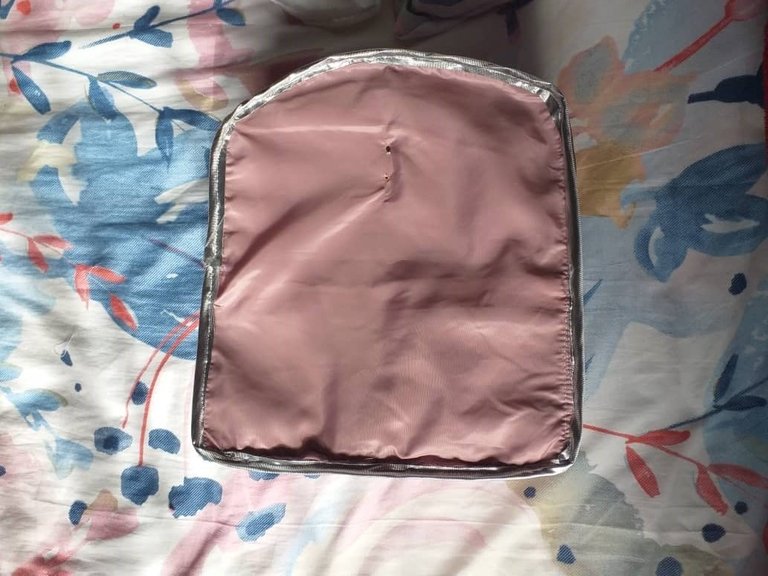
Colocamos el forro por el interior de la tapa.
Place the lining on the inside of the lid.
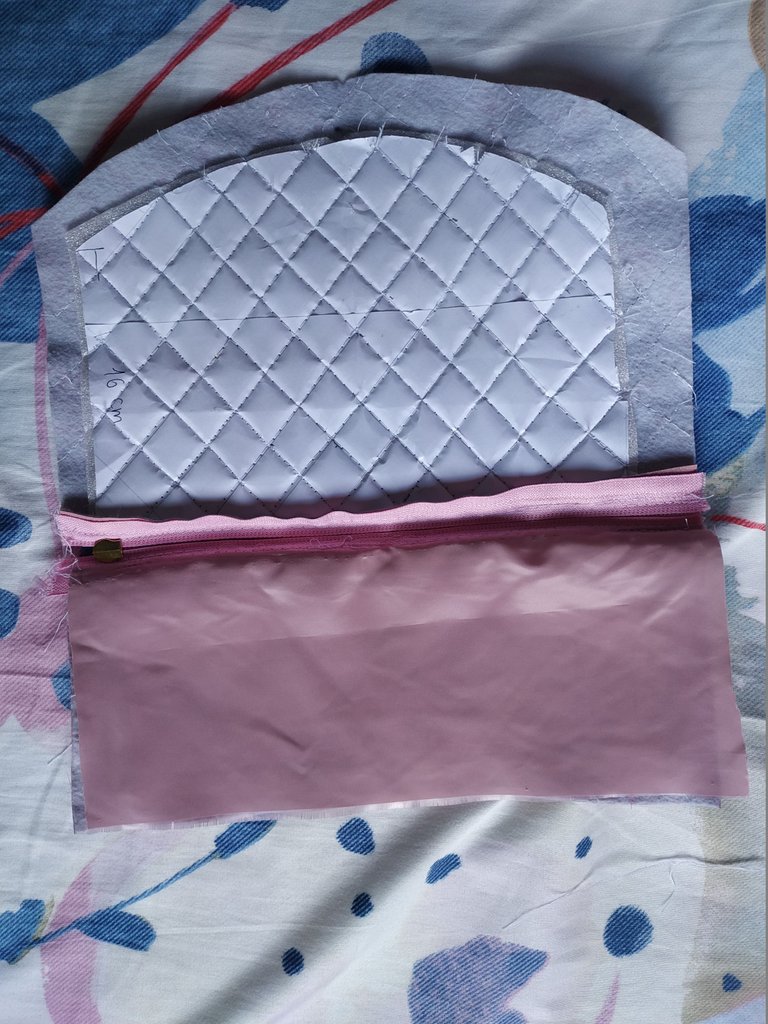
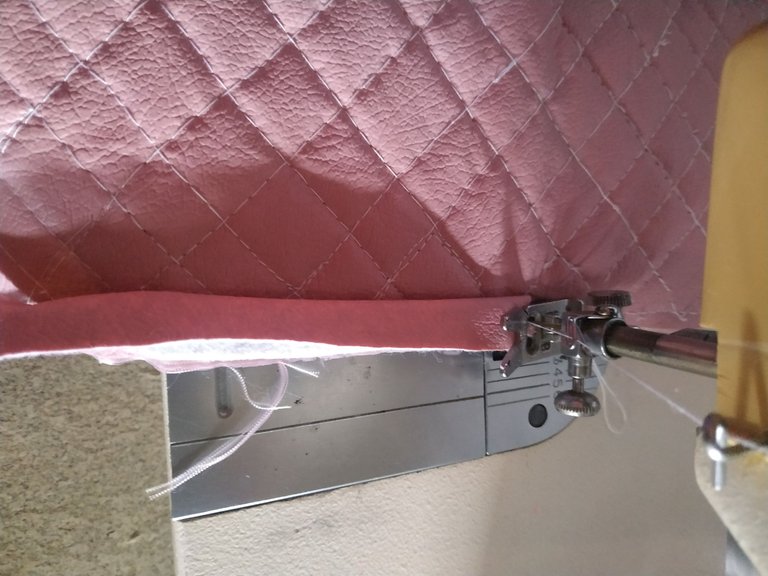
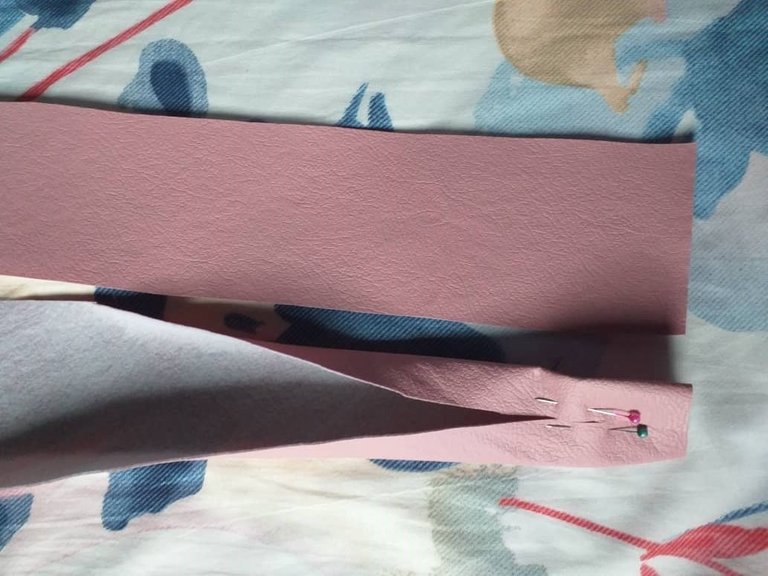
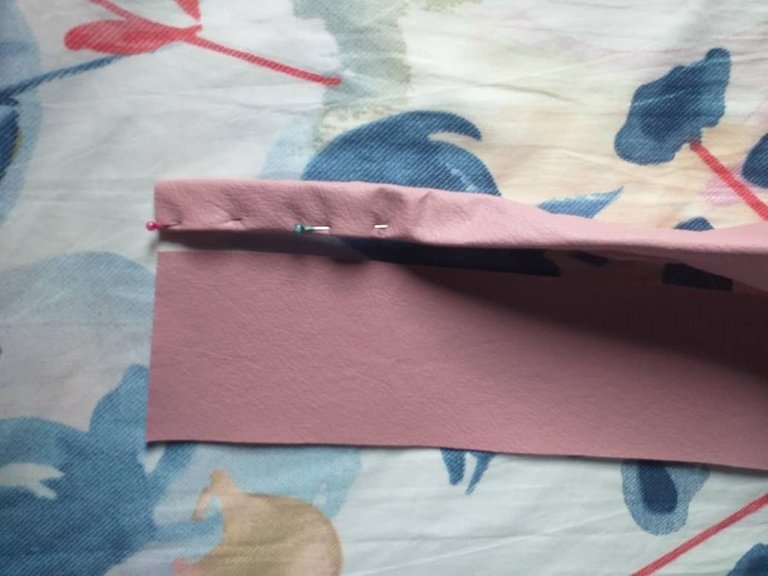
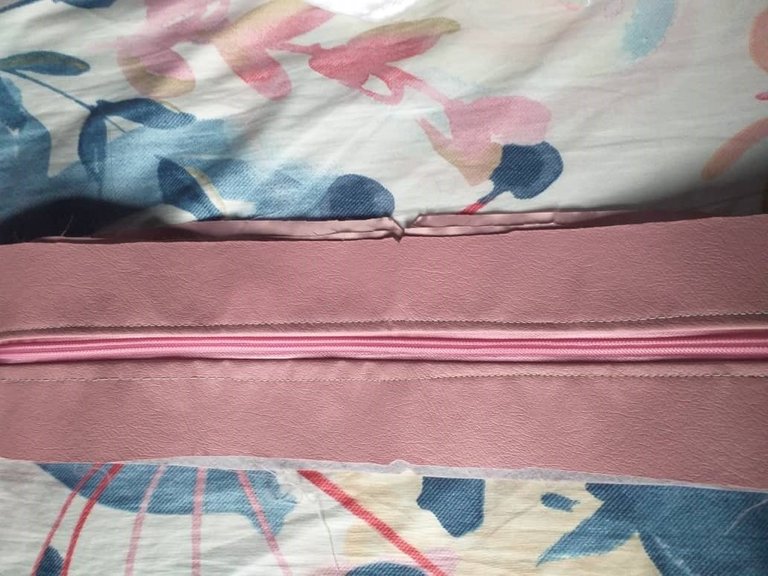
La parte de la tapa le marcamos la mitad arriba y abajo, y de la parte de abajo procedemos a pegar el vivo por todo el contorno de la tapa del bolso.
We mark the top and bottom half of the lid, and from the bottom half we proceed to glue the piping all around the contour of the bag lid.
Luego agarramos una parte del fuelle superior en material y colocamos el cierre de revés sobre él y tapamos con el forro luego cosemos y hacemos el mismo procedimiento con el otro fuelle.
Then we take a part of the upper gusset in material and place the back zipper over it and cover it with the lining, then we sew and do the same procedure with the other gusset.
Luego de la parte delantera del fuelle superior vamos a colocarlo por la parte del derecho el fuelle inferior y el forro coser por el revés.
Then from the front of the upper gusset we will place it on the right side, the lower gusset and the lining sew on the reverse side.


Volteamos y fijamos costura.
Continuamos realizando el mismo procedimiento por el otro lado.
Aquí nos queda un círculo al cual vamos a marcar en cuatro partes iguales.
We turn over and fix the seam.
Continue the same procedure on the other side.
Here we are left with a circle which we will mark in four equal parts.
Agarramos la parte de las asas y doblamos en mitad y vamos a coser.
El mismo procedimiento para la parte de la asita y asitas de trabilla.
We take the part of the handles and fold in half and we are going to sew.
The same procedure for the handle part and loop handles.

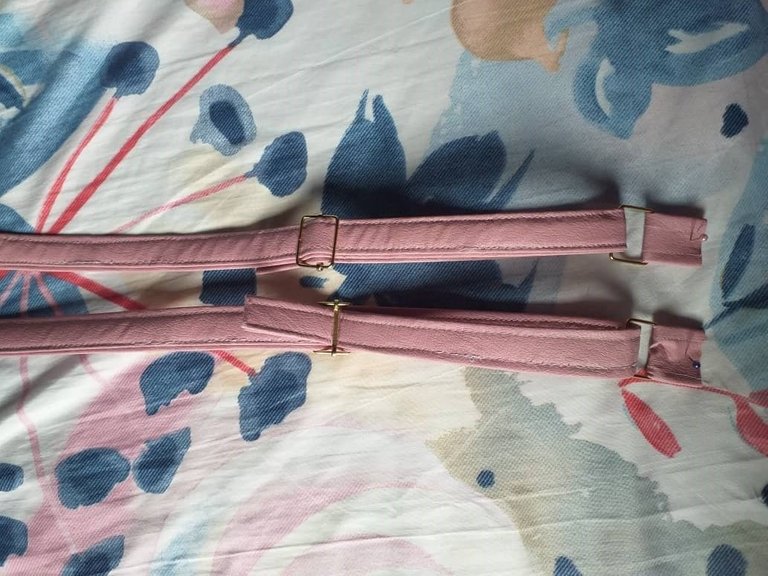
Procedemos a colocarle los dos cuadrantes a la tira de asa y las asitas las trabillas.
We proceed to attach the two quadrants to the handle strip and the loops to the loops.
Luego tomamos la parte trasera del bolso colocamos el forro y la tela de material.
Then we take the back of the bag and place the lining and the material fabric.
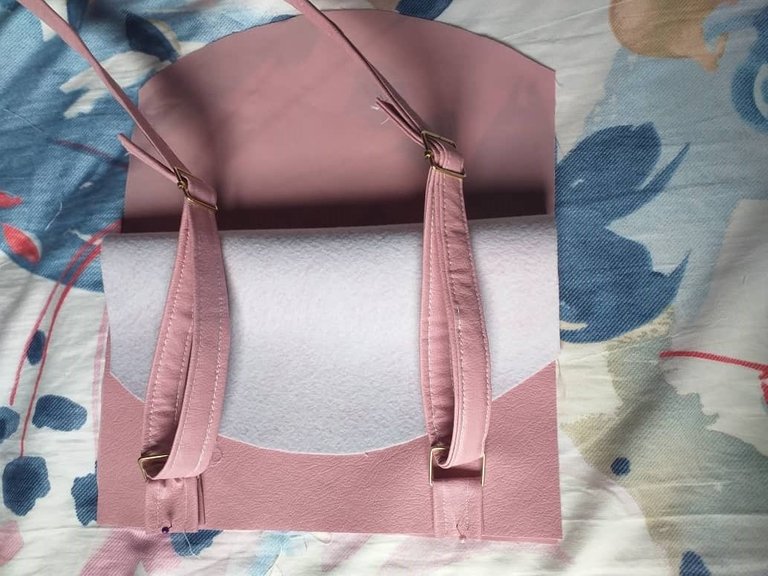
De la parte de abajo medimos 4 centímetros de cada lado y colocamos las asitas de trabilla, luego de la parte superior cuadramos la asita y allí mismo cuadrados la parte de las asas o tiras.
From the bottom we measure 4 centimeters on each side and place the loop handles, then from the top we square the handle and there we square the part of the handles or strips.
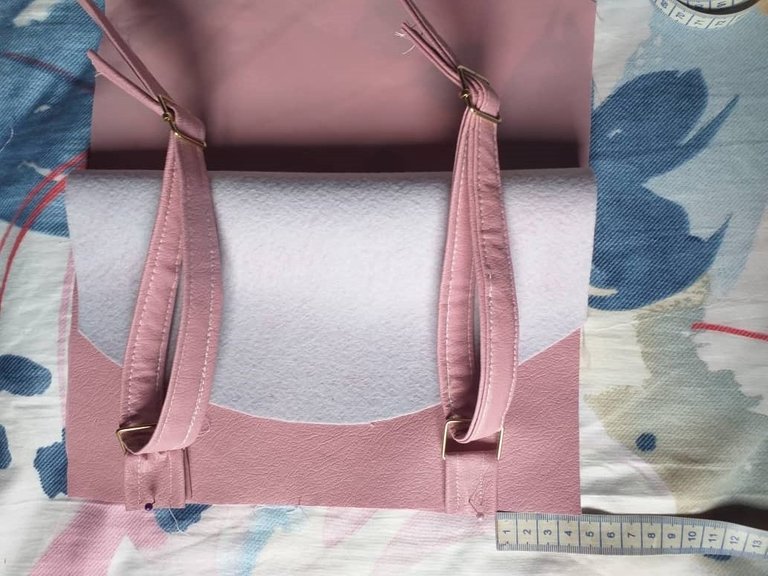
Cosemos bien y colocamos al rededor el vivo.
We sew well and place the piping all around.
Luego acomodamos la parte de fuelle que ya hemos marcado en partes iguales en la tapa del bolso y procedemos a coser.
Then we place the gusset part that we have already marked in equal parts on the top of the bag and proceed to sew.

Ese mismo procedimiento lo hacemos por la parte trasera del bolso.
The same procedure is done on the back of the bag.
Con tapa costura o ribete lo fijamos por todo el contorno del bolso con la finalidad de tapar la costura y que nos quede un mejor acabado.
With a seam cover or edging, we fix it all around the bag in order to cover the seam and give us a better finish.
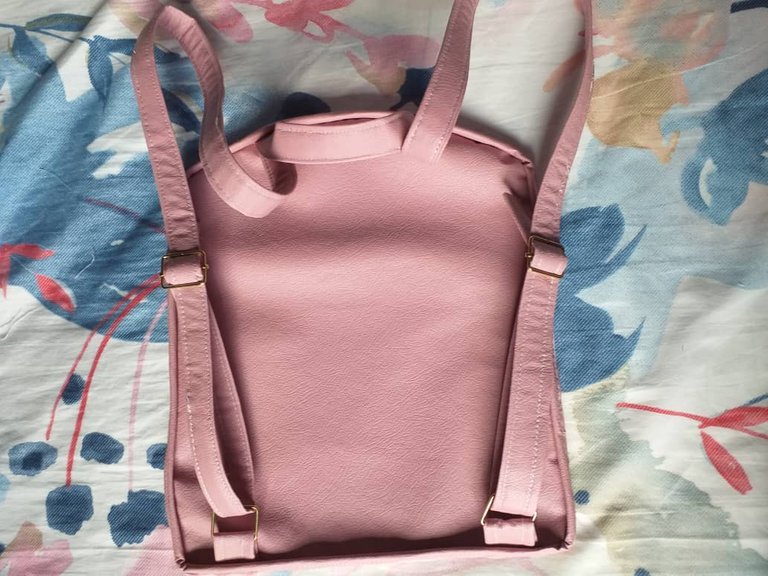
Ya con esto le damos vuelta al bolso y listo.
With this we turn the bag over and that's it.
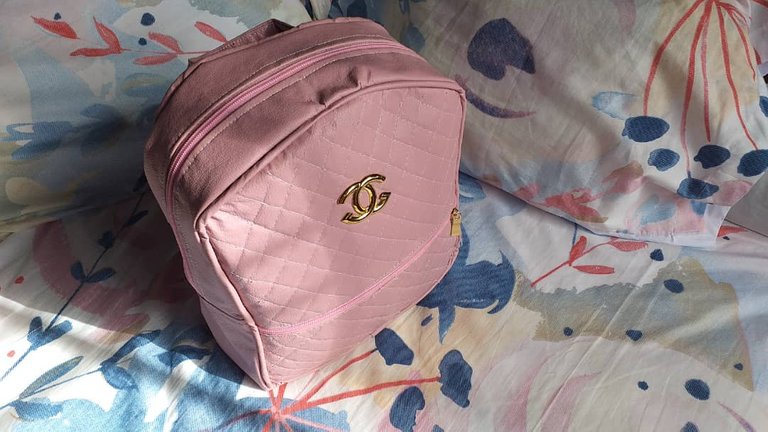
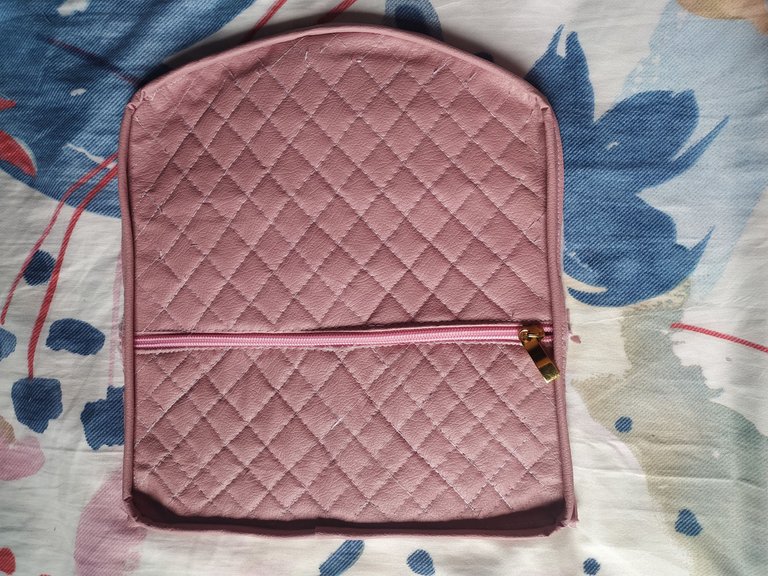
Me encanto el acabado del bolso y me gusta el detalle del broche que le colocamos.
Espero les haya gustado el blog del día de hoy y el haber aprendido aun más con este proyecto.
Les agradezco por el apoyo. Les deseo que tengan un feliz día y noche.
I love the finish of the bag and I like the detail of the brooch that we put on it.
I hope you liked today's blog and I thank you for your support and I hope to have learned even more with this one.
I wish you a happy day and night.
Fotos tomadas de mi teléfono Xiaomi Redmi Note 6 Pro y mi Samsung J4 plus|| Photos taken from my Xiaomi Redmi Note 6 Pro phone and my Samsung J4 plus
Fuente del editor de imágenes || Image editor source
https://twitter.com/Mavis166/status/1519843872834301953
The rewards earned on this comment will go directly to the person sharing the post on Twitter as long as they are registered with @poshtoken. Sign up at https://hiveposh.com.
Me encanta, nosotros compramos bolsos de estos para vender y no sabia que se hacian tan facil, ahora siento que podré hacerlos yo jajaja
Seguro mi novia no me dejará, pero arrrgun dia, arrgun día. Excelente post
Hola Oscar, gracias por tu comentario jeje espero si se animen a elaborarlo.
Que bonitoo, de verdad que tienes un talento increíble para esto✨
Hola, muchas gracias.
Preciosura de bolso, ademas en mi color favorito😍😍😍 Me encanto y haces ver tan sencillo el paso a paso.. Saludos muñeca!
Hola, el rosa también es mi color favorito jeje. Muchas gracias por tu comentario linda
Que hermoso quedó, me encantó el color y de verdad te felicito amiga, me gustó cómo explicaste tu paso a paso. Gracias por compartir. Bendiciones.
Muchas gracias por tu comentario, que linda
😊🖐
Congratulations @gabimramirez! You have completed the following achievement on the Hive blockchain and have been rewarded with new badge(s):
Your next target is to reach 10000 upvotes.
You can view your badges on your board and compare yourself to others in the Ranking
If you no longer want to receive notifications, reply to this comment with the word
STOPCheck out the last post from @hivebuzz:
Support the HiveBuzz project. Vote for our proposal!
Hermoso bolso. Felicidades
Hola Milly mucha gracias
Que hermoso, que trabajo tan bello hiciste con tu mamá, me encantan los bolsos, saludos 💕
Holaa, que linda gracias. La verdad si nos disfrutamos mucho este proyecto juntas.
Realmente hermoso 😍 yo quiero uno 🥺.
Te felicito, excelente trabajo 🥰
Hola Wendy muchas gracias.
Que hermoso el resultado😍 y lo detallas todo tan bien que yo sin maquina ni saber de costura siento que puedo hcerlo jajjjaa de verdad felicidades, te quedo bello
Waoo, excelente trabajo, parece de tienda este hermoso bolso, me encantó el acabado tan prolijo. Te felicito.