Barbie style makeup - Step by step | Maquillaje estilo Barbie - Paso a paso [ENG/ESP]
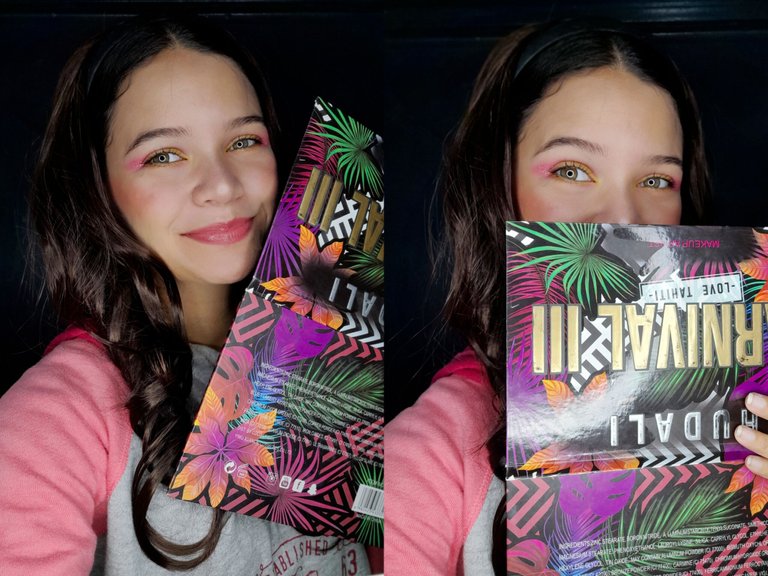
Hello to the entire Makeup Power community, welcome to my blog! After a long time without publishing makeup content, today I resume my activation with a Barbie style makeup, since I was very little I remember that I love this doll and it was one of my favorite shows, I definitely loved all the songs and pink of course. For this occasion I decided to use pink shadow as the main pigment, as we know it is one of the colors that identifies Barbie. Without further ado, the cosmetics to use and step by step.
¡Hola a toda la comunidad de Makeup Power! ¡Bienvenidos a mi blog! Después de un largo tiempo sin publicar contenido de maquillaje, hoy retomo mi activación con un maquillaje estilo Barbie, desde muy pequeño recuerdo que esta muñeca me encanta y era uno de mis programas favoritos, definitivamente amaba todas las canciones y el rosa por su puesto. Para esta ocasión decidí utilizar sombra rosada como pigmento principal, ya que sabemos que es uno de los colores que identifica a Barbie. Sin más que decir, los cosméticos a utilizar y paso a paso.

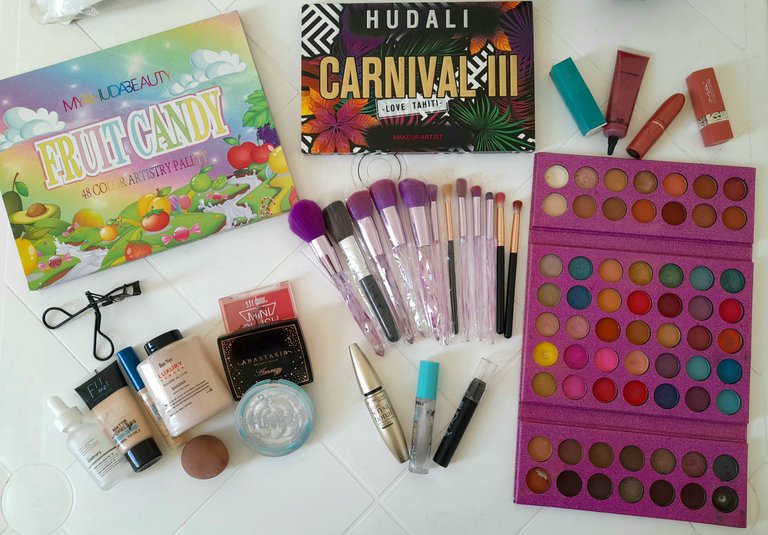
Cosmetics to be used
| - Proofreader | - Corrector de Maybelline | |
|---|---|---|
| - Pink and yellow pigments | -Pigmentos rosado y amarillo | |
| - Brushes | - Brochas | |
| - Maybelline Mascara | - Máscara de pestañas Maybelline | |
| -Maybelline foundation | -Base de Maybelline | |
| -Ben Nye Banana Powder | -Polvo banana de Ben Nye | |
| -Cream Contour | -Contorno en crema | |
| -Illuminator | -Iluminador | |
| -Pink lipstick and gloss | -Labial rosado y brillo |
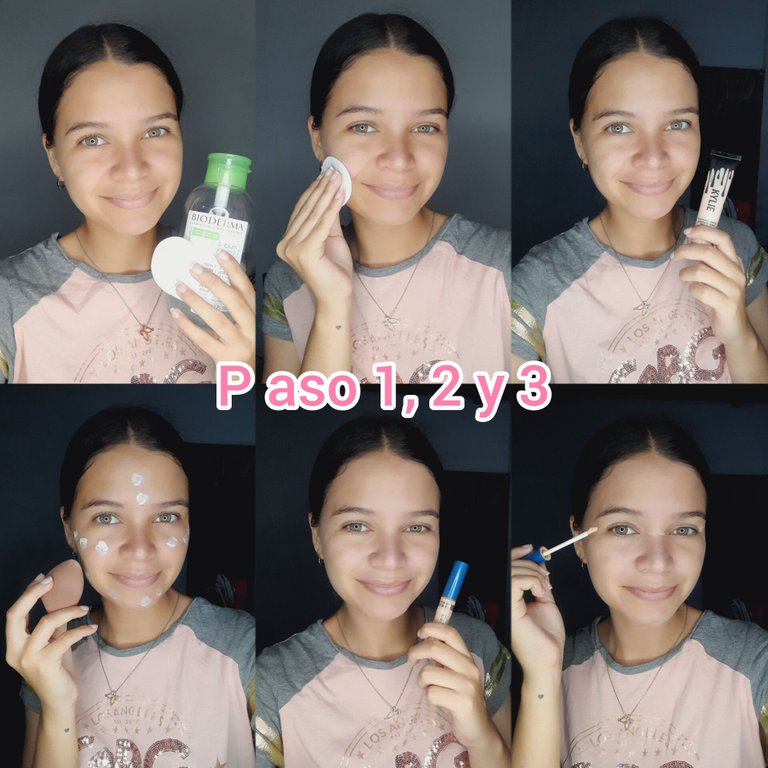
STEP BY STEP
📌The first step was based on cleansing my face with micellar water, to proceed to prepare the face with the application of foundation, which I blended with a damp sponge. Next, I proceeded with the concealer, which I deposited on my eyelids, and then blended it with the sponge used before.
📌 El primer paso, se basó en la limpieza de mi rostro con agua micelar, para así proceder a prepara el rostro con la aplicación de base, la misma la difuminé a toques con una esponjita húmeda. Seguidamente, procedí con el corrector, lo cual, deposité del producto en mis párpados, para después difuminarlo con la esponja antes usada.
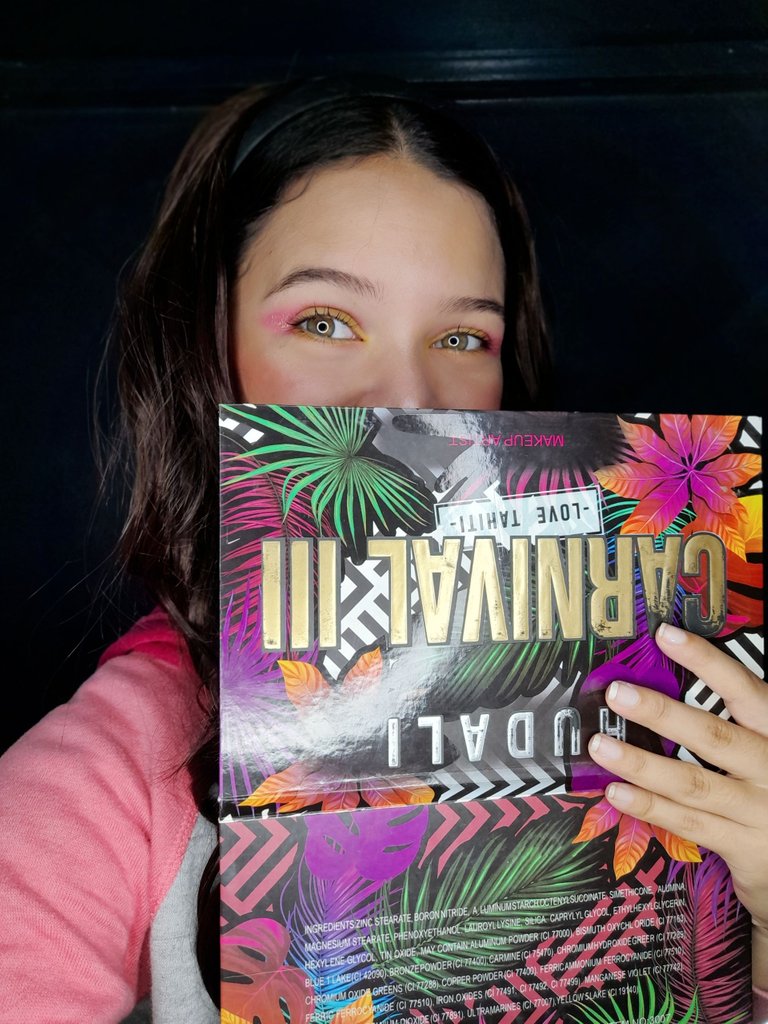
📌 The next thing I did was to lather up the face, blending it with a brush to correct the nose with a concealer. I then used a blusher and applied it on my cheekbones. For the part of my eyelids, I started with a pink on the outer part until I got the desired result.
📌 Lo siguiente fue cotornear el rostro, la misma lo fui difuminando con una brocha para así corregir la parte de la nariz con un corrector. De esta manera, hice uso de un rubor y lo apliqué en mi pómulos. Para la parte de mis párpados, empecé con una rosada en la parte externa hasta obtener el resultado deseado.
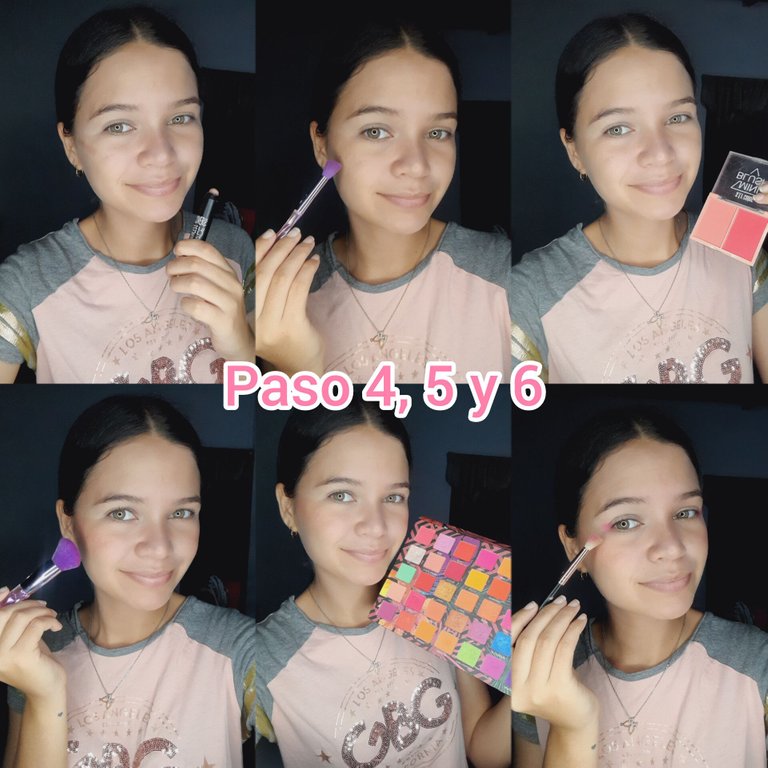
📌 Next was to apply yellow shadow on the inner part, and likewise the same yellow shadow I used for the lower part of my eye along with the pink. To close with my eye area, I used mascara. Then I illuminated my face.
📌 Lo siguiente fue aplicar sombra amarilla en la parte interna, y asimismo la misma sombra amarilla la usé para la parte inferior de mi ojo junto con el rosado. Para cerrar con la zona de mis ojos, utilicé el rimel. Después iluminé mi rostro.
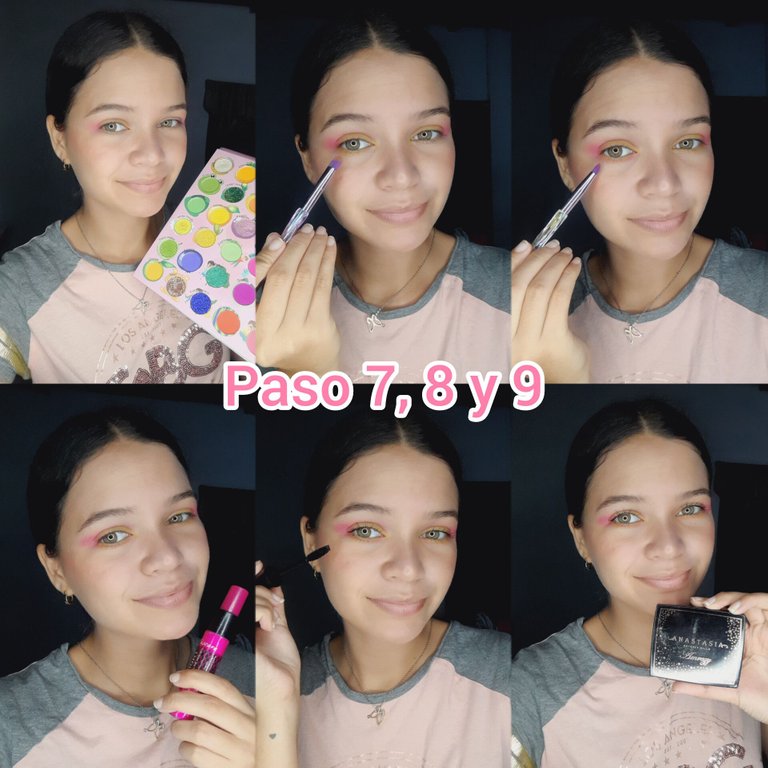
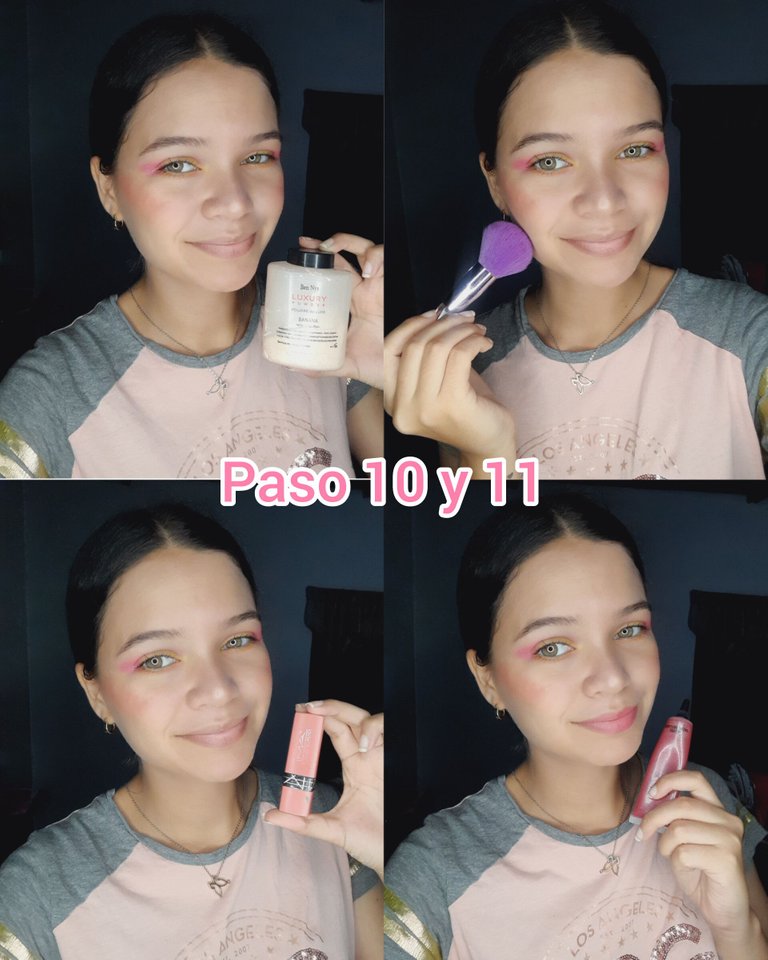
📌 Finally, I sealed all the makeup with translucent powder and the application of lipstick and gloss. That's it, let's shine!
📌 Por último, sellé todo el maquillaje con polvo traslúcido y la aplicación del labial y brillo. Listo ¡A brillar!
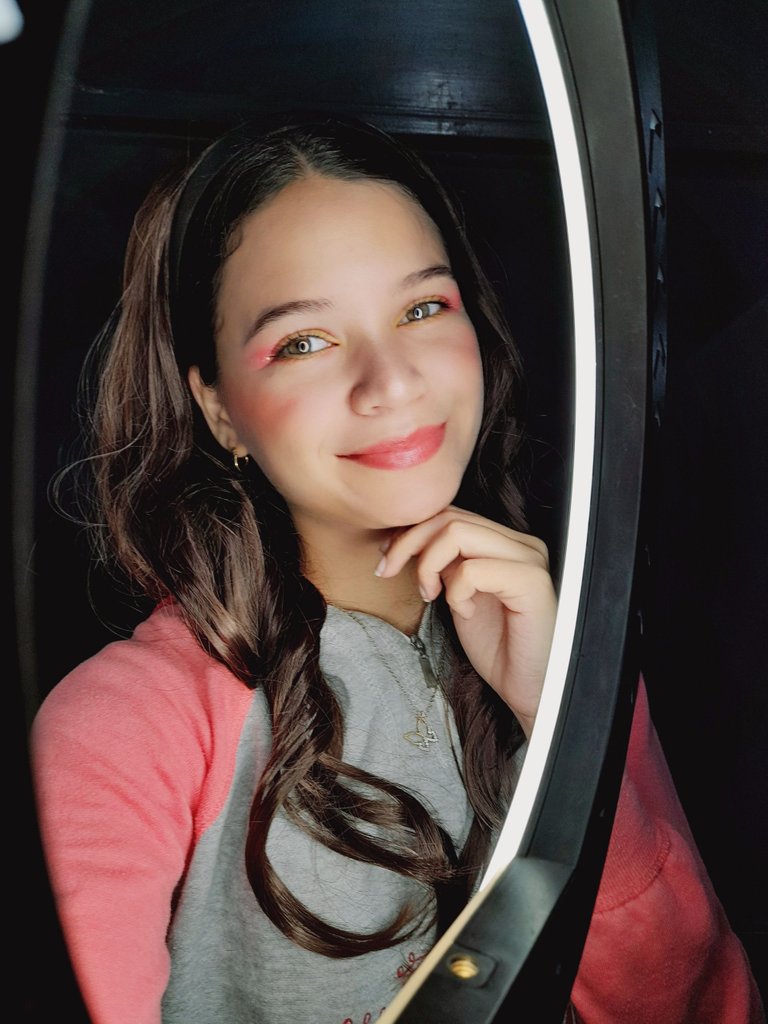
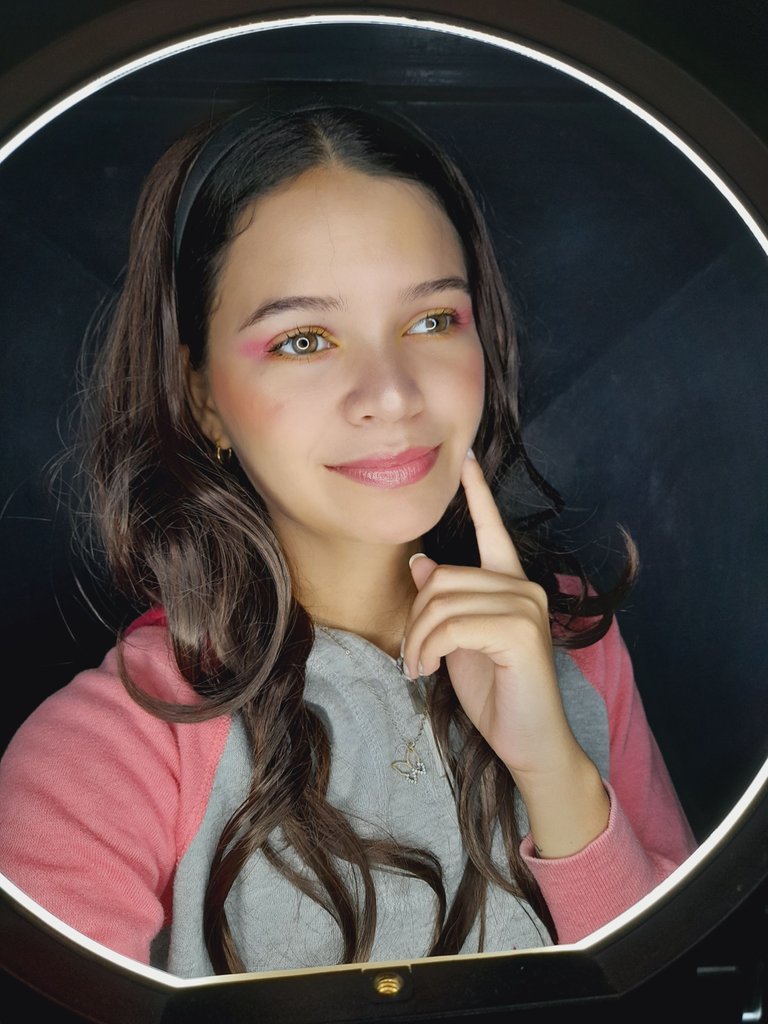
Make-up result / Resultado del maquillaje

Todas las fotografías fueron tomadas con mi télefono Samsung Galaxy A12 📲
0
0
0.000
0 comments