✨ Maquillaje Natural + Técnica para Corregir Ojeras y Cejas 💕// ✨ Natural Make-up + Technique to Correct Dark Circles and Eyebrows 💕
Versión en Español
Hola Comunidad feliz sábado ❣
El día de hoy les traigo un valioso post donde les enseñaré una mejor técnica para cubrir ojeras, muchas veces piensan que con solo usar corrector claro en la zona de ojera se acabó el problema y noooo, no es así acompáñame en este tutorial al corregir y hacer un maquillaje muy natural para quienes no les gusta usar muchos productos.
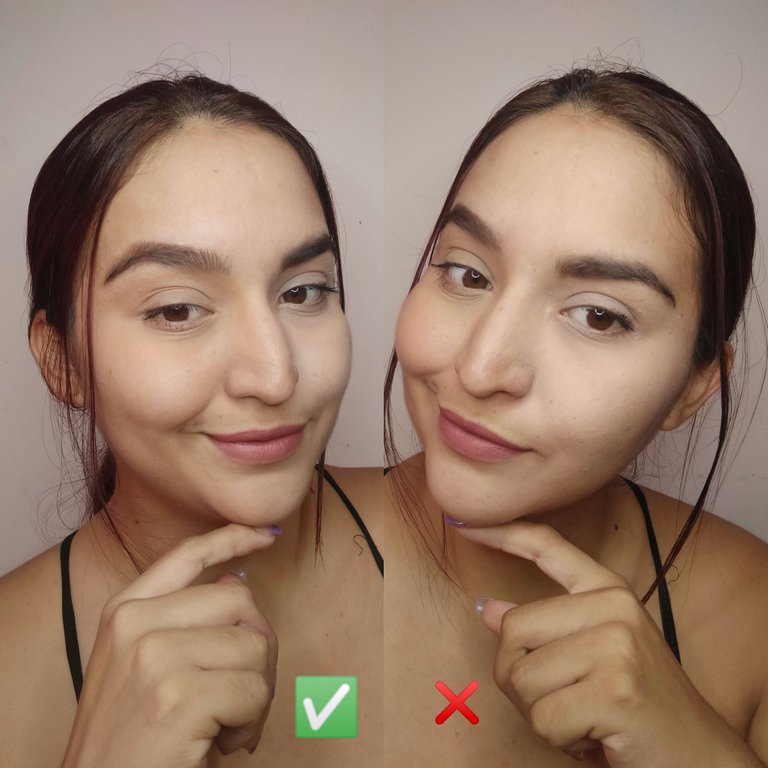
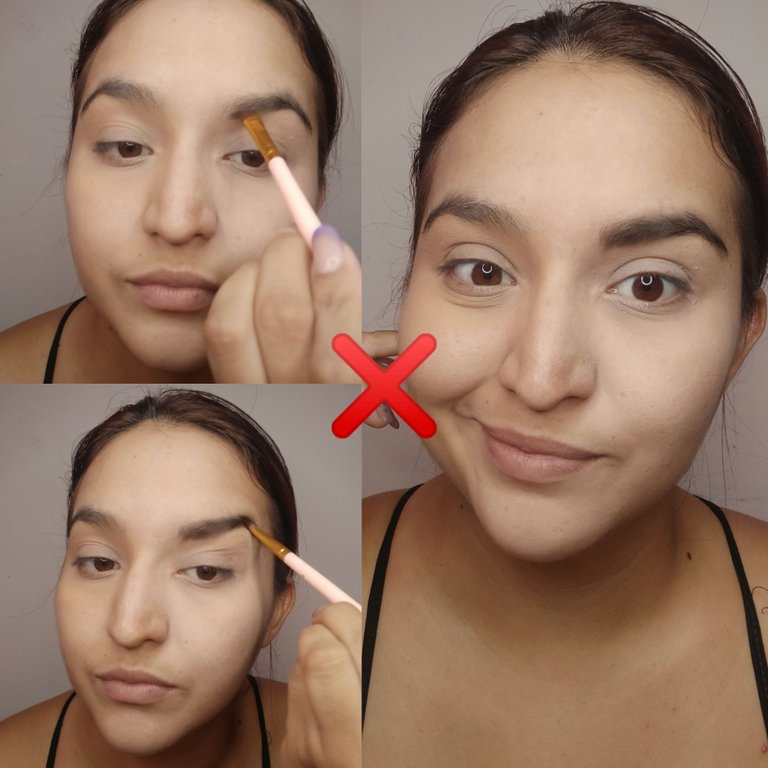
Técnica correcta ✅ vs Técnica incorrecta ❌
Comenzaré mostrándoles el lado izquierdo de mi rostro donde aplicaré un corrector que a pesar de tener muy buena cobertura no cubre de forma correcta la ojera estas 2 razones:
1 Estoy usando mucho producto
- difumino arrastrando el producto hacia otras partes del rostro.
En lado derecho de mi rostro aplico un corrector casi del tono de mi piel, puede ser naranja, amarillo o un tono mas oscuro porque debemos neutralizar el color gris de la ojera técnica correcta:
- Poco producto únicamente en la zona oscura.
- Difuminar con esponja o con el dedo anular a toques sin mover a ningún otro lado del rostro.
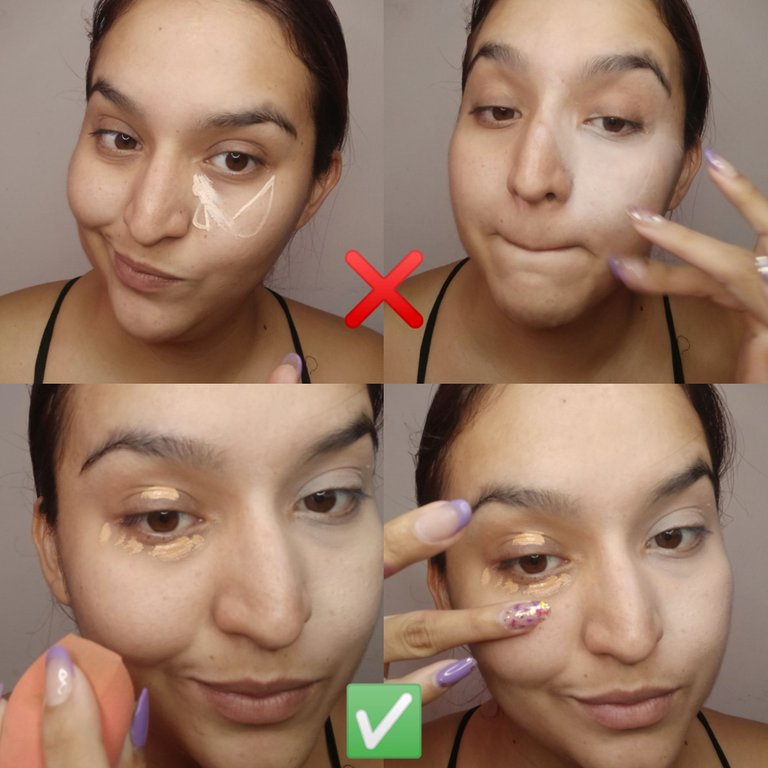
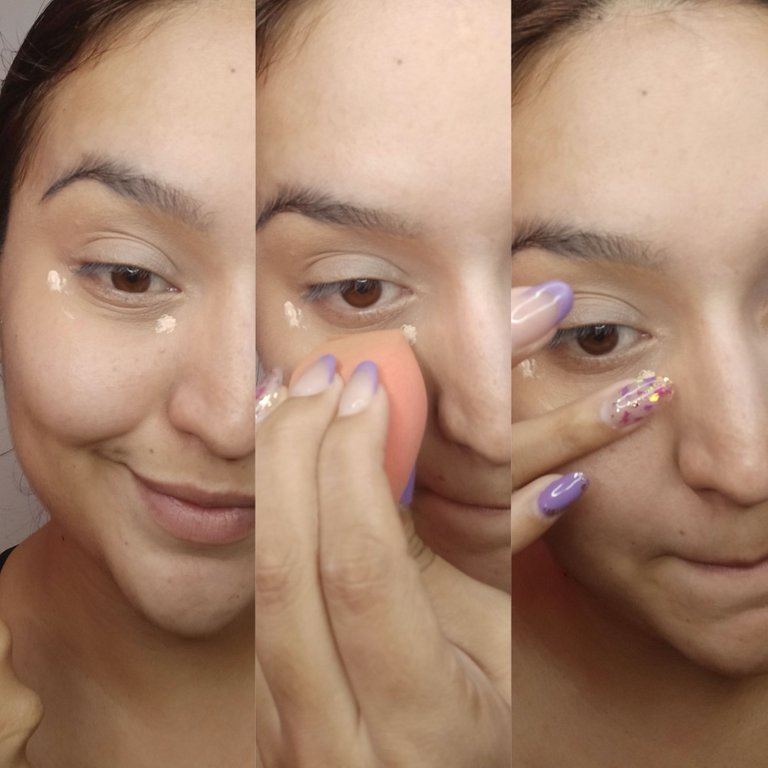
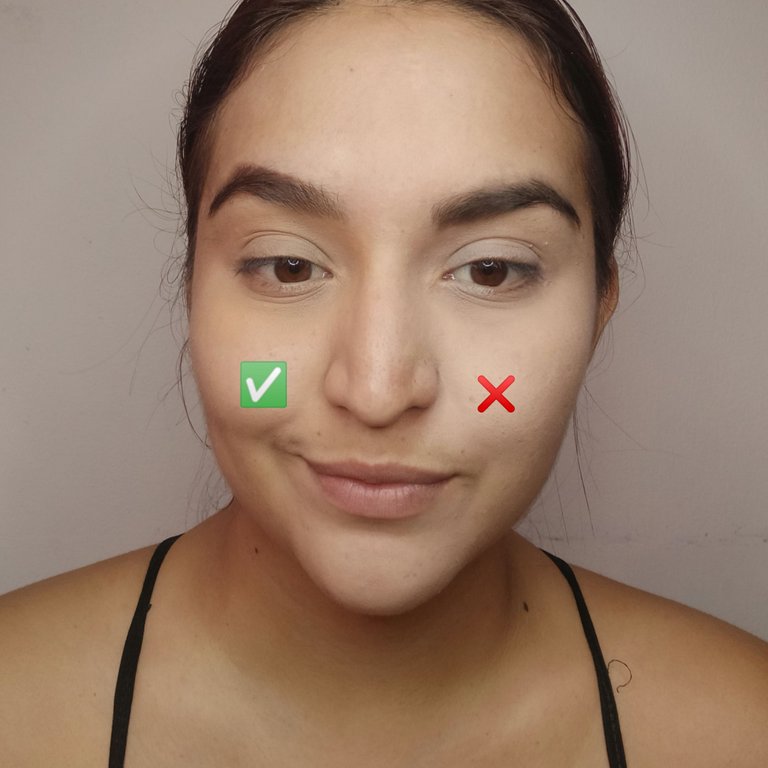
Ahora vamos a iluminar esa zona con un corrector un poco mas claro de igual forma poca cantidad y difuminar con esponja o dedo anular.
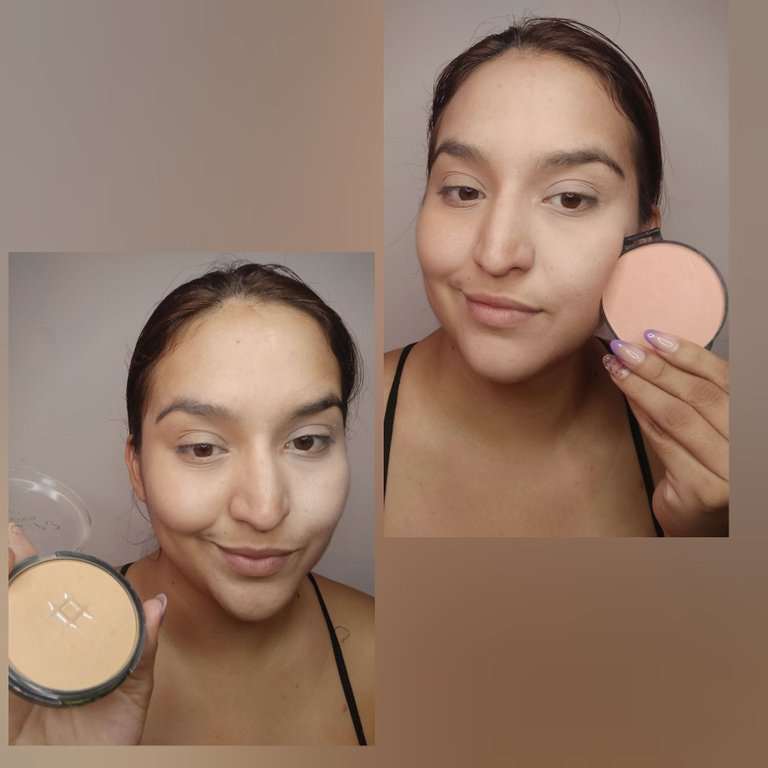
Sellar la ojera
Para sellar la ojera debemos usar un polvo compacto del mismo tono de nuestra piel, si usamos un color claro vamos a resaltar mas la zona gris de la ojera y al momento de tomar una foto se verá mucho mas clara esa zona.
Cejas Naturales
Para hacer unas cejas naturales sin que se vean oscuras o como si tuvieran un teipe pegado en esa área el único y sencillo paso que NO debemos hacer es el siguiente:
No debemos comenzar a aplicar la sombra desde el inicio de la ceja
Técnica Correcta ✅
Debemos peinar en el mismo sentido donde crecen los vellos, tomar el producto de preferencia en crema, gel o sombra y aplicar desde la mita de la ceja hacia afuera y con lo restante pequeños trazos en el inicio.
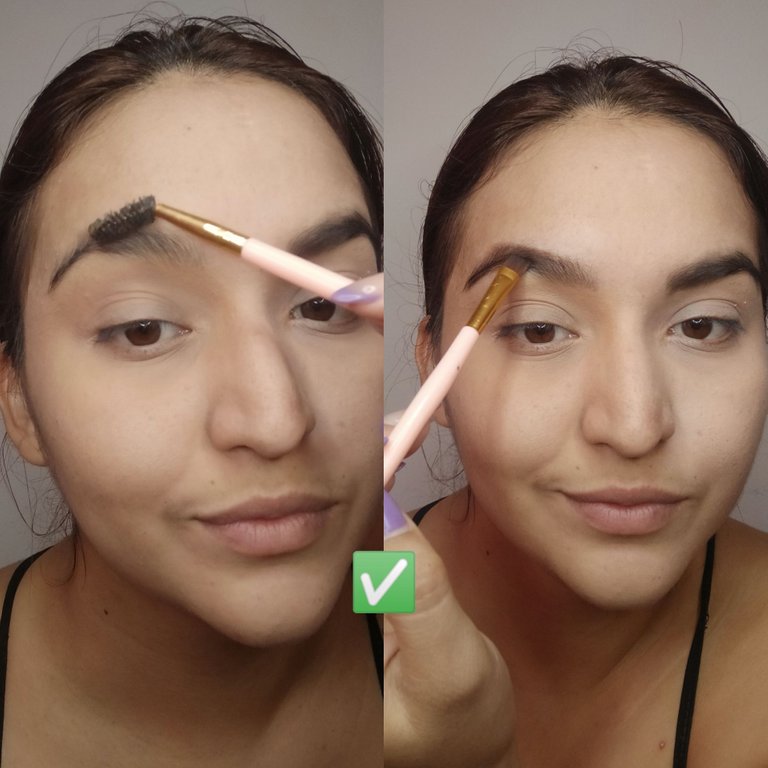
Con la técnica correcta evitamos que la mayor cantidad de producto se quede en el inicio y así permitimos que nuestra ceja se vea mas natural.
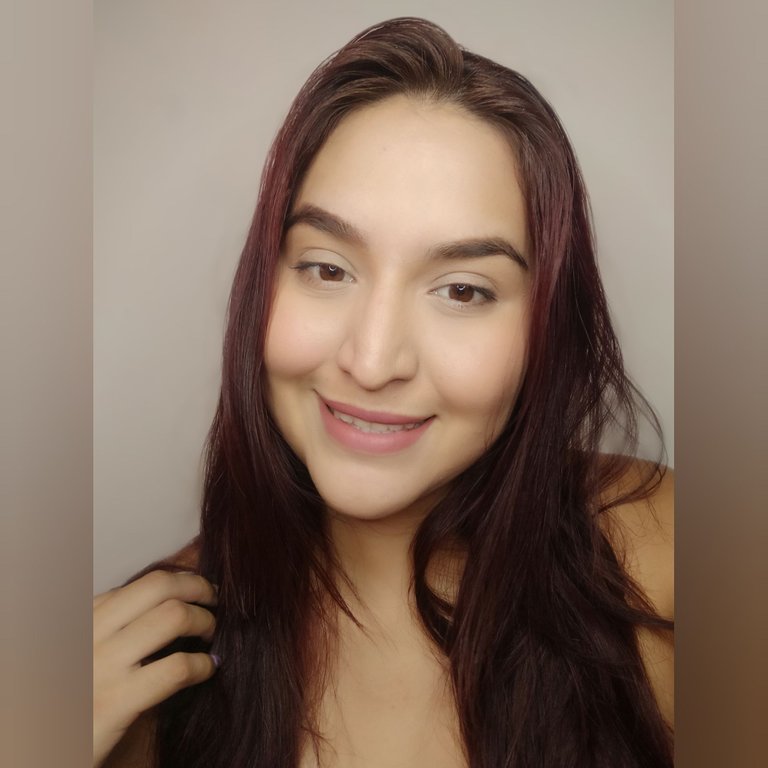
Para terminar el look básico y natural arreglé la mitad del rostro y apliqué las técnicas correctas, coloque blush, máscara de pestañas y labial. Y listo un look super sencillo y natural usando técnicas correctas que me permitirán verme bella y que el maquillaje se prolongue por mas tiempo.
Gracias por llegar hasta acá espero les haya gustado este post educativo especifico en ojeras y cejas, un gran abrazo y feliz noche para todos. ✨
Fotos propiedad del autor.

English Version
Hello Community happy saturday ❣
Today I bring you a valuable post where I will teach you a better technique to cover dark circles, many times people think that just by using clear concealer on the under eye area the problem is over and noooo, it's not like that join me in this tutorial to correct and make a very natural makeup for those who don't like to use many products.
Correct Technique ✅ vs Incorrect Technique ❌
I will start by showing you the left side of my face where I will apply a concealer that despite having very good coverage does not cover the under eye circles correctly these 2 reasons:
- I'm using too much product.
- I blend by dragging the product to other parts of my face.
On the right side of my face I apply a concealer almost the same tone as my skin tone, it can be orange, yellow or a darker tone because we have to neutralise the grey colour of the dark circles correct technique:
- Little product only on the dark area.
- Blend with sponge or ring finger in dabs without moving to any other side of the face.
Now we are going to illuminate that area with a slightly lighter concealer in a small amount and blend with a sponge or ring finger.
Sealing the dark circles
To seal the dark circles we must use a compact powder of the same tone of our skin, if we use a light colour we will highlight more the grey area of the dark circles and at the moment of taking a photo it will look much clearer that area.
Natural Eyebrows
To make natural looking eyebrows without them looking dark or as if they have a tape stuck in that area the only and simple step we should NOT do is the following:
We should not start applying the shadow from the beginning of the eyebrow.
Correct Technique ✅
We must comb in the same direction where the hairs grow, take the product of preference in cream, gel or shadow and apply from the half of the eyebrow outwards and with the remaining small strokes at the beginning.
With the right technique we avoid that most of the product stays at the beginning and so we allow our eyebrow to look more natural.
To finish the basic and natural look I fixed the middle of the face and applied the correct techniques, blush, mascara and lipstick. And ready a super simple and natural look using the correct techniques that will allow me to look beautiful and the make up will last longer.
Thanks for making it this far I hope you liked this specific educational post on dark circles and eyebrows, big hugs and happy night to all. ✨
Photos property of the author.
https://twitter.com/Francysfio/status/1540882784222412803
The rewards earned on this comment will go directly to the people sharing the post on Twitter as long as they are registered with @poshtoken. Sign up at https://hiveposh.com.
Buen post mi bella @francysfiore ❤️