Behind the camera 2, techniques and tips to take better pictures for your blog on hive / Detrás de cámara 2, técnicas y tips para hacer mejores fotografías para tus blog en hive [Ing/Esp]
Techniques and tips to take better pictures for your blog on hive
I love to share with you in this community the behind the scenes of the session that I usually do once I elaborate the recipe meals and which ones I recommend to be better visually in your posts.
I am a lover of photographs and if it is of food even more since many of them take a lot of process in their preparation and documenting this is usually an important part to visually have an idea of the step by step without losing details that for lack of a good writing or overunderstanding is not explained in the procedures.
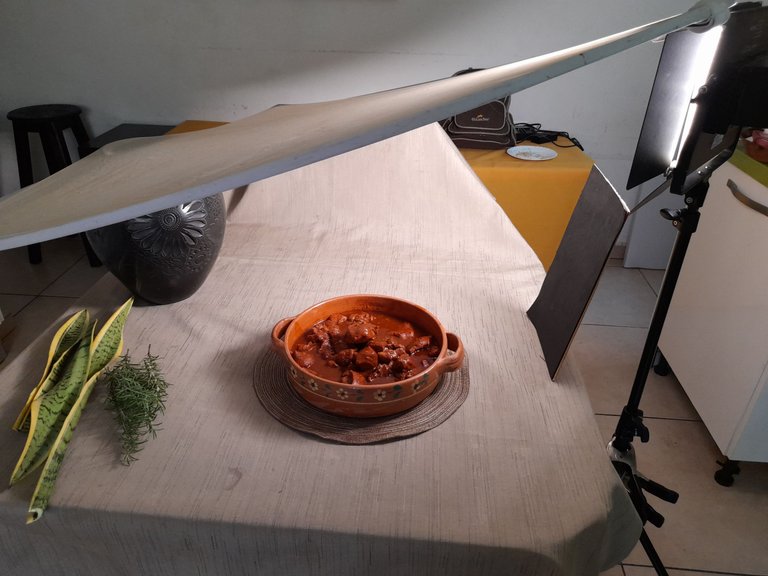
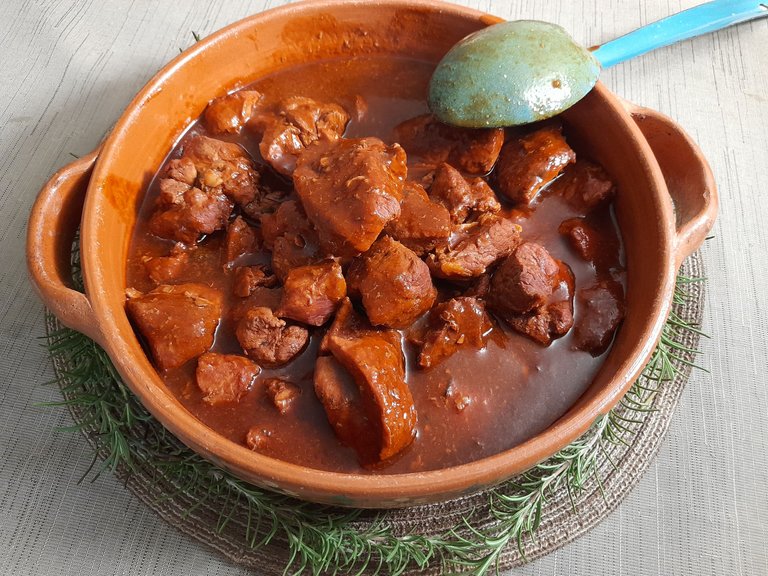
In the case of this stew that I prepared during the week, I usually place on the table a tablecloth of uniform color without anything else that distracts from the main point to be photographed.
A Leg lamp with warm light not so intense and above it a diffuser to help the light move over it and completely bathe the surface of the image giving it more brightness and highlighting its dimensionality.
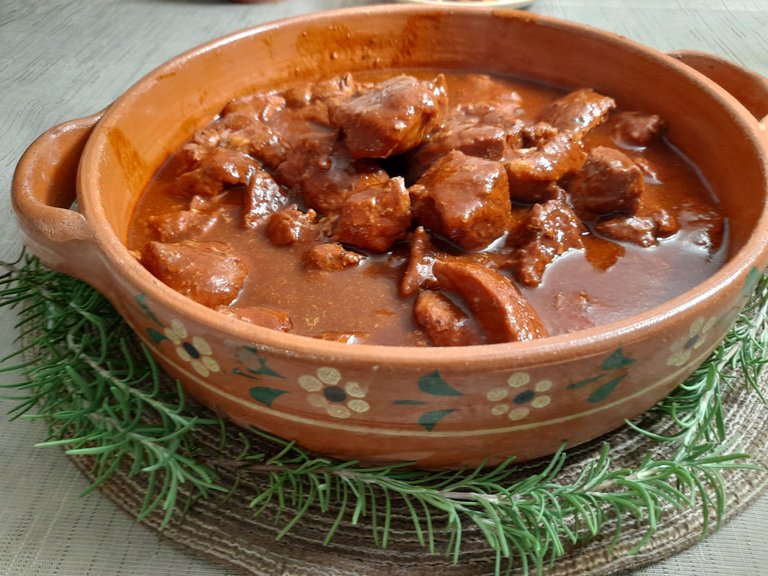
It is important in the case of photos of casseroles to bathe the surface continuously between photos, otherwise it will remain like this. Not very nice.
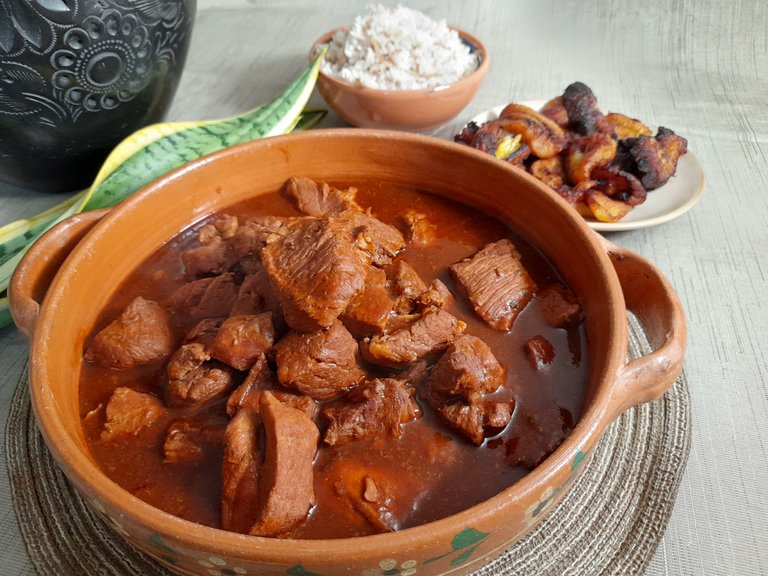
Incorporating a serving element to the main dish (stew) gives it a more real touch and if it includes the contours to accompany it is a visual plus that incites the viewer's senses to savor and enjoy this delicious food.
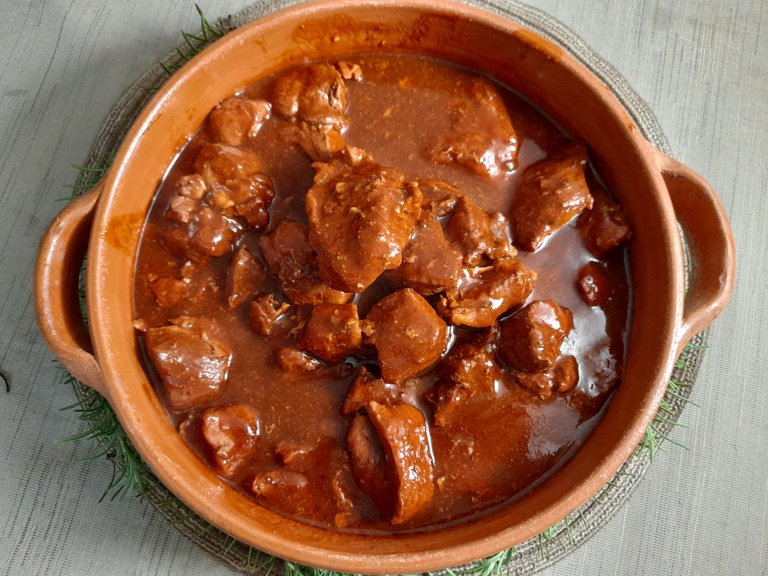
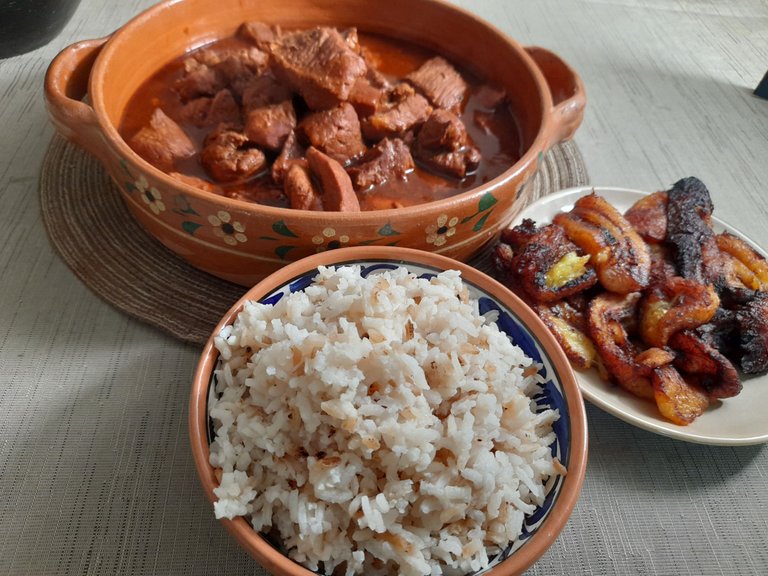
This photograph is taken from above, that is, from top to bottom, capturing the entire breadth of the bowl that contains it. It is an excellent way to do gourmet photography.
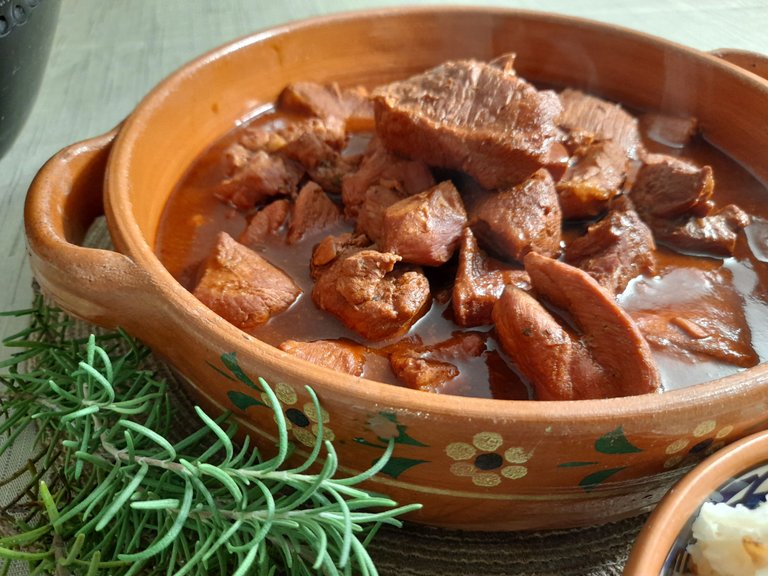
The camera's close-ups allow you to take photos that have greater visual impact.
You can distribute according to the composition of the thirds the elements que quieras destacar en la fotografía.
This post is 100% original, the writing, photos and content are my own. I used the text separators elaborated in Canva, the photos were taken with the Samsung A21s Smartphone camera and I used the translator DeepL.
Use Neewer lamp model NL660- BI COLOR: 3200-5600k
Me encanta compartir con ustedes en esta comunidad el detrás de cámara de la sesión que suelo realizar una vez que elaboro las recetas de comidas y cuales les recomiendo para que queden mejor visualmente en sus post
Soy amante de las fotografías y si es de comidas más ya que muchas llevan micho procesos en su elaboración y documentar esto suele ser parte importante para que visualmente se tenga idea del paso a paso sin perder detalles que por falta de una buena redacción o sobreentendido no se explica en los procedimientos.
En el caso de este guiso que preparé en la semana, suelo colocar en la mesa un mantel de color uniforme sin nada más que distraiga del punto principal a fotografiar.
Una lámpara de Leg con luz cálida no tan intensa y encima un difusor para ayudar a que la luz se desplace sobre él y bañe completamente la superficie de la imagen dando a este más brillo y resaltando sus dimensionalidad.
Es importante en el caso de fotos de guisos bañar la superficie continuamente entre foto y foto, en caso contrario quedará así. Nada agradable.
Incorporar al plato principal (guiso) un elemento para servirlo le da una toque más real y si incluye los contornos para acompañar es un plus visual que incita al espectador los sentidos de saborear y disfrutar este deliciosa comida.
Esta fotografía es realizada cenitalmente, es decir de arriba hacia abajo, logrando capturar toda la amplitud del bol que lo contiene. Es una excelente manera de hacer fotografía gourmet.
Los acercamientos de la cámara permiten hacer fotos que tengan mayor impacto visual.
Gracias amigos lector por visitar mi post.
Este post es 100 % original, la redacción, fotos y contenido son de mi autoría. Use las separadores de texto elaborados en Canva, las fotos las tomé con la cámara del Smartphone Samsung A21s y use el traductor DeepL.
Use lampara marca Neewer modelo NL660- BI COLOR: 3200-5600k


Congratulations @fotomaglys! You have completed the following achievement on the Hive blockchain and have been rewarded with new badge(s) :
Your next target is to reach 400 replies.
You can view your badges on your board and compare yourself to others in the Ranking
If you no longer want to receive notifications, reply to this comment with the word
STOPCheck out the last post from @hivebuzz:
Umammmii
Hello @fotomaglys
Great post with some useful tips.
I'm always sold when there's ripe fried plantains 😍😋
Also, I love the inclusion of the greenery, and Rosemary is also one of my favourite herbs;-)
Electronic-terrorism, voice to skull and neuro monitoring on Hive and Steem. You can ignore this, but your going to wish you didnt soon. This is happening whether you believe it or not. https://ecency.com/fyrstikken/@fairandbalanced/i-am-the-only-motherfucker-on-the-internet-pointing-to-a-direct-source-for-voice-to-skull-electronic-terrorism
https://twitter.com/fotomaglys/status/1436009633135616000
The rewards earned on this comment will go directly to the person sharing the post on Twitter as long as they are registered with @poshtoken. Sign up at https://hiveposh.com.
Dios mío, ese plato se ve buenísimo. Me encanta la calidad de tus fotos, muy Wow, parecen de propaganda. Super tasty, me dio mucha hambre ahora 😆. Gracias por compartir tus conocimientos, a mi también me gusta tomar buenas fotos del proceso de mis dibujos, a veces no lo consigo y por eso debo armar un mini estudio para eso y se puedan apreciar bien las fotos. Muchas gracias por los consejos, voy a buscar aplicarlos.
¡Mucho éxito y buen día!