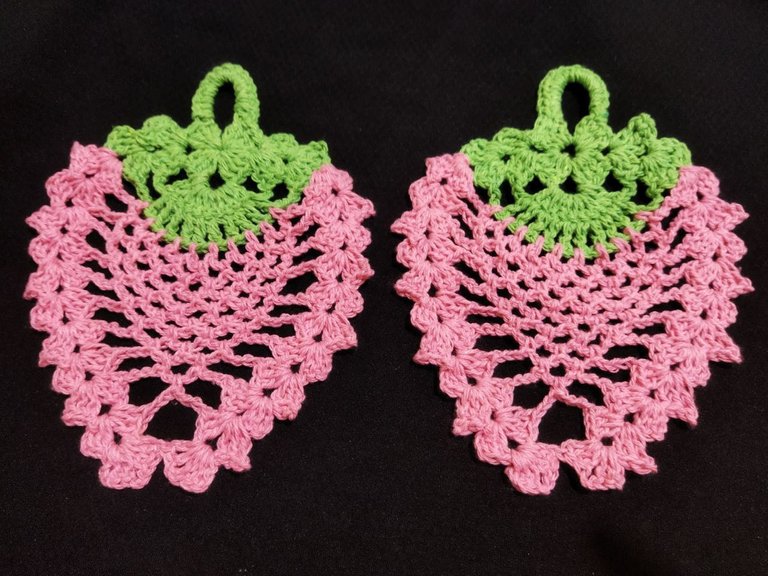
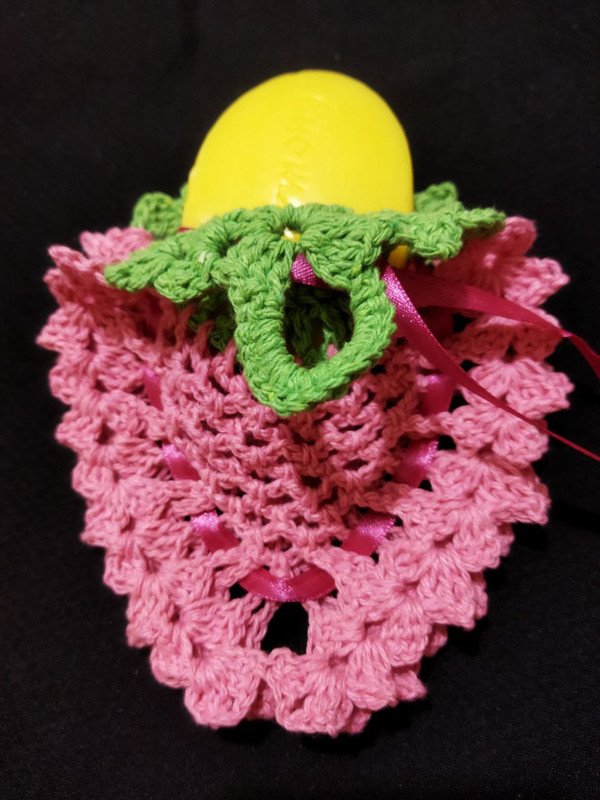
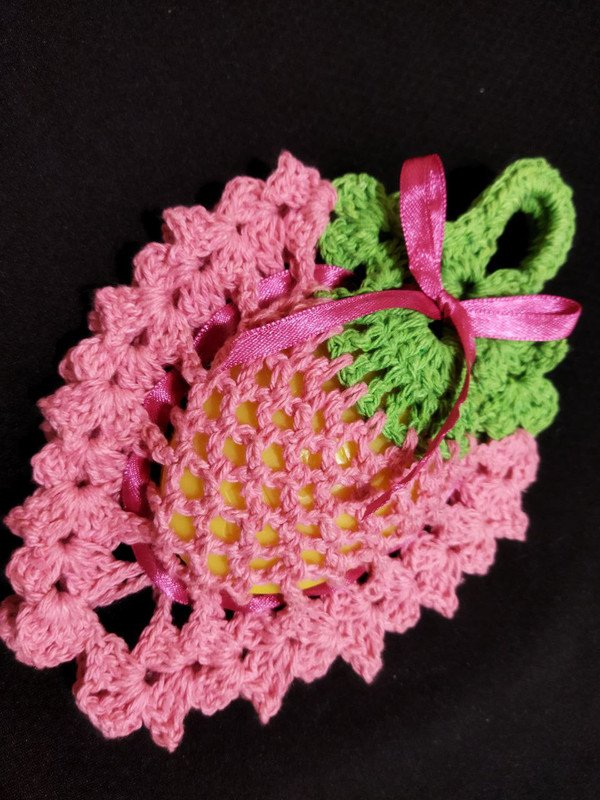
Crocheted soap dish in the shape of strawberry to decorate and perfume the bathroom [ESP|ENG]

Un saludo mi querida comunidad @NeedleWorkMonday 💜 mantener los espacios de la casa decorados con esos pequeños detalles que marcan la diferencia es una de las cosas que me apasiona y mas aun si están elaborados por nuestras manos y uno de esos espacios que me encanta tenerlo limpio y perfumado es el baño por eso me gusto este modelo de Jabonera tejida a crochet con forma de fresa que ademas de tener unos colores muy alegres, tiene doble función una es decorar y la otra es que aprovechando el fuerte y agradable aroma del jabón de baño también sirve como ambientador y así perfumar la sala de baño de nuestra casa. No esta demás decirles que es una excelente opción a la hora de hacer un obsequio con este lindo detalle.
Greetings my dear community @NeedleWorkMonday 💜 keep the spaces of the house decorated with those little details that make a difference is one of the things that I love and even more if they are made by our hands and one of those spaces that I love to have it clean and scented is the bathroom so I liked this model of crocheted soap dish shaped strawberry that besides having some very cheerful colors, It has a double function, one is to decorate and the other is that taking advantage of the strong and pleasant aroma of the bath soap also serves as an air freshener and thus perfume the bathroom of our house. It is not too much to tell you that it is an excellent choice when making a gift with this nice detail.

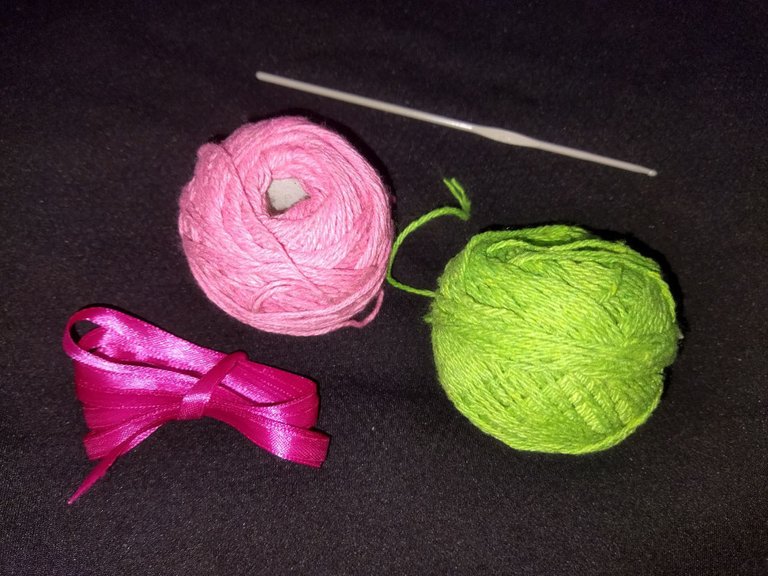
- Hilo pabilo rosado
- Hilo pabilo verde
- Aguja para crochet
- Cinta de tela
- Pink wick thread
- Green wick yarn
- Crochet needle
- Cloth tape

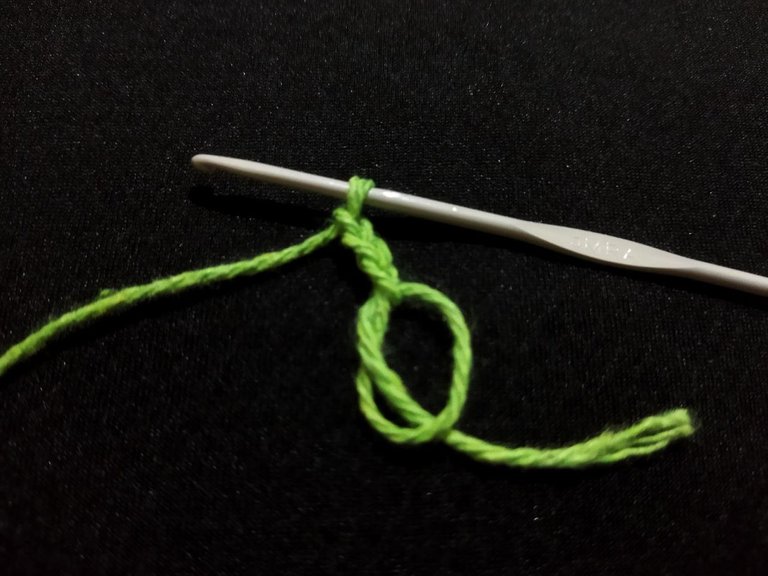
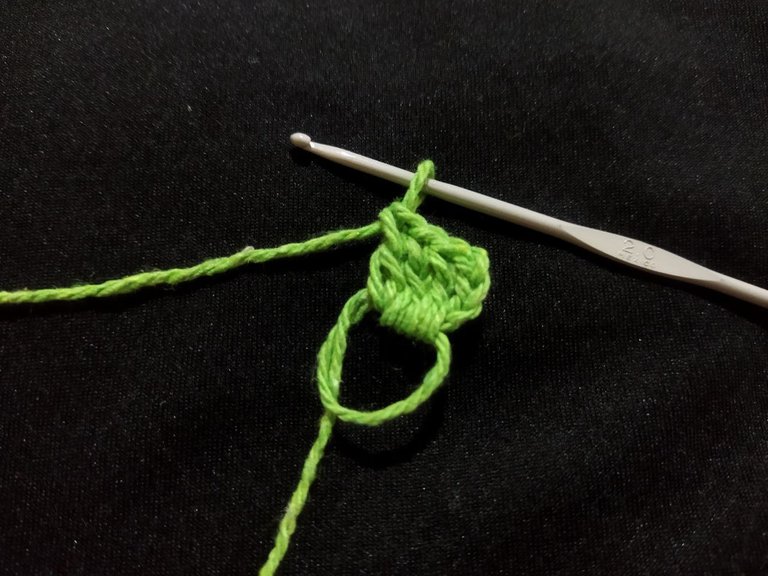
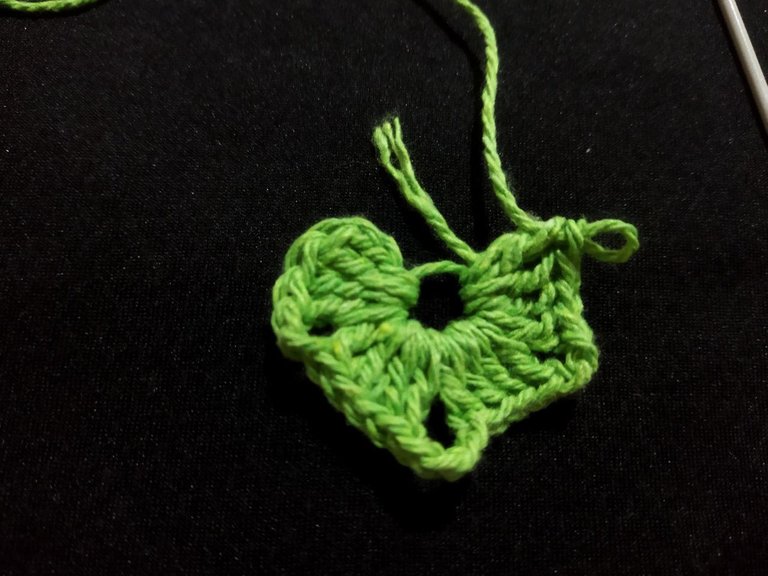
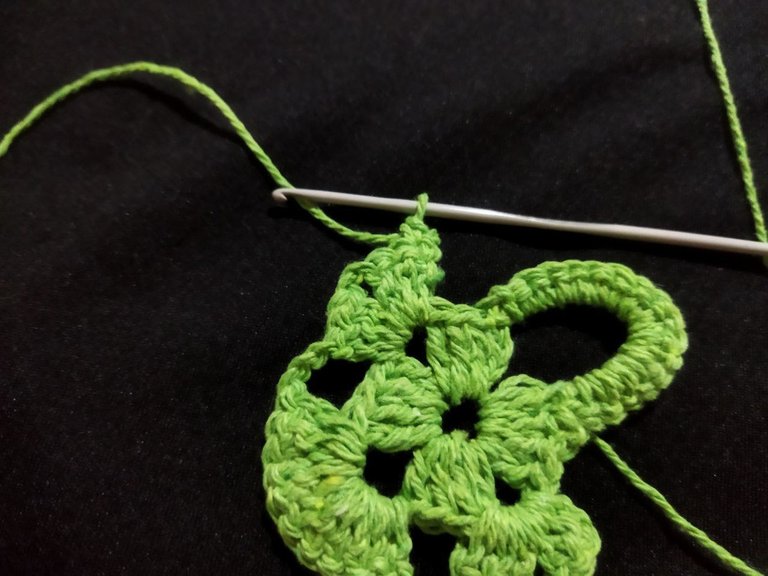
Iniciamos con este nuevo proyecto que les traigo para compartir hoy como es una fresa porta jabón tejida a crochet. Comenzamos haciendo un anillo mágico seguido de 3 cadenas y 3 puntos altos para completar los 4 puntos y una cadena de 3 puntos para repetir nuevamente 3 puntos altos mas, luego hacemos 2 cadena 4 puntos altos 4 cadenas y nuevamente 4 puntos altos mas, para terminar esta vuelta hacemos 2 cadenas y cuatro puntos alto y apretamos el anillo mágico. Seguimos en el mismo sentido del tejido y elaboramos una cadena de 10 puntos y la fijamos en el primer punto alto que elaboramos al inicio del tejido
Let's start with this new project that I bring you to share today as it is a crocheted soap holder strawberry. We start by making a magic ring followed by 3 chains and 3 high stitches to complete the 4 stitches and a chain of 3 stitches to repeat again 3 more high stitches, then we make 2 chain 4 high stitches 4 chains and again 4 more high stitches, to finish this round we make 2 chains and four high stitches and tighten the magic ring. We continue in the same direction of knitting and we make a chain of 10 stitches and we fix it in the first high stitch that we made at the beginning of the knitting.
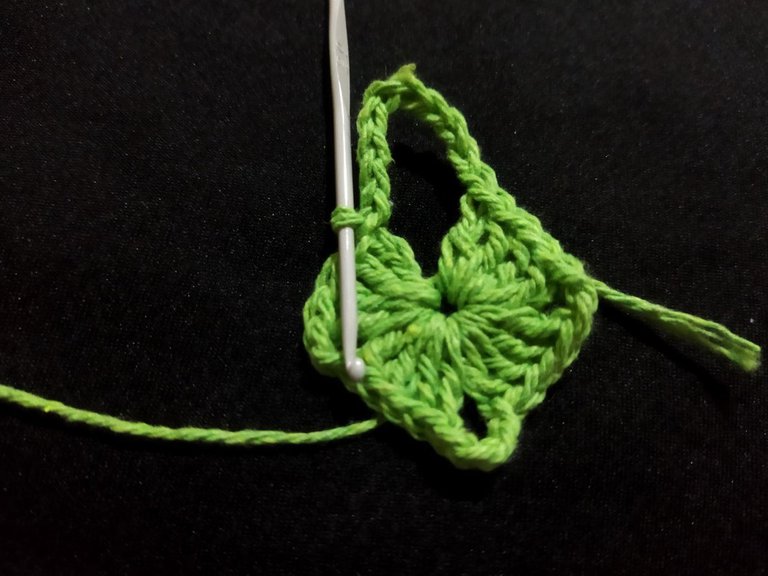
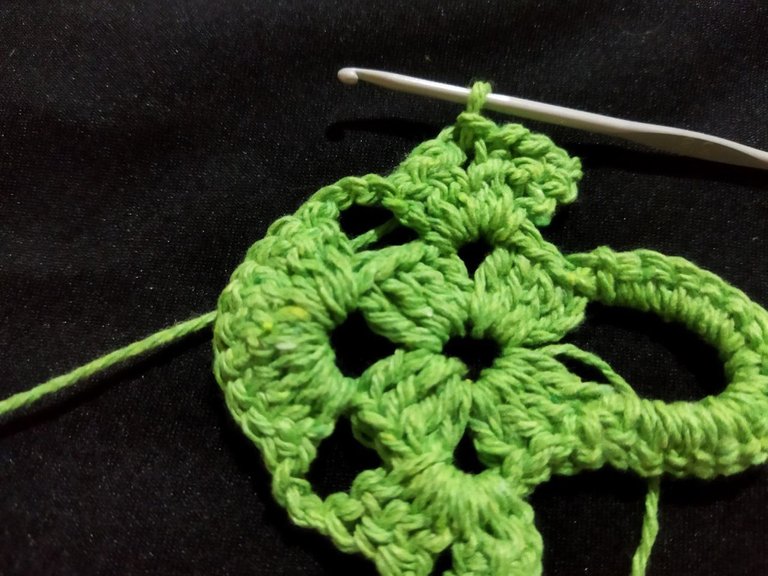
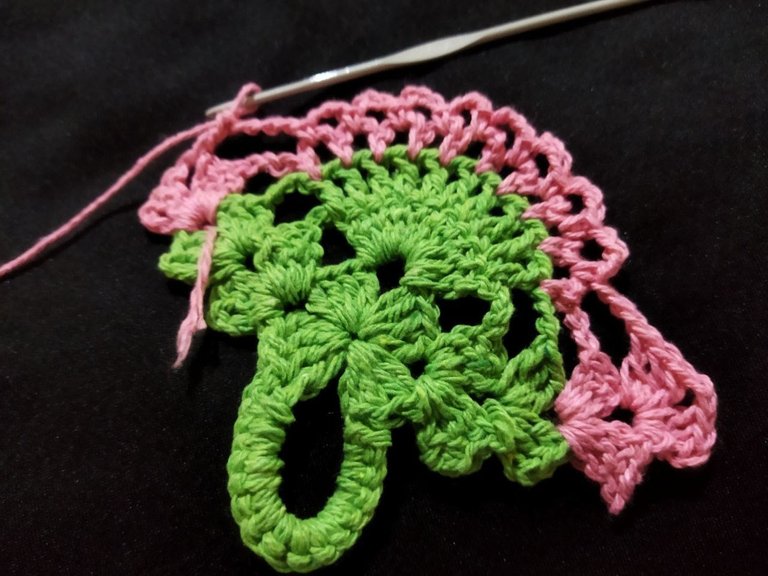
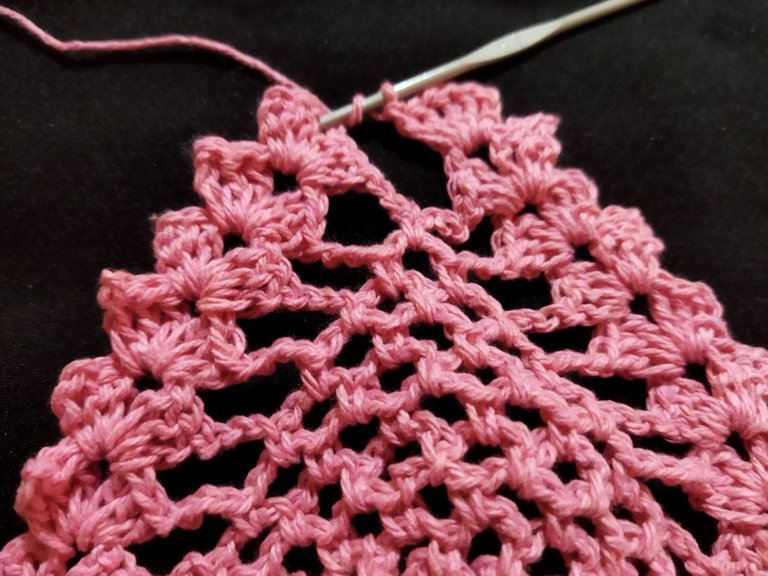
Subimos con una cadena y volteamos el sentido del tejido para hacer 16 puntos bajos tomando la cadena que acabamos de realizar, al terminar hacemos puntos deslizados encima de los 4 puntos altos ubicándonos en el espacio que es una cadena que separa este abanico. Subimos con una cadena de 3 puntos y elaboramos luego 3 puntos altos para completar un total de 4 puntos, después una cadena de 2 puntos y 4 puntos altos mas. Ahora hacemos 3 cadenas 10 puntos altos en el espacio central de las cadenas seguido de 3 cadenas y repetimos la secuencia de los extremos
We go up with a chain and turn the direction of knitting to make 16 low stitches taking the chain we just made, when we finish we make slipped stitches over the 4 high stitches placing ourselves in the space that is a chain that separates this fan. We go up with a chain of 3 stitches and then we make 3 high stitches to complete a total of 4 stitches, then a chain of 2 stitches and 4 more high stitches. Now we make 3 chains 10 high stitches in the central space of the chains followed by 3 chains and repeat the sequence of the ends.

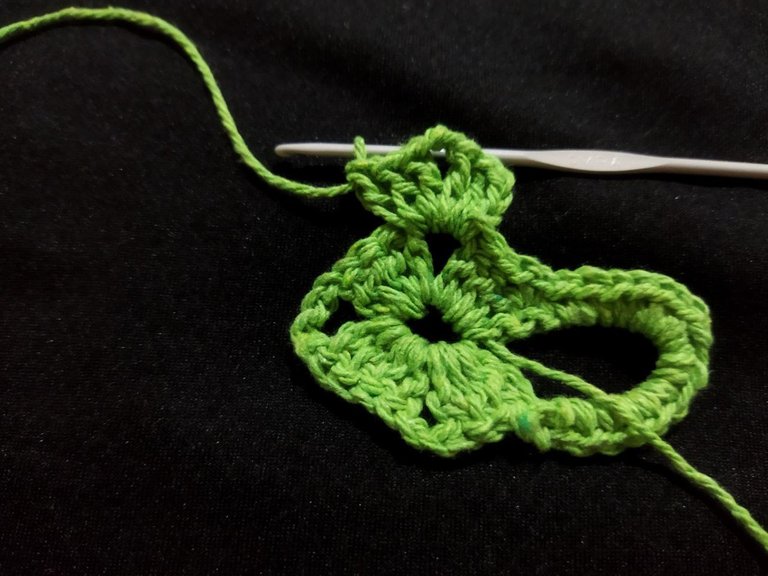

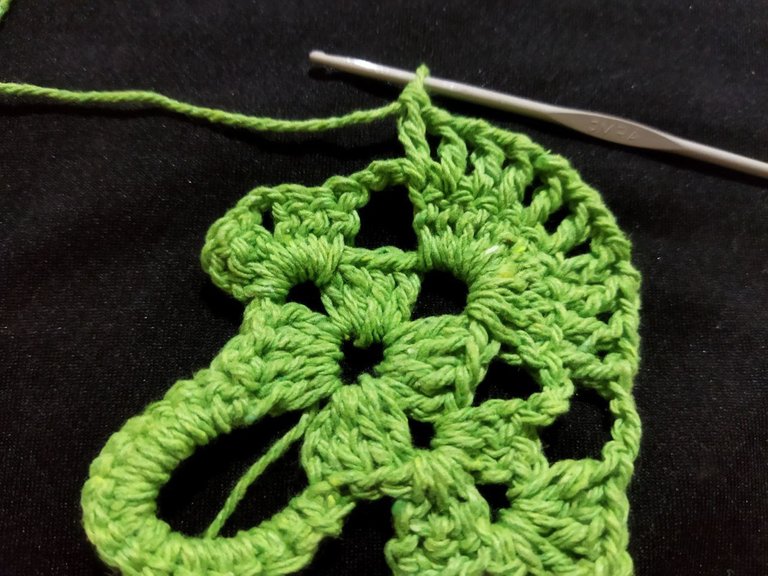
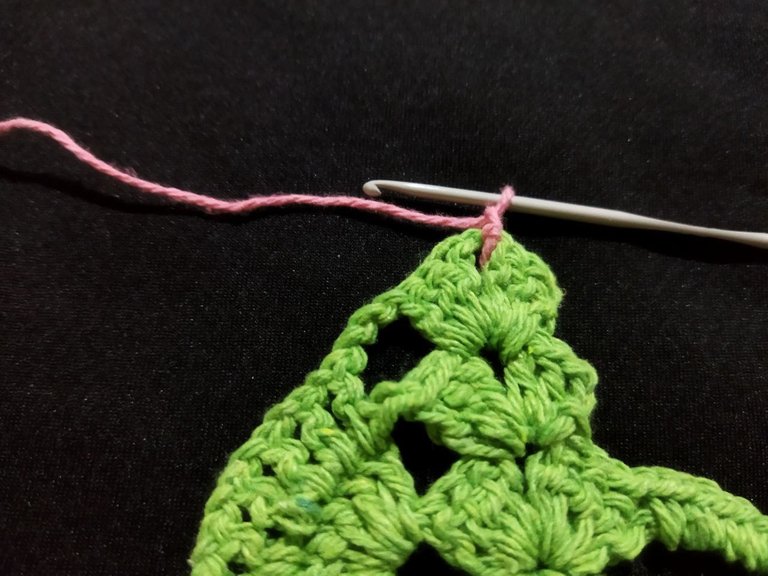
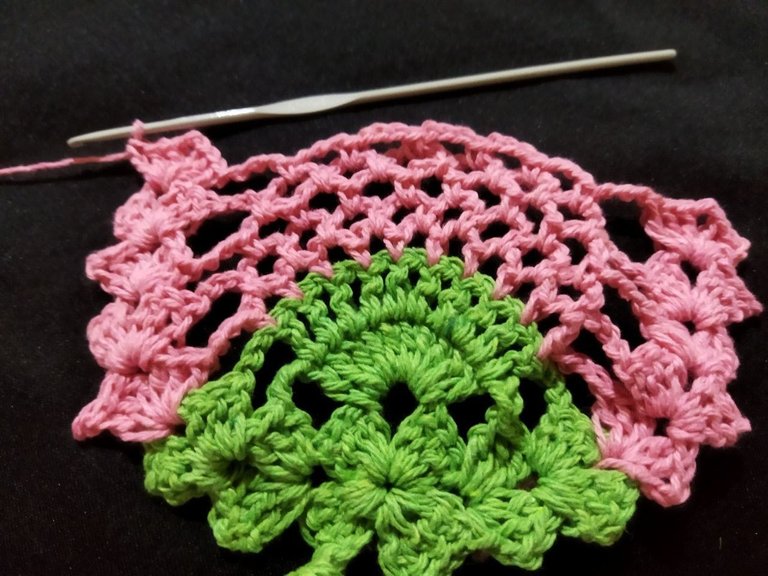
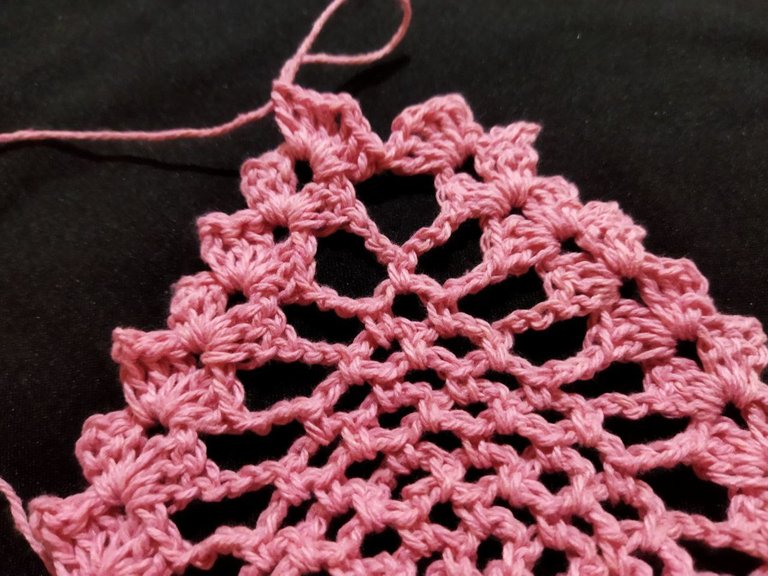
A partir de este momento siempre que iniciamos por los extremos repetimos esta secuencia que es deslizar los cuatro puntos para terminar en el espacio central, luego levantamos una cadena de 3 puntos para hacer 2 puntos altos y sumar un total de 3 puntos luego una cadena de 2 puntos y seguido de 3 puntos altos mas al igual que una cadena de 3 puntos, esta secuencia en los extremos es repetitiva incluso en el siguiente paso que cambiemos de color de hilo. En la parte central donde hicimos los 10 puntos altos los vamos a repetir igual pero esta vez con una cadena de separación entre cada uno, De esta manera terminamos con el hilo en color verde lo cortamos y ocultamos, seguidamente realizamos otra pieza igual ya que esta fresa porta jabón es una bolsita y debe tener 2 caras
From this moment on, whenever we start at the ends we repeat this sequence which is to slip the four stitches to finish in the central space, then we pick up a chain of 3 stitches to make 2 high stitches and add a total of 3 stitches then a chain of 2 stitches and followed by 3 more high stitches as well as a chain of 3 stitches, this sequence at the ends is repetitive even in the next step that we change the color of the yarn. In the central part where we made the 10 high stitches we are going to repeat the same but this time with a chain of separation between each one, in this way we finish with the thread in green color we cut it and hide it, then we make another equal piece since this strawberry soap holder is a bag and must have 2 faces.
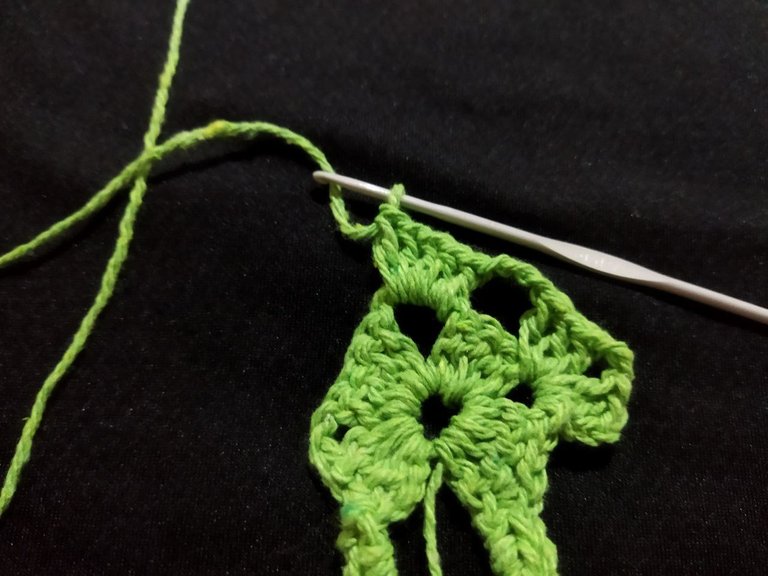
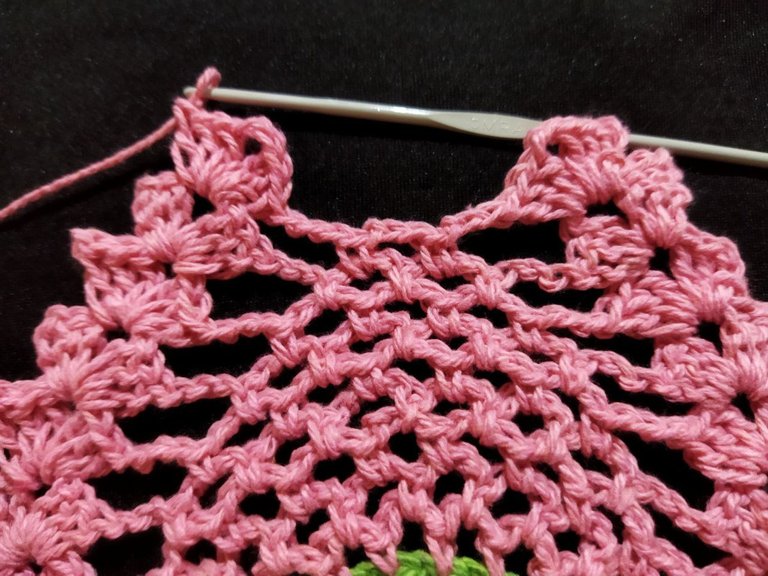
Cambiamos de color para el fucsia e iniciamos en uno de los extremos en el espacio de las cadenas elaborando la secuencia que les explique que es repetitiva en ambos extremos, hacemos un punto bajo en el primer punto alto pero esta vez separados por una cadena de 3 puntos y seguimos con la secuencia del otro extremo. Para la otra vuelta vamos a insertar los puntos bajos en el centro de las cadena y de esta manera vamos a evidenciar la reducción de espacios en esta parte central porque en los extremos se mantendrá igual
We change color for the fuchsia and we start at one of the ends in the space of the chains elaborating the sequence that I explained to you that is repetitive at both ends, we make a low stitch in the first high stitch but this time separated by a chain of 3 stitches and we continue with the sequence of the other end. For the other round we are going to insert the low stitches in the center of the chain and in this way we will show the reduction of spaces in this central part because at the ends it will remain the same.

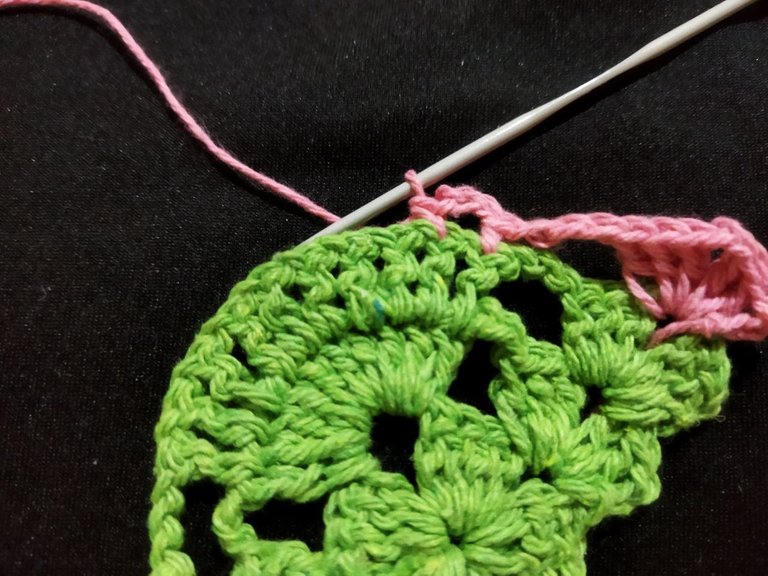
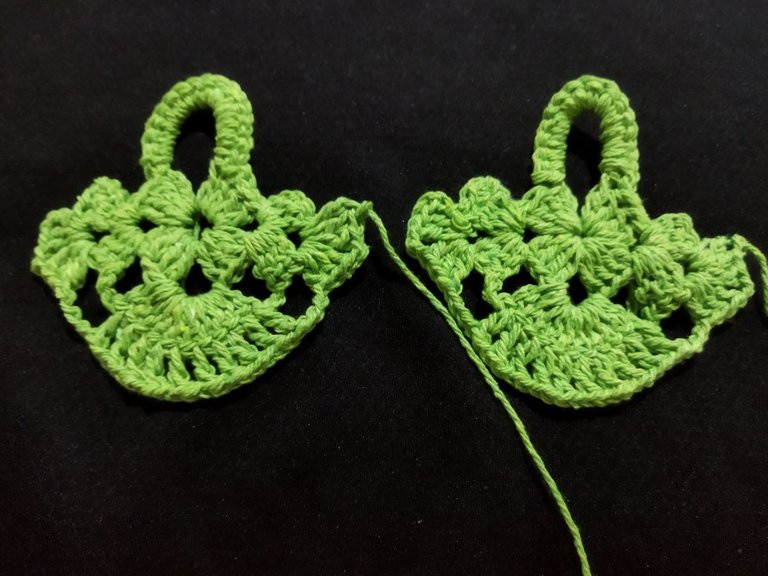
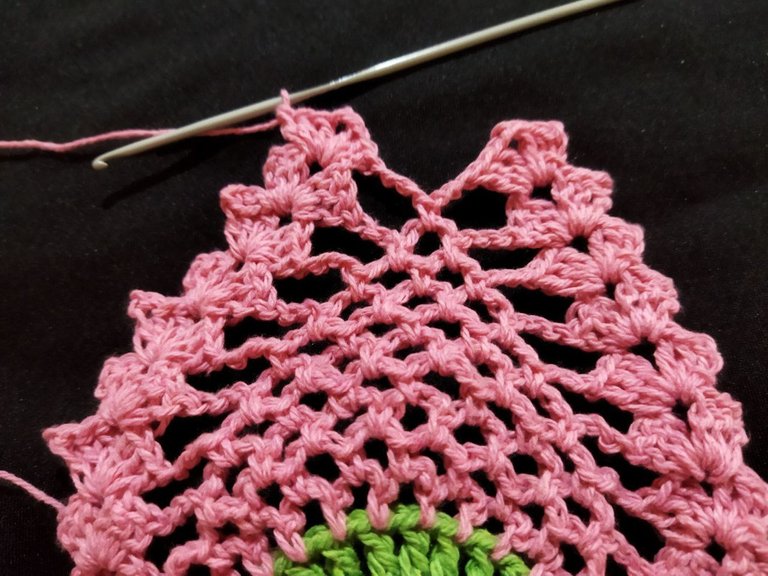
Cuando nuestro tejido se haya reducido a solo un espacio, repetimos de igual manera la secuencia de cada extremo pero insertamos la cadena de 3 puntos en centro repitiendo el mismo paso para terminar el otro lado. por ultimo solo vamos hacer los abanicos de ambos extremos unidos. Cortamos hilo y lo ocultamos. Terminamos la otra pieza elaborando exactamente los mismos pasos empleados para esta figura
When our weave has been reduced to just one space, we repeat the same sequence for each end but insert the 3 stitch chain in the center repeating the same step to finish the other side. Finally we just make the fans of both ends together. We cut the thread and hide it. We finish the other piece making exactly the same steps used for this figure.

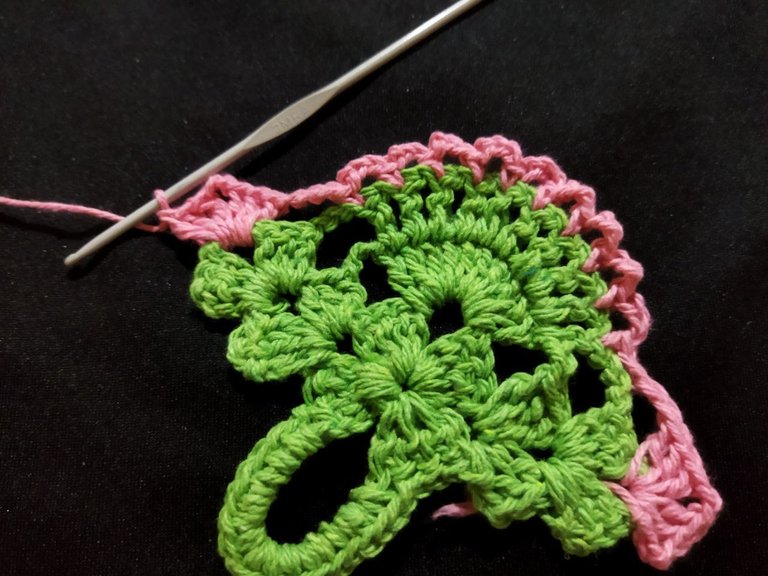
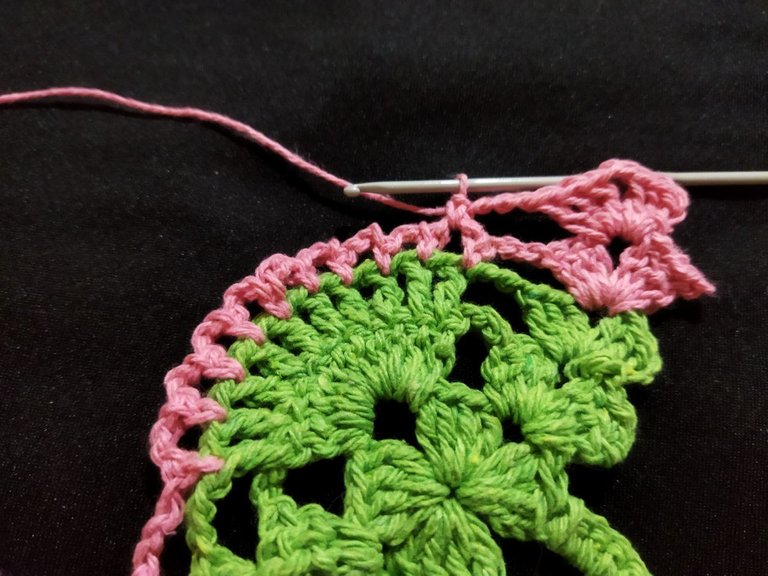
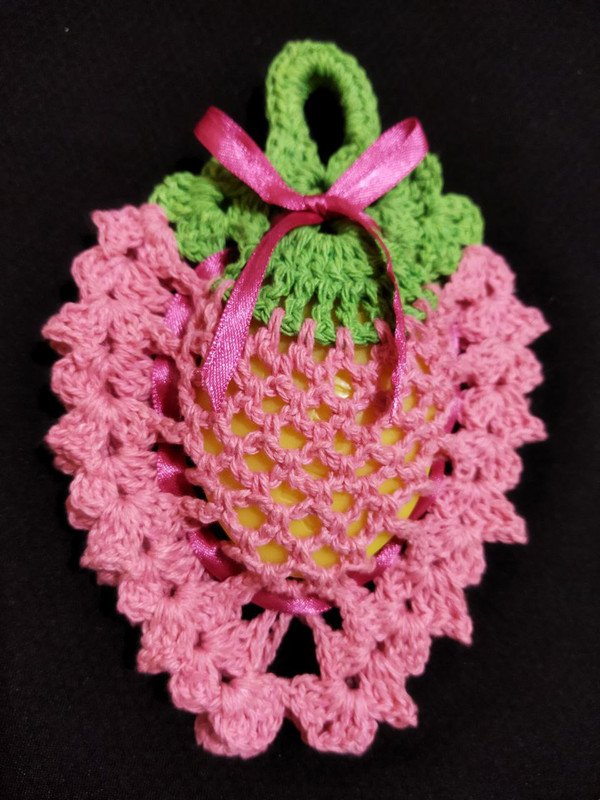
Teniendo ambas piezas terminadas las colocamos una encima de otra haciendo coincidir los puntos y utilizamos las cadenas de tres puntos que elaboramos por los costados de la fresa como pasa cinta y de esta manera cerramos esta bolsa porta jabón
Once both pieces are finished, we place them one on top of the other, making the points coincide and we use the three-point chains that we made on the sides of the milling cutter as a ribbon pass-through and in this way we close this soap-holder bag.
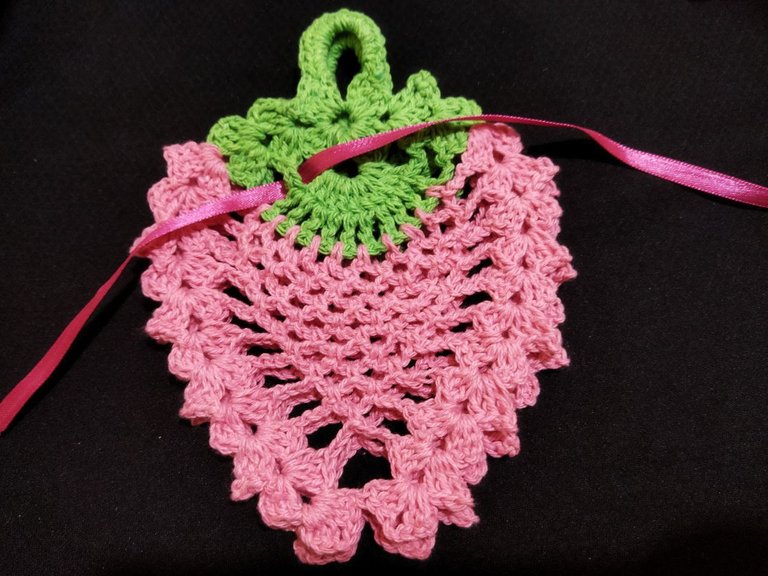
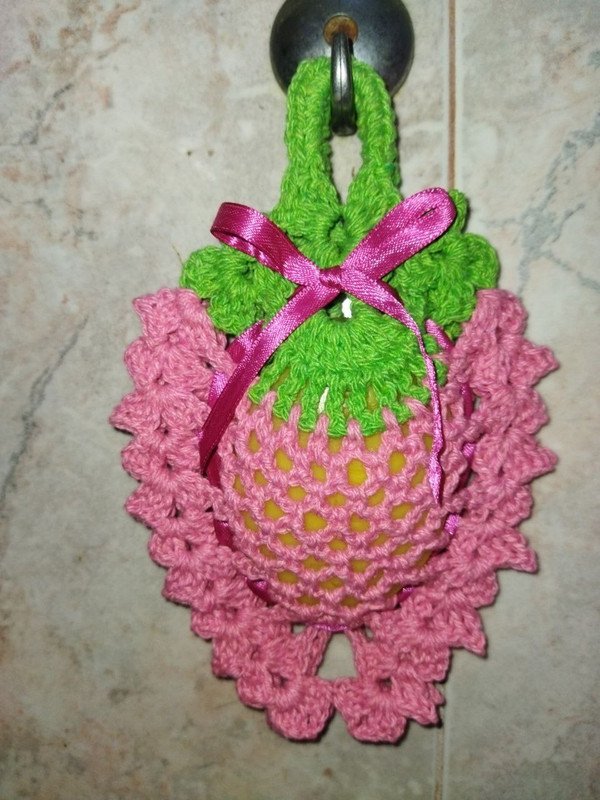
Ahora si Listo!!! ya culminamos con este hermoso proyecto como fue elaborar una linda fresa porta jabon tejida a crochet con la que voy a decorar y ambientar mi sala de baño. Con esmero y dedicación podemos lograr muchas cosas que nos proponemos
!! Un saludo y nos vemos en una próxima oportunidad!!
Now if Ready!!! we have finished this beautiful project as it was to develop a nice crocheted soap holder strawberry with which I will decorate and set my bathroom. With care and dedication we can achieve many things that we propose.
!! Greetings and see you in the next opportunity!
| Pueden seguirme en 💙: | You can follow me on 💙: |
|---|---|
| eveyese1312 | |
| Discord | eveyese1312#6211 |
Las fotos y el contenido son de mi autoria
Imágenes editadas en Canva y PicMonkey
Para la traducción usé el traductor: DeepL
The photos and content are my own.
Images edited in Canva and PicMonkey
For the translation, I used the translator: DeepL

De verdad que es una belleza para decorar nuestro baño, la felicito amiga le quedo muy hermoso y es una excelente idea para mantener un aroma fresco, gracias por compartir el paso a paso, feliz día 🤗
Gracias si en realidad se mantiene el baño con buen olor . Me alegra que te haya gustado 😊. Bendiciones
Waoo! Me encantó esta idea. Es un proyecto bastante útil y además decorativo. Te felicito porque te quedó hermoso. Saludos!
Gracias amiga @kattycrochet me alegra que te haya gustado mi proyecto, si además de su verdadera utilidad es un detalle muy hermoso y colorido para decorar, bueno a mí baño le combina de maravilla porque es rosado. Saludos y muchas bendiciones 🙂