Crochet Multicolor Bow Scrunchie [ESP|ENG]

Un saludo mi querida comunidad @NeedleWorkMonday 💖 y uno muy especial para los amantes de este hermoso arte de las agujas, para hoy les traigo un lindo proyecto tejido a crochet, con el que elabore un accesorio para el cabello bien colorido, como es un scrunchie lazo multicolor, es super fácil de hacer y algo muy importante es que invertí muy poco tiempo, como también algo muy importante es que para elaborar este tipo de accesorio no necesitas tener grandes cantidades de hilo con sobrantes de otros proyectos lo puedes hacer y utilizar el color de tu preferencia, este hilo matizado me gusto porque tengo la opción de combinarlo con varios colores presentes en el accesorio, incluso es una muy buena idea tanto para hacer un obsequio como también para comenzar un emprendimiento. Así que materiales en manos y comencemos con este paso a paso
Greetings my dear community @NeedleWorkMonday 💖 and a very special one for lovers of this beautiful art of needles, for today I bring you a nice crochet project, with which I made a very colorful hair accessory, such as a scrunchie multicolored bow, it is super easy to make and something very important is that I invested very little time, as well as something very important is that to make this type of accessory you do not need to have large amounts of thread with leftovers from other projects, you can make it and use the color of your preference, I liked this nuanced thread because I have the option of combining it with various colors present in the accessory, it is even a very good idea both to give a gift and also to start a business. So materials in hand and let's start with this step by step

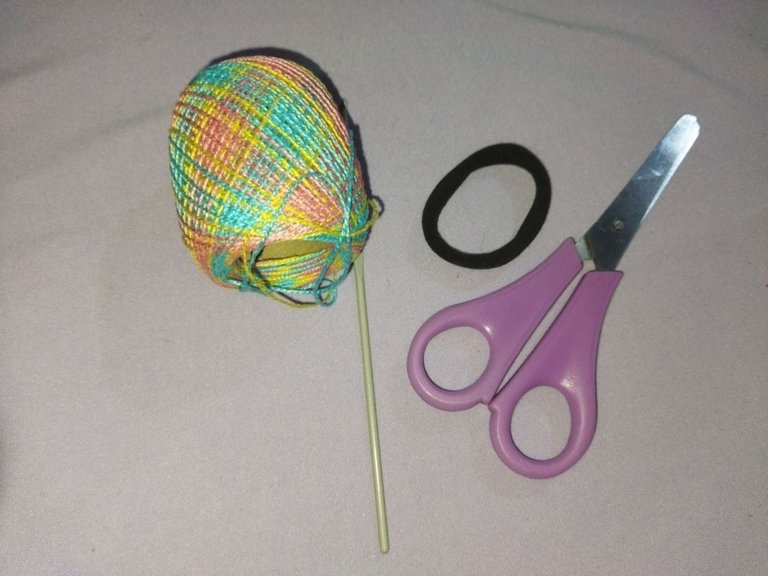
- Hilo matizado
- Aguja para crochet
- Cuentas de perlas
- Tijera
- Aguja lanera
- Nuanced yarn
- Crochet needle
- Pearl beads
- Scissors
- Wool needle
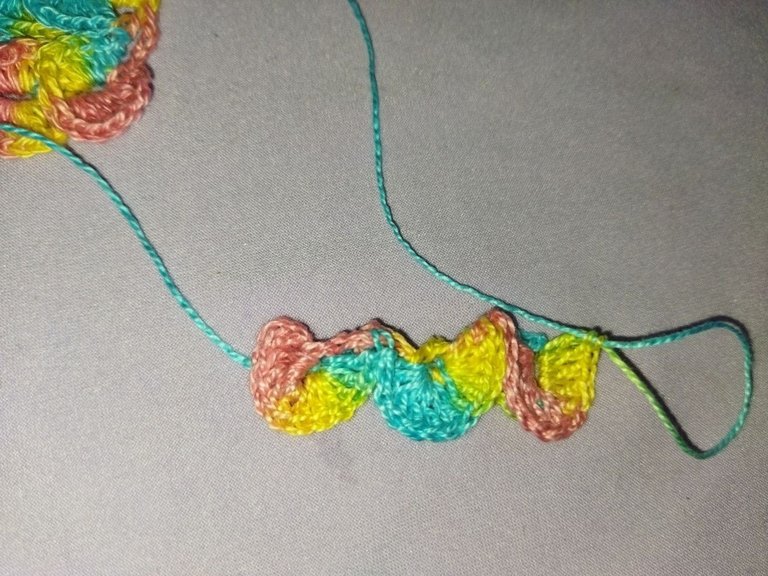
Comenzamos con este nuevo proyecto que les comparto hoy sonde les voy a mostrar como realizar un scrunchie lazo multicolor tejido a crocret. iniciamos elaborando una pieza exacta a esta que les muestro que ya tengo adelantada. Iniciamos primeramente haciendo una cadena de 16 puntos y elaboramos nuestro primer punto alto en la cuarta cadena y se contaran como 2 puntos altos seguido de una cadena de 2 puntos, luego en la tercera cadena cadena hacemos otro punto alto seguido nuevamente de 2 cadenas, repetimos en la tercera cadena 2 puntos altos seguidos de 2 cadenas, 1 punto alto seguido de 2 cadenas y terminamos en la ultima cadena con 2 puntos altos esta secuencia la debemos memorizar ya que sera repetitiva para poder elaborar el punto cocodrilo
We first start by making a chain of 16 stitches and we make our first double crochet in the fourth chain and it will be counted as 2 double crochets followed by a chain of 2 stitches, then in the third chain chain we make another double crochet followed again by 2 chains, we repeat in the third chain 2 double crochets followed by 2 chains, 1 double crochet followed by 2 chains and we finish in the last chain with 2 double crochets we must memorize this sequence since it will be repetitive to be able to make the crocodile stitch
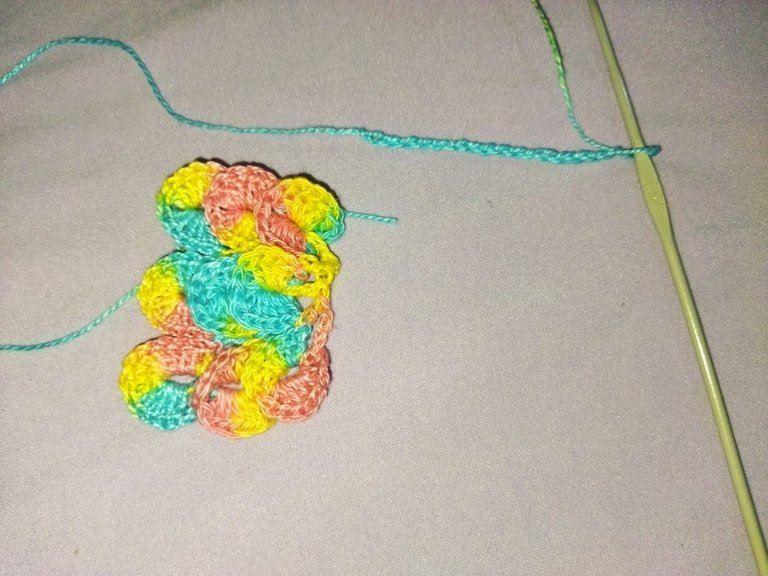

Ahora haremos en punto cocodrilo de la siguiente manera iniciamos la segunda vuelta haciendo una cadena de 3 puntos que sera el primer punto alto y continuamos haciendo 5 puntos altos para completar un total de 6 en el ultimo punto alto con que terminamos la primera vuelta y continuamos haciendo 6 mas en el otro punto alto. La secuencia sera la siguiente en los puntos altos dobles haremos en relieve 6 puntos altos en cada uno un donde tenemos un punto alto solo haremos por el revés un punto bajo y así continuamos hasta obtener tres escamas de cocodrilo
Now we will do the crocodile stitch in the following way: we start the second round by making a chain of 3 points that will be the first double crochet and we continue making 5 double crochets to complete a total of 6 in the last double crochet with which we finish the first round and we continue making 6 more in the other double crochet. The sequence will be as follows: in the double treble crochets we will make 6 treble crochets in relief in each one, where we have a treble crochet we will only make a single crochet on the reverse side and we continue like this until we obtain three crocodile scales.


Para la siguiente vuelta haremos la secuencia que les explique anteriormente solo que al terminar con la ultima escama hacemos una cadena de 3 puntos y la colocamos en el medio que es el primer espacio con un punto deslizado, desde allí inicia la secuencia. Vamos a realizar 2 PUNTOS altos en en el centro de cada una de las escamas y en cada uno de las espacios de separación un solo punto alto
For the next round we will do the sequence that I explained previously, only that when we finish with the last scale we make a chain of 3 stitches and place it in the middle, which is the first space with a slipped stitch, from there the sequence begins. We are going to make 2 double crochets in the center of each of the scales and in each of the separation spaces a single double crochet.
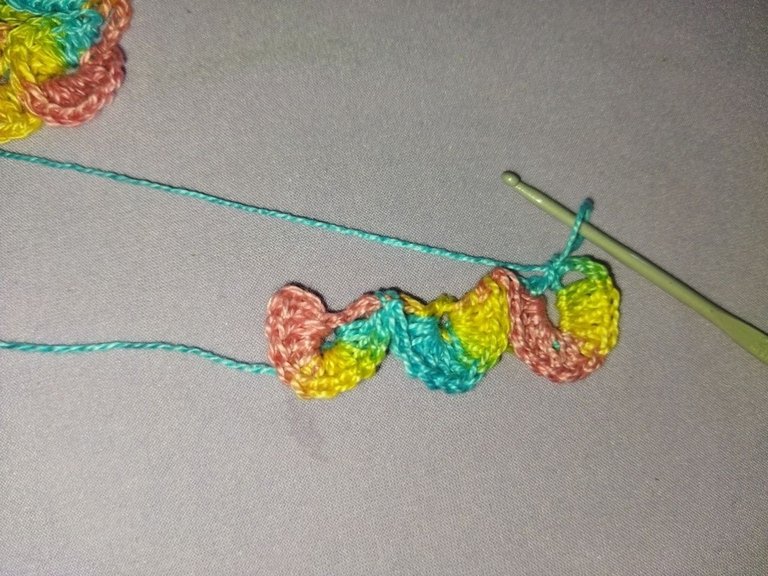

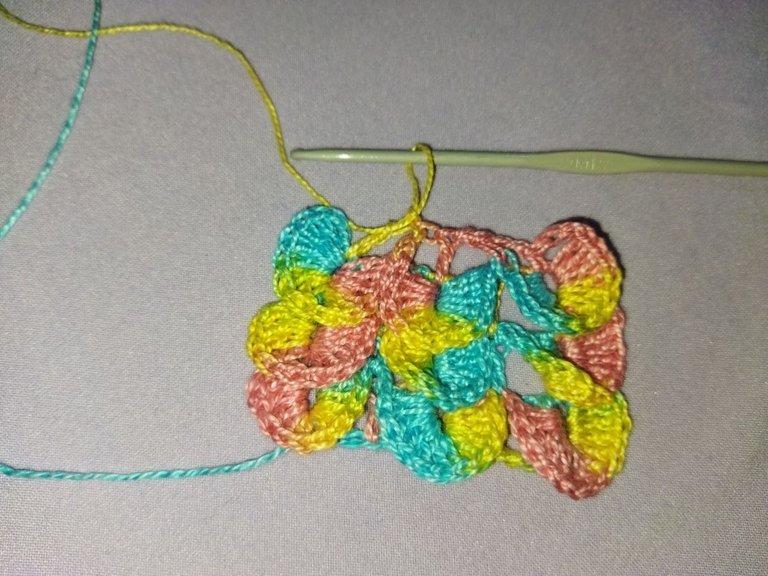
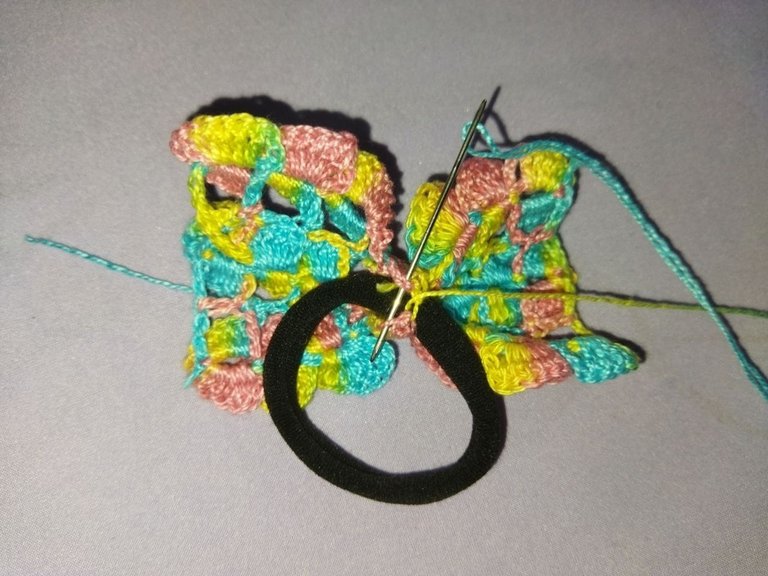
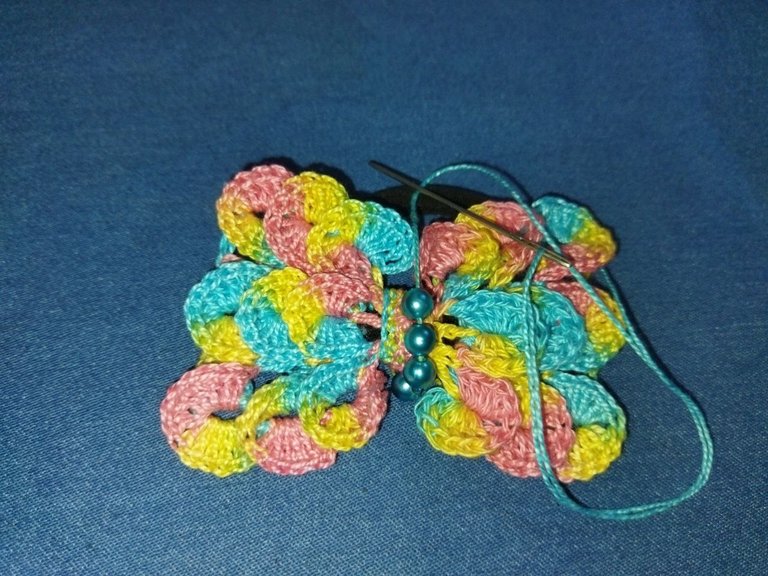
Esta secuencia la vamos a repetir hasta obtener 3 vueltas con el punto cocodrilo y para finalizar haremos un solo punto alto en cada uno de los espacios sonde anteriormente lo realizábamos. Colocamos los derechos enfrentados y con la aguja de tejer unimos las dos piezas que forman el lazo. Como también elaboramos una cadena de 8 puntos y haremos 4 vueltas y esto sera la pieza central del lazo y con la que vamos a fijar la coleta con el lazo. Ahora le aplicamos un poco de cola blanca con los dedos y moldeamos muy bien las figuras y dejamos secar, esto para que no se deforme cuando la usemos
We are going to repeat this sequence until we obtain 3 rounds with the crocodile stitch and to finish we will make a single double crochet in each of the spaces where we previously did it. We place the right sides facing each other and with the knitting needle we join the two pieces that form the loop. As we also make a chain of 8 points and we will make 4 turns and this will be the central piece of the bow and with which we are going to fix the ponytail with the bow. Now we apply a little white glue with our fingers and mold the figures very well and let it dry, so that it does not deform when we use it.


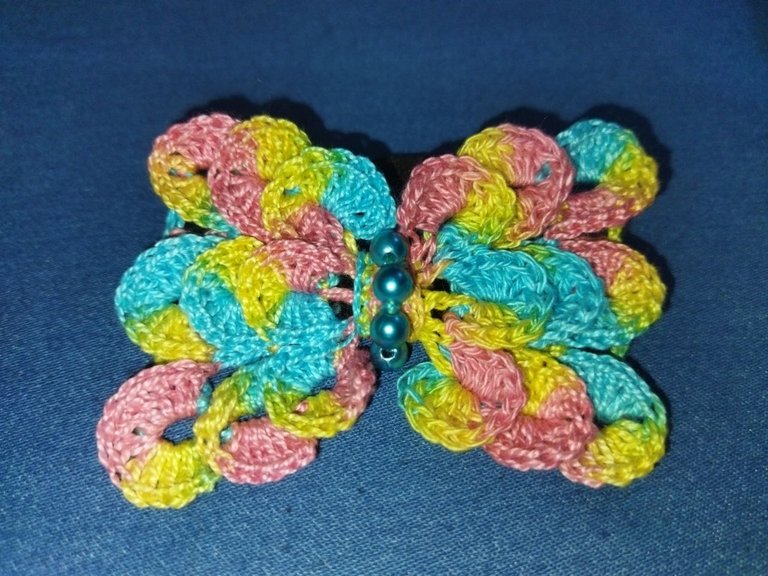
Ahora si Listo!!! ya culminamos con este hermoso proyecto de tejido a crochet con el que elabore un lindo scrunchie lazo tejido a crochet, un lindo accesorio que se adapta a cualquier estilo, como también una excelente idea tanto para obsequiar al igual que para emprender con su venta. Con esmero y dedicación podemos lograr muchas cosas que nos proponemos
!! Un saludo y nos vemos en una próxima oportunidad!!
Now it's ready!!! We have already finished with this beautiful crochet project with which I made a cute crochet bow scrunchie, a beautiful accessory that adapts to any style, as well as an excellent idea both to give as a gift as well as to start selling it. With care and dedication we can achieve many things that we set out to do.
!! Greetings and see you next time!!
| Pueden seguirme en 💙: | You can follow me on 💙: |
|---|---|
| eveyese1312 | |
| Discord | eveyese1312#6211 |
Las fotos y el contenido son de mi autoria tomadas con mi teléfono POCO M3
Imágenes editadas en PowerPoint Canva
Para la traducción usé el traductor: DeepL
The photos and content are my own.
Images edited in PowerPoint Canva
For the translation, I used the translator: DeepL
That is a colorful bow for any attire. Fine work.
Es preciosa, y como tú lo mencionas, es una buena forma de dar uso a esos pequeños sobrantes de hilos y lanas. Me encantó el diseño.