[ENG-ESP] Quick sketch of a female face // Boceto rápido de un rostro femenino
ENGLISH
I made a sketchbook or a small sketchbook and started drawing in it :) that's what it's for xD
(If you want to see how I made this sketchbook with paper and cardboard, I leave the link at the end of this post).
To make faces I don't use a particular scheme or method, it has been a very empirical process. I usually start by placing on the paper or canvas, the eyes and nose and from there I start to build the face, it's a little bit by eye.
There are different methods of analytical drawing to make faces. One of them is the Loomis method. These days I downloaded it to study it. I took advantage of my new sketchbook to make a face using this method (at least I tried :D).
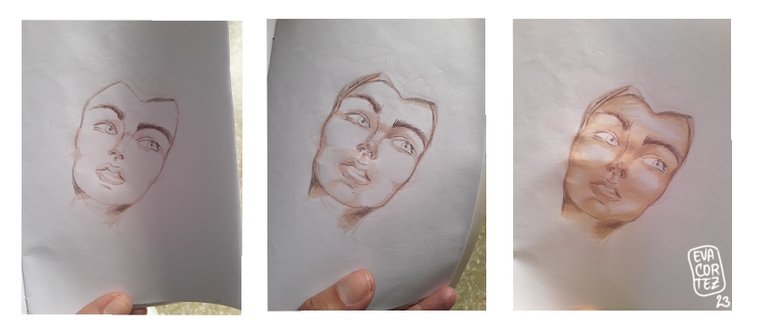
I share with you the step by step of a sketch I made.
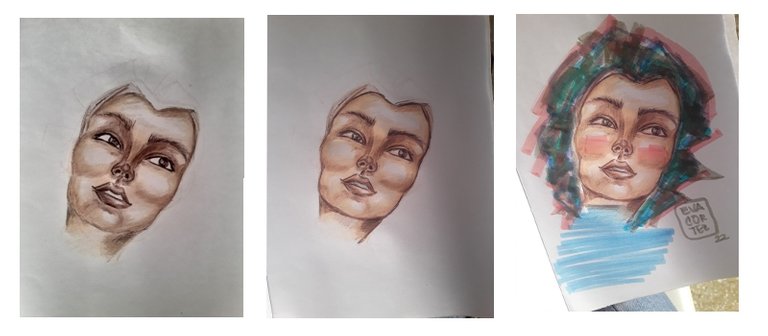
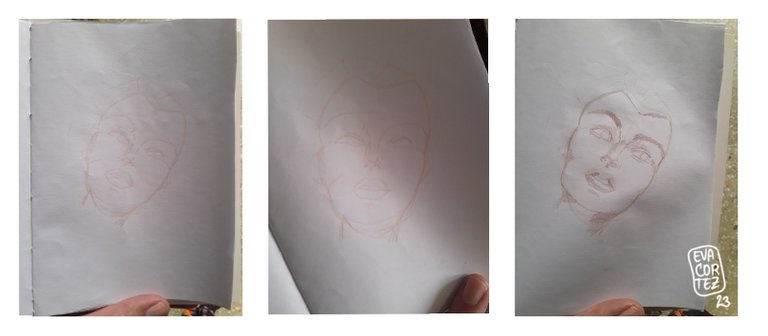
First I drew some lines to define the contour of the face and the location of its elements.
If you can see, the face is divided in 3 almost proportional areas.
Then I used a darker skin color to mark the shadows and give dimension to the face.
ESPAÑOL
Realicé un sketchbook o un cuaderno pequeño de bocetos y empecé a dibujar en él :) pues para eso es xD
(Si quieres ver cómo realicé este cuaderno de bocetos con papel y cartulina, te dejo el enlace al final de esta publicación).
Para realizar rostros no utilizo un esquema o método en particular, ha sido un proceso muy empírico. Suelo iniciar ubicando en el papel o lienzo, los ojos y la nariz y a partir de allí empiezo a construir el rostro, es un poco al ojo por ciento.
Existen diferentes métodos de dibujo analítico para realizar rostros. Uno de ellos es el método Loomis. En estos días lo descargué para estudiarlo. Aproveché mi sketchbook nuevo para hacer un rostro mediante este método (al menos hice el intento :D).
Te comparto el paso a paso de un boceto que realicé.
Primeramente tracé algunas líneas para definir el contorno del rostro y la ubicación de sus elementos.
Si puedes apreciarlo, el rostro está divido en 3 áreas casi proporcionales.
Luego utilicé un color de piel en un tono más oscuro para marcar las sombras y dar dimensión al rostro.
I used a third color, even darker than the previous one to mark more details of the face and shadows.
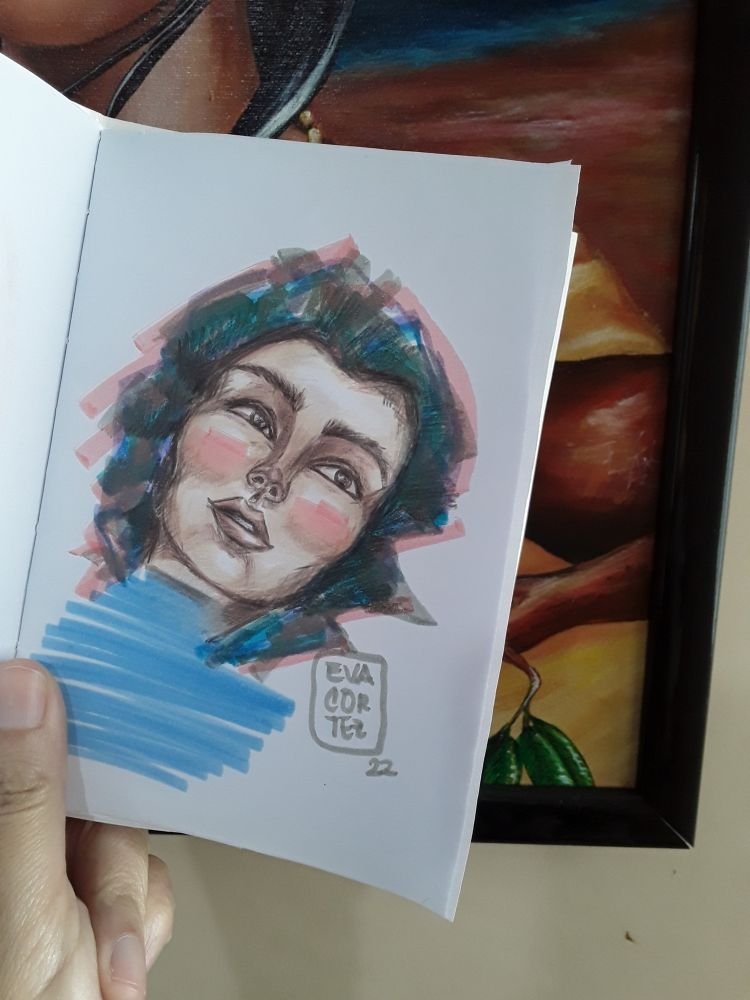
With a medium skin color, I drew the areas of the face where depth should be seen, such as the eye socket, around the mouth, nose.
With a lighter skin color I filled in the entire face except for those areas that should stand out, such as: forehead, chin, cheekbones, nose. Those areas I left blank, without applying color.
Utilicé un tercer color, aún más oscuro que el anterior para marcar más detalles del rostro y sombras.
Con un color piel medio, dibujé las áreas del rostro en donde debe verse profundidad, tales como la cuenca de los ojos, alrededor de la boca, nariz.
Con un color de piel más claro rellené todo el rostro a excepción de aquellas áreas que deben sobresalir, tales como: frente, mentón, pómulos, nariz. Esas áreas las dejé en blanco, sin aplicarle color.
With the dark skin color, I retouched the areas where I wanted to give her more depth or highlight.
Finally I used some markers to paint her hair, blush on her cheeks and her shirt.
And this is how this quick sketch looks like has a few details, but I liked it; I hope you do too :)
If you want to learn how to make your own sketchbook I leave you the link to the corresponding post ;)
Make your own sketchbook
Con el color de piel oscuro, retoqué las áreas en donde quería darle más profundidad o destacar.
Finalmente utilicé unos marcadores para pintarle el cabello, rubor en las mejillas y su camisa.
Y así ha quedado este boceto rápido tiene sus cuantos detalles, pero me ha gustado; espero a ti también :)
Si quieres aprender a hacer tu propio cuaderno de bocetos te dejo el enlace a la publicación correspondiente ;)