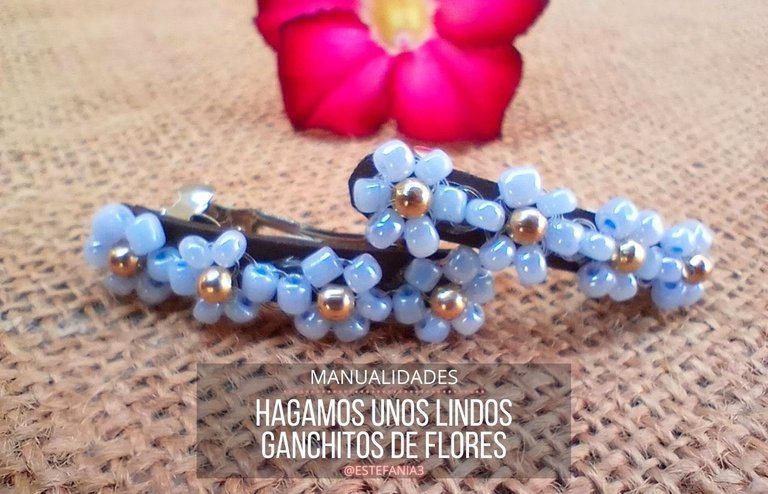
Manualidades: Hagamos unos Lindos Ganchitos de Flores || Crafts: Let's make some Cute Flower Hooks

¡Hola Chicos!
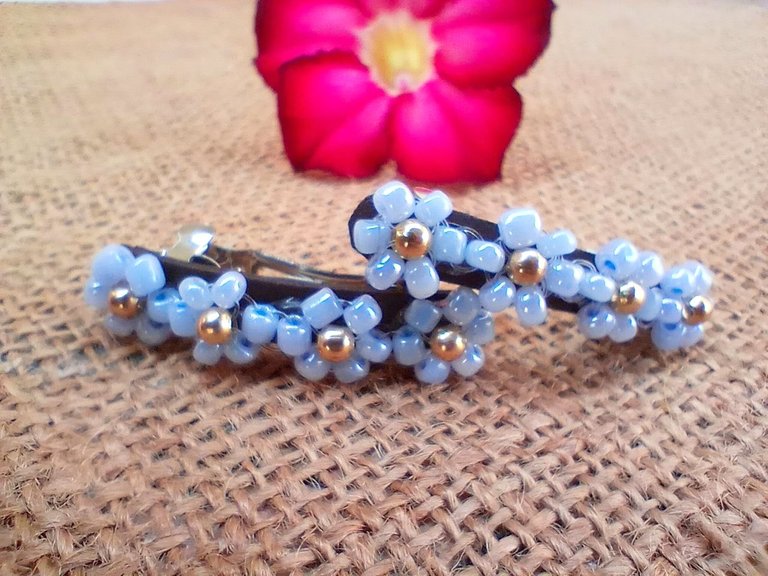
Hoy estoy feliz porque vuelvo nuevamente a compartirles lo que me gusta. Esta vez les traigo una propuesta bastante linda a mi parecer, se trata de unos ganchitos de flores para el cabello.
Estos puedes hacerlos del color de tu preferencia, en mi caso utilicé un morado claro perlado, y puede ser utilizado por niñas y mujeres, ¿por qué no?
Dependiendo del tamaño del gancho, se puede hacer uno individual si es grande o como en esta ocasión, un lindo par.
Espero que les guste la propuesta y sin más que agregar. Vayamos a los materiales y el paso a paso.
Hey guys!
Today I am happy because I am back again to share what I like. This time I bring you a pretty nice proposal in my opinion, it's about some flower hooks for hair.
These can be made in the color of your choice, in my case I used a pearly light purple, and it can be used by girls and women, why not?
Depending on the size of the hook, you can make an individual one if it's big or like this time, a nice pair.
I hope you like the proposal and without more to add. Let's go to the materials and step by step.
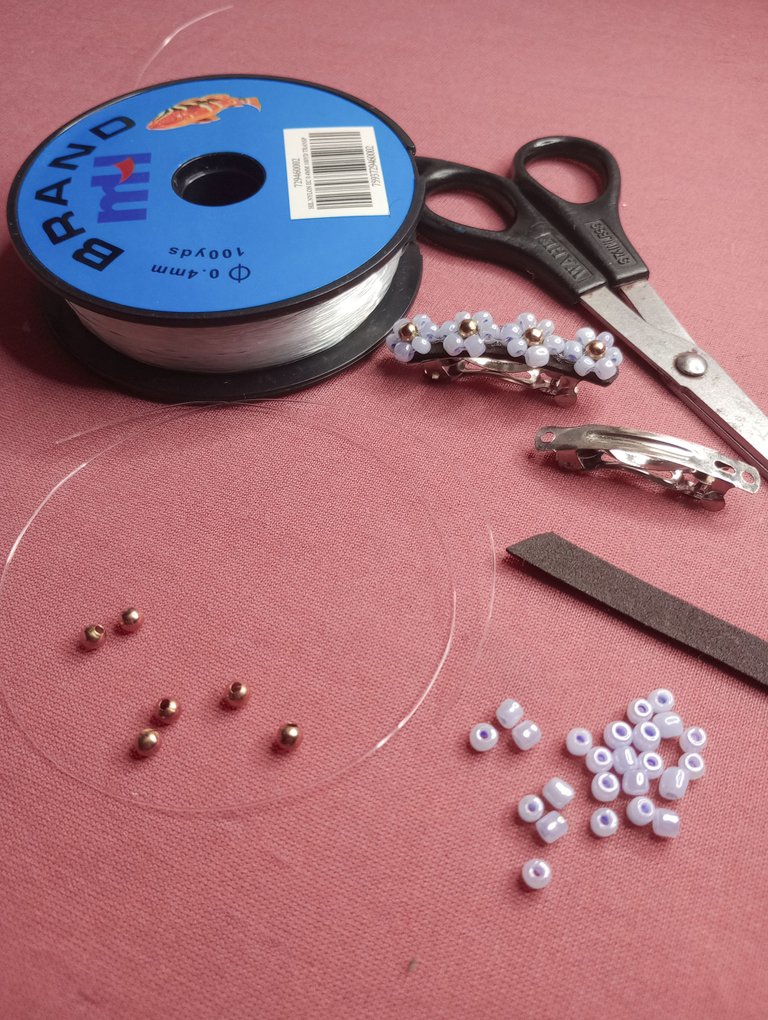
- Un par de ganchos base
- 48 abalorios morado claro perlado
- 8 balines dorados
- Foami de color oscuro o que combine con los abalorios
- Nylon transparente de 0.4mm de grosor
- Silicón
- Tijera
- A pair of base hooks
- 48 light purple pearl beads
- 8 golden pellets
- Foami of dark color or that combines with the beads
- 0.4mm thick transparent nylon
- silicone
- Scissors
Comenzamos con la elaboración de las flores para nuestros ganchitos, yo en este caso ya tengo listo el primero y estaré haciendo el segundo para completar el par junto a ustedes.
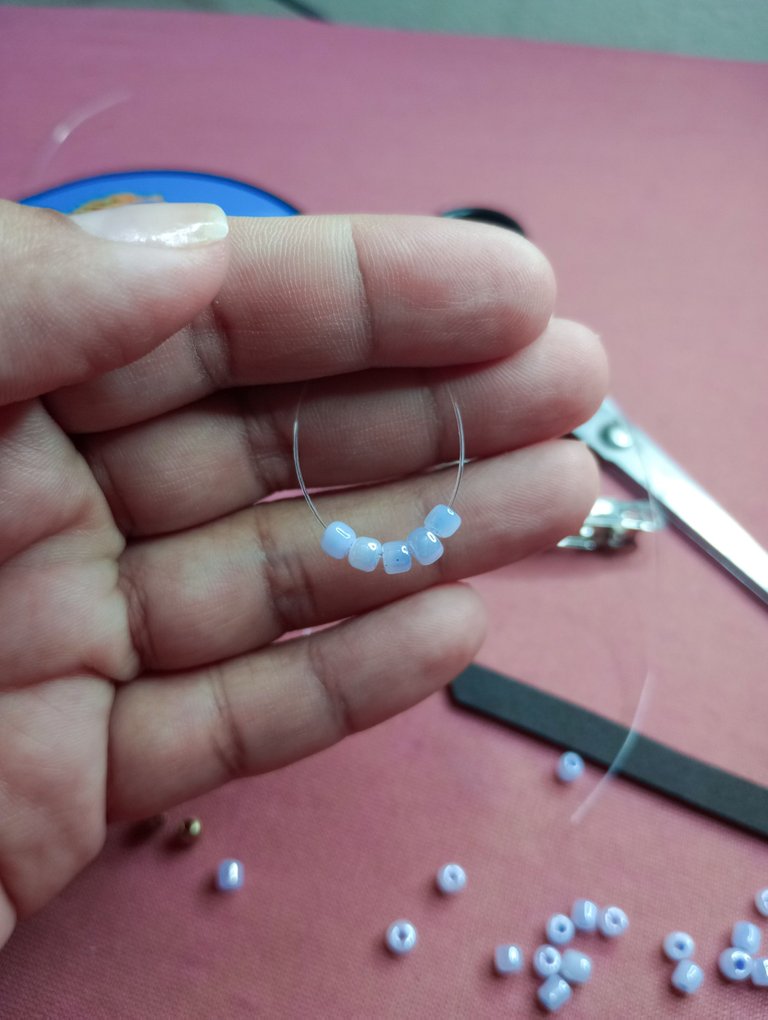
Iniciamos cortando 35 centímetros de nylon y en él introducimos 5 abalorios.
We begin with the elaboration of the flowers for our hooks, in this case I already have the first one ready and I will be making the second one to complete the pair with you.
We start by cutting 35 centimeters of nylon and insert 5 beads into it.
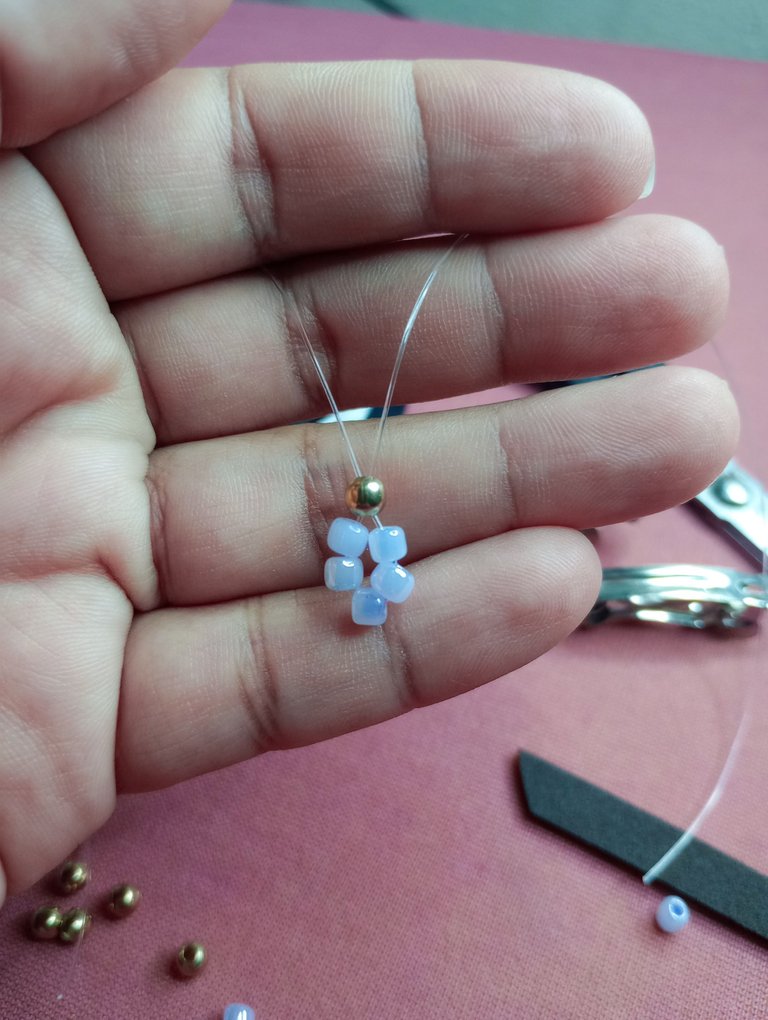
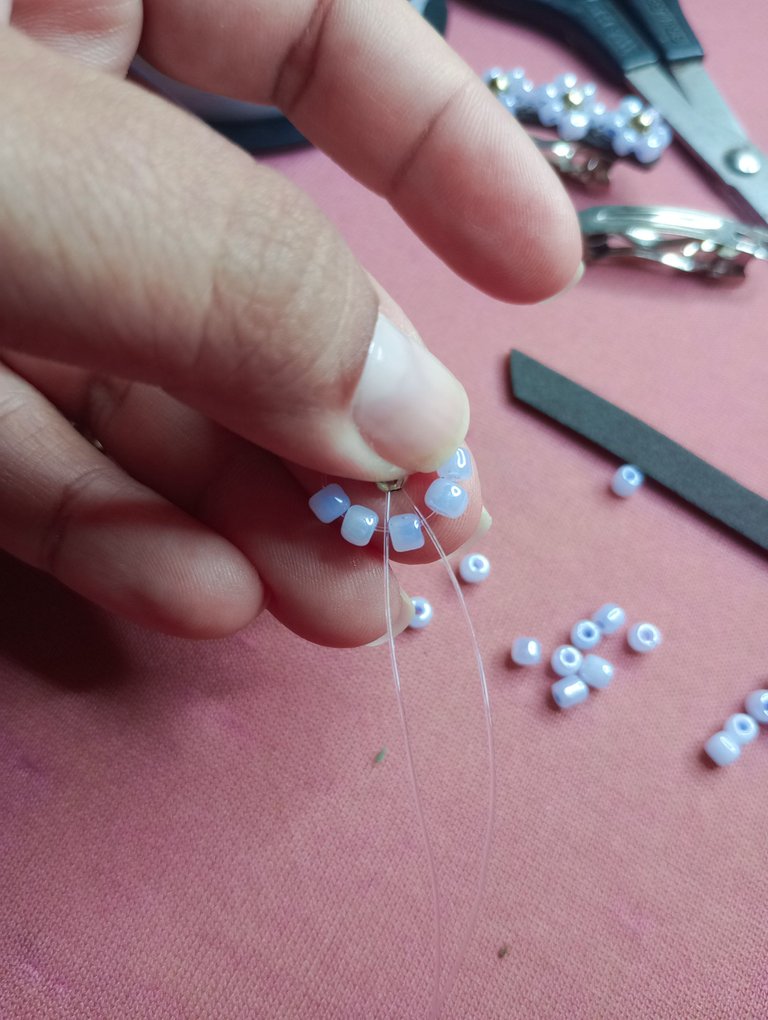
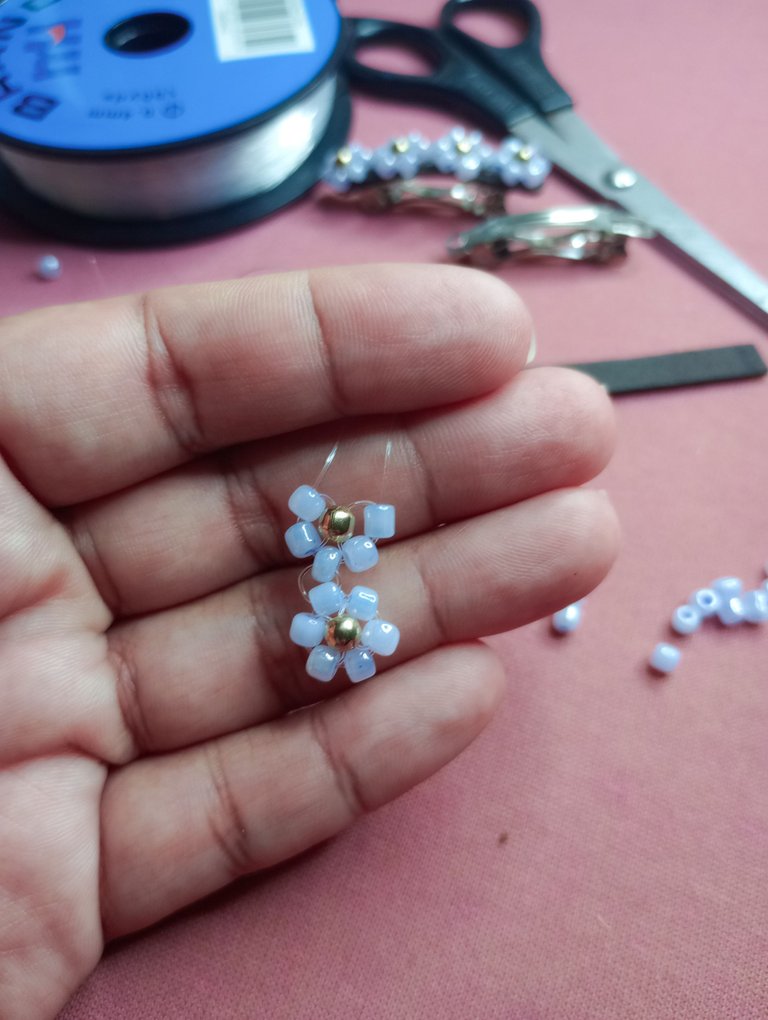
Luego pasamos los dos extremos por el interior de un balín dorado. Este será el centro de la primera flor.
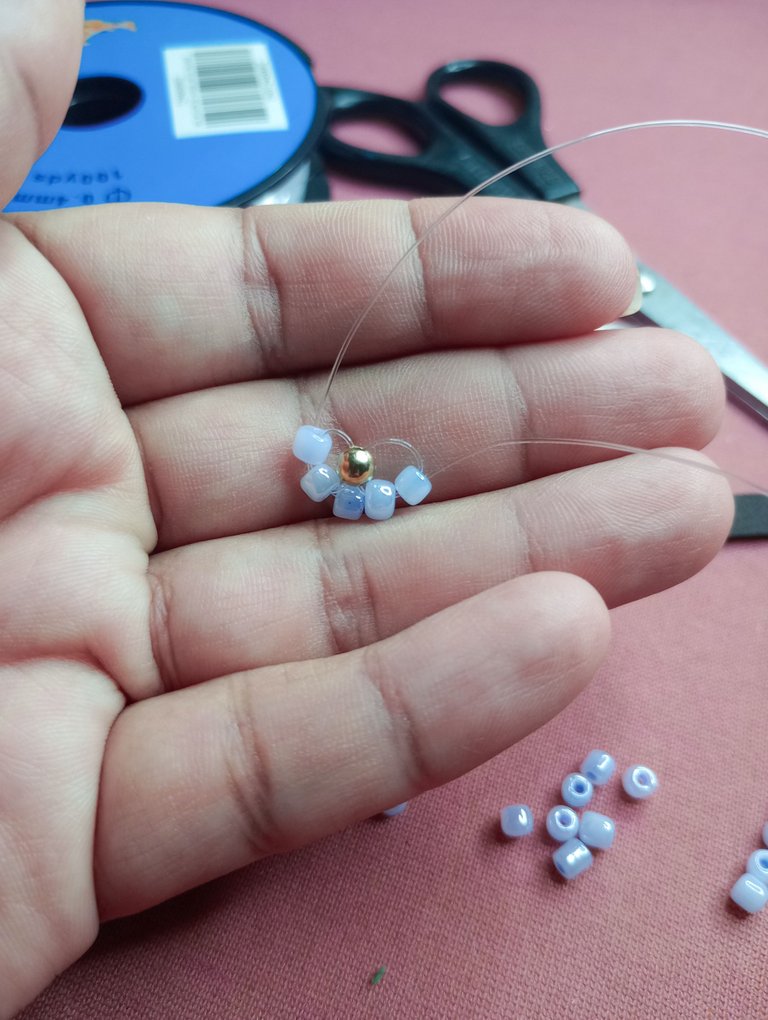
Damos vuelta a los extremos del nylon y pasamos ambos hilos por el costado del abalorio central, cómo se muestra en la primera fotografía. Deben quedar dos abalorios de cada lado. En ellos introducimos el nylon correspondiente y lograremos algo como lo muestra la segunda fotografía.
Then we pass the two ends through the inside of a golden pellet. This will be the center of the first flower.
We turn the ends of the nylon and pass both threads through the side of the central bead, as shown in the first photograph. There should be two beads left on each side. In them we introduce the corresponding nylon and we will achieve something as shown in the second photograph.
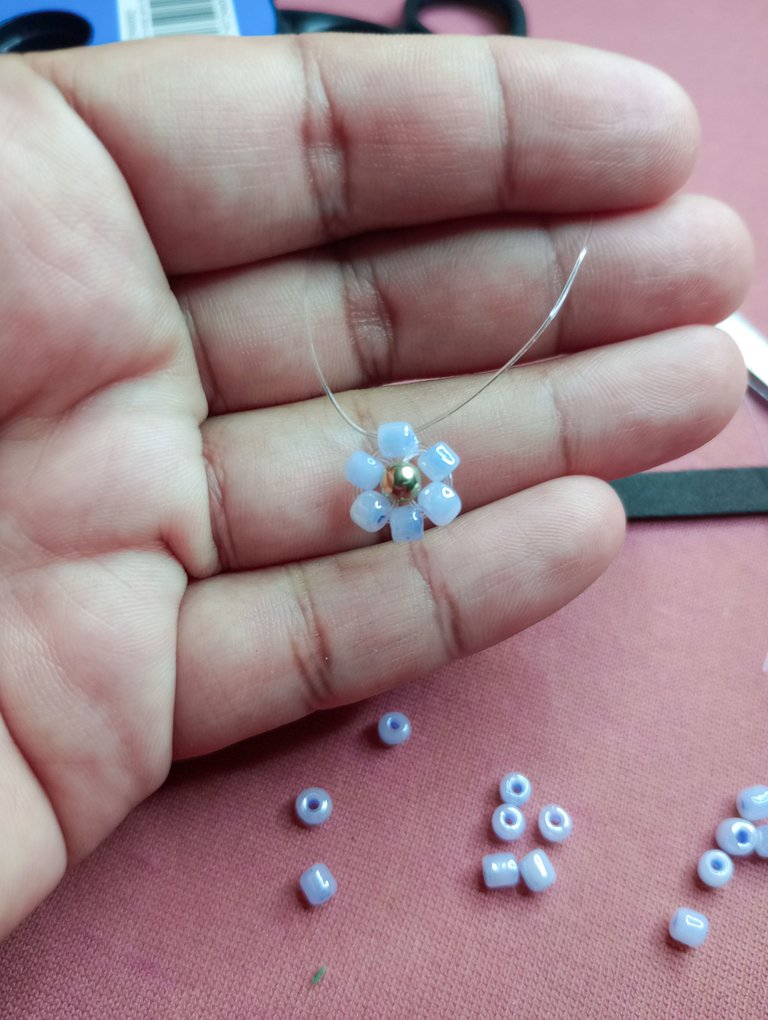
Para finalizarla, agregamos un último abalorio morado al cual le introducimos ambos extremos del nylon en su interior, pero esta vez llevando el extremo derecho hacia el lado izquierdo, y el extremo izquierdo hacia el lado derecho.
To finish it, we add a last purple bead to which we introduce both ends of the nylon inside, but this time taking the right end to the left side, and the left end to the right side.
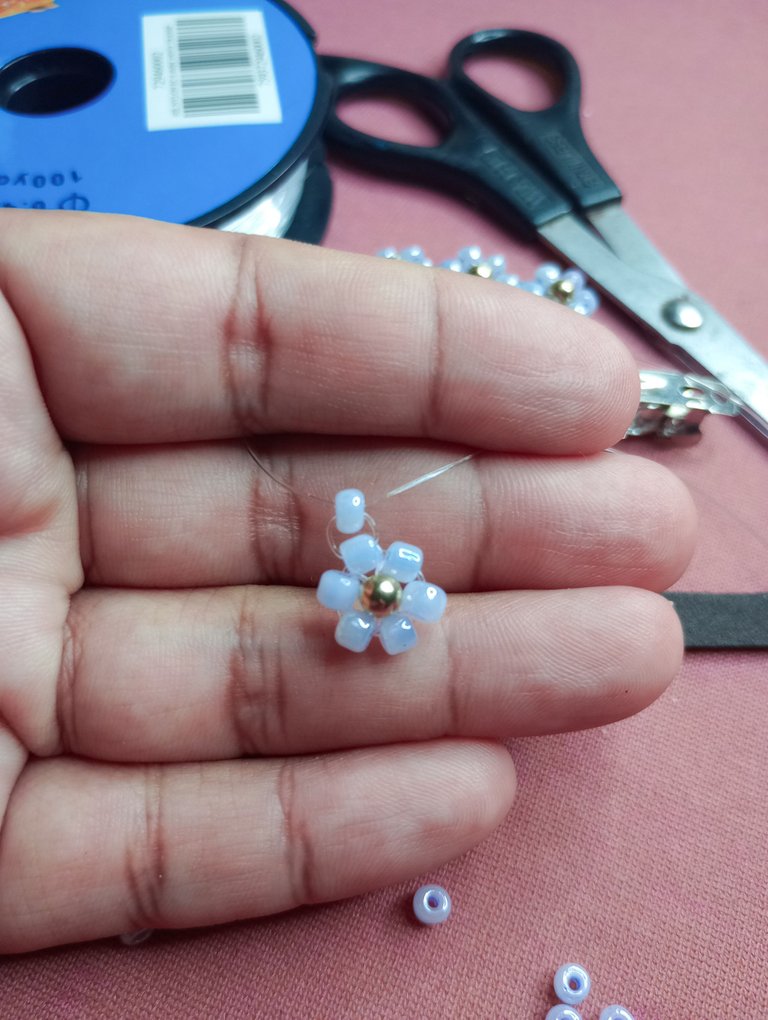
Ahora, para hacer la siguiente flor, repetimos este paso anterior pero con un nuevo abalorio.
Luego introducimos 2 abalorios de cada lado, el balín dorado para el centro introduciendo ambos extremos por su interior y repetimos los pasos que hicimos en la primera flor para completar.
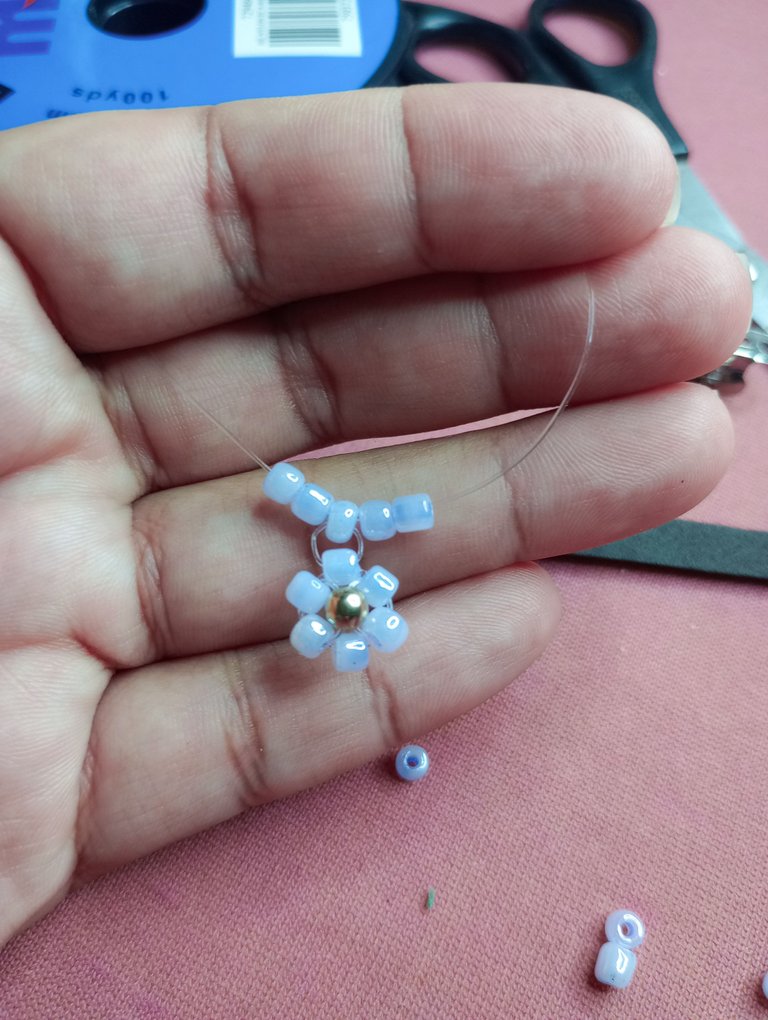
Now, to make the next flower, we repeat this previous step but with a new bead.
Then we introduce 2 beads on each side, the golden pellet for the center introducing both ends inside and repeat the steps we did in the first flower to complete.
.
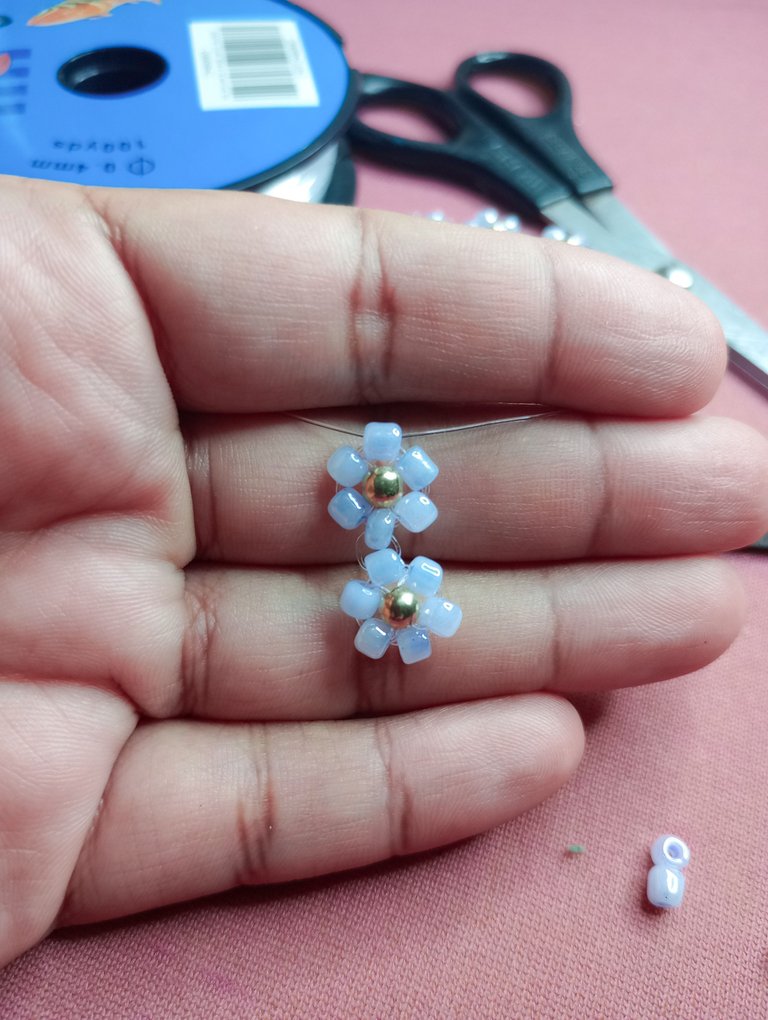
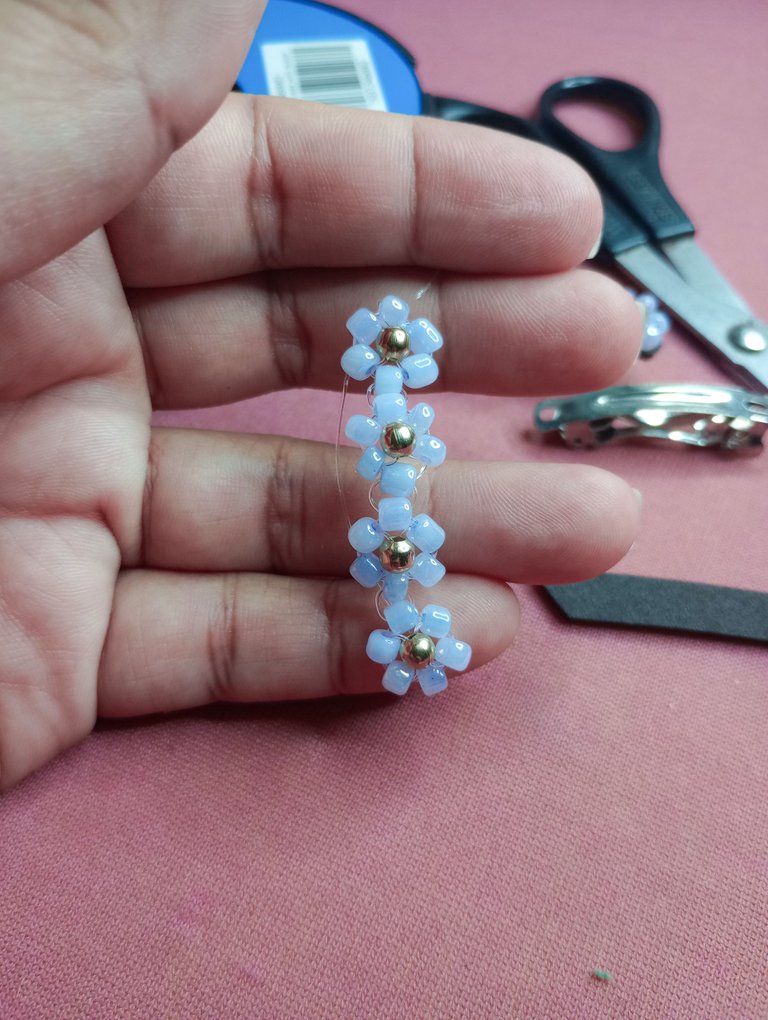
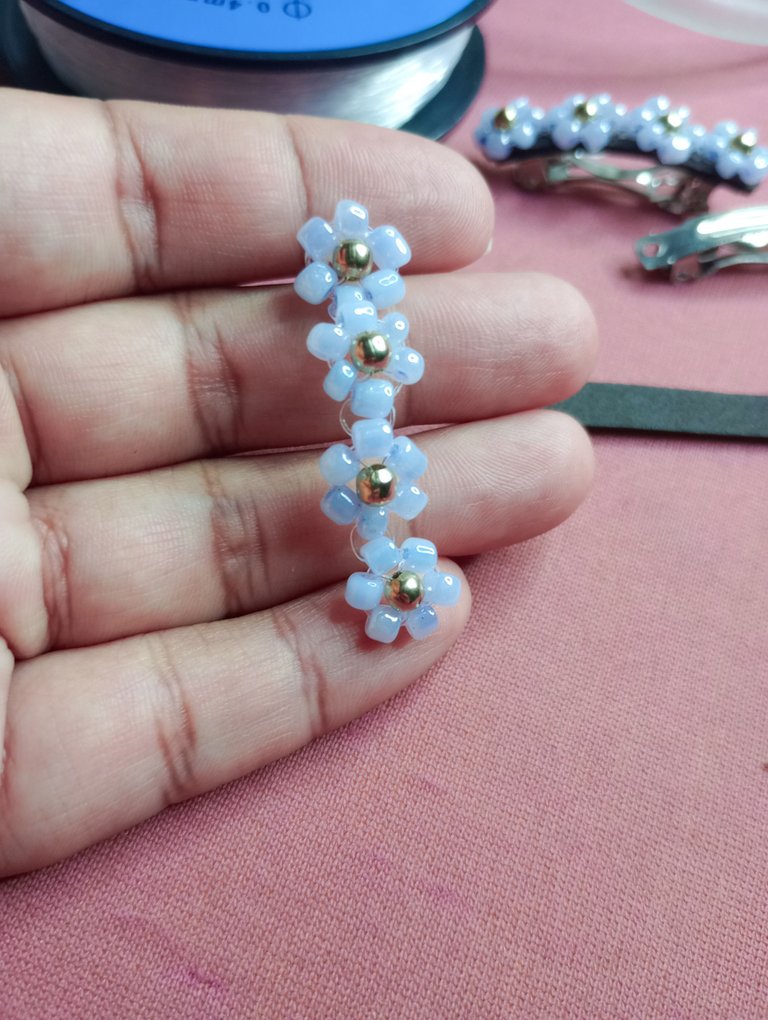
Así haremos 2 flores más (o los que te falten para cubrir completamente el gancho)
Hacemos 3 nudos para asegurar nuestras flores, cortamos los excedentes y con un encendedor vamos a quemar ligeramente estos extremos que quedan para que quede todo más seguro. En esta parte hay que tener mucho cuidado porque podemos quemar de más y arruinar el trabajo.
This way we will make 2 more flowers (or the ones you need to completely cover the hook)
We make 3 knots to secure our flowers, we cut the excesses and with a lighter we are going to lightly burn these remaining ends so that everything is safer. In this part you have to be very careful because we can burn too much and ruin the work.
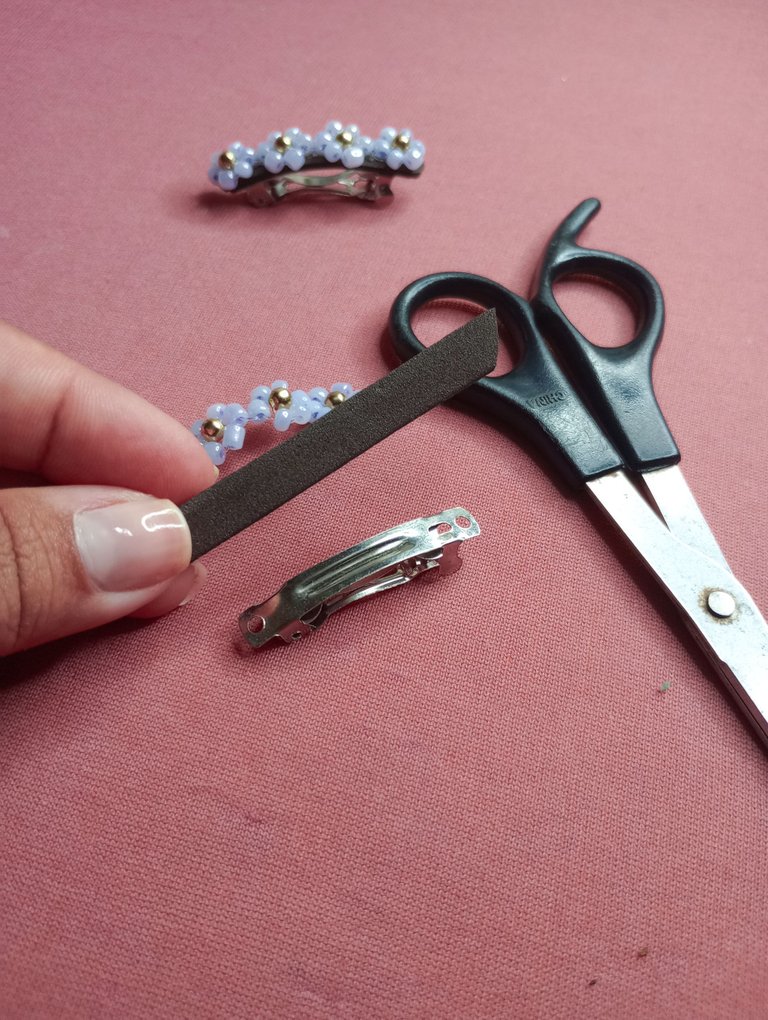
Ahora necesitamos una base para cubrir nuestro gancho y que se vea un trabajo más prolijo. Para ello cortaremos una tira de foami del mismo grosor del gancho.
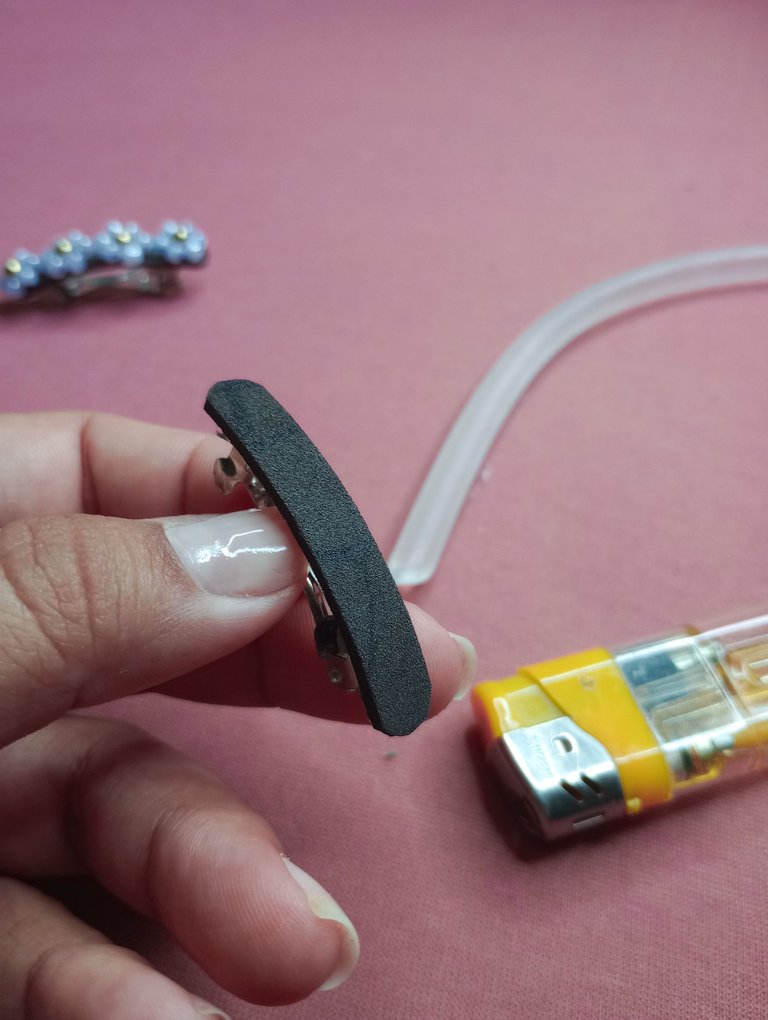
Redondeamos los extremos y procedemos a pegar con un poco de silicón. Yo como no tengo pistolita lo que hago es quemar el extremo con un encendedor y luego aplicar en la superficie.
Now we need a base to cover our hook for a neater look. To do this we will cut a strip of foami the same thickness as the hook.
We round the ends and proceed to paste with a little silicone. Since I don't have a gun, what I do is burn the end with a lighter and then apply it to the surface.
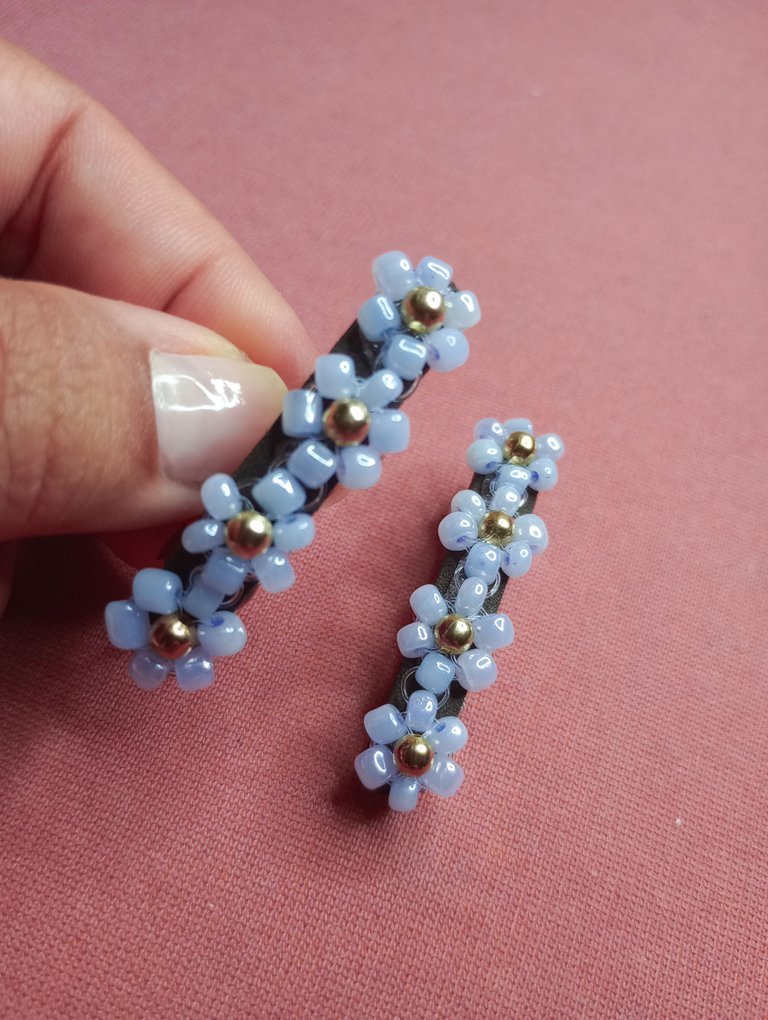
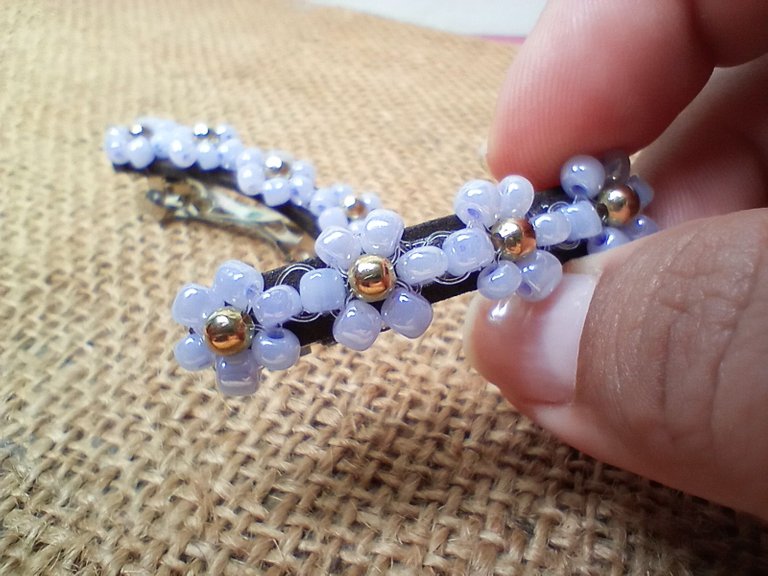
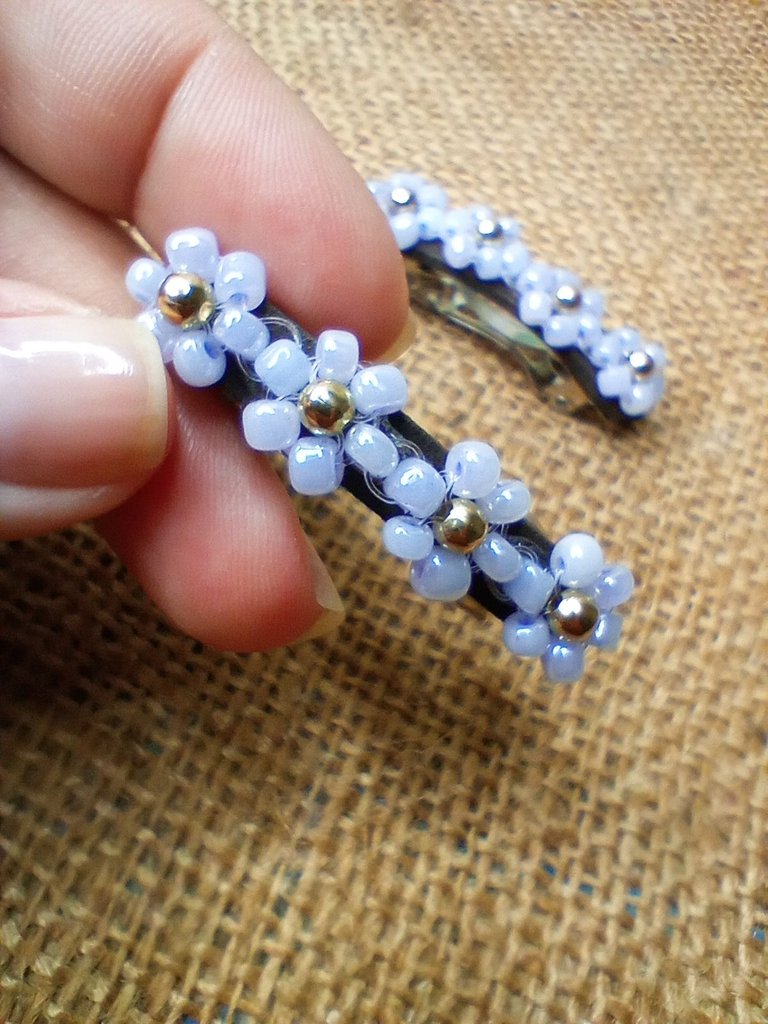
Ahora vamos a pegar las flores, aplicamos un poco de silicón en la superficie del foami y pegamos, cuidando de que queden bien ubicadas las flores.
Recuerda revisar que no haya quedado ningún excedente de silicón en los bordes para que quede todo lo más bonito posible.
Now we are going to paste the flowers, we apply a little silicone on the surface of the foami and paste, taking care that the flowers are well placed.
Remember to check that there is no excess silicone on the edges so that everything is as beautiful as possible.
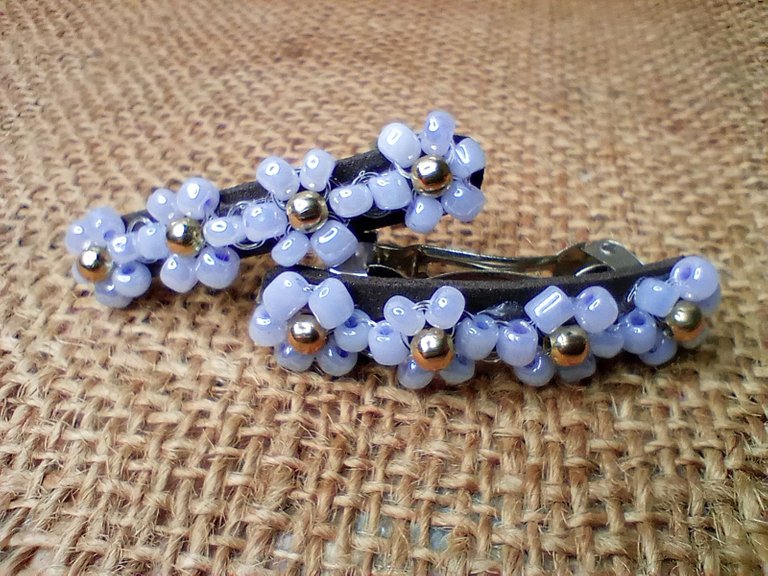
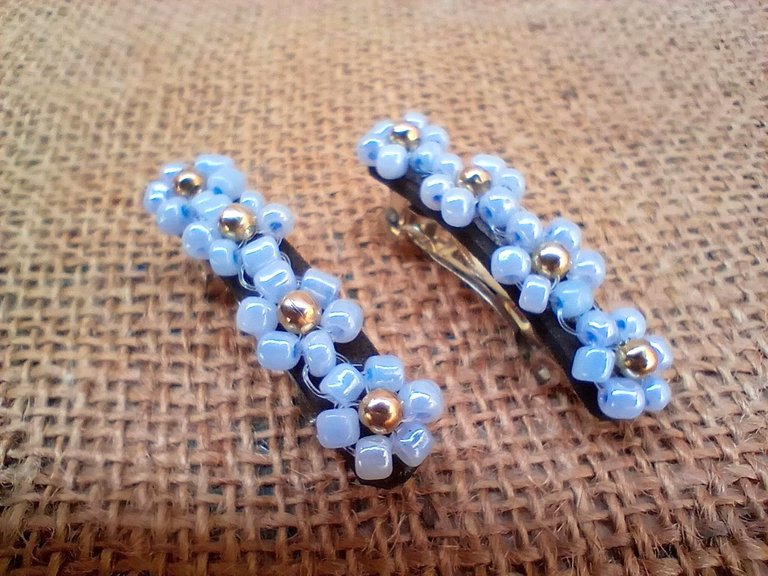
Y listo, solo falta repetir este proceso nuevamente si quieres lograr el par, y ya tenemos listos nuestros ganchitos de flores para utilizar.
Espero les hayan gustado y los hagan en casa. 😊❤️
And that's it, we just need to repeat this process again if you want to achieve the pair, and we have our flower hooks ready to use.
I hope you liked them and make them at home. 😊❤️

Espero haya sido de tu agrado y provecho.
Un gran abrazo a todos, y nos leemos en un próximo post
• Lakrearte en Hive •
Att: Estefania Garcia ♥

Imágenes y separadores de mi autoría
Portada editada en Canva
Fotografías tomadas con un Moto G31
Texto traducido en Google ImTranslate v.14.19
¡Felicidades! Esta publicación obtuvo upvote y fue compartido por @la-colmena, un proyecto de Curación Manual para la comunidad hispana de Hive que cuenta con el respaldo de @curie.
Si te gusta el trabajo que hacemos, te invitamos a darle tu voto a este comentario y a votar como testigo por Curie.
Si quieres saber más sobre nuestro proyecto, acompáñanos en Discord: La Colmena.
Muchas gracias amigos por el apoyo ❤️😊
Que bonita idea!, me encanta, gracias por compartir @estefania3
Hola! Muchas gracias me alegra que te haya gustado ☺️❤️✨
Amiga @estefania3 te han quedado unos ganchos para el cabello preciosos, estas flores se ven increíbles y lo mejor es lo fácil que las hiciste, felicidades 👏
Muchas gracias! ♥
Me alegra que les haya gustado mi propuesta, y si lo genial es que se hacen super rapido y cualquiera con poco esfuerzo puede hacerlos 😊
Your content has been voted as a part of Encouragement program. Keep up the good work!
Use Ecency daily to boost your growth on platform!
Support Ecency
Vote for new Proposal
Delegate HP and earn more
Están súper hermosos! Que facilidad al realizarlo @estefania3 super bien 🤩