Manualidades: Hagamos un Copo de Nieve en Macramé || Crafts: Let's make a Snowflake in Macramé ❄️♥🎄

¡Hola Chicos!
Se acerca la navidad y yo adoro que por fin esté llegando esta época tan bonita, en la que todo se llena de luces y color y que para nosotros en casa, representa el inicio de un gran cambio para nuestra vida, que espero ya pronto estarles contando.
Continuando con los adornos navideños, hoy quiero compartirles una decoración hecha en macramé. Se trata de un lindo copo de nieve, que variando el grosor del hilo que utilicemos y el aro del centro, podremos hacerlo más pequeño o más grande si gustamos.
Solo es necesario saber hacer los nudos básicos de macramé y contar con suficiente hilo para hacer esta manualidad. Se teje en cuestión de minutos y queda súper hermoso.
Me lo imagino en cualquier rincón de mi hogar y si tuviera un arbolito, les aseguro que haría un montón para colgarlos en él.
Ahora, vamos mejor a comenzar con el tutorial para que puedas hacer uno o muchos para decorar tu casa. ♥
Hey guys!
Christmas is coming and I love that this beautiful time is finally coming, in which everything is filled with lights and color and that for us at home, represents the beginning of a great change for our lives, which I hope to be with you soon counting.
Continuing with the Christmas decorations, today I want to share with you a decoration made in macramé. It is a beautiful snowflake, which by varying the thickness of the thread we use and the center ring, we can make it smaller or larger if we like.
It is only necessary to know how to make the basic macramé knots and have enough thread to make this craft. It knits in a matter of minutes and is super beautiful.
I imagine it in any corner of my home and if I had a little tree, I assure you I would do a lot to hang them on it.
Now, let's better start with the tutorial so that you can make one or many to decorate your house. ♥
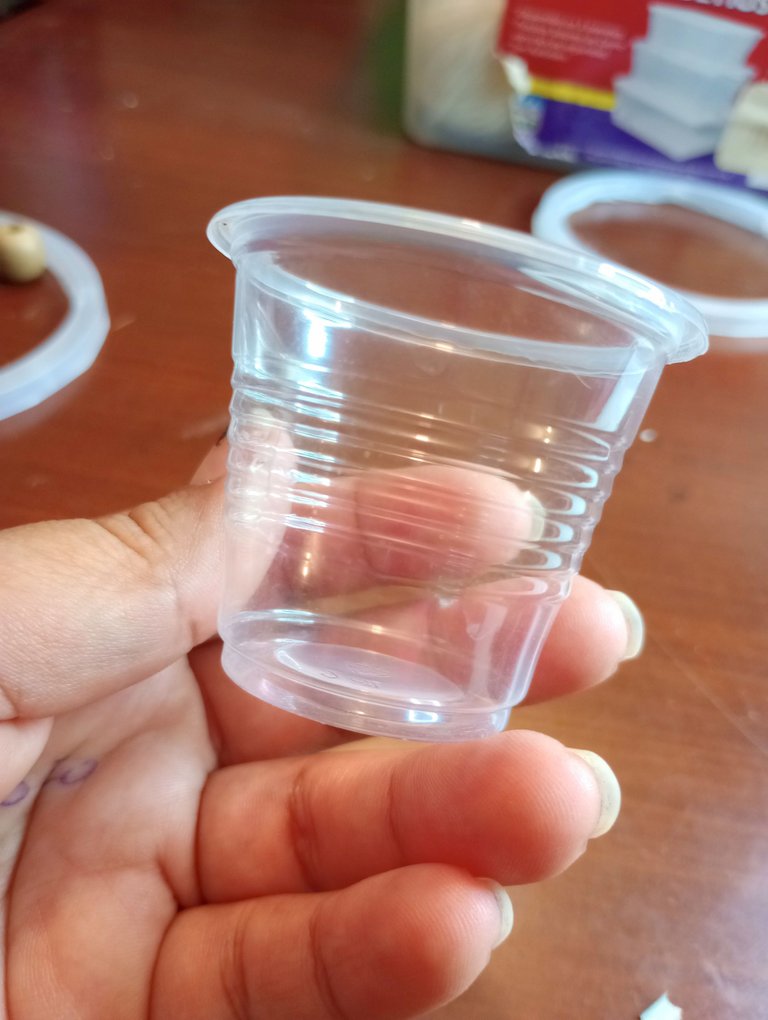
Para hacer el copo de nieve necesitamos un aro sobre el que tejeremos con los hilos.
Yo tenía un vasito desechable de café había guardado en mi bolso para no botarlo en la calle. Me pareció buen momento para darle un uso diferente que simplemente botarlo.
Con una tijera corté el vaso quedándome únicamente con el borde superior. Tenía un tamaño perfecto para la manualidad que estaba a punto de hacer.
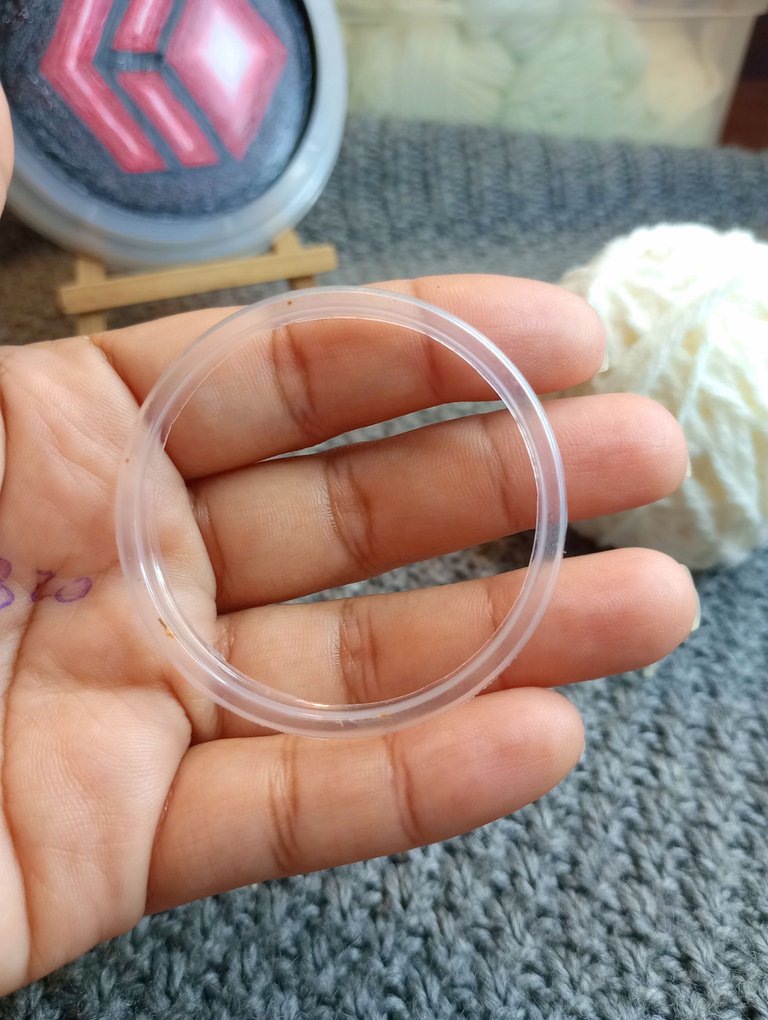
To make the snowflake we need a hoop on which we will weave with the threads.
I had a disposable coffee cup I had kept in my bag so I wouldn't throw it out on the street. It seemed like a good time to give it a different use than just throw it away.
With a pair of scissors I cut the glass, leaving only the upper edge. It was a perfect size for the craft I was about to make.
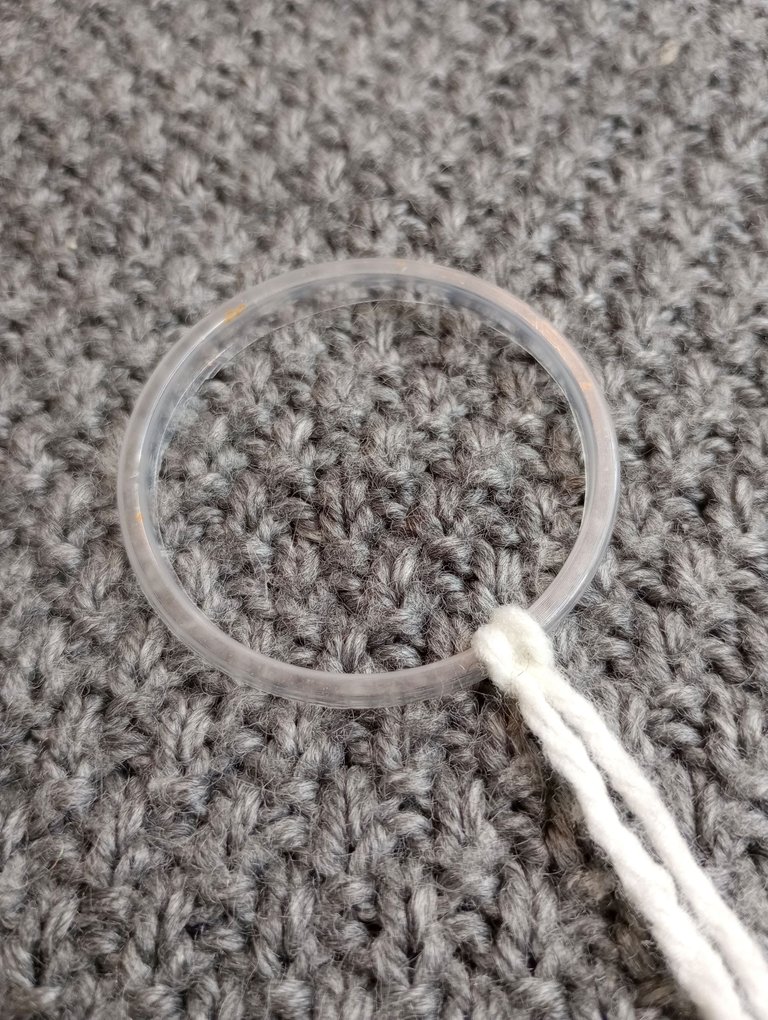
Como hilo elegí un estambre en color blanco hueso. Corté tiras de 60 centímetros de largo.
Para cada sección del copo necesitamos contar con dos grupos de 4 tiras cada uno. Es decir que si queremos agregar un segmento más al copo solo debemos agregar una cantidad de tiras que sea múltiplo de 8.
Yo en un principio agregué 24 tiras, las cuales doblé a la mitad y amarre al aro que hicimos en el paso anterior. Ya les cuento por qué digo "en un principio"...

As a thread I chose a bone white yarn. I cut strips 60 centimeters long.
For each section of the codend we need to have two groups of 4 strips each. In other words, if we want to add one more segment to the codend, we only have to add a number of strips that is a multiple of 8.
I initially added 24 strips, which I folded in half and tied to the ring we made in the previous step. I'll tell you why I say 'in the beginning'...
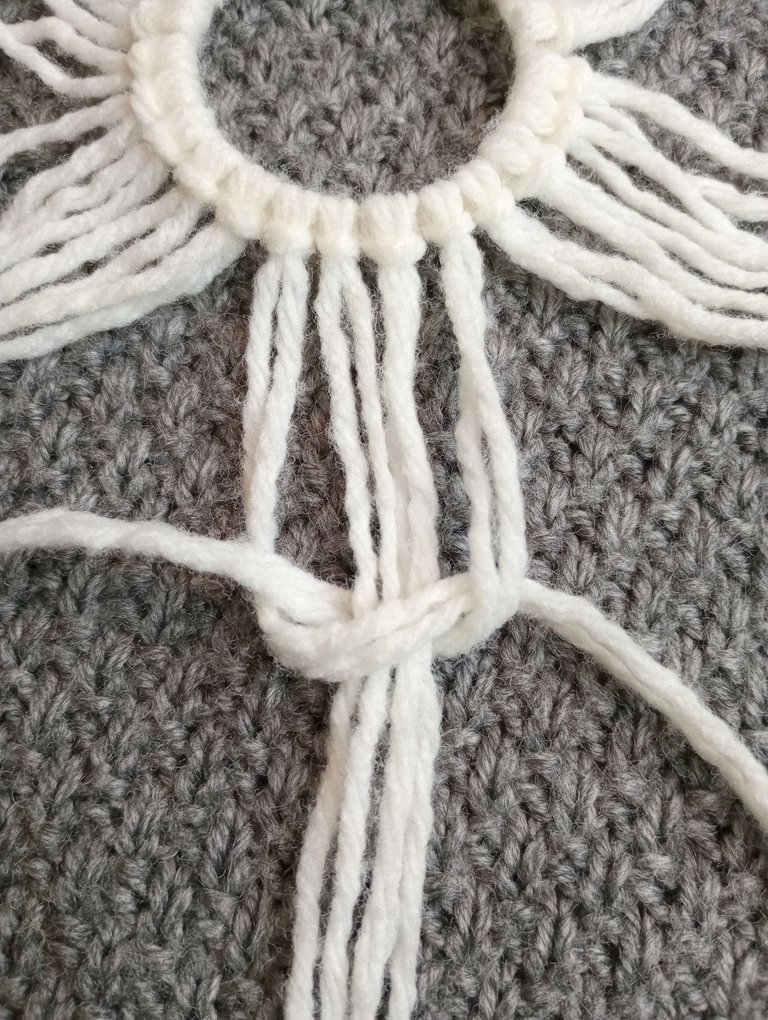
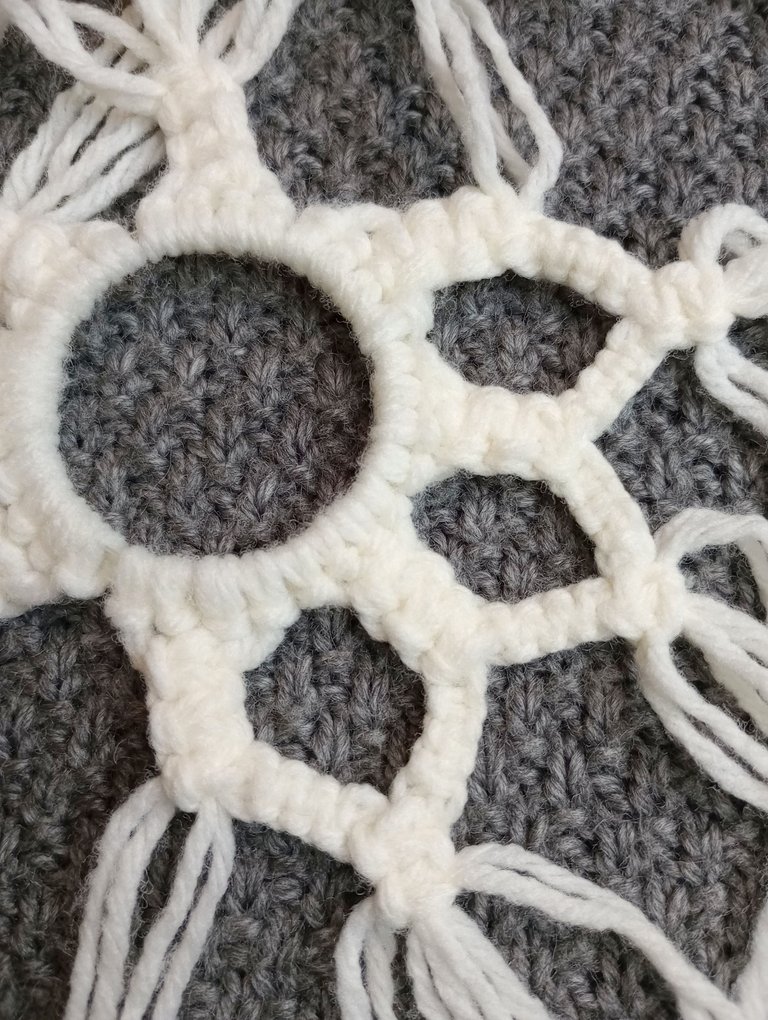
Tomamos 2 tiras, una de cada lado y dejamos 2 en el centro. Tejemos 6 nudos macramé y repetimos este proceso con los otros grupos.
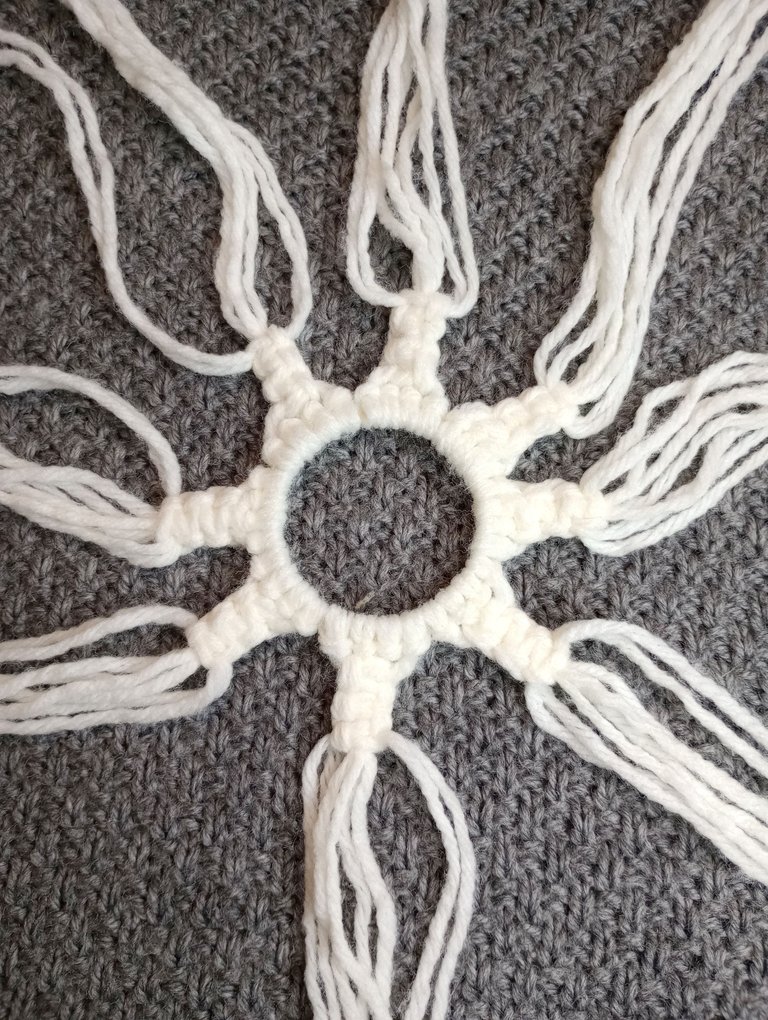
En este punto me di cuenta de que me iba a quedar espacio de sobra en el aro, así que agregué 8 tiras más para formar otra sección en el copo.
We take 2 strips, one on each side and leave 2 in the center. We weave 6 macramé knots and repeat this process with the other groups.
At this point I realized that I was going to have room to spare in the hoop, so I added 8 more strips to form another section in the codend.
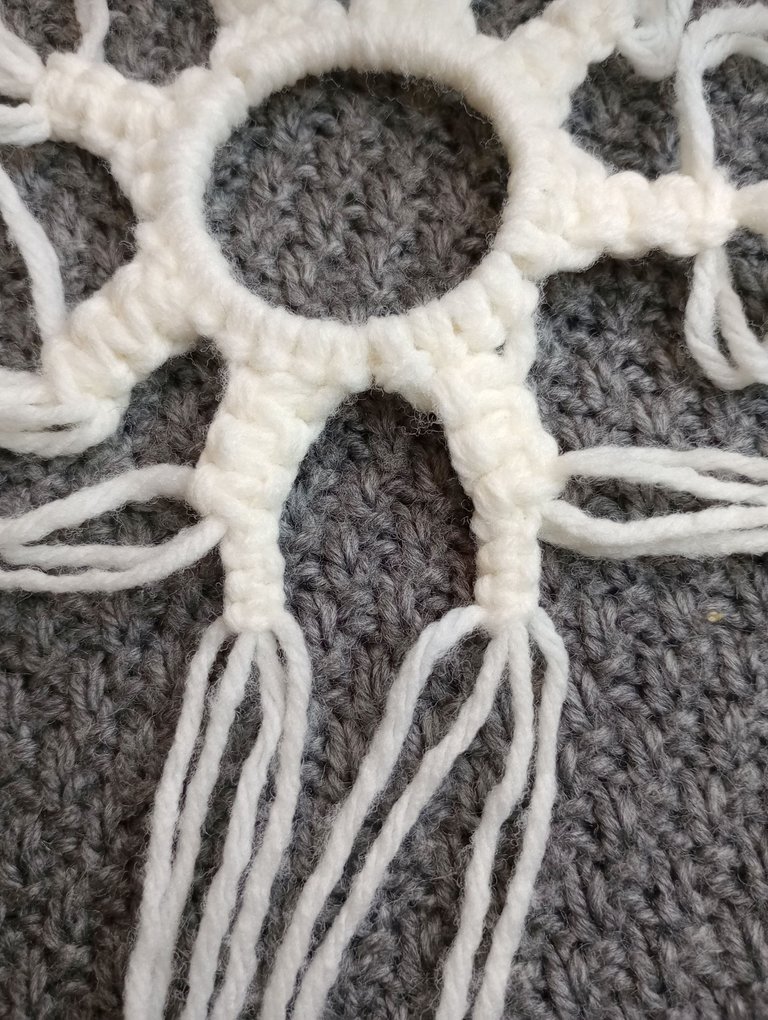
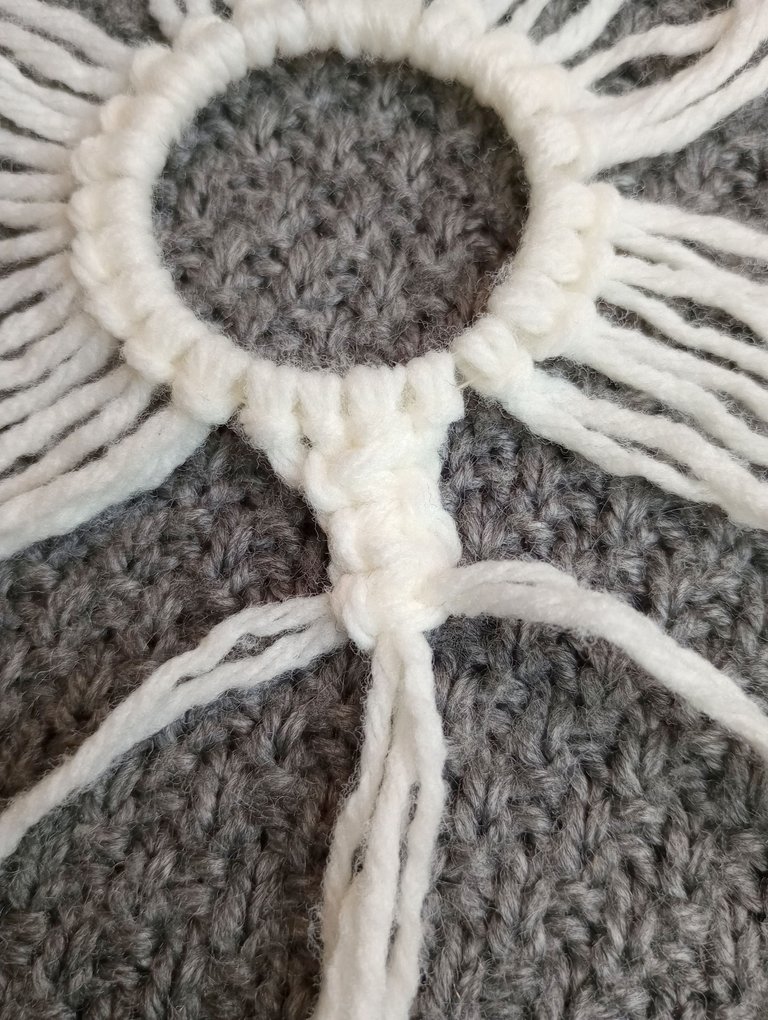
Tomamos la mitad de las tiras de cada sección y tejemos 6 puntos macramé.
Luego vamos a unir estos puntos con los de la sección de al lado y así formaremos un pico. Esta vez tejeremos solo 4 puntos.
Así repetiremos el proceso, uniendo todas las secciones y formando picos.
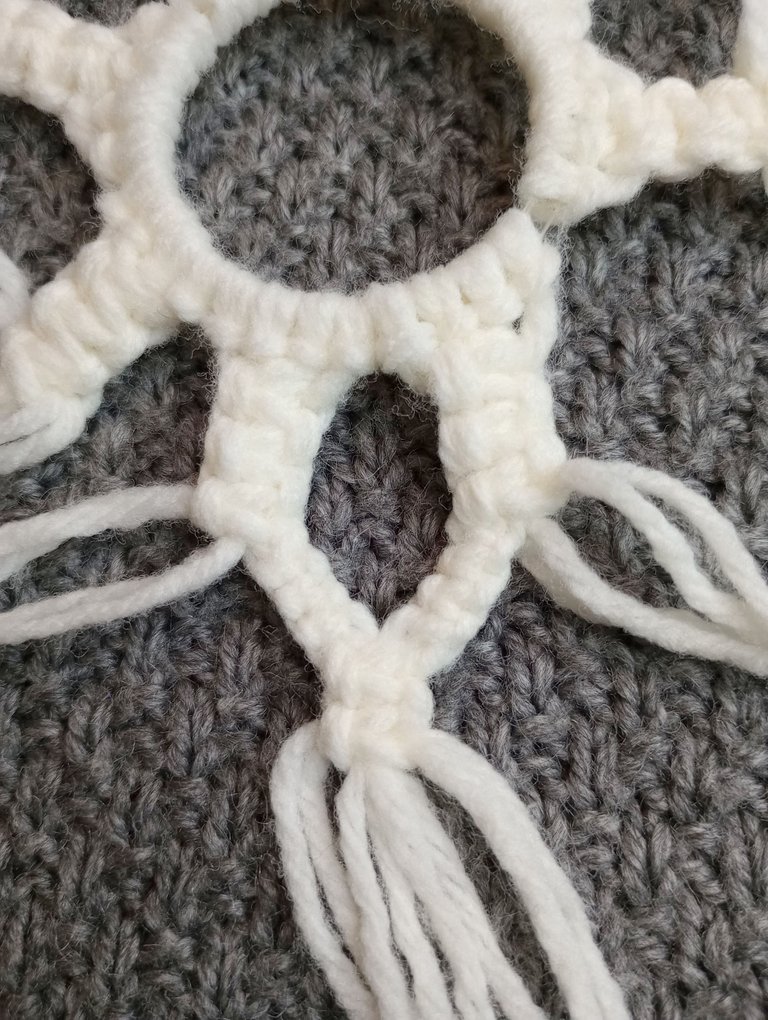
We take half of the strips from each section and weave 6 macrame stitches.
Then we are going to join these points with those of the next section and thus we will form a peak. This time we will knit only 4 stitches.
This way we will repeat the process, joining all the sections and forming peaks.
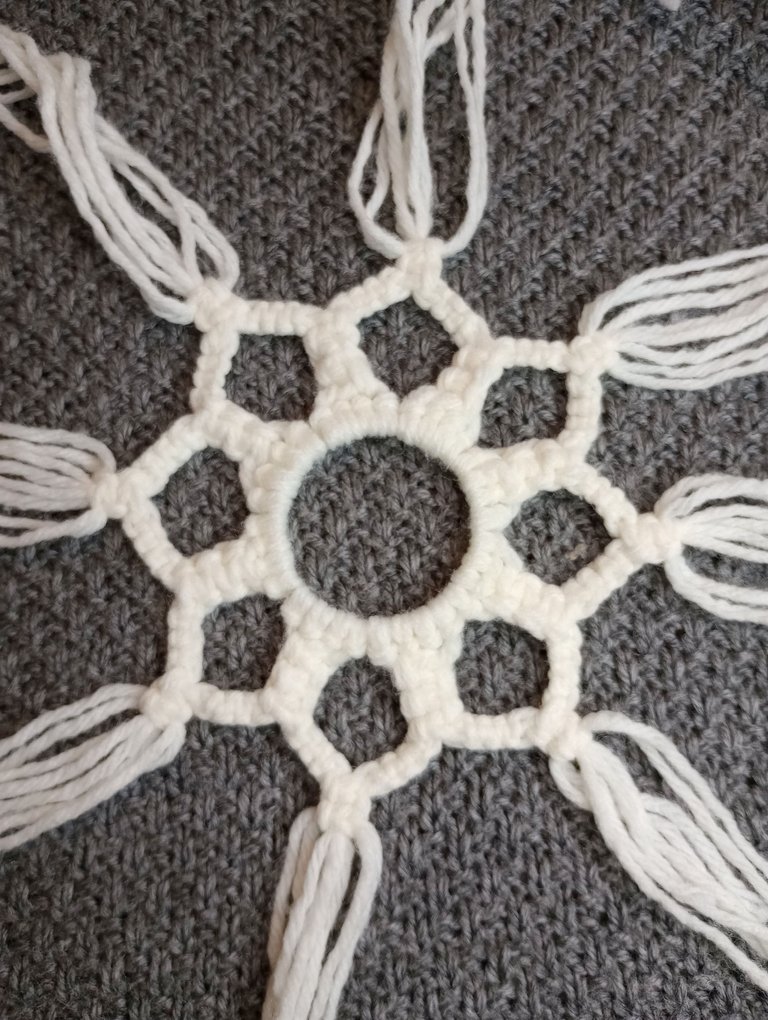
Al terminar vamos a cortar todas las tiras del mismo largo y con un peine separamos las hebras de cada hilo.
At the end we are going to cut all the strips of the same length and with a comb we separate the strands of each thread.
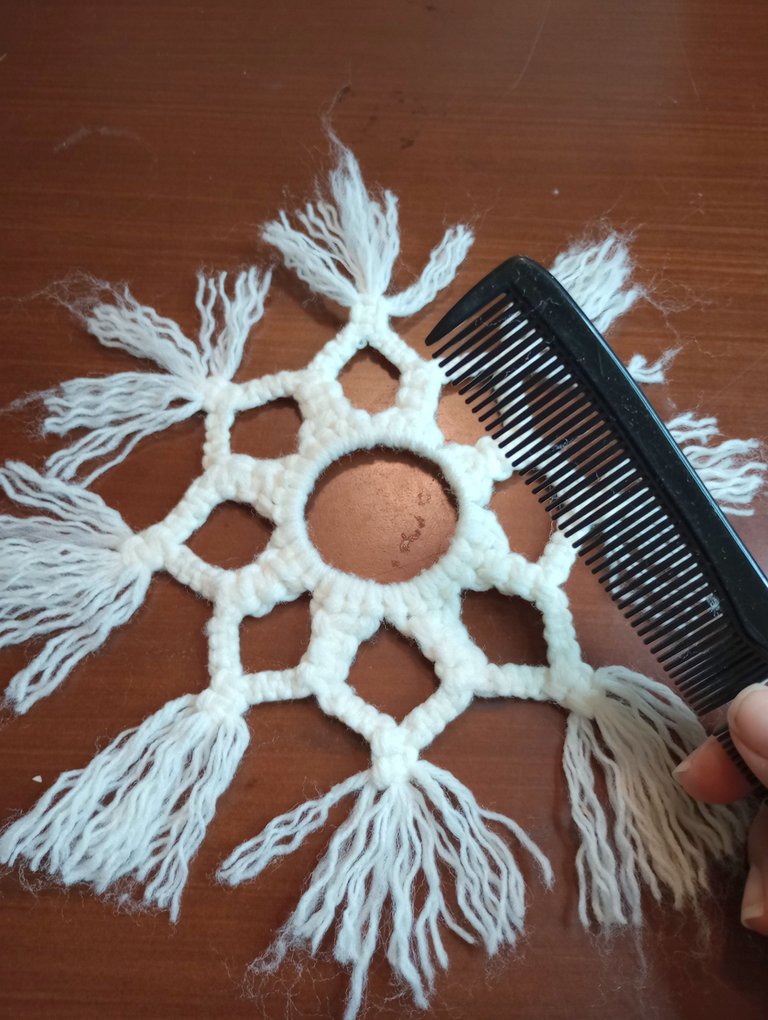
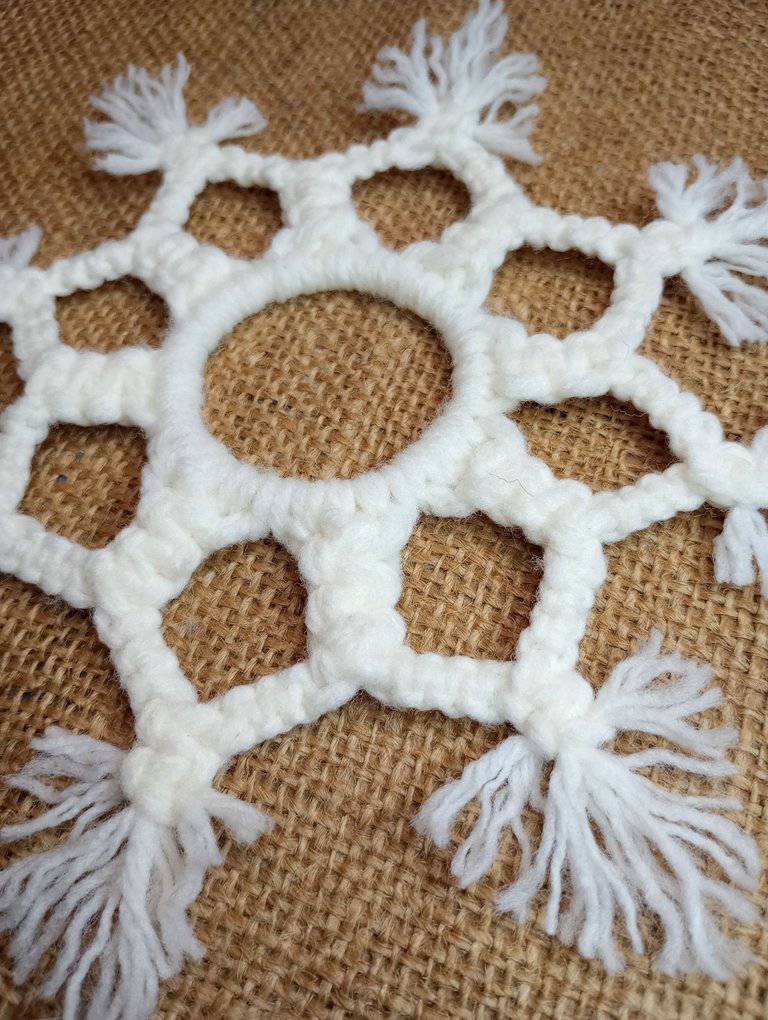
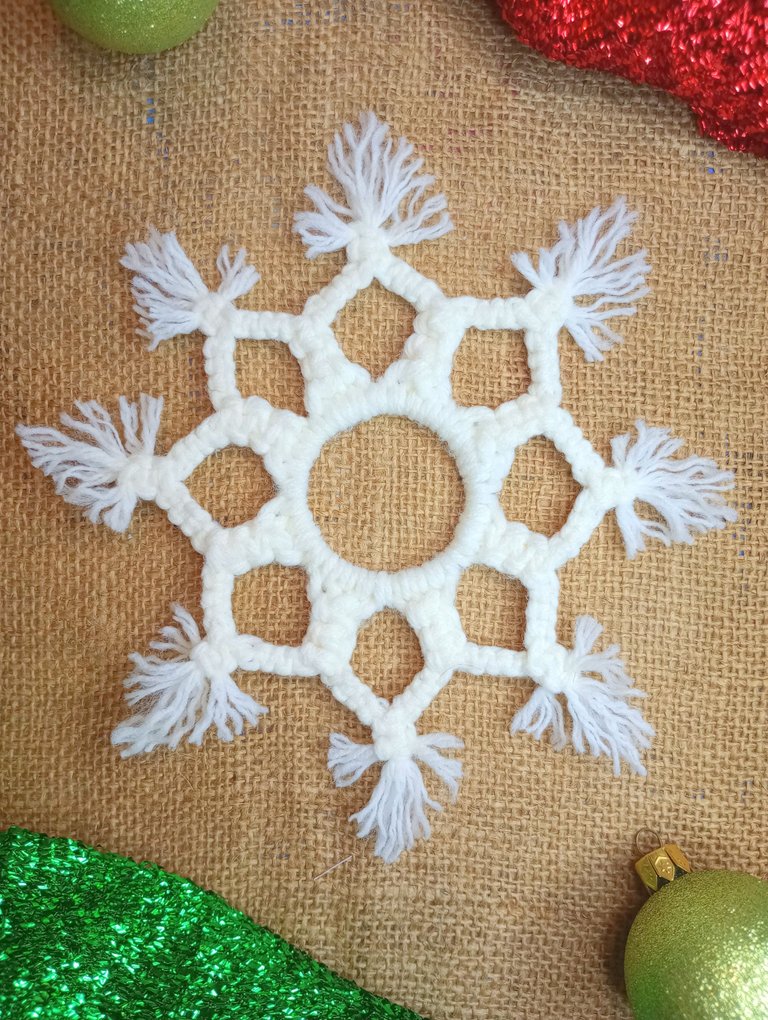
Para finalizar cortamos con una tijera las hebras en forma de picos y así queda listo nuestro copo de nieve, con el que podemos decorar los diferentes rincones de nuestro hogas.
Espero les haya gustado la propuesta y la hagan para decorar sus casas. ♥
To finish, we cut the strands in the form of peaks with scissors and thus our snowflake is ready, with which we can decorate the different corners of our homes.
I hope you liked the proposal and do it to decorate your homes. ♥

Espero haya sido de tu agrado y provecho.
Un gran abrazo a todos, y nos leemos en un próximo post
• Lakrearte en Hive •
Att: Estefania Garcia ♥

Imágenes y separadores de mi autoría
Portada editada en Canva
Fotografías tomadas con un Moto G31
Texto traducido en Google Translate v.14.27
Se ve hermoso, creo que sería buena idea para hacer muchos y ponerlos en un árbol de navidad Saludos 🤗
Muchas gracias y Sii! Tal cual. Si tuviera un arbolito haría muchos para colgarlos. 😊❤️ Le alegra que te haya gustado la propuesta. Saludos
Muchas gracias por el apoyo ☺️✨
Están hermosos, perfectos para hacerlos en familia y después decorar nuestro árbol navideño🎄
Hey si! Es una buena actividad para hacerla con los seres queridos, así todos se ven involucrados en el resultado final y van cargaditos de amor. 🤗❤️ Muchas gracias por tu comentario! ✨
Thank you for sharing this post on HIVE!
Your content got selected by our fellow curator rezoanulvibes & you received a little thank you upvote from our non-profit curation initiative. Your post will be featured in one of our recurring curation compilations which is aiming to offer you a stage to widen your audience within the DIY scene of Hive.
Next time make sure to post / cross-post your creation within the DIYHub community on HIVE and you will receive a higher upvote!
Stay creative & hive on!
Thanks for your support ❤️😊✨
Thank you for sharing your knowledge with hive!
Congratulations @estefania3! You have completed the following achievement on the Hive blockchain and have been rewarded with new badge(s):
You can view your badges on your board and compare yourself to others in the Ranking
If you no longer want to receive notifications, reply to this comment with the word
STOPCheck out the last post from @hivebuzz:
Support the HiveBuzz project. Vote for our proposal!
¡Enhorabuena!
✅ Has hecho un trabajo de calidad, por lo cual tu publicación ha sido valorada y ha recibido el apoyo de parte de CHESS BROTHERS ♔ 💪
♟ Te invitamos a usar nuestra etiqueta #chessbrothers y a que aprendas más sobre nosotros.
♟♟ También puedes contactarnos en nuestro servidor de Discord y promocionar allí tus publicaciones.
♟♟♟ Considera unirte a nuestro trail de curación para que trabajemos en equipo y recibas recompensas automáticamente.
♞♟ Echa un vistazo a nuestra cuenta @chessbrotherspro para que te informes sobre el proceso de curación llevado a diario por nuestro equipo.
Cordialmente
El equipo de CHESS BROTHERS
Muchas gracias por su apoyo 😊❤️