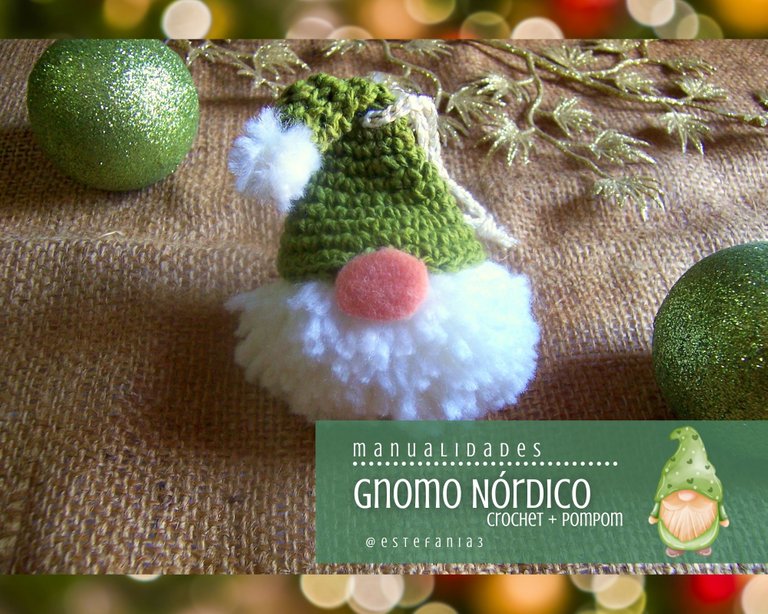
Manualidades: Gnomo Nórdico (crochet + pompom) || Crafts: Nordic Gnome (crochet + pompom) 🧶♥🎄

¡Hola Chicos!
Hoy quiero compartirles este simpático amiguito que hice combinando dos técnicas, la del pompón y crochet. Este lindo gnomo a nacido para ser parte de la serie de decoraciones navideñas que he estado compartiendo con ustedes a lo largo de estos días y que pronto estarán llenando de color toda mi casa.
Es muy fácil de hacer y queda muy lindo. Se pueden hacer varios en poco tiempo y colgarlos por toda la casa o hasta crear una linda guirnalda uniéndolos con un cordel.
Les cuento a continuación los materiales que necesitan para hacerlo y todos los pasos para lograr este resultado,
¡Acompáñenme!
Hello Guys!
Today I want to share with you this nice little friend that I made combining two techniques, pompom and crochet. This cute gnome was born to be part of the series of Christmas decorations that I have been sharing with you throughout these days and that will soon be filling my whole house with color.
It is very easy to do and it is very nice. You can make several in a short time and hang them throughout the house or even create a cute garland by joining them with a string.
I tell you below the materials you need to do it and all the steps to achieve this result,
Join me!
- Lanas de color verde y blanco
- Aguja de crochet
- Silicón
- Fieltro color carne
- Tijeras
- Cartón
- Green and white wool
- Crochet hook
- Silicone
- Flesh colored felt
- Pair of scissors
- Paperboard
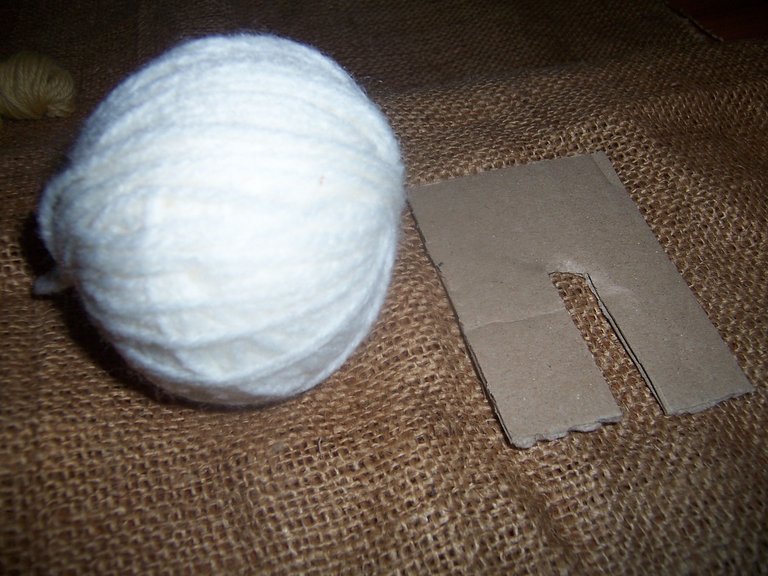

Primero haremos el pompón, para ello vamos a hacer el molde con un trozo de cartón que cortaremos en forma de "n", tal y como se muestra en la primera foto.
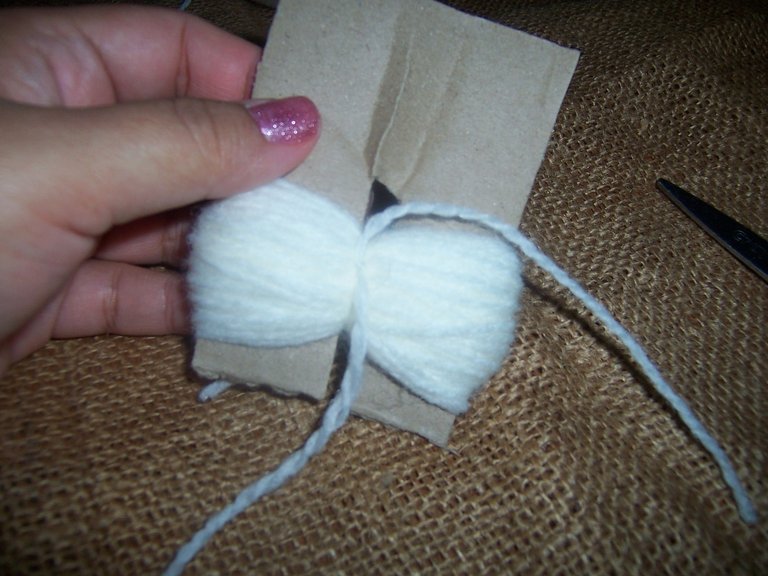
Ahora con la lana vamos a envolverlo y damos unas 80 vueltas con la lana blanca.
Cortamos y con un trozo adicional de lana vamos a hacer un nudo en el centro para unir todas las vueltas de hilo. Debemos ajustar muy bien para que no se nos vaya a desarmar.
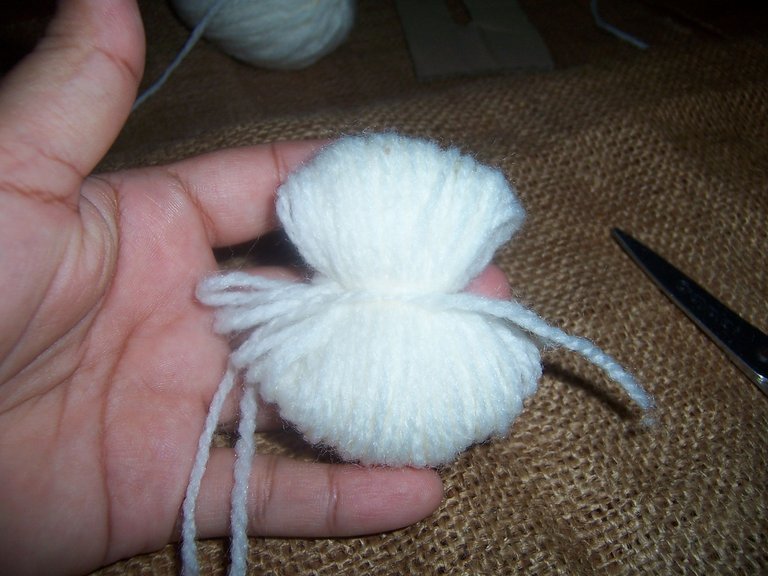
Sacamos del molde y nos va a quedar algo como lo que se muestra en la siguiente foto.
First we will make the pompom, for this we are going to make the mold with a piece of cardboard that we will cut in the shape of an 'n', as shown in the first photo.
Now with the wool we are going to wrap it and we give about 80 turns with the white wool.
Cut and with an additional piece of wool we are going to make a knot in the center to join all the yarn rounds. We must adjust very well so that we are not disarmed.
We take out of the mold and we will have something like what is shown in the following photo.
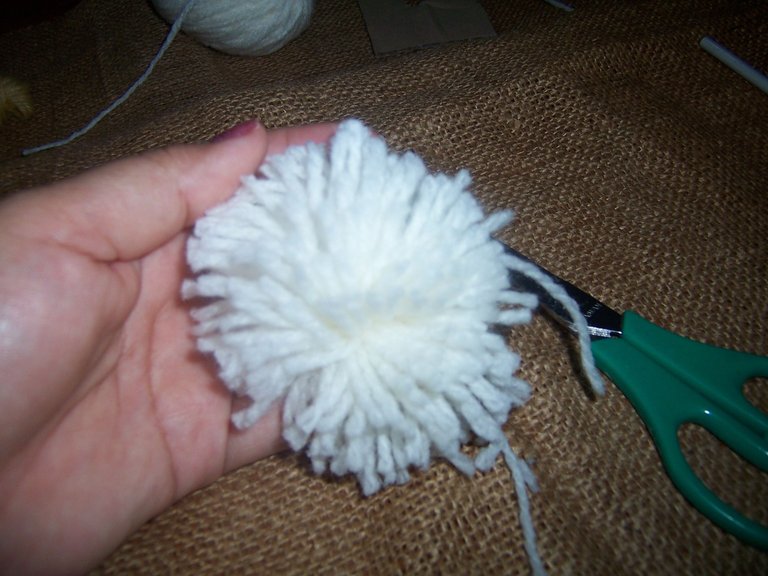
Con la tijera vamos a cortar los dos extremos de los hilos y nos quedará un pompón un poco despeinado. Cortamos los excedentes y vamos emparejando todo hasta lograr una pelota peluda.
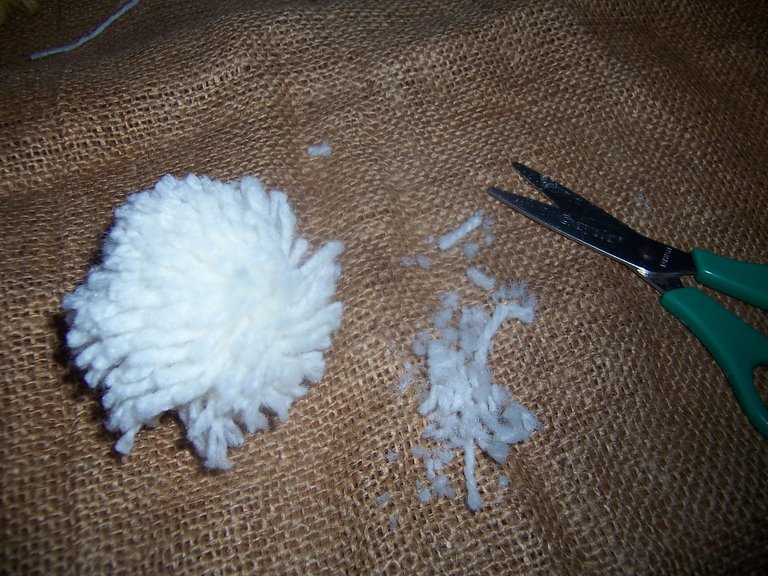
With the scissors we are going to cut the two ends of the threads and we will have a slightly disheveled pompom. We cut the surplus and we match everything until we achieve a furry ball.
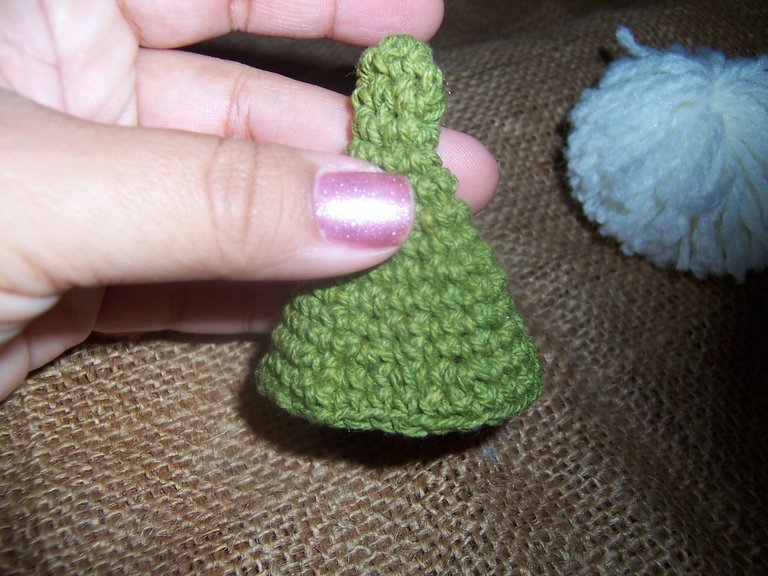
Ahora vamos con el sombrero de nuestro gnomo. Yo lo tejí a crochet, sin seguir un patrón en específico, pero te cuento un poco de que va.
Primero tejí de forma circular 6 puntos bajos, hice unas 5 vueltas sin hacer aumentos lo que provoca que se forme el cilindro de la parte superior.
Luego tejí aumentos intercalados por 3 puntos bajos, poco a poco se va haciendo la abertura del sombrero. Lo fui midiendo con el pompón hasta lograr un tamaño aceptable. Cerré el tejido con nudo deslizado y corté los excedentes.
Si no sabes tejer puedes sustituir este gorrito con uno hecho de fieltro.
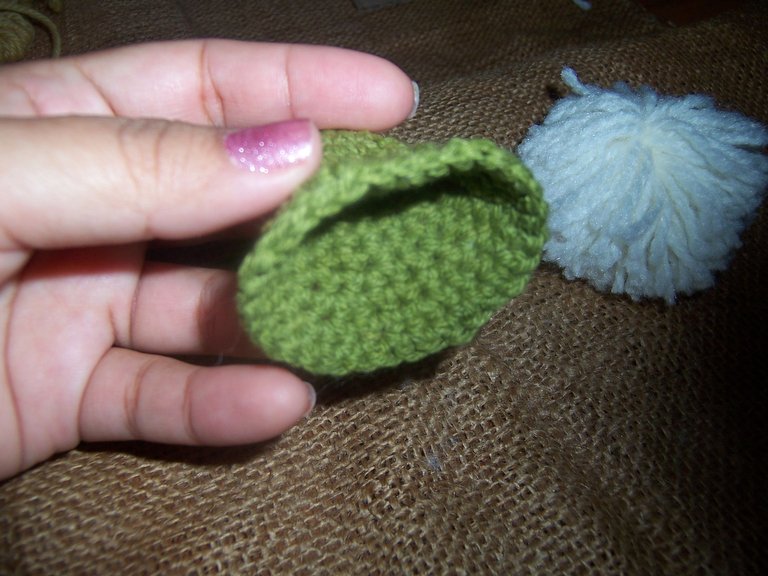
Now we go with our gnome's hat. I crocheted it, without following a specific pattern, but I'll tell you a little about what it is.
First I knit 6 single crochets in a circular way, I did about 5 laps without increasing, which causes the cylinder of the upper part to form.
Then I knit increases interspersed by 3 single crochets, little by little the hat opening is made. I was measuring it with the pompom until I reached an acceptable size. I closed the fabric with a slip knot and cut off the excess.
If you don't know how to knit, you can replace this hat with one made of felt.
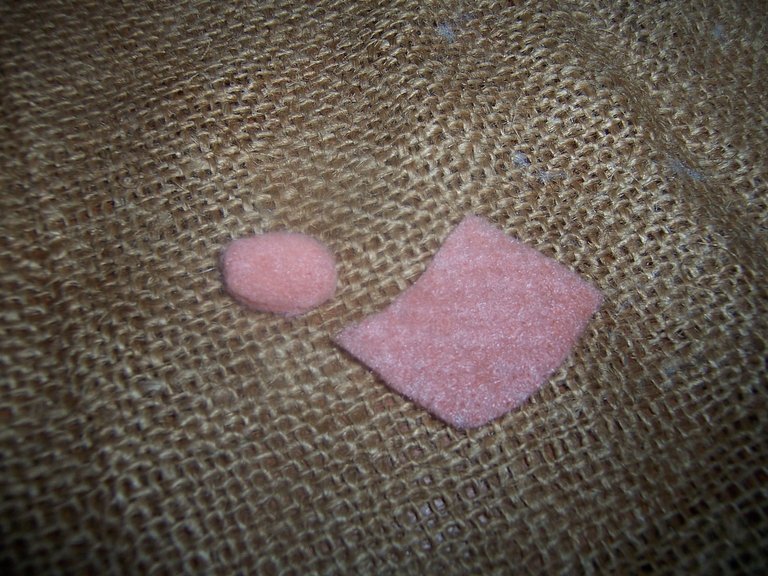
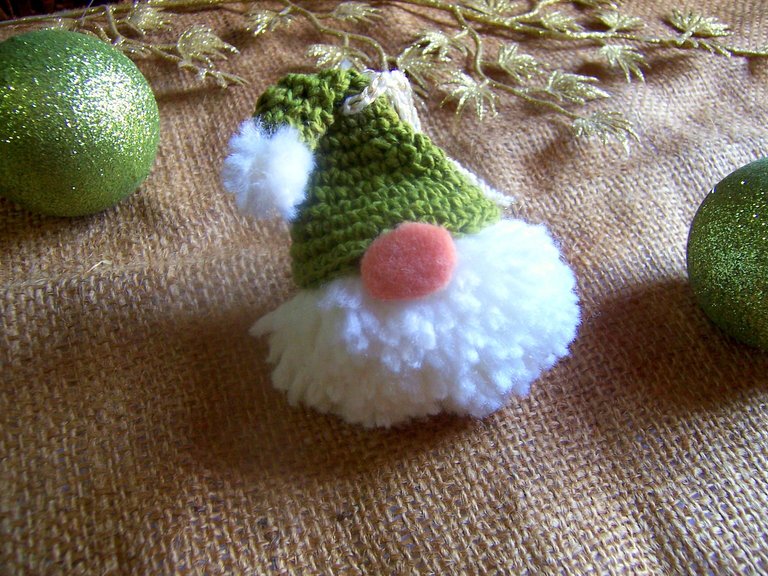
Para la nariz he pegado dos trozos de fieltro con un poco de pega blanca y al secar corté un óvalo. Para la punta del gorro hice un pequeño pompón de lana blanca.
Ya tenemos listos todas las piezas, ahora es momento de unir todo.

For the nose I have glued two pieces of felt with a little white glue and when drying I cut an oval. For the tip of the hat I made a small white wool pompom.
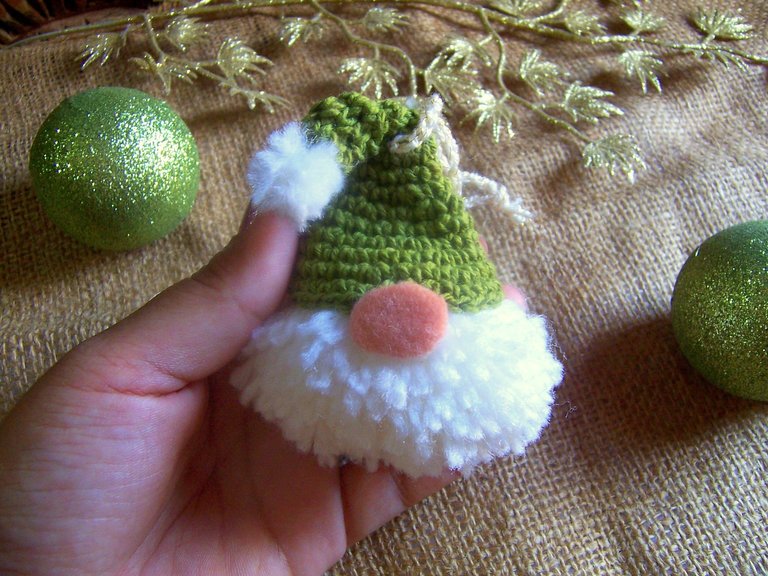
We have all the pieces ready, now is the time to put everything together.
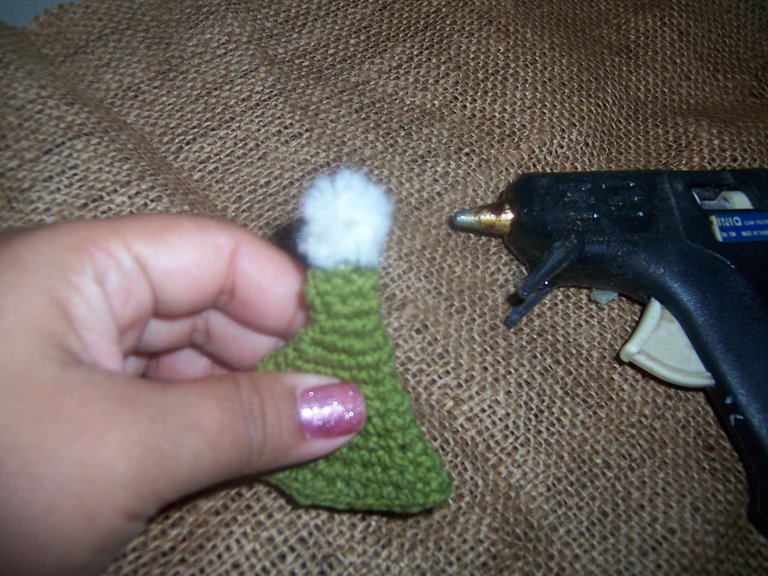
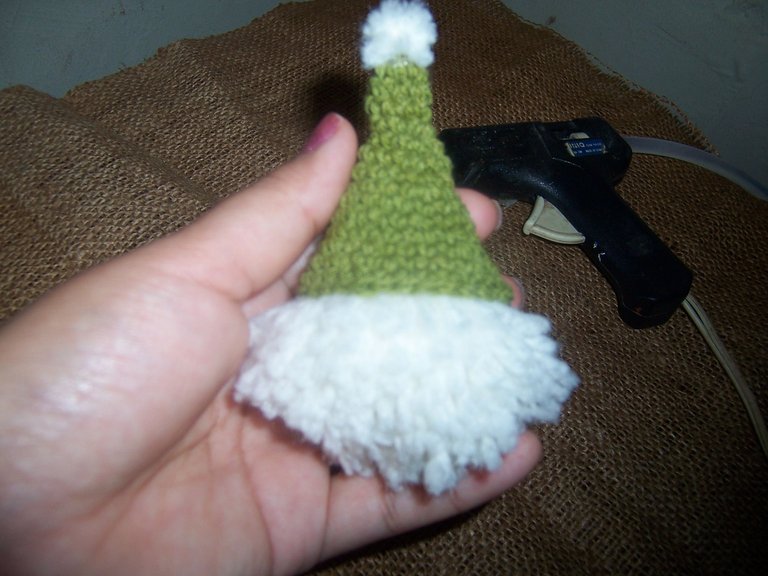
Con una pistola de silicón procedí a unir las piezas. Primero el pequeño pompón a la punta del sombrero, luego coloqué pegamento en el interior para unirlo al pompón que sería la barba de nuestro gnomo y por último la nariz.
También agregué un punto de silicón al gorro para darle el típico doblez.
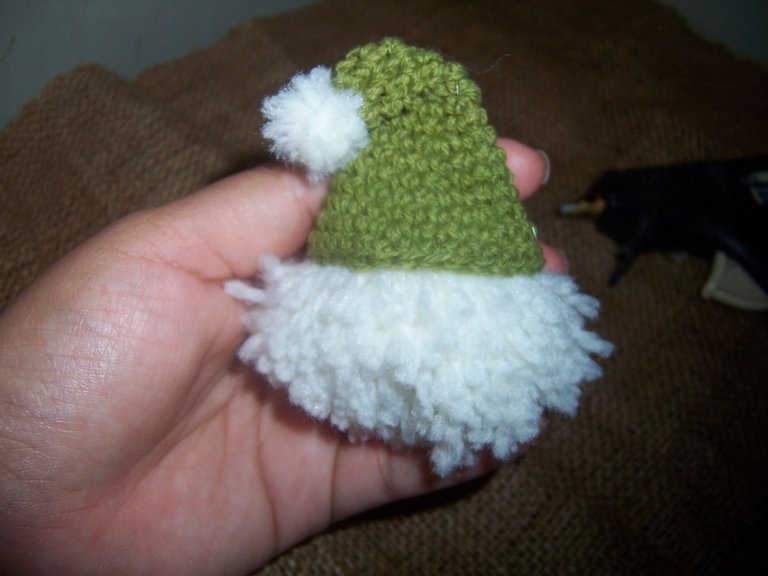
With a glue gun I proceeded to join the pieces. First the small pompom to the tip of the hat, then I put glue inside to join it to the pompom that would be the beard of our gnome and finally the nose.
I also added a point of silicone to the hat to give it the typical fold.

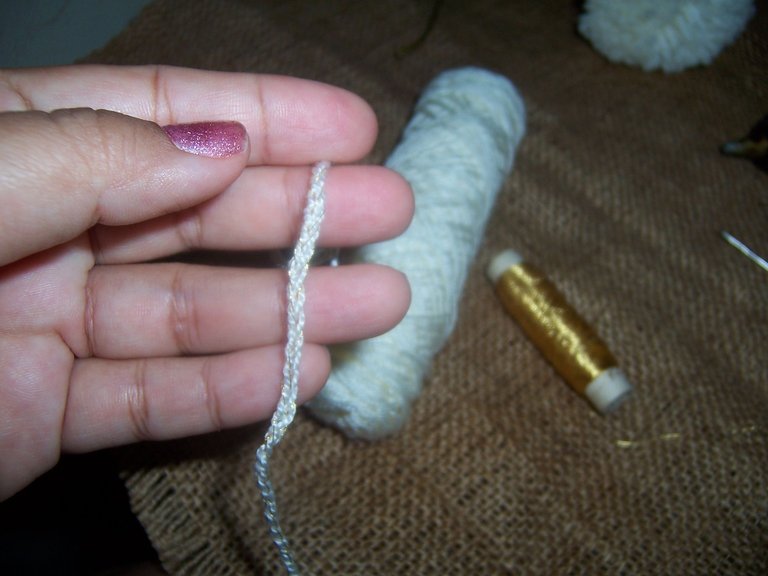
Como ultimo detalle tejí una tira de puras cadenas a crochet uniendo lana blanca y un hilo dorado para darle brillo.
Este cordón lo pasé por el centro del gorro para poder colgar al gnomo.

As a last detail I wove a strip of pure crochet chains joining white wool and a golden thread to give it shine.
I passed this cord through the center of the hat to be able to hang the gnome.
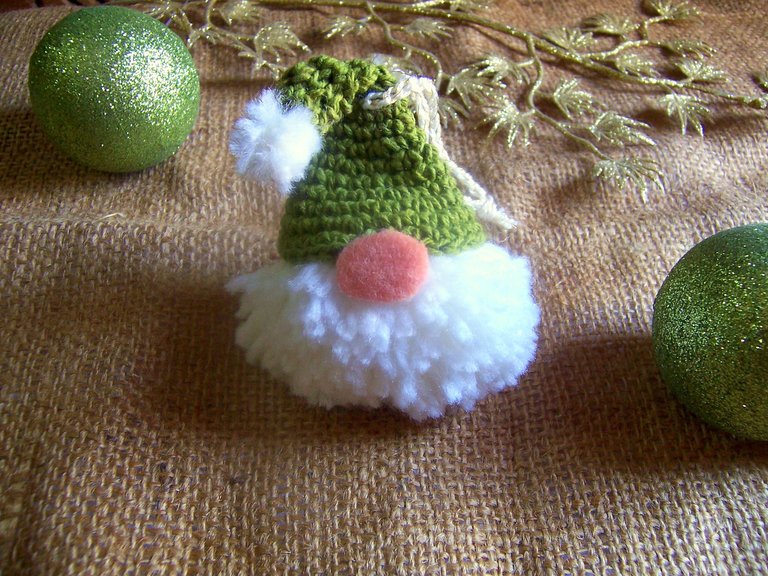

Espero haya sido de tu agrado y provecho.
Un gran abrazo a todos, y nos leemos en un próximo post
• Lakrearte en Hive •
Att: Estefania Garcia ♥

Imágenes y separadores de mi autoría
Portada editada en Canva
Que adorable!!! 😍🤩
!discovery 30
Muchas gracias 😊
This post was shared and voted inside the discord by the curators team of discovery-it
Join our community! hive-193212
Discovery-it is also a Witness, vote for us here
Delegate to us for passive income. Check our 80% fee-back Program
Muchas gracias ♥