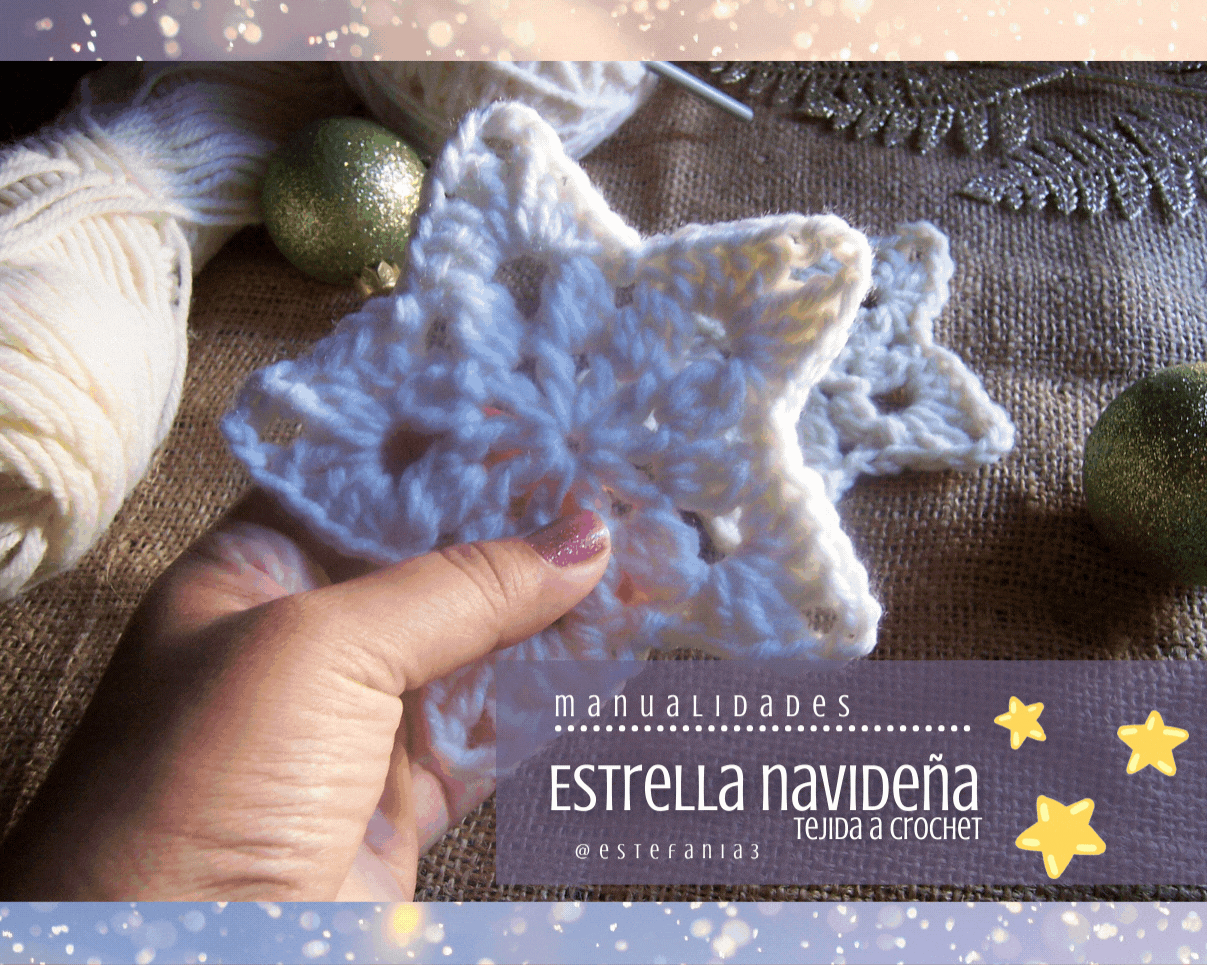
Manualidades: Estrella Navideña tejida a crochet || Crafts: Crochet Christmas Star 🎄♥🌟

¡Hola Chicos!
Hoy quiero compartir con ustedes esta linda propuesta para continuar con mi proyecto de adornos navideños. Como saben, desde hace algunos días he estado compartiendo con ustedes tutoriales en los que pueden conocer como elaborar diversos adornos navideños tejidos a crochet.
Son fáciles de elaborar y no requieren muchos materiales para lograr un bonito resultado, además van con ese plus especial que es el hecho de haberlos tejido con tus propias manos, nada más satisfactorio y lleno de amor.
En este post te quiero mostrar como hacer esta linda estrella navideña, que en pocos pasos puedes lograr y como les he comentado anteriormente en otros post, dependiendo del grosor del hilo que utilices te quedaran de diferentes tamaños (el ejemplo te lo muestro más adelante).
Sin más que agregar, vamos con el paso a paso para que puedas hacerlas en casa,
¡Comencemos!
Hello Guys!
Today I want to share with you this beautiful proposal to continue with my Christmas decorations project. As you know, for a few days I have been sharing with you tutorials in which you can learn how to make various crochet Christmas decorations.
They are easy to make and do not require many materials to achieve a beautiful result, they also go with that special plus that is the fact of having woven them with your own hands, nothing more satisfying and full of love.
In this post I want to show you how to make this beautiful Christmas star, which in a few steps you can achieve and as I have mentioned previously in other posts, depending on the thickness of the thread you use, they will be of different sizes (I will show you the example later) .
Without more to add, we go with the step by step so that you can do them at home,
Let's get started!
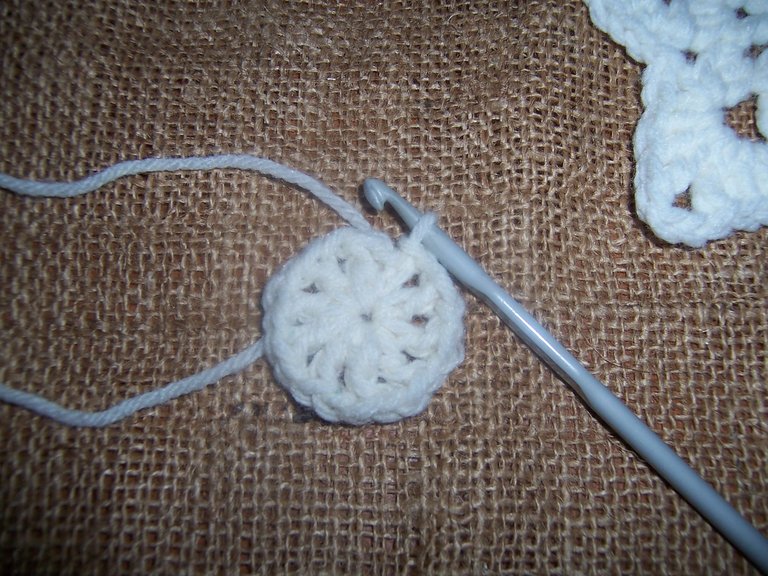
Iniciamos la labor haciendo un anillo mágico, sobre él vamos a tejer dos cadenas para elevar la vuelta y luego comenzamos a tejer 9 puntos altos, cada uno deparado por una cadena.
Al llegar al final de la vuelta vamos a tejer la cadena de separación y cerramos con punto deslizado sobre las cadenas de inicio.
We start the work by making a magic ring, on it we are going to knit two chains to raise the round and then we begin to knit 9 double stitches, each one provided by a chain.
When we reach the end of the round, we are going to knit the separating chain and close with a slip stitch over the starting chains.
En la segunda vuelta vamos a iniciar de la siguiente forma: tejemos dos cadenas para elevar la vuelta, luego en el espacio de separación vamos a tejer dos puntos altos juntos, es decir, ambos puntos van a estar unidos en la última lazada.
Tejemos dos cadenas de separación y luego en el próximo espacio vamos a tejer 3 puntos altos cerrados con la misma lazada, así hasta completar 9 grupos de 3 puntos altos, para un total de 10 grupos de puntos altos, todos separados por dos cadenas.
In the second round we are going to start as follows: we knit two chains to raise the round, then in the gap we are going to knit two double crochets together, that is, both stitches will be joined in the last yarn over.
We knit two separating chains and then in the next space we are going to knit 3 closed double crochets with the same yarn over, like this until completing 9 groups of 3 double crochets, for a total of 10 groups of double crochets, all separated by two chains.
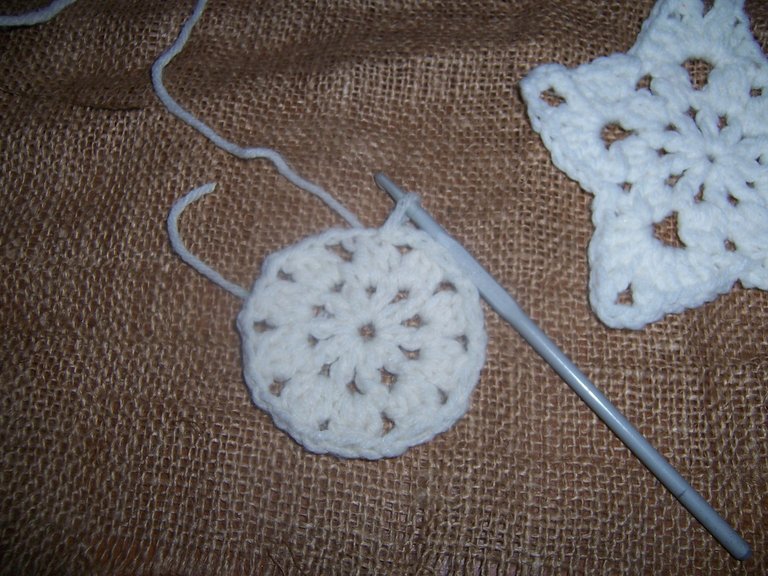
Para la última vuelta vamos a comenzar tejiendo sobre el espacio entre puntos dos cadenas para elevar la vuelta, luego tejemos un punto alto, un punto alto doble, 3 cadenas, un punto alto doble, dos puntos altos y terminamos con medio punto alto.
Tejemos una cadena y sobre el siguiente espacio vamos a tejer un punto deslizado, continuamos con una cadena.
En el siguiente espacio vamos a tejer nuevamente la secuencia:
Medio punto alto + dos puntos altos + un punto alto doble
- 3 cadenas + un punto alto doble + dos puntos altos + medio punto. Luego 1 cadena, un punto deslizado sobre el siguiente espacio y 1 cadena.
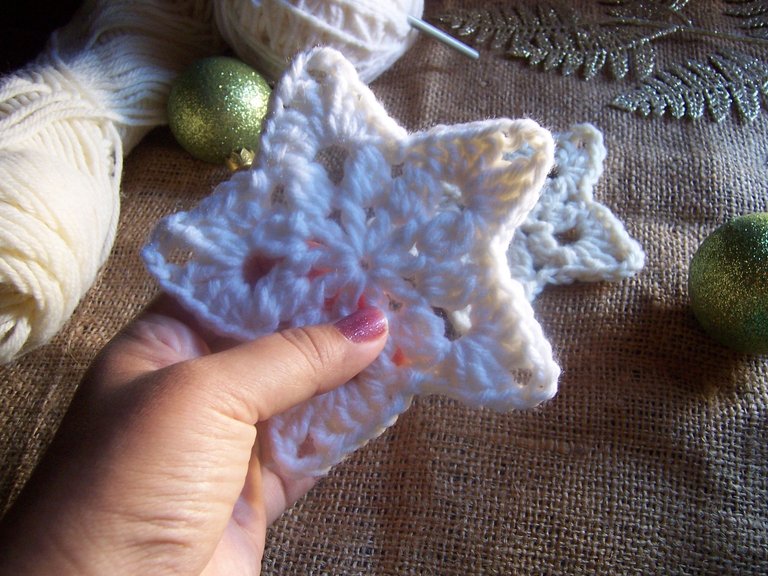
Así hasta completar los 5 grupos de puntos, que serían las 5 puntas de la estrella. Al llegar al final de la vuelta vamos a tejer medio punto alto sobre el mismo punto de las dos cadenas de inicio, y finalizamos con un punto deslizado.
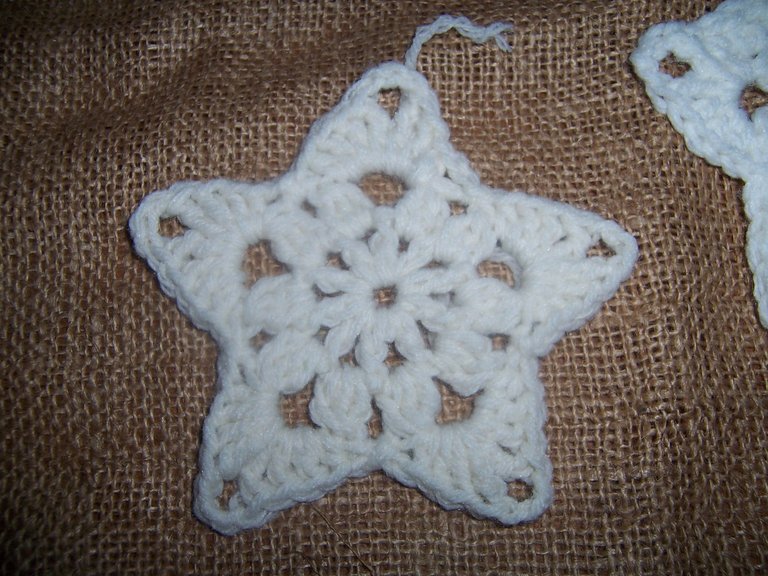
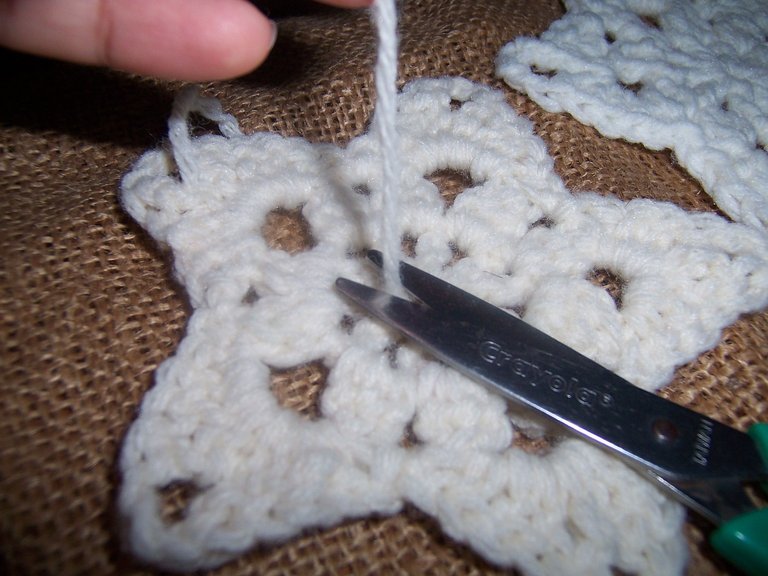
Ahora solo resta cortar los excedentes de hilo y colocarle un lindo cordel para colgarla. ♥
For the last round we are going to start by knitting two chains over the space between stitches to raise the round, then we knit a double crochet, a double double crochet, 3 chains, a double double crochet, two double crochets and we end with a half double crochet.
We knit a chain and over the next space we are going to knit a slip stitch, we continue with a chain.
In the next space we are going to weave the sequence again:
Half double crochet + two double crochets + one double double crochet
- 3 chains + one double crochet + two double crochets + single crochet. Then 1 chain, a slip stitch over the next space and 1 chain.
So until the 5 groups of points are completed, which would be the 5 points of the star. When we reach the end of the round we are going to crochet a half double crochet over the same stitch of the two starting chains, and we finish with a slip stitch.
Now it only remains to cut the excess thread and place a nice string to hang it. ♥
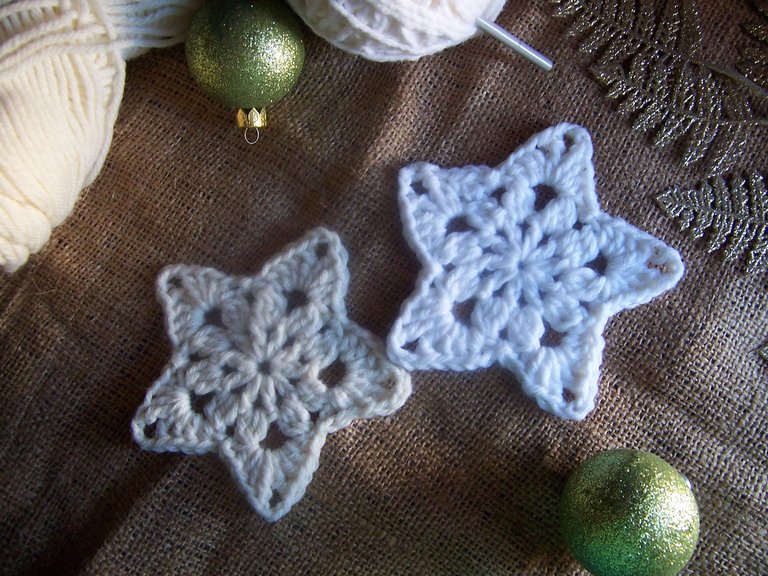
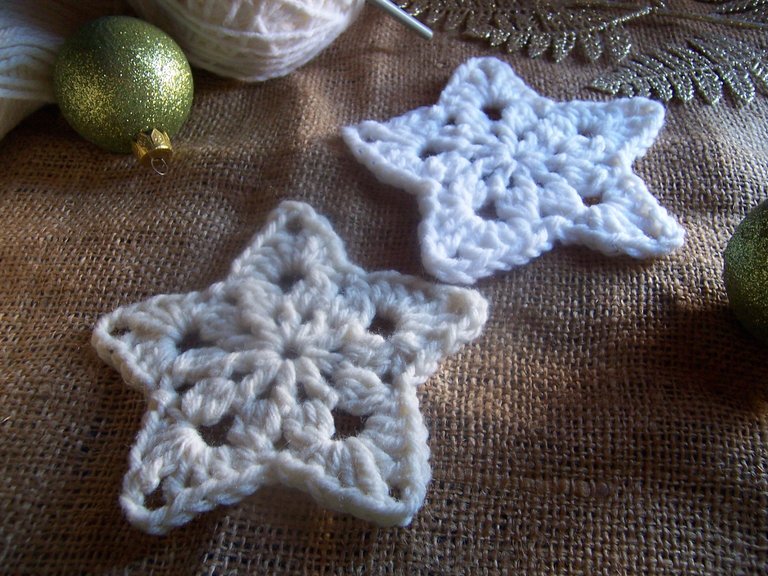
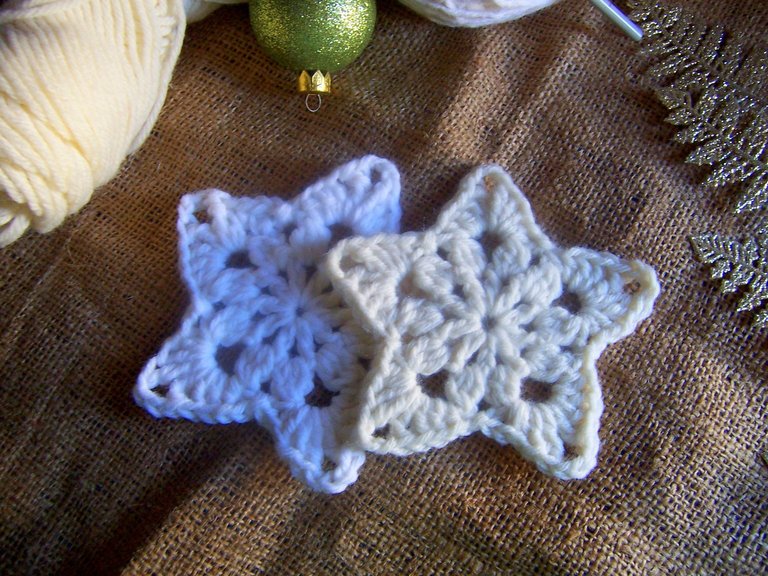
Como te comentaba al inicio, el grosor del hilo que utilices definirá el tamaño final de tu estrella. Como verás en la foto la estrella de la izquierda quedó ligeramente más pequeña y está elaborada con la misma cantidad de puntos.
Así que ya sabes, si quieres estrellas grandes, busca un hilo de bastantes hebras.
Espero te haya gustado la propuesta y llenes tu casa de estrellas ♥
As I mentioned at the beginning, the thickness of the thread you use will define the final size of your star. As you will see in the photo, the star on the left was slightly smaller and is made with the same number of points.
So now you know, if you want big stars, find a yarn with quite a few strands.
I hope you liked the proposal and fill your house with stars ♥


Espero haya sido de tu agrado y provecho.
Un gran abrazo a todos, y nos leemos en un próximo post
• Lakrearte en Hive •
Att: Estefania Garcia ♥

Imágenes y separadores de mi autoría
Portada editada en Canva
Your post has been curated by us! Received 20.00% upvote from @opb. Do consider delegate to us to help support our project.
Do join our discord channel to give us feedback, https://discord.gg/bwb2ENt
* This bot is upvoting based on the criteria : 1. Not plagiarised, 2. Persistent previous quality posts, 3. Active engagement with other usersDo upvote this commment if you 💚 our service :)
Congratulations @estefania3! You have completed the following achievement on the Hive blockchain and have been rewarded with new badge(s):
Your next target is to reach 1750 replies.
You can view your badges on your board and compare yourself to others in the Ranking
If you no longer want to receive notifications, reply to this comment with the word
STOPCheck out the last post from @hivebuzz: