La aventura del armado de lienzos para el evento "Convinarte" || The adventure of assembling canvases for the event "Convinarte" ♥

¡Hola Chicos!
Como les comenté en mi post anterior, cada paso que dimos para realizar el evento Convinarte fue una aventura. Aún hay mucho que contar al respecto antes de por fin hablarles de como nos fue ese gran día.
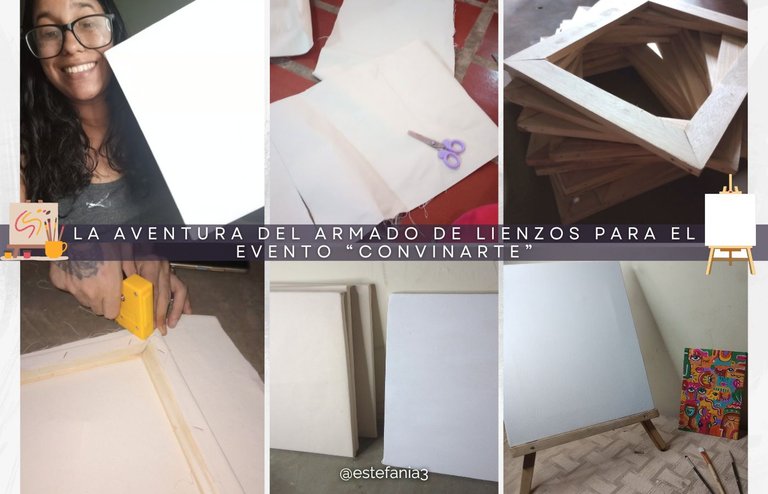
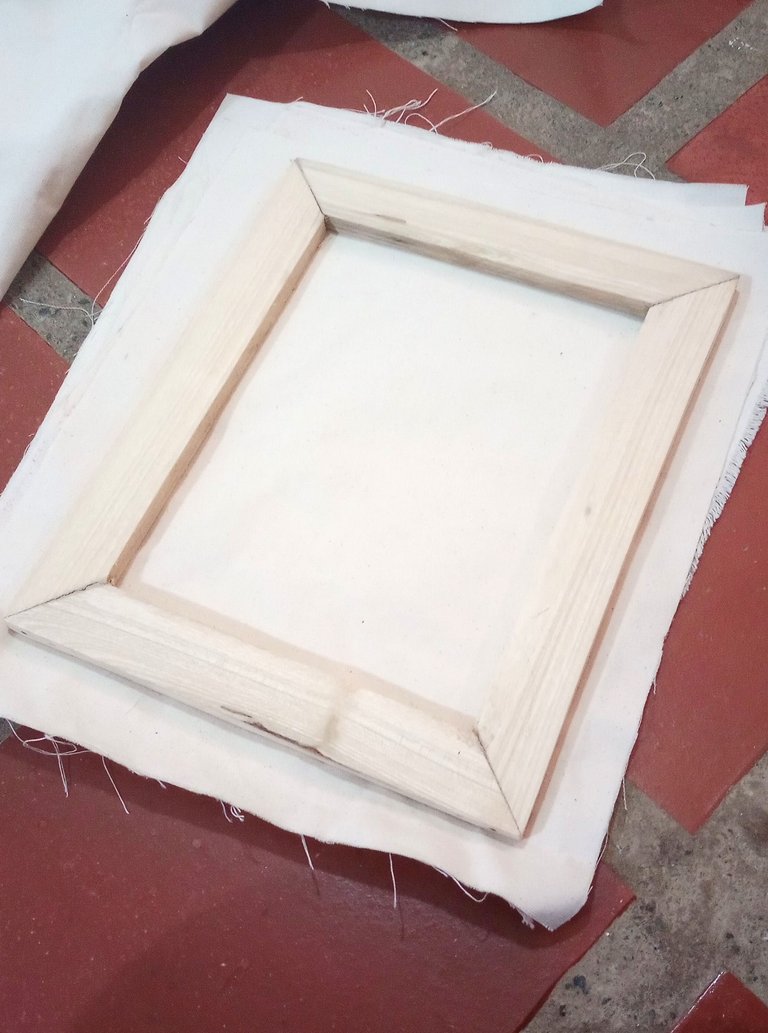
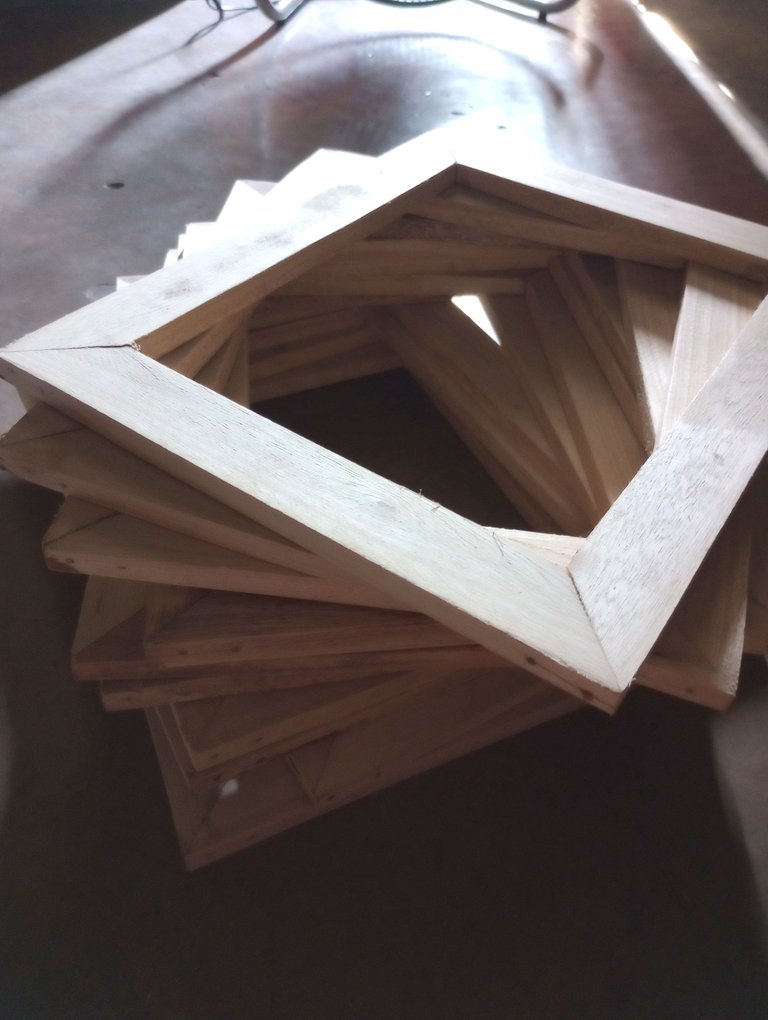
Dos elementos súper importantes que no podían faltar eran los lienzos y los caballetes. Contactamos con un carpintero que hace unos meses nos había hecho una mesa para la academia.
Al proponerle el trabajo el nos dijo que nos cobraría 1$ por cada uno, tanto por el marco como por los caballetes. Decidimos mandar a hacer 20 de cada uno porque nuestro presupuesto era bajo y hasta los momentos no teníamos a casi personas inscritas para participar.
Ya luego si se sumaban otras mandaríamos a hacer el resto. Yo fui, le di las medidas y él comenzó a trabajar. Luego al tenerlos listos me envió una foto. Tuvimos algunos problemitas con ese señor... pero lo importante es que se logró tener todo lo que encargamos.
Hi Guys!
As I mentioned in my previous post, every step we took to make the Convinarte event happen was an adventure. There is still a lot to tell you about it before I finally tell you how that great day went.
Two super important elements that could not be missing were the canvases and the easels. We contacted a carpenter who had made us a table for the academy a few months ago.
When we proposed the job, he told us that he would charge us $1 for each one, both for the frame and the easels. We decided to send 20 of each because our budget was low and so far we had almost no people signed up to participate.
Then, if others joined us, we would have the rest made. I went, gave him the measurements and he started working. When he had them ready, he sent me a photo. We had some problems with that man... but the important thing is that we were able to have everything we ordered.
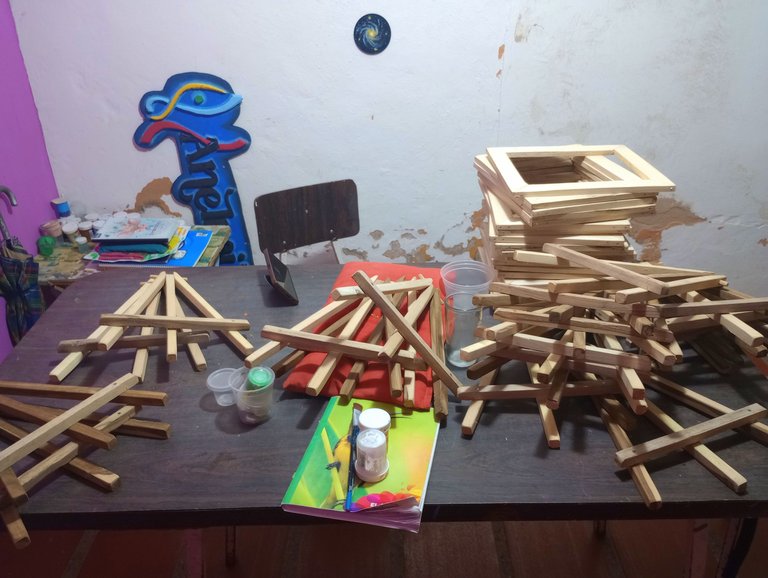
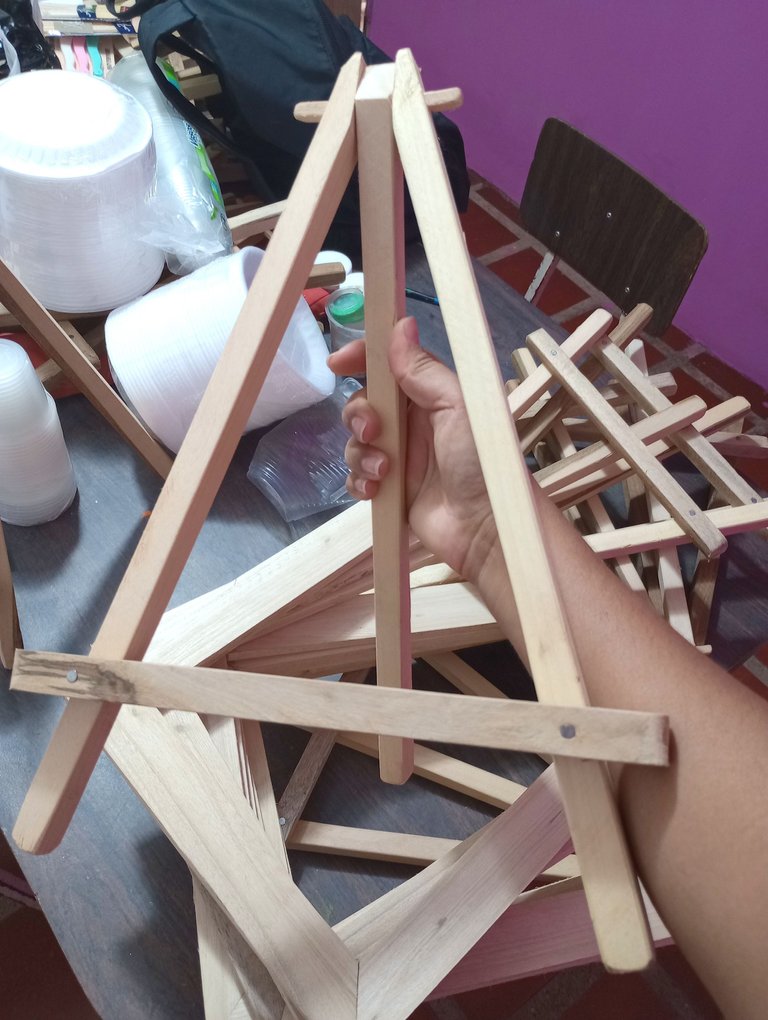
En general los marcos para los lienzos quedaron muy bien aunque no pudimos decir lo mismo de algunos caballetes.
El acabado de la mayoría era perfecto pero algunos estaban algo defectuosos, tenían las tablas dobladas o algo estilladas y rotas.
Las que definitivamente no podíamos aceptar las regresamos para que las repararan y el resto se quedó con nosotros.
In general the frames for the canvases were very good although we could not say the same for some of the easels.
The finish on most of them was perfect but some of them were a bit defective, with bent or somewhat splintered and broken boards.
The ones we definitely could not accept we returned for repair and the rest stayed with us.
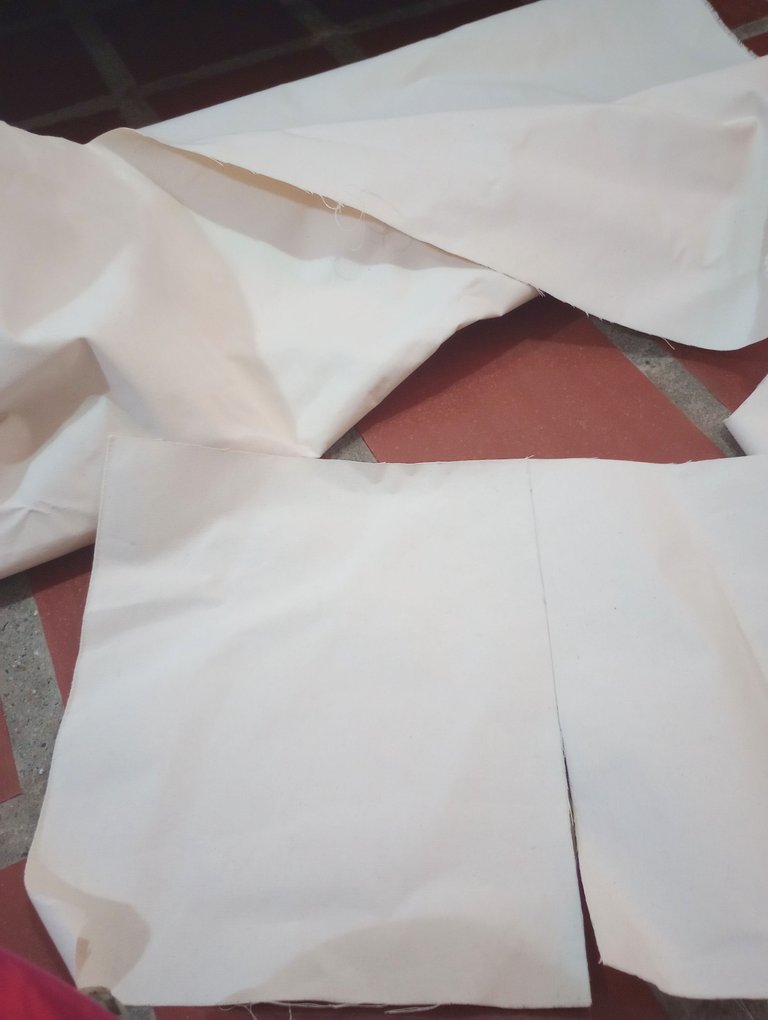
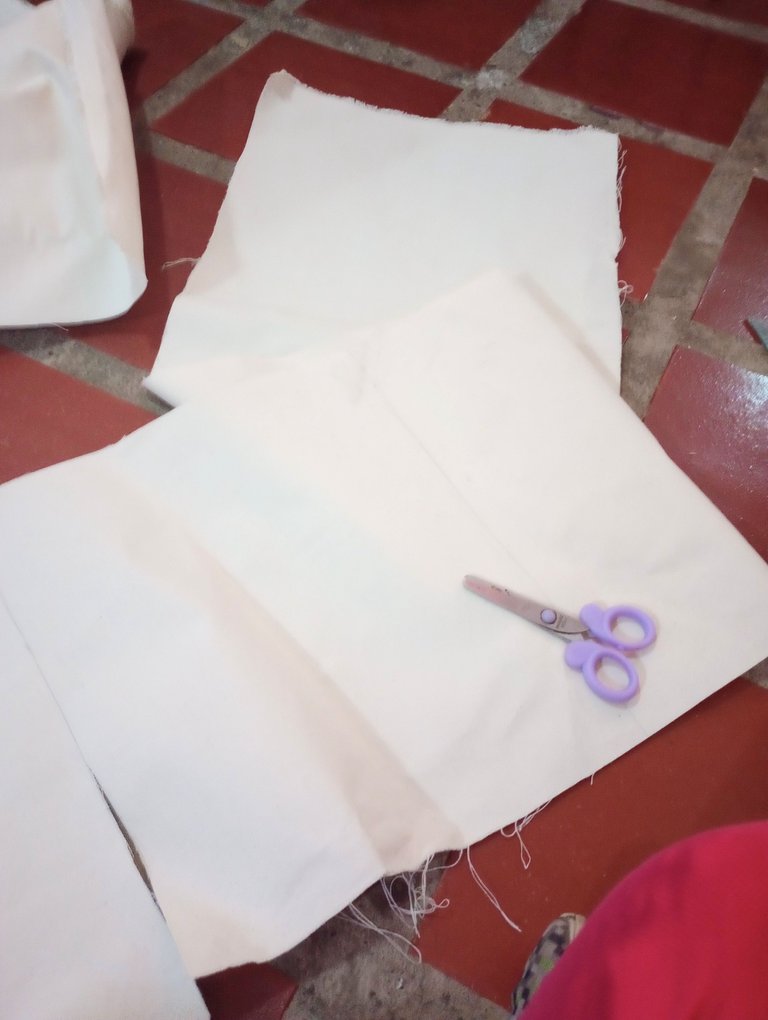
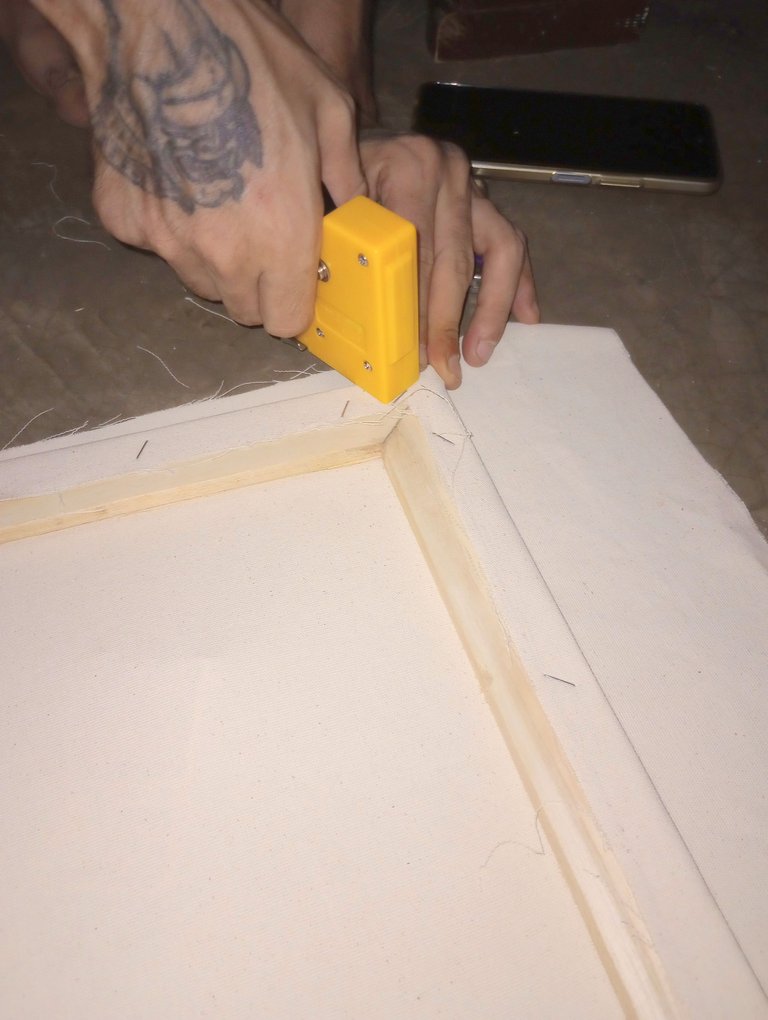
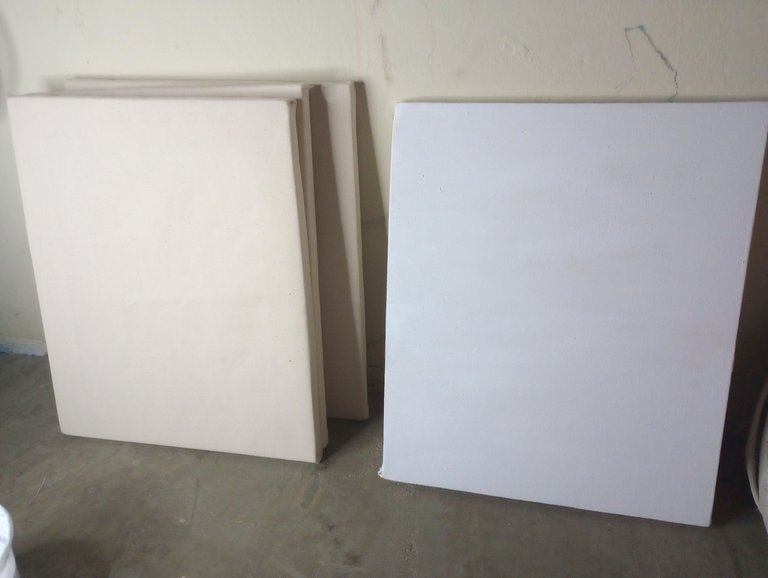
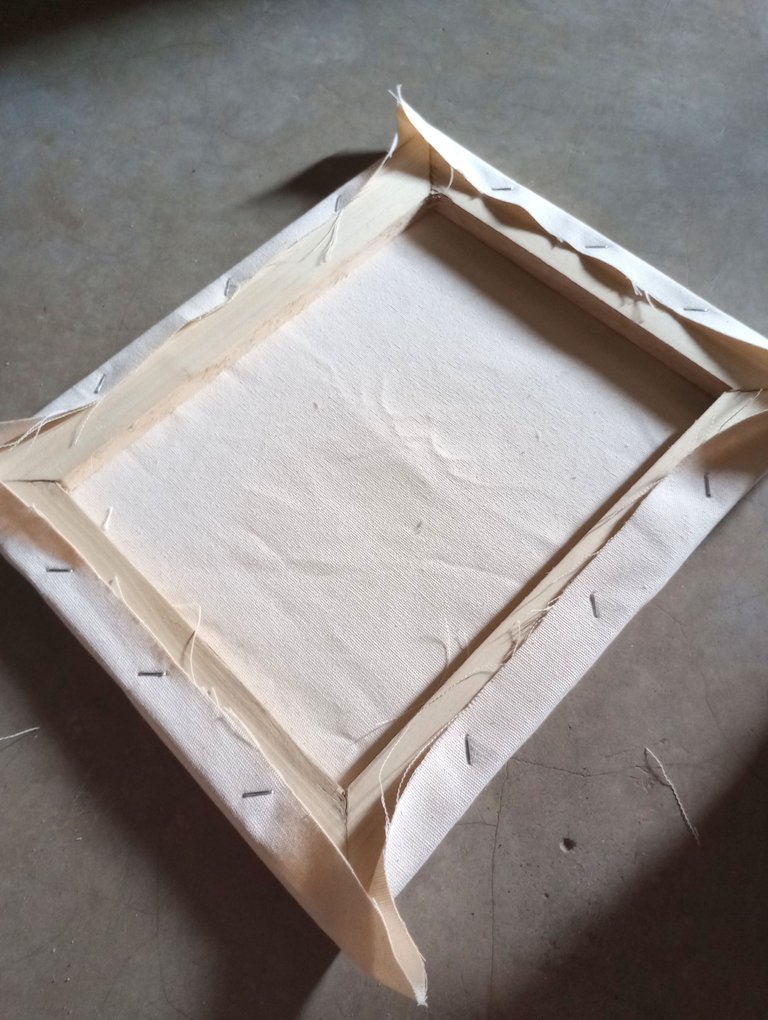
Comencé a trabajar en los lienzos, primero midiendo y cortando toda la tela. Los marcos medían 26 x 31 centímetros. Era necesario dejar algunos centímetros de más para poder cubrir el marco y tener para pegarlos en la parte trasera.
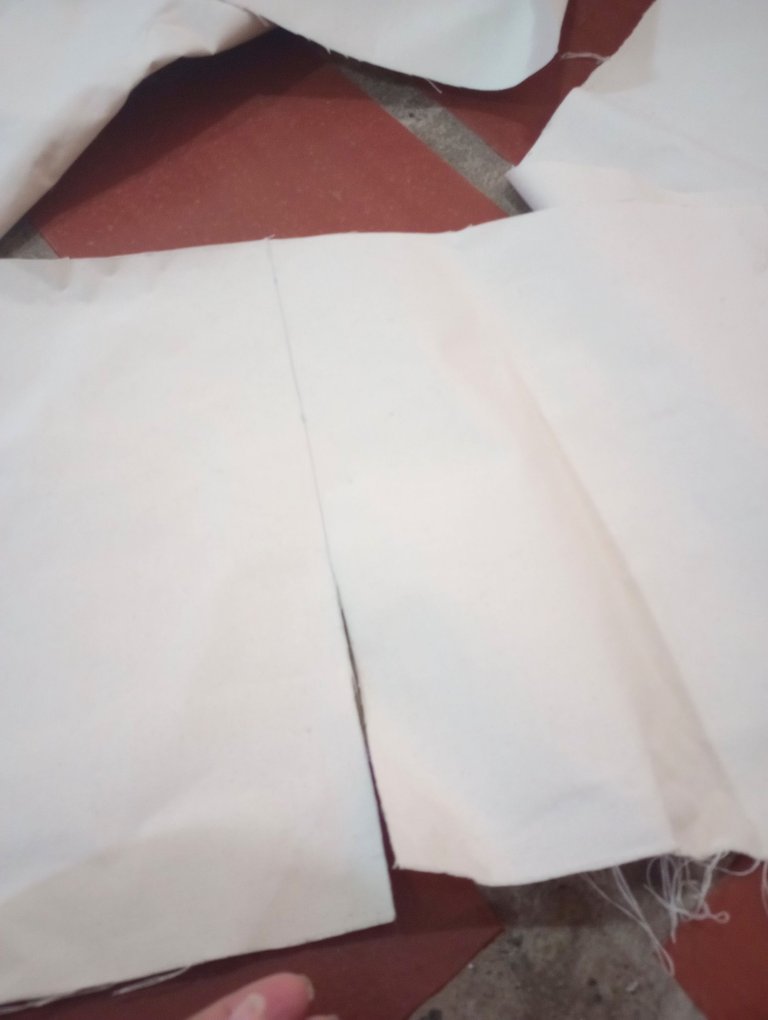
I started working on the canvases, first measuring and cutting all the canvas. The frames measured 26 x 31 centimeters. It was necessary to leave a few extra centimeters to be able to cover the frame and have them to glue on the back.
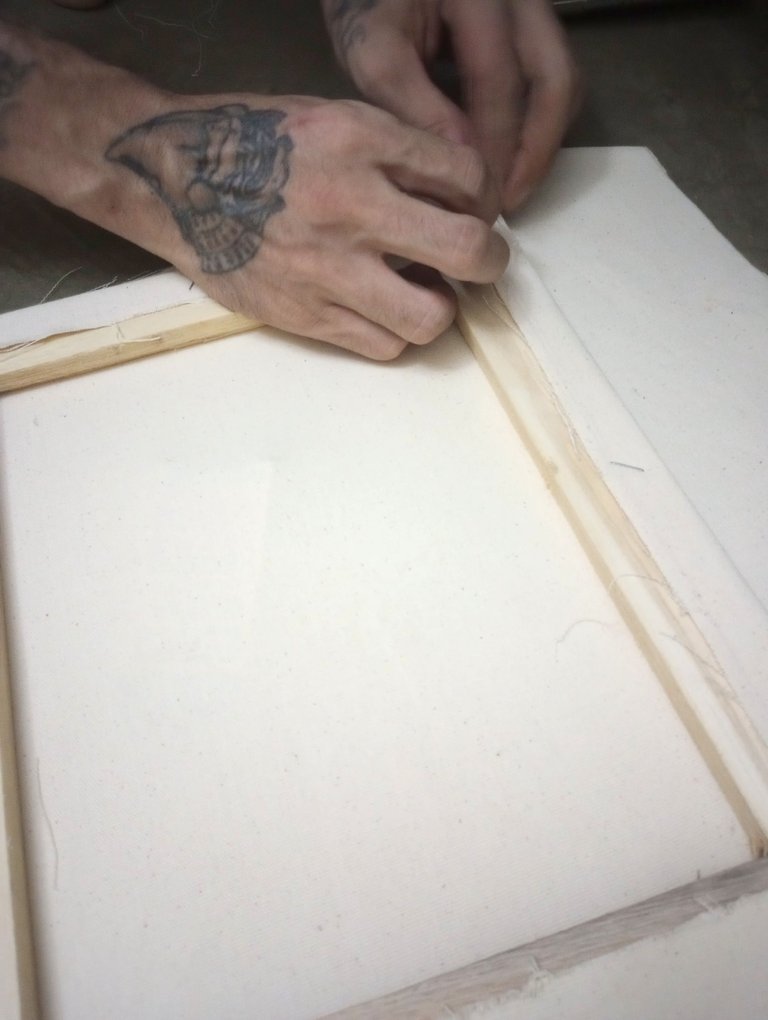
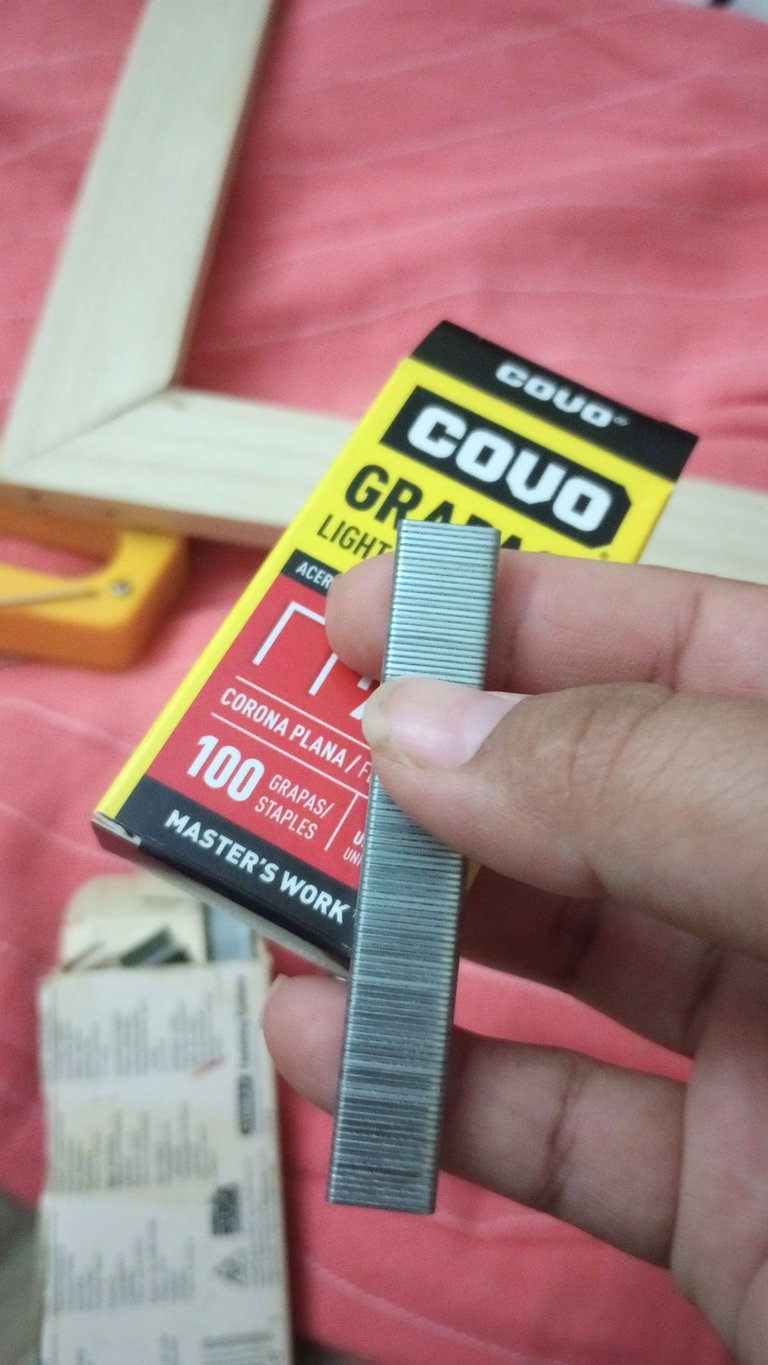
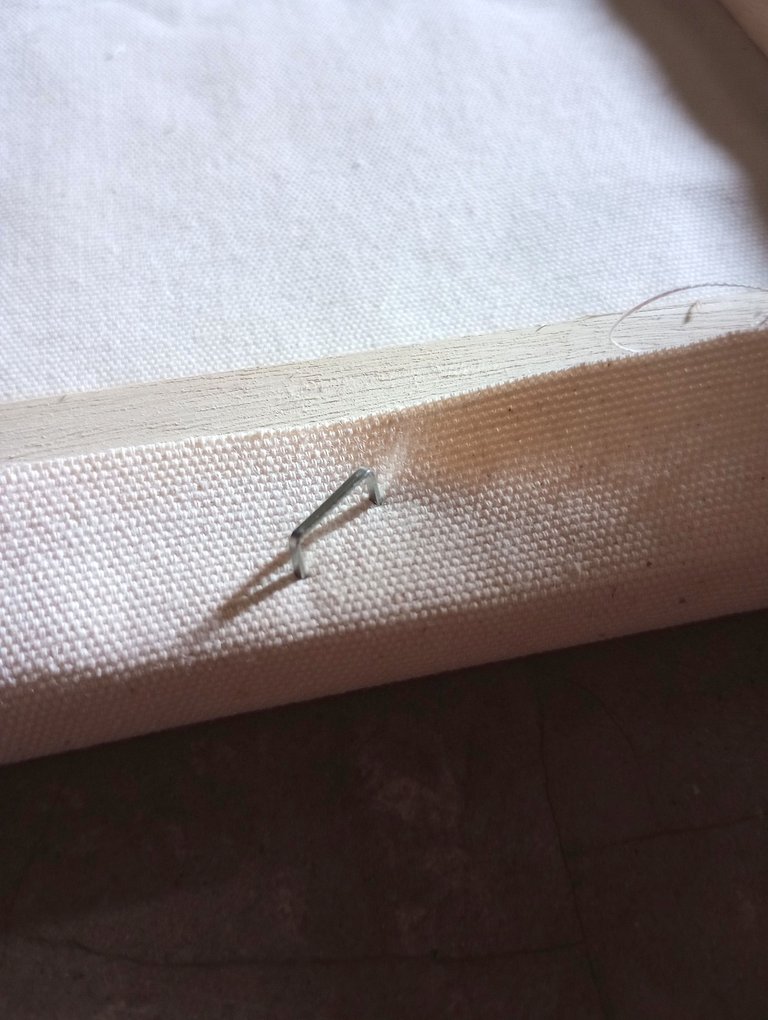
Acá es donde comienza la aventura con las grapas. Yo tenía unas en casa, y estaba confiada de que le iban a servir perfectamente a la grapadora que compramos.
Resulta ser que no entraban al canal y pues, tocó usar solo las que traía la grapadora consigo, que apenas eran 100. Mi esposo me ayudó a grapar la tela a los marcos.
Al acabarse las grapas intentamos con grapas de hojas pero estas eran muy débiles y se doblaban al tener contacto con la tela. Al menos lo intentamos. 😓
This is where the adventure with the staples begins. I had some at home, and I was confident that they would work perfectly with the stapler that we bought.
It turns out that they didn't fit in the channel and so, we had to use only the staples that the stapler came with, which were barely 100. My husband helped me staple the fabric to the frames.
When we ran out of staples, we tried using sheet staples but they were very weak and bent when they came in contact with the fabric. At least we gave it a try. 😓
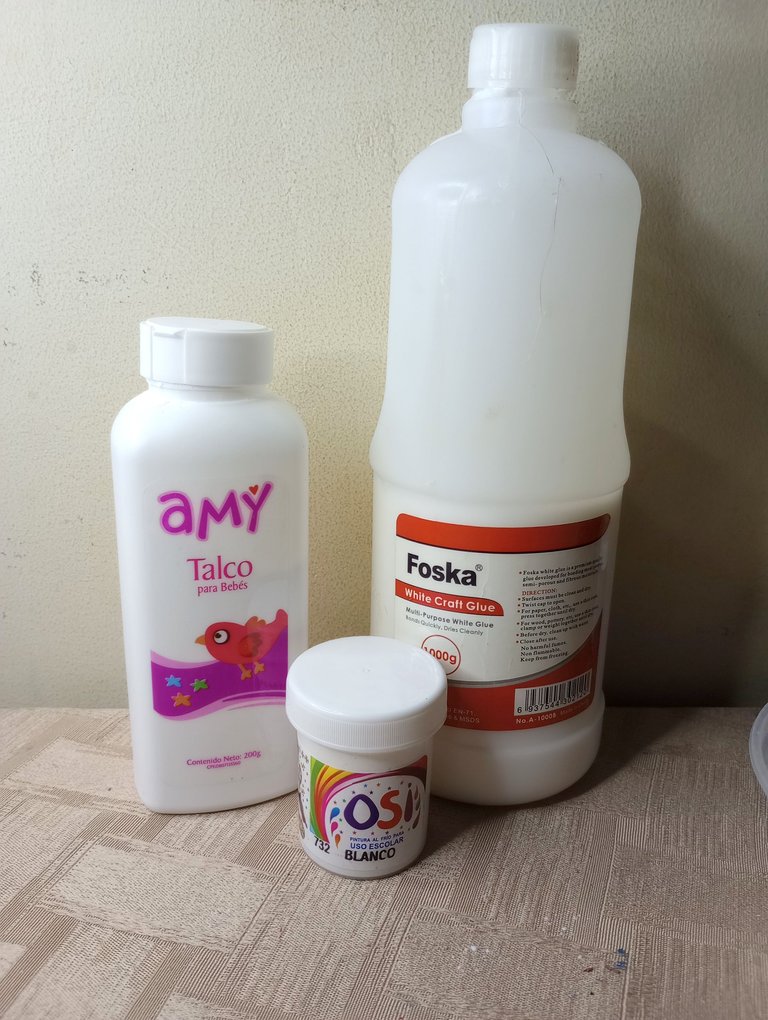
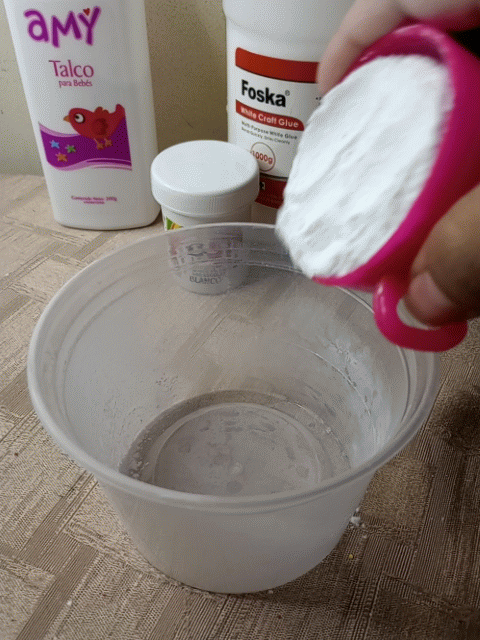
Con 8 lienzos armados, empecé a hacer el gesso para prepararlos. Anteriormente les compartí la forma de hacerlo en un post, pero volveré a recordarles.
Para esta mezcla se coloca una parte de talco (puede ser de cualquier tipo), una parte de pega blanca y dos parte de pintura al frío blanca.
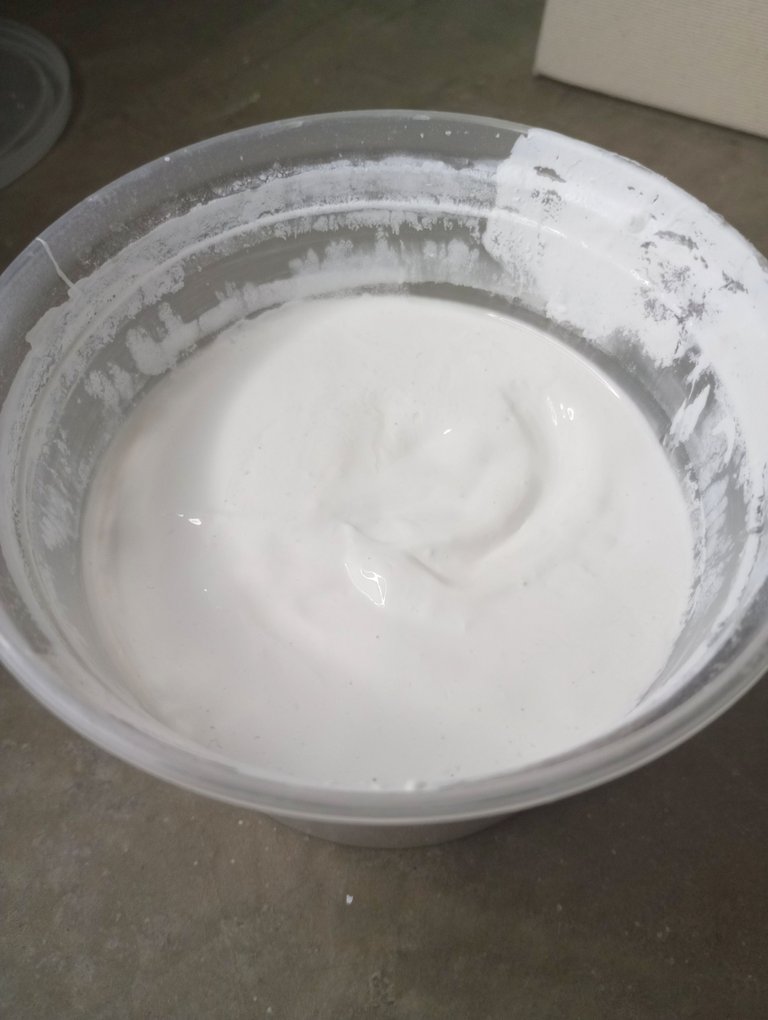
Se mezcla todo muy bien y se conserva bien tapado. Si notamos que está algo espeso podemos agregar un poco más de pintura o agua.

With 8 canvases assembled, I started to make the gesso to prepare them. I previously shared with you how to do it in a post, but I will remind you again.
For this mixture, put one part of talcum powder (it can be any kind), one part of white glue and two parts of white cold paint.
Mix everything very well and keep it well covered. If we notice that it is a little thick we can add a little more paint or water.
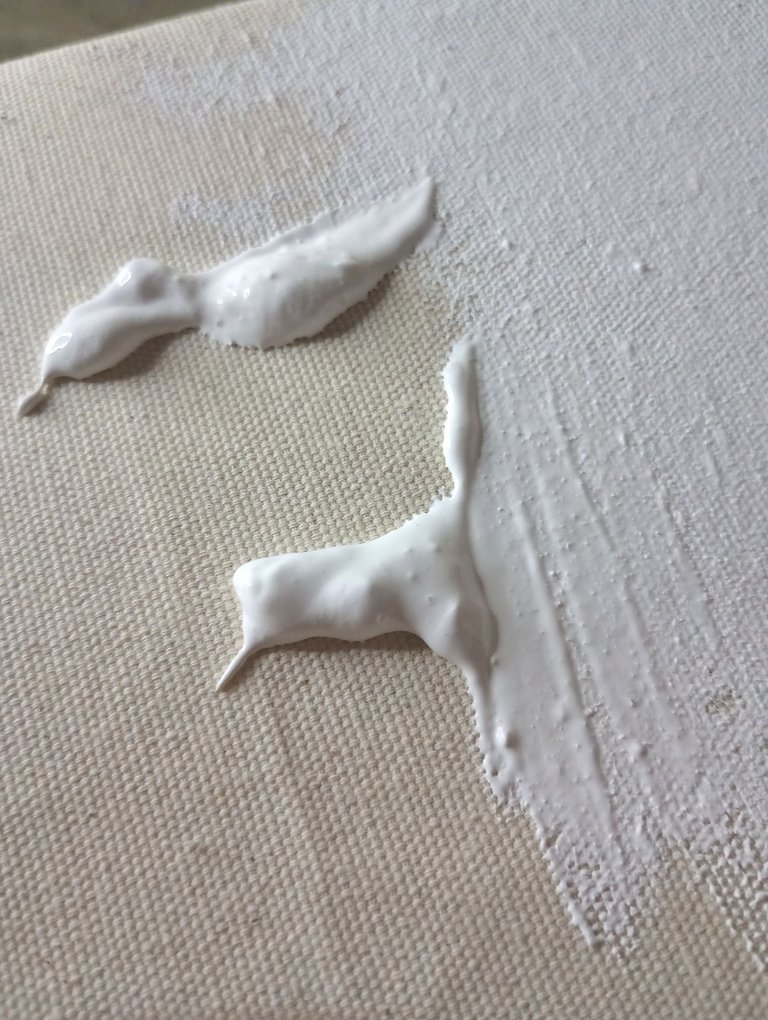
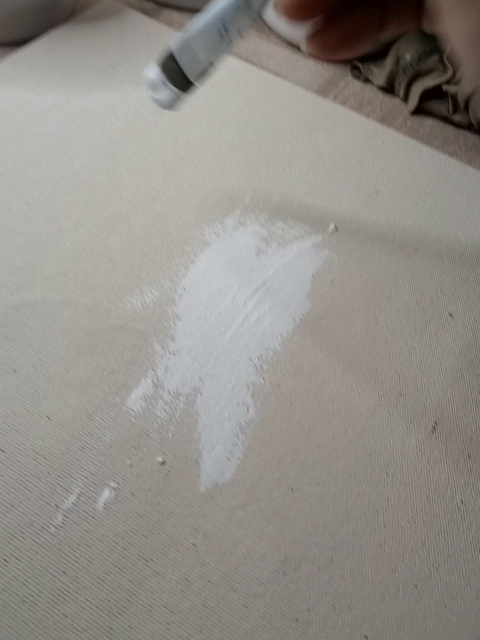
Se coloca una cantidad generosa de gesso en el lienzo y se va aplicando en toda la superficie. Es importante hacerlo primero en una sola dirección y luego darle vuelta al lienzo y hacerlo en la otra. Es decir si primero aplicamos de arriba a abajo, en la segunda capa lo haremos de izquierda a derecha.

Place a generous amount of gesso on the canvas and apply it all over the surface. It is important to do it first in one direction and then turn the canvas and do it in the other direction. That is to say, if first we apply from top to bottom, in the second layer we will do it from left to right.
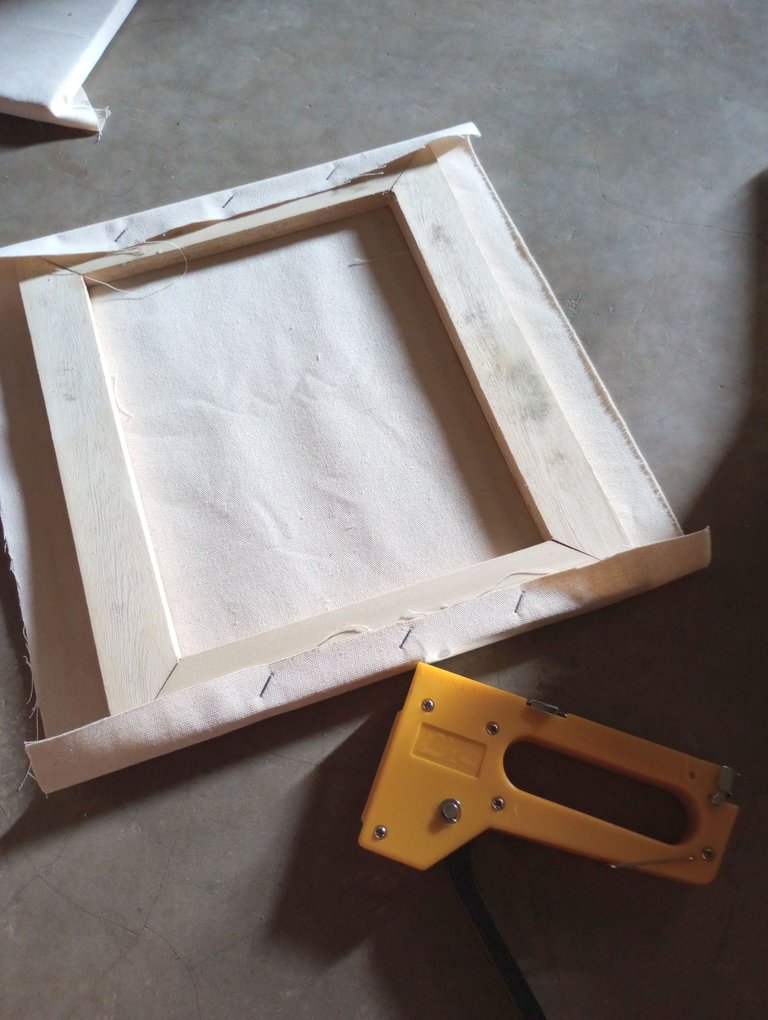
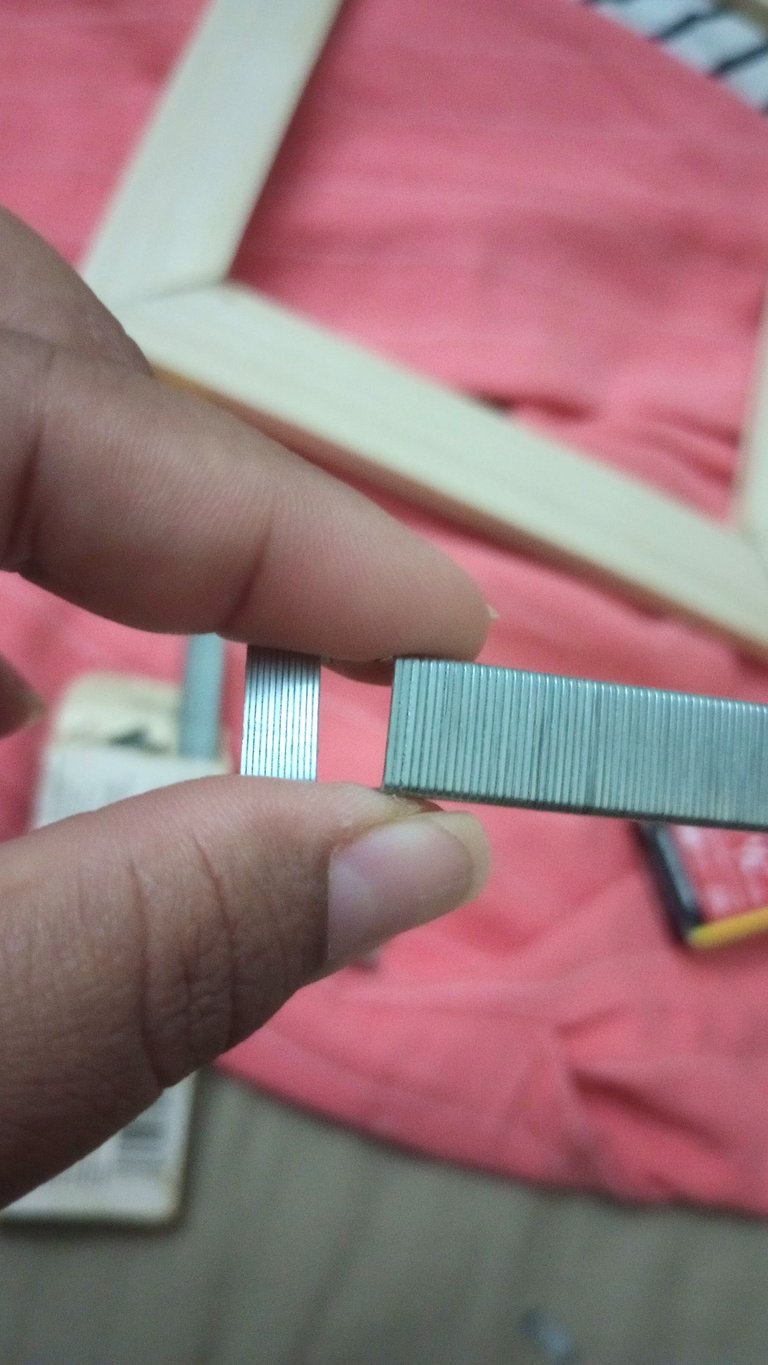
En cuanto a los otros lienzos, pues... me tocó hacer un tour por ferreterías, tapicerías y encontré un pequeño paquete de 200 grapas.
Estas traían otros dos tipos de grapas que no le servían a la grapadora pero bueno, lo importante es que estas si entraban al canal.
El detalle estaba que al colocarlas apenas se fijaban un poco en la madera. Pero como todo tiene solución busqué un martillo y comencé a clavarlas.
Me resultó la idea y así continué trabajando los 12 marcos restantes.
As for the other canvases, well... I had to make a tour of hardware stores and upholstery shops and I found a small package of 200 staples.
These had two other types of staples that did not fit the stapler, but well, the important thing is that they did fit in the channel.
The problem was that when I put them in place, they were only slightly fixed in the wood. But as everything has a solution, I looked for a hammer and started to nail them.
The idea worked and so I continued working on the remaining 12 frames.
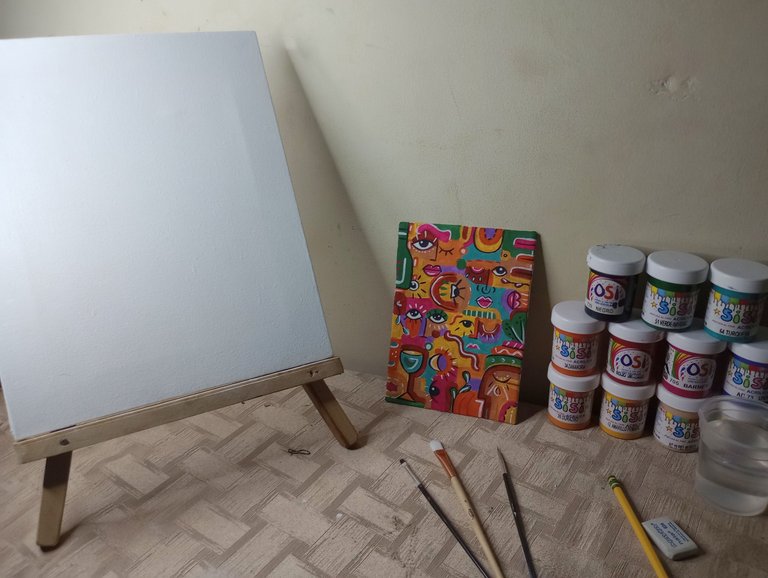
Luego de que el gesso se secó completamente había que pasarle una lija fina para quitar la textura y que quedara una superficie suave.
Ahora sí estábamos listos para pintar la gran obra. ¿Quieren ver el proceso? se los enseño en un próximo post. ♥
After the gesso was completely dry, we had to sand it with fine sandpaper to remove the texture and leave a smooth surface.
Now we were ready to paint the big work, do you want to see the process? I'll show you in a future post. ♥

Espero haya sido de tu agrado y provecho.
Un gran abrazo a todos, y nos leemos en un próximo post
• Lakrearte en Hive •
Att: Estefania Garcia ♥

Imágenes y separadores de mi autoría
Portada editada en Canva
Fotografías tomadas con un Moto G31
Texto traducido en Google ImTranslate v.14.27
Hola @estefania3, un gran trabajo elaborar los lienzos, gracias por compartir la preparación del gesso.
Saludos!
Sii, lleva su buen trabajo pero los resultados valen la pena, uno se ahorra mucho al hacerlos y no comprar el canvas ya listo. Saludos y espero sea de provecho la información 😊
En la universidad nos enseñaron como preparar el lienzo, pero se me olvido 🤣, gracias a ti puedo volver a hacerlo
Que bueno que hayas podido refrescar conocimientos con mi post. A poner manos a la obra. Jaja 😊
https://twitter.com/hivediy47901/status/1774302384493089180