[ESP-ENG] Designing Beautiful Case for my Lenses | Diseñando Hermoso estuche para mis Lentes
Hello friends and friends of hive, I hope you are all very well, today I am excited to show you a new one of my creations, which is a cute lining for my glasses, designed my way and with my tastes, you can do this too, design your way every thing you do and put your style to your brand of creativity, so I hope you like this I did to show you that if we are able to design anything we do, so let's see the step.
.jpg)
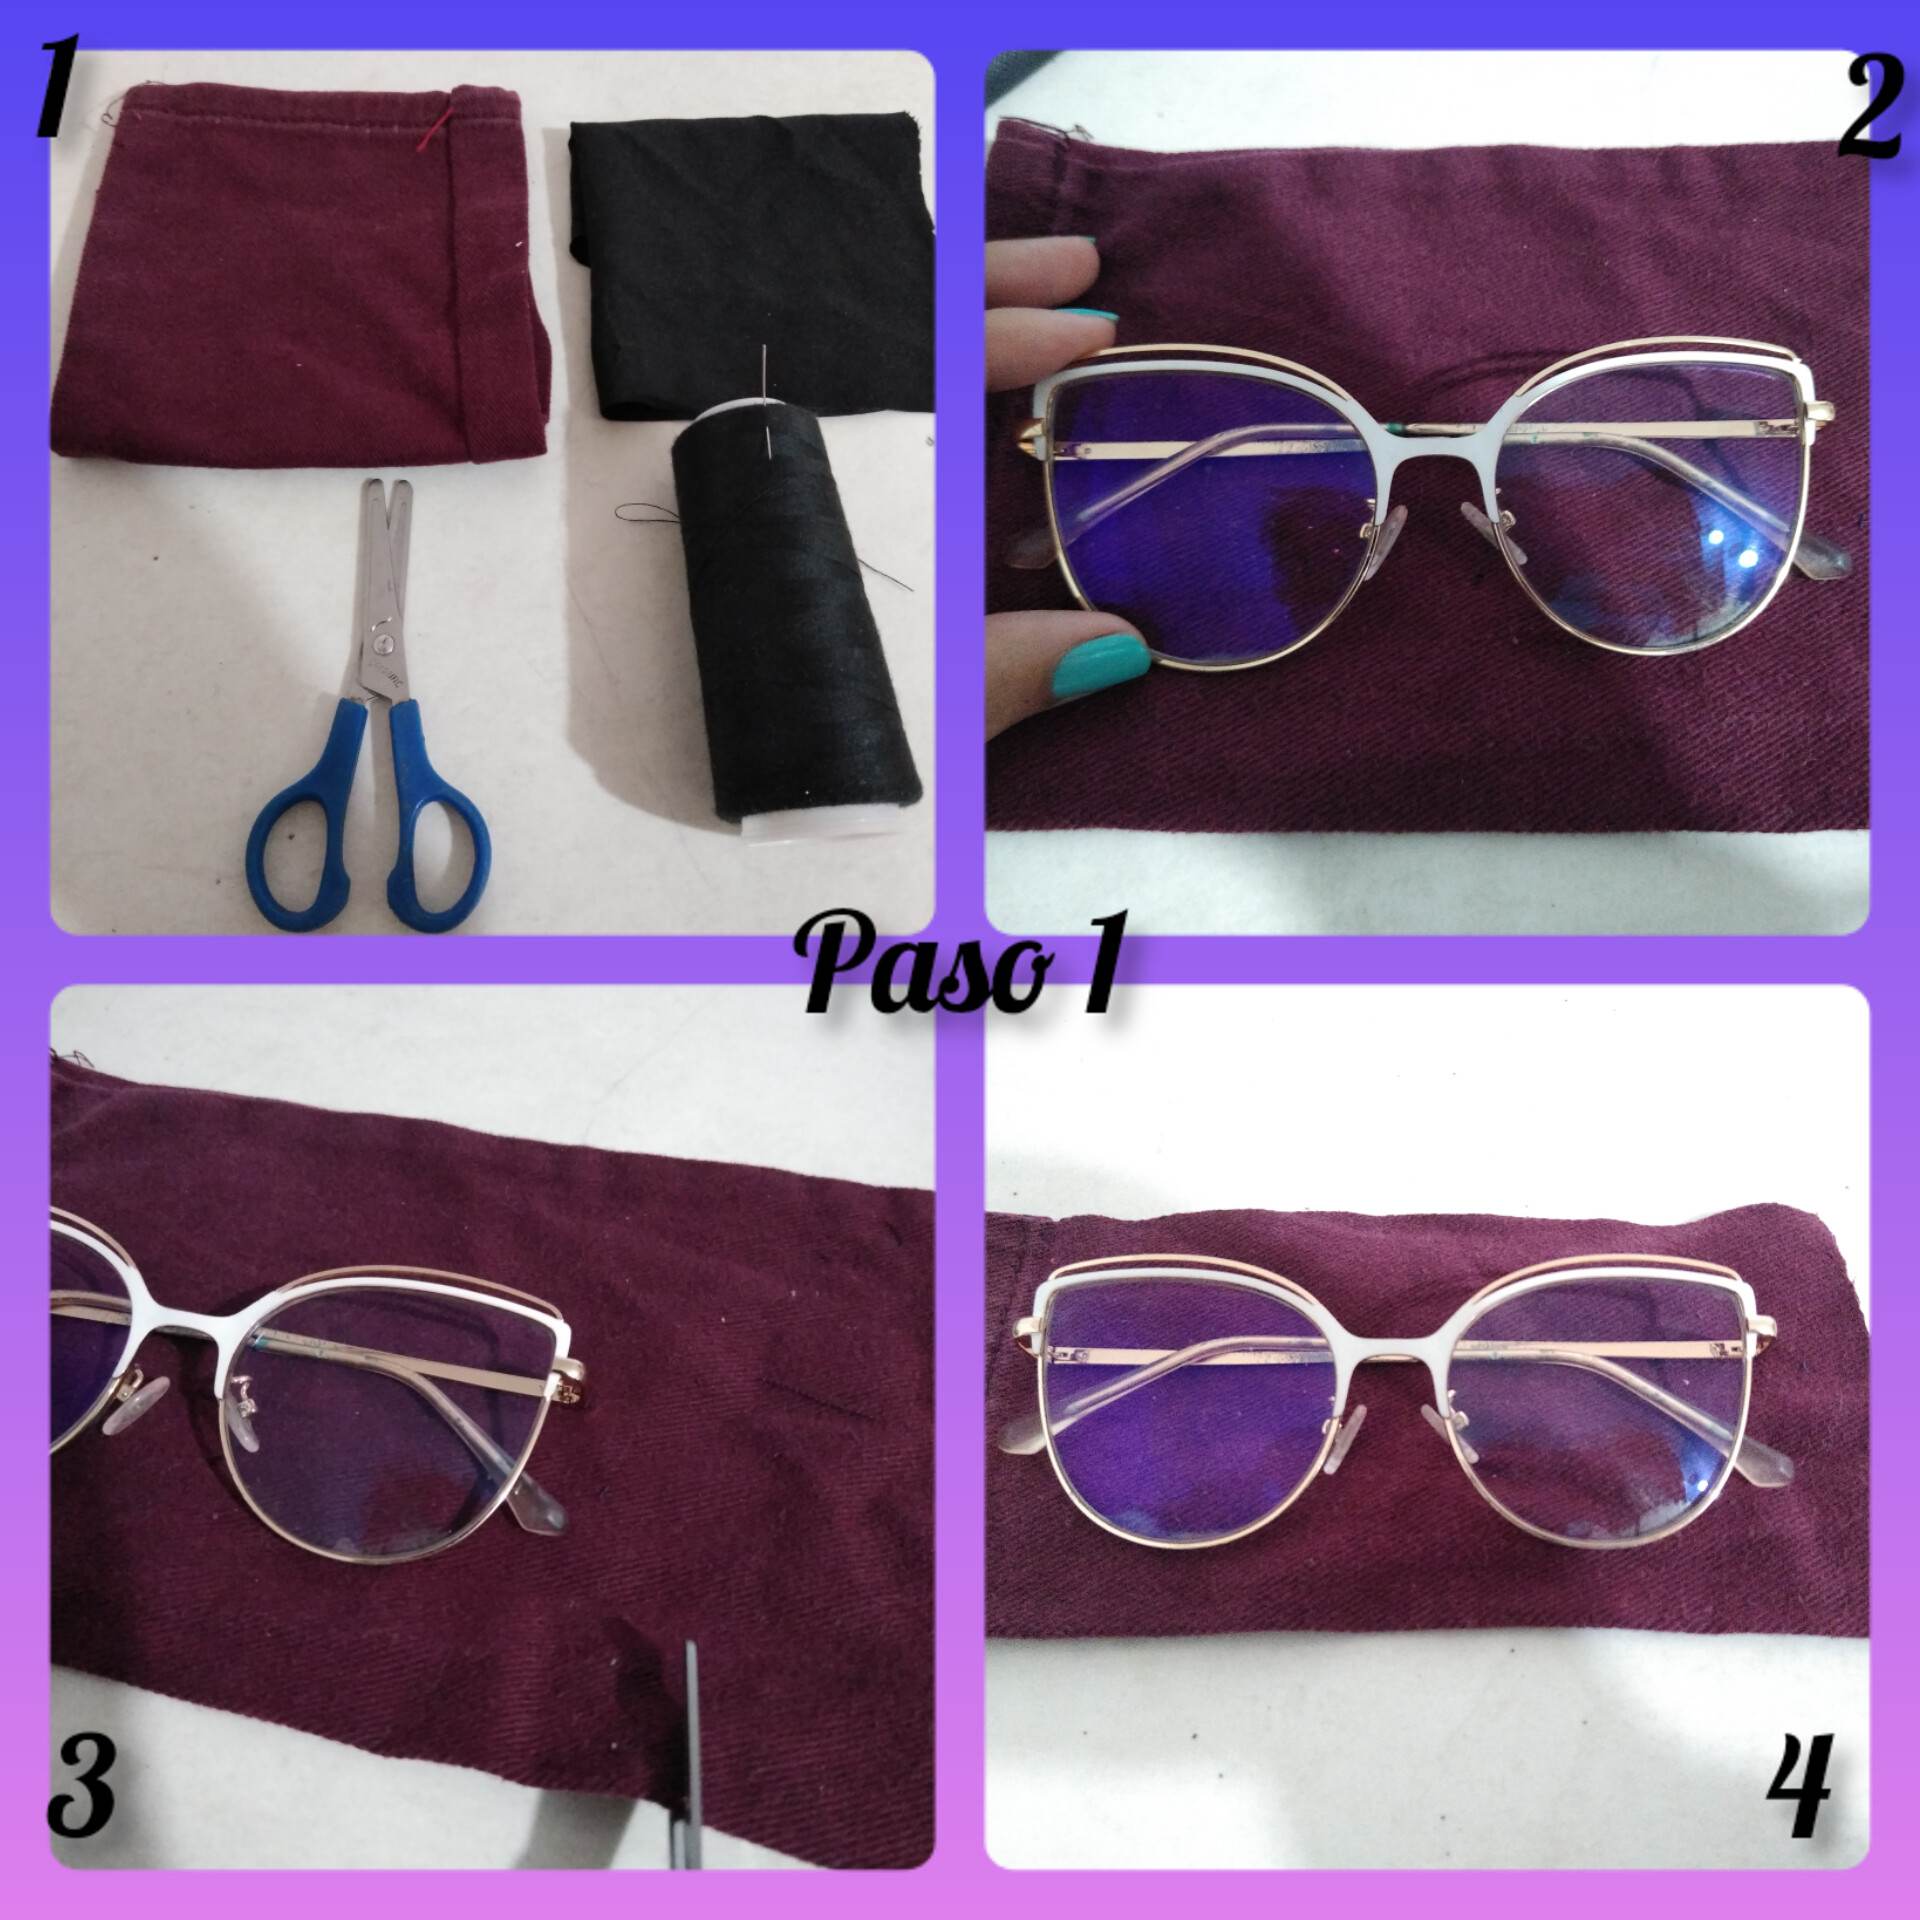
Paso 1: para realizar este lindo forro usé las telas de mi gusto, en mi caso esta tela vinotinta que pueden ver es la parte de abajo de un jean, algo que rehusé para o votarlo, es un color muy lindo, y la tela de jean es dura y cubrirá muy bien los lentes, a parte de esa tela usaré una tela negra que con esa haré la parte que cerrará mi estuche, lo que haré será colocar mis lentes encima de la tela para cortar la medida correcta de lo ancho y de lo largo, y cortaremos esa pieza.
Step 1: to make this nice lining I used the fabrics of my taste, in my case this vinotint fabric that you can see is the bottom of a jean, something I refused to or vote it, it is a very nice color, and the jean fabric is hard and will cover the glasses very well, apart from that fabric I will use a black fabric that with that I will make the part that will close my case, what I will do is place my glasses over the fabric to cut the correct measure of the width and length, and we will cut that piece.
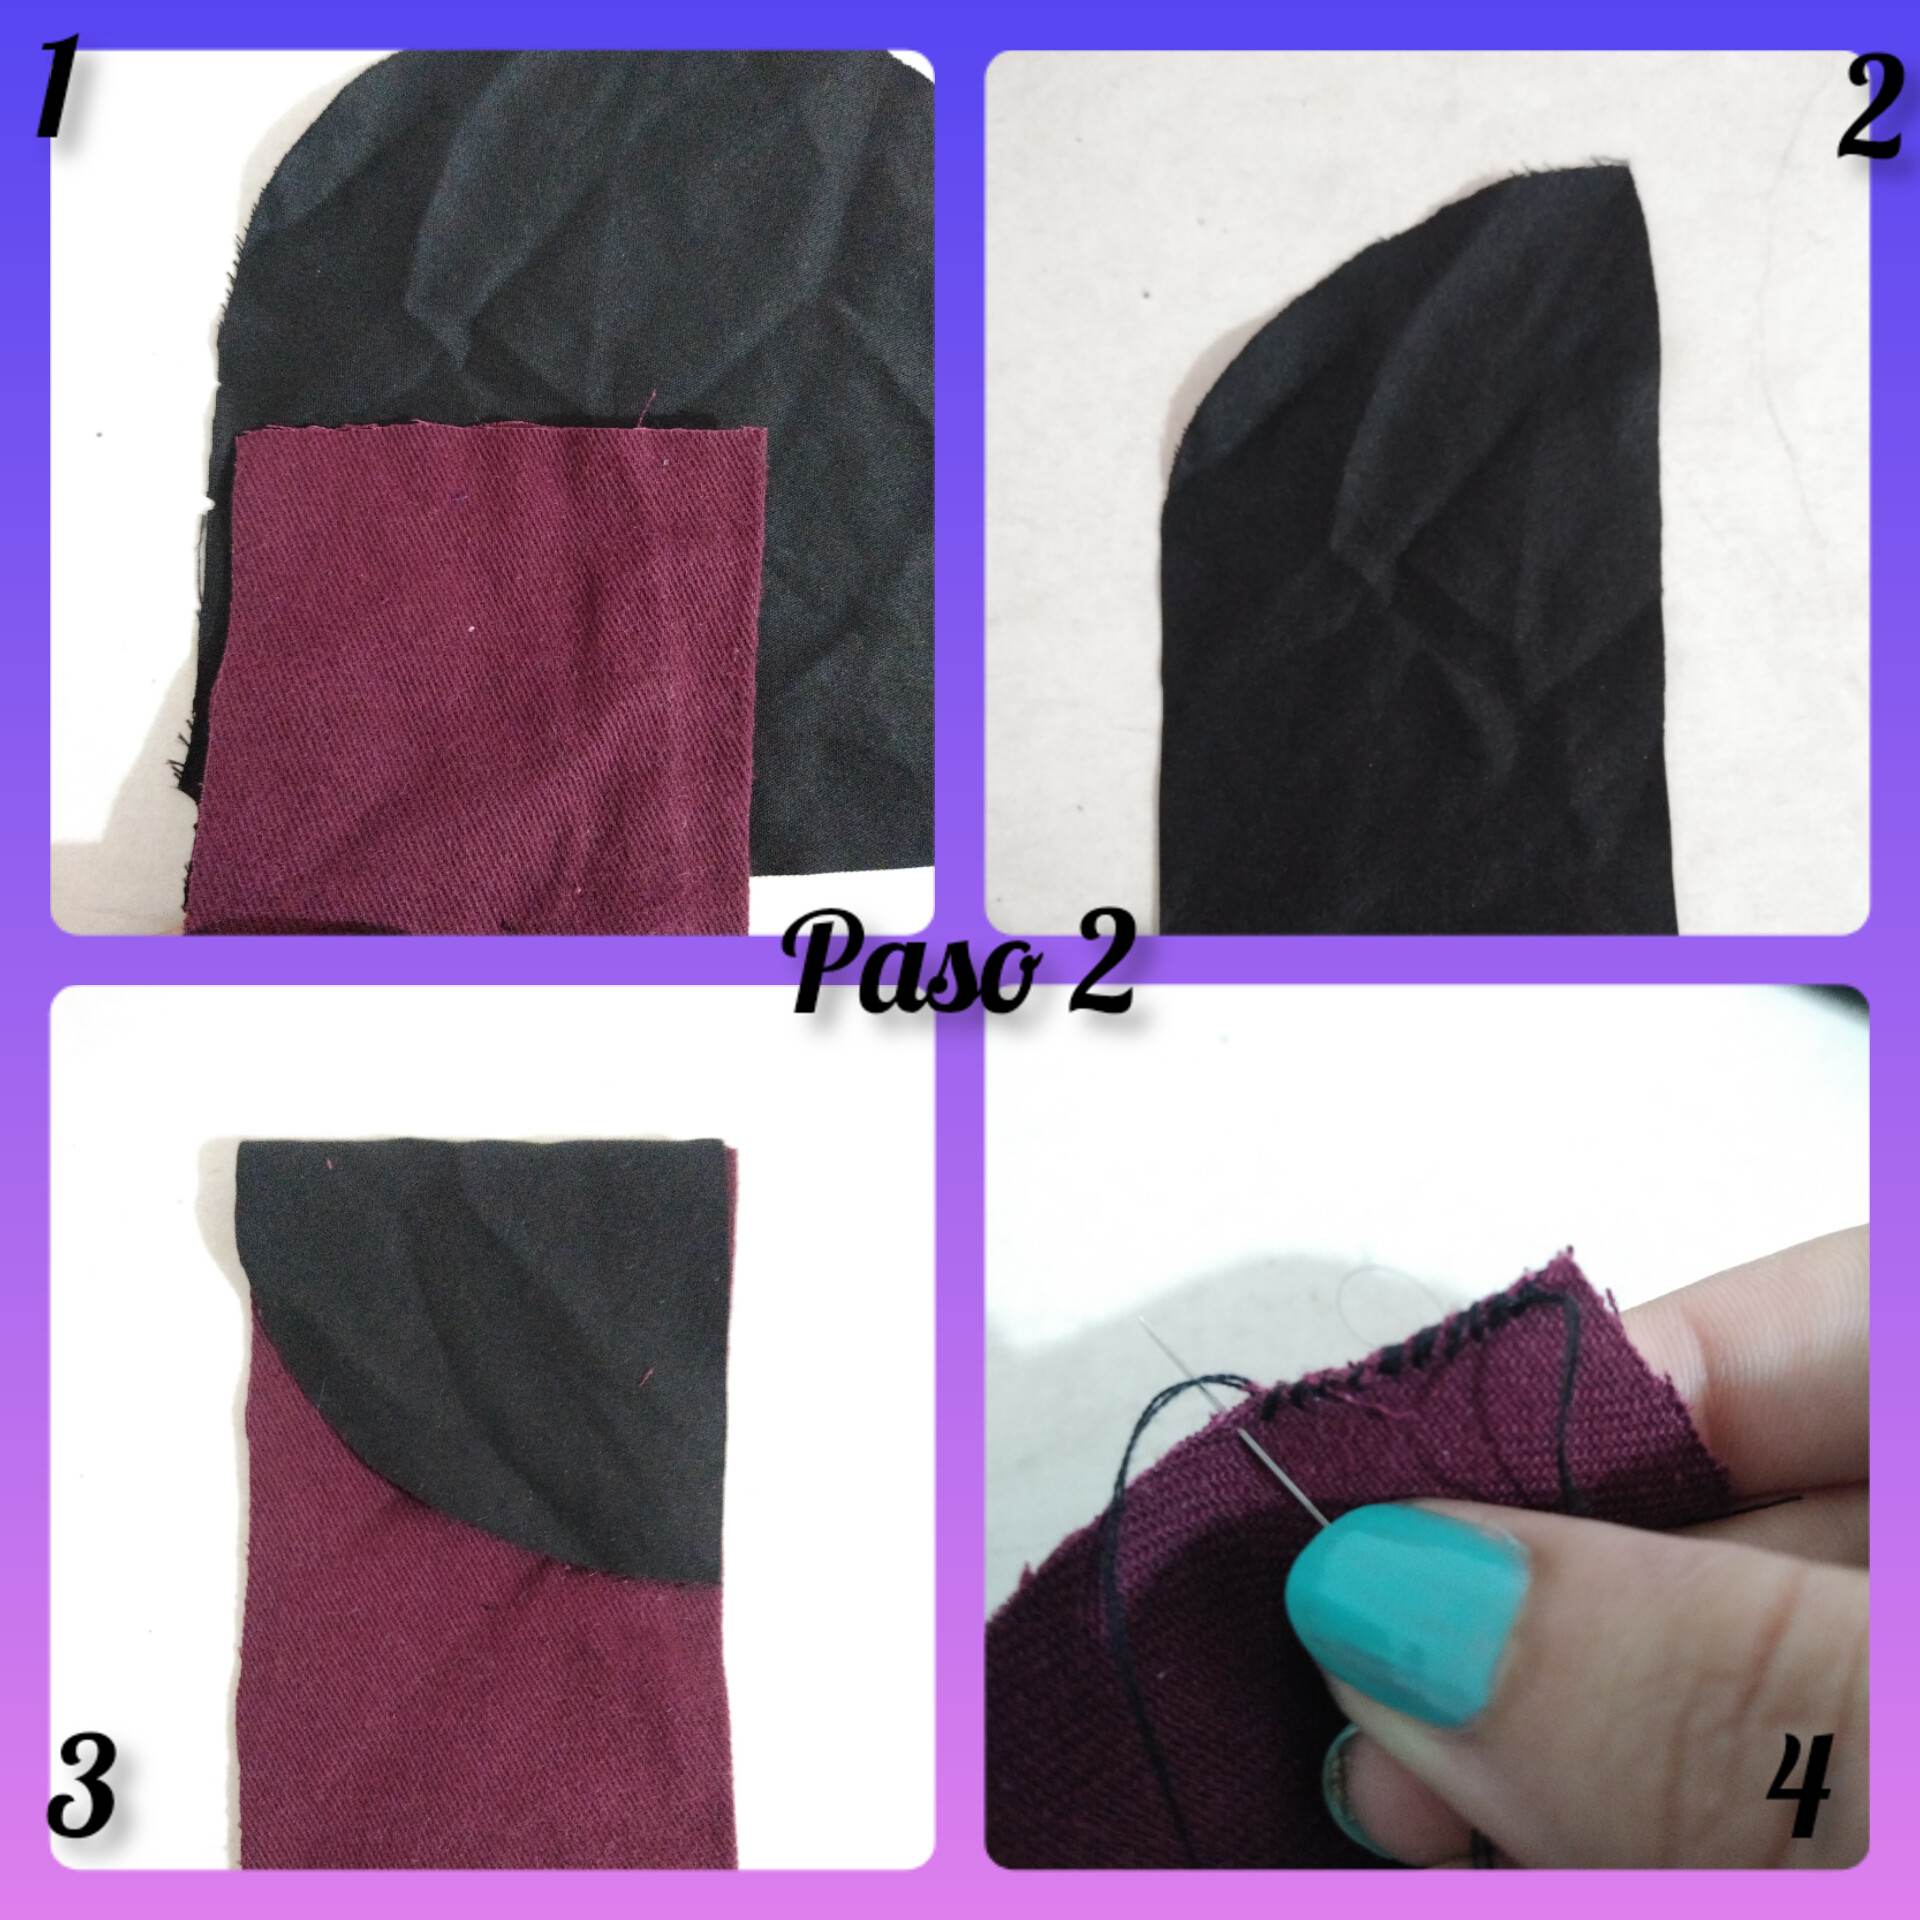
Paso 2: lo que haré ahora será que con la medida que corté de la pieza de color vino, ahora cortaré en la tela negra la misma medida de ancho, lo cortaremos y arriba haremos un corte distinto que será ovalado en la punta para hacerlo distinto al modelo común. Ahora lo que haré será voltear la pieza vinotinta para coser por dentro como lo muestra en la imagen y coseremos cuidadosamente.
Step 2: what I will do now is that with the measure I cut from the wine-colored piece, now I will cut in the black fabric the same measure of width, we will cut it and we will make a different cut at the top that will be oval at the tip to make it different from the common model. Now what I will do is flip the vinotint piece to sew inside as shown in the picture and sew carefully.
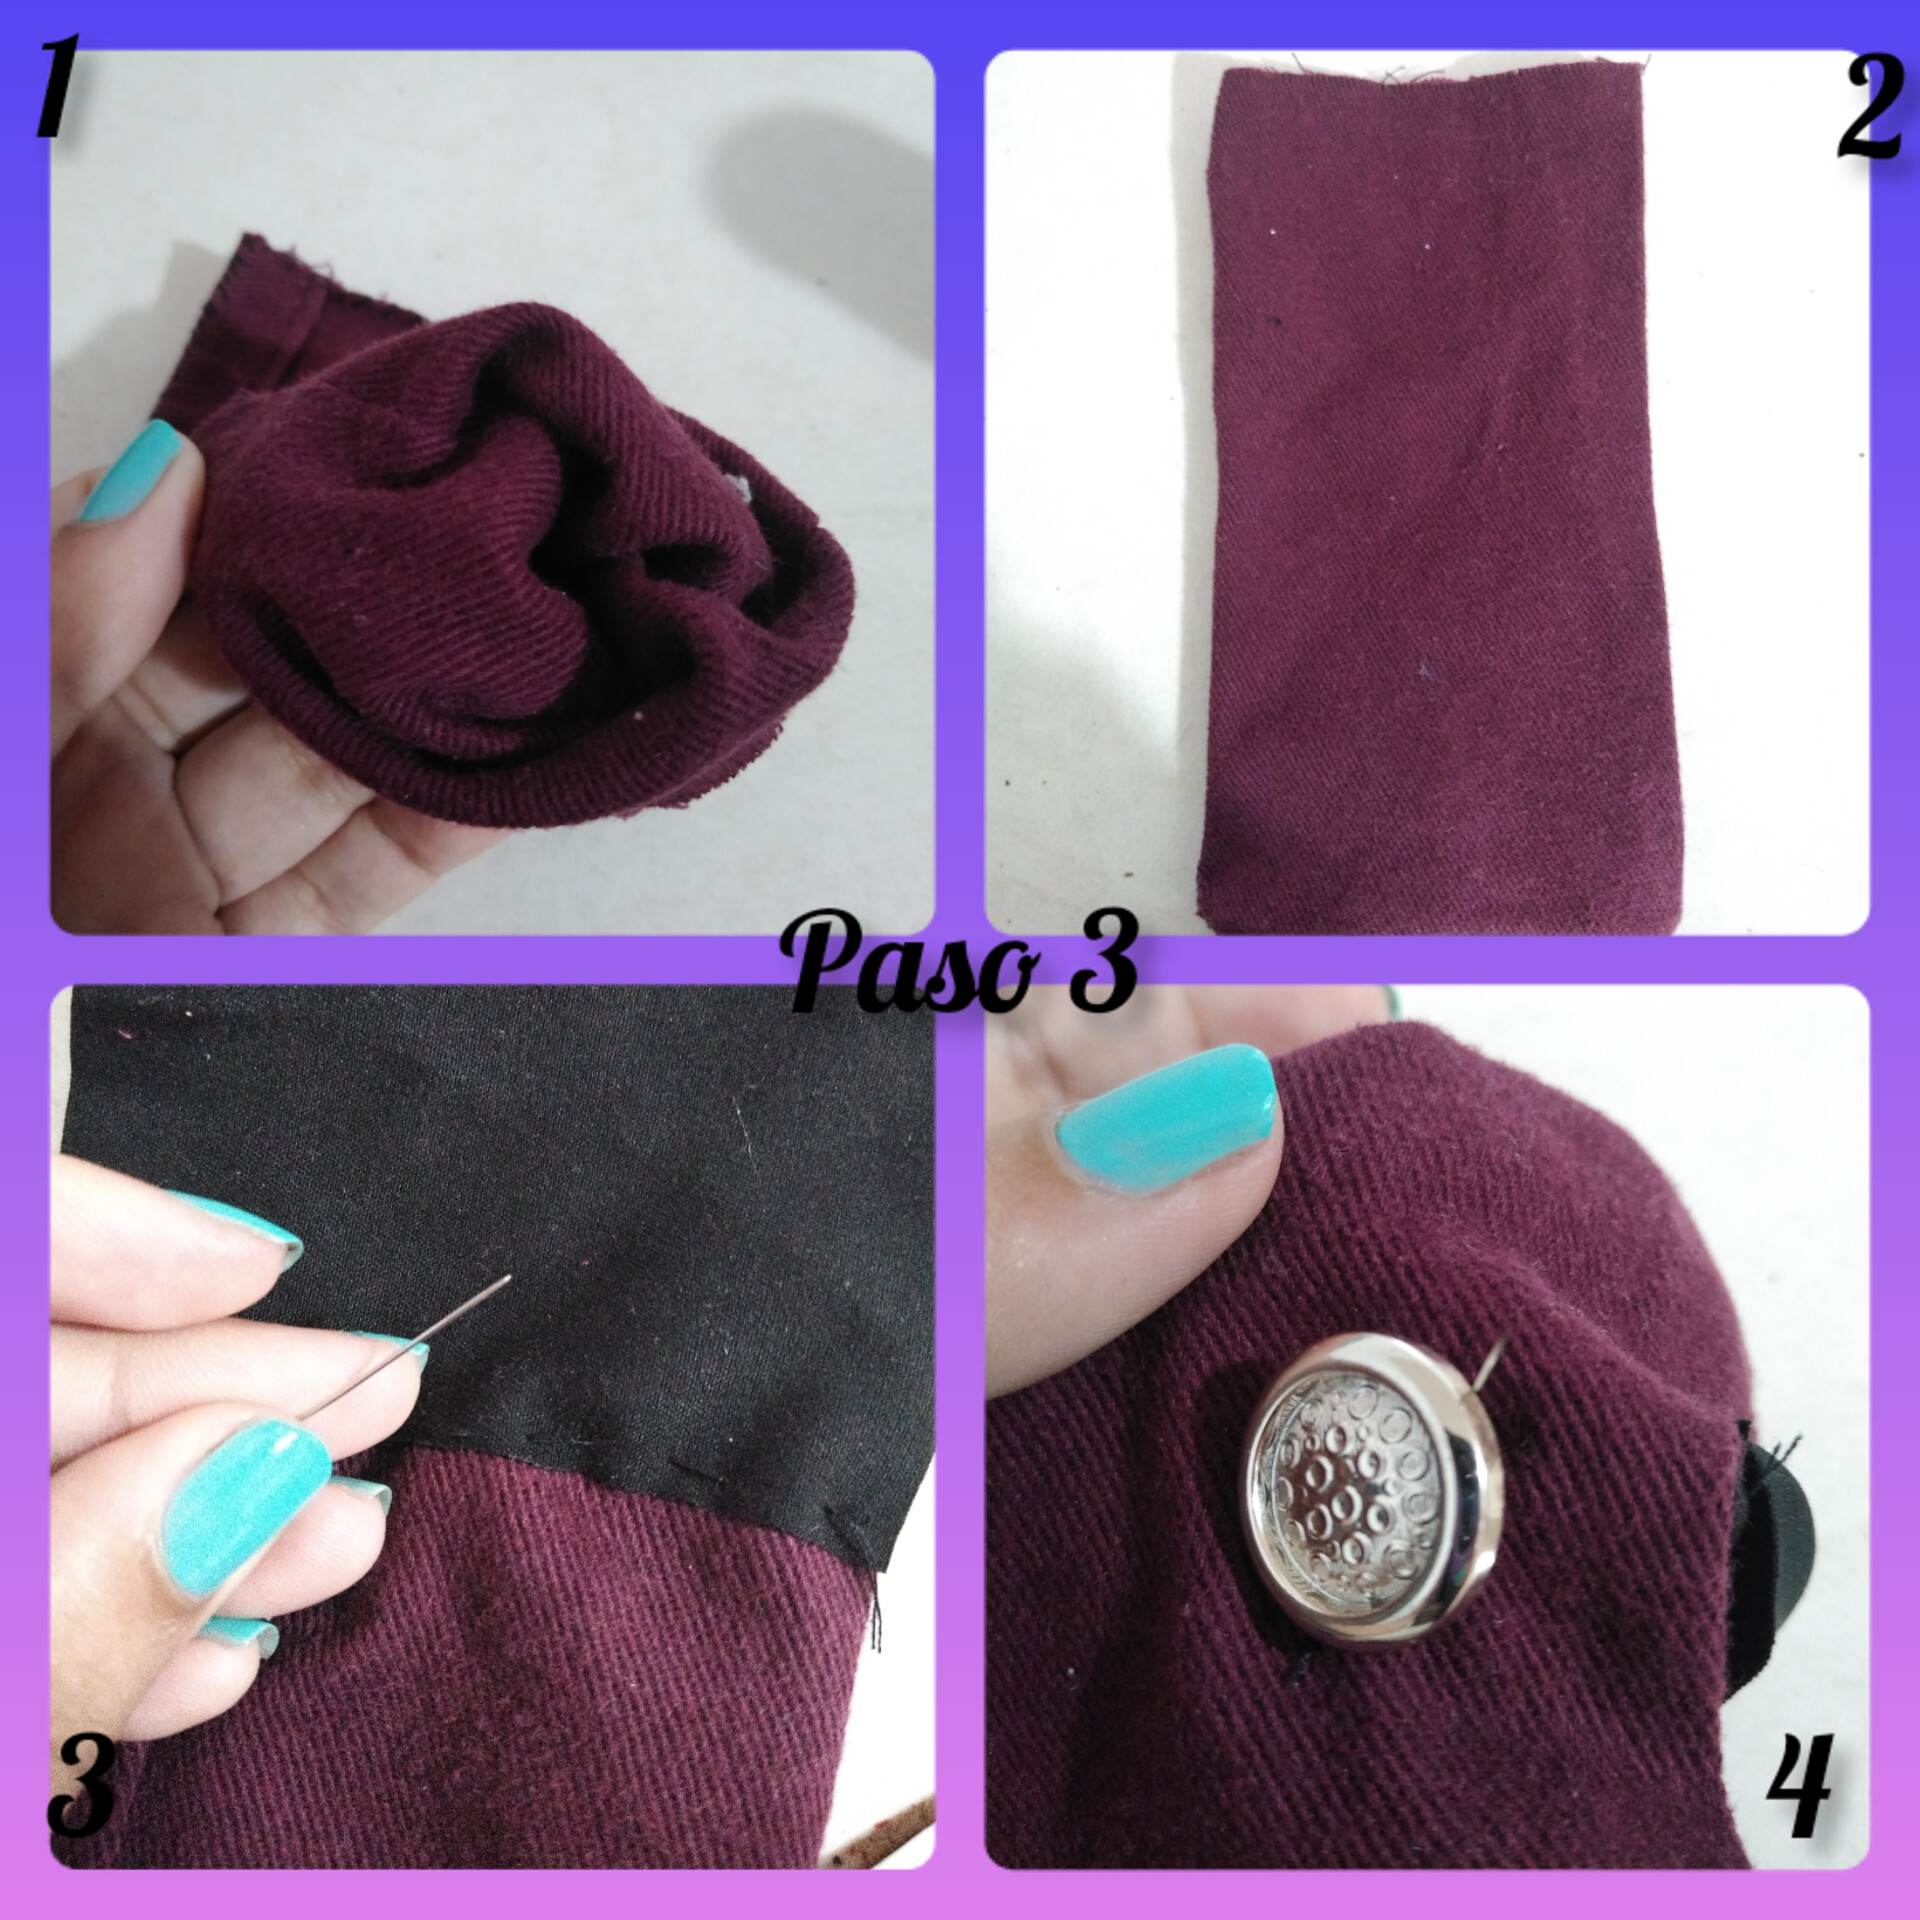
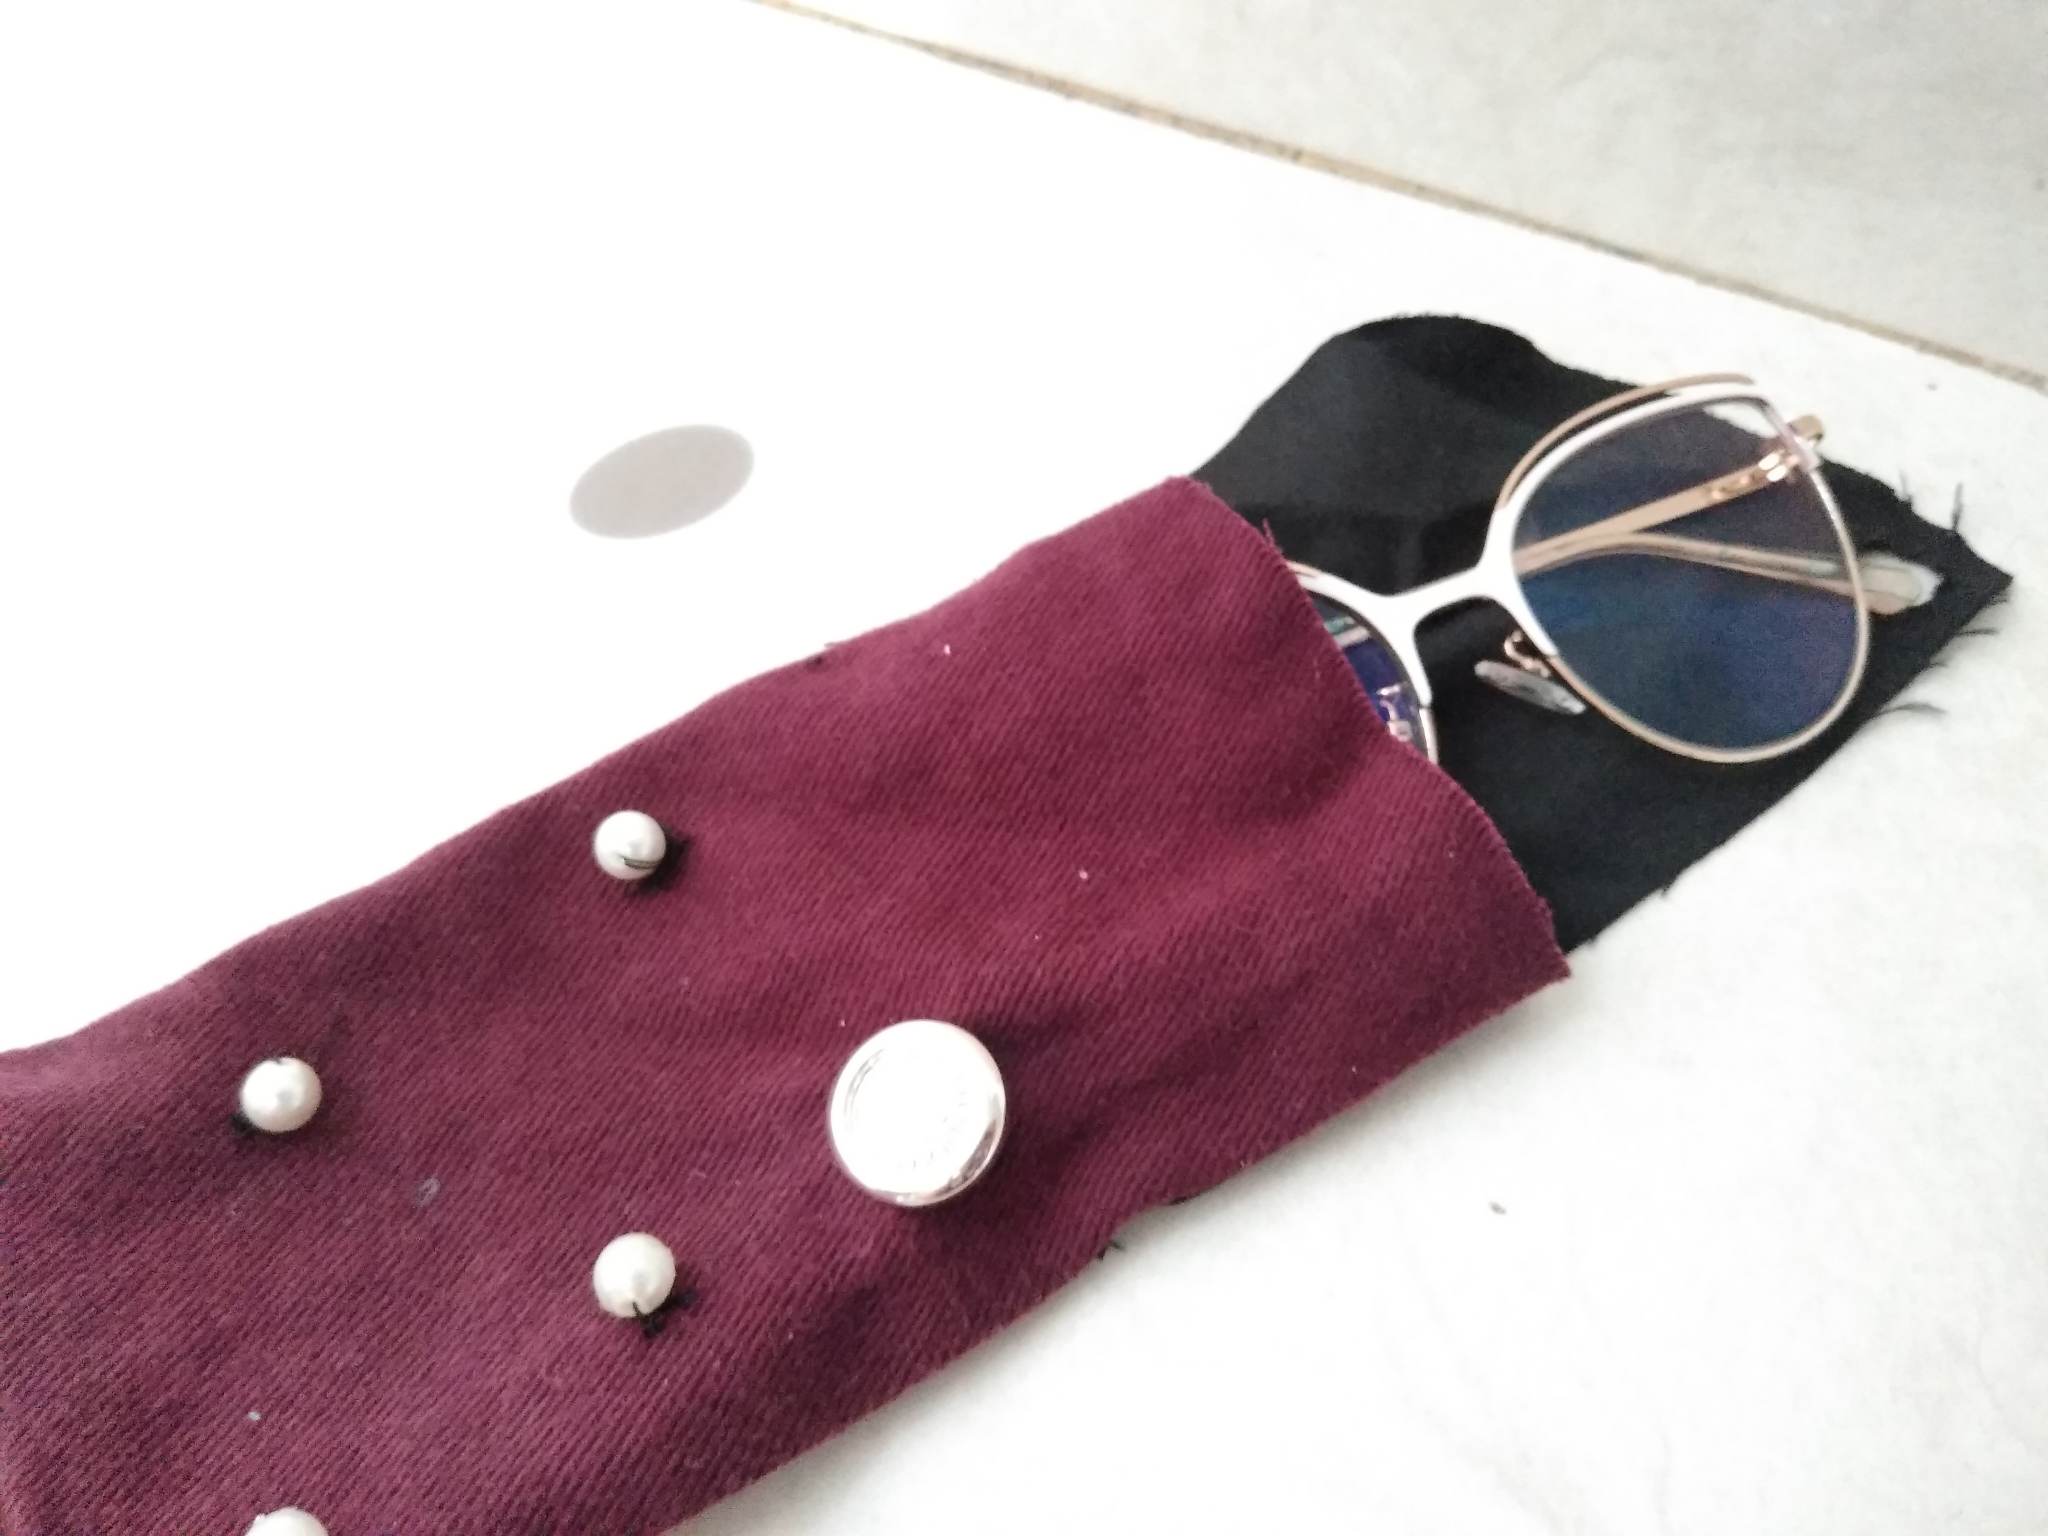
Paso 3: luego de haber cosido dejando una abertura arriba por donde entrará los lentes, procederemos a voltear esta pieza como lo muestra la imagen, lo que haremos ahora será coser la pieza negra a la parte trasera del estuche, luego procederemos a coser el botón en la esquina que es donde irá el botón.
Step 3: after sewing leaving an opening at the top where the glasses will enter, we will proceed to flip this piece as shown in the image, what we will do now is to sew the black piece to the back of the case, then proceed to sew the button in the corner where the button will go.
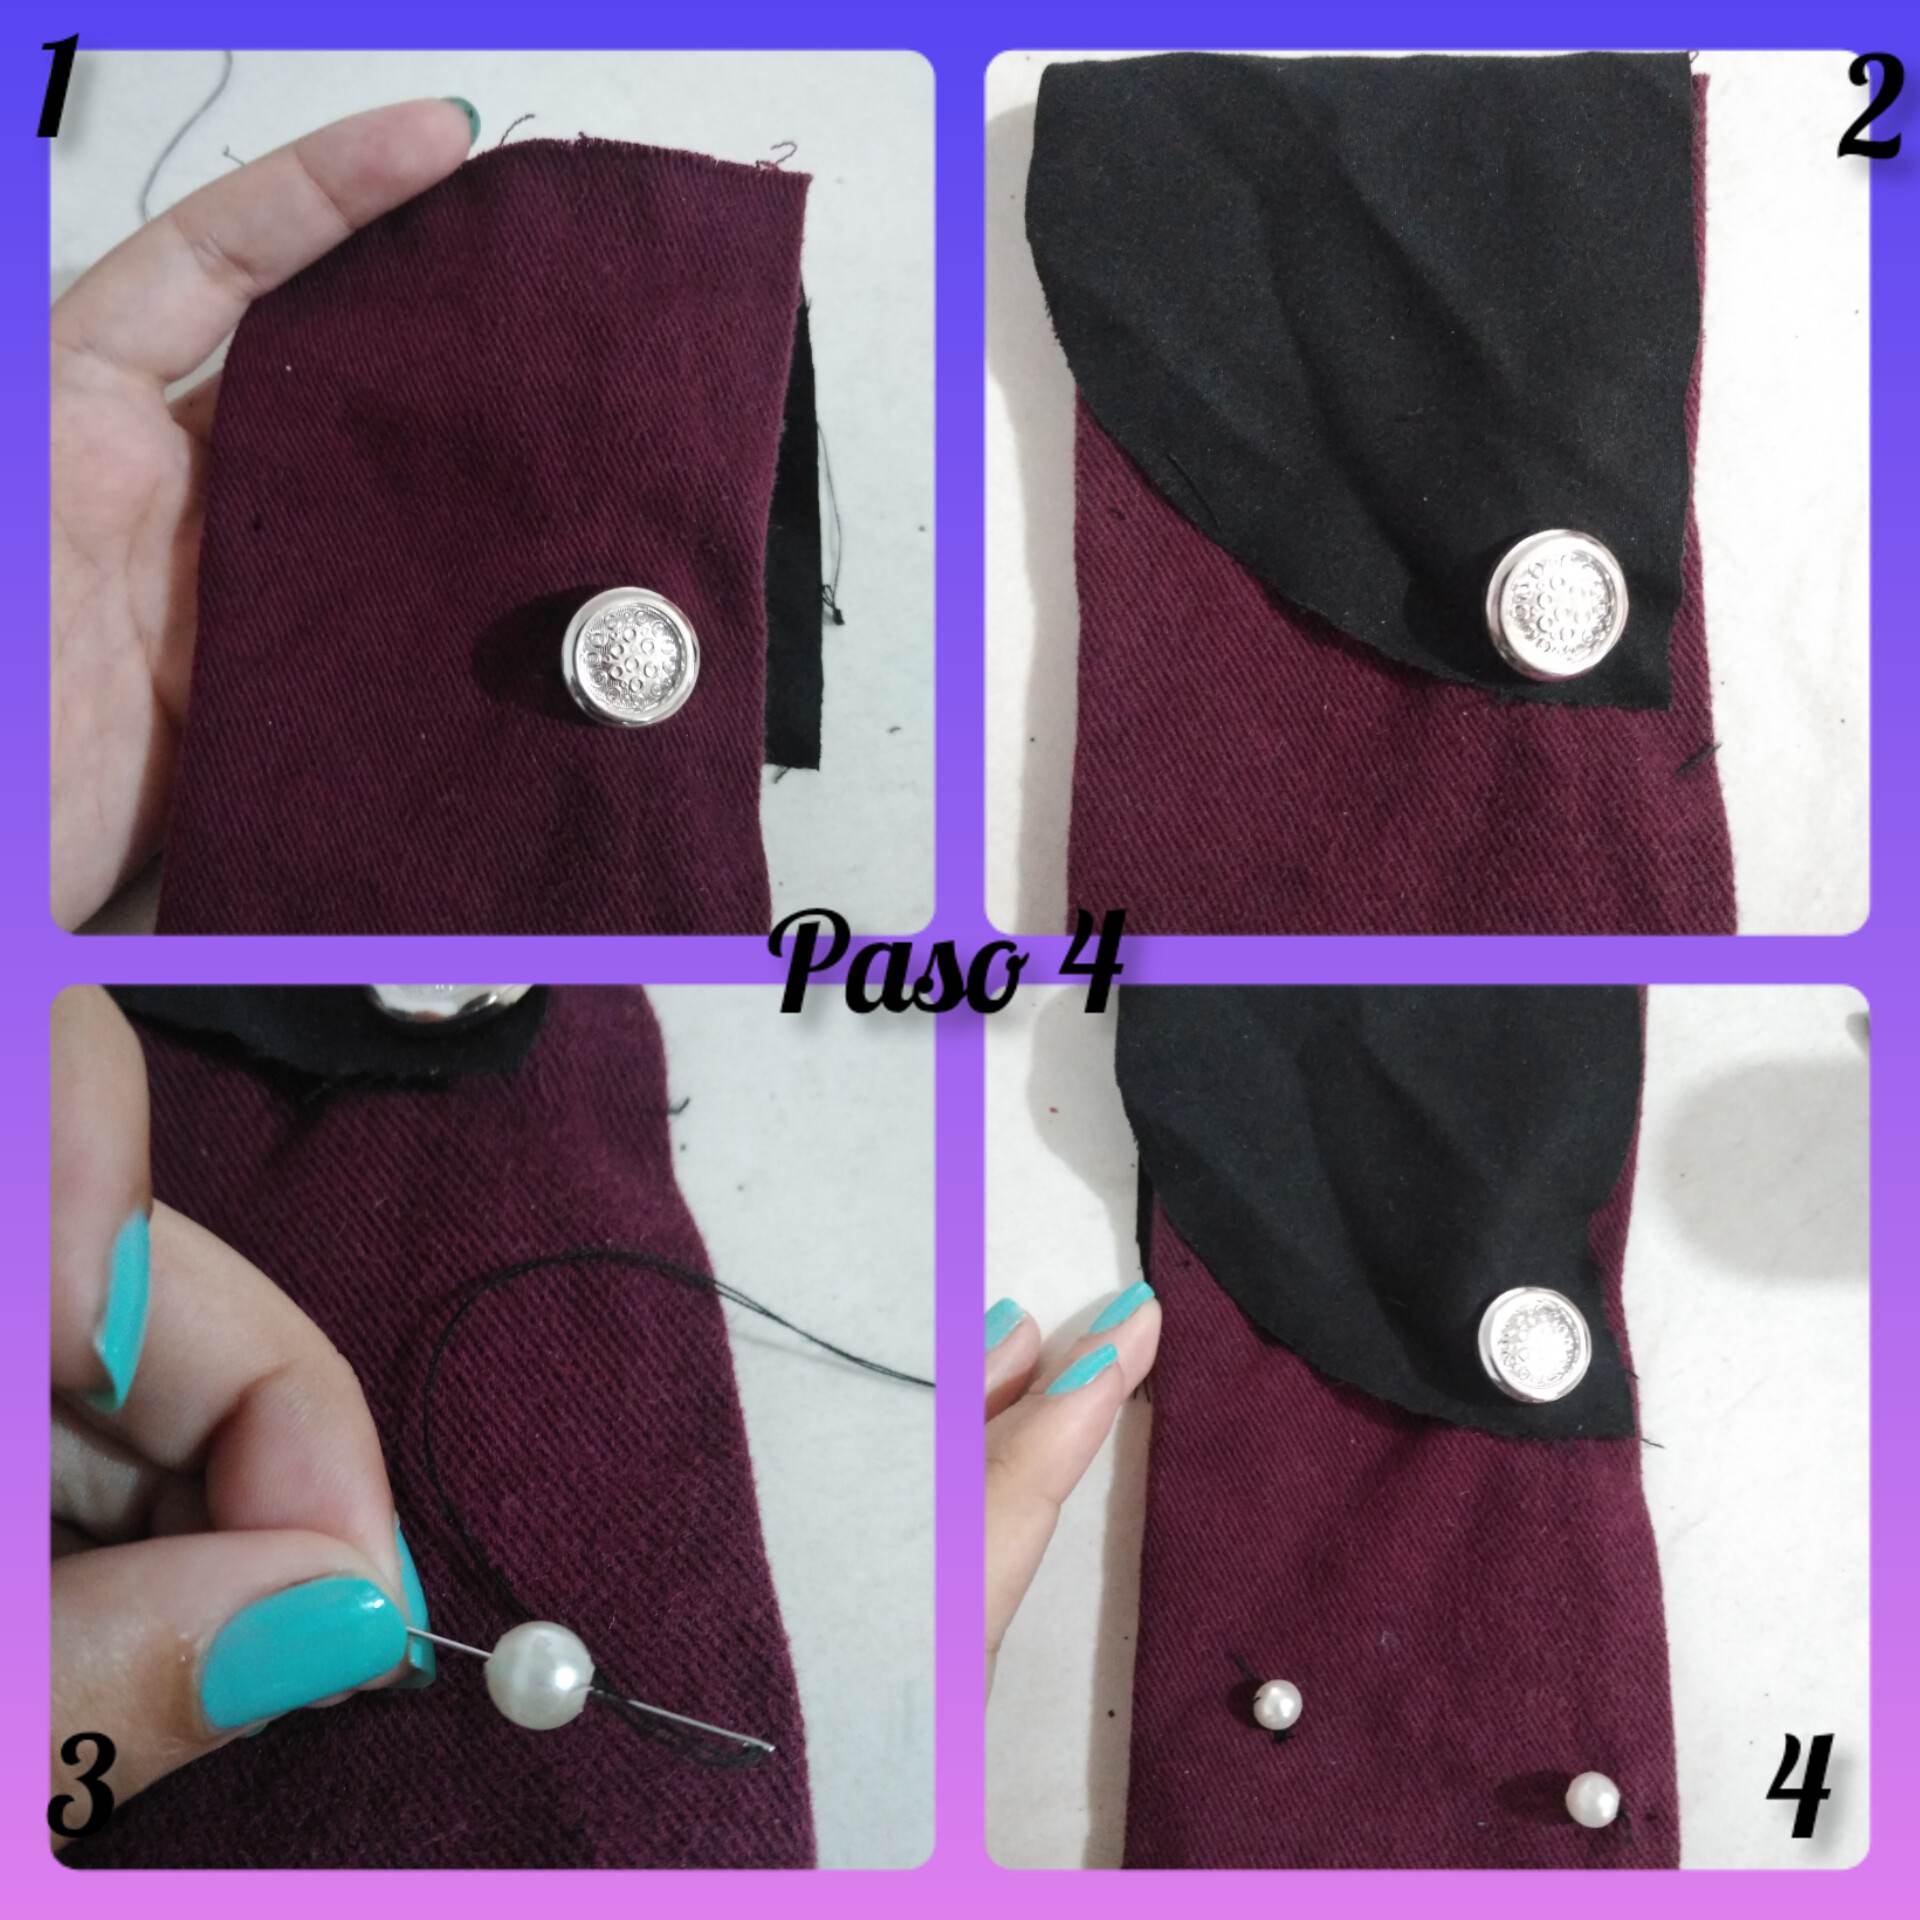
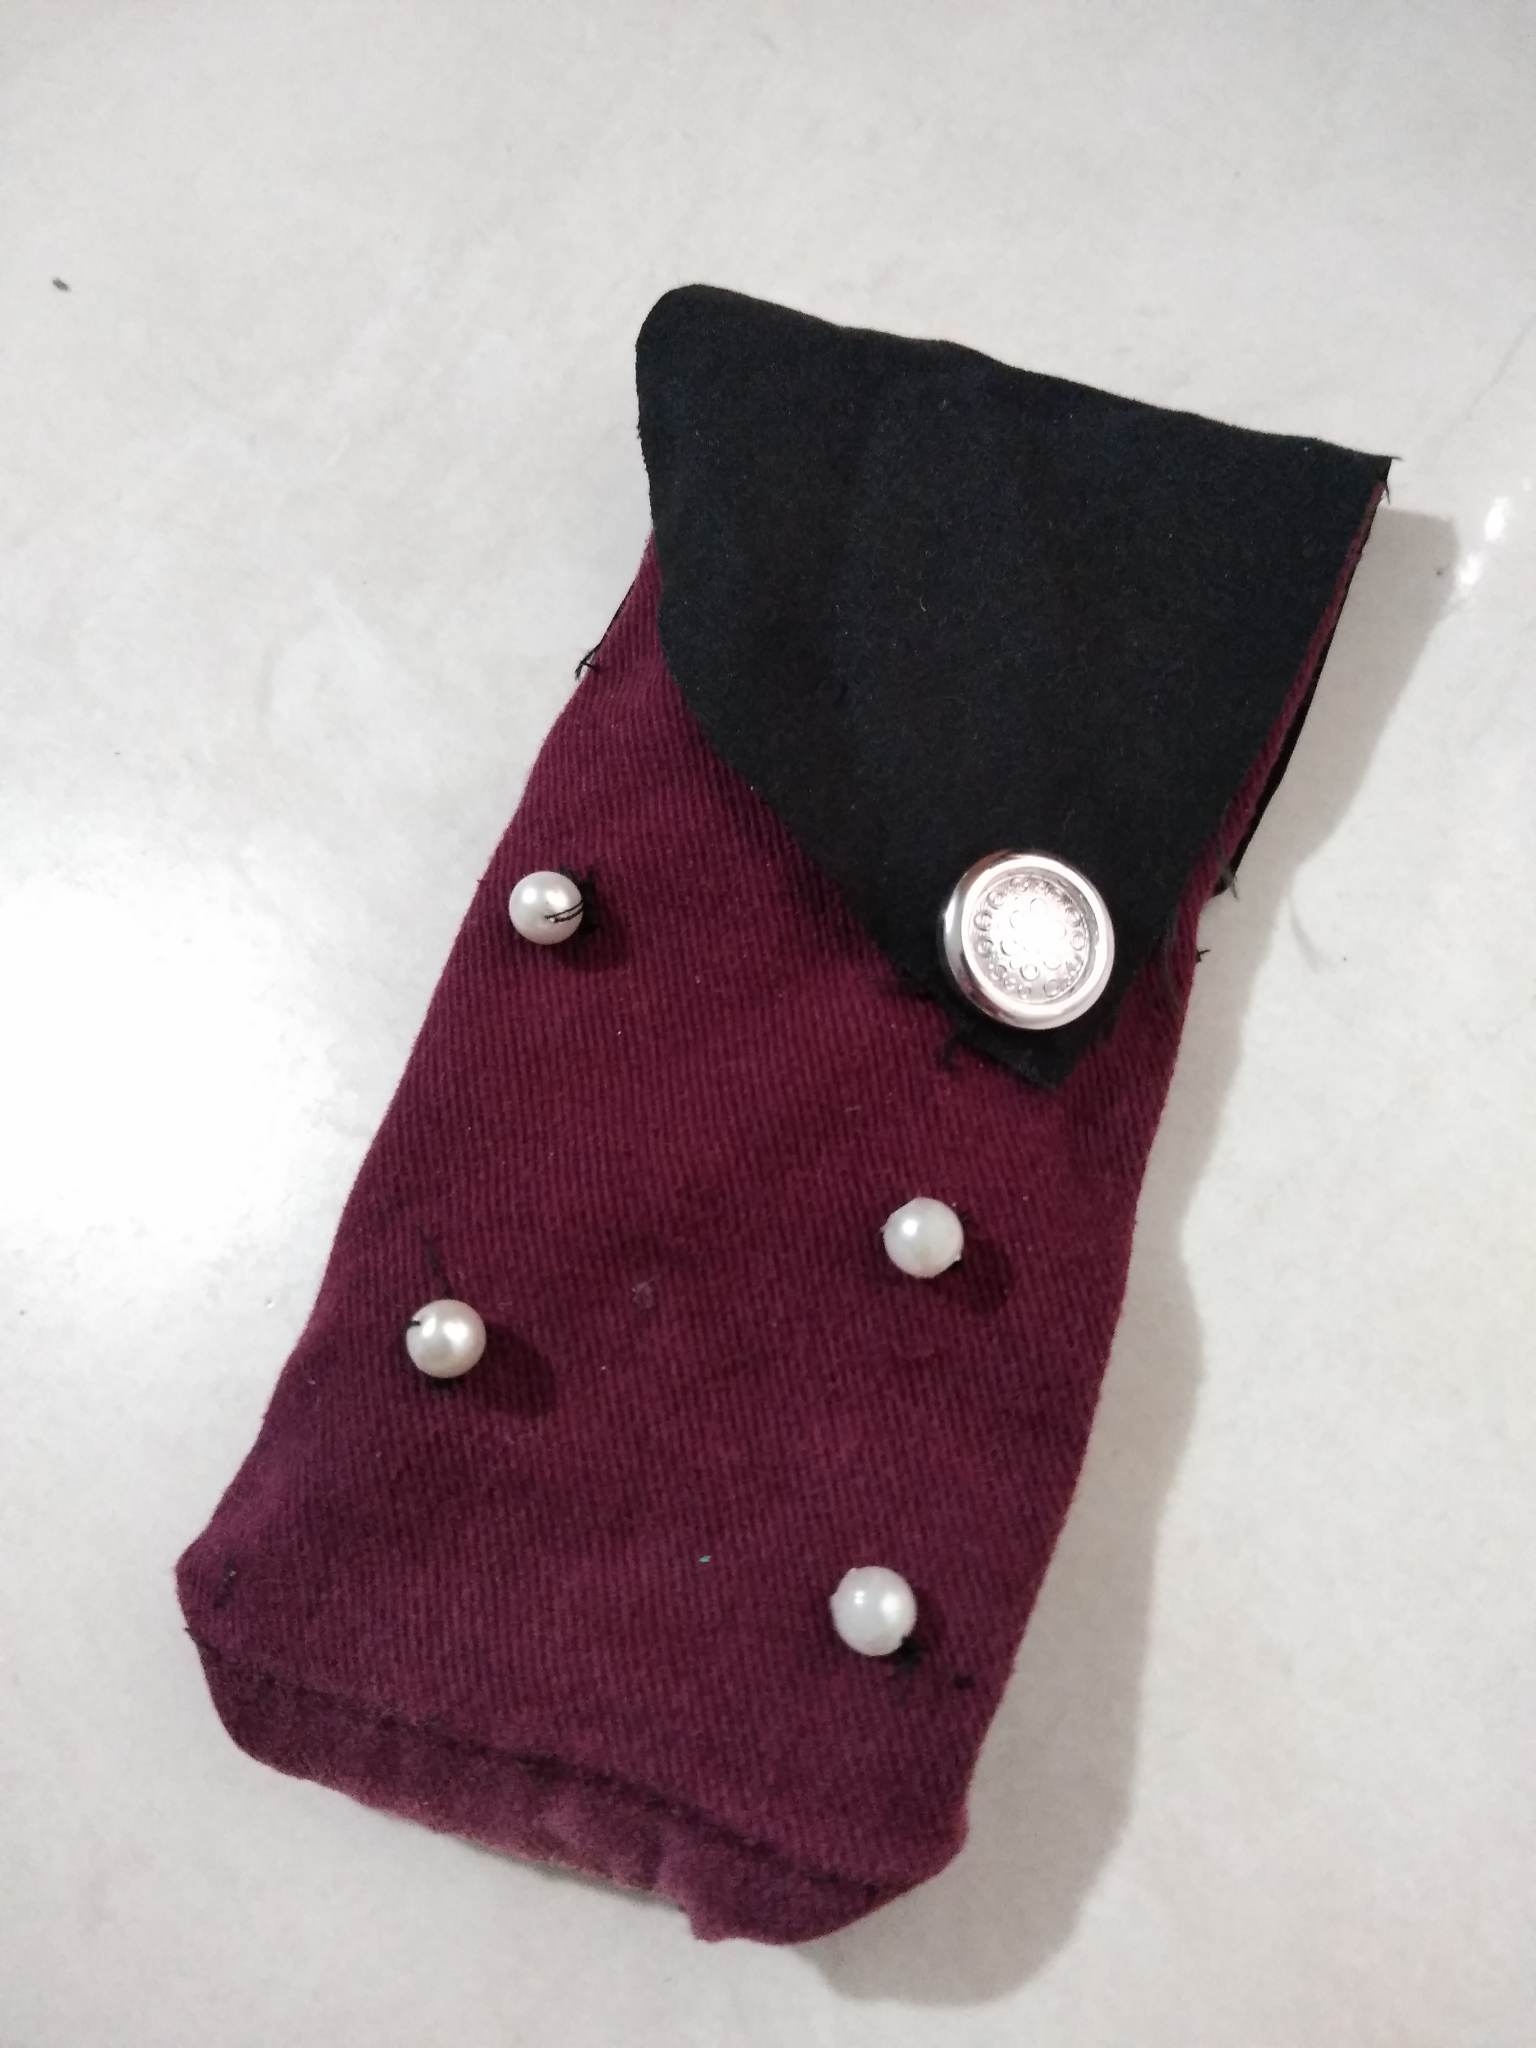
Paso 4: Luego de haber cocido el botón como aparece en la imagen, cortaremos el pequeño agujero por donde entrará el botón, luego procederemos a coser las perlas a la parte delantera y en el orden de nuestra preferencia para adornar a nuestro gusto nuestro lindo estuche, y así seguimo haciendo hasta colocar la cantidad de perlas que querramos.
Step 4: After having baked the button as shown in the picture, cut the small hole where the button will enter, then proceed to sew the pearls to the front and in the order of our preference to decorate our nice case to our liking, and so we continue doing until we place the amount of pearls we want.
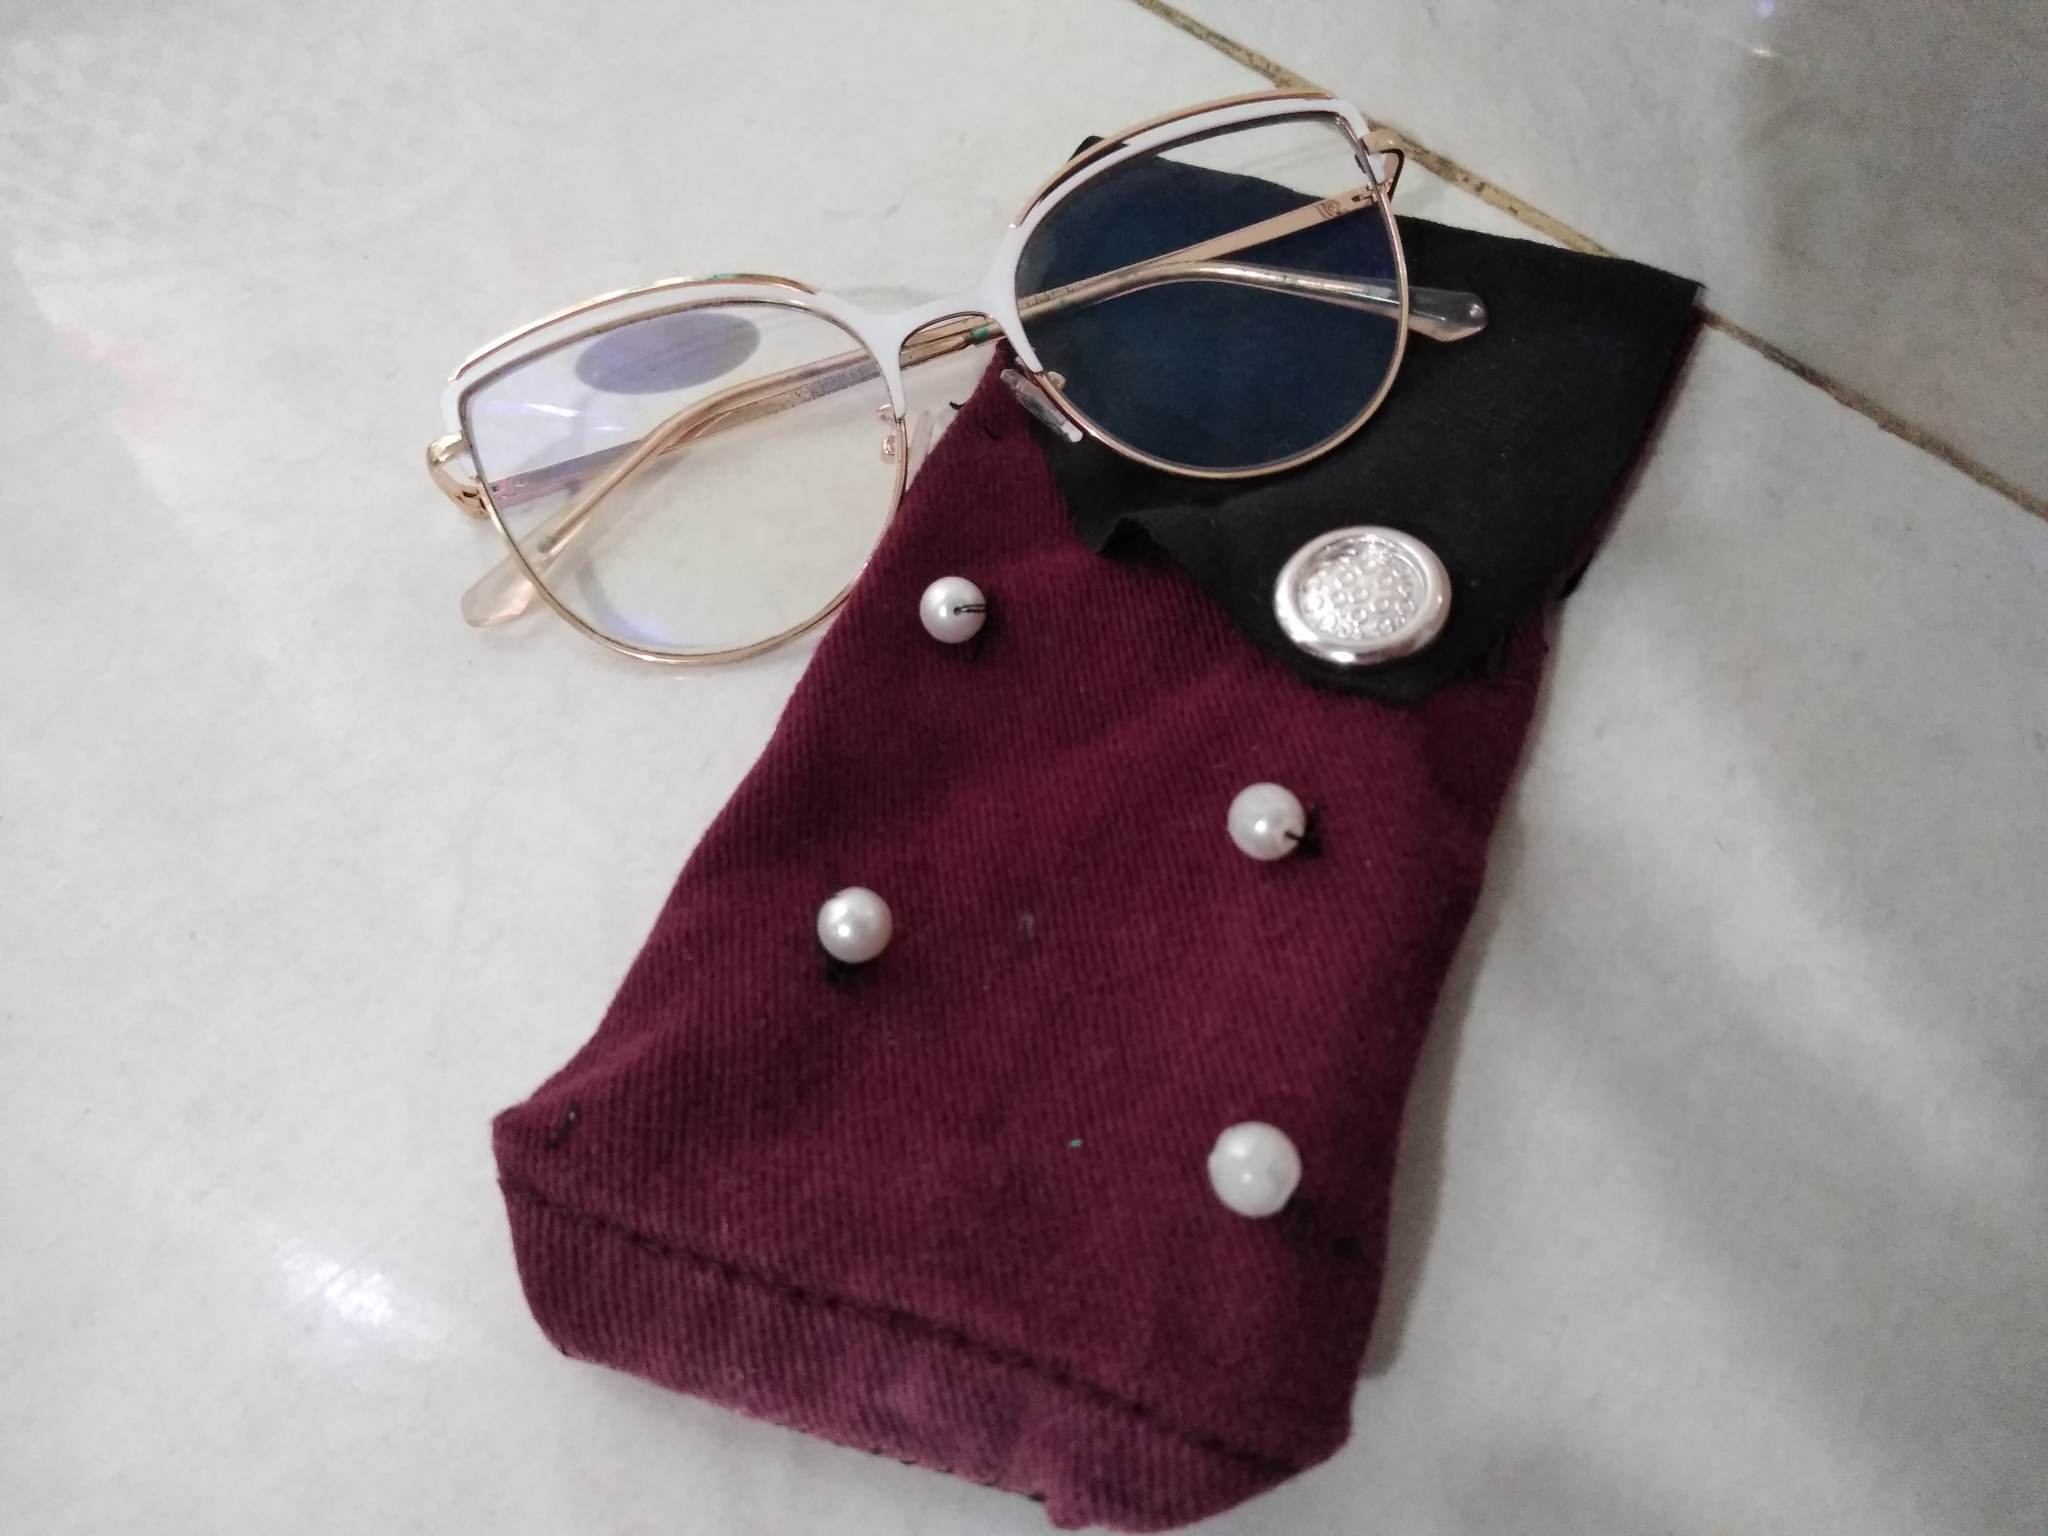
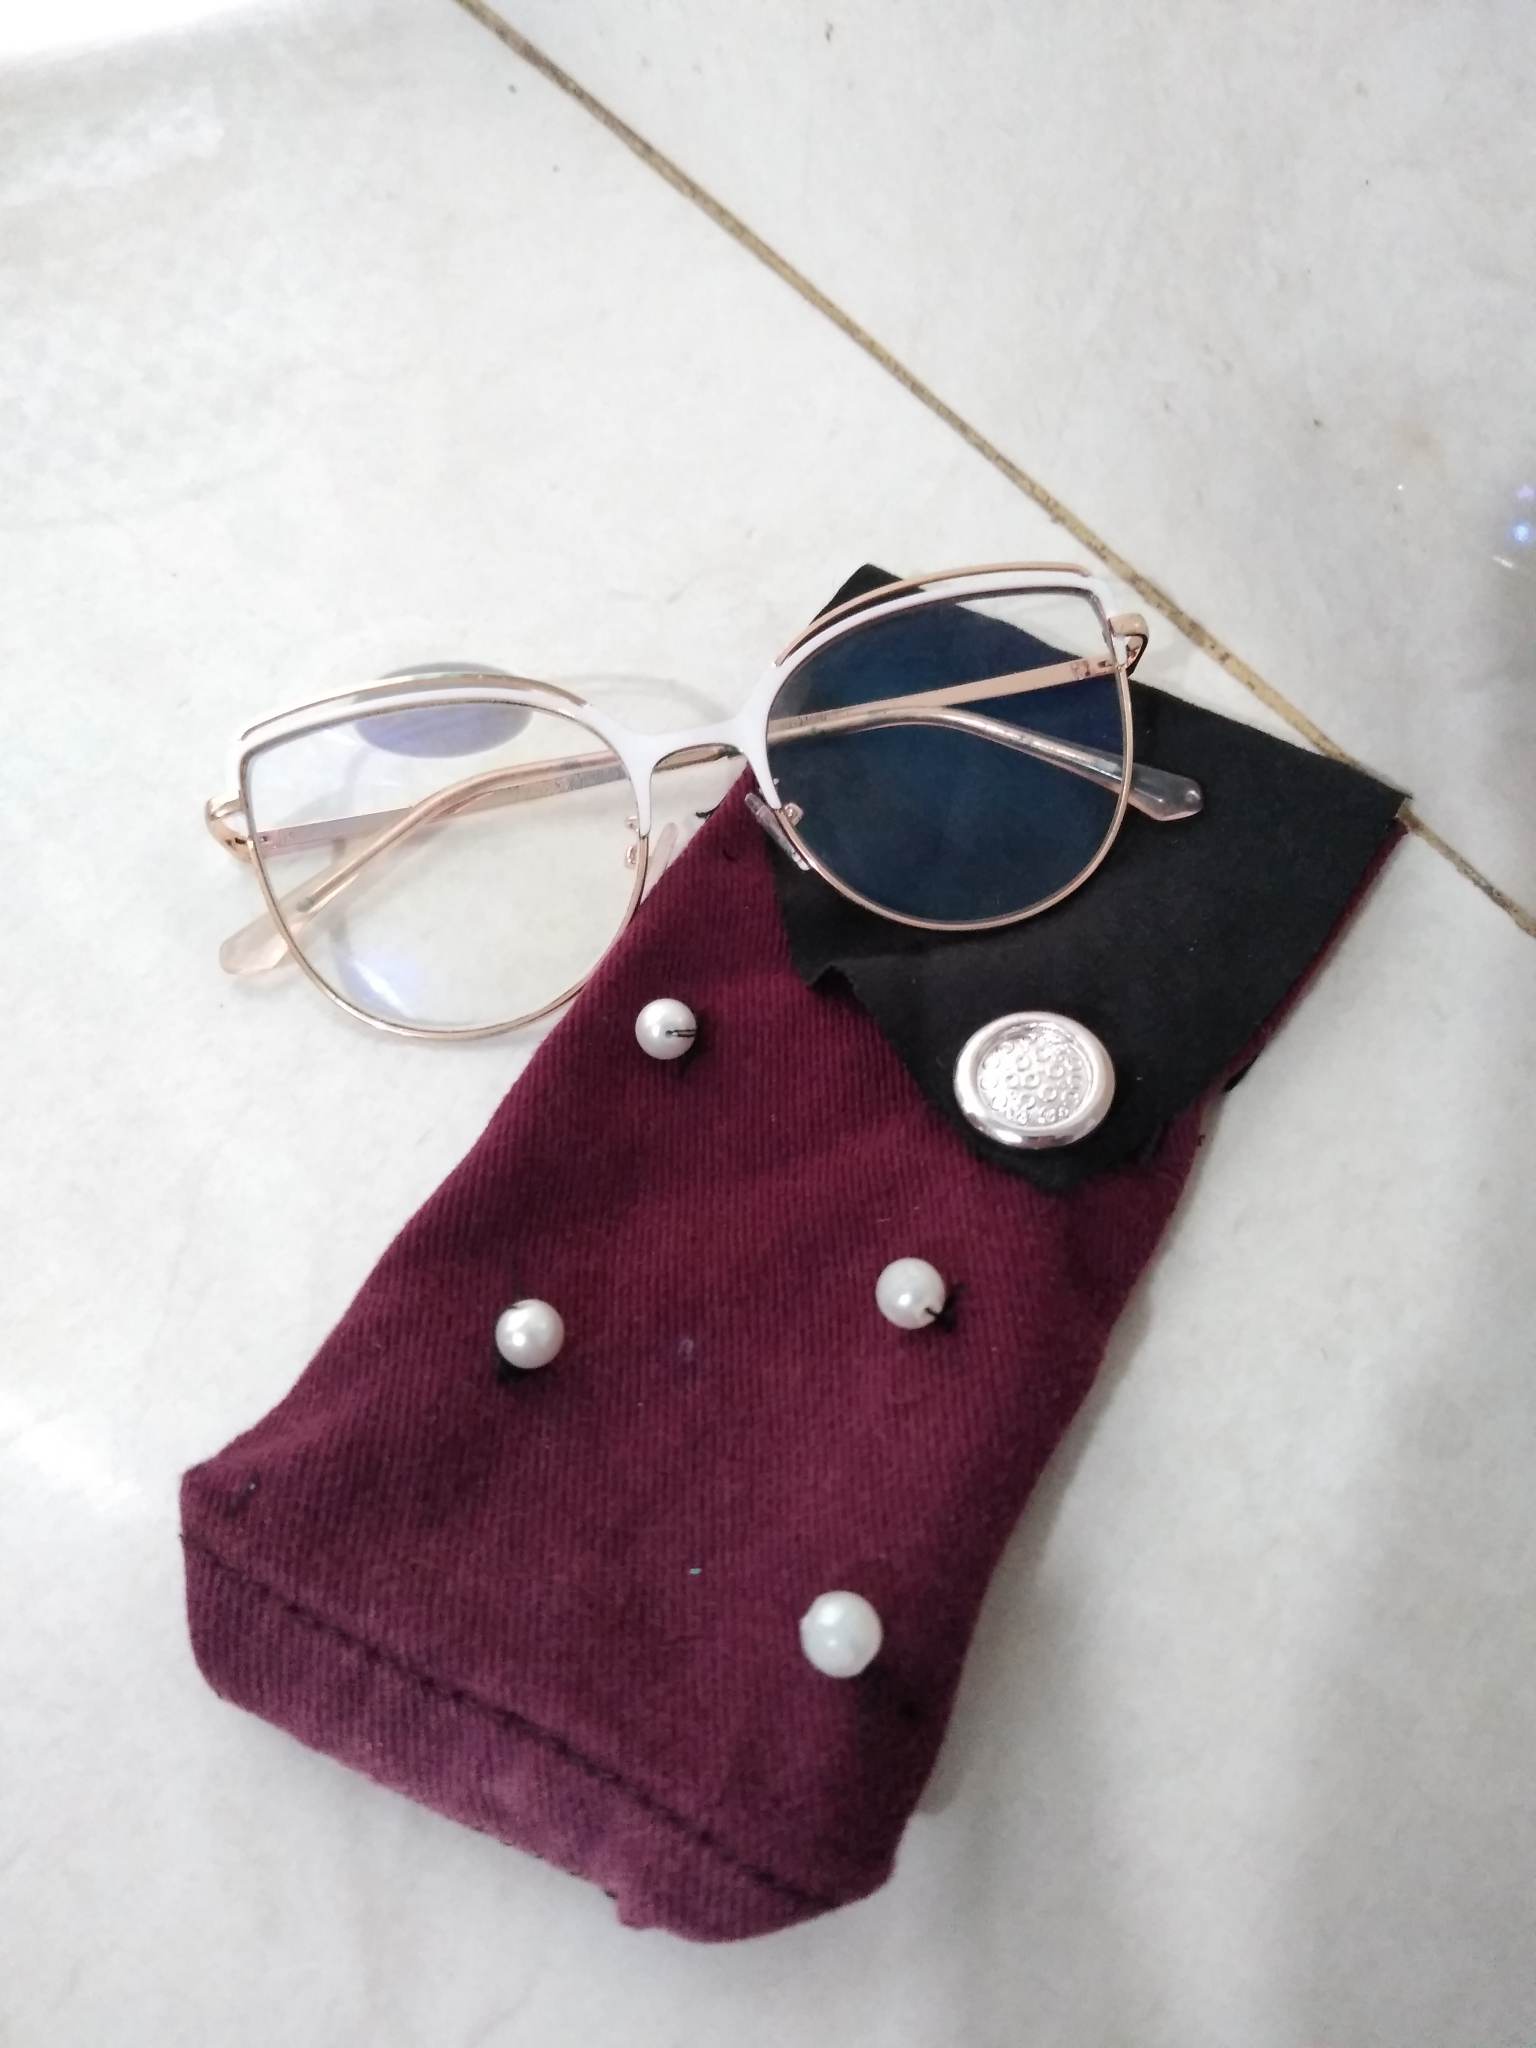
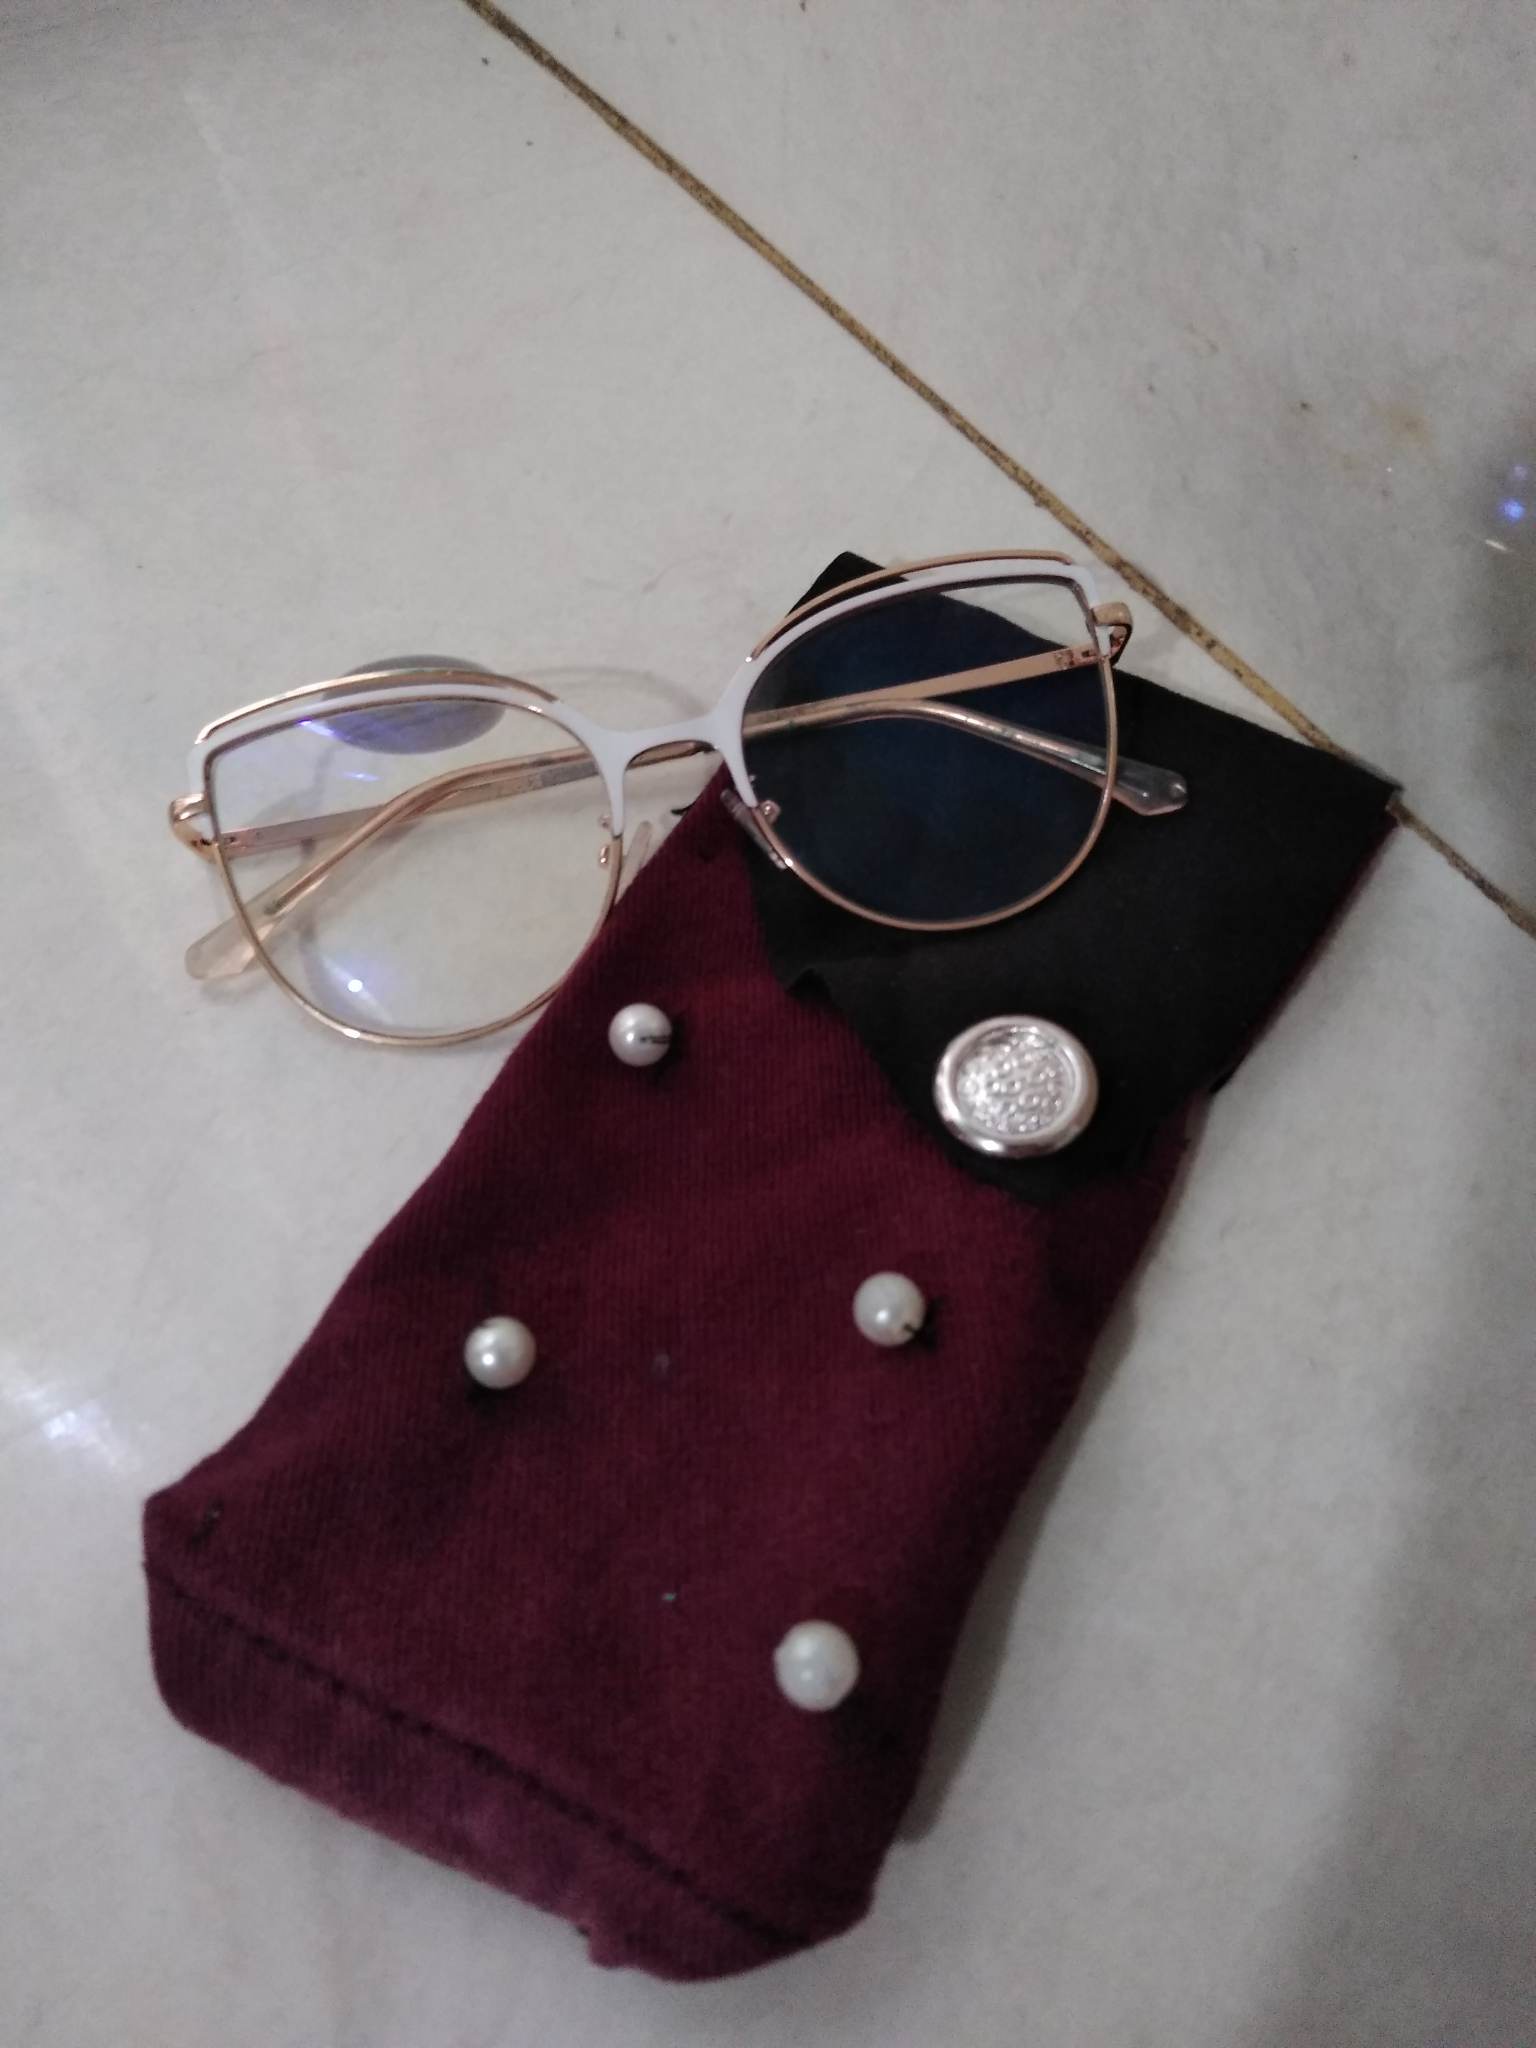
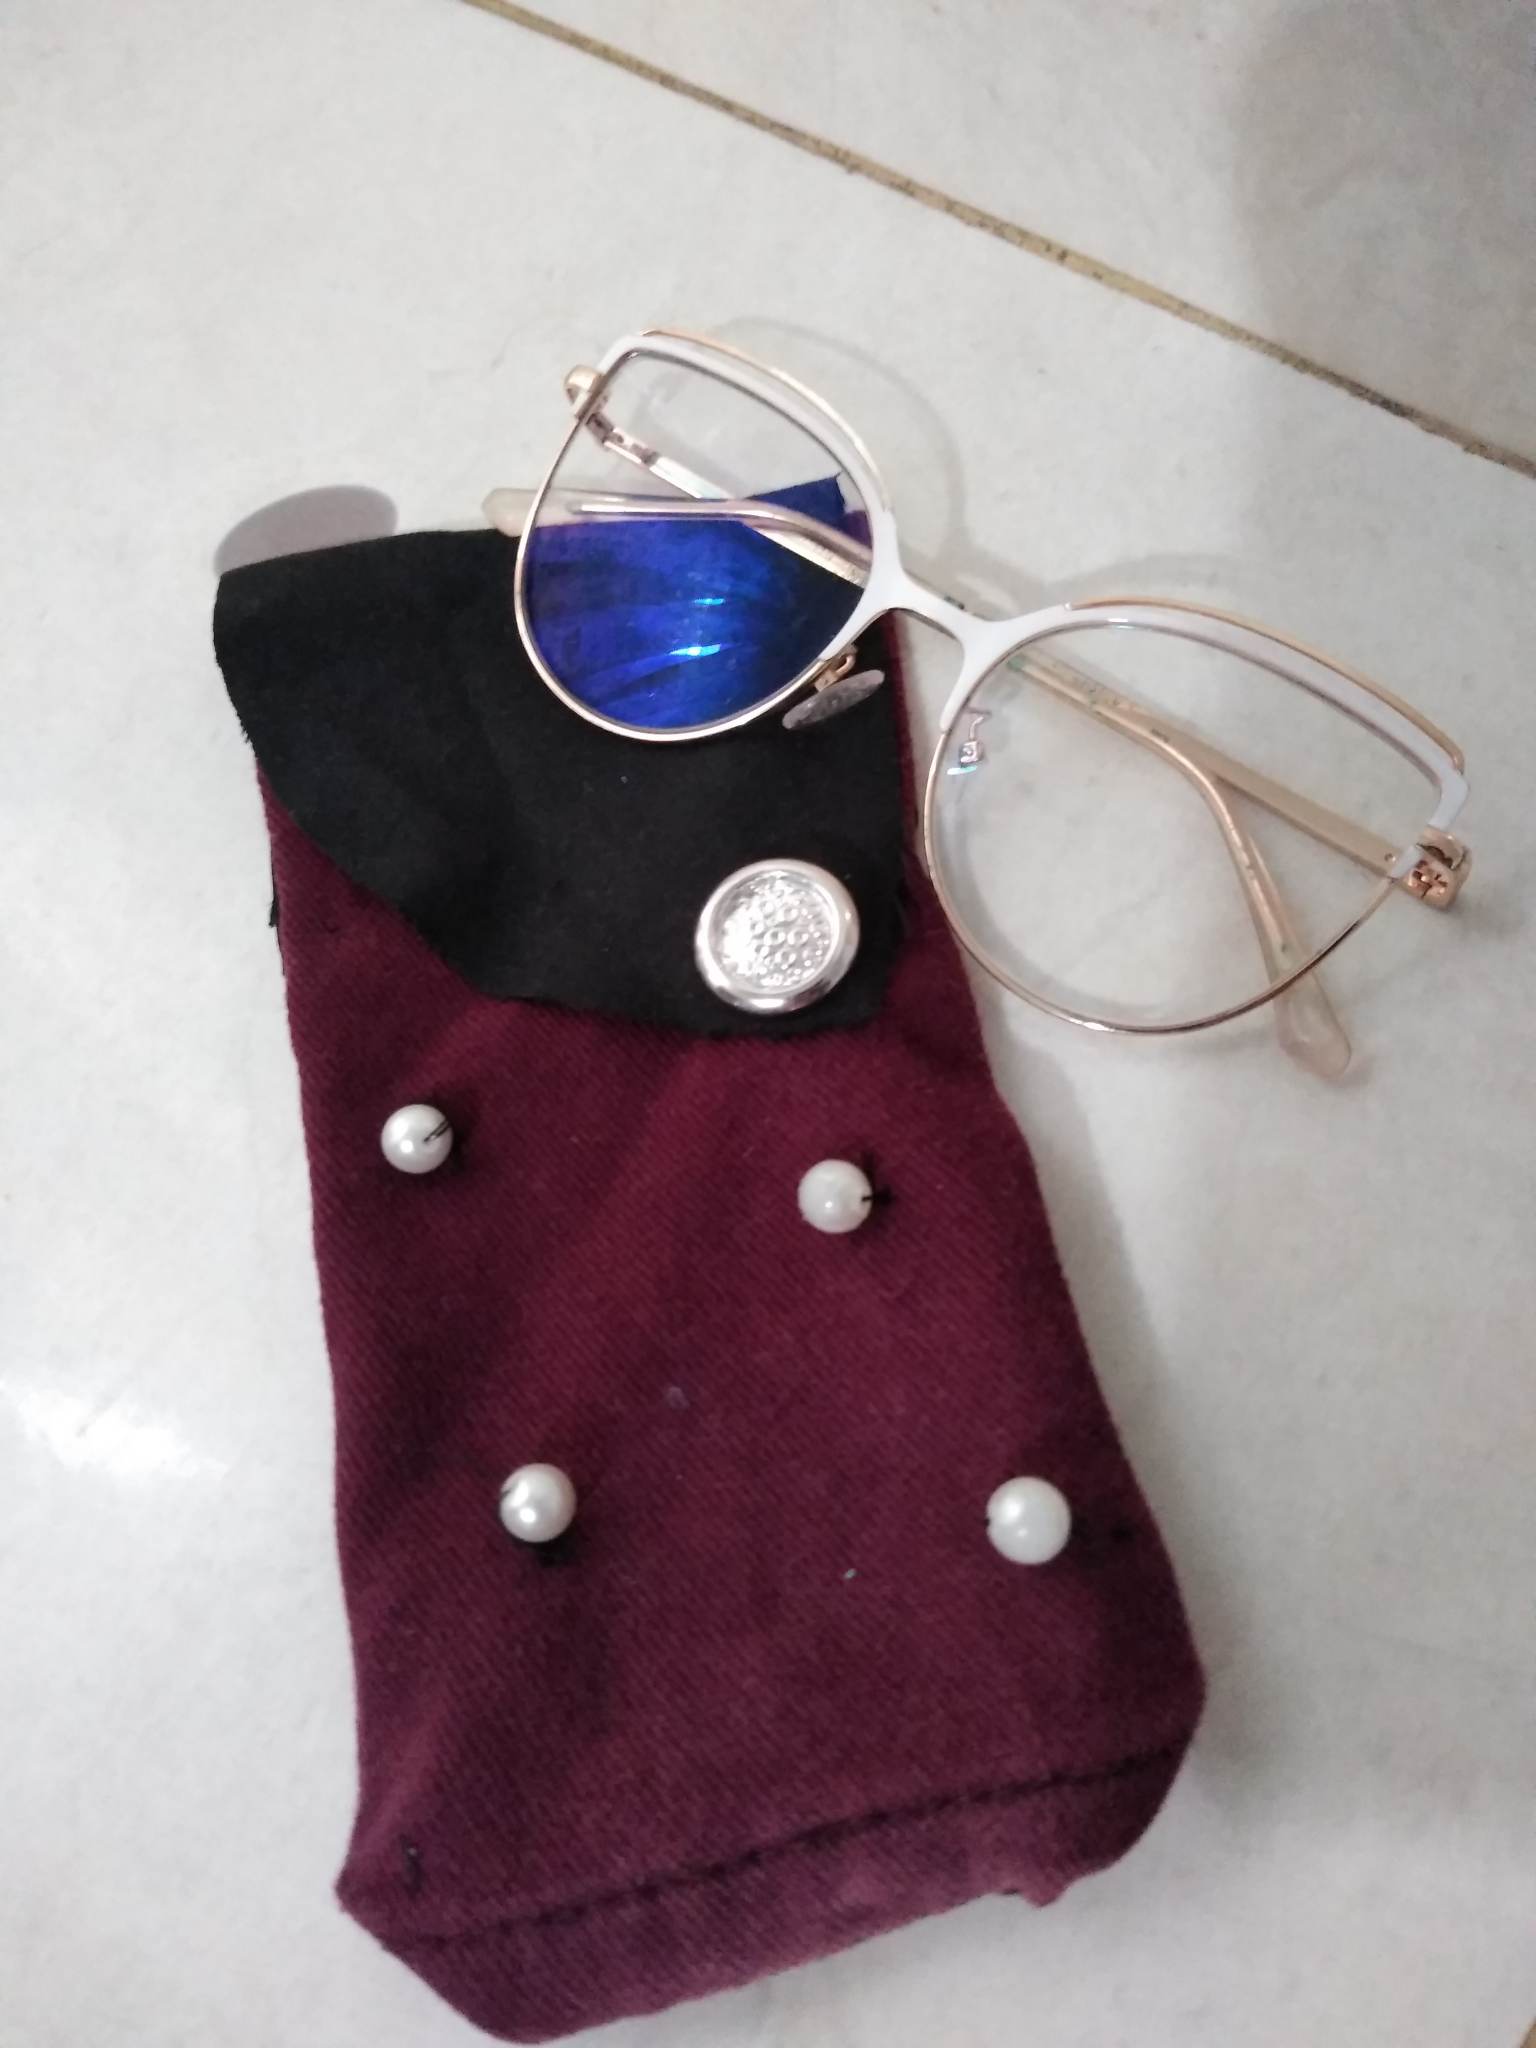
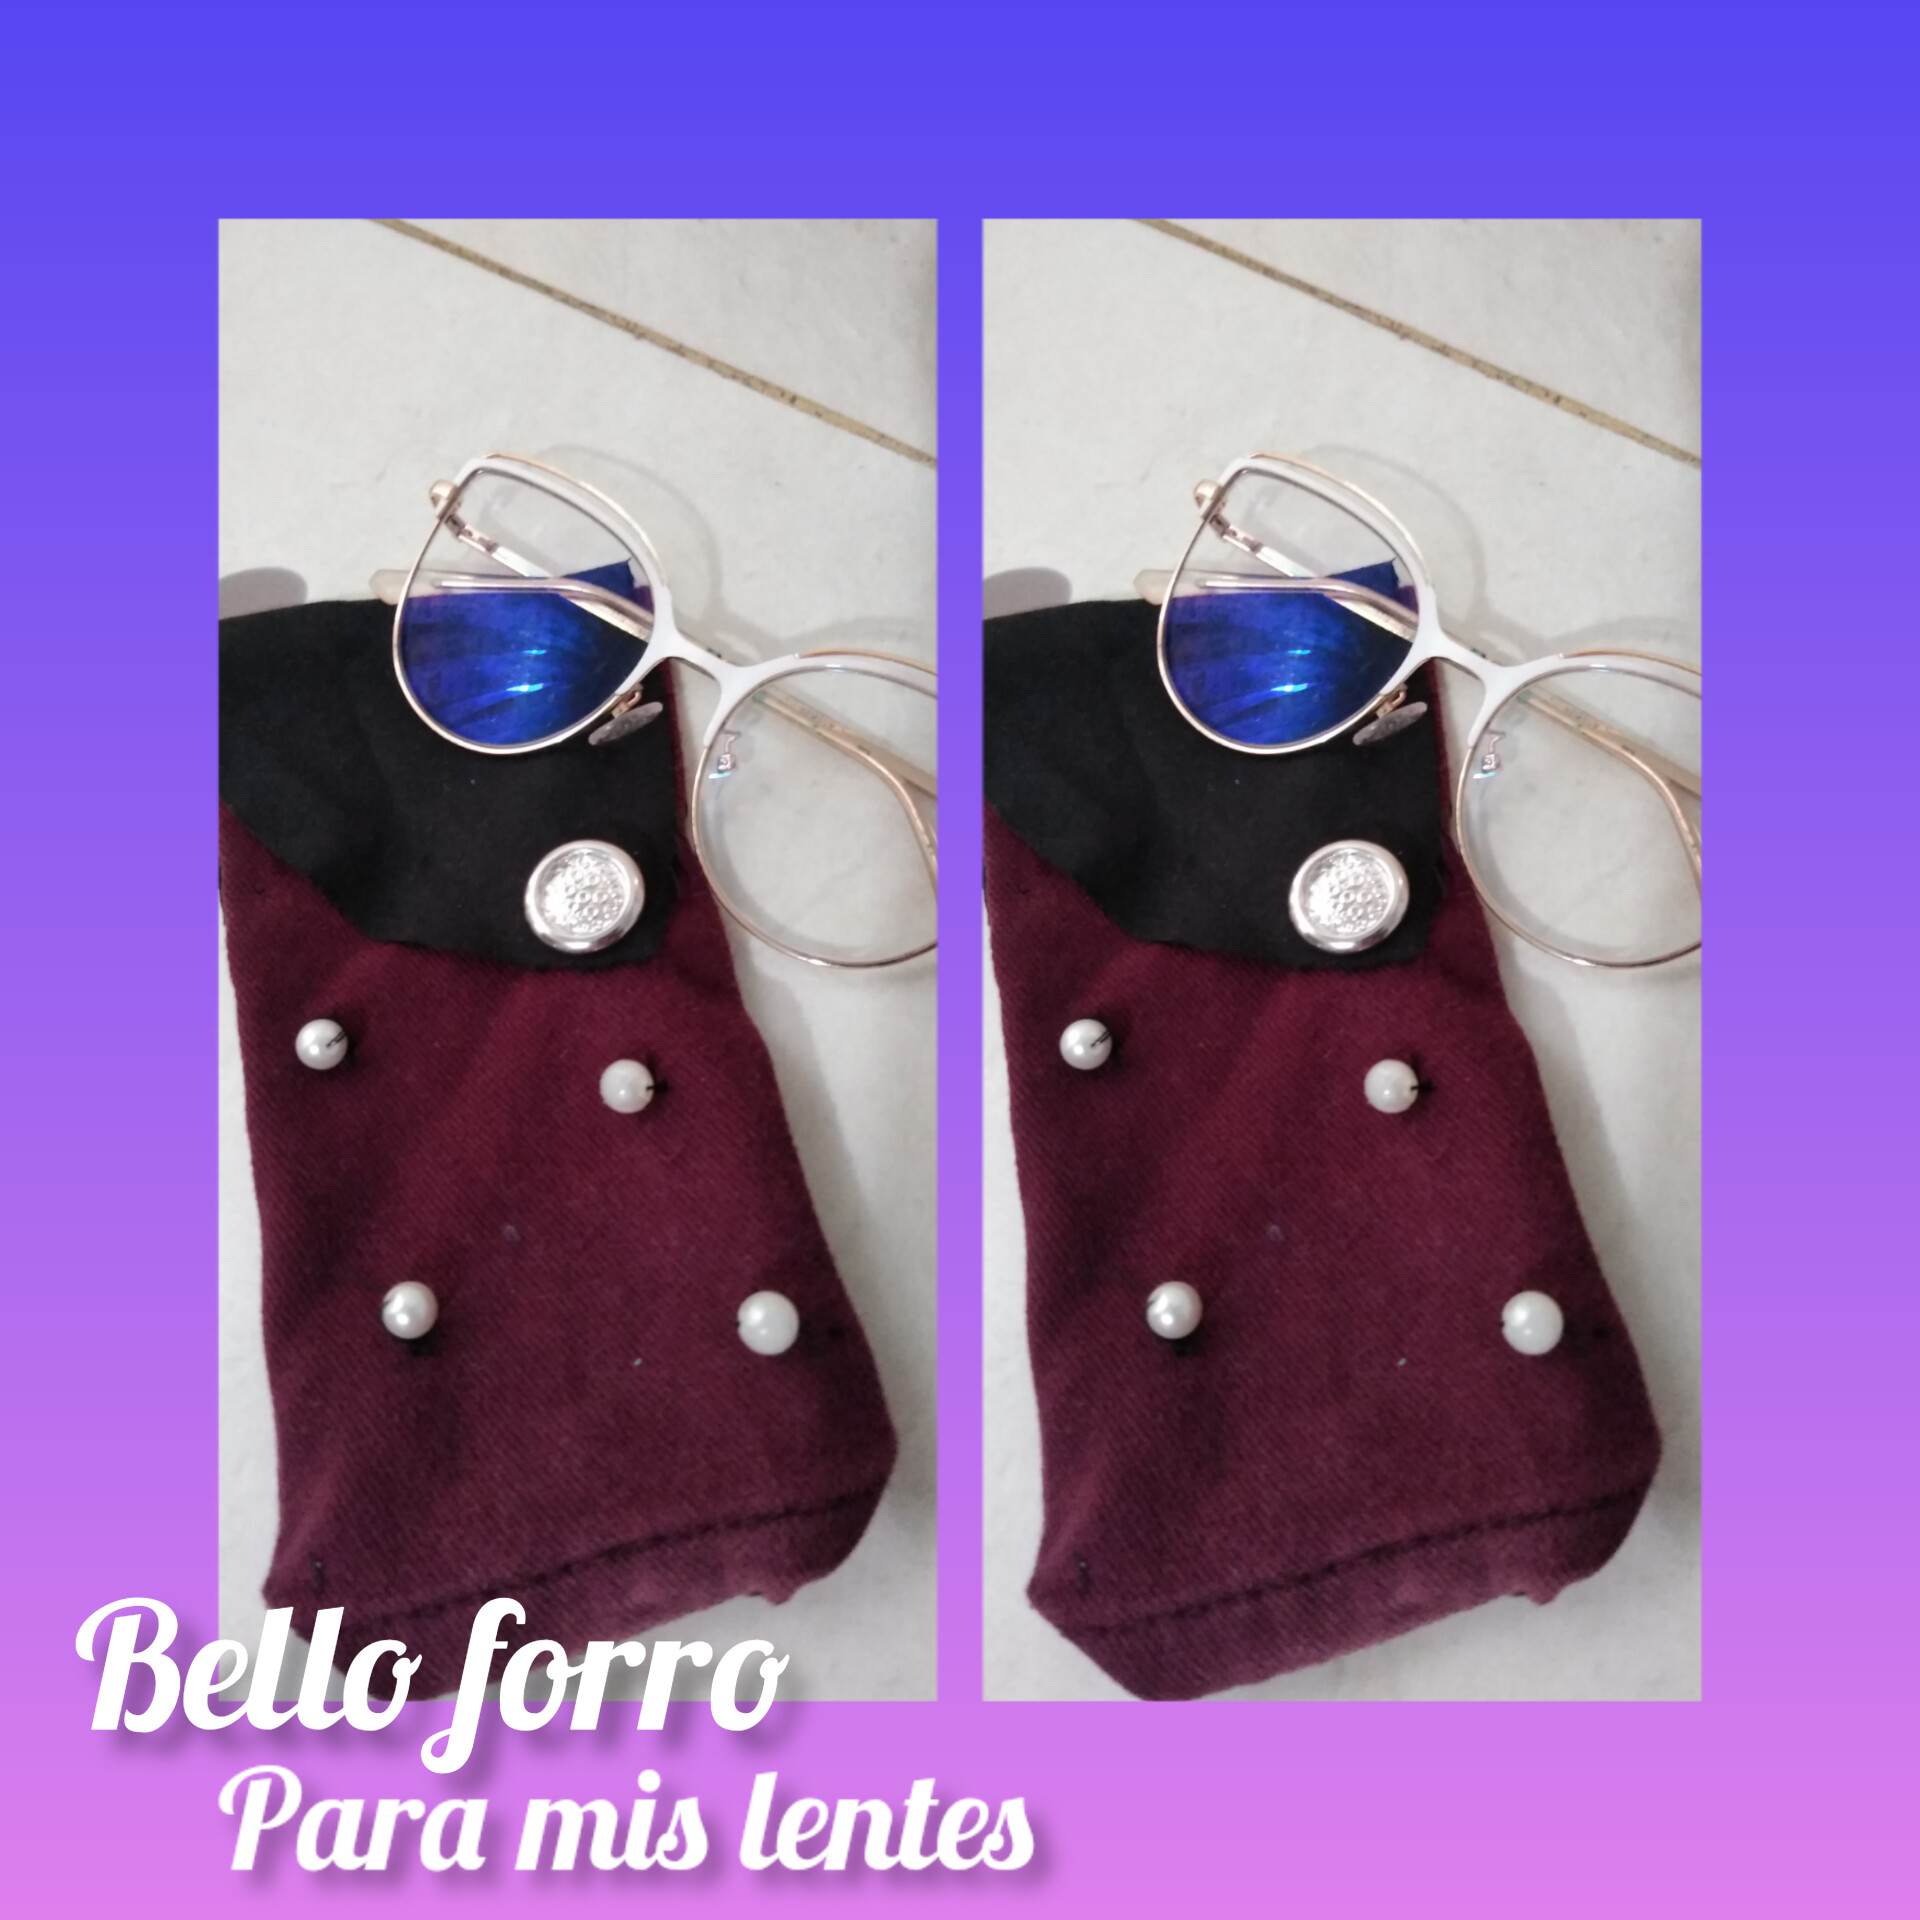
Final Result.