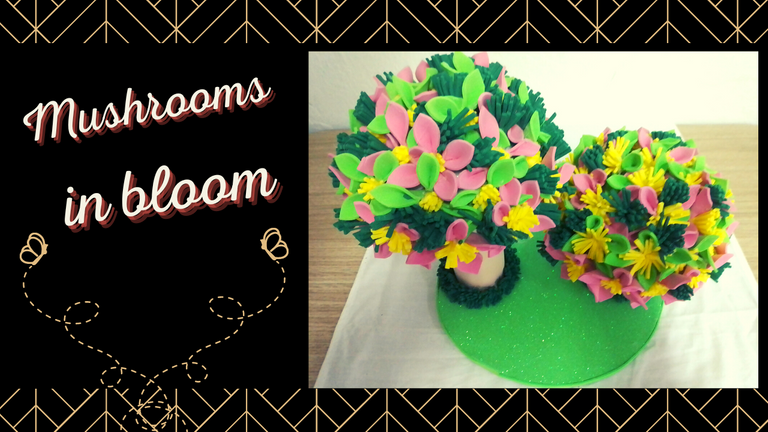
Mushrooms in bloom. Floral arrangement, two levels. / Hongos en flor. Arreglo floral, dos niveles. (ENG/ESP)


Greetings beautiful creative community, arts, crafts, artistic, arts enthusiasts and visitors to my blog
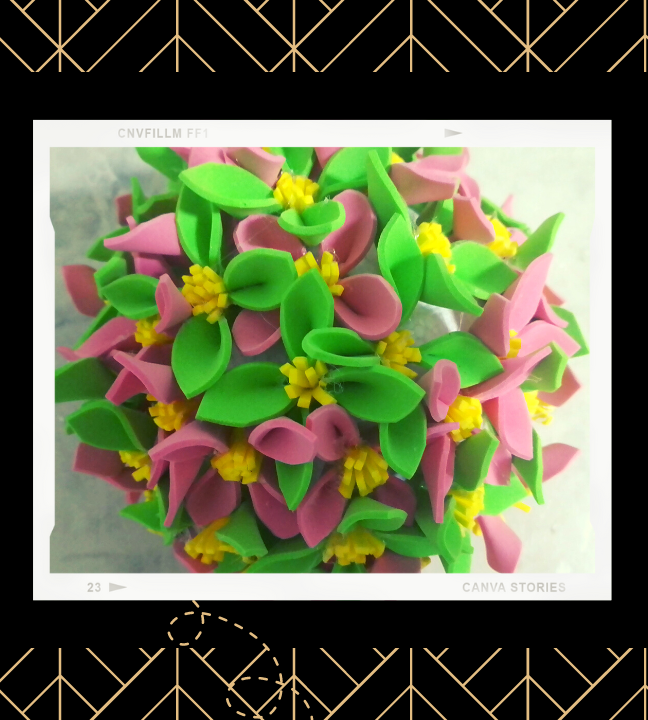
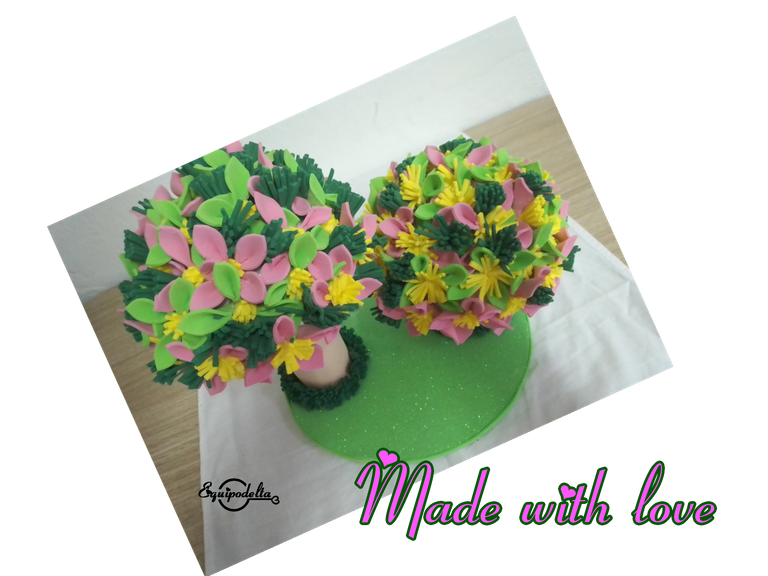
Today I show you how to make this simple floral arrangement, which is now part of the decoration of those empty spaces in my home.
Nothing like making crafts to keep your mind busy creating and relaxing, it is a doubly effective exercise because at the same time you take the opportunity to decorate and make more cozy and cute those spaces in your home that look sad and colorless.
This decoration can be used for other reasons, it can be used as a lollipop, centerpiece and continue creating an environment with butterflies, small toys to decorate a child's room, it's all a matter of adjusting it to your needs.
The hardest thing to do is to create the many flowers, there comes a time when they seem infinite to cover all the spaces of the anime.
But it has been very nice and very sweet, the pastel colors I used are very tender so it lends itself to other uses, you can even change the colors of the fomi. Well it would be red with white, like the mushrooms but I wanted it to last and the white color tends to get very dirty with dust over time.
Without further ado, I'll tell you how I did it.


Saludos hermosa comunidad creativa, artesa, artística, aficionados a las artes, manualidades y visitantes de mi blog.
Hoy te enseño cómo realizar este arreglo floral sencillo, que ahora forma parte ahora de la decoración de esos espacios vacíos en mi hogar.
Nada como hacer manualidades para mantener la mente ocupada creando y relajándose, es un ejercicio doblemente de efectivo pues al mismo tiempo aprovechas de decorar y hacer más acogedores y lindos esos espacios de tu hogar que se ven tristes y sin color.
Esta decoración puede utilizarse para otros motivos, bien puede usarse como una chupetera, centro de mesa y seguir creando un ambiente con mariposas, pequeños juguetes para decorar un cuarto infantil, todo es cuestión de ajustarlo a tu necesidad.
Lo que más trabajo te puede dar es crear las muchas flores, llega un momento que parecen infinitas para cubrir todos los espacios del anime.
Pero ha quedado muy lindo y muy dulce, los colores pasteles que empleé son muy tiernos por eso se presta para otros usos, puedes cambiar los colores del fomi inclusive. bien e quedarían rojo con blanco, como los hongos pero quería que perdurara y el color blanco tiende a ensuciarse mucho de polvo con el tiempo.
Sin más preámbulos te cuento cómo lo hice.

| |
|---|---|
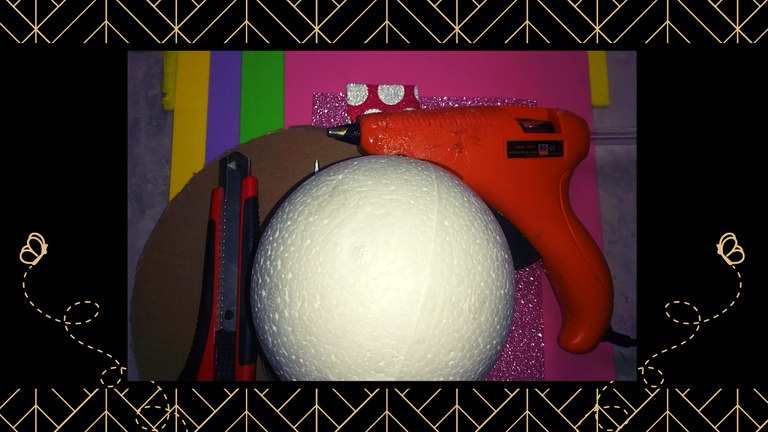
| - Anime ball #12 | - Bola de anime #12 |
| - Scissors. | - Tijera. |
| - Colored and frosted Fomi. | - Fomi de colores y escarchado. |
| - Silicone gun. | - Pistola de silicón. |
| - Cardboard or toilet paper tube. | - Cartulina, cartón o tubo de papel higiénico . |

Step 1️⃣
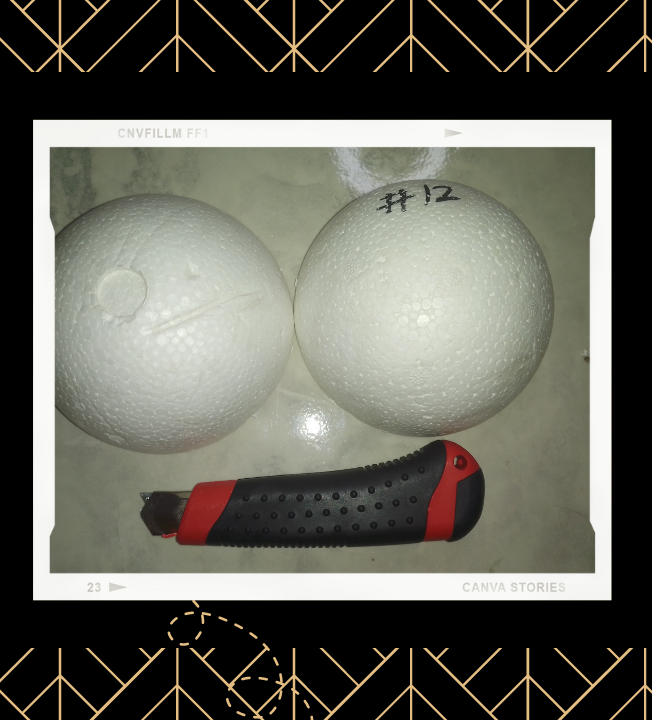
The first thing to do is to divide the anime ball in two with a cutter or a knife or anime cutter if you want to be more precise.
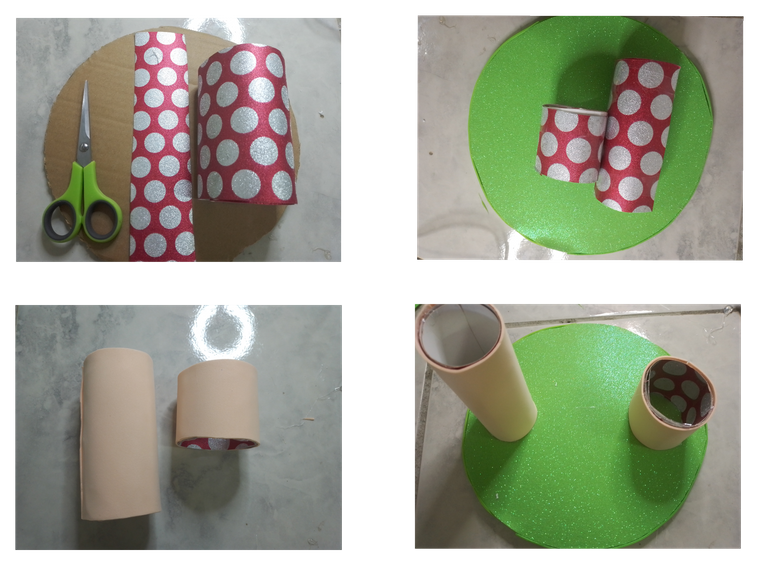
Then we cut a circle in the cardboard and with the cardboard if we don't have empty toilet paper rolls we can create a roll with it, we cut two measures, one high and one short so that it looks like a step or as my title says: two levels.
These rolls must be lined like the cardboard base we just cut out, trying not to show the same, so you have to cover it all.
Glue the cylinders to the base.
Paso 1️⃣
Lo primero que hay que hacer es dividir la bola de anime en dos con un cutter o exacto un cuchillo o cortador de anime si quieres ser más preciso.
Seguidamente recortamos un circulo en el cartón y con la cartulina sino tenemos rollos de papel higiénico vacíos podemos crear un rollo con él, recortamos dos medidas, uno alto y uno corto para que se vea en escalón o como dice mi título: dos niveles.
Estos rollos hay que forrarlos al igual que la base de cartón que acabamos de recortar, procurando no se vea el mismo, así que hay que cubrirlo todo.
Pega los cilindros a la base.
Step 2️⃣
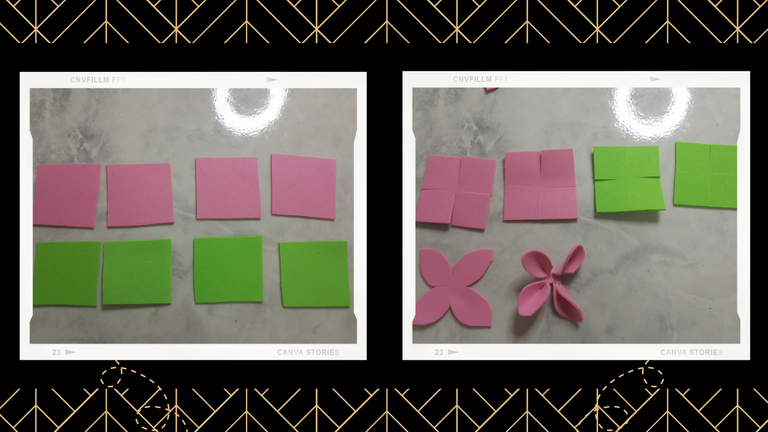
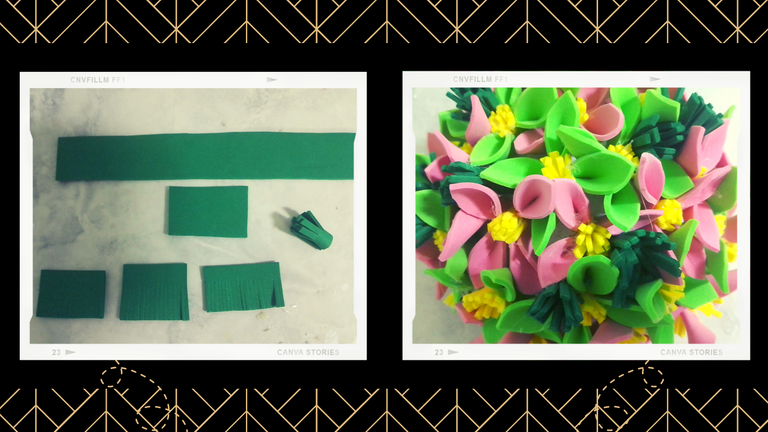
Cut a strip 5 centimeters wide by the length of the fomi, we do this with both colors.
Then cut perfect squares of 5 centimeters from the strip.
You will have to make a cut on it but without reaching the center, the cut is from each central part as shown in the image. Repeat this step with the fomi of the other color, this step must be repeated as many flowers as you need to cover the anime ball.
Take the square that you have already made the central cuts and now you have to cut out the shape of the leaf of the flower.
Then place glue on the inner edge of the leaf and press it together until it dries. Repeat these procedures as many times as you need.
Paso 2️⃣
Recorta una tira de ancho 5 centímetros por el largo del fomi, esto lo hacemos con ambos colores.
Luego recorta cuadrados perfectos de 5 centímetros de la tira.
A estos deberás hacerle un corte en él pero sin llegar al centro, el corte es de cada parte céntrica como muestra la imagen. Repite este paso con el fomi del otro color, este paso hay que repetirlo las flores que necesites para cubrir la bola de anime.
Toma el cuadrado al que ya le realizaste los cortes céntricos y ahora hay que recortar la forma de la hoja de la flor.
Seguidamente coloca pegamento en el extremo interno de la hoja y presiona para que se una hasta que se seque. Repite estos procedimientos las veces que lo necesites.
Step 3️⃣
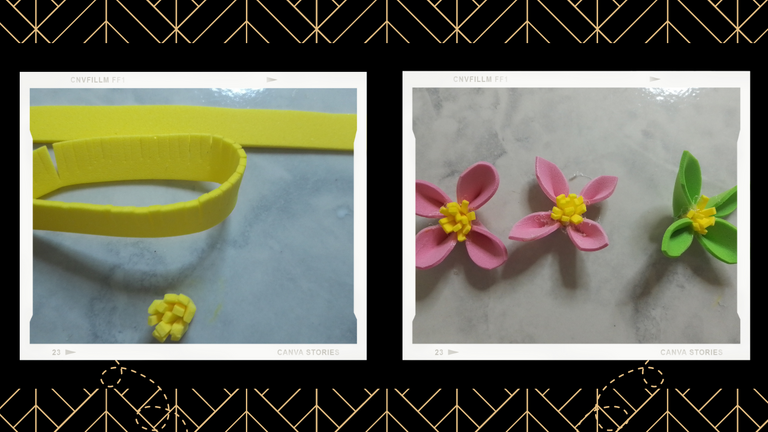
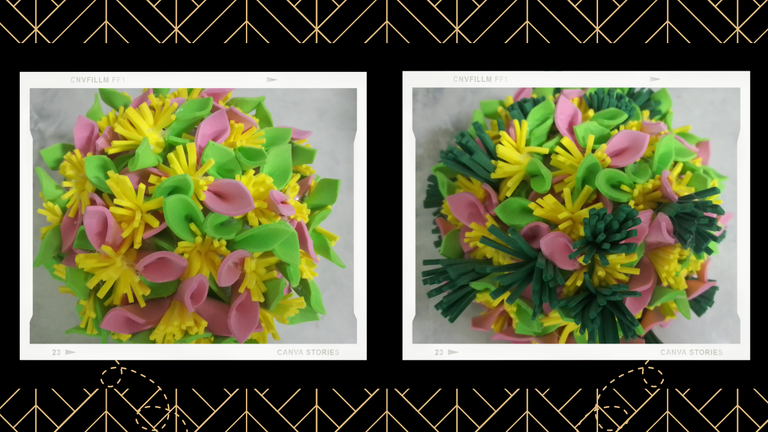
Cut a strip of yellow fomi of approximately 1.5 centimeters to make the pistils, then make several cuts very close together along the same length, once you finish up to the tip, divide it into pieces of approximately 6 centimeters long, roll and apply glue as shown in the photo.
Glue the pistils to the flower making them join together.
Glue the flowers to the anime ball, alternating each color, as shown in the picture.
Paso 3️⃣
Recorta una tira de fomi amarillo de 1,5 centímetros aproximadamente para hacer los pistilos, luego realiza varios cortes muy juntos en el mismo a lo largo una vez termines hasta la punta divide el mismo en trozos de 6 centímetros de largo aproximadamente, enrolla y aplica pegamento como indica la foto.
Los pistilos los pegamos a la flor haciendo que se unan.
Pegamos las flores en la bola bola de anime intercalando cada color, como indica la imagen.
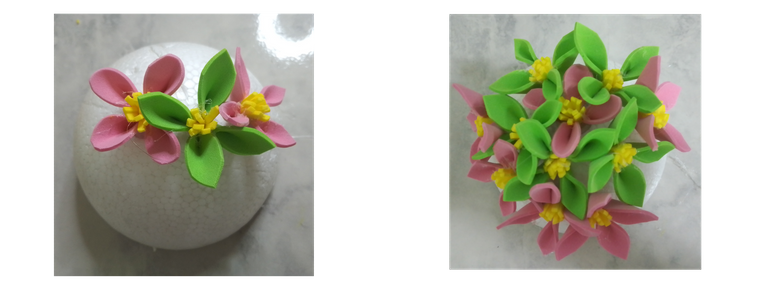
Step 4️⃣
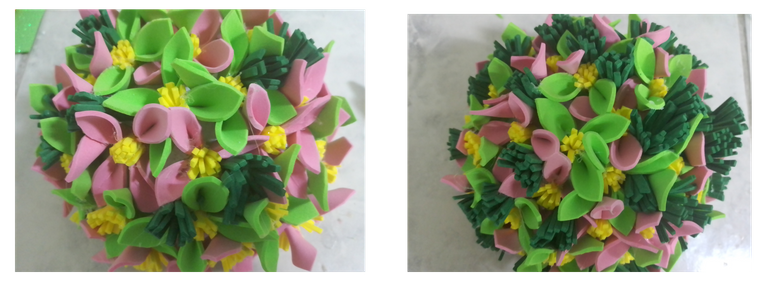
To cover the empty spaces we will make foliage.
Cut a strip approximately 3 centimeters wide by the length of the fomi, repeat the step of making the pistils.
Make small cuts along the length and then divide into rectangles of approximately 6 centimeters, roll and glue.
Cover all the spaces where the anime is shown. If it is necessary to trim the ends that look longer, trim them.
Paso 4️⃣
Para cubrir los espacios vacíos realizaremos follaje.
Recorta una tira de aproximadamente 3 centímetros de ancho por el largo del fomi, repite el paso de elaboración de los pistilos.
Realiza pequeños cortes a lo largo y luego dividen en rectángulos de aproximadamente 6 centímetros, enrolla y pega.
Cubre todos los espacios donde se muestre el anime. si es necesario recortar las puntas que se vean más largas, recorta.
Step 5️⃣
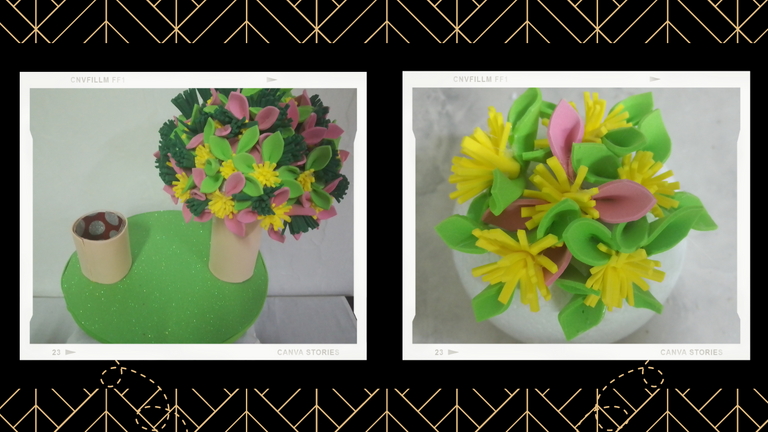
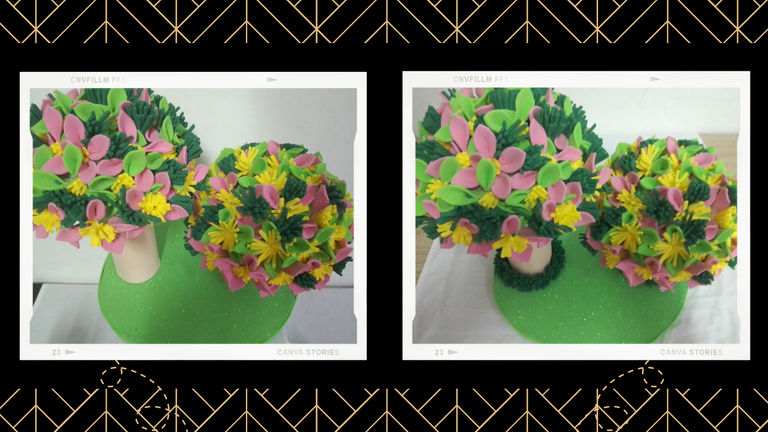
Once finished, glue the flower bouquet to the base.
Repeat all the above steps to assemble the other bouquet.
Once finished glue it to the other base of the cylinder.
To finish, place the foliage on the base of the cylinder and with that we have concluded our beautiful project.
What do you think?
I hope you like it and I encourage you to do it.
Paso 5️⃣
Una vez terminado pega el bouquet de flores a la base.
repite todos los pasos anteriores para armar el otro bouquet.
Una vez terminado pégalo en la otra base del cilindro.
Para culminar coloca follaje en la base del cilindro y con ello hemos concluido nuestro lindo proyecto.
¿Qué te pareció?
Espero te guste y te animes hacerlo.
Credits / Créditos
I'm a contributor of royalty-free images
Soy contribuyente de imágenes libres de derechos de autor

My youtube channel - game Play
My youtube channel - arts and crafts

Hacks, DIY, Crafts, handmade arts Community
Discord


![]() 👉
👉 ![]() 👉
👉 ![]() 👉
👉  👉
👉 ![]() 👉
👉 

https://twitter.com/EquipodeltaS/status/1564363919027732482
The rewards earned on this comment will go directly to the people( @equipodelta ) sharing the post on Twitter as long as they are registered with @poshtoken. Sign up at https://hiveposh.com.
Congratulations, your post has been upvoted by @dsc-r2cornell, which is a curating account for @R2cornell's Discord Community. We can also be found on our hive community & peakd as well as on my Discord Server
Felicitaciones, su publication ha sido votado por @dsc-r2cornell. También puedo ser encontrado en nuestra comunidad de colmena y Peakd así como en mi servidor de discordia
El resultado está muy hermoso 💗
Gracias amiga, ahora decora mi mesita.
Me encanto! es muy hermoso, muchas felicidades!😊😙
Gracias Ana, incluso el bouquet se puede quedar así, queda bonito él solito.
bellísimo trabajo 👏🏻👏🏻👏🏻🌟
Gracias Bella.
Hola bella @equipodelta @isabeliraequipod, que hermoso bouquete, Dios siga bendiciendo tus manos y creatividad.
Amen querida, igualmente muchas bendiciones para ti, me alegra que te guste :)
qué desborde de creatividad e imaginación.. Es impresionante!
No tanto como la tuya maestro 😍. Gracias, muchas gracias.