Tutorial: How to Knit a Chirple Parrot for Holozing
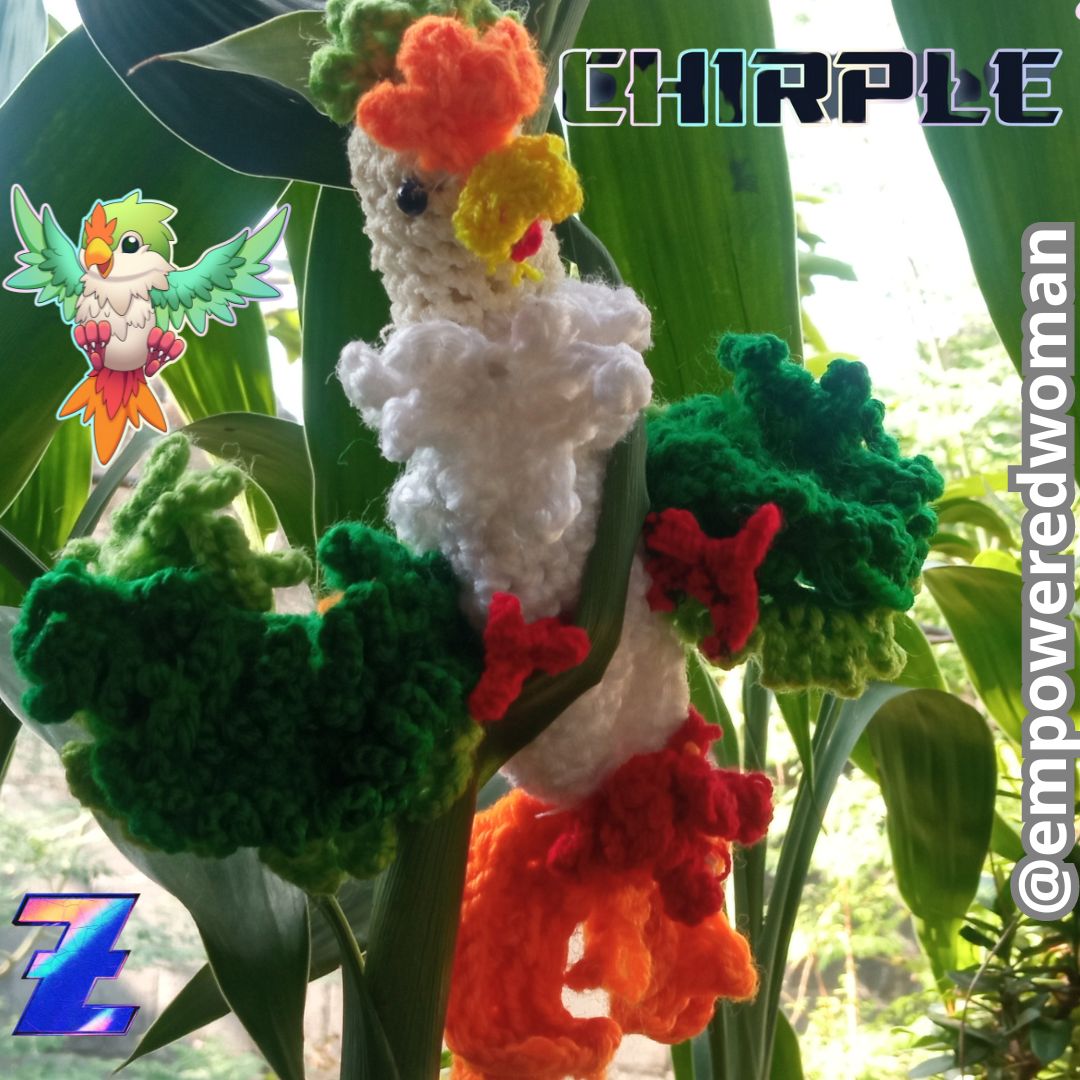
Hello Holozing community, here again with you to share a new project where I am excited and happy, I am pleased to present my proposal for the elaboration of a knitted parrot that is among the catchable creatures. This is Chirple, a beautiful parrot that will help our creatures heal. Additionally, Chirple can say some words that benefit the health and mana of creatures.
In this new weaving creation project I have combined my passion for weaving that has been going on for years. When I was little I sat watching my grandmother weave, although she didn't believe that I wouldn't learn to weave because I was left-handed, but that's for me. It did not make my dreams of knitting come true, I started creating small designs that I used it, until later I created accessories, making a hand-knitted parrot will allow my creativity and my fascination for this creature to be reflected here.
Since the parrot is an animal known for its beauty thanks to its bright colors in its plumage, apart from the fact that it has the ability to imitate sounds, it was a great feature to incorporate this creature into this game, due to its abilities and skills. that I would love to observe in the #Holozing game, now with my fabric I will reflect a character similar to these great creatures, using threads, creativity, passion, and my hands.
As for the aspects of this woven parrot, I wanted to give those shapes its bright colors through the threads with bright tones such as green, yellow, orange, green and its black eyes, Chirple's body is like a white but opaque color , I used the color white. Another part I wanted to highlight in this project are the powerful wings of Chirple, which as shown in the original creation with its open wings and beautiful plumage of two shades of light and dark green. In the same way, its long and slender tail with bright colors such as orange and red, this selection of colors together with the type of thread that is made with worsted, this is a thick texture to shape its body, you can see the point used.

This knitting project will undoubtedly be unique and adorable since each knitting creation is different when given that personal touch, which will capture your hearts as well as the original Chirple, which several of you will want to make, without further ado let's get to the creation of this beautiful creature.
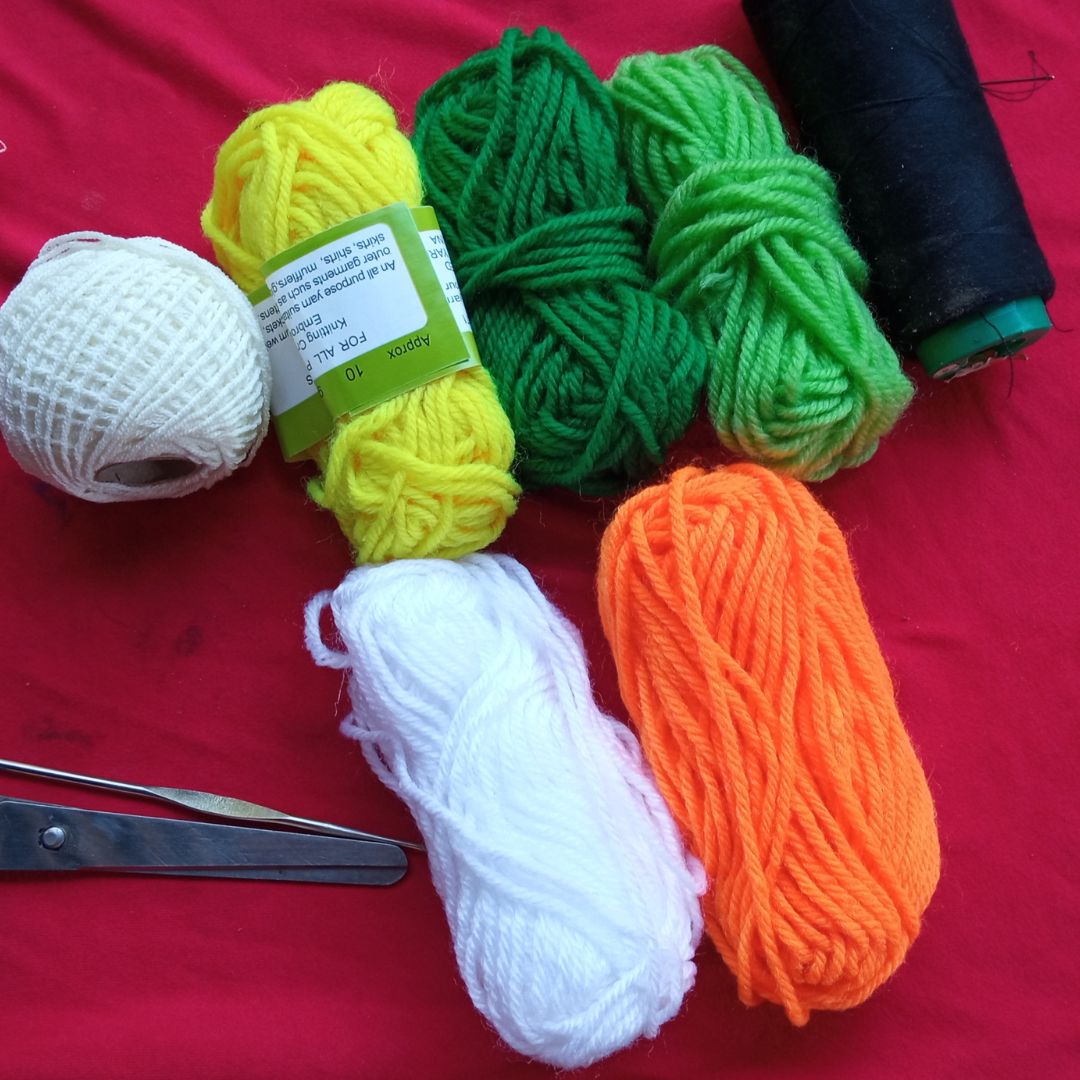
Materials
Worsted Threads in white, light and dark green, yellow, orange, red.
2 little black eyes.
Knitting needle No. 2
Scissors
Thread and sewing needle.
Stuffed.
Process
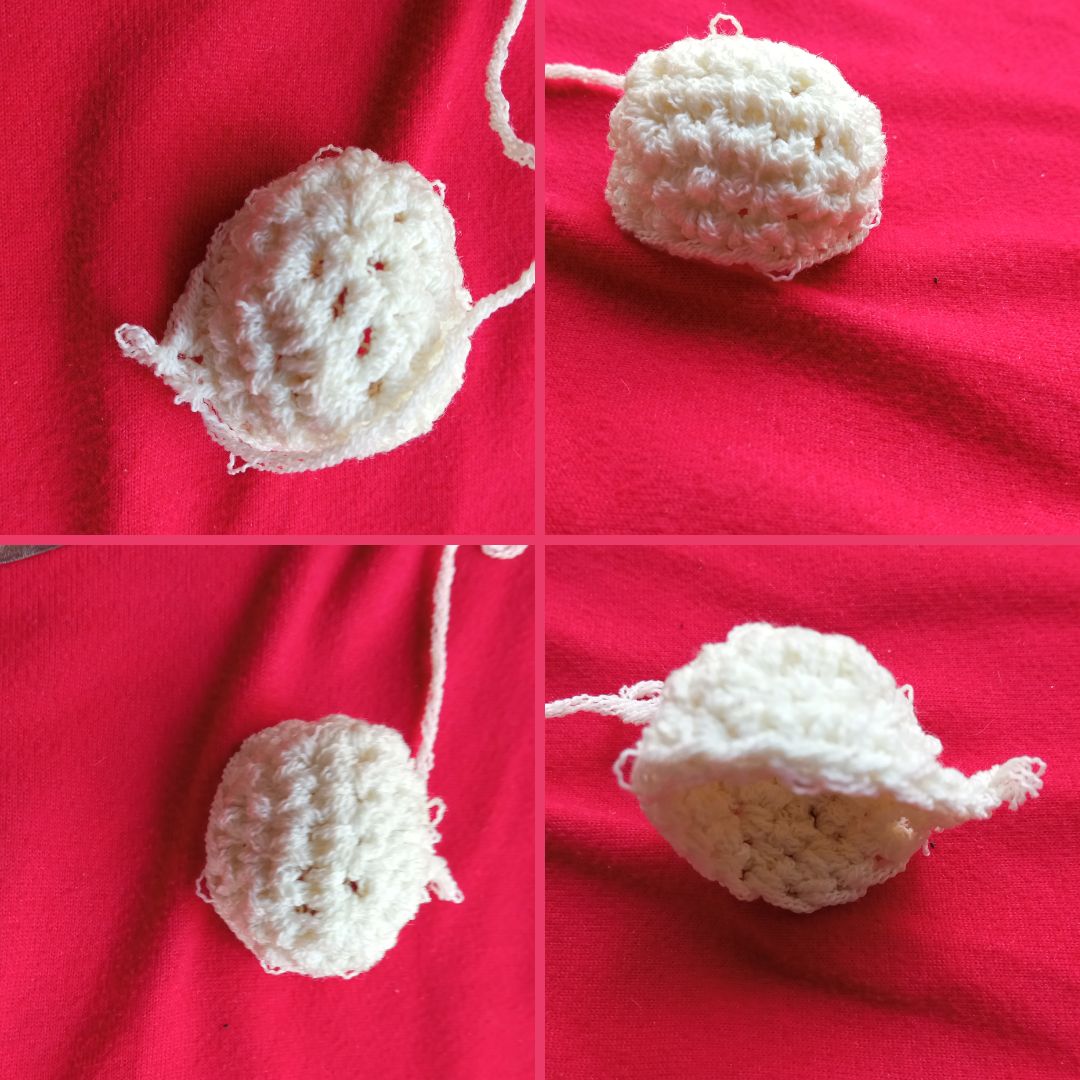
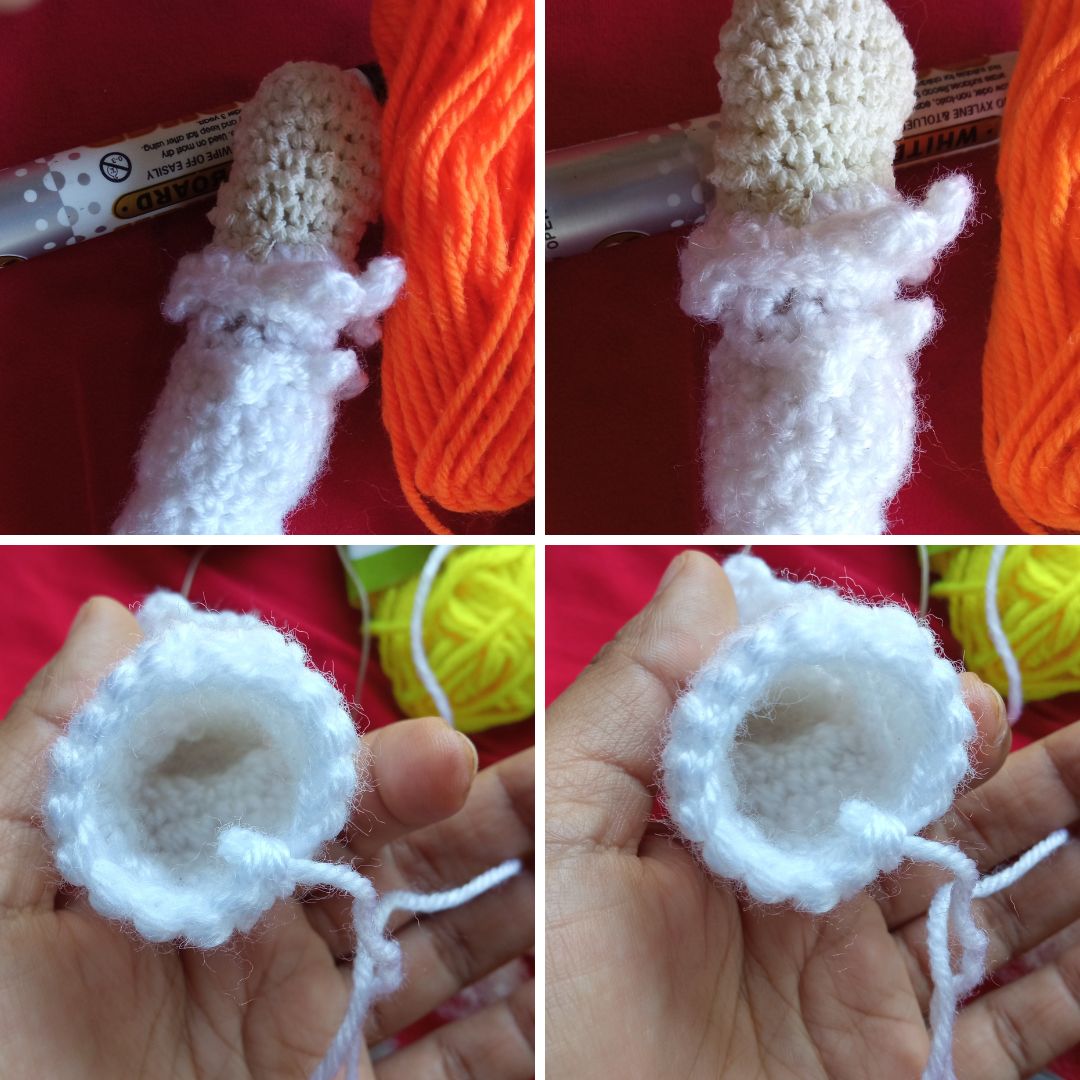
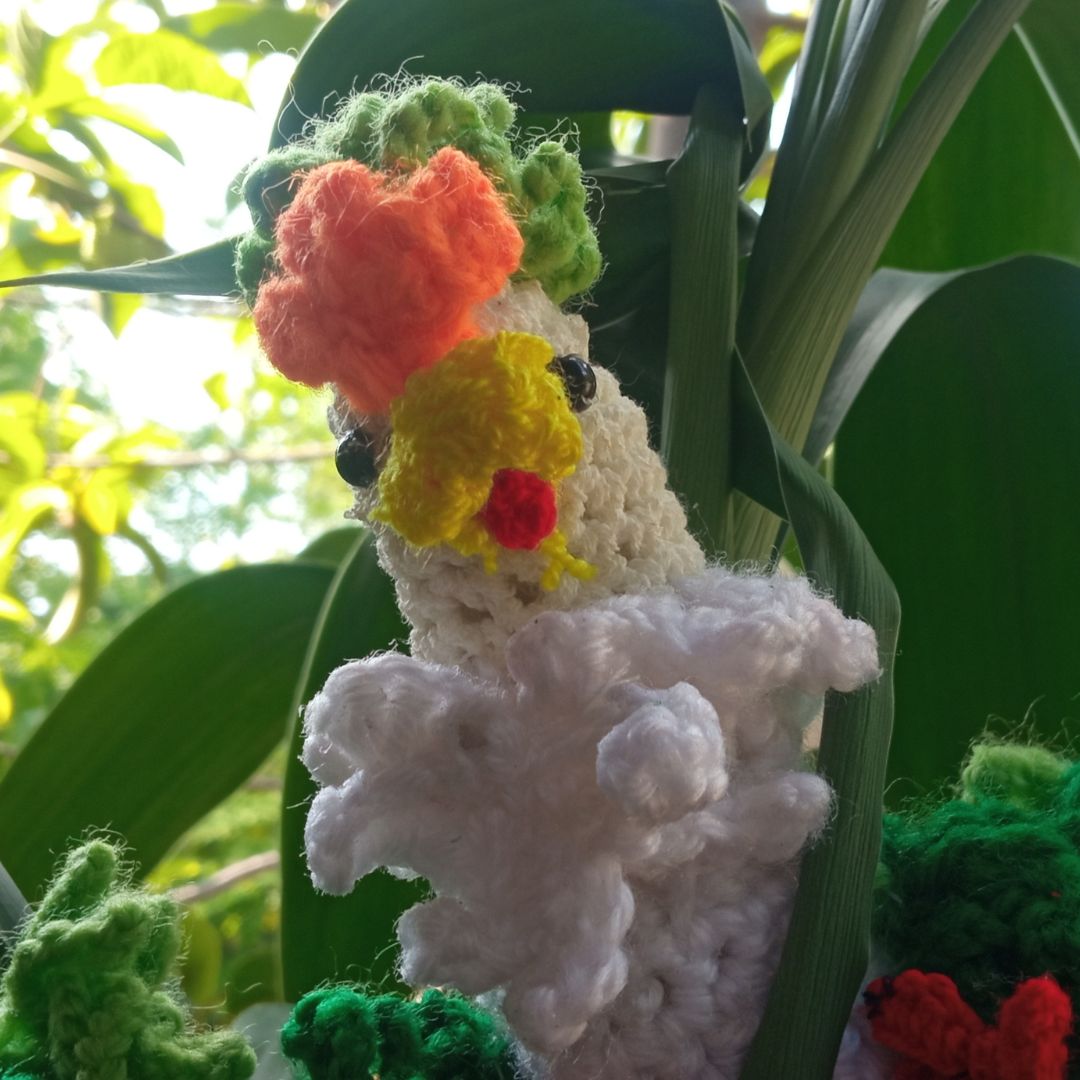
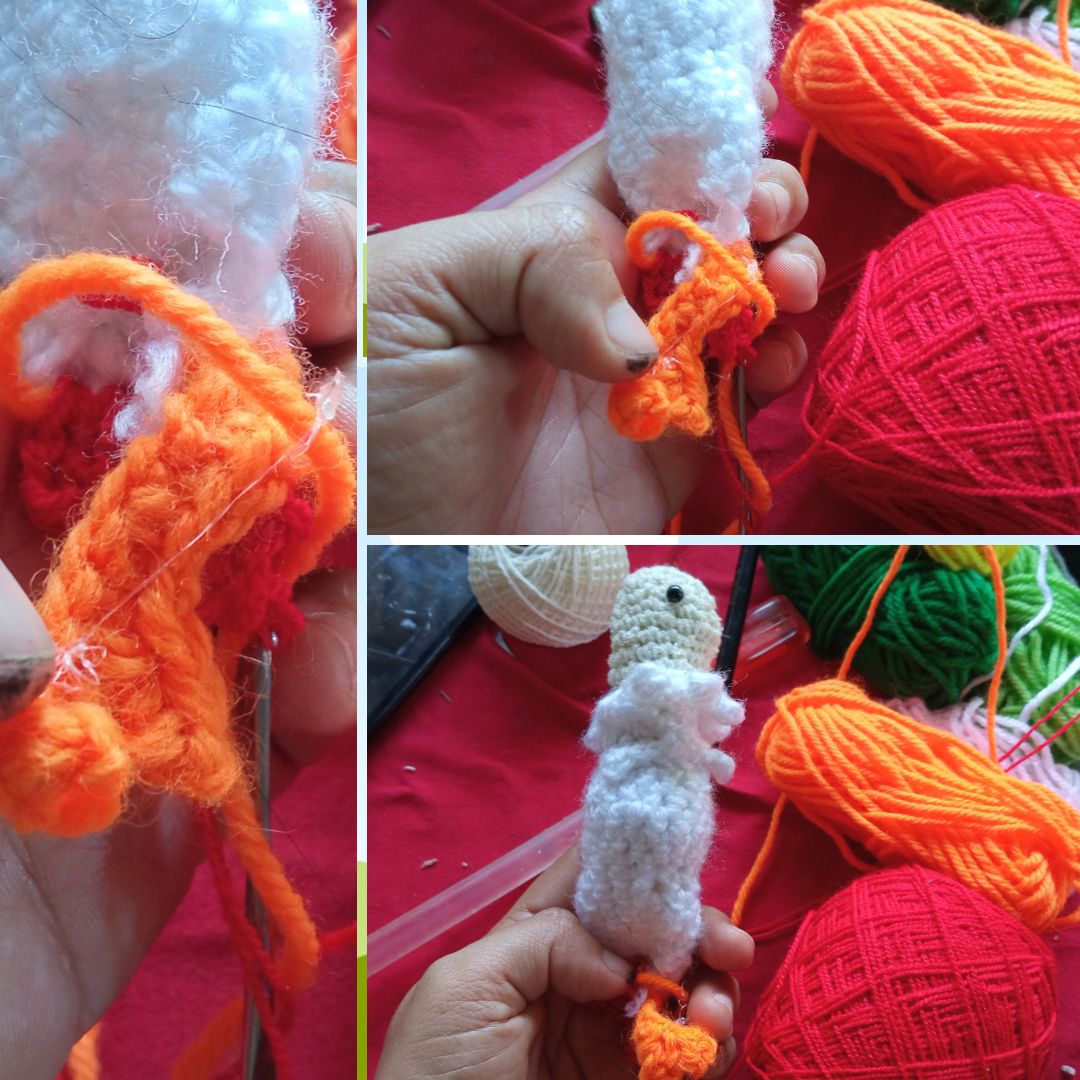
First, starting by creating the body, we start with the head, which we use the amigurumi technique, which is to knit in a circle and increase the stitches and decrease them to give their shape to each part that we must point to the head, in the neck it is thinner and we will go down. towards his chest where we must increase the stitches in each round, I made a relief effect to make the plumage that our little friend has on his neck, until we get to decrease again in the tail, I started with stitches under 8 until I reached the most large to 24, when going down again in the tail with four that its thinnest part.
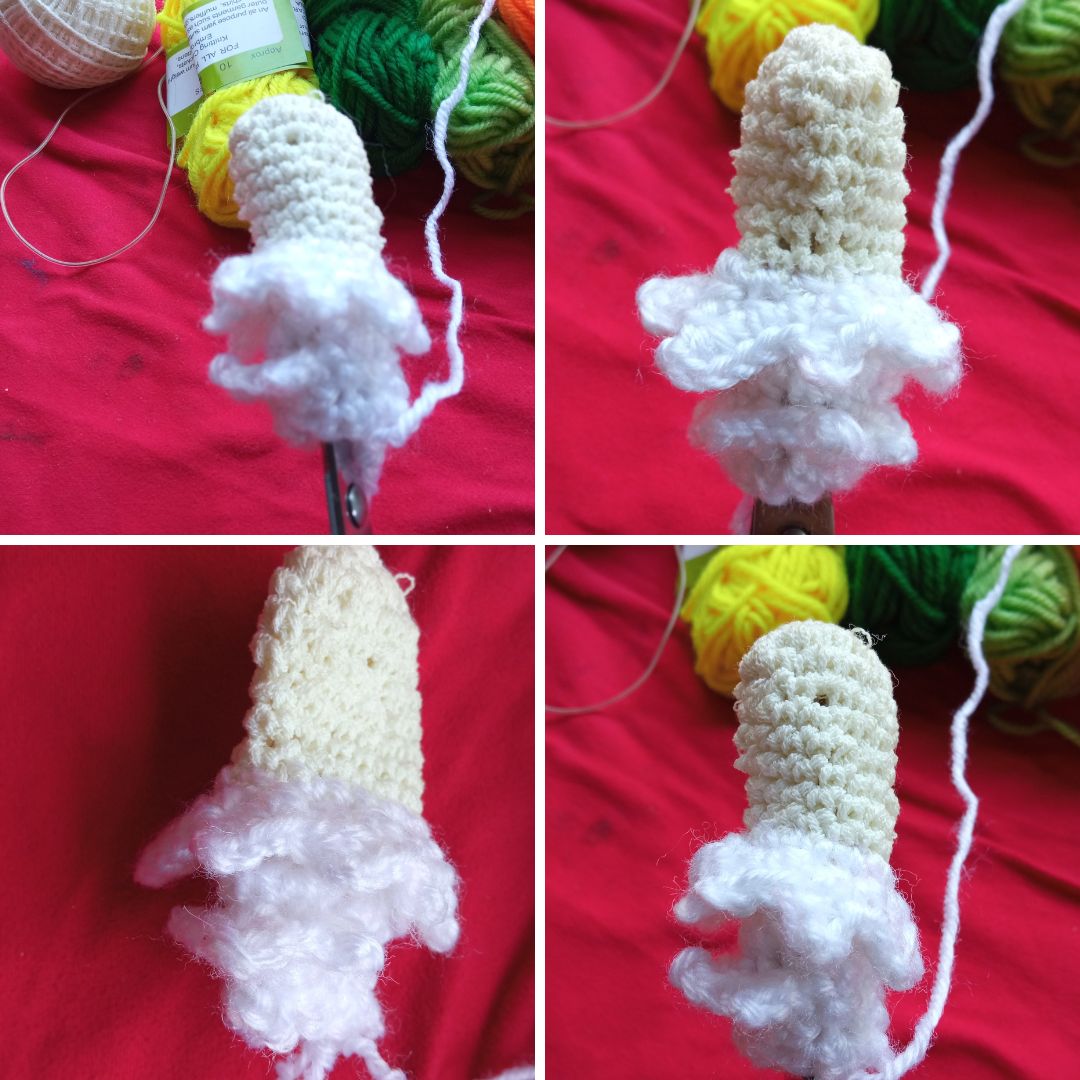
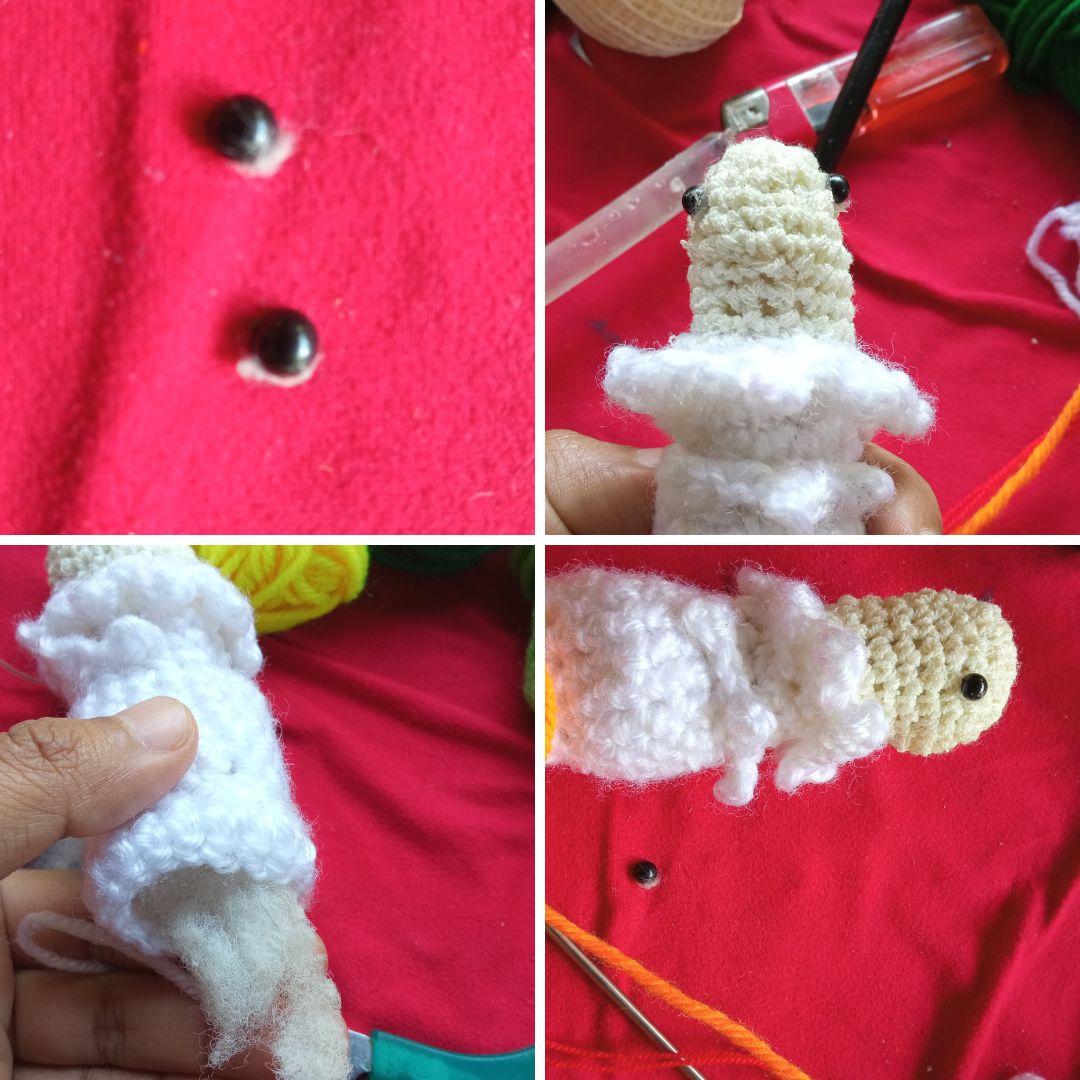
To shape our body we must use the filling, this will help us to give our parrot a well-defined shape, where we must fill its head and body, making a good distribution of it, where to fill more, we must shape the body of the parrot with our hands giving gentle squeezes so that it is defined, our hands are the most important tools of this project. Glue two little black eyes to see the shape of my parrot.
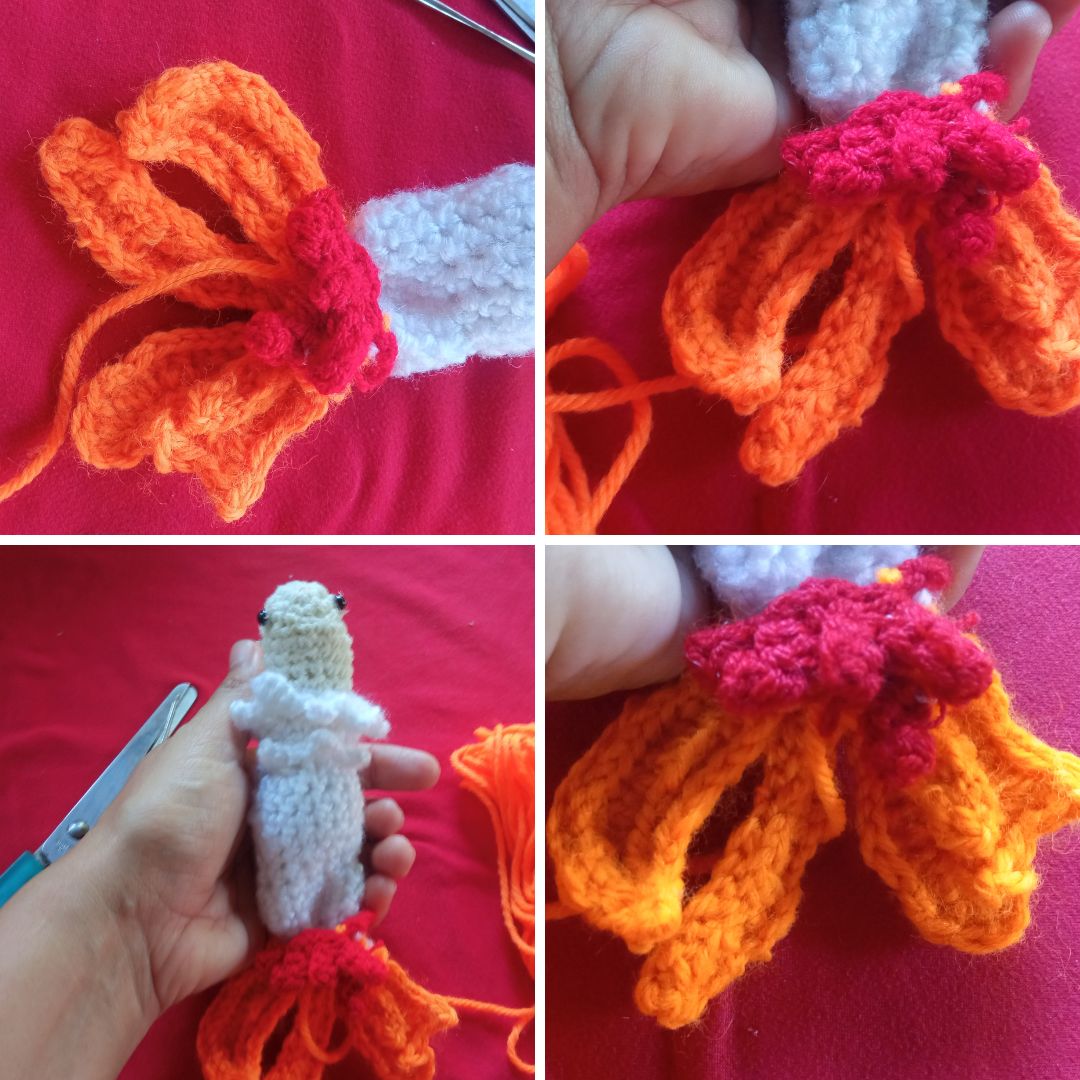
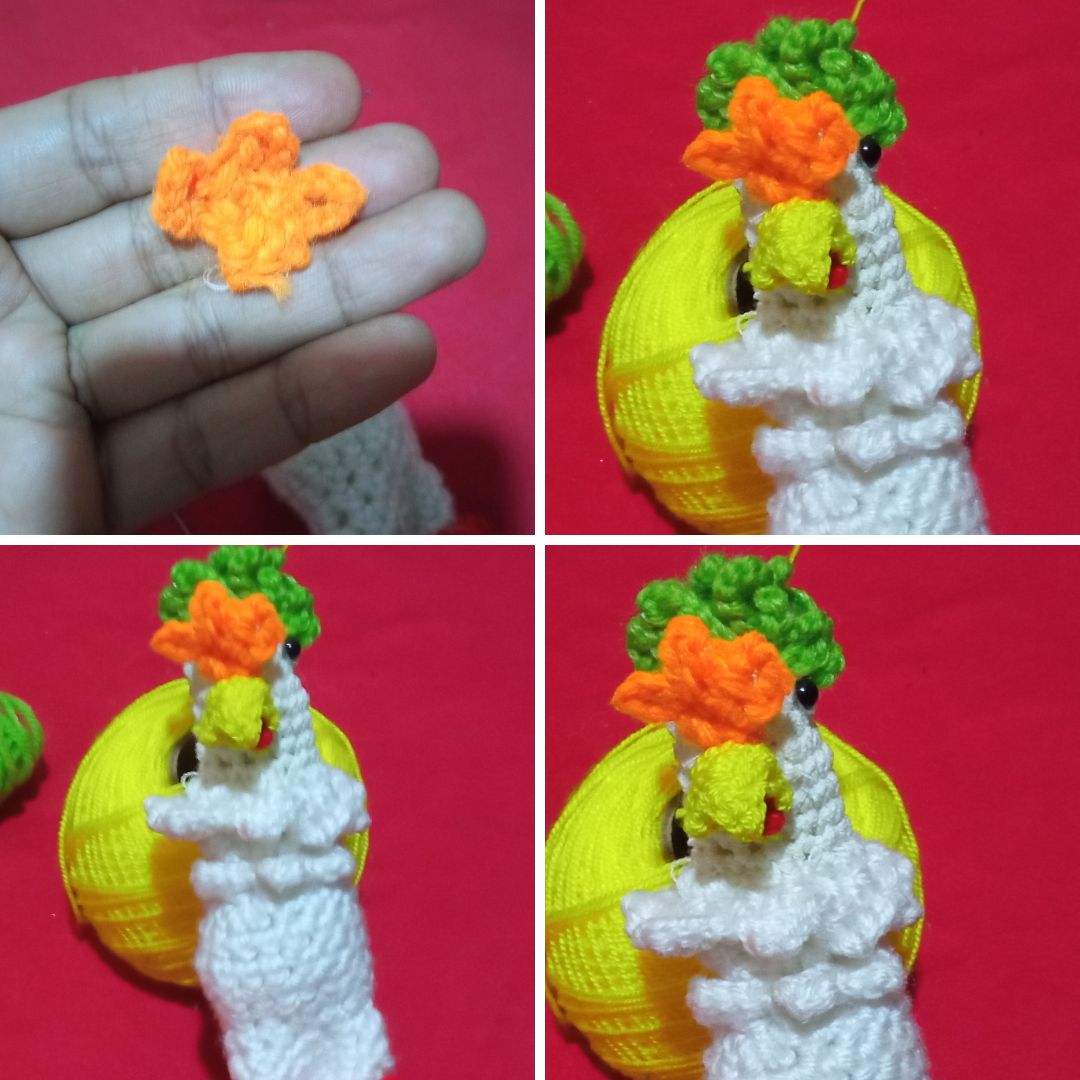
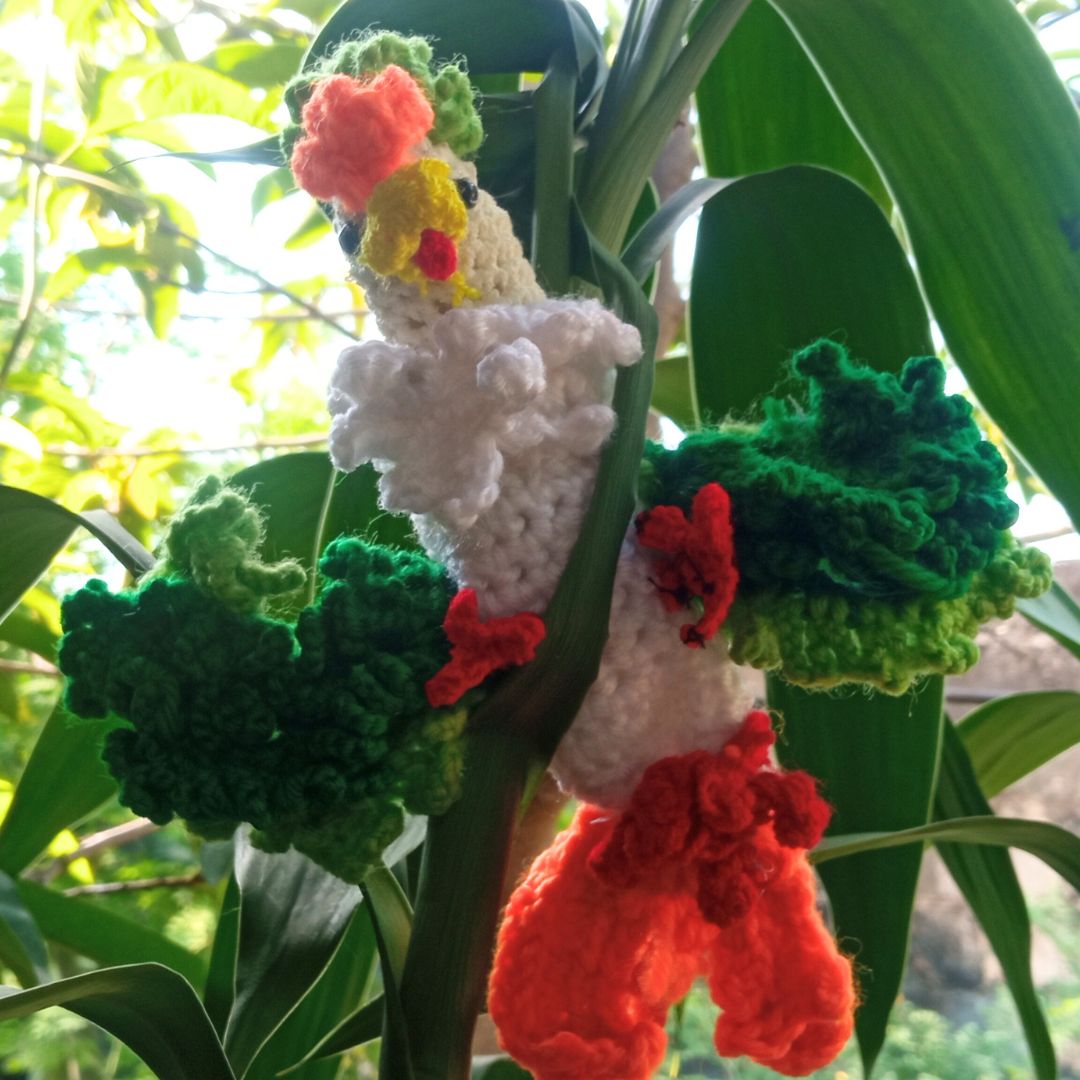
Then I created the parts of this majestic parrot, starting with its beautiful Using the red and orange yarn, making single stitches, giving it shape, creating with the technique when we make the leaves, insert this fabric directly into the tail, weaving it with the same thread, from this I create 4 feathers.
[PHOTO COPY-2024-02-23T142651.611.JPG] ( )
)
When I was creating each piece apart from my parrot, I glued it all at once, since I wanted to observe how my parrot Chirple took on its parrot shape as I placed each piece.
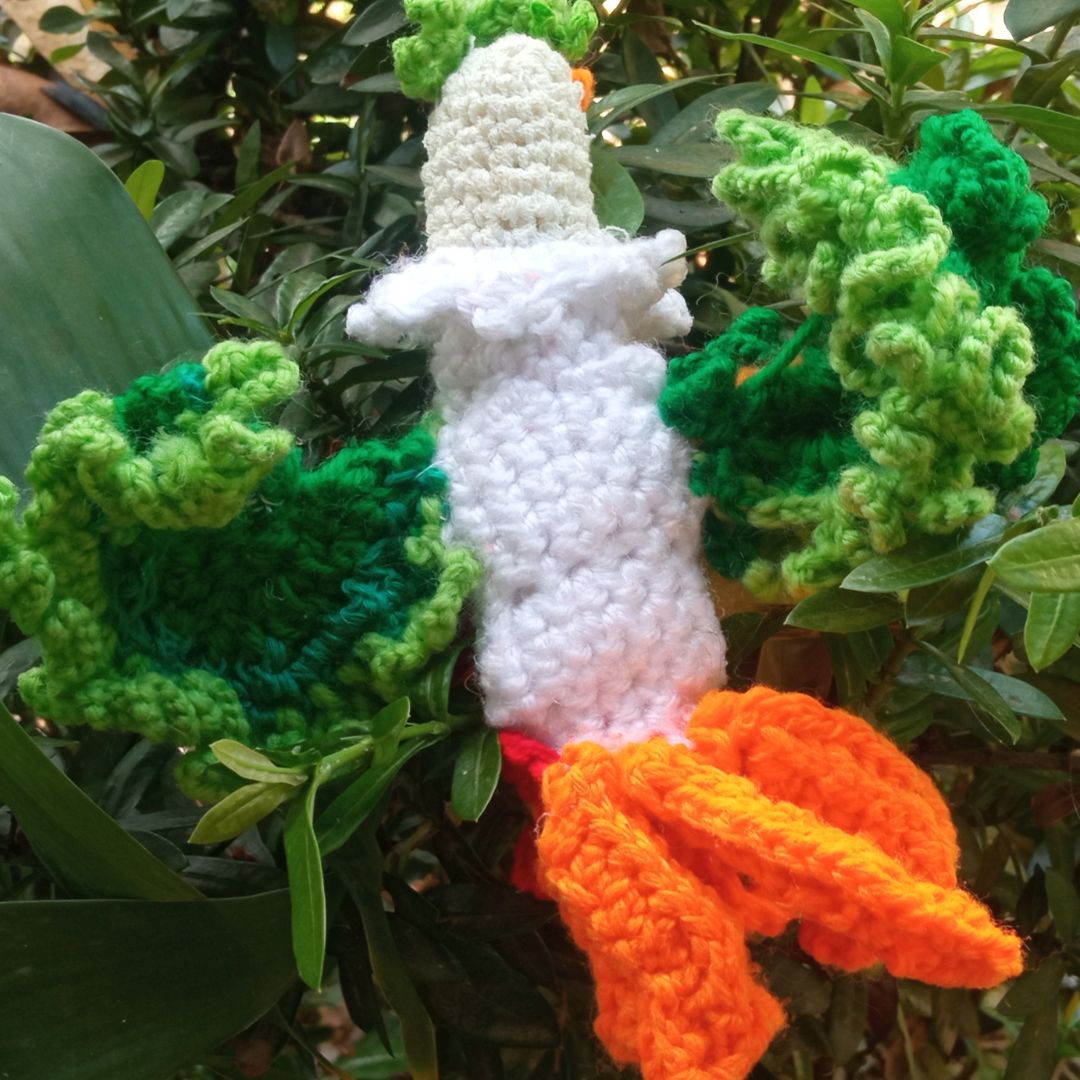
Continuing with the Chirple Tail, apart from having an orange tail, it also has a smaller red one, this one made the same amigurumi of the orange stitch which is single crochet, this one I made with 8 stitches to make the small tail. This creates five small feathers, to create the small red tail that Chirple has.
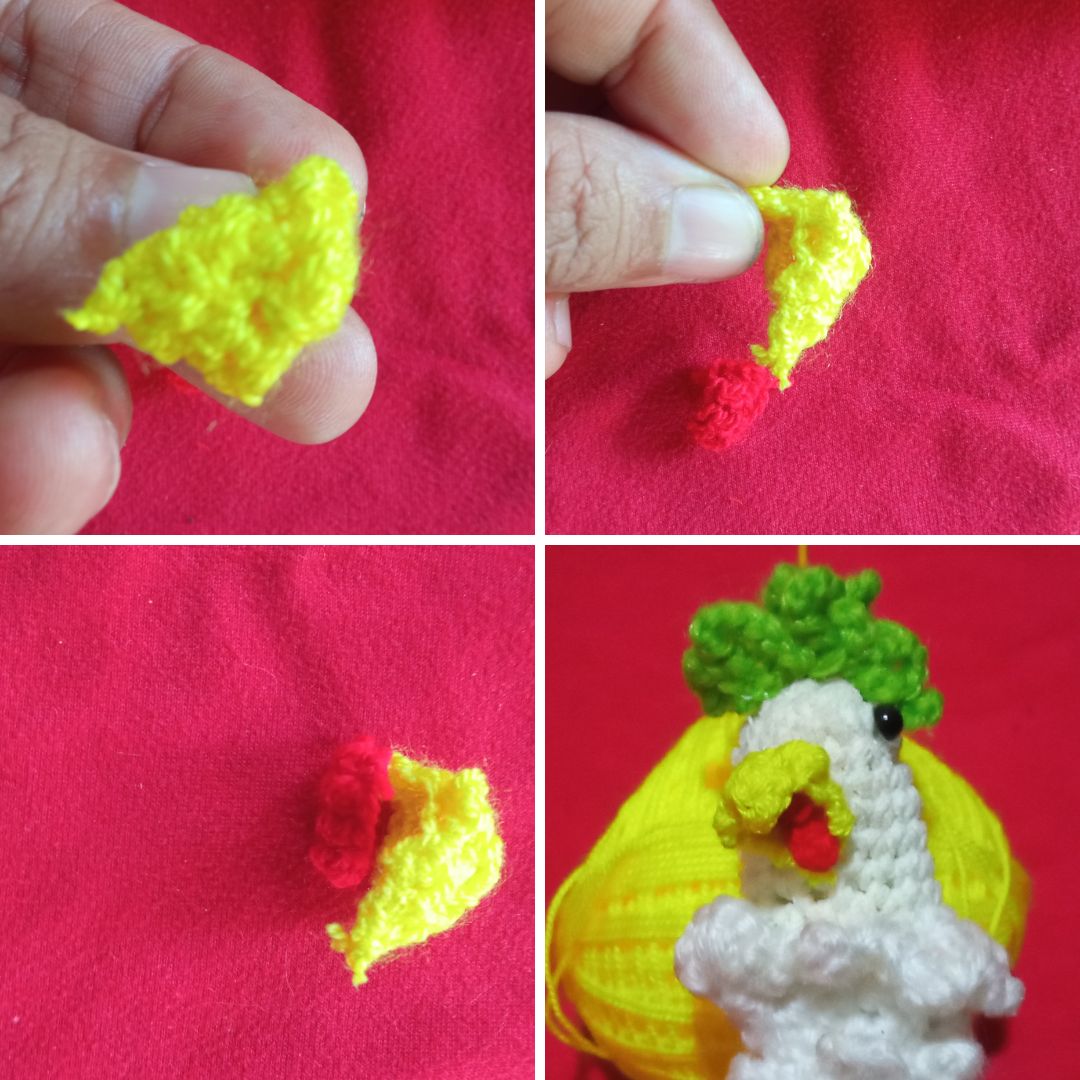
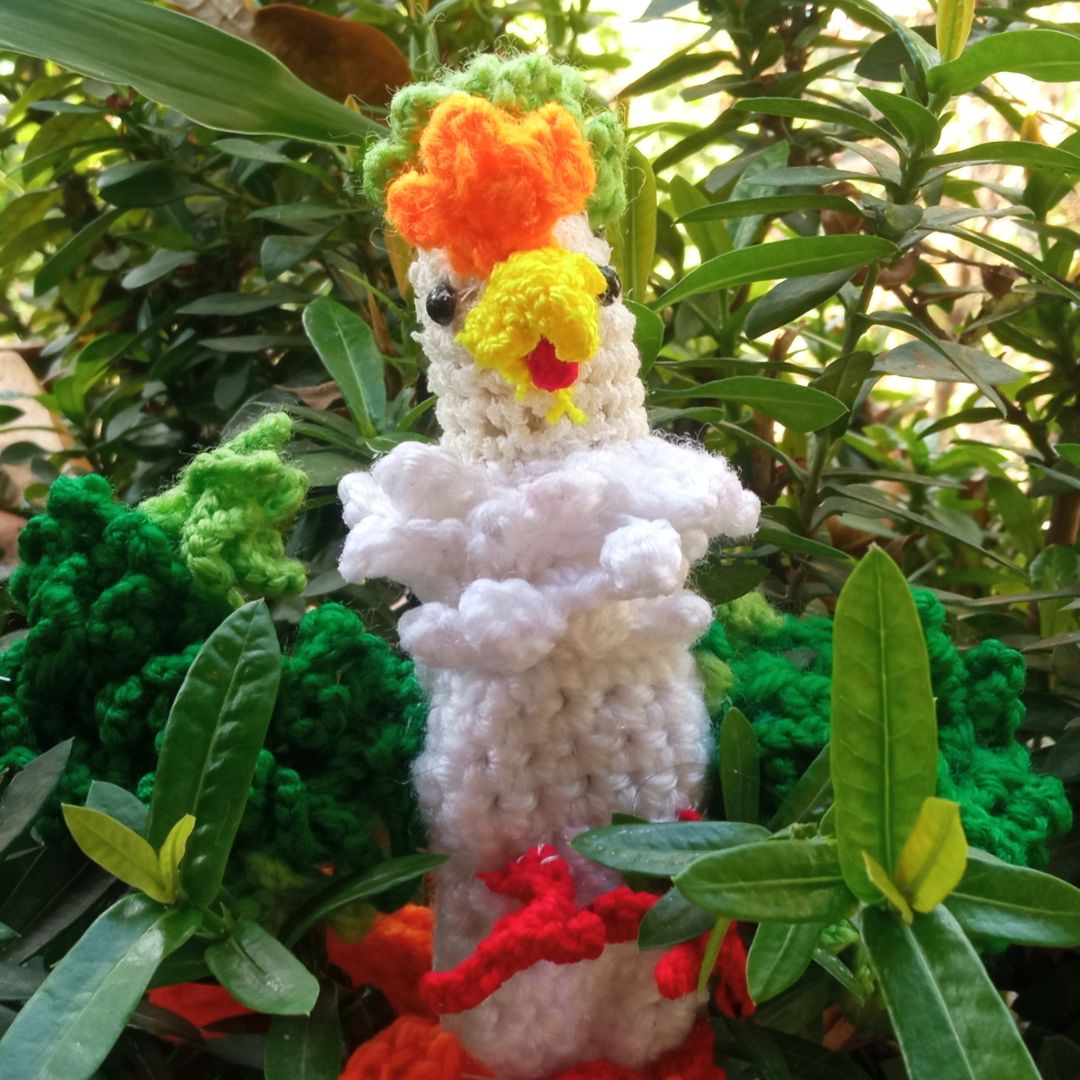
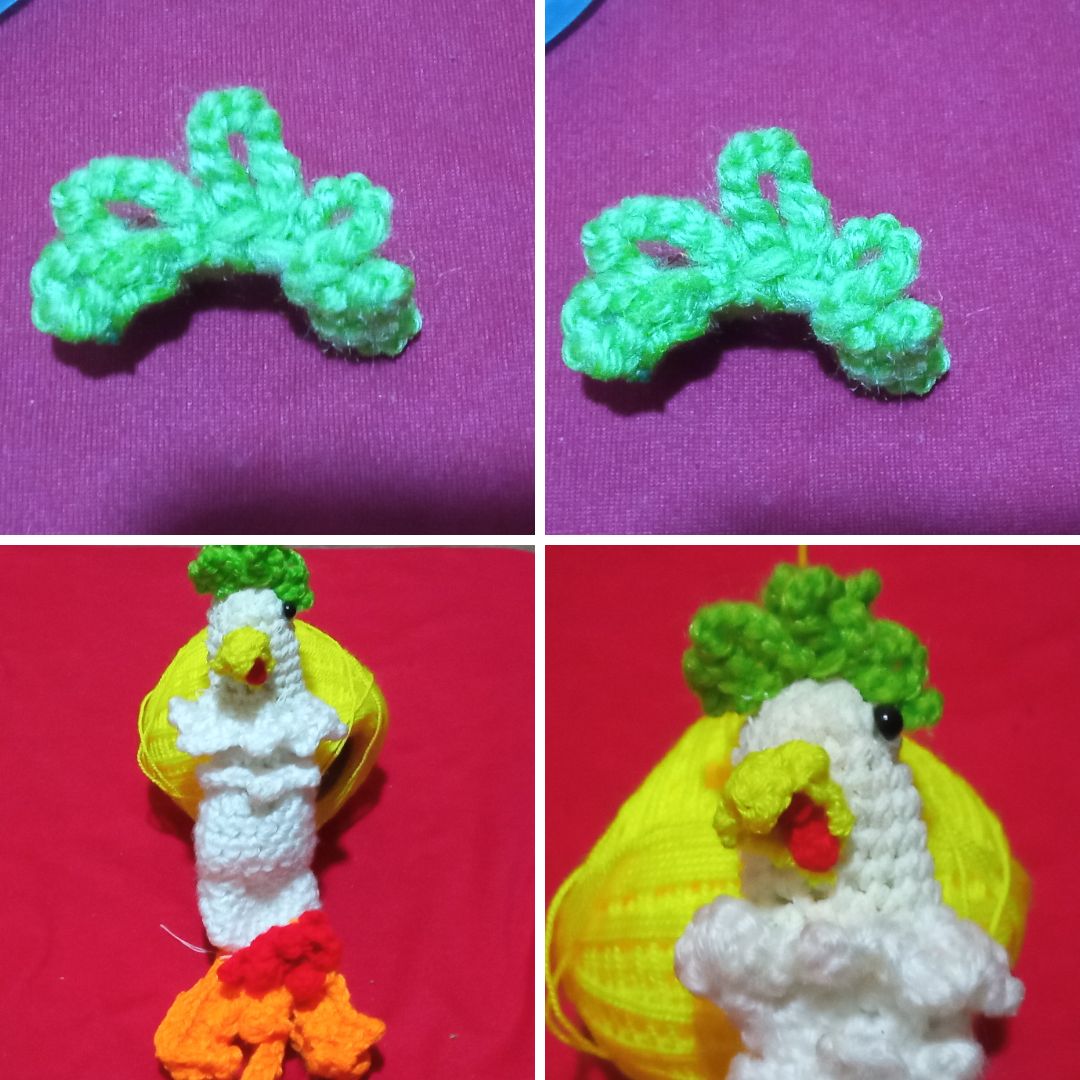
To give that green plumage effect that our friend Charly has on his head, make a small green crest in the shape of a relief, in turn make the orange crest that is near his beak, make the beak with yellow yarn thread and red I made it open type, without forgetting to shape its pointed beak.
[PHOTO COPY-2024-02-23T143104.807.JPG] ( )
)
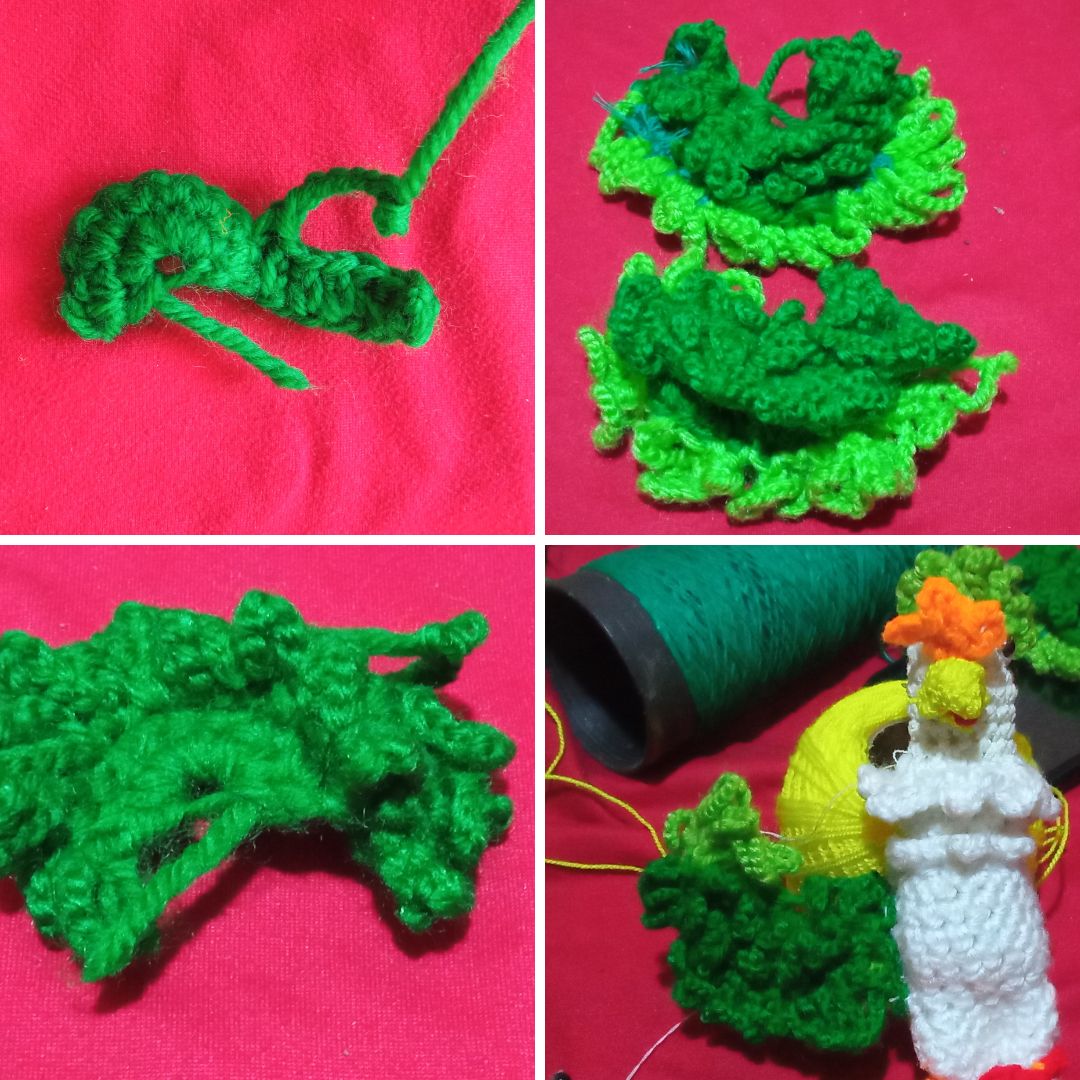
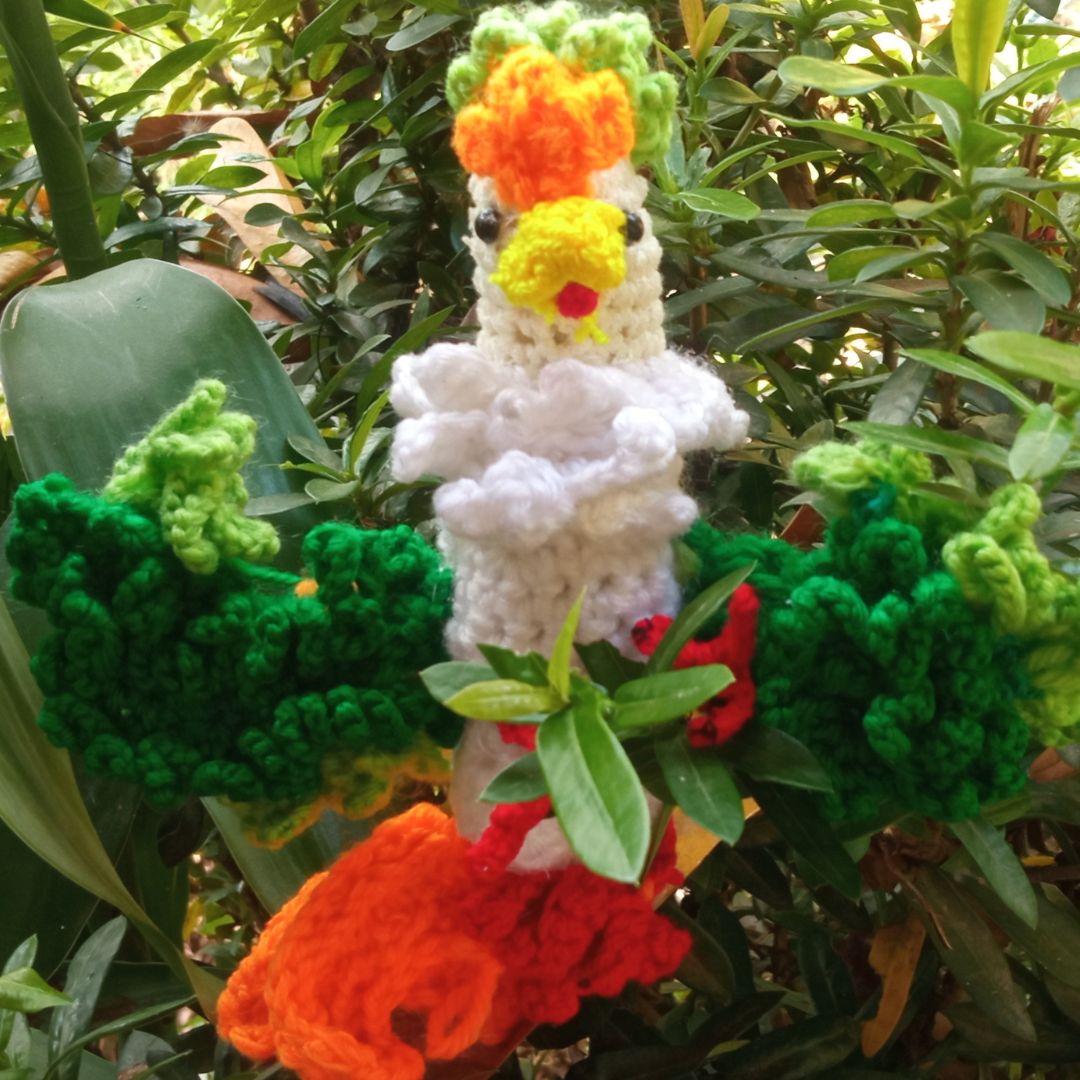
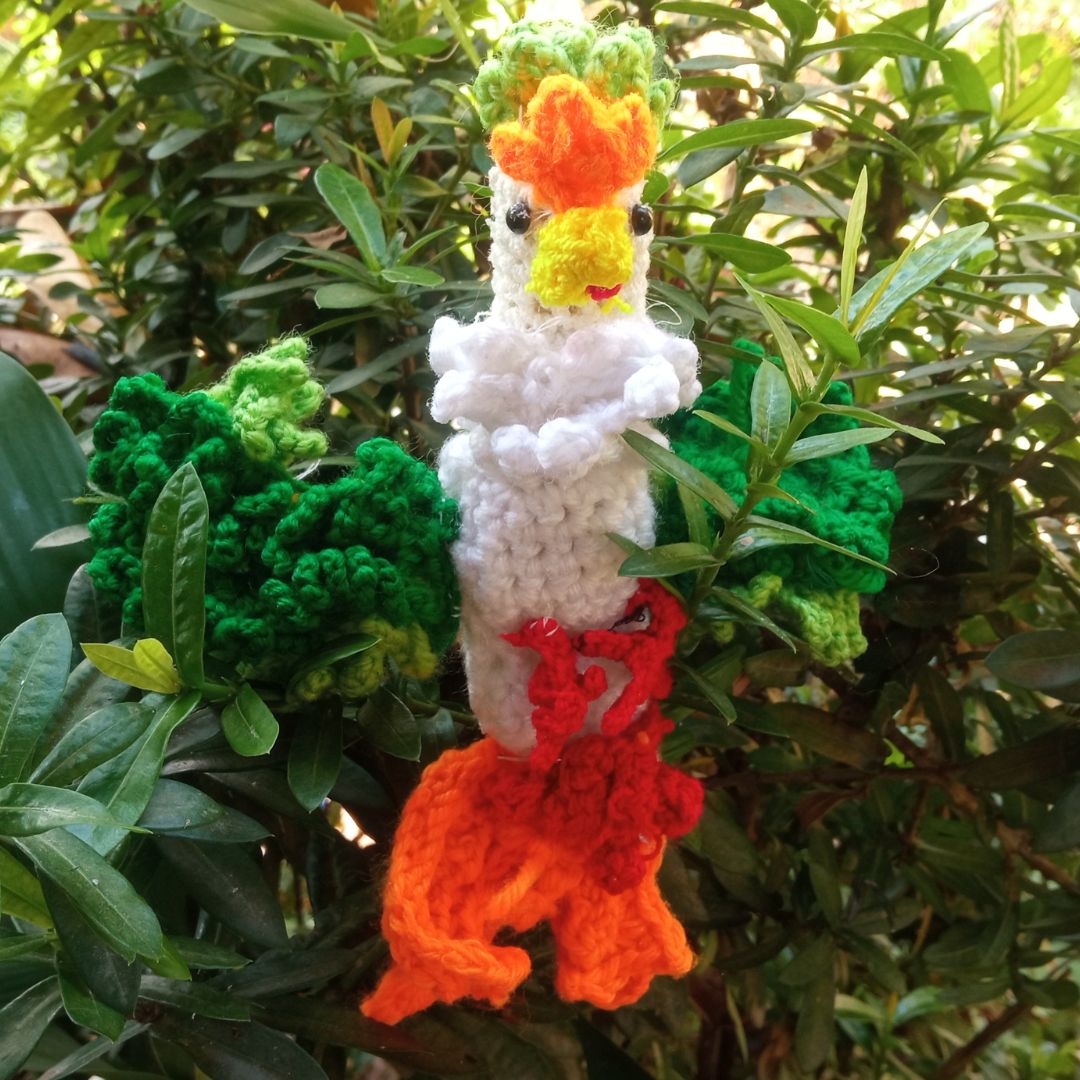
For the wings to create that feather effect and enhance their beauty, use the relief type effect and circular shape to detail those feathers that our friend Chirple will help him fly high and be powerful that can help the creatures in their battles. First start by making the dark green ones with two layers, to close with a single layer of light green. Finally, create the red legs and claws.
This is how my Parrot Chirple amigurumi work turned out, I hope you like the set of photos I select to present my project.

In summary, creating a knitted parrot for the world of games #Holozing was an exciting and rewarding project for me since it makes a great combination that is the craft of hand knitting, because we combine that imagination and creativity at moments Creating these pieces, and designing a beautiful game makes it exciting and fascinating. This type of project takes time because it must be done with patience and dedication, each part of this parrot to create our work, this is the first of my collection of woven Holozing creatures. I just have to tell you:
May fun and creativity be with you in this exciting knitting project and games from Holozing!
Hola comunidad Holozing nuevamente aquí con ustedes para compartir un nuevo proyecto en donde estoy emocionada y feliz, me complace presentarle mi propuesta para la elaboración de un loro tejido que está entre las criaturas capturable este es Chirple un hermoso loro que ayudara a nuestra criaturas a sanar, además Chirple puede decir algunas palabras que benefician en la salud y mana de las criaturas.
En este nuevo proyecto de creación de tejido he combinado mi pasión al tejido que viene desde hace años que inicies cuando estaba pequeña me sentaba observar a mi abuela como tejía, aunque ella no creía que no aprendería a tejer por ser zurda, pero eso para mí no hizo que mi sueños de tejer se cumpliera, inicie creando pequeños diseños que lo utilizaba, hasta luego llegue crear accesorios, hacer un loro tejido a mano dará que mi creatividad y mi fascinación por esta criatura se plasme aquí.
Ya que, el loro es un animal conocido por su belleza gracias a sus colores brillantes que tiene su plumaje, aparte de que este tiene la capacidad para imitar sonidos, fue una gran característica que incorporara esta criatura en este juego, por sus habilidades y destrezas que me encantara observar en el juego #Holozing, ahora con mi tejido yo reflejare un personaje parecido a están gran criatura, utilizando los hilos, creatividad, pasión, y mis manos.
En cuanto los aspectos de este loro tejido quise dar esas formas de sus colores brillantes por medio de los hilos con tonos vivos como el verde, el amarillo, naranja, verde y sus ojos negros, el cuerpo de Chirple es como un color blanco pero opaco, yo utilice fue el color blanco. Otra parte quise resaltar en este proyectos son las poderosas alas de Chirple que como nos muestra en la creación original con sus alas abiertas y bellos plumajes de dos tonalidades verde claro y oscuro. De igual manera su cola larga y esbelta con los colores brillantes como lo son el naranja y el rojo, esta selección de colores conjuntamente con el tipo de hilo que lo realice con estambre este es una textura gruesa para darle forma a su cuerpo se observe el punto utilizado.
Este proyecto tejido será sin duda único y adorable ya que cada creación de tejido es diferente cuando se le da ese toque personal, que capturara sus corazones así como el Chirple original, que varios de ustedes querrán elaborar, sin más preámbulo vamos a la creación de este hermosa criatura.
Materiales
Hilos de Estambre colores blanco, verde claro y oscuro, amarillo, naranja, rojo.
2 ojitos negros.
Aguja de tejer N° 2
Tijera
Hilo y aguja de coser.
Relleno.
Proceso
Primero iniciando creando el cuerpo se inicia con la cabeza que utilizamos la técnica de amigurumi que es ir tejiendo en círculo e ir aumentando los puntos y disminuyéndolo para darle su forma a cada parte que debemos señalar la cabeza, en cuello es más delgado e iremos bajando hacia su pecho en donde debemos aumentar los puntos en cada vuelta, le realice un efecto relieve para hacerle el plumaje que tiene nuestro amiguito en el cuello, hasta llegar nuevamente a disminuir en la cola, yo inicie con puntos bajo de 8 llegue hasta el más grande a 24, al bajar nuevamente en la cola con cuatro que su parte más fina.
Para ir dando forma a nuestro cuerpo debemos utilizar el relleno esto nos ayudara a que nuestro loro tenga la forma bien definida, donde debemos rellenar su cabeza y cuerpo, haciendo una buenas distribución de este, en donde rellenar más, debemos moldear el cuerpo del loro con nuestra manos dando suave apretones para que este se le defina, nuestra manos son la herramientas más importante de este proyecto. Pegue dos ojitos negros para irle viendo forma a mi lorito.
Luego fui creando las piezas a partes de este majestuoso loro como inicie por su hermosas colas utilizando el estambre rojo y naranja, haciendo puntos bajos dándole forma, creando con la técnica cuando realizamos las hojas, este tejido de una vez lo inserte directamente en la cola tejiéndolo con el mismo hilo, de este cree 4 plumas.
Cuando iba creando cada pieza aparte de mi loro, la fui de una vez pegando, ya que deseaba ir observando como mi loro Chirple iba teniendo su forma de loro al ir colocando cada piezas.
Continuando en la Cola Chirple a parte de tener una cola de color naranja, a su vez tiene una más pequeña de color rojo, este hizo el mismo amigurumi del punto de las naranja que es punto bajo, este lo realice con 8 punto para hacer la cola pequeña. Este le cree cinco pluma pequeña, para crear la cola roja pequeña que tiene Chirple.
Para dar ese efecto de plumaje verde que tiene nuestro amigo Charly en la cabeza, realice un pequeña cresta verde con forma de relieve, a su vez realice la cresta naranja que está cerca de su pico, el pico lo realice con hilo de estambre amarillo y rojo lo hice tipo abierto, sin olvidar de darle forma a su pico puntiagudo.
Para las alas para crear ese efecto de plumas y realzar sus belleza utilice el efecto tipo relieve y forma circular para detallar esas plumas que nuestro amigo Chirple le ayudara a volar alto y ser poderosas que puede ayudar a las criaturas en sus batallas. Primero inicie realizando las del color verde oscuro con dos capas, para cerrar con una sola capa de verde claro. Por ultimo cree las patas y garras de color rojos.
Así quedo mi obra de Loro Chirple amigurumi, espero le guste el set de fotos que seleccione para presentar mi proyecto.
En resumen, para la creación de un loro tejido para el mundo de los juegos #Holozing fue un proyecto emocionante y gratificante para mí ya que se realiza una gran combinación que es la artesanía del tejido a mano, porque combinamos esa imaginación y creatividad al momentos de crear esta piezas, y realizar un diseño de un hermosos juegos hace que sea emocionante y fascinante. Este tipo de proyecto lleva su tiempo porque hay que realizarlo con paciencia y dedicación, cada parte de este loro para crear nuestra obra, este es el primero de mi colección de criaturas de Holozing tejidos. Solo me queda decirte:
That surely is one of the coolest parrot ever 👏🏿
Hello, thank you very much for the support and for your kind words.