[ENG- ESP] Tutorial: kitten headband for carnivals
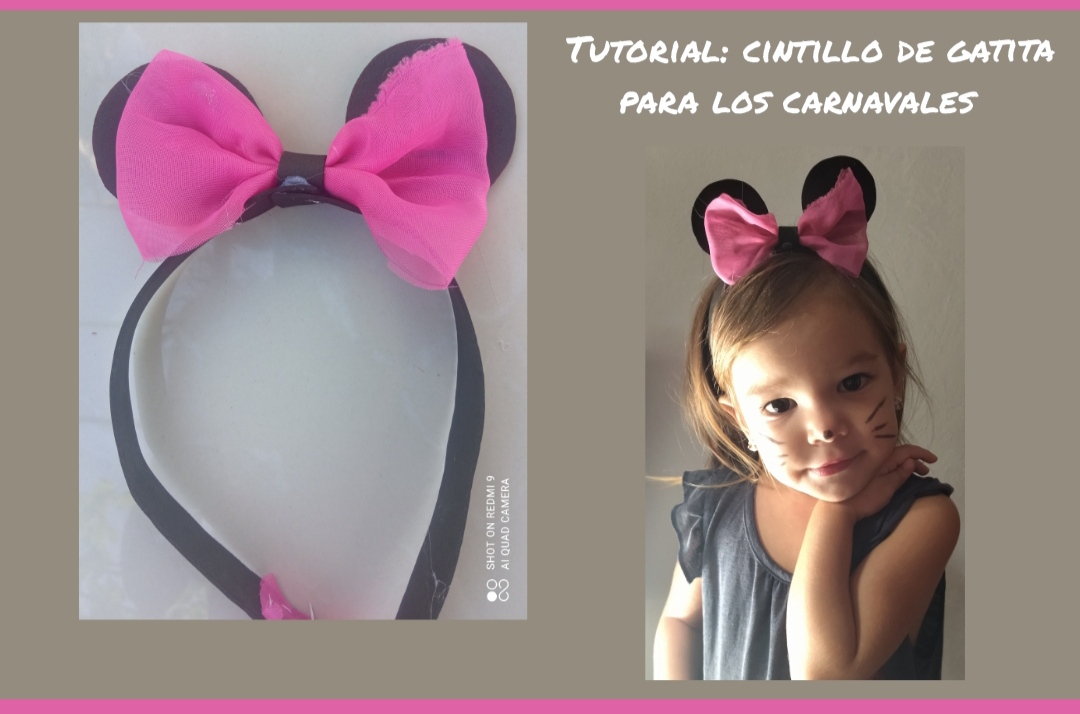
Happy and blessed night everyone, I hope you are enjoying these days of Carnival, parties and colors, this time I want to share with you a simple and easy tutorial for making a beautiful headband which I made for my girl, in This time we have very little to buy costumes for our little ones, but our creativity allows us to imagine and create things to satisfy our little ones who have the illusion of dressing up.
Feliz y bendecida noche tengan todos, espero estén disfrutando de estos días de Carnaval, fiestas y colores, en esta oportunidad quiero compartir con ustedes un sencillo y fácil tutorial bde la elaboración de un lindo cintillo el cual elabore para mi niña, en este tiempo muy poco tenemos para comprar disfraz para nuestros pequeños, pero nuestra creatividad nos permitide imaginar y crear cosas para satisfacer a nuestros pequeños quien tienen la ilusión de disfrazarse.
Yo decidí realizar para mí pequeña un lindo cintillo que me permitiera disfrazarla de una linda gatita.
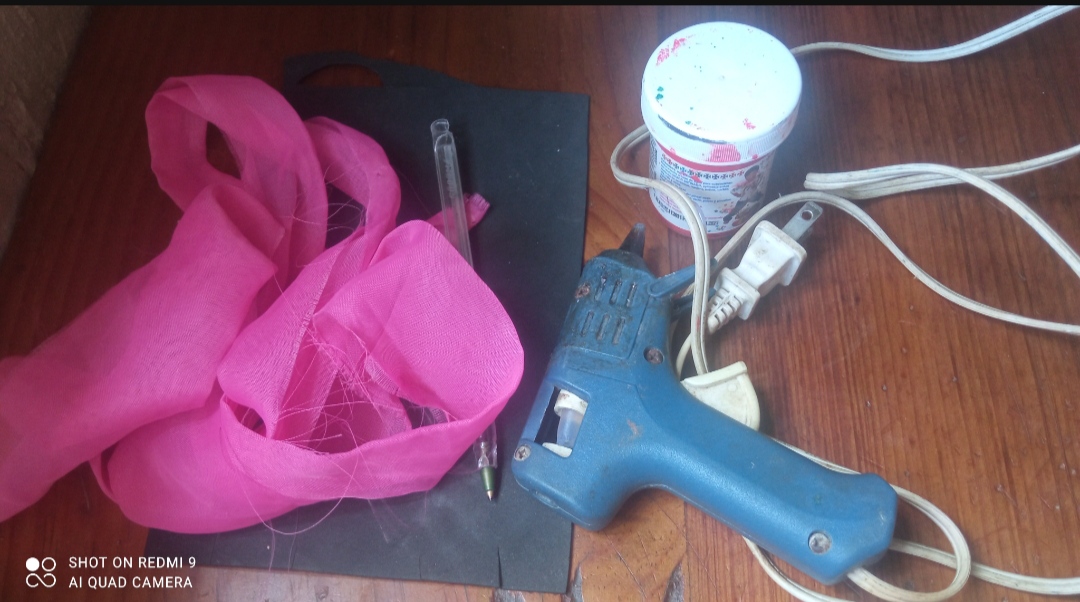
Acá mi proceso de elaboración para todos ustedes, cabe destacar que todo lo que usé lo tenía en casa, no fue necesario gastar en materiales.
- Black foam.
- Pink Cloth.
- needle and thread.
- Glue.
- Scissors.
- Foami negro.
- Tela Rosada.
- hilo y aguja.
- Pegamento.
- Tijera.
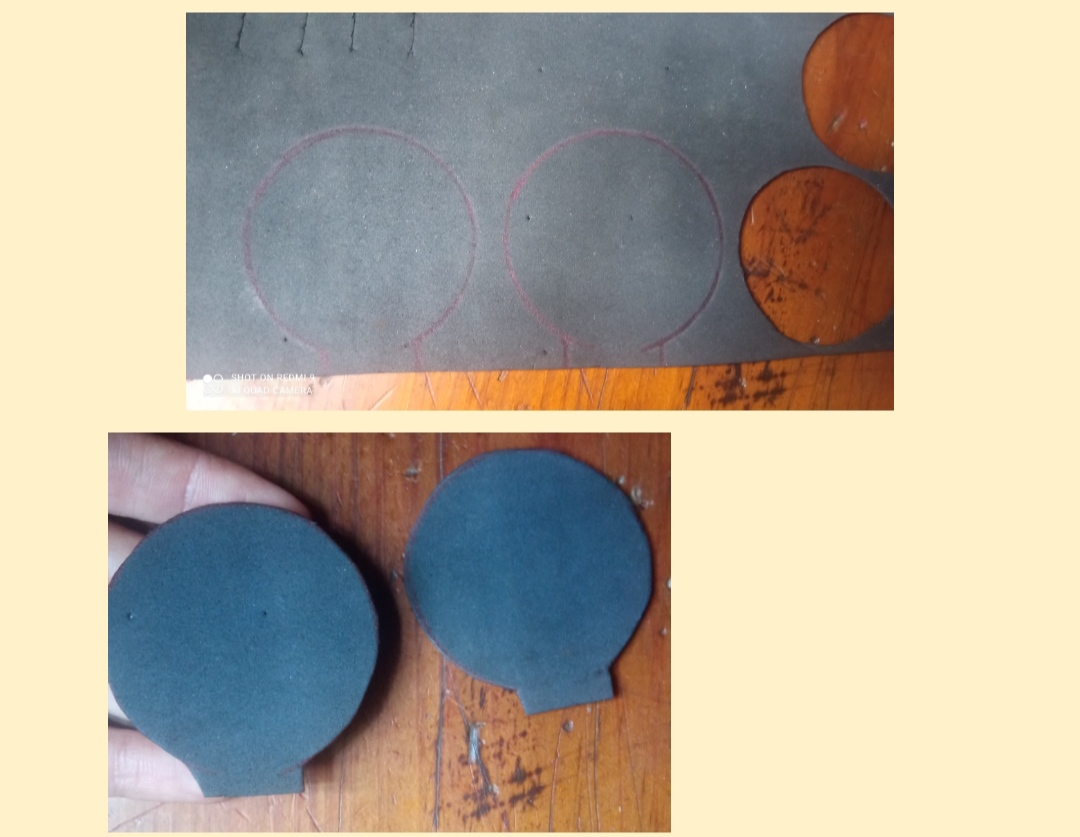
✴️ Step 1: to take the black foami and mark two circular shapes with two small tabs at the bottom and then cut the shape with scissors.
✴️ Paso 1: para tomaremos el foami negro y marcaremos dos formas circulares con dos pequeñas pestañas en la parte de abajo y luego con la tijera recortaremos la forma.
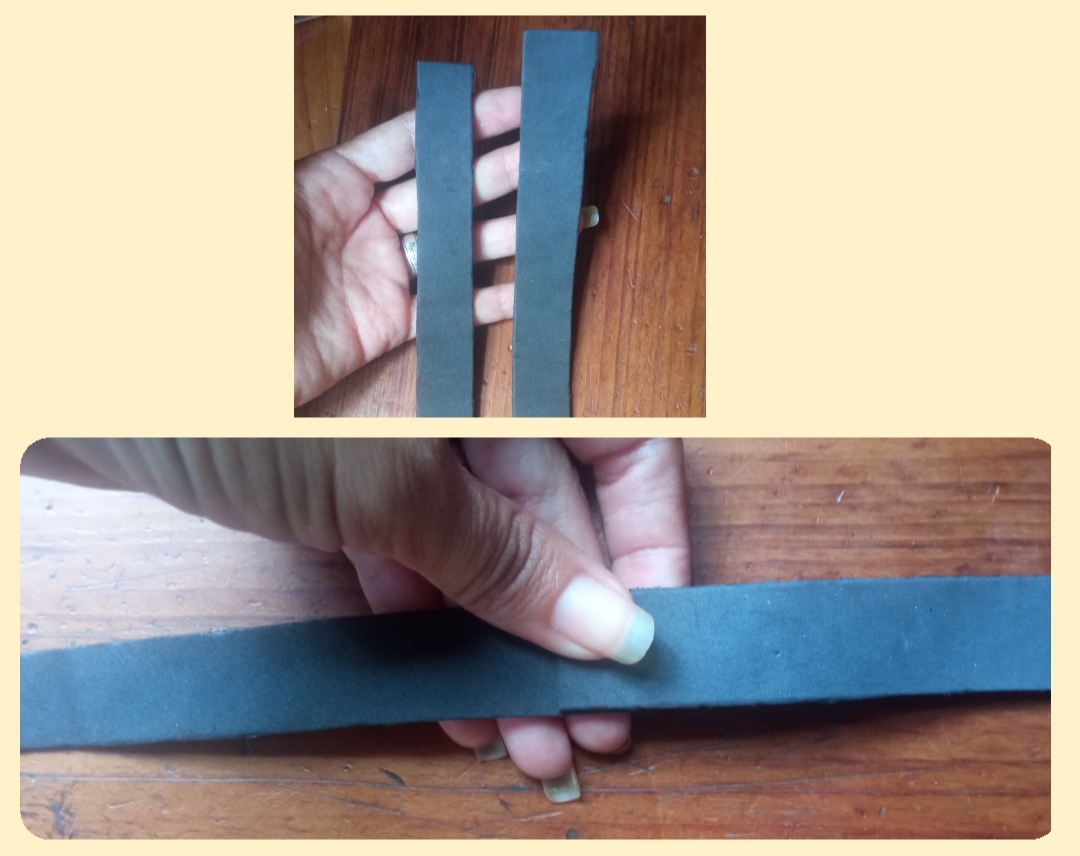
✴️ Step 2: for our second we will cut two strips of 2cm wide foami and we will join them by gluing the ends and thus forming a single strip.
✴️ Paso 2: para nuestro segundo cortaremos dos tiras de foami de 2cm de ancho y los uniremos pegando las puntas y formando así una sola tira.
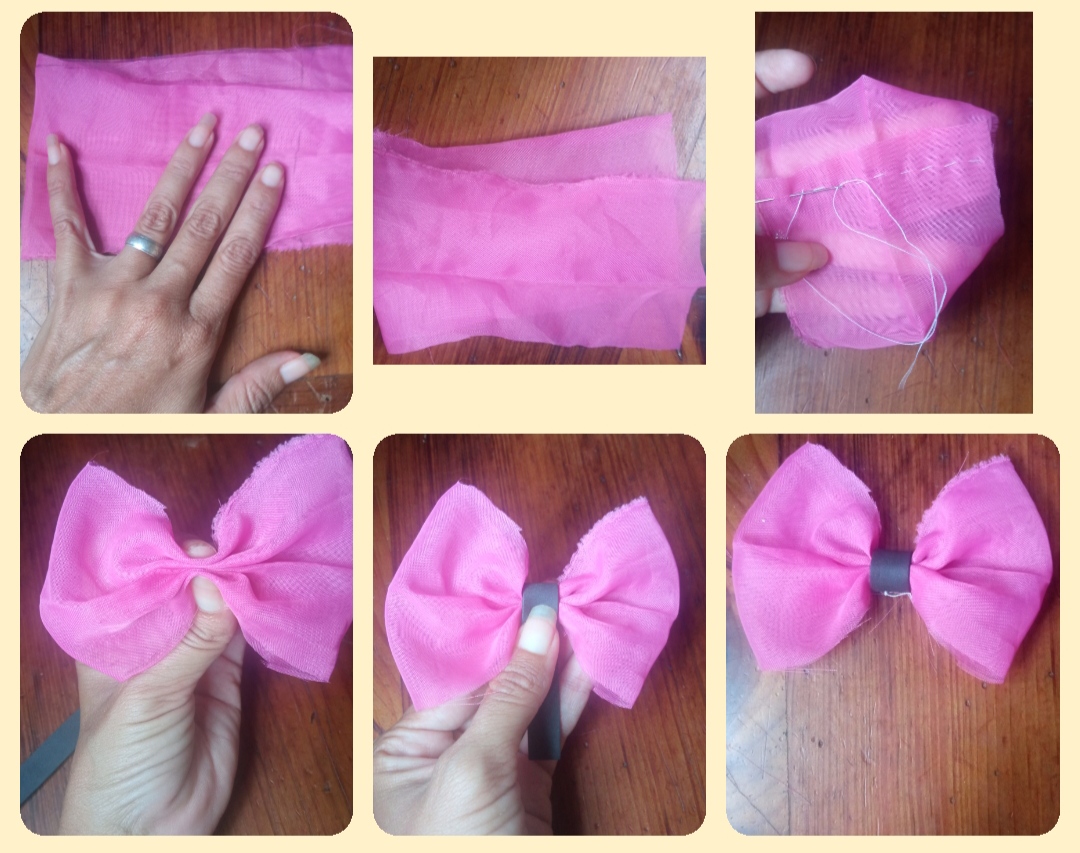
✴️ Step 3: to continue we take the pink fabric and we will cut a piece of 20 cm long and 8 cm wide, we will join the two ends and with the help of the needle and thread we will sew these to join the shape. Next we will take this 19cm piece of fabric because it is now doubled and we will fold it in the form of a zip-zap in its central part and with a small strip of foami we will place it in this part and glue it to adjust the shape obtaining a nice bow.
✴️ Paso 3: para continuar tomamos la tela rosada y cortaremos un pedazo de 20cm de largo y 8 de ancho , uniremos las dos puntas y con ayuda de la aguja e hilo coseremos estás para unir la forma.
Seguidamente tomaremos este pedazo de tela de 19cm porque ahora está doble y lo doblaremos en forma de zip-zap en su parte central y con una tira pequeña de foami la colocaremos en esta parte y la pegaremos para ajustar la forma obteniendo un lindo lazo.
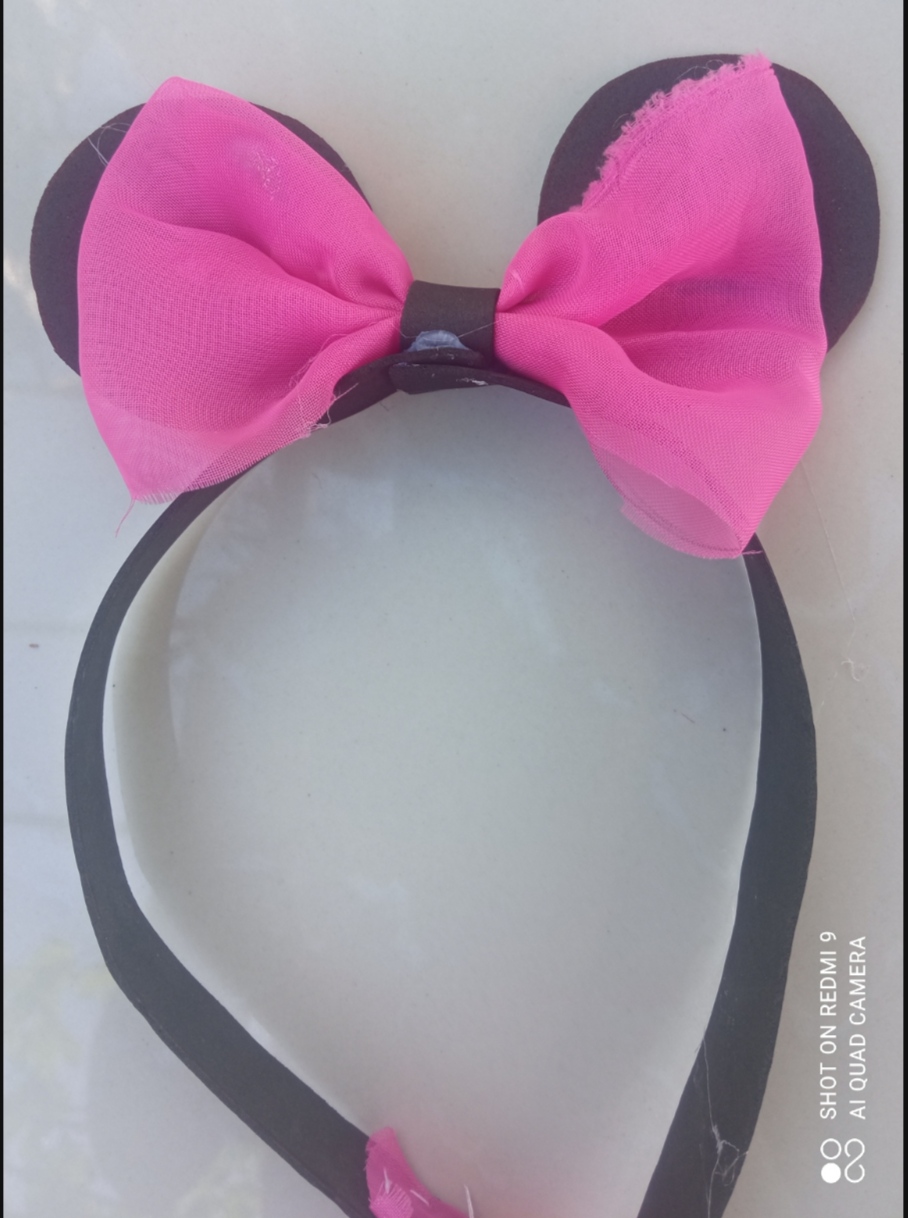
✴️ Step 4: Next we will glue this cute bow in the central part of the foami strip, exactly where the joint is. And on both sides of this loop we will paste the two black circles or ears. You can already see that our headband is shaped like cat ears and a bow.
✴️ Paso 4: Seguidamente pegaremos este lindo lazo en la parte central de la tira de foami, exactamente dónde está la unión.
Y a ambos lados de este lazo pegaremos los dos círculos negros u orejitas. Ya pueden observar que nuestro cintillo tiene forma de orejitas de gato y un lazo.

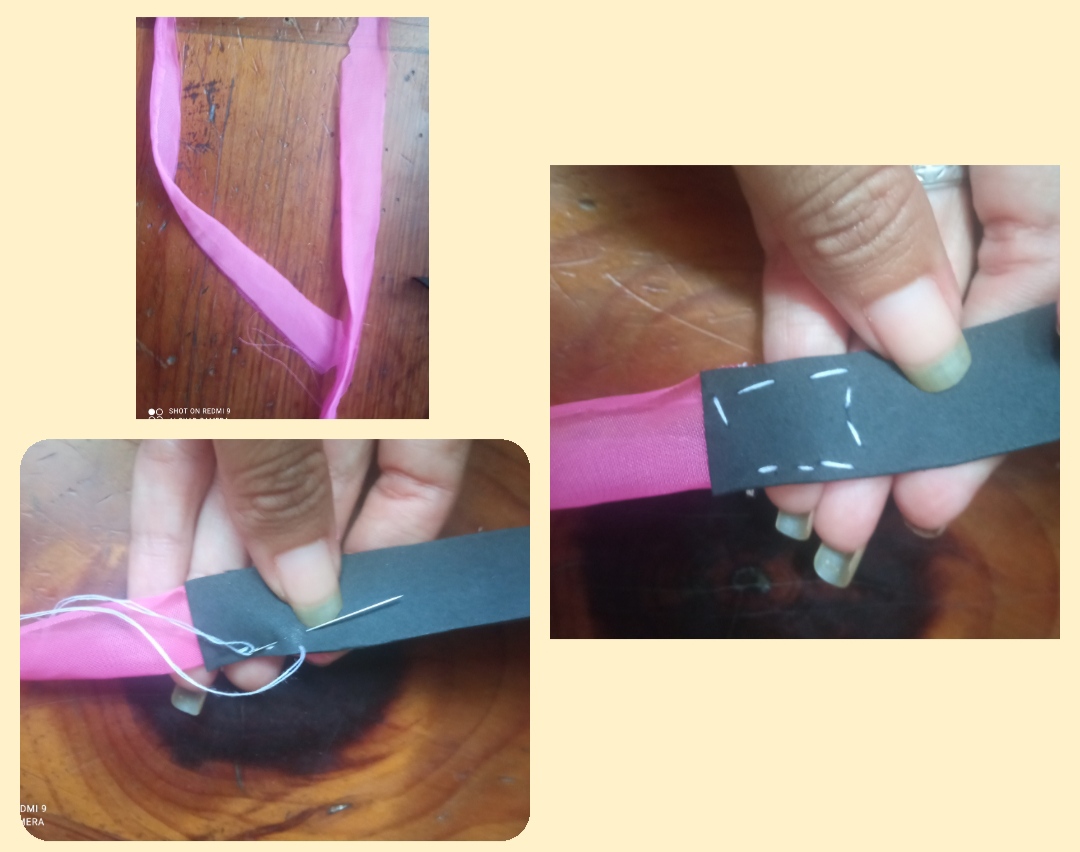
✴️ Step 5: to finish we will cut two not very long strips of the pink fabric and we will sew each one at one end, this will help us to tie the headband to our little girl.
✴️ Paso 5: para culminar cortaremos dos tiras no muy largas de la tela rosada y la coseremos cada una en una punta, esto nos servirá para amarrar el cintillo a nuestra pequeña.
All Photos are my authorship and were taken with my Redmi 9 CellphoneY así mis queridos amigos, con este procedimiento elabore este lindo Cintillo y ya solo me quedo colocar un lindo vestido a mi niña y con un lápiz negra realizar los últimos toque de su maquillaje 🐱.
Espero que este sencillo tutorial sea del agrado de ustedes, agradezco por su visita.
Saludos y bendiciones.
Todas las Fotos son de mi autoría y fueron tomadas con mi Celular Redmi 9
Thank you for sharing this post in the DIYHUB Community!
Your content got selected by our fellow curator sharminmim & you just received a little thank you upvote from us for your great work! Your post will be featured in one of our recurring compilations which are aiming to offer you a stage to widen your audience within the DIY scene of Hive. Stay creative & HIVE ON!
Please vote for our hive witness <3
Has hecho un gran trabajo @emmaris, tu niña se ve muy guapa con su lazo.
Muchas gracias.
I have learn alot from this post. I never had ideas on how this is being done. I will give a try to it, the headband look so beautiful
Hi @emmaris
Consider joining this contest by @devann, for the opportunity to win LEO, LIST and BUIDL tokens.
Best of luck.