[ENG- ESP] Small Details for Valentine's Day 💘 / Pequeños Detalles para El día de San Valentín 💘
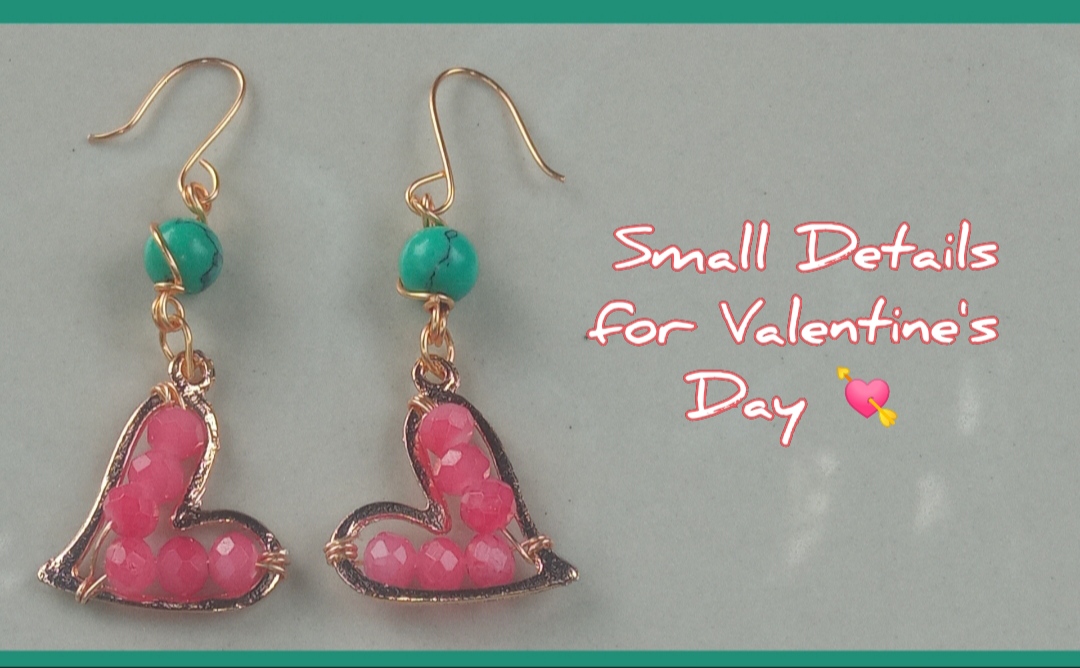
Happy and blessed night everyone, and these are the sweetest month of the year, the month of love and friendship, and many of us begin to look for some detail to cheer up that special person, but it is also true that everything, even The smallest detail has become very expensive, so today I bring you a very beautiful and simple design that you can make at home for that special friend. This design is very simple to make but to help you a little more I bring you a very simple tutorial where you can see my making process step by step.
Feliz y bendecida noche tengan todos, ya estos en el mes más dulce del año, el mes del amor y la amistad, y muchas comenzamos a buscar algún detalle para alegrar a esa persona especial, pero también es cierto que todo, hasta el más pequeño detalle se ha vuelto muy costoso, por el que hoy les traigo un muy bello y sencillo diseño que pueden elaborar en casa para esa amiga especial.
Este diseño es muy sencillo de elaborar pero para ayudarlos un poco más les traigo un muy sencillo tutorial dónde podrán observar paso a paso mi proceso de elaboración.
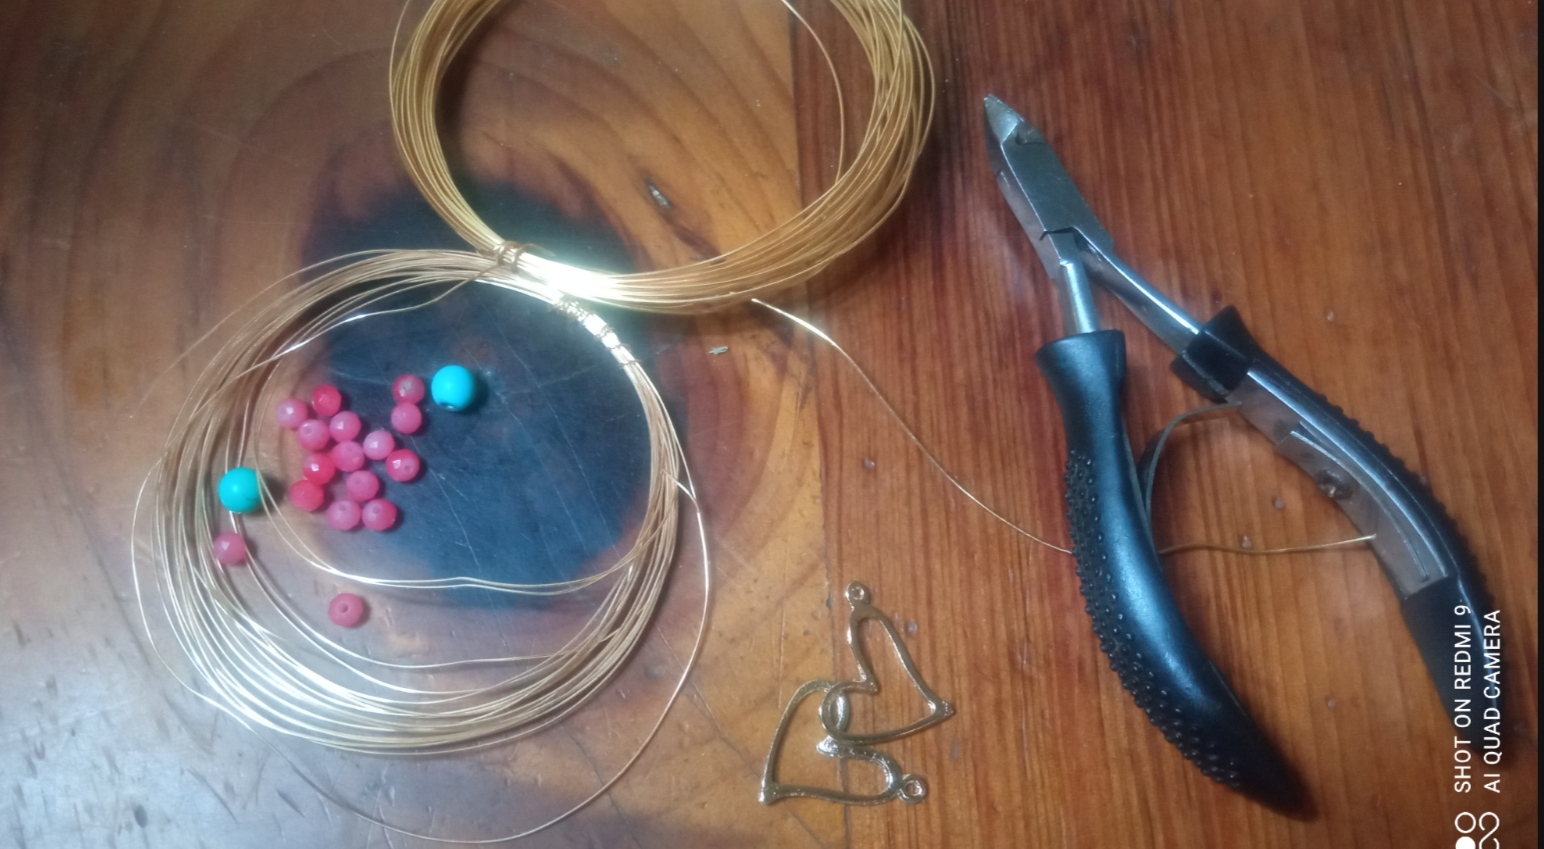
- 26 gauge jewelry wire
- 22 gauge jewelry wire.
- 2 medium heart-shaped pendants.
- 2 green round stones.
- light pink crystals.
- Jewelry tweezers.
- Toothpick.
- Alambre de bisutería calibre 26
- Alambre de bisutería calibre 22.
- 2 Dijes medianos con forma de corazón.
- 2 piedras redondas verdes.
- cristales color rosa claro.
- Pinza de bisutería.
- Palillo.
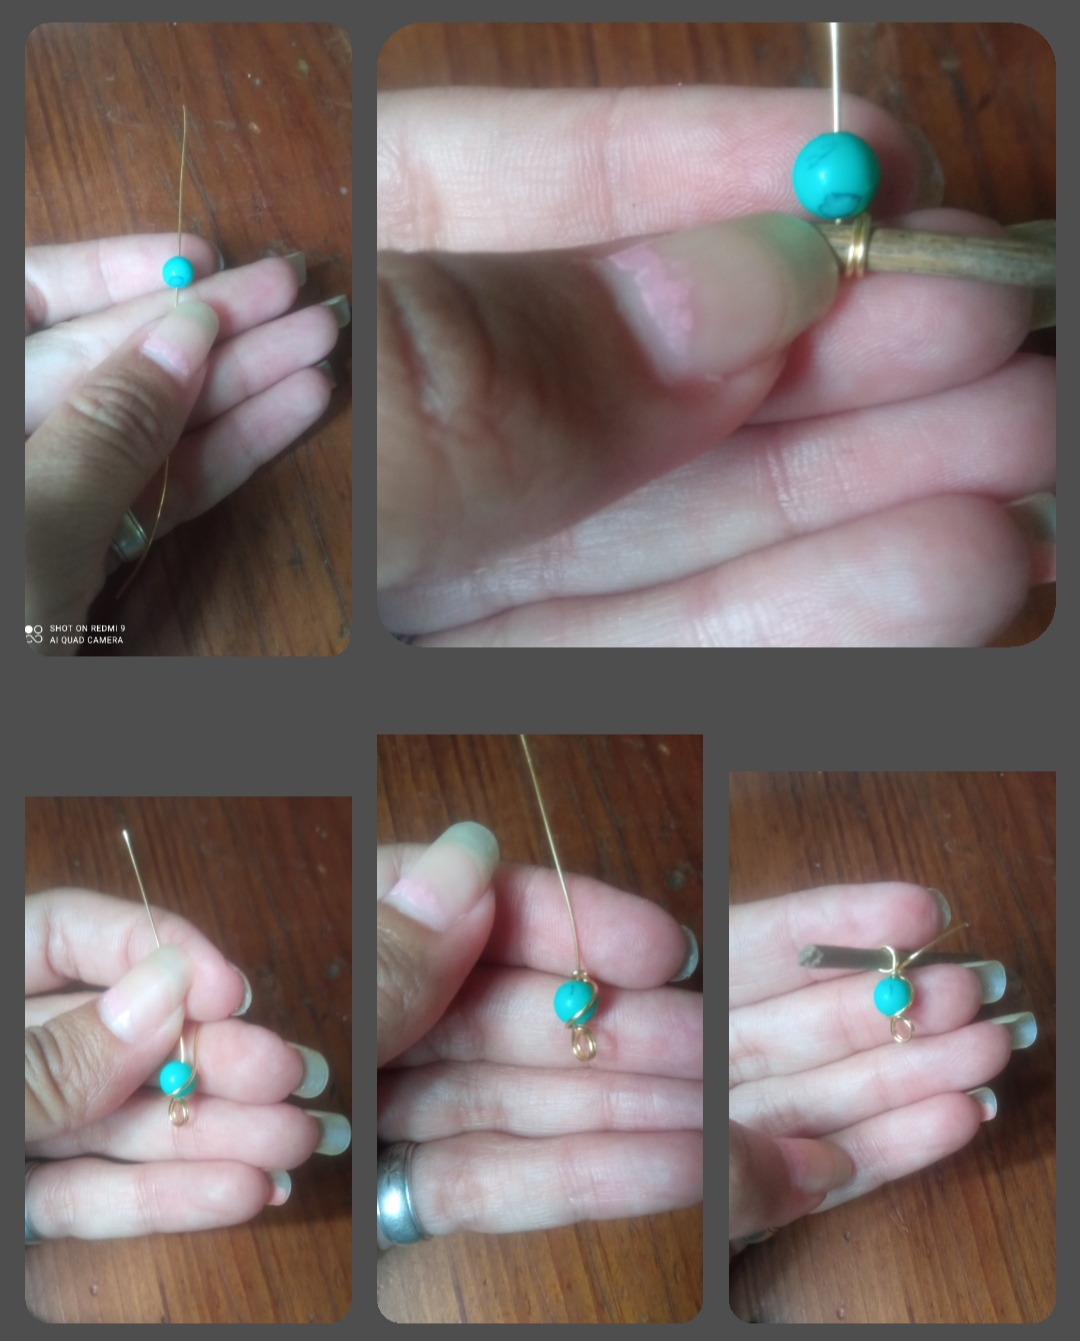
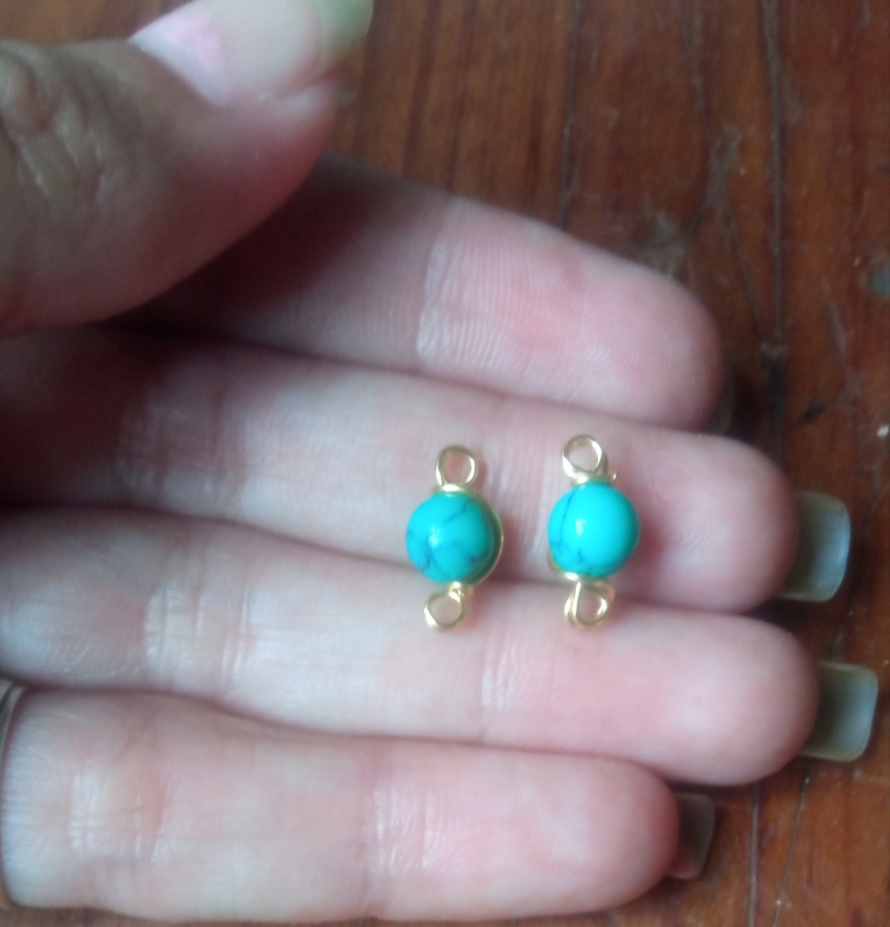
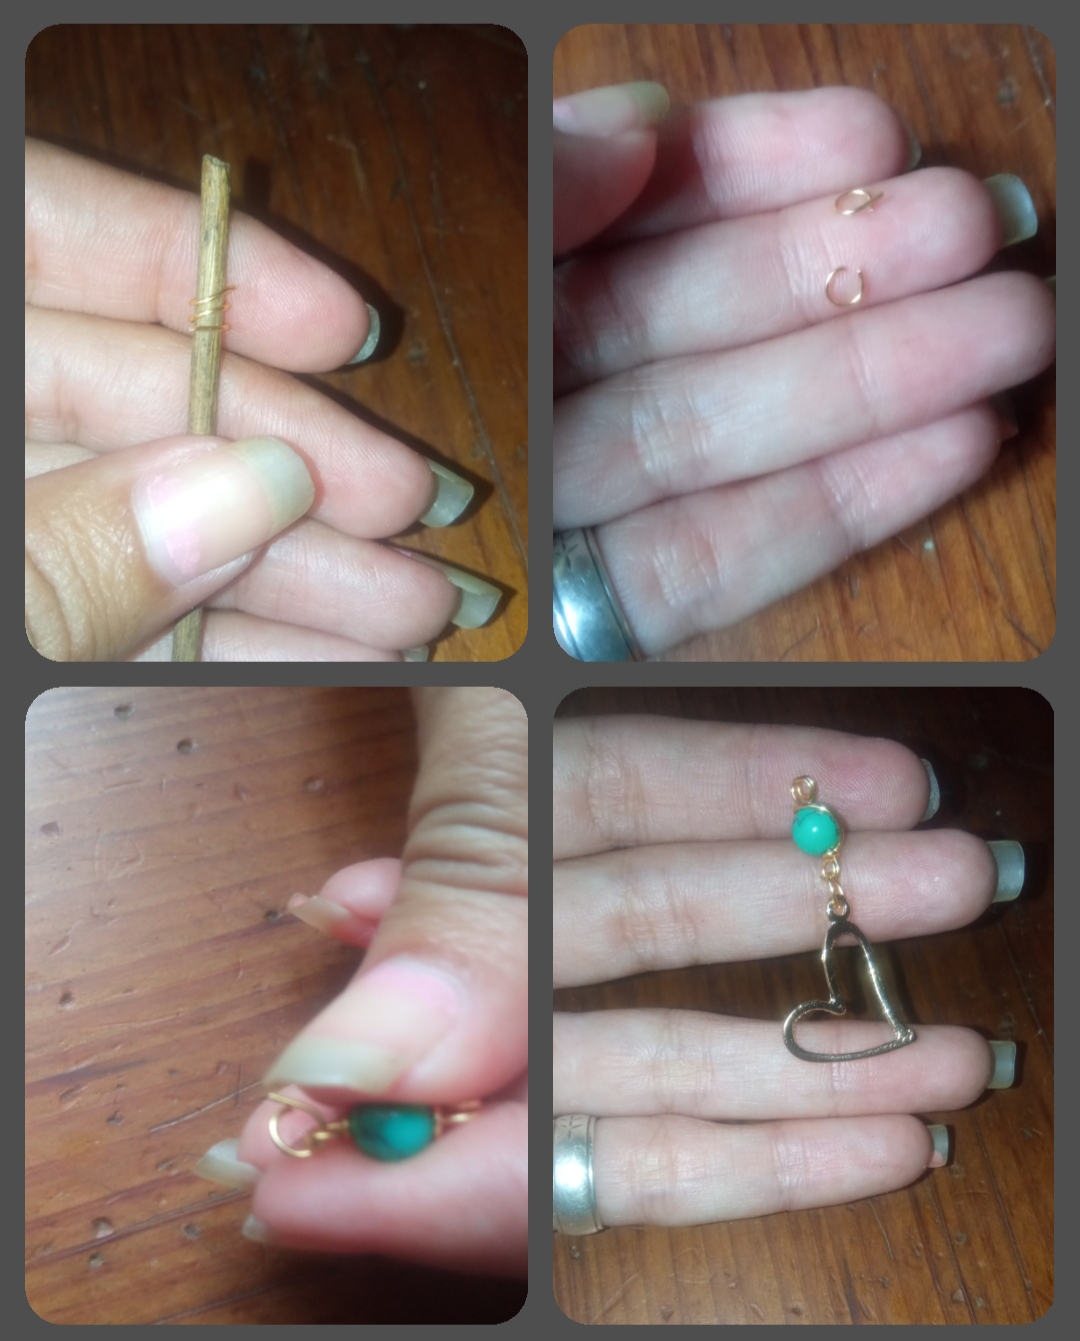
✴️ Step 1: to start our elaboration we will take 6 cm of 22 gauge jewelry wire and we will introduce one of the round green Pichitas, we will place it in the center of the wire and with the wire from the bottom we will make two Turn the small toothpick thus forming two small joined rings and then we will turn this tip under the stone and then crosswise pass it over the stone until we bring the wire over the stone and wind the tip to hold the shape. Now with the wire that is left over at the top of the stone we will make two exact circular shapes to those made on the back. We will repeat this procedure again to make the other piece or tendril.
✴️ Paso 1: para iniciar nuestra elaboración tomarémos 6 cm de alambre de bisutería calibre 22 e Introducimos una de la Pichitas redondas color verde, la colocamos en el centro del alambre y con el alambre de la parte de adebajo vamos a realizar dos vueltas en el pequeño palillo formando así dos pequeñas argollas unidas y Seguidamente daremos una vuelta de esta punta debajo de la piedra y luego de forma cruzada la pasaremos por encima de la piedra hasta llevar el alambre encima de la piedra y enrrollar la punta para sujetar la forma.
Ahora con el alambre que nos sobra en la parte superior de la piedra realizaremos dos formas circulares exactas a las realizadas en la parte posterior.
Este procedimiento lo repetiremos nuevamente para elaborar la otra pieza o zarcillo.
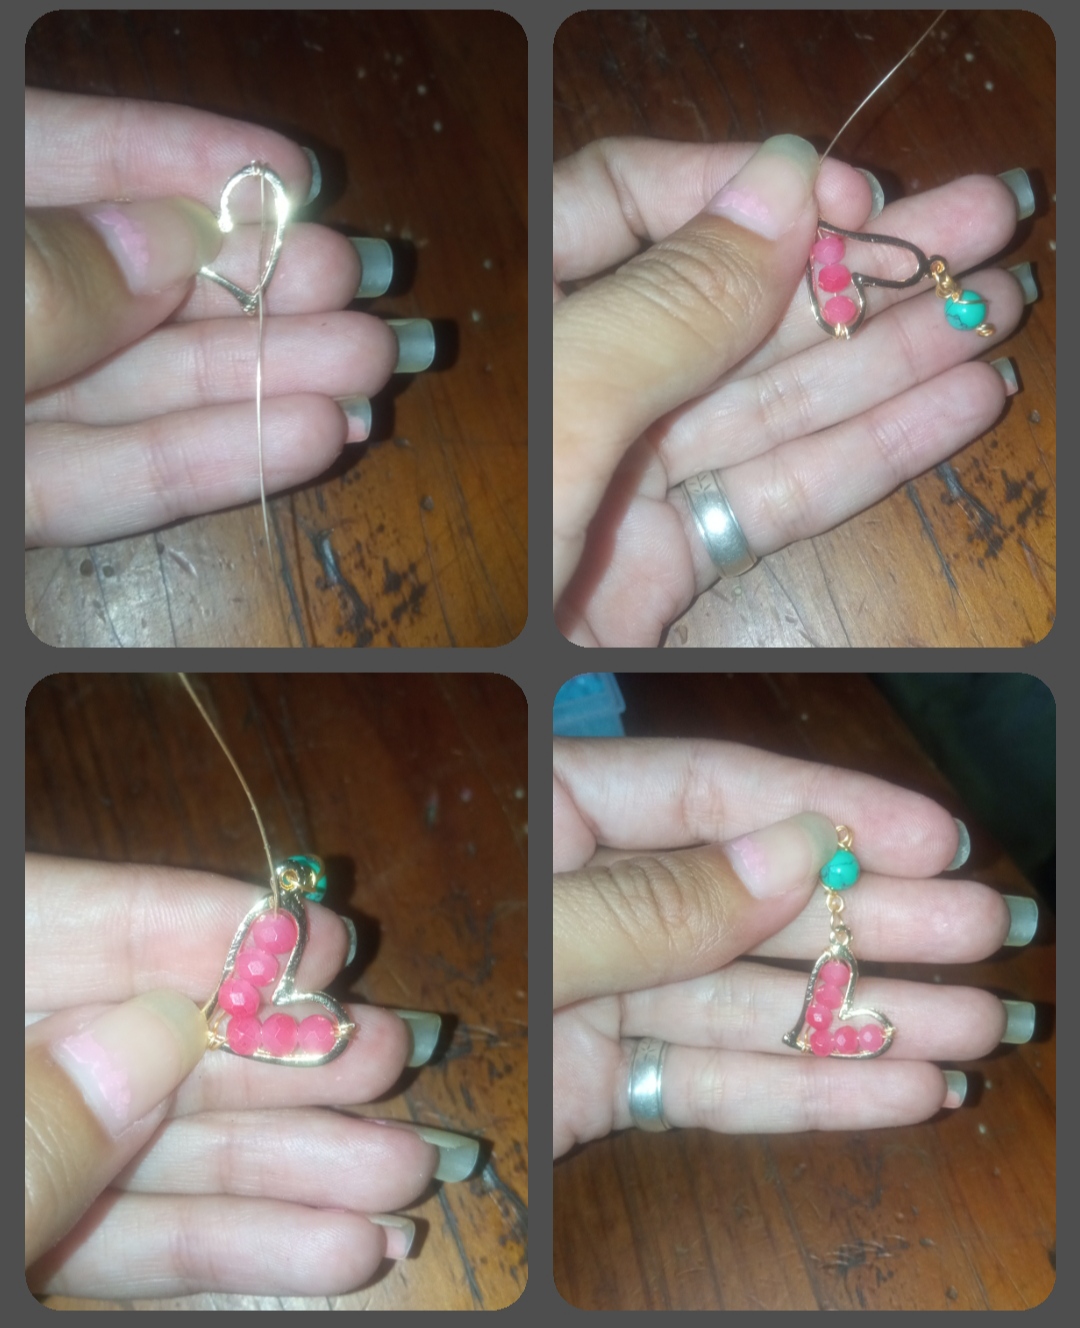
✴️ Step 2: now we will take 3 cm of 22-gauge costume jewelry wire and with the help of the toothpick we will make two turns of the wire, which later, when separated and chopped, will be small rings. We will take one of the rings and insert the piece that we made in the previous step through the ring at the bottom and we will also insert a cute heart charm into the same ring and close the ring.
✴️ Paso 2: ahora tomaremos 3 cm de alambre de bisutería calibre 22 y con ayuda del palillo realizaremos dos vueltas del alambre, que luego al separarlas y picarlas serán pequeñas argollas.
Tomaremos una de las argollas e Introducimos la pieza que elaboramos en el paso anterior por la argolla de la parte de abajo y también Introduciremos en la misma argolla un lindo dije de corazón y cerraremos la argolla.
✴️ Step 3: to continue we will take a long piece of 26 gauge beading wire and we will fasten it in our heart pendant and we will introduce 3 crystals and we will fasten the wire at the tip of the wire, then we will introduce 3 more crystals and we will fill our cute heart pendant, we fasten the wire again in our base heart and that's it, we cut the excess wire.
✴️ Paso 3: para continuar tomaremos un pedazo largo de alambre de bisutería calibre 26 y lo sujetaremos en nuestro dije de corazón e Introducimos 3 cristales y sujetamos el alambre en la punta del alambre, luego Introducimos 3 cristales más y rellenamos así nuestro lindo dije de corazón, sujetamos nuevamente el alambre en nuestro corazón base y listo, cortamos el exceso de alambre.
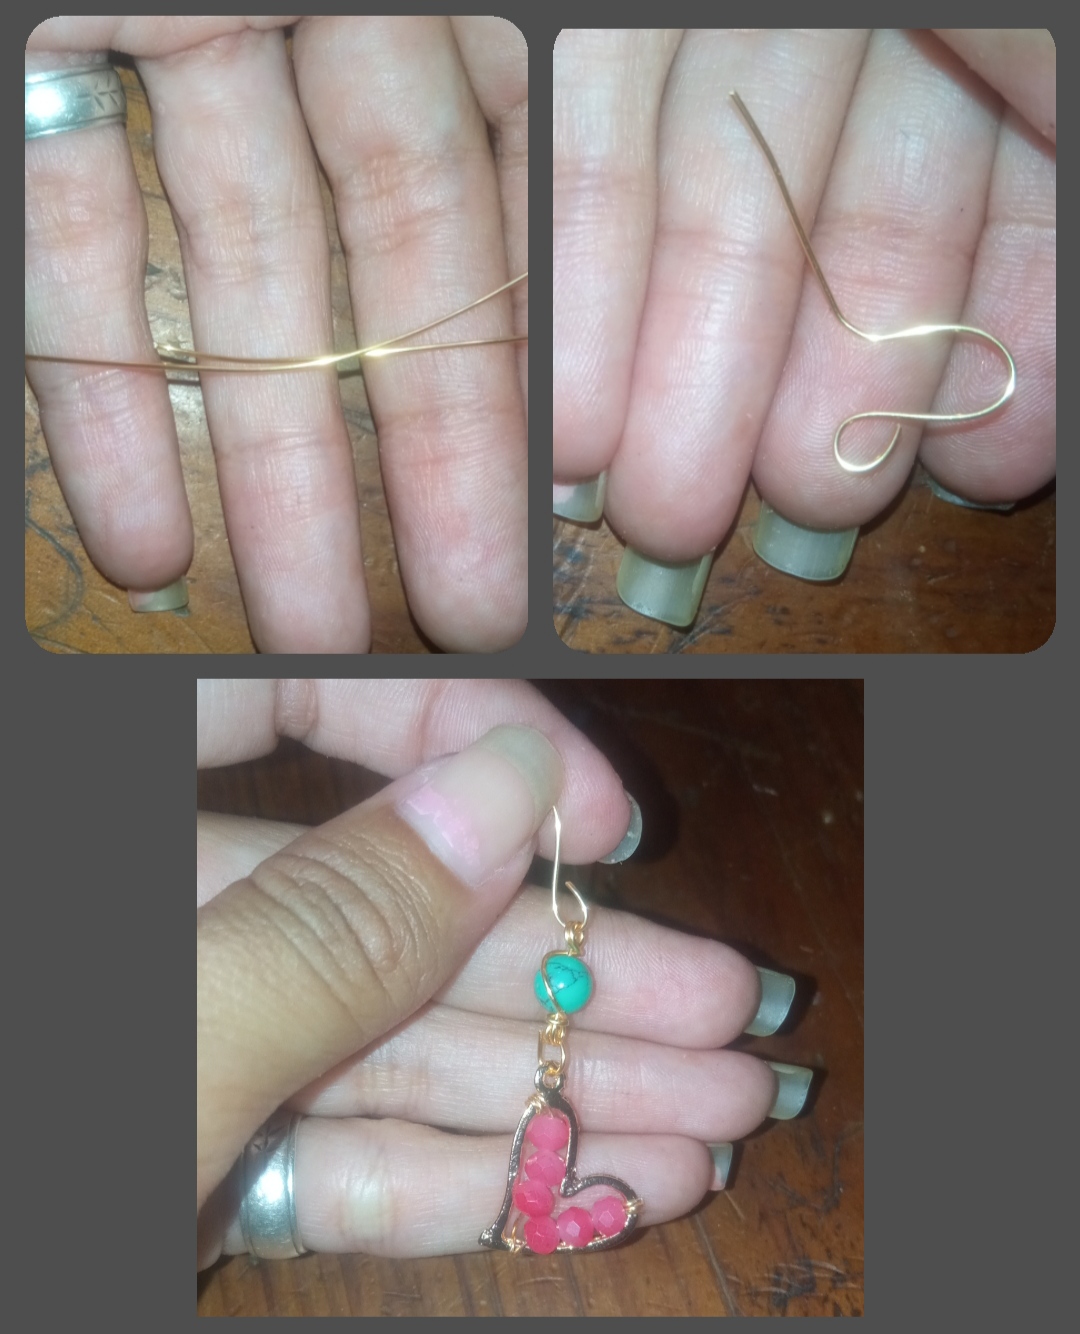
✴️ Step 4: finally we take 4 cm of 22 gauge jewelry wire and with the help of the toothpick we will make a ring shape at the tip of the wire and then we will mold and shape our Hook for tendrils, which we will join to our Elaboration and thus we will finish our first piece, all that remains is to repeat the steps to make the pair of tendrils.
✴️ Paso 4: por último tomamos 4 cm de alambre de bisutería calibre 22 y con ayuda del palillo realizaremos una forma de argolla en la punta del alambre y luego moldearemos y daremos forma a nuestro Anzuelo para zarcillos, el cual uniremos a nuestra Elaboración y así culminaremos nuestra primera pieza, solo queda repetir los pasos para realizar la pareja de zarcillos.
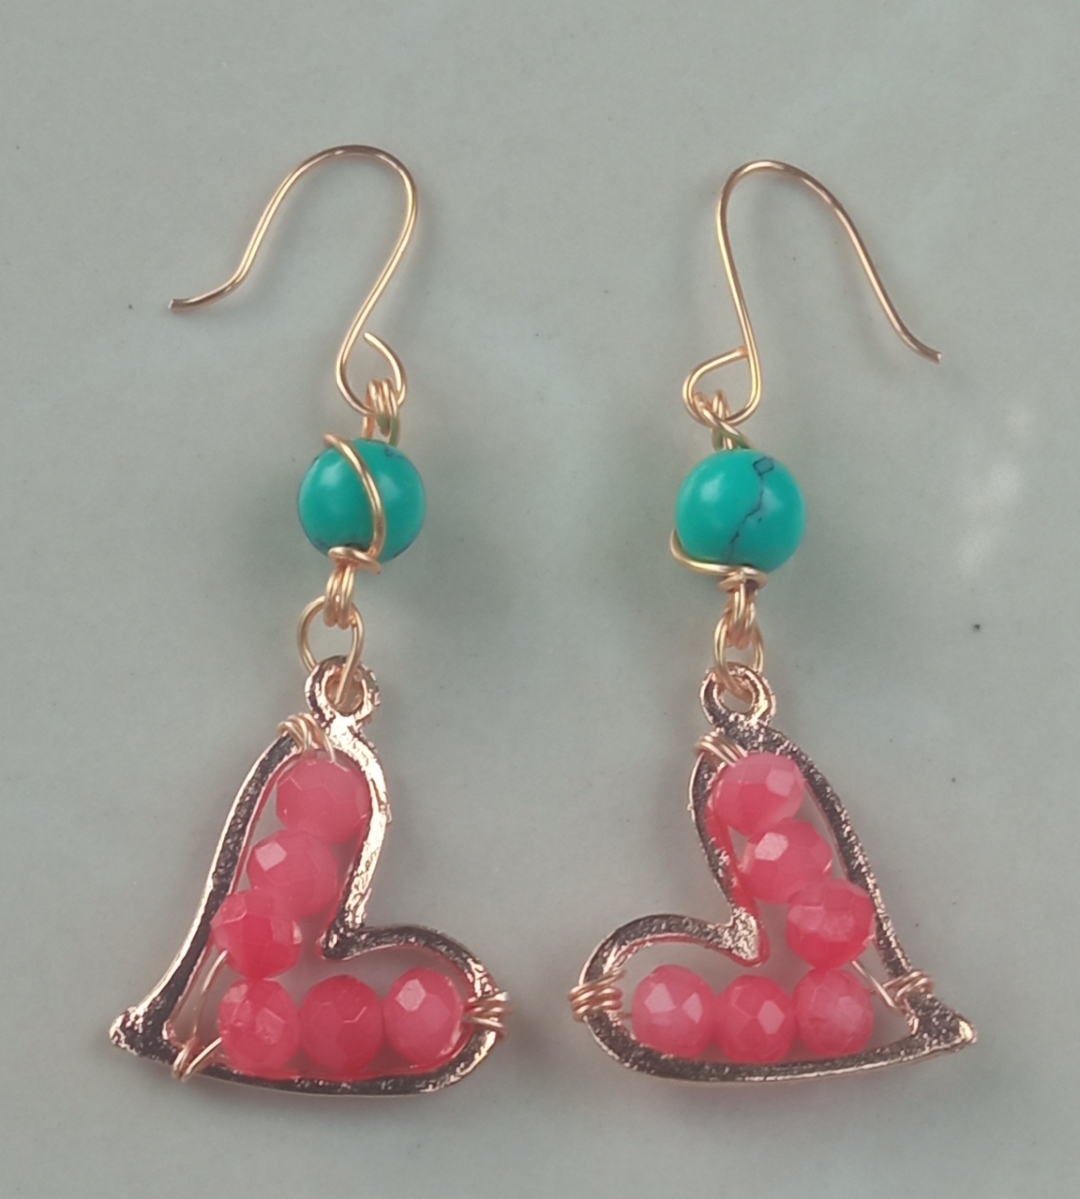
And so, my dear friends, in an easy and economical way we can make these beautiful tendrils, ideal for making a beautiful detail for these festive dates. To say goodbye, I want to thank you for your visit and I hope you like it and find it useful. Greetings and blessings.
All Photos are my authorship and were taken with my Redmi 9 CellphoneY así mis queridos amigos de manera fácil, y económica podemos elaborar estos hermosos Zarcillos ideales para realizar un bello detalle para estás fechas festivas.
Para despedirme quiero agradecerles por su visita y espero que este les sea de su agrado y de utilidad.
Saludos y bendiciones.
Todas las Fotos son de mi autoría y fueron tomadas con mi Celular Redmi 9
Hello friend, I love these earrings, the color is beautiful, they combine perfectly, thanks for teaching us how to make them, excellent work, thanks for sharing.
Hola amiga, me encantan estos aretes, el color es hermoso, combinan a la perfección, gracias por enseñarnos a hacerlos, excelente trabajo, gracias por compartir.
Gracias amiga 😊, me alegra que sean de su agrado.
Thank you for sharing this post in the DIYHUB Community!
Your content got selected by our fellow curator ashikstd & you just received a little thank you upvote from us for your great work! Your post will be featured in one of our recurring compilations which are aiming to offer you a stage to widen your audience within the DIY scene of Hive. Stay creative & HIVE ON!
Please vote for our hive witness <3