Hello creative people of Hive Diy.
I welcome you to my blog and I tell you that a few months ago I wanted to start a very ambitious project and that is to create a homemade drone, I have been gathering information and materials so today I will share with you my experience extracting the camera from a smartphone; this is not exactly the first step, rather it would be one of the last but since I have the phone at hand I put myself into it. I will clarify a very important point and that is that the phone is not functional, for this reason you will notice that I will not take any care when disassembling it. I will remove the screws with a custom screwdriver.
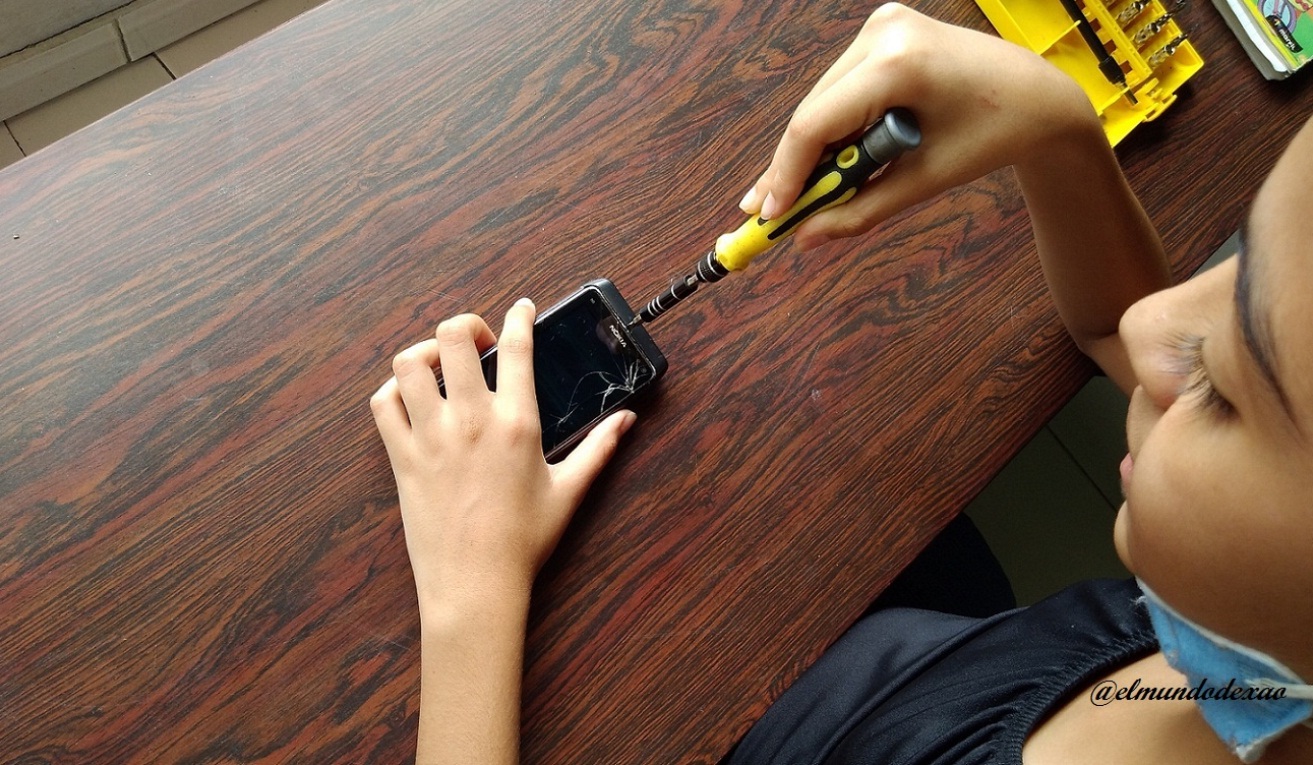 The phone is a Nokia N8 with a 12 megapixel camera with Carl Zeiss optics and Xenon flash; 720p video recording at 25 frames per second. Focal aperture of 2.8 and if you've never heard of this phone it's because it was released over a decade ago.
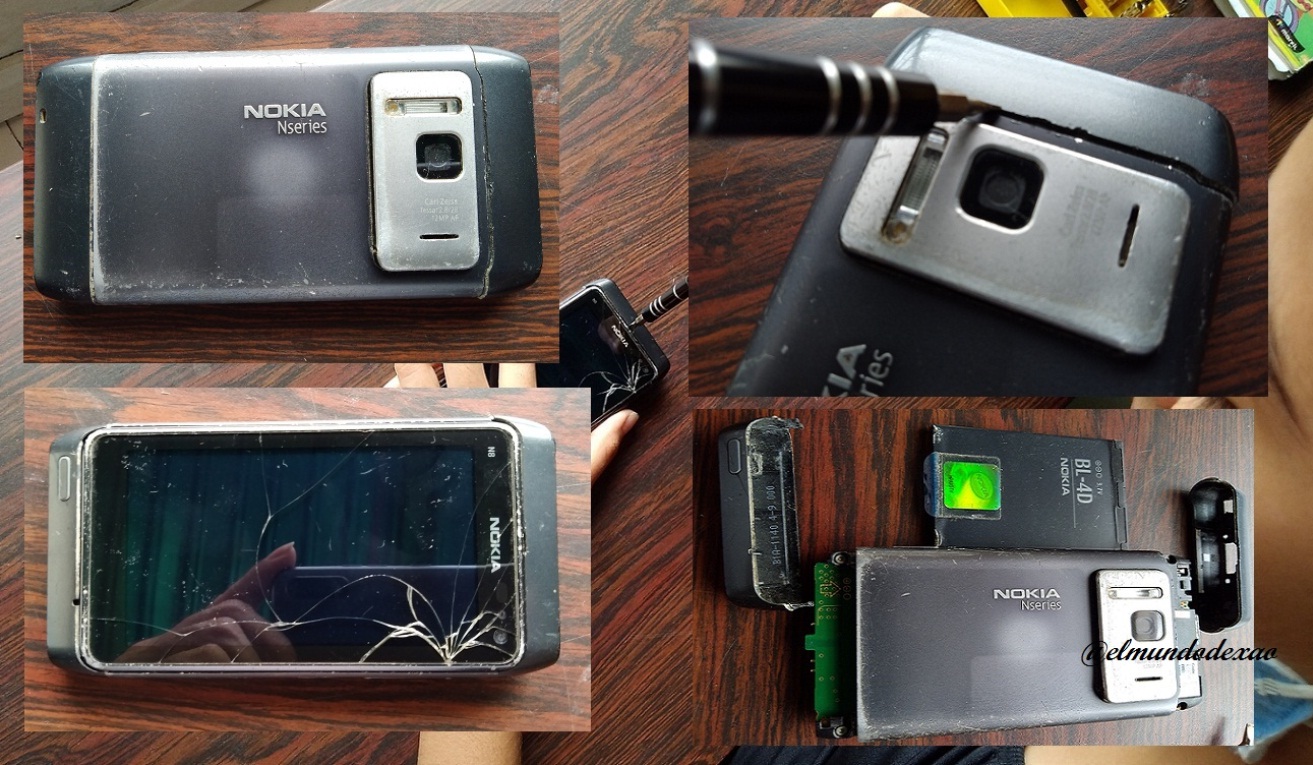
Step # 1: First I look for all the screws that are in sight and remove them, I try to remove the parts but some do not come out so they must be placed under pressure and proceed to use a screwdriver to remove them. In this first phase of the disassembly I only managed to remove two small covers and the battery as you can see in these photos.
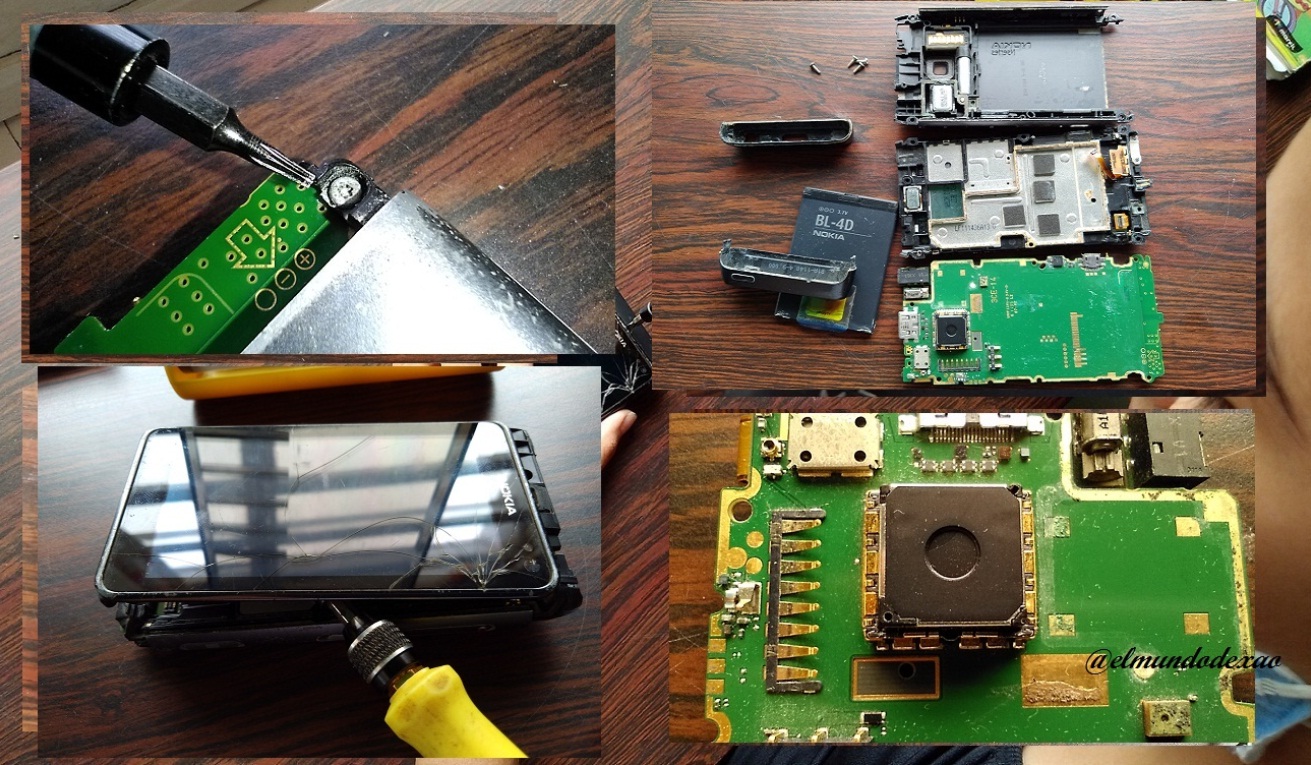
Step # 2: Now I look for and remove all the internal screws and try to remove the screen, here I must be very careful as the screen is split and can release glass splinters. It has been a bit complicated to disassemble this phone, if it was functional I would have already damaged it. Well, until I managed to separate all the parts and the camera was exposed, now I will have to concentrate on figuring out how to remove the camera without damaging it.
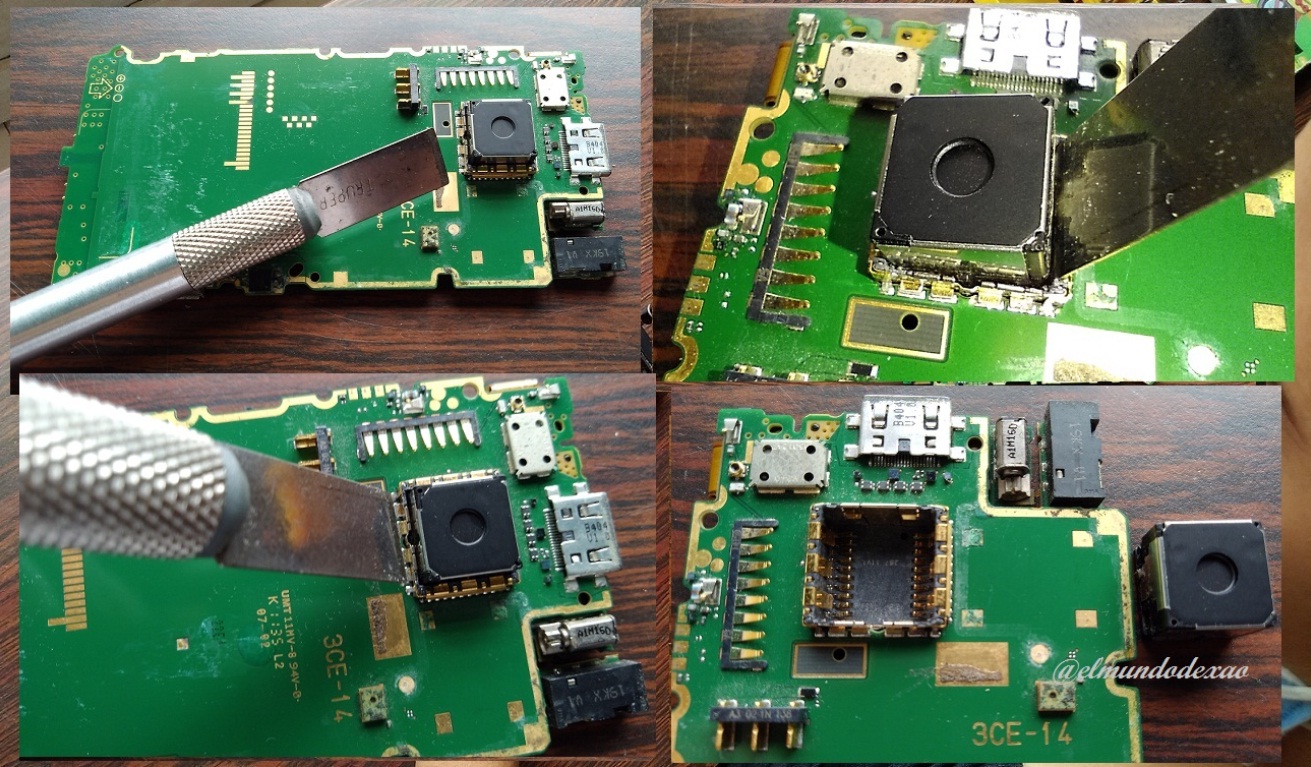
Step # 3: We spent several days trying to figure out how to remove the camera and we did not achieve anything, we decided to search on YouTube and found a video that helped to solve this problem (at the end I leave the link to the video). In the video they showed us how to make a small plastic paddle to remove the camera in a very easy way; when we looked at the paddle we thought that a spatula type scalpel could be useful, and when we tried it, it turned out to be just right for the job.
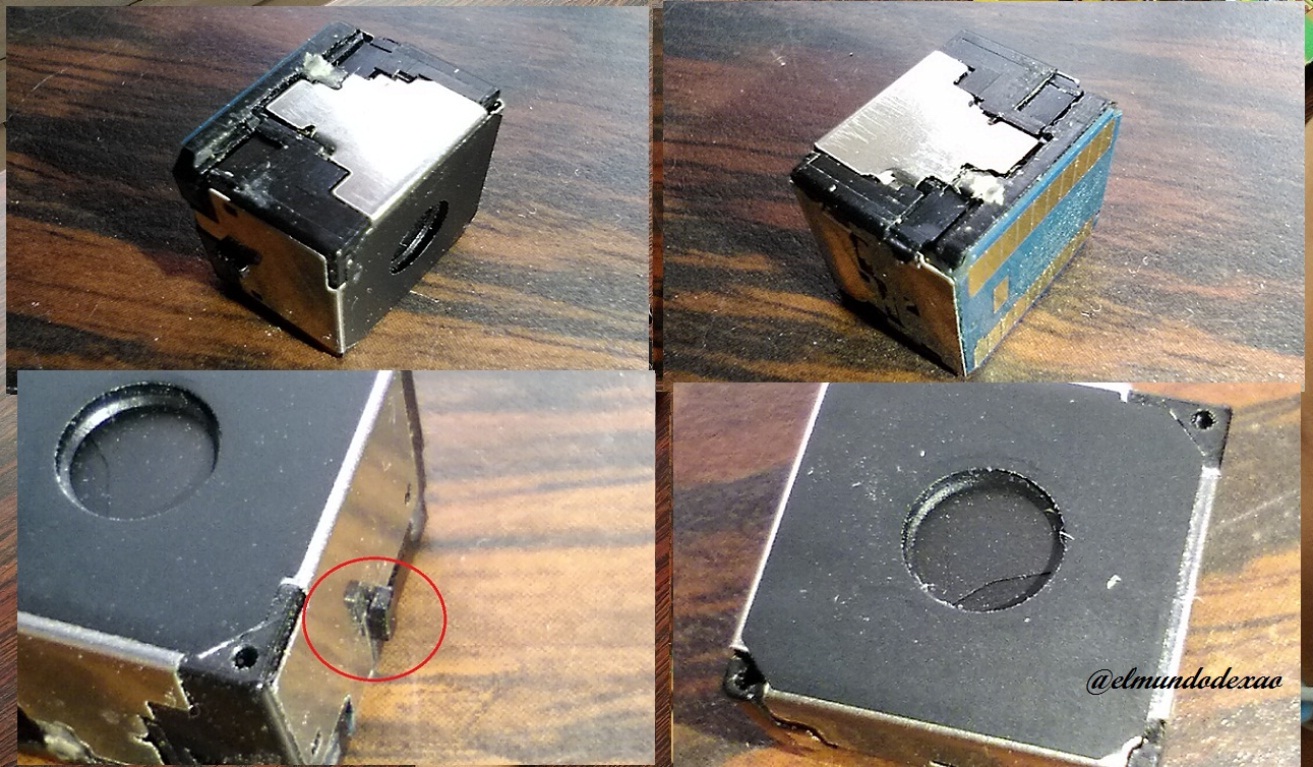
At first we thought that this camera was soldered to the card but as you can see it is placed under pressure and is held by a tab that protrudes on one side of the camera, now I can say that the work of removing the camera is finished, only remains to test it to see if it works but that is part of a future publication.
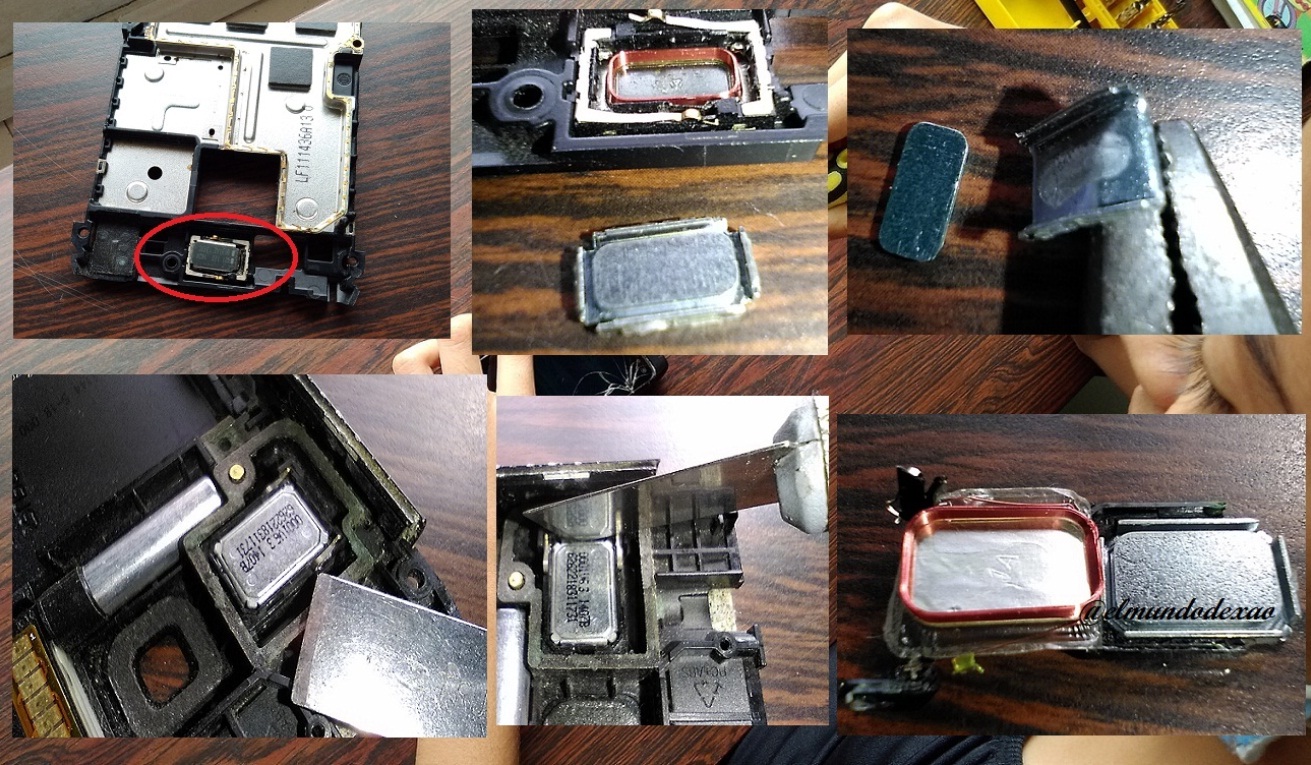
Photo Source: Own photos captured with a Síragon camera.
Modified size: With the Paint Program.
Finally I want to share a discovery that will serve me for crafts that need magnets, like the ones we put on the fridge; when I was uncovering the phone I noticed that the screwdriver was attracted by what were obviously magnets that were inside some rectangular pieces, so I chose to extract them and open them; Inside they had a winding with an extremely thin wire which bordered the magnet, after opening these pieces and extracting the magnets I realized that they are very powerful magnets and I say this without exaggeration because I placed one in the fridge and I could not remove it, I had to help me using a plastic spatula.
Thanks for visiting my Blog… AH! Don't forget to vote, reblogear, and comment.
Translated with:


Hola gente creativa de Hive Diy.
Les doy la bienvenida a mi blog y les cuento que desde hace unos meses quise comenzar un proyecto muy ambicioso y es crear un dron casero, he estado reuniendo información y materiales por lo que hoy compartiré con ustedes mi experiencia extrayendo la cámara de un teléfono inteligente; este no es precisamente el primer paso, más bien seria uno de los últimos pero ya que lo tengo el teléfono a la mano me puse en ello. Les aclaro un punto muy importante y es que el teléfono no está funcional, por esta razón podrán notar que no tendré ningún cuidado al desarmarlo. Retirare los tornillos con un desarmador a la medida.
El teléfono es un Nokia N8 con una cámara de 12 megapíxeles con óptica Carl Zeiss y flash de Xenon; grabación de vídeo 720p a 25 imágenes por segundo. Apertura focal de 2.8 y si nunca habías escuchado de este teléfono es porque salió al mercado hace más de una década.
Paso # 1: Primero busco todos los tornillos que estén a la vista y los remuevo, intento quitar las partes pero algunas no salen por lo que deben estar colocadas a presión y procedo a utilizar un desarmador de pala para retirarlas. En esta primera fase del desarmado solo conseguí retirar dos pequeñas tapas y la batería como puedes apreciar en estas fotos.
Paso # 2: Ahora busco y retiro todos los tornillos internos he intento retirar la pantalla, aquí debo tener mucho cuidado ya que la pantalla esta partida y puede soltar astillas de vidrio. Ha sido un poco complicado desarmar este teléfono, si estuviese funcional ya lo hubiese dañado. Bueno, hasta que logre separar todas las partes y la cámara ya quedó al descubierto, ahora tendré que concentrarme en averiguar cómo retirar la cámara sin que sufra algún daño.
Paso # 3: Estuvimos varios días intentando averiguar cómo retirar la cámara y no logramos nada, decidimos buscar en YouTube y encontramos un vídeo que ayudo a resolver este inconveniente (al final les dejo el enlace del vídeo). En el vídeo nos indicaban como hacer una pequeña paleta de plástico con la que se retiraba la cámara de una manera muy fácil; al mirar la paleta pensamos que un bisturí tipo espátula podría servir, y al probarlo resulto justo a la medida para el trabajo.
En un principio pensábamos que esta cámara estaba soldada a la tarjeta pero como pueden observar va colocada a presión y es sujetada por una pestaña que sobresale en uno de los lados de la cámara, ahora puedo decir que el trabajo de extracción de la cámara está terminado, solo resta probarla a ver si funciona pero eso forma parte de una próxima publicación.
Fuente de Fotos: Propias capturadas con una cámara Síragon.
Modificado el tamaño: Con el Programa Paint.
Por ultimo quiero compartir un descubrimiento que me servirá para manualidades que necesiten imanes, como las que colocamos en la nevera; cuando estaba destapando el teléfono note que el desarmador era atraído por lo que obviamente eran imanes que estaban dentro de unas piezas rectangulares, así que opte por extraerlas y abrirlas; adentro poseían un bobinado con un cable extremadamente delgado el cual bordeaba a dicho imán, luego de abrir estas piezas y extraer los imanes me di cuenta que son imanes muy potentes y lo digo sin exagerar ya que coloque uno en la nevera y no pude retirarlo, me tuvieron que ayudar utilizando una espátula de plástico.
Me despido deseándoles una feliz tarde a todos.
Gracias por visitar mi Blog… ¡AH! No se olvide de votar, rebloguear y comentar.
Cuando comiences a fabricar el dron me avisas para leer tu post y aprender yo también a hacer el mío!
Hola @caracasprin, me alegra que sientas interés, es muy interesante todo esto de los drones. Gracias por pasar y apoyarme. Feliz tarde.

Congratulations @elmundodexao! You have completed the following achievement on the Hive blockchain and have been rewarded with new badge(s):
Your next target is to reach 34000 upvotes.
You can view your badges on your board and compare yourself to others in the Ranking
If you no longer want to receive notifications, reply to this comment with the word
STOPCheck out the last post from @hivebuzz:
Support the HiveBuzz project. Vote for our proposal!
Hi @hivebuzz, thanks for keeping me informed of my accomplishments. I wish you a happy weekend.

Translated with www.DeepL.com/Translator (free version)