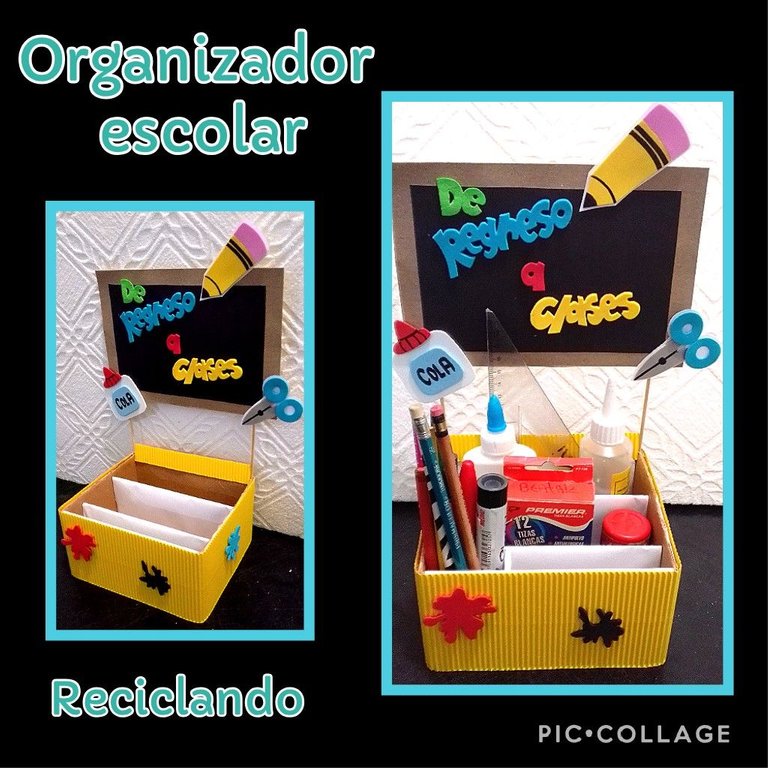
Organizador de útiles escolares. (Reciclando) School supplies organizer. (Recycling)
Hola mis queridos amigos de esta linda comunidad.
Así que les mostraré un tutorial de Cómo hacer un Organizador de útiles escolares.
Para ello necesitas estos materiales:
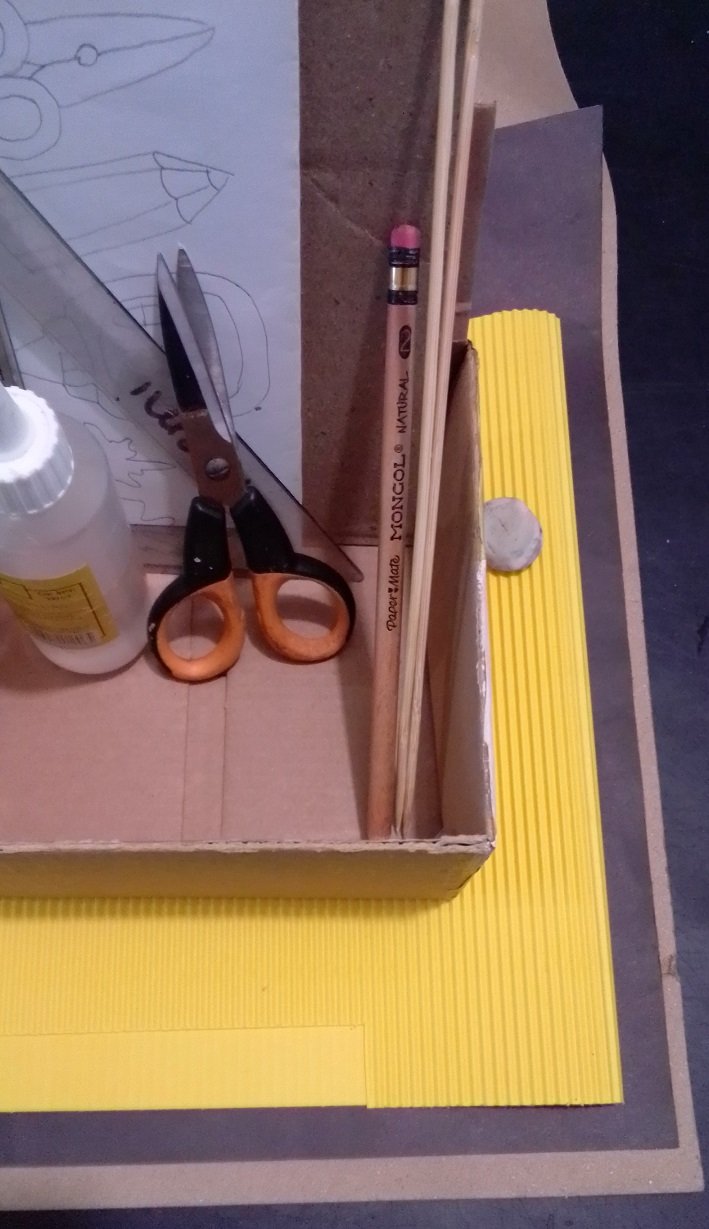
| Caja de cartón Reciclada | Cartulinas lisas y corrugada |
|---|---|
| Foamy retazos | Silicón líquido |
| Tijera | Regla |
| Lápiz | Palitos de madera |
| Dibujos de letras y figuras | Marcador |
Comienza el Procedimiento:
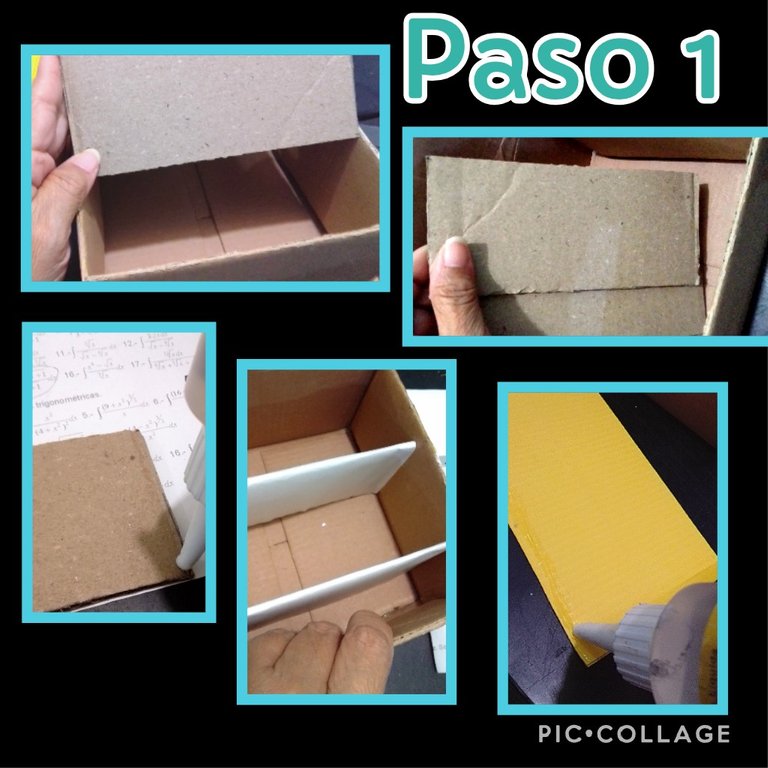
- Mides la caja por dentro (Alto y ancho)
- Marca y recorta 2 rectángulos de cartón con esa medida para hacer las divisiones dentro de la caja.
- Luego con Papel blanco reciclado, forras los dos (2) rectángulos y pega dentro de la caja, dejando la distancia que gustes.
- Mide todo el contorno de la caja y recorta en cartulina corrugada y aplica silicón.

- Pega la cartulina para forrar la caja.
- Introduce un palito de madera dentro del cartón en dos (2) esquinas.
- Recorta dos (2) rectángulos en cartulina negra y cartón del tamaño deseado para hacer la pizarra.
- Pega con silicón, dejas secar bien la pizarra y aplicas silicón en la parte superior de los palitos y pega la pizarra, sosteniendo bien, hasta que seque.
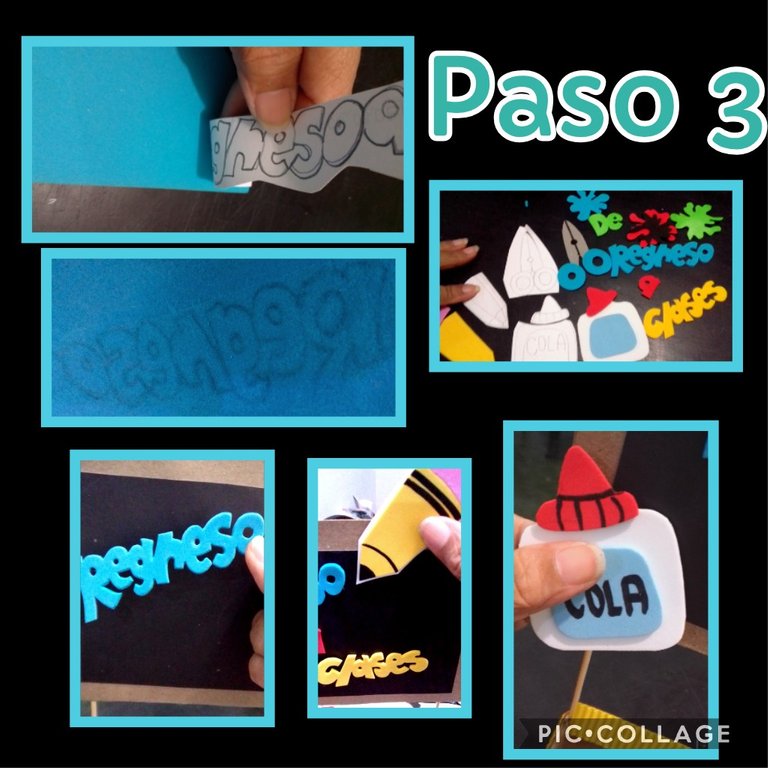
- Remarcas las letras y figuras con lápiz de mina blanda, coloca de frente sobre el foamy y transfiere frotando con las orejas de la tijera.
- Así haces con todas las figuras, recortas, delineas, armas y
vas pegando con silicón sobre cartulina blanca. - Recorta a 2 milímetros la cartulina y vas pegando y decorando la caja.
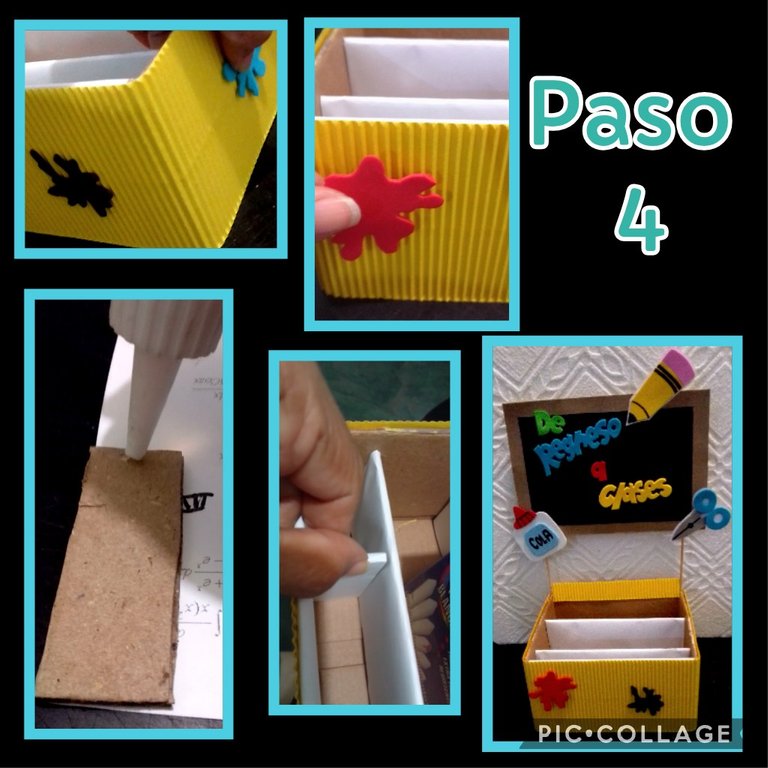
- Por último, recorta un rectángulo de 3 x 8cms, forra en blanco y pegas a la caja formando un pequeño cuadro donde meterás los creyones, lápices y otros.
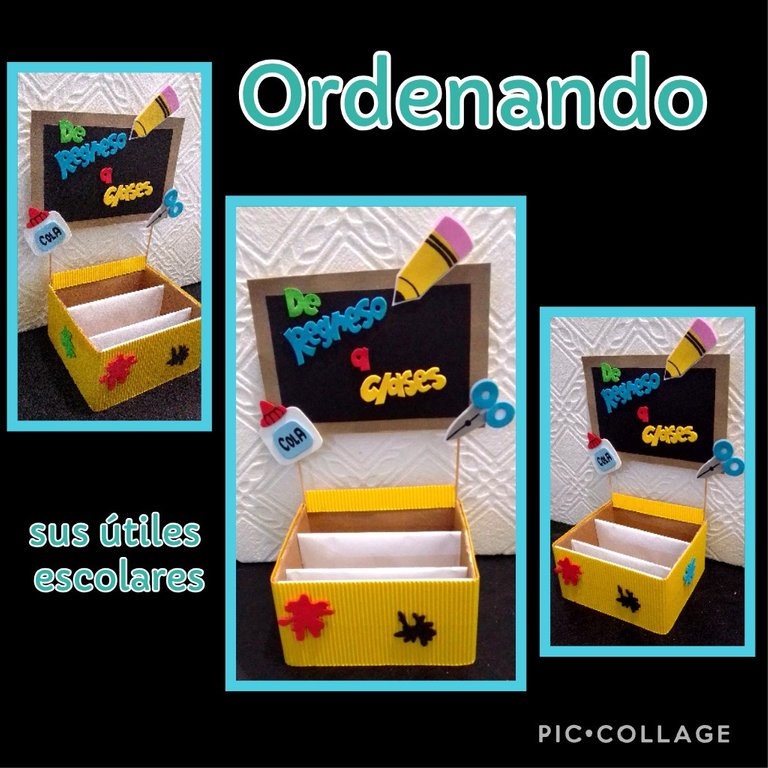
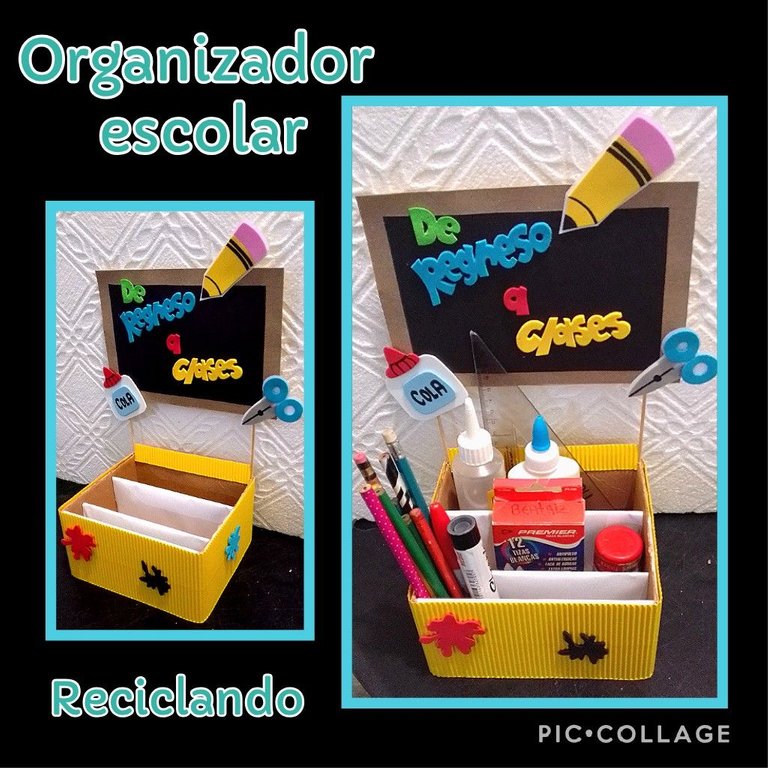
Así queda listo este lindo organizador, hecho con mucho cariño para que te animes y lo hagas. Ese será el lugar más seguro donde ordenar sus útiles.
Viste que es muy fácil y sencillo este paso a paso?.
Ahora, me despido muy contenta de haber compartido esta publicación con ustedes, la traduje con DeepL, la edité con Etiquetas HTML y las fotos tomadas por mi, con un teléfono Blu G5 y editadas con Pic Collage.
Aquí te dejo la foto para que me comentes si te gustó.
Gracias por el apoyo y por tu tiempo!
*** English ***
Hello my dear friends of this nice community.
Welcome to the place where I love to share with you my publications and at the same time watch and learn from yours. Since back to school is coming up, and the kids are always excited to have their new supplies, today I wanted to make them a very nice place where they can store, Organize and at the same time decorate their study place at home.So I will show you a tutorial on How to make a
School supplies organizer..
For this you need these materials:
| Recycled cardboard box | Plain and corrugated cardboard |
|---|---|
| Foamy scraps | Liquid silicone |
| Scissors | Ruler |
| Pencil | Wooden sticks |
| Letter and figure drawings | Marker pen |
Begin the Procedure:
- Measure the inside of the box (height and width).
- Mark and cut out 2 rectangles of cardboard with that measurement to make the divisions inside the box.
- Then, with recycled white paper, line the two (2) rectangles and glue them inside the box, leaving the distance you want.
- Measure the entire contour of the box and cut it out of corrugated cardboard and apply silicone.
- Glue the cardboard to line the box.
- Insert a wooden stick inside the cardboard at two (2) corners.
- Cut out two (2) rectangles in black cardboard and cardboard of the desired size to make the blackboard.
- Glue with silicone, let the chalkboard dry well and apply silicone on the top of the sticks and glue the chalkboard, holding well, until dry.
- Outline the letters and figures with a soft lead pencil, place the front side on the foamy and transfer by rubbing with the ears of the scissors.
- You do the same with all the figures, cut out, outline, and glue them with silicone
and glue with silicone on white cardboard. - Cut the cardboard to 2 milimeters and glue and decorate the box.
- Finally, cut out a 3 x 8 cm rectangle, line it in white and glue it to the box forming a small square where you will put the crayons, pencils and others.
This is how this beautiful organizer is ready, made with love so that you can make it. This will be the safest place to organize your supplies.
Did you see how easy and simple this step-by-step is?
Now, I am very happy to have shared this publication with you, I translated it with DeepL, I edited it with HTML Tags and the photos were taken by me, with a Blu G5 phone and edited with Pic Collage.
Here I leave the photo for you to comment me if you like it.
Thank you for your support and your time!
Muy precioso y ingeniosa idea para este regreso a clases. Me encanto, sobre todo las letras.
Hola @nubra11 muchas gracias por el comentario.. y me contenta mucho te haya gustado.
Saludos...