Hermoso y fácil detalle para regalar en el mes del amor. ESP/ENG.Beautiful and easy gift for the month of love.
Saludos mis queridos creadores y amigos que hoy están por aquí.
Pero como ayer me fué imposible compartir con ustedes hoy les mostraré un hermoso detalle que realicé con mucho cariño para una amiguita.
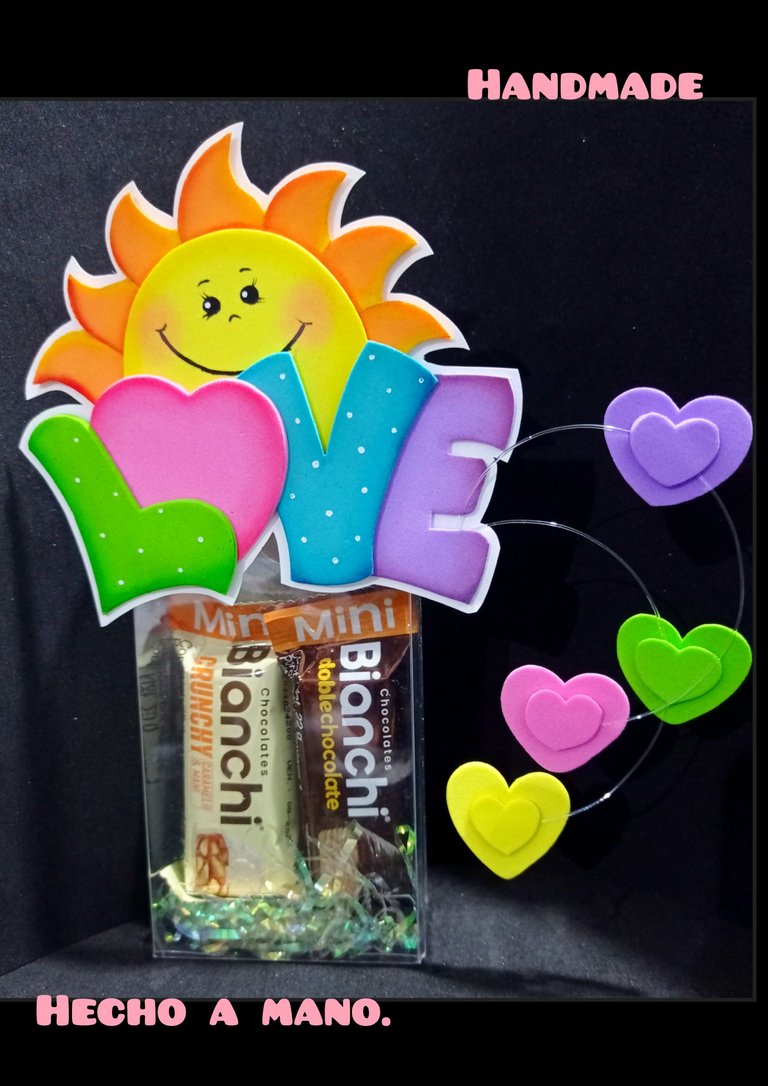
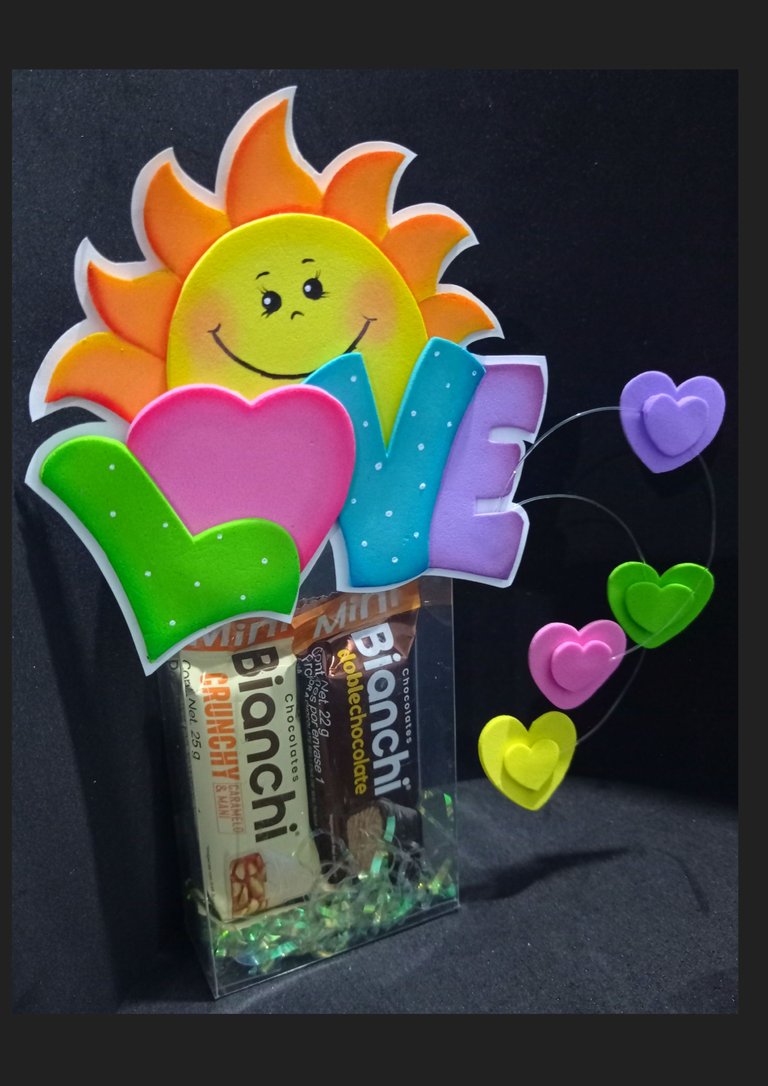
Este obsequio lo hice usando una cajita de acetato donde vienen unos marcadores, y como me pareció muy bonita, decidí decorar con un sol reluciente, la palabra amor y muchos corazones en señal del cariño que nos tenemos por muchos años de amistad, sé que no es gran cosa, pero sé que a ella le gustaría.
Y como todavía quedan días para celebrar en este mes del amor y la amistad, les muestro mi paso a paso.
Entonces comencemos:
Vamos a usar:

| Caja de acetato | Foami de colores | Cartulina |
|---|---|---|
| Pinturas y pinceles | Lápiz | Silicón |
| Tiza | Chocolates | Biruta |
| Tijera | Molde o dibujo | Palito de madera |
Paso 1:
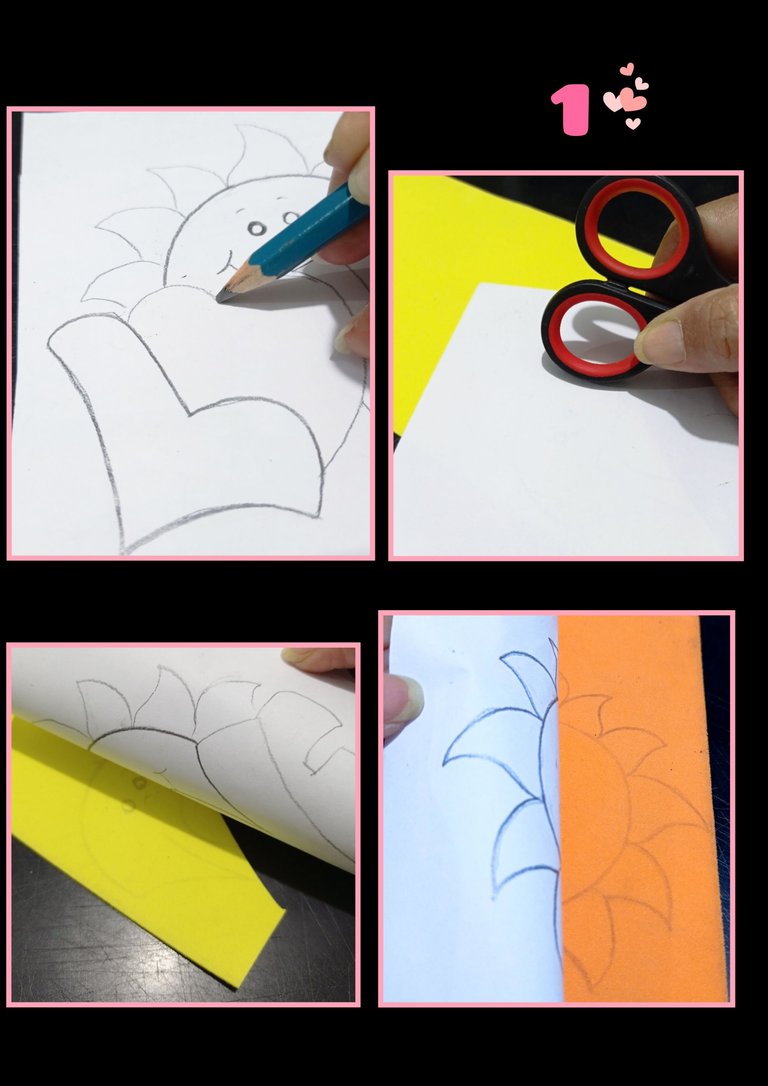
- Remarca el dibujo con lápiz HB o de mina blanda, luego coloca el papel sobre el foami y con la tijera frota para que se transfiera el dibujo, asegúrate que queden todas las piezas bien marcadas.
Paso 2:
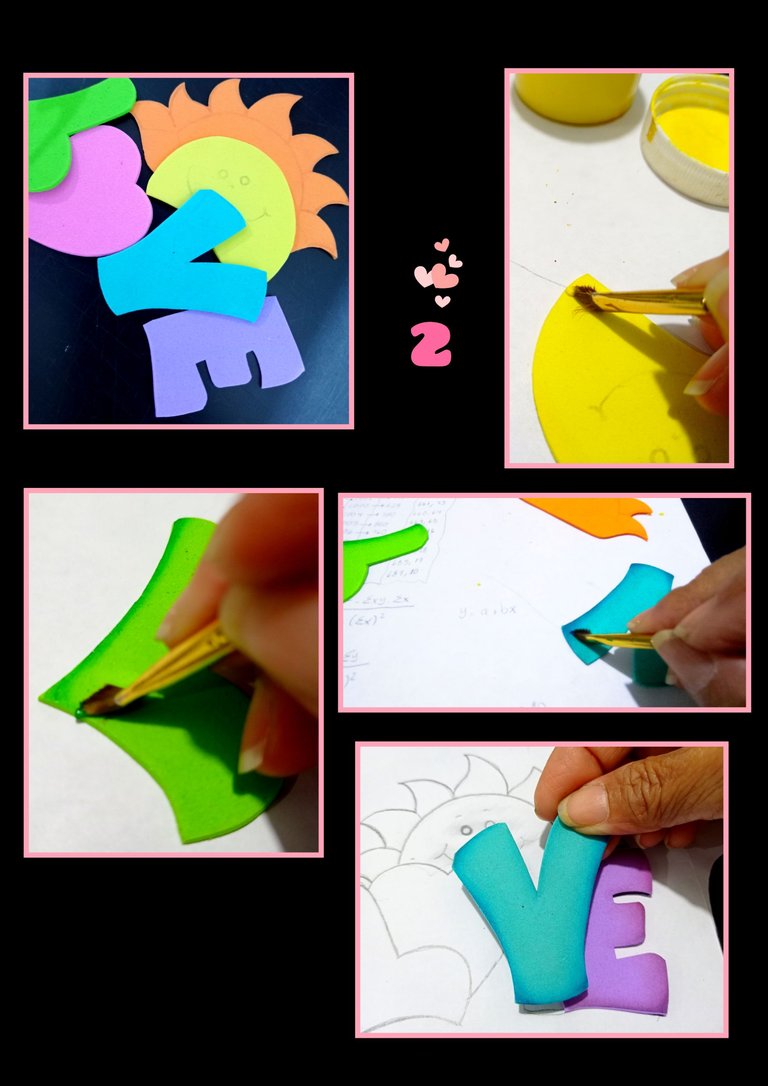
- Recorta todas las piezas y humedece la punta de un pincel plano o angular, luego moja la punta en el color de pintura a usar y comienza a pintar por todos los bordes de las piezas, como te muestro en las fotos y deja secar.
Paso 3:
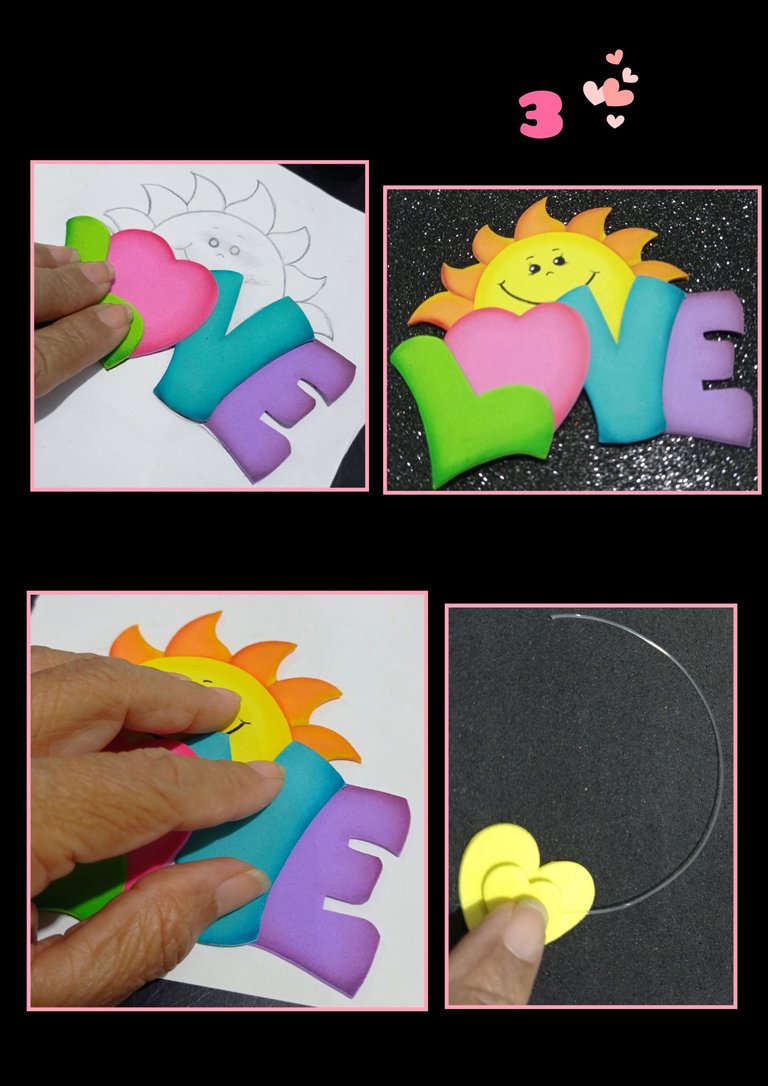
- Luego aplica silicón en las letras y guiándote con el molde comienza a pegar, al formar la palabra, procedes a pegar el sol.
- Ahora aplica silicón a la figura armada y pega sobre cartulina, deja secar y recorta dejando un pequeño borde.
- Después recorta 2 pedazos de nylon y pega los corazones.
Paso 4:
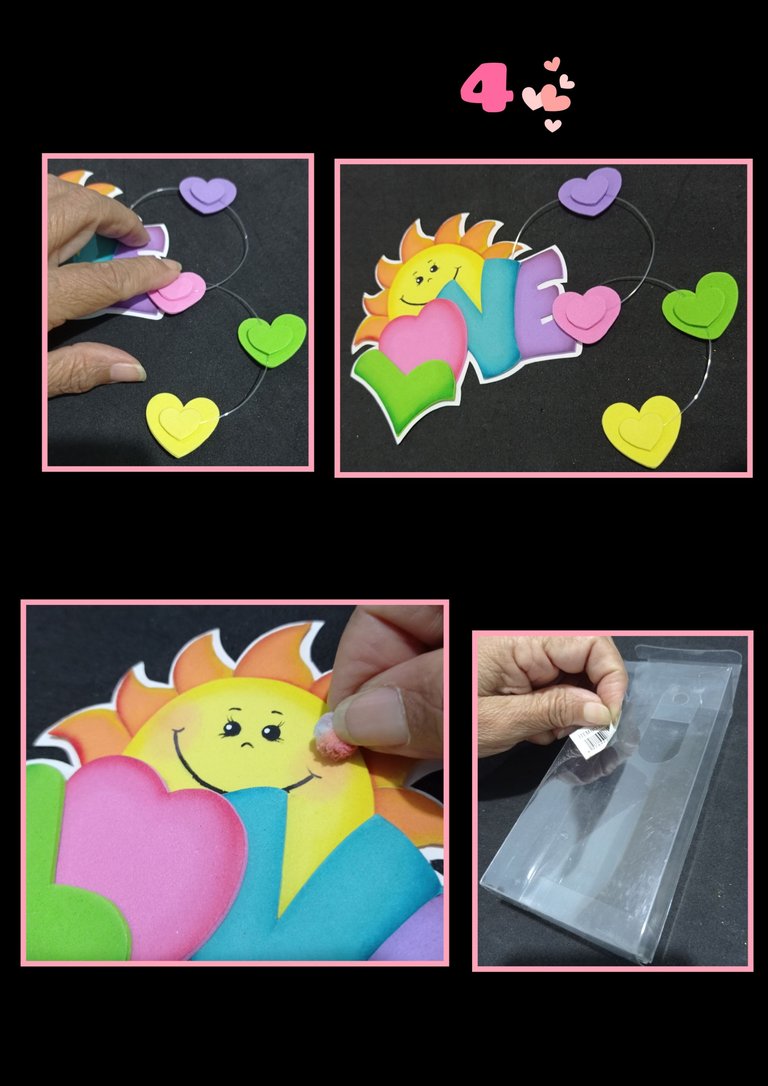
Inserta los hilos de nylon entre las letras y pega con silicón.
Luego pinta las mejillas con tiza y así quedará listo.
Limpia la cajita con un poco de alcohol para quitar cualquier suciedad.
Paso 5:
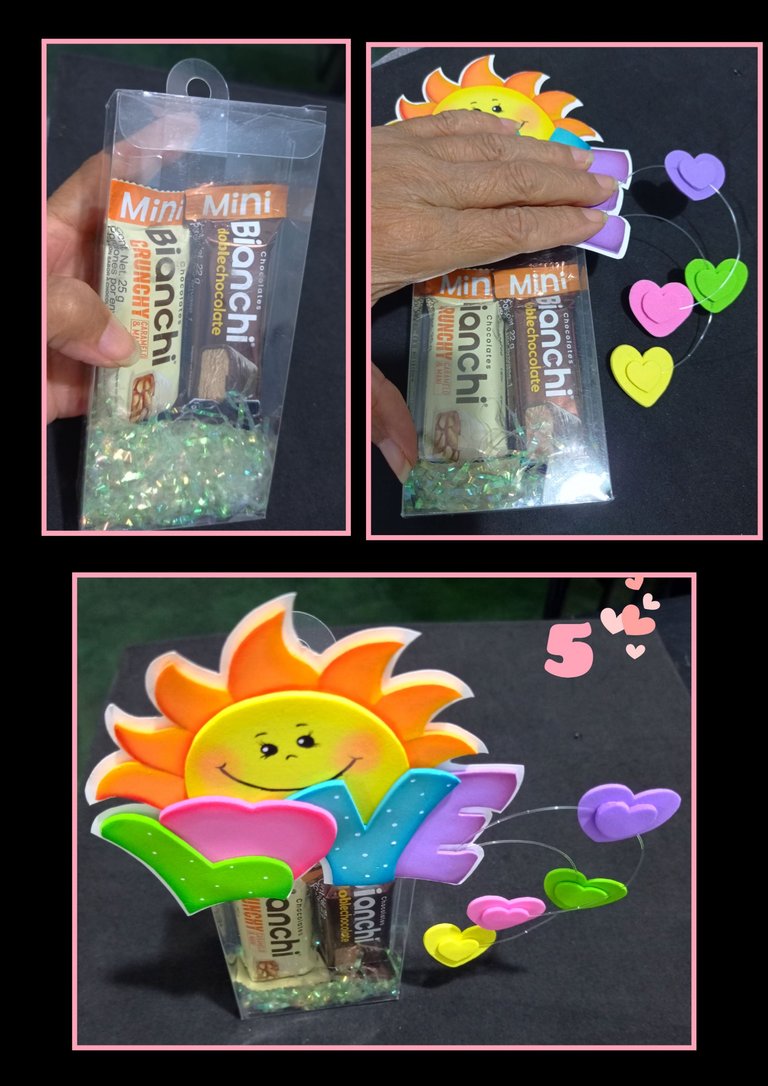
- Abre la cajita e inserta biruta y los chocolates.
- Luego aplica silicón en la pieza y pega a la caja.
- Así queda el resultado.
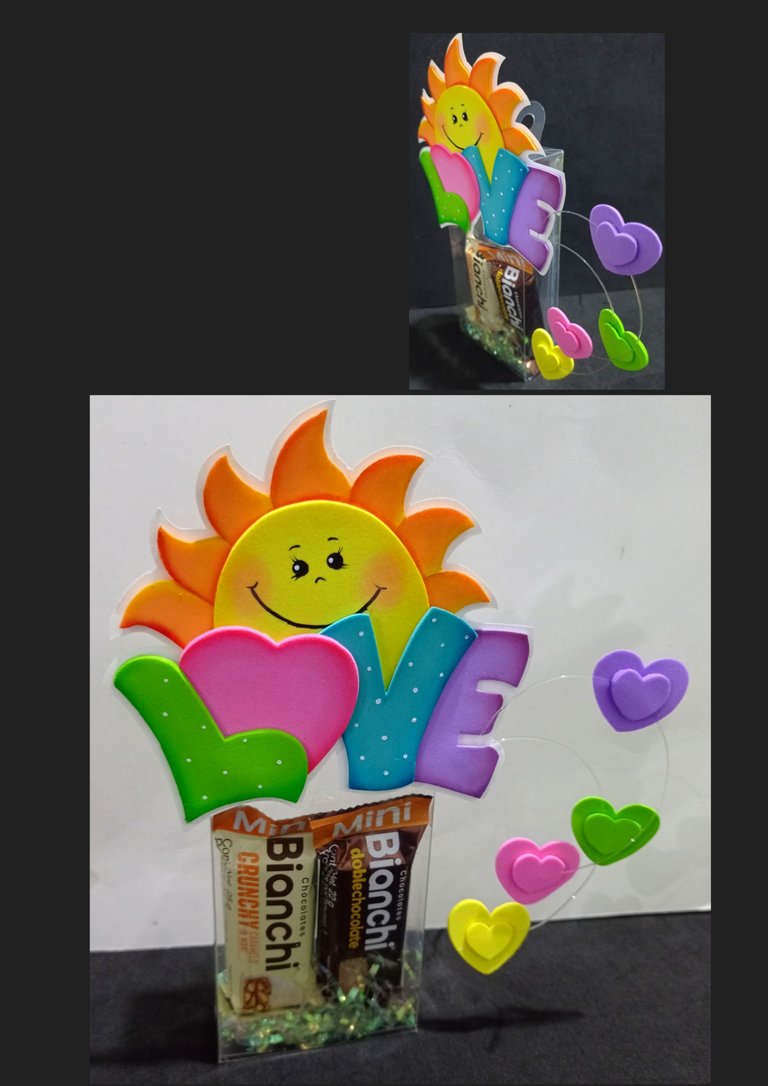
Así que terminado el trabajo, te invito a que me acompañes y realices conmigo este fácil y bonito proyecto hecho con una caja reciclada y también puedas obsequiar.
fuente:https://es.pinterest.com/pin/476255729363635869/
https://files.peakd.com/file/peakd-
hive/elmundodebetty/23vsBzdmP819WGuq1LX9cV8Fn1pdRVMbJeCCwKJ8YGXihvaeHdPETxemSwQci2YCuedKQ.jpg
Editor de fotos GridArt.
Teléfono Redmi Note 9.
Ahora llegó la hora de despedirme feliz de haber compartido con ustedes y agradecida por su visita y apoyo a mi publicación.
Saludos y feliz fin de semana.
English:
Greetings my dear creators and friends who are here today.
So let's start:
We are going to use:
| Acetate box | Colorful Foami | Cardboard |
|---|---|---|
| Paints and brushes | Pencil | Silicone |
| Chalk | Chocolates | Biruta |
| Scissors | Mold or drawing | Wooden stick |
Step 1:
- Outline the drawing with HB or soft lead pencil, then place the paper on the foami and rub with the scissors to transfer the drawing, make sure that all the pieces are well marked.
Step 2:
- Cut out all the pieces and wet the tip of a flat or angled brush, then dip the tip in the paint color to use and start painting all the edges of the pieces, as I show you in the pictures and let dry.
Step 3:
- Then apply silicone on the letters and guiding you with the mold start gluing, when you form the word, proceed to glue the sun.
- Now apply silicone to the assembled figure and glue on cardboard, let dry and trim leaving a small border.
- Then cut out 2 pieces of nylon and glue the hearts.
Step 4:
Insert the nylon threads between the letters and glue with silicone.
Then paint the cheeks with chalk and you're done.
Clean the box with a little alcohol to remove any dirt.
Step 5:
- Open the box and insert the biruta and the chocolates.
- Then apply silicone on the piece and glue it to the box.
- Here is the result.
So, after finishing the work, I invite you to join me and make with me this easy and beautiful project made with a recycled box and you can also give it as a gift.
fuente:https://es.pinterest.com/pin/476255729363635869/
https://files.peakd.com/file/peakd-
hive/elmundodebetty/23vsBzdmP819WGuq1LX9cV8Fn1pdRVMbJeCCwKJ8YGXihvaeHdPETxemSwQci2YCuedKQ.jpg
GridArt Photo Editor.
Redmi Note 9.
Now it's time to say goodbye happy to have shared with you and thankful for your visit and support for my publication.
Greetings and happy weekend.
Que lindo, me encantó 😍
Muchas gracias, me alegro que te gustó.
This is such a wonderful gift idea and your friend will no doubt love and cherish it. It turned out nice. Well done and thanks for sharing.
Muchas gracias @diyhub por tu comentario y apoyo.
Wow muy linda tu creación . Excelente trabajo
Muchas gracias, me contenta saber que te gustó.