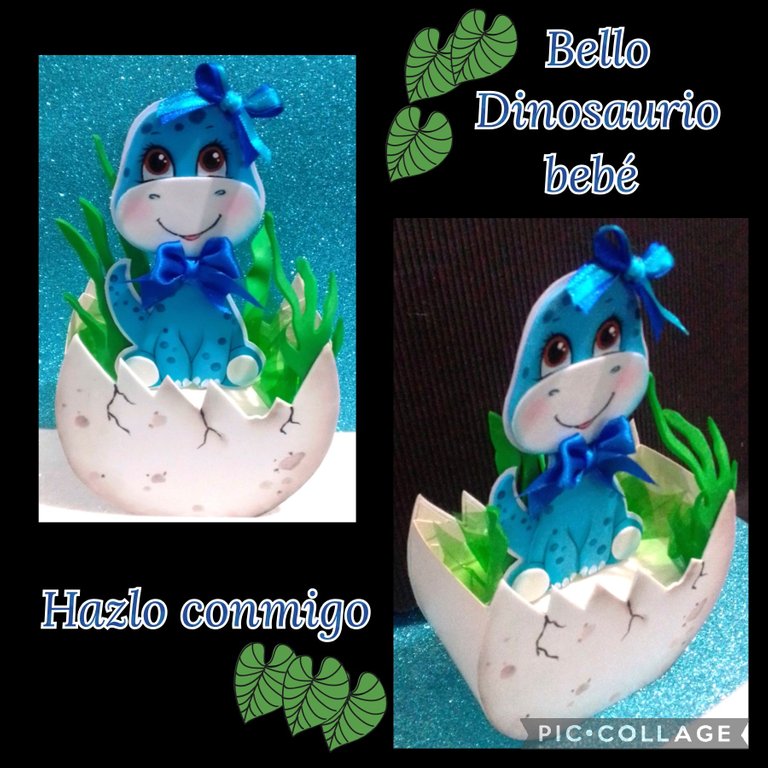
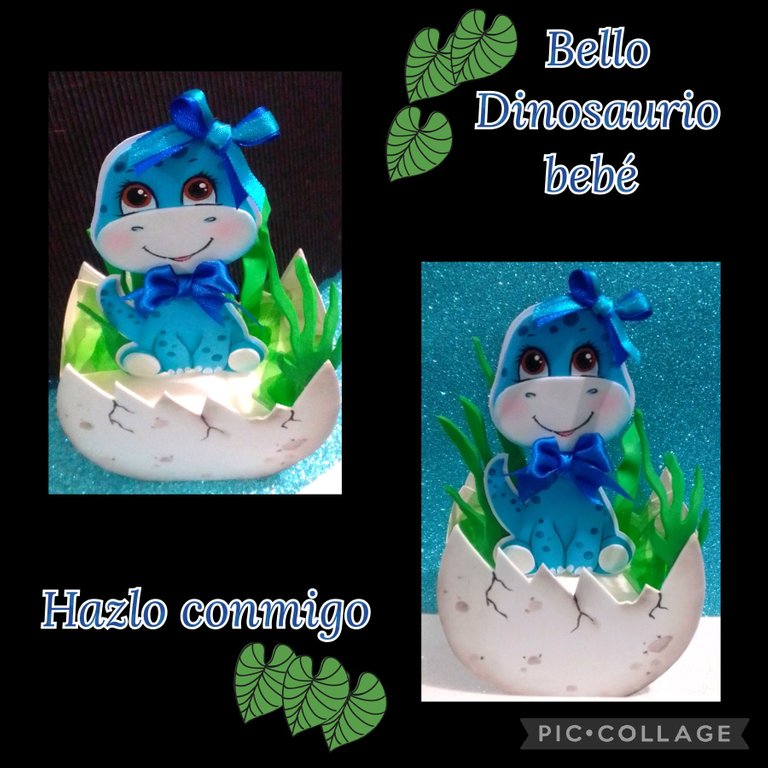
Hagamos un Lindo cotillón de Dinosaurio Bebé. Let's make a Cute Baby Dinosaur Cotillion.
Hola, hola amigos que visitan mi blog!
Bienvenidos sean todos a este mi espacio preferido, donde me encanta compartir con ustedes.
Hoy vengo a mostrarles un tutorial para que aprendas cómo hacer un Cotillón con un Tierno y Lindo Dinosaurio y que también lo puedes realizar para decorar cualquier espacio o un centro de mesa.
Para ello vamos a utilizar los siguientes materiales:

| Foami de colores | Cartulina doble faz |
|---|---|
| Anime trocito | Cartulina escolar |
| Silicón | Cinta de raso |
| Tijera | Pinturas y pinceles |
| Palitos de madera | Lápiz y marcador |
| Algodón con tiza | Dibujo o impresión |
Ahora sin esperar más comencemos con el procedimiento:
- Paso 1:
Base del cotillón (Huevo)
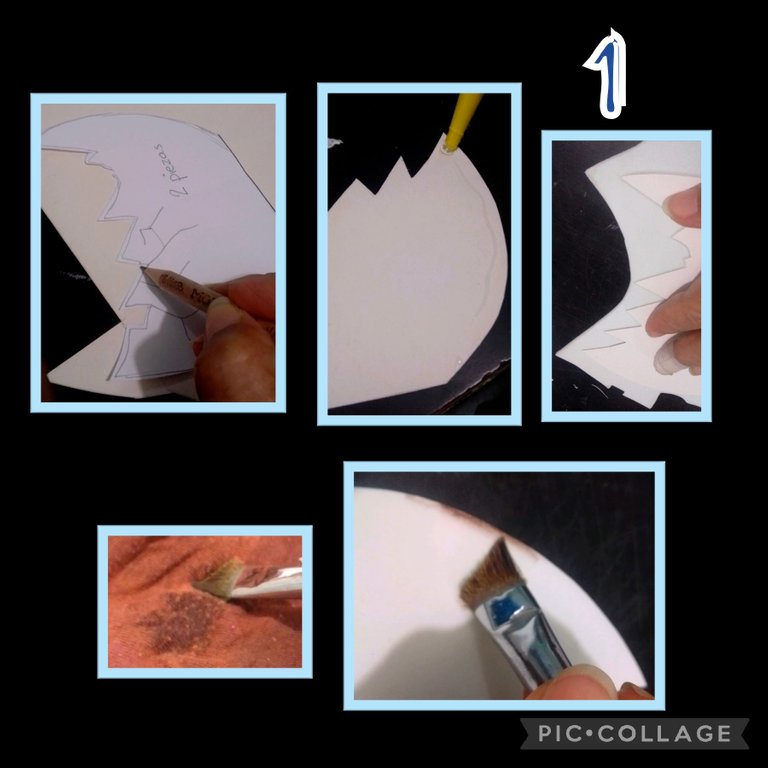
- Recorta el dibujo.
- Luego marca el dibujo del huevo sobre la cartulina doble faz y recorta dos (2) piezas.
- Aplica silicón en cada pieza, pega al foami y recorta por todo el borde.
- Moja un pincel en agua y seca el exceso, luego moja en pintura marrón la punta del pincel y comienza a pintar el borde.
- Paso 2:
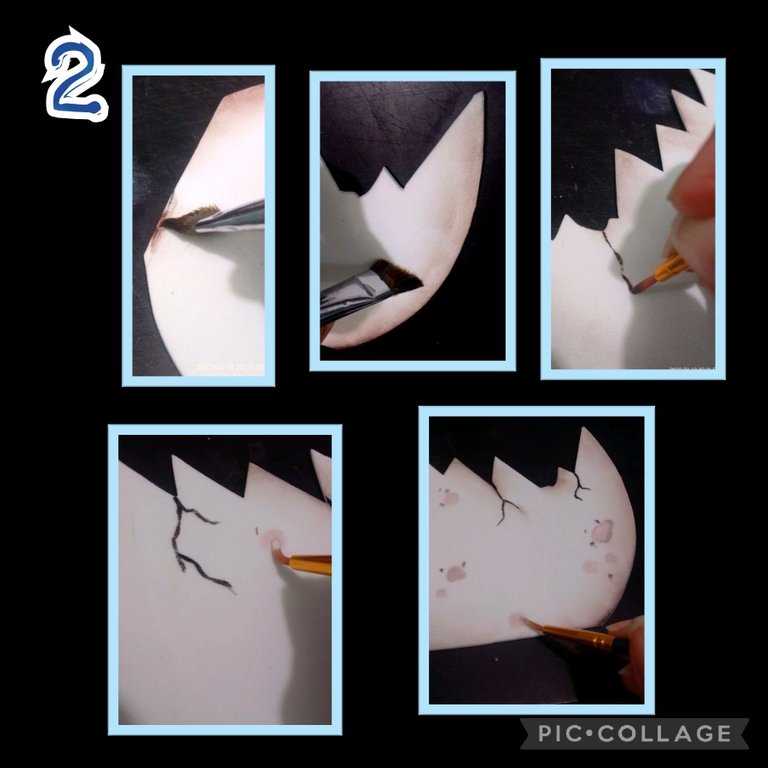
- Sigue aplicando la pintura en el borde y con el pincel húmedo difumina el color sobre la cáscara del huevo.
- Ahora con un pincel delgado haz líneas o trazos como de grietas luego pinta manchas y deja secar.
Paso 3:
¿Cómo hacer el Dinosaurio?
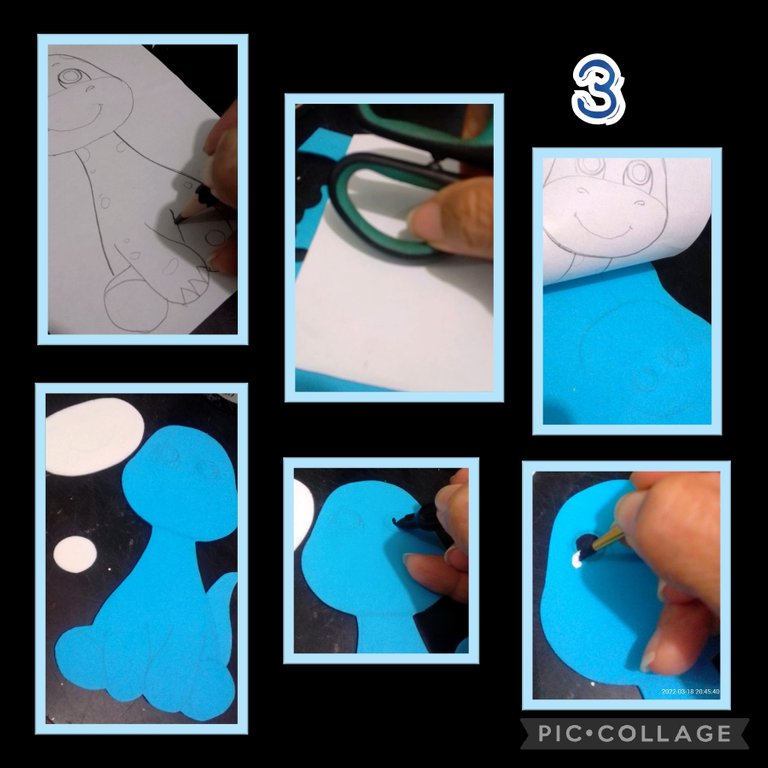
Lo primero será remarcar el dibujo con lápiz de mina blanda eso es para que al frotar con las orejas de la tijera el papel sobre el foami, se transfiera fácilmente como se aprecia en las fotos,
Luego de marcar cada pieza en el color de foami de tu preferencia, recórtalas todas.
Como puedes ver hasta ahora todo ha sido fácil!Con el marcador negro, rellena la pupila y aplica color blanco en los ojos.
- Paso 4:
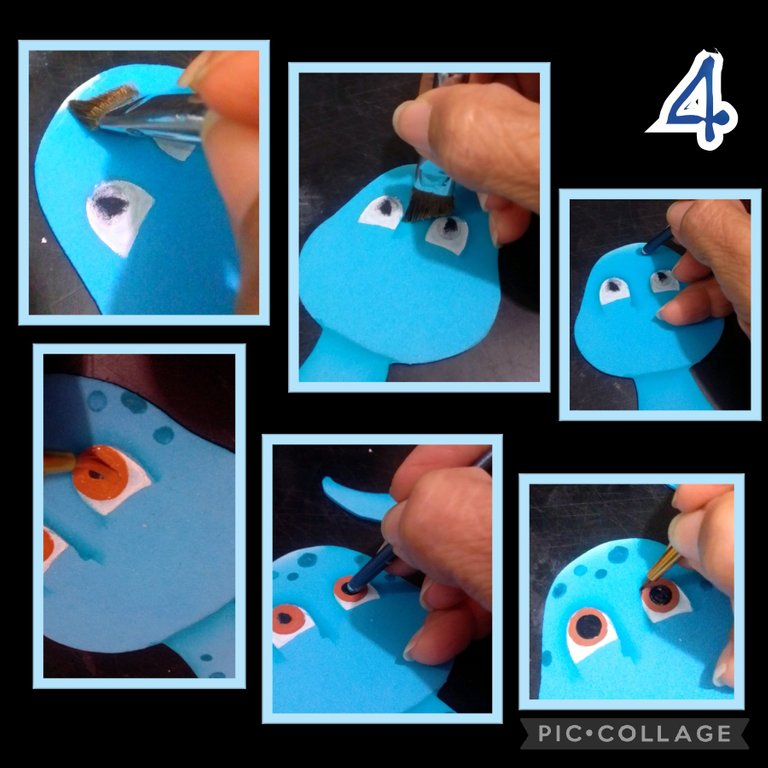
- Aplica pintura blanca en el borde superior de la cabeza para dar luz a la pieza, luego con pintura azul pinta el cuello, el borde de los ojos y todas las partes del cuerpo.
- Ahora con la punta trasera del pincel, pinta manchas en la cabeza y el resto del cuerpo.
- Aparte rellena el iris de los ojos con pintura marrón claro, deja secar y pinta luego el iris con color negro y delinea el borde de los ojos, pinta pestañas y pon puntos de luz con pintura blanca.
- Paso 5:

- Aplica silicón, pega el hocico y termina de pintar o delinear la nariz, boca, las uñas y deja secar bien.
- Arma el dinosaurio y pega a un pedazo de cartulina, recorta el borde dejando 2 o 3 milímetros e inserta antes de que seque el silicón, un palito. (ver foto)
- Paso 6:
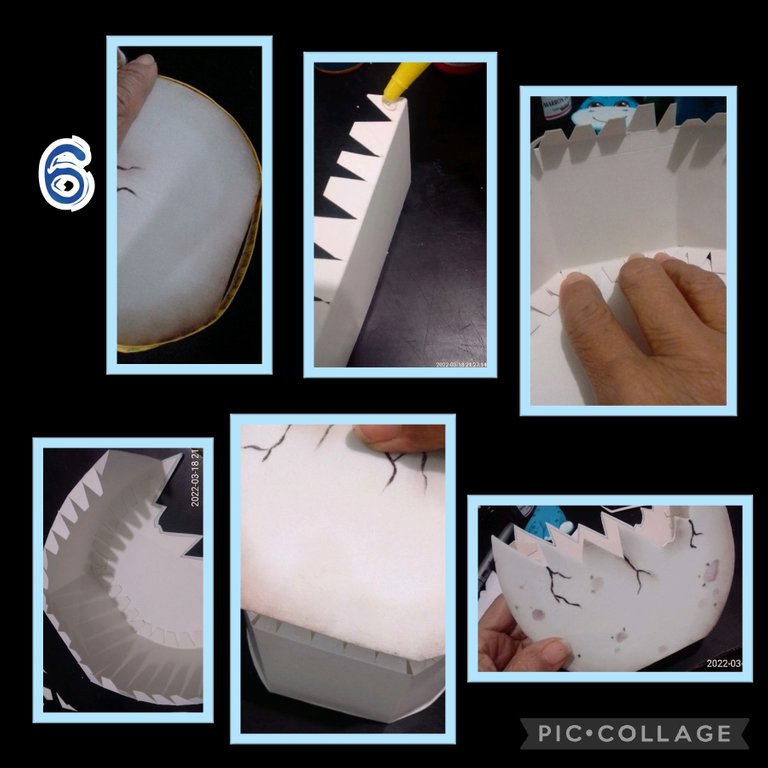
- Mide el contorno del huevo y recorta una tira con esa medida y a la que le colocarás el ancho de tu preferencia y recuerda dejar una pestaña de cada lado de 1,5 o 2 cm de ancho.
- Recorta triángulos en las pestañas, dóblalas y aplica silicón para ir pegando a las piezas una primero y luego la otra, para formar el huevo. (ver fotos)
- Paso 7:
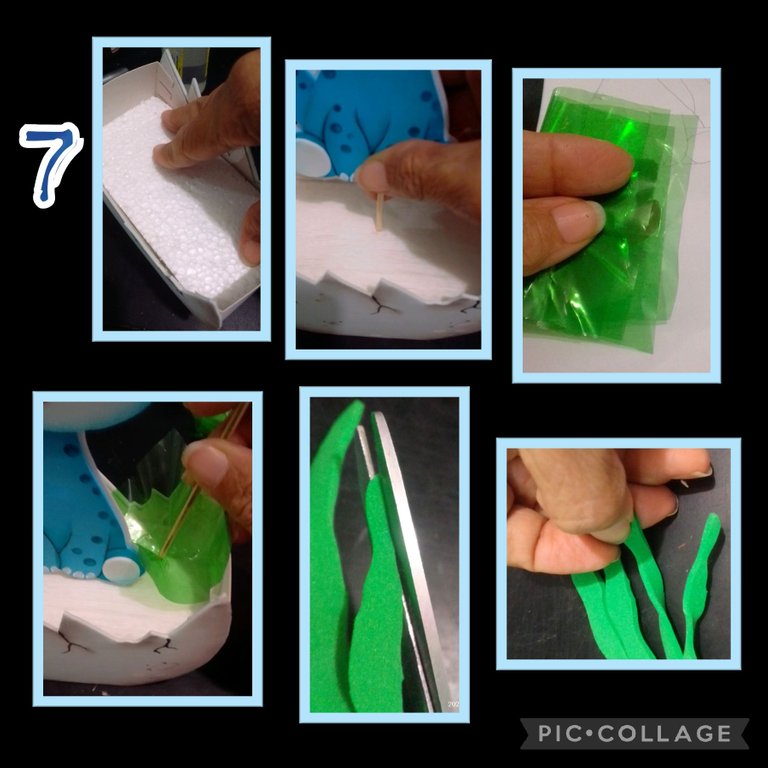
- Recorta un pedacito de anime del tamaño y ancho del huevo y pega en la parte superior y forra el anime con un pedacito de papel crepé.
- Luego inserta el dinosaurio en el centro del anime.
- Recorta unos cuadritos de papel celofán e inserta con la ayuda de un palito de madera.
- Aparte recorta unas plantas que puedes torcer con las manos, para darle movimiento.
Paso 8:
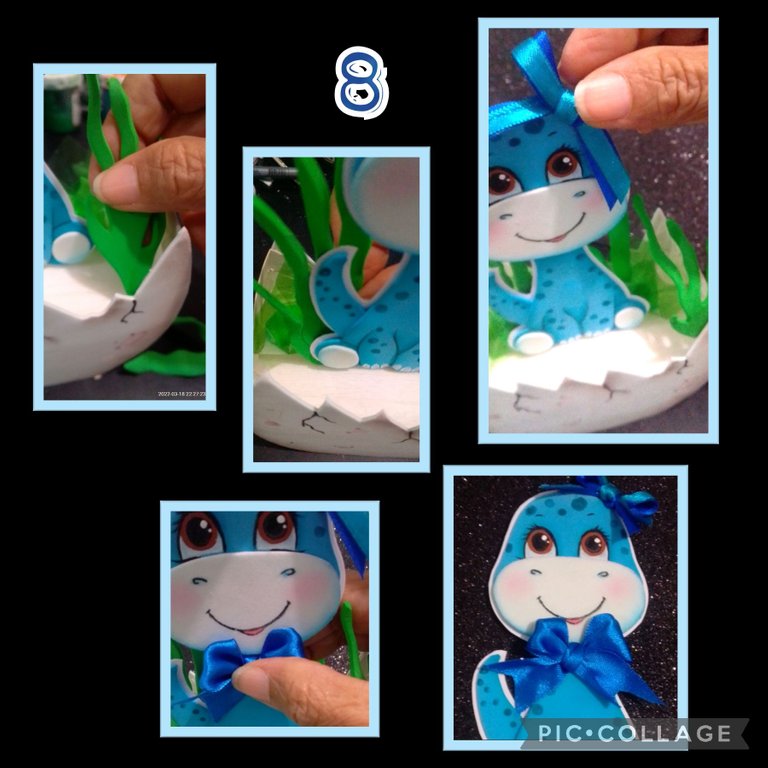
Ahora aplica silicón en la parte inferior de las plantitas y pega para decorar en los sitios que quieras, la verdad es que le dan un toque muy bonito.
Y ya para terminar haz dos lazos uno para la cabecita y otro para el cuello, aplica silicón y haz un poco de presión hasta que pegue bien.
Nota: Lo mejor es sacar el dinosaurio del anime y decorarlo afuera y luego volver a colocar en su sitio.
Ahora te mostraré el resultado de este Lindo Cotillón!

Si deseas, puedes colocarle dulces y bueno decorar a tu gusto.
Etiquetas HTML.
Teléfono: Blu G5
Editor de fotos: Pic Collage
Fuente: https://www.pinterest.es/pin/10625749112399652/
Como siempre me encantó estar contigo y espero haya sido de tu agrado mi tutorial y de ser así, me alegrará mucho ver tu comentario.
Gracias por tu visita.
Hasta mañana, felices sueños.
English:
Hola, hola amigos que visitan mi blog!
Bienvenidos sean todos a este mi espacio preferido, donde me encanta compartir con ustedes.
Hoy vengo a mostrarles un tutorial para que aprendas cómo hacer un Cotillón con un Tierno y Lindo Dinosaurio y que también lo puedes realizar para decorar cualquier espacio o un centro de mesa.
Para ello vamos a utilizar los siguientes materiales:
| Foami de colores | Cartulina doble faz |
|---|---|
| Anime trocito | Cartulina escolar |
| Silicone | Satin ribbons |
| Tijera | Pinturas y pinceles |
| Palitos de madera | Lápiz y marcador |
| Algodón con tiza | Dibujo o impresión |
| Crepe paper | Blade |
Ahora sin esperar más comencemos con el procedimiento:
- Paso 1:
Base del cotillón (Huevo)
- Cut out the drawing.
- Then mark the egg drawing on the double-sided cardboard and cut out two (2) pieces.
- Apply silicone on each piece, glue to the foami and cut out all around the edge.
- Dip a paintbrush in water and dry the excess, then dip the tip of the brush in brown paint and start painting the edge.
- Step 2:
- Continue applying the paint on the border and with the wet brush blend the color over the eggshell.
- Now with a thin brush make crack-like lines or strokes then paint spots and let dry.
Step 3:
How to make the Dinosaur?.
The first thing to do is to mark the drawing with a soft lead pencil so that when you rub the paper on the foami with the ears of the scissors, it will transfer easily as shown in the pictures,
After marking each piece in the foami color of your choice, cut them all out.
As you can see so far everything has been easy!With the black marker, fill in the pupil and apply white color on the eyes.
- Step 4:
- Apply white paint on the top edge of the head to give light to the piece, then with blue paint paint the neck, the edge of the eyes and all the body parts.
- Now with the back tip of the brush, paint spots on the head and the rest of the body.
- Then fill in the iris of the eyes with light brown paint, let it dry and then paint the iris with black color and outline the edge of the eyes, paint eyelashes and put light spots with white paint.
- Step 5:
- Apply silicone, glue the snout and finish painting or outlining the nose, mouth, nails and let dry well.
- Assemble the dinosaur and glue to a piece of cardboard, trim the edge leaving 2 or 3 millimeters and insert a stick before the silicone dries. (see photo)
- Step 6:
- Measure the contour of the egg and cut out a strip with that measurement and to which you will add the width of your choice and remember to leave a tab on each side of 1.5 or 2 cm wide.
- Cut out triangles in the tabs, fold them and apply silicone to stick one piece first and then the other to form the egg. (see photos)
- Step 7:
- Cut out a piece of anime the size and width of the egg and glue on top and line the anime with a piece of crepe paper.
- Then insert the dinosaur into the center of the anime.
- Cut out a few squares of cellophane paper and insert with the help of a wooden stick.
- Cut out some plants that you can twist with your hands to give it movement.
Step 8:
Now apply silicone on the bottom of the plants and glue to decorate in the places you want, the truth is that they give a very nice touch.
And finally, make two bows, one for the head and one for the neck, apply silicone and apply a little pressure until it sticks well.
Note: The best thing to do is to take the dinosaur out of the anime and decorate it outside and then put it back in place.
Now I will show you the result of this cute cotillion!
If you wish, you can put candy on it and well decorate to your liking.
HTML tags.
Phone: Blu G5
Photo editor: Pic Collage
Fuente: https://www.pinterest.es/pin/10625749112399652/
As always I was delighted to be with you and I hope you liked my tutorial and if so, I will be very happy to see your comment.
Thank you for your visit.
See you tomorrow, happy dreams.
Congratulations @elmundodebetty! You have completed the following achievement on the Hive blockchain and have been rewarded with new badge(s):
Your next target is to reach 200 posts.
You can view your badges on your board and compare yourself to others in the Ranking
If you no longer want to receive notifications, reply to this comment with the word
STOPTo support your work, I also upvoted your post!
Check out the last post from @hivebuzz:
Amiga te quedo hermoso
Muchas gracias Mari.
Saludos.
Lo que haces es arte, el acabado de tus trabajos es simplemente asombroso, gracias por compartir tu creatividad.
Hola amiga, muchísimas gracias por tu comentario.
Es un placer compartirlo con ustedes.
Saludos.
Está muy hermoso😍😍😍
Muchas gracias amiga @hannymarchan por tu comentario.
Saludos.
Que hermoso quedo tu trabajo amiga bendiciones y éxitos en abundante ❤❤
Buenas noches amiga @bleuclair muchas gracias por tu comentario.
Igual para ti.
Saludos.
Que hermoso bebe dinosaurio!
Me enamore!
Es delicado tierno y con mucho detalles!
Hermoso trabajo amiga!
Saludos!
Muchas gracias amiga @hetyg.
Que bueno que te gustó mi trabajo!
Saludos para ti.