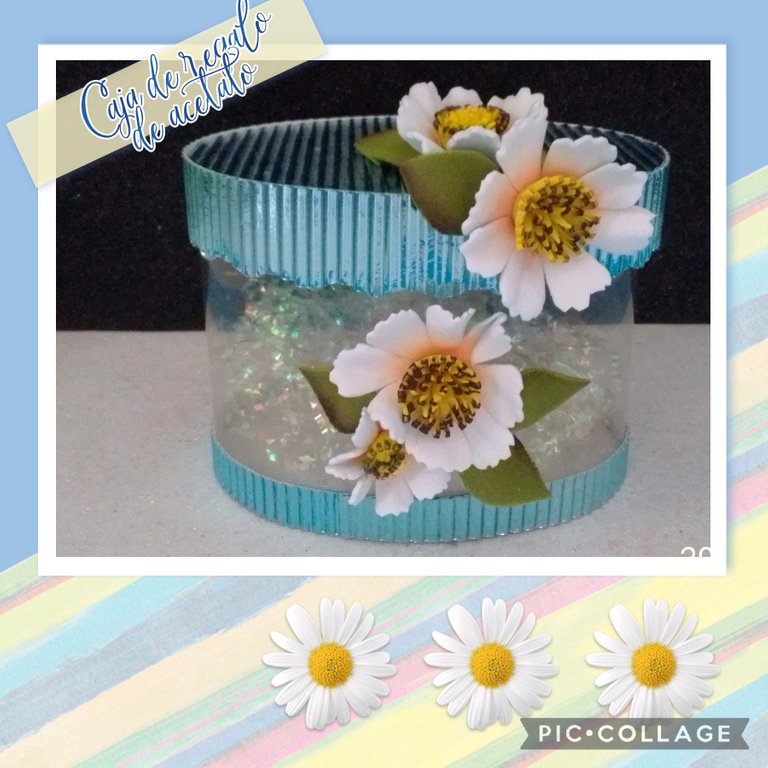
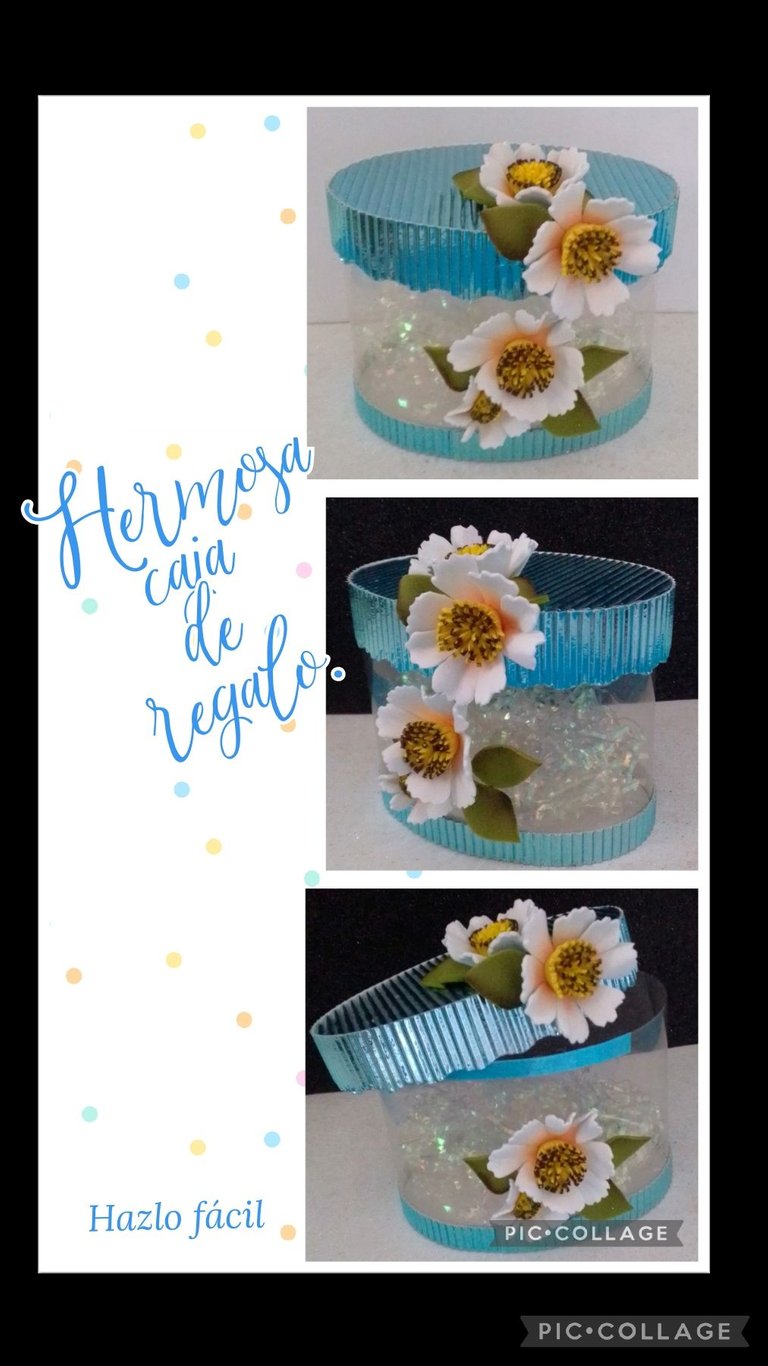
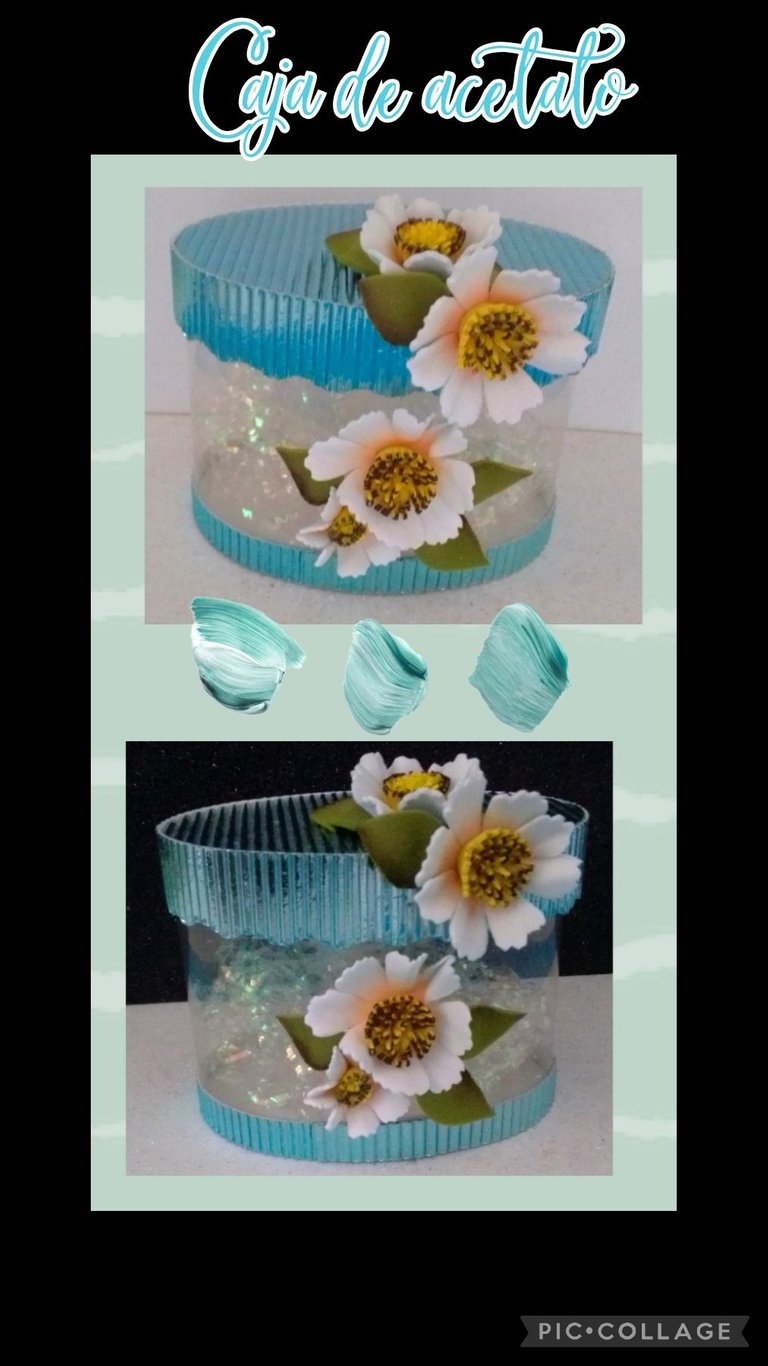
Hagamos esta hermosa y fácil Caja con acetato, decorada con flores de foami. Let's make this beautiful and easy box with acetate, decorated with foami flowers.
Feliz noche tengan todos los amigos que me visitan.
Bienvenidos.
Así que si quieres aprender, te invito a que me acompañes y veas como se hace.
Vas a necesitar:
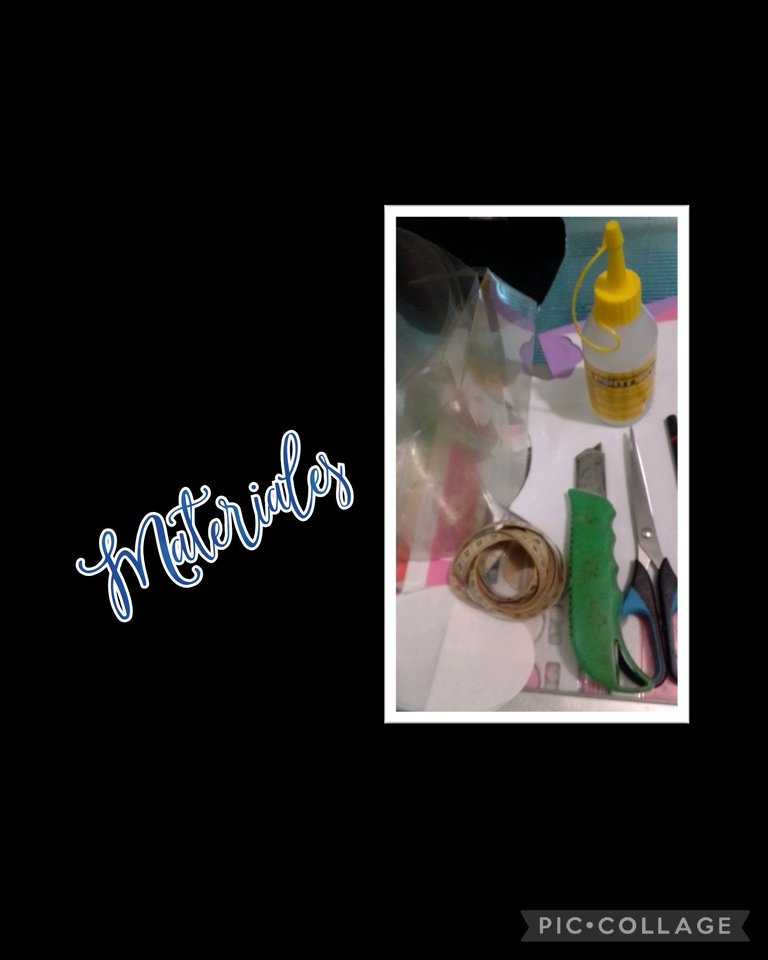
| Acetato | Cartulina corrugada metalizada | Foami |
|---|---|---|
| Cinta de regalo | Cartulina | Cartón de caja |
| Cinta métrica | Lápiz | Cuchilla |
| Tijera | Silicón | Regla |
| Molde | Tiza | Pinturas y pinceles |
| Plancha eléctrica |
Comencemos:
Base de la caja.
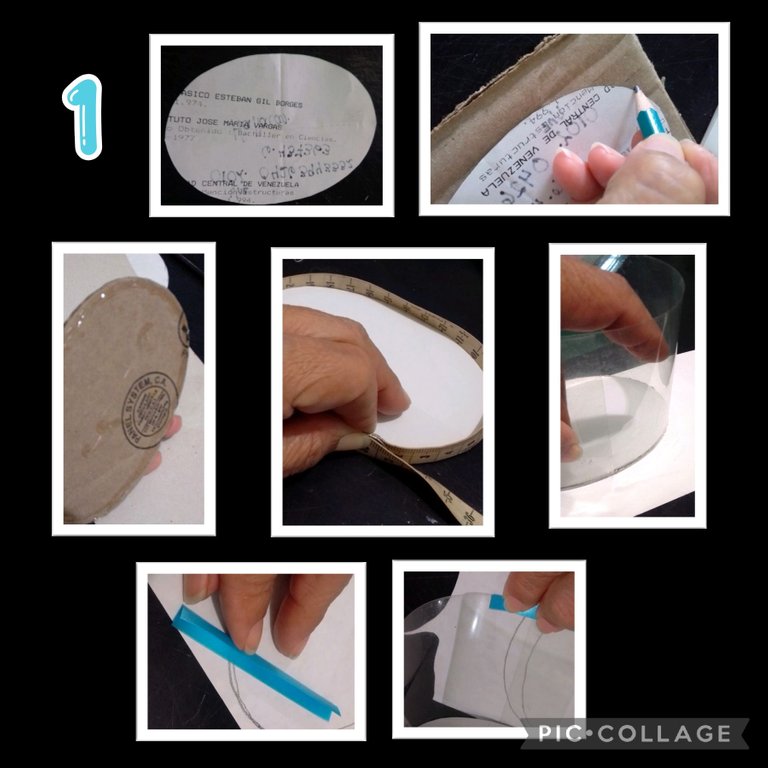
- Recorta el molde y marca sobre el cartón, marcando por todo el borde.(1 pieza), luego aplica silicón y pega sobre cartulina blanca, recorta y mide con una cinta métrica todo el borde.
- Aparte marca y recorta un rectángulo de acetato de 8cms de altura por 32cm que es la medida tomada más 2cms serían 34 en total, aplica silicón por toda la orilla del cartón y pega el acetato ajustando que quede bien pegado.
- Ahora en la parte superior aplica un poquito de silicón y pega la punta, recorta un pedacito de cinta de 4cms, dobla por la mitad y pega en la orilla.
Tapa de caja.
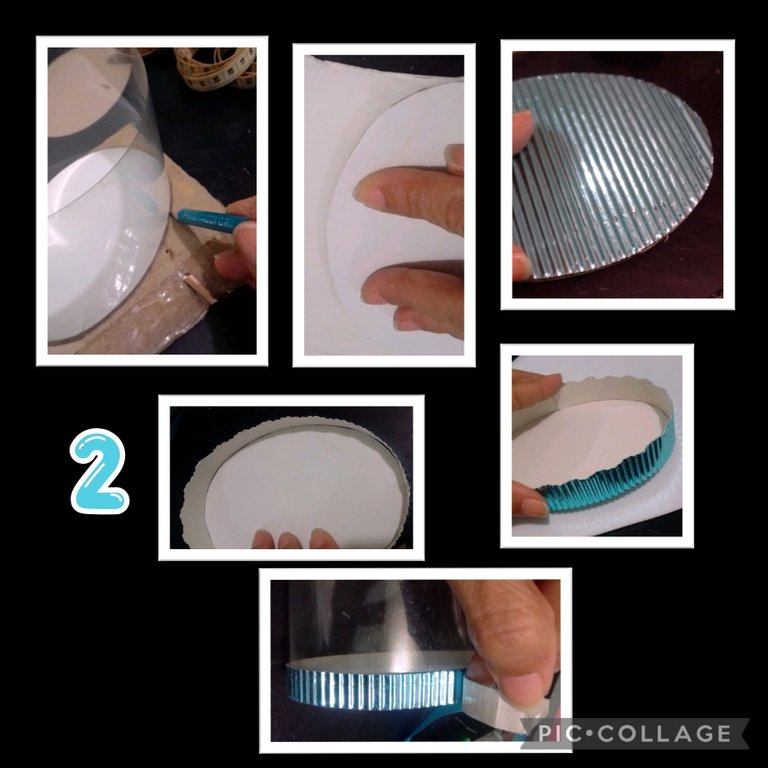
- Armada la base, colócala sobre otro pedazo de cartón y marca por toda la orilla, aplica silicón, pega sobre la cartulina blanca, recorta y aplica silicón por todo el borde y pega sobre la cartulina corrugada y recorta el óvalo.
- Aparte recorta con tijera de ondas, una tira de cartulina corrugada de 2cm x 34cm de largo y pega por todo el borde del óvalo, tratando de que la unión quede en el centro de la tapa.
- Ahora recorta una lista de 1cm x 34cm de largo y pega en la parte inferior de la base de la caja.
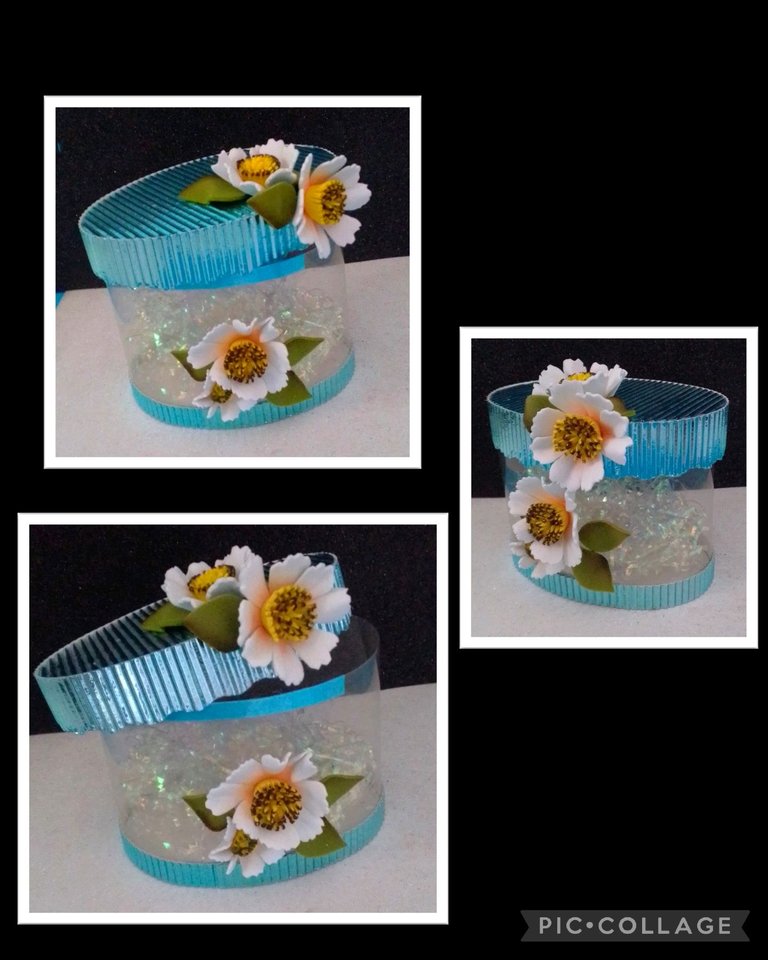
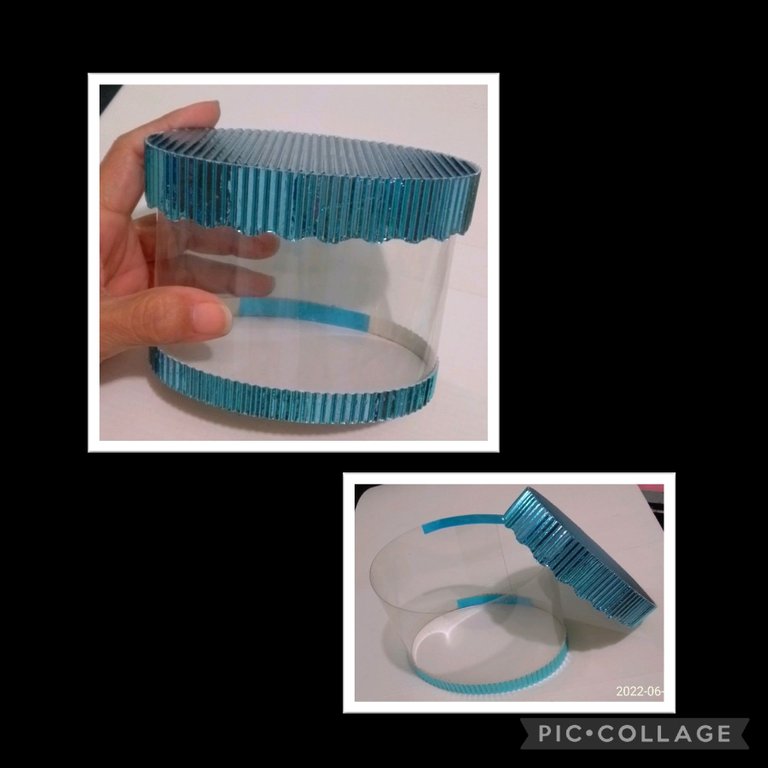
Así queda la caja armada.
Recortar y pintar flores.
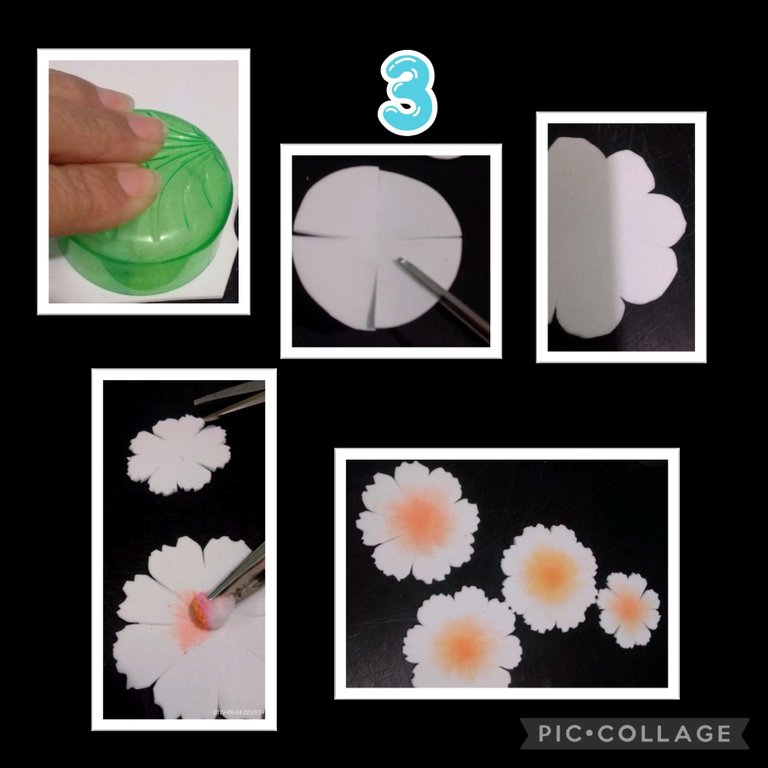
- Marca un círculo del tamaño de tu preferencia y divide en 4 partes formando una cruz y luego recorta cada cuarto en 2 y te quedarán 8 partes.
- Recorta en forma redondeada los pétalos y recorta sacando cortes sin forma, luego pasa un algodón por tiza y pinta los centros de las flores, después calienta la plancha y coloca una a una las flores para dar forma a los pétalos.
Pistilos y armado de flores.
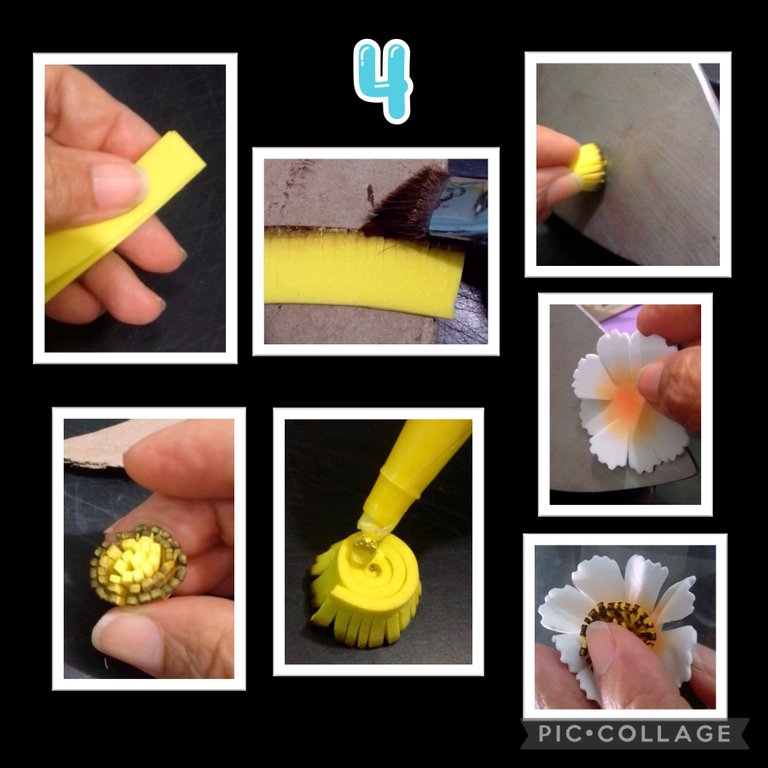
- Para hacer los pistilos, recorta una lista de 8mm de ancho x 7cms de largo, pinta la orilla, aplica silicón enrolla y calienta en la plancha para que des forma, abriendo los pistilos.
- Luego calienta la plancha y coloca los pétalos de las flores y dales la forma que quieras.
- Después aplica silicón en la parte de abajo de los pistilos y pega en el centro de las flores.
Decoración de caja.
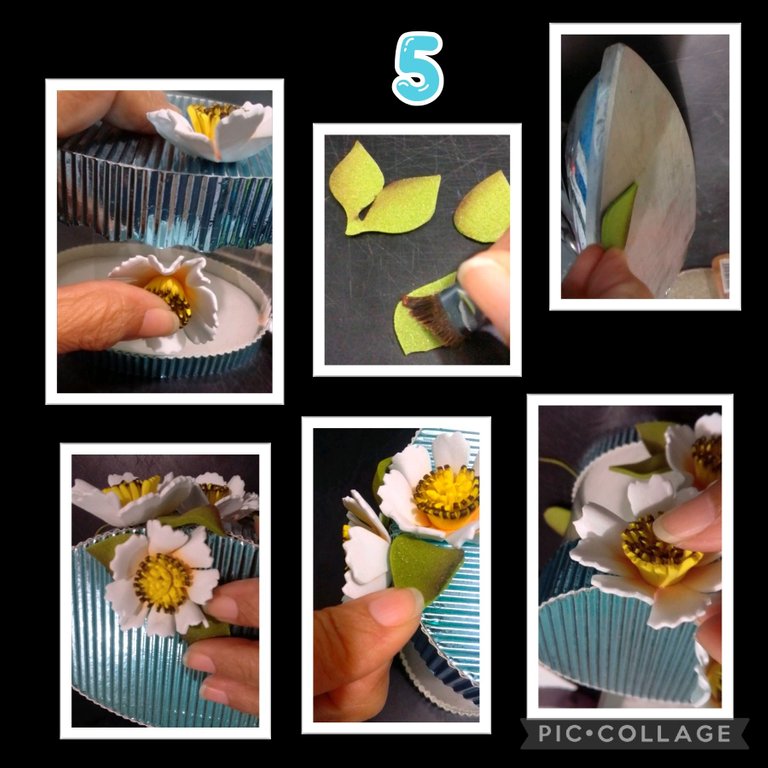
- Aplica silicón a las flores y pega en el acetato y aparte recorta unas hojas, sombrea o difumina con pintura marrón, deja secar y pasa por la plancha caliente para dar forma.
- Por último pega y decora a tu gusto.
Dime que tal quedó?
Las fotos capturadas por mi Teléfono: BLU G5 y editadas con Pic Collage.
Espero te guste y te sirva en alguna ocasión mi tutorial.
Ahora me despido agradeciendo tu visita, apoyo y si te gustó me encantará ver tu comentario.
Aquí te comparto mis fotos...
Saludos y bendiciones para ti.
English:
Happy evening to all my friends who visit me.
Welcome.
So if you want to learn, I invite you to join me and see how it's done.
You will need:
| Acetato | Metallic corrugated cardboard | Foami |
|---|---|---|
| Gift wrap ribbon | Cardboard | Cardboard box |
| Measuring tape | Pencil | Blade |
| Scissors | Silicone | Ruler |
| Mold | Chalk | Paints and brushes |
| Electric iron |
Let's get started:
Base of the box.
- Cut out the mold and mark on the cardboard, marking all around the edge (1 piece), then apply silicone and paste on white cardboard, cut out and measure with a tape measure all around the edge.
- Then mark and cut a rectangle of acetate 8cm high by 32cm which is the measure taken plus 2cms would be 34 in total, apply silicone all around the edge of the cardboard and glue the acetate adjusting that it is well glued.
- Now apply a little bit of silicone on the top and glue the tip, cut a 4 cm piece of ribbon, fold it in half and glue it on the edge.
Box cover
- Once the base is assembled, place it on another piece of cardboard and mark all around the edge, apply silicone, glue on the white cardboard, cut and apply silicone all around the edge and glue on the corrugated cardboard and cut out the oval.
- Cut a 2cm x 34cm long strip of corrugated cardboard with wave scissors and glue all around the edge of the oval, making sure that the joint is in the center of the lid.
- Now cut out a strip 1cm x 34cm long and glue it to the bottom of the base of the box.
This is how the box is assembled.
Cut out and paint the flowers.
- Mark a circle of the size of your choice and divide into 4 parts forming a cross and then cut each quarter into 2 and you will be left with 8 parts.
- Cut out the petals in a rounded shape and cut out unshaped cuts, then pass a cotton ball through chalk and paint the centers of the flowers, then heat the iron and place the flowers one by one to shape the petals.
Flower styling and assembling
- To make the pistils, cut a list of 8mm wide x 7cms long, paint the edge, apply silicone roll and heat in the iron to give shape, opening the pistils.
- Then heat the iron and place the flower petals and give them the shape you want.
- Then apply silicone to the bottom of the pistils and glue in the center of the flowers.
Decoration of the box.
- Apply silicone to the flowers and glue on the acetate and separately cut out some leaves, shade or blur with brown paint, let dry and pass through the hot iron to shape.
- Finally glue and decorate as you like.
Tell me how it turned out?
The photos were captured by my phone: BLU G5 and edited with Pic Collage.
I hope you like it and it will be useful to you sometime my tutorial.
Now I say goodbye thanking you for your visit, support and if you liked it I will love to see your comment.
Here I share with you my photos...
Greetings and blessings to you.
Te ha quedado hermosisima. Bien elaborado, todo lo que hace le queda muy lindo. Muchas gracias por compartir el proceso de sus lindas manualidades. Saludos❣️
Muchas gracias por tu comentario kellyrsa, lo hago con mucho cariño!
Saludos para ti.
Me encantó lo hermosa que quedó la caja y te felicito por tan lindo paso a paso, saludos
Buenas tardes yolimarag, gracias por tu lindo comentario.
Igual para ti.
Esta realmente hermosa.
Muy detallado tu paso a paso.
Si que se ve elegante con ese tipo de cartulina.
Las flores me encantaron, me gustó la técnica de como resalta con la pintura el foami.
Gracias por compartir.
Bendiciones.
Hola leidimarc, por leerme y comentar, que bueno que te gustó.
Siempre a sus ordenes.
Igualmente.
Muchas bendiciones en esta nueva semana.
Sus trabajos son muy bonitos.
Seguro estaré viendo más de sus creaciones.
Buenas tardes leidimarc, igual para ti.
Muchas gracias por tus palabras y que bueno que me visites, estaré feliz por eso... igualmente ahora tengo otro lugar donde visitar para ver tus trabajos...
Saludos.
Así es amiga nos estaremos viendo por esta comunidad.
También me gustan las manualidades, aunque no he posteado tanto por aquí, además que soy relativamente nueva en la Blokchaing.
Hay muchas cosas buenas y bonitas que ver.
Por cierto ayer hice un portarretrato para mi papá.
Greetings @elmundodebetty what a nice craft you show us, we invite you to join the community @jewelry a community for the creation of accessories, where we currently have a contest of a creation of accessories using jeans fabric, we hope you are encouraged to participate you are welcome to our community.
We leave you the link to the community
https://peakd.com/c/hive-189504/created
Buenas tardes comunidad @hive-189504 @jewelry, estoy muy agradecida por el comentario y por la invitación que me hacen.. trataré en lo posible de participar en el concurso.
Saludos...
Te ha quedado espectacular y los colores son divinos.
Muchas gracias @equipodelta por su comentario.
Saludos.
Thank you for sharing this amazing post on HIVE!
Your content got selected by our fellow curator @rezoanulvibes & you just received a little thank you via an upvote from our non-profit curation initiative!
You will be featured in one of our recurring curation compilations and on our pinterest boards! Both are aiming to offer you a stage to widen your audience within and outside of the DIY scene of hive.
Join the official DIYHub community on HIVE and show us more of your amazing work and feel free to connect with us and other DIYers via our discord server: https://discord.gg/mY5uCfQ !
If you want to support our goal to motivate other DIY/art/music/homesteading/... creators just delegate to us and earn 100% of your curation rewards!
Stay creative & hive on!
Buenas tardes @diyhub agradecida como siempre por su apoyo.
Saludos.
Quedó realmente hermosa!💕
Me parece muy lindo el cartón corrugado, ese tono resalta mucho pero sin ser escandaloso.
Los tonos de las flores y todo quedó realmente lindo y combinado. ☺️🥰✨
Muchas gracias por compartir. Saludos. 💕✨
Hola valen que bueno que te gustó mi trabajo, gracias por tus palabras.
Siempre a la orden.
Igualmente.💐
Te ha quedado muy linda la caja, gracias por compartirla, es fácil de elaborar, me encanto el detalle de las flores.
Muchas gracias coromoto, si es muy fácil de realizar y que bueno que te gustó.
Saludos.
Que hermosura amiga @elmundodebetty. Siempre es gratificante apreciar tu excelente trabajo. Felicidades...
Hola amiga, de verdad muy agradecida por tus lindas palabras.
Bendiciones y saludos.