Creative Christmas ball made with aluminum foil, anime and ribbons... Creativa bola navideña elaborada con papel de aluminio, anime y cintas..
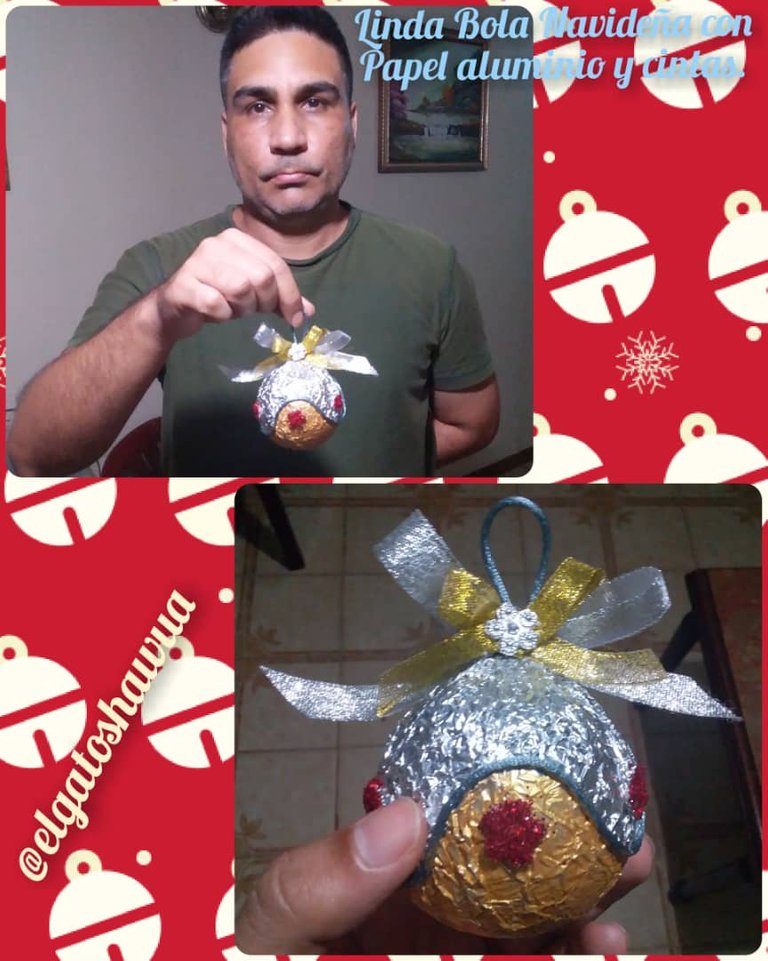
Happy Wednesday and beginning of December starting today the Christmas festivities and that is why today I want to present once again a craft work how is the development of a beautiful and creative Christmas ball lined with aluminum foil as always based on the work on recycling, the same will give me the opportunity to decorate purging this beautiful work in the tree of my home, I hope you join me during the development of this publication.
Feliz miércoles e inicio de diciembre iniciando a partir de hoy las festividades decembrinas y es por eso que hoy quiero presentarles una vez más un trabajo de manualidades cómo es la elaboración de una bonita y creativa bola navideña forrada con papel de aluminio como siempre basándome en el trabajo sobre reciclaje , el mismo me va a dar la oportunidad de decorar purgando este hermoso trabajo en el arbolito de mi hogar, espero que me acompañen durante el desarrollo de esta publicación.
Materials:
Anime ball, aluminum foil, shiny ribbons, paintbrush, gold paint, gray cord, silicone, gold applique glue, red frosting.
Materiales:
Bola de anime, papel de aluminio, cintas brillantes, pincel, pintura dorada, cordón gris, silicón, apliques dorado pega, escarcha roja.
Step by step:
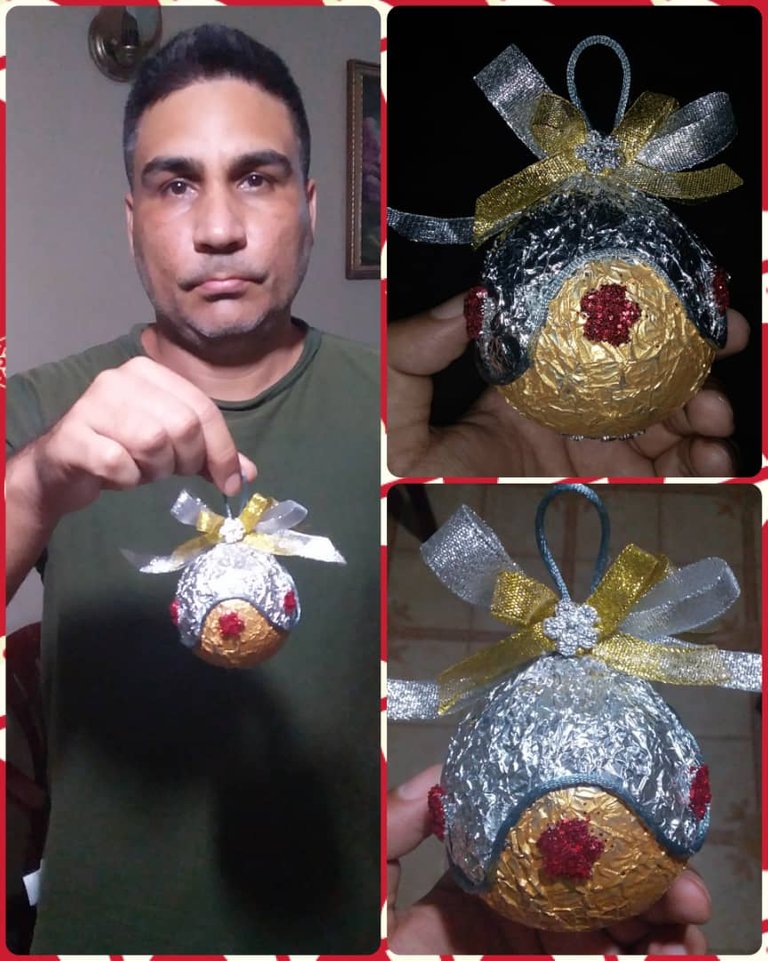
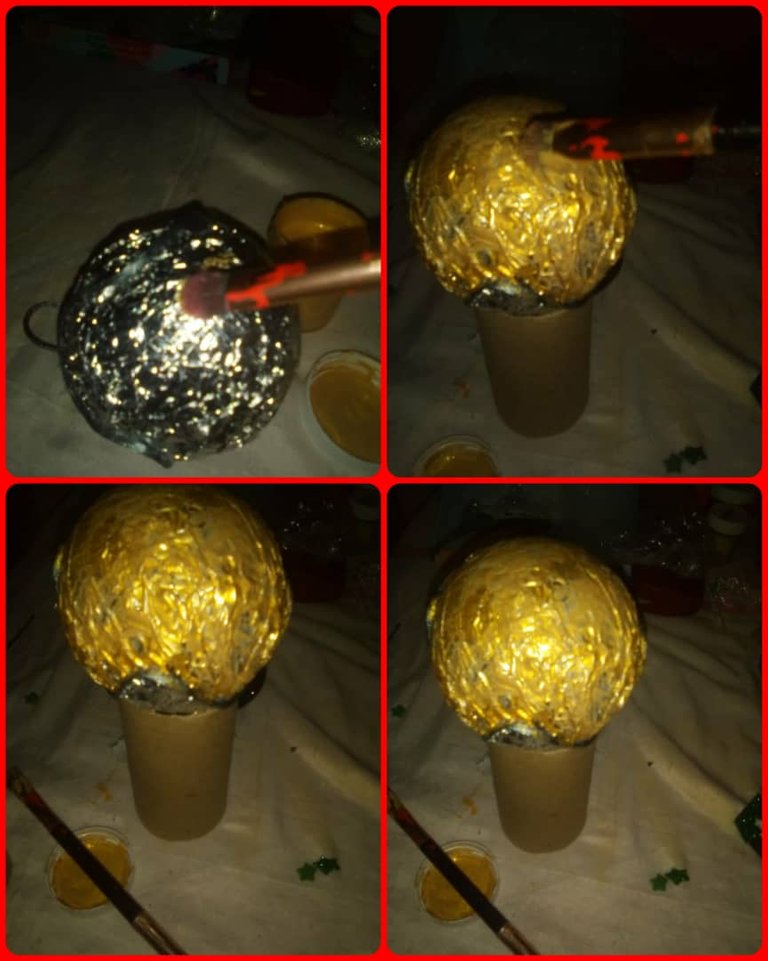
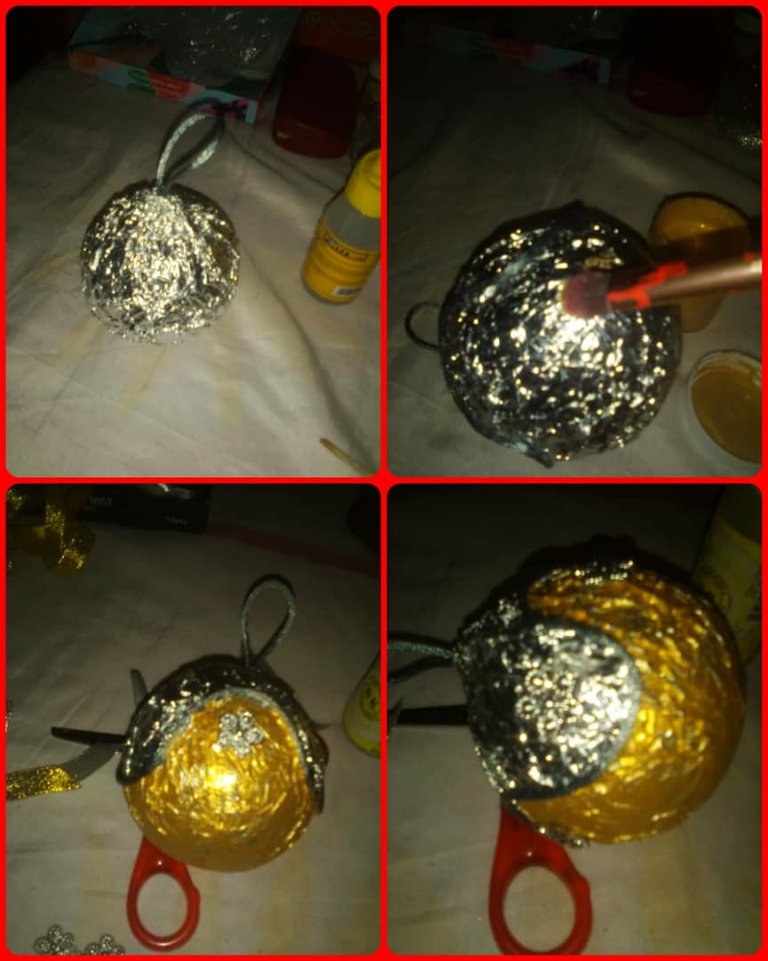
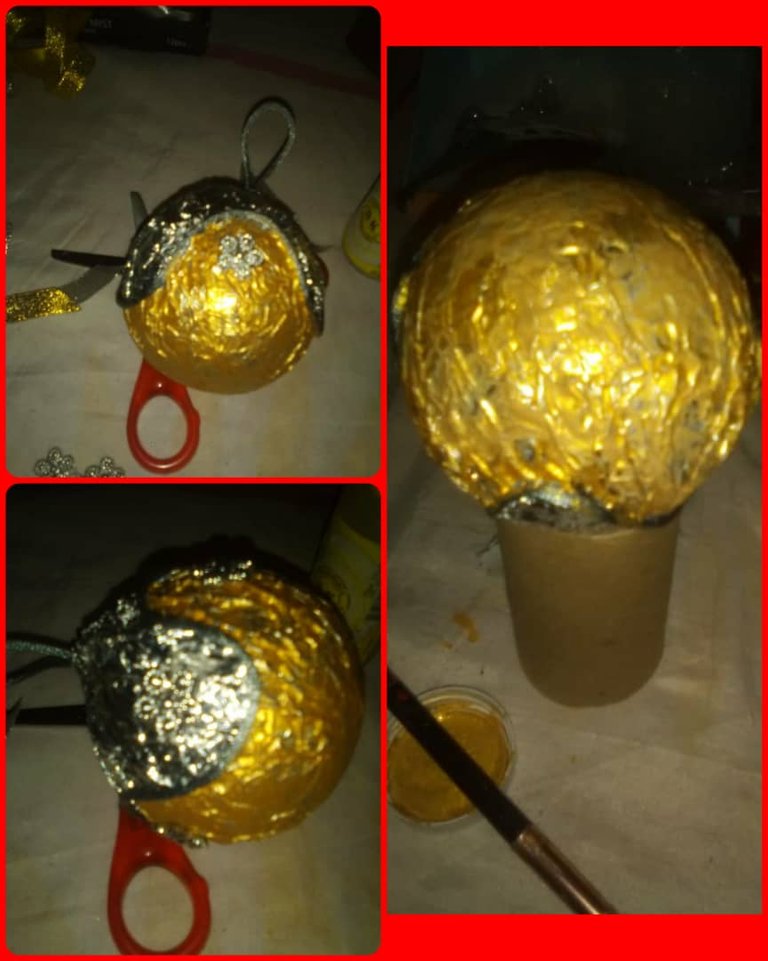
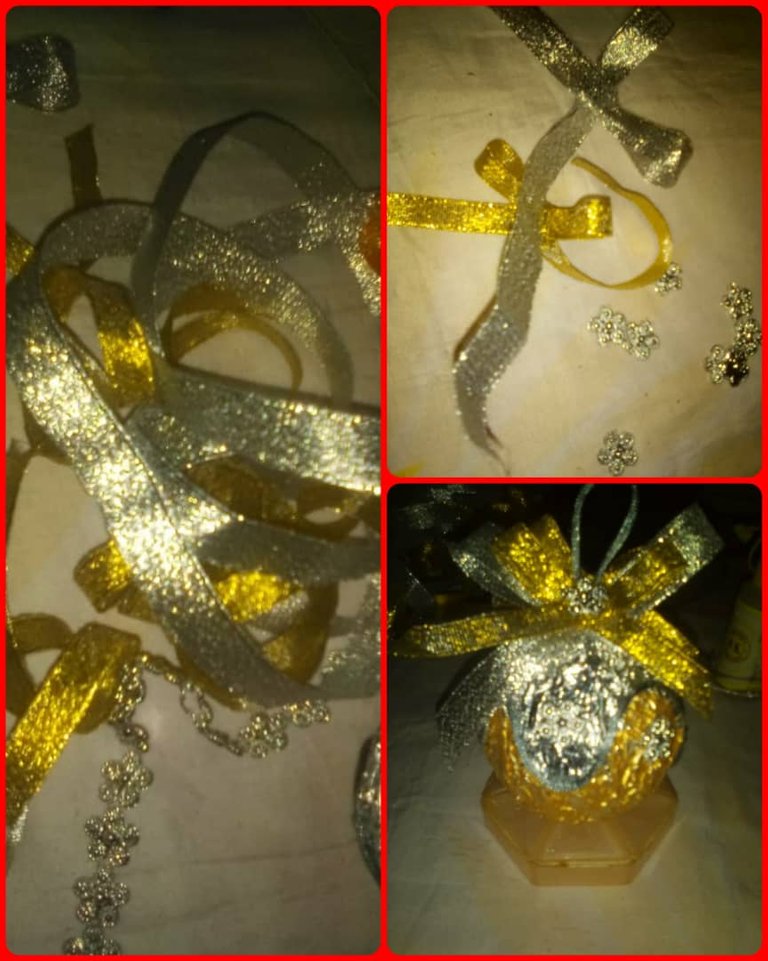
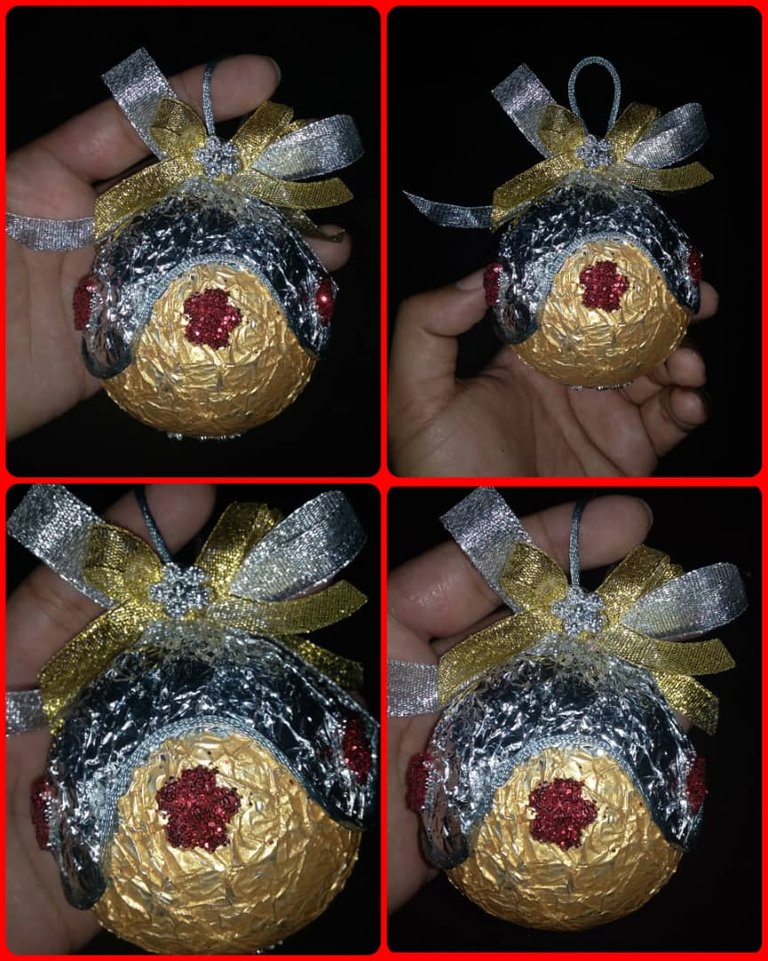
We start this work by crumpling a piece of aluminum foil then wrap the sphere corrugated paper and molding it until it is completely round then we place the gray cord in the middle of the same which will allow us a division or separation and at the top that will allow us to hang the sphere then with the gold paint we paint the bottom of the sphere and we also begin to glue it with the gold paint. We also begin to glue the different decorative appliqués and we will make two bows with the different transparent ribbons that we will glue on the top to get a better appearance and originality to our Christmas ball and finally to the different appliqués we put glue and red frost to give a better appearance and brightness to the Christmas sphere, and the final result is as shown in the pictures.
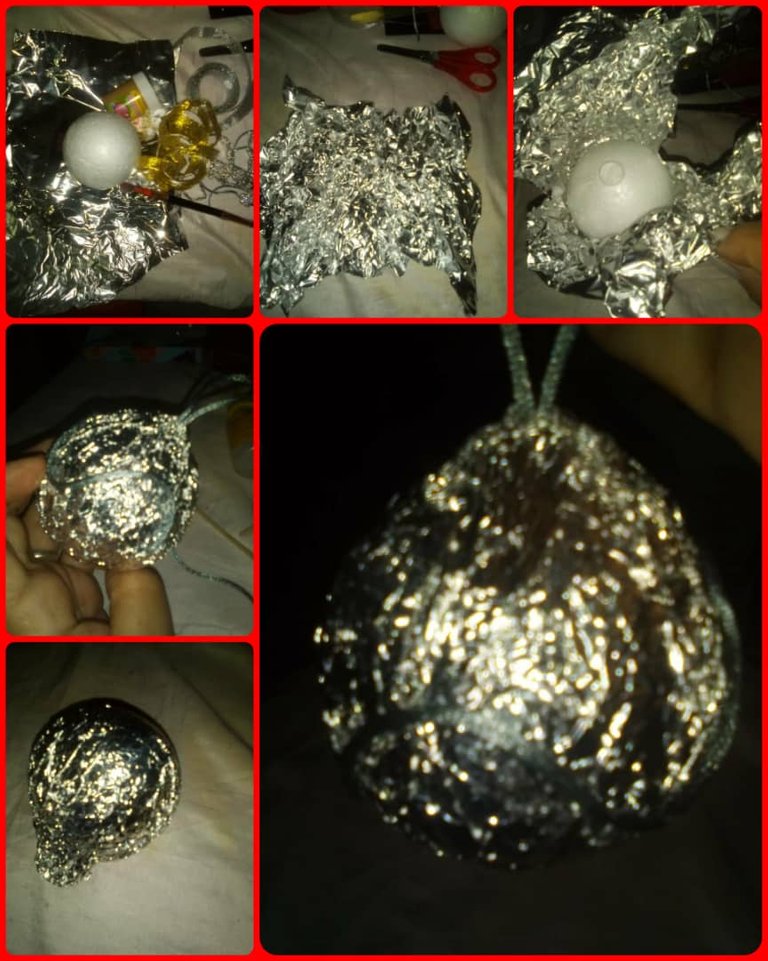
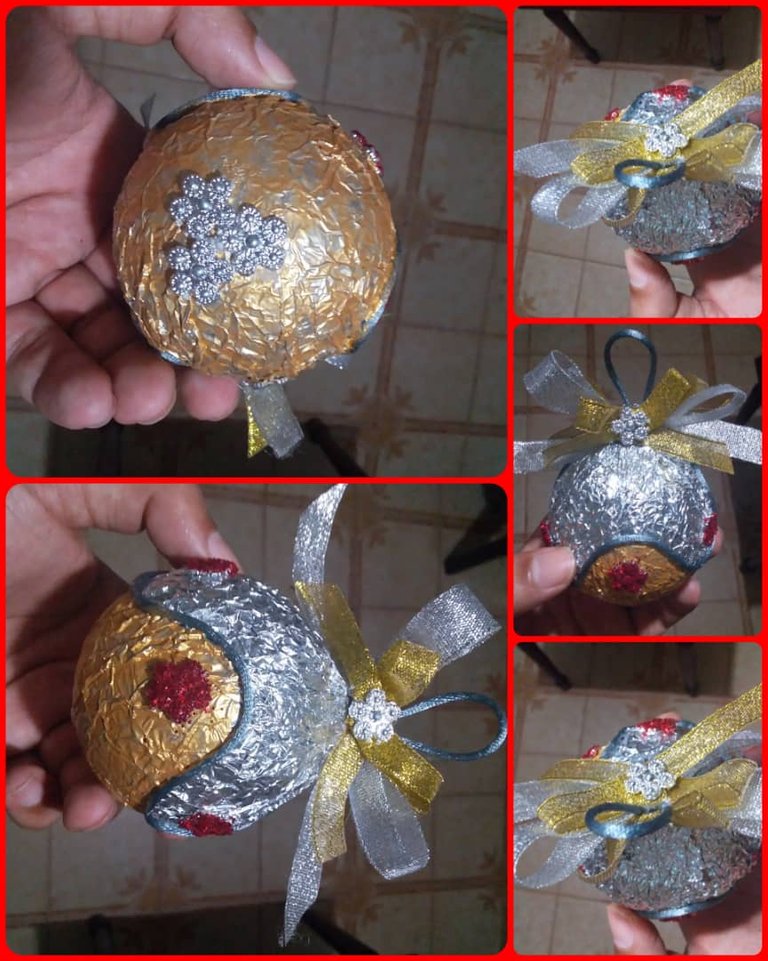
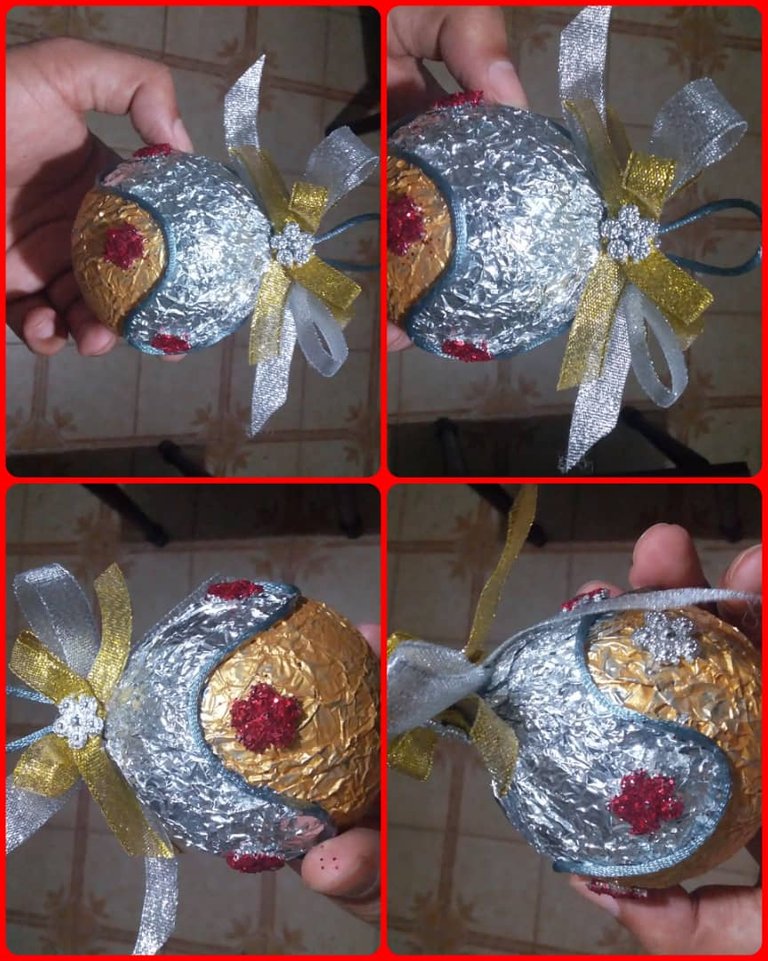
Paso a paso:
Iniciamos este trabajo arrugando un pedazo de papel aluminio seguidamente envolvemos la esfera corrugado el papel y moldeando a lo hasta que nos quede totalmente redonda seguidamente colocamos el cordón gris por la mitad de la misma qué nos va a permitir una división o separación y en la parte de arriba que nos va a permitir guindar la esfera luego con la pintura dorada pintamos la parte inferior también comenzamos a pegar los diferentes apliques decorativos además haremos dos lazos con las diferentes cintas transparentes qué vamos a pegar en la parte de arriba para obtener una mejor apariencia y originalidad a nuestra bola navideña por último a los diferentes apliques le colocamos pega y escarcha roja para darle una mejor vistosidad y brillo a la esfera navideña, quedando de tal manera como muestran las fotos.
Photos by me @elgatoshawua.
Translated by DeepL.
Fotos de mi autoría @elgatoshawua.
Traducido por DeepL
https://twitter.com/JessHer00376336/status/1466265647827070976
The rewards earned on this comment will go directly to the person sharing the post on Twitter as long as they are registered with @poshtoken. Sign up at https://hiveposh.com.