How to make the Elsa-Frozen wig for our little girls. [Eng-Esp] Como elaborar la peluca de Elsa-Frozen para nuestras niñas.

English Version
How to make the Elsa-Frozen wig for our little girls.
Hello hello! dear friends of this beautiful Community, today I want to share with you the steps to make a wig of Elsa from the animated movie Frozen!
Here are the materials to use 😉.
- 4 rolls of white stamens
- Scissors
- Hot glue
- Liquid Silicone
- 1 girl's headband
- Blue frosted Foami
- Pattern of a wreath

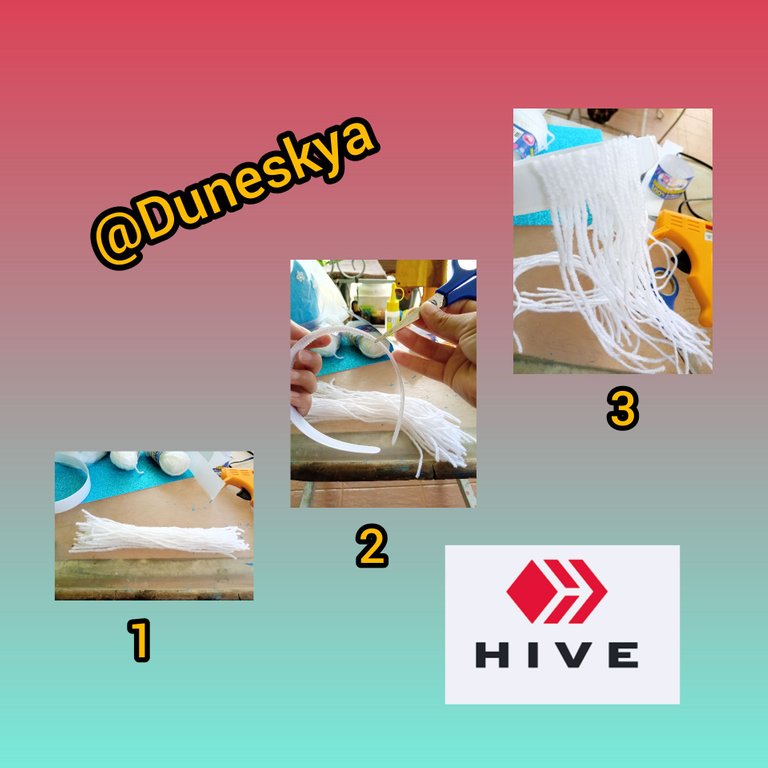
👉Steps for the following Imágen👈.
Step 1: Cut 35 to 40 strips of 20 cm each.
Step 2: Mark the fourth part of the headband where I indicate with the tip of the scissors.
Step 3: From that mark on the headband I glue the stamen strips. Leaving a space, about half of that quarter to do the next step.
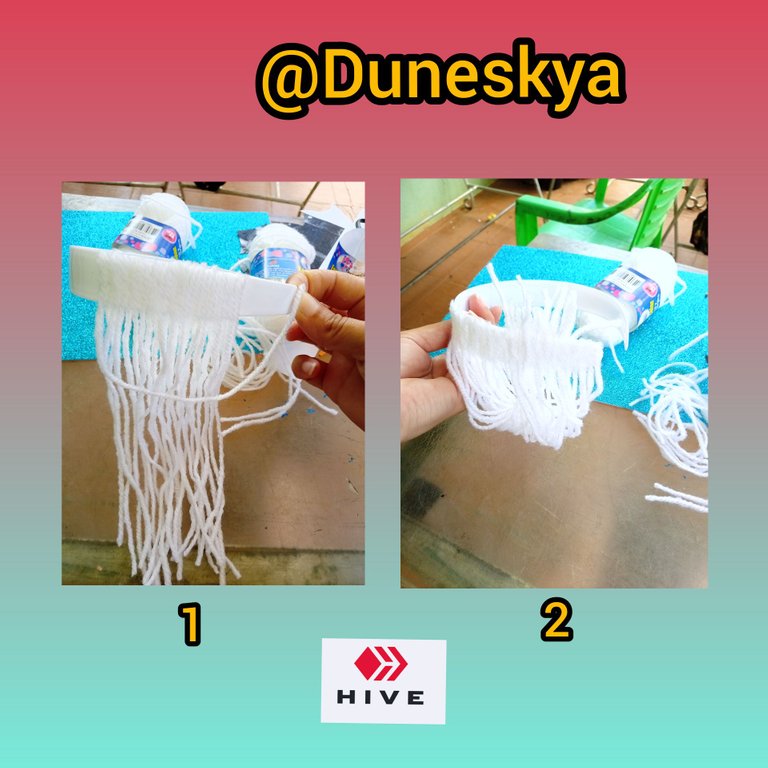
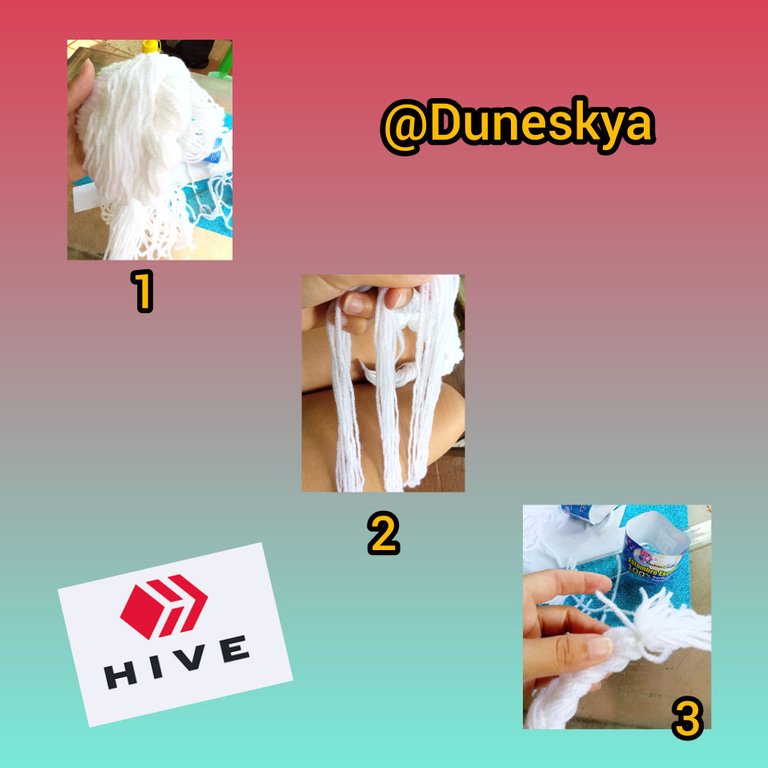
👉Steps of the following Imágen👈.
Step 1: the end of the first strip that is left hanging, glue it last towards the end of the headband and so on with the rest of the strips.
Step 2: we are going to be like this as shown in this step. Towards the top there will be some ends left over that should be cut.
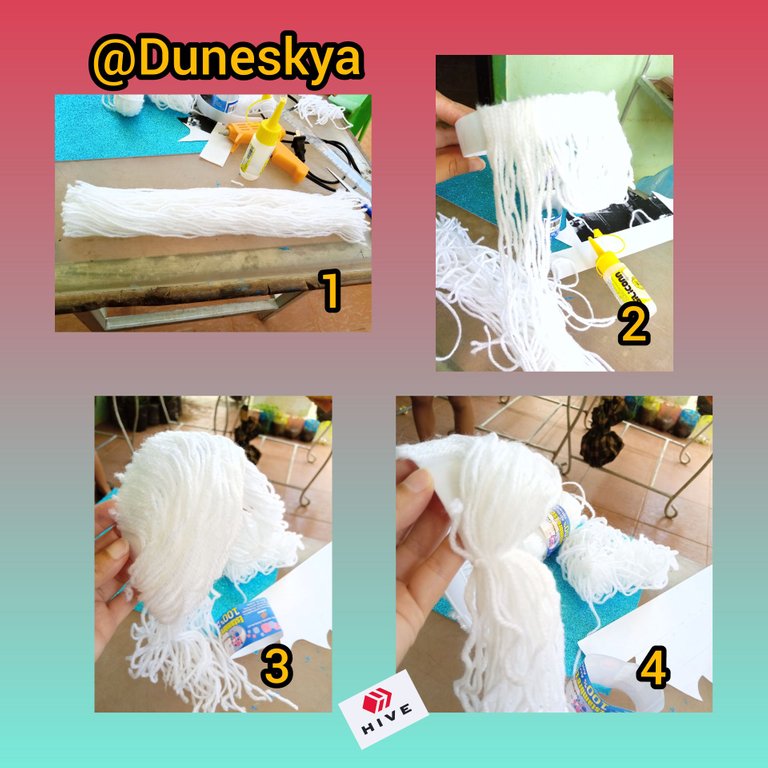
👉Steps for the following Image👈
Step 1: Cut 80 to 100 strips of 35 cm each.
Step 2: Glue the strips to the other end of the headband.
Step 3: with cold silicone we glue the strips side by side.
Step 4: Once all the strips are glued together, bring all the strips to the end of the headband and tie with another piece of yarn of the same color.
👉Steps of the following Imágen👈.
Step 1: In this step, we cut 60 strips of 240 CM each, together all the strips and in half at 120 cm tie it with a little piece of the same yarn, just that half we are going to paste on the back of the headband then leaving the front part exactly glued from step 3 of the previous image. We divide these strips in two and we make 8 turns forming a line of 2. We tie with a piece of the same yarn. And from there we do the next step.
Step 2: we divide the stamens in 3 parts and form a braid of 3, we braid until the end.
Step 3: at the end we tie with another piece of yarn of the same color !
! InShot_20210826_170437981.jpg
The wig is already taking shape.
InShot_20210826_170640475.jpg](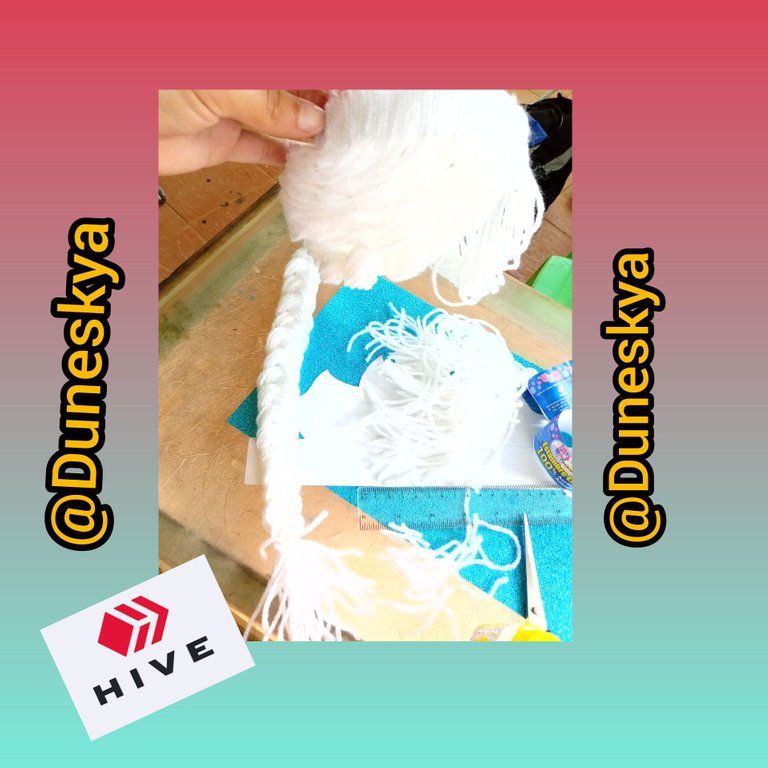 )
)
We look on the web for a crown model that we like the most and we take it to the foami, cut and decorate the wig.
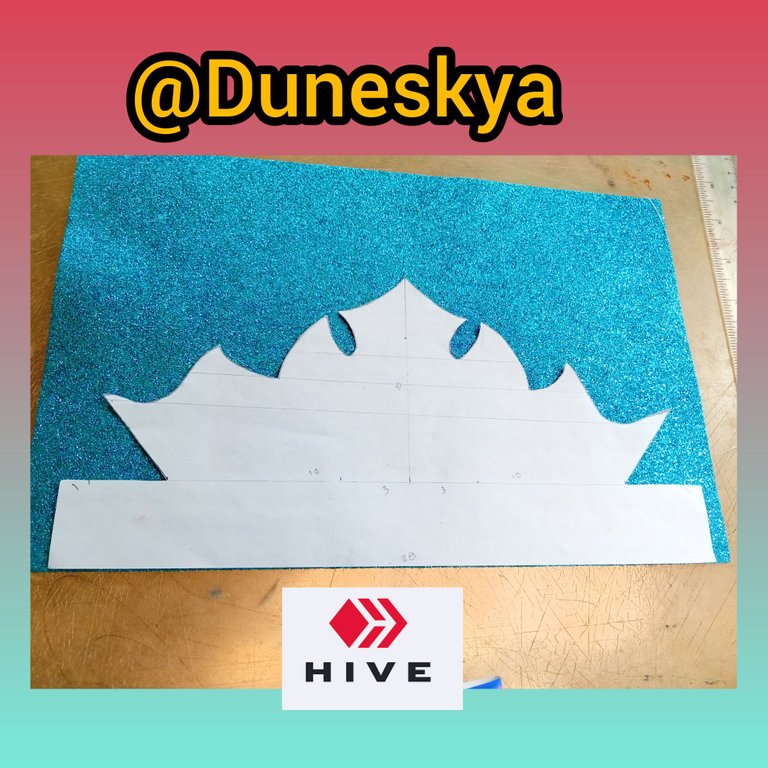
Here I glued the crown I cut out of the foami, put silver ribbon and some silver details. Now you can decorate your Elsa wig to your liking.
The wig is ready for the little girls in our houses.
👉 For an adult person buy a larger headband and therefore increase the number of strips of stamens !

I hope you liked it. Thanks for reading me.
Photos and Banner of my property.
Translated with www.DeepL.com/Translator (free version)
Versión Español
Como elaborar la peluca de Elsa-Frozen para nuestras niñas.
Hola hola.! queridos amigos de está linda Comunidad, hoy quiero compartir con ustedes los pasos para Realizar una clineja o peluca de Elsa de la película animada Frozen..!
Acá los materiales a usar 😉
- 4 rollos de estambres blanco
- Tijeras
- Silicón caliente
- Silicón líquido
- 1 cintillo de niña
- Foami escarchado color azul
- Patrón de una corona
👉Pasos de la siguiente Imágen👈
Pasó 1: Cortar de 35 a 40 tiras de 20 cm cada una
Paso 2: Marco la cuarta parte del cintillo donde indico con la punta de la tijera
Paso 3: a partir de esa marca del cintillo pego las tiras de estambres. Dejando un espacio, como la mitad de esa cuarta parte para hacer el siguiente paso.
👉Pasos de la siguiente Imágen👈
Paso 1: la punta de la primera tira que queda guindando, pegarla de última hacia la punta del cintillo y así sucesivamente con el resto de las tiras.
Paso 2: nos va a quedar así como se muestra en este paso. Hacia arriba van a sobrar unas puntas que se deben de cortar.
👉Pasos de la siguiente Imágen👈
Paso 1: cortamos de 80 a 100 tiras de 35 cm cada una
Paso 2: pegamos las tiras hacia el otro extremo del cintillo
Paso 3: con silicón al frío pegamos las tiras unas al lado de la otra.
Paso 4: una vez pegadas todas llevamos todas las tiras hacia la punta del cintillo y amarramos con otro pedazo de estambre del mismo color.
👉Pasos de la siguiente Imágen👈
Paso 1: En este paso, cortamos 60 tiras de 240 CM cada una, junto todas las tiras y por la mitad a 120 cm la amarro con un pedacito del mismo estambre, justamente esa mitad la vamos a pegar en la parte trasera del cintillo saliendo luego por la parte de adelante exactamente pegadita del paso 3 de la imagen anterior. Dividimos esas tira en dos y le damos 8 vueltas formando una clineja de 2. Amarramos con un pedazo del mismo estambre. Y partir de allí hacemos el siguiente paso.
Paso 2: dividimos los estambres en 3 partes y formamos una clineja de 3, trenzamos hasta la punta.
Paso 3: en la punta amarramos con otro pedazo de estambre del mismo color !
La peluca ya va agarrando forma.
Buscamos en la web un modelo de corona que más nos guste y la llevamos al foami cortamos y decoramos la peluca.
Aquí pegué la corona que recorté del foami, coloqué cinta plateada y unos detalles color plateado. A su gusto ya puede decorar su peluca de Elsa.
Lista la peluca para las niñas de nuestras casas.
👉 Para una persona adulta comprar cintillo más grande y por ende aumenta la cantidad de tiras de estambres !
Espero que les haya gustado. Gracias por leerme.
Fotos y Banner de mi propiedad.
Wow it looks so nice and I wish I could see your girls wearing it. @tipu curate
Upvoted 👌 (Mana: 22/82) Liquid rewards.
Hello, I don't have a female ! I have is male 😁. But I made it for a niece. I owe you that picture. She lives far away from where I am.
Hi, thanks for your response. I thought you made it for your baby girl. Your niece will like it very much I think. And yes, you owe me that picture. :)
Hello friend @sharminmim ! Promise is a promise 🙊😁😉 Cheers 🙋
Wow, she looks beautiful and the hat really suits on her.
I bet she loved it.
Thank you for keeping the promise.
Hola, que linda trenza de princesa, seguro a mi hija le encantará. Gracias por compartir
Si amiga y muy fácil de hacer. A mi sobrina le encantó.
😃 👍 saludos