Diseño de Top con corte cuadrado | Top design with square cut
Español
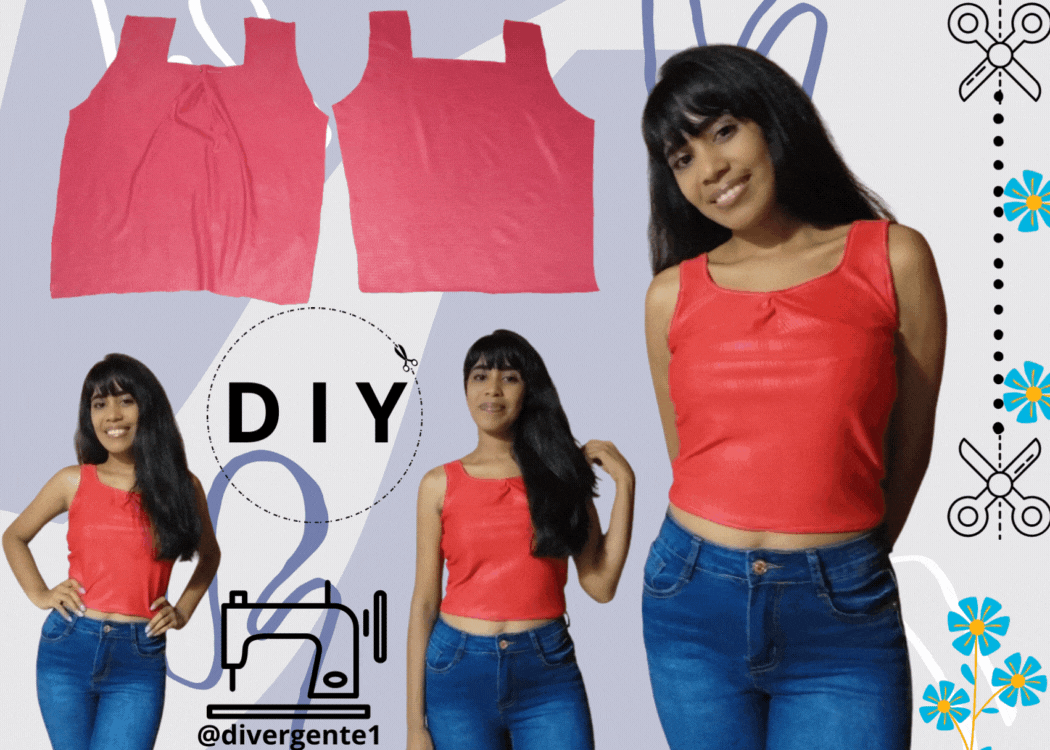
Hola queridos amigos de Hive, es un gusto poder saludarles nuevamente. Poder diseñar y crear es uno de mi hábitos preferidos. En esta ocasión quiero mostrarles un top de corte cuadrado, partiendo de un diseño desde un patrón.
Materiales
- Patron de corte Cuadrado
- Tijera
- 1 Metro de Tela Roja
Paso a Paso
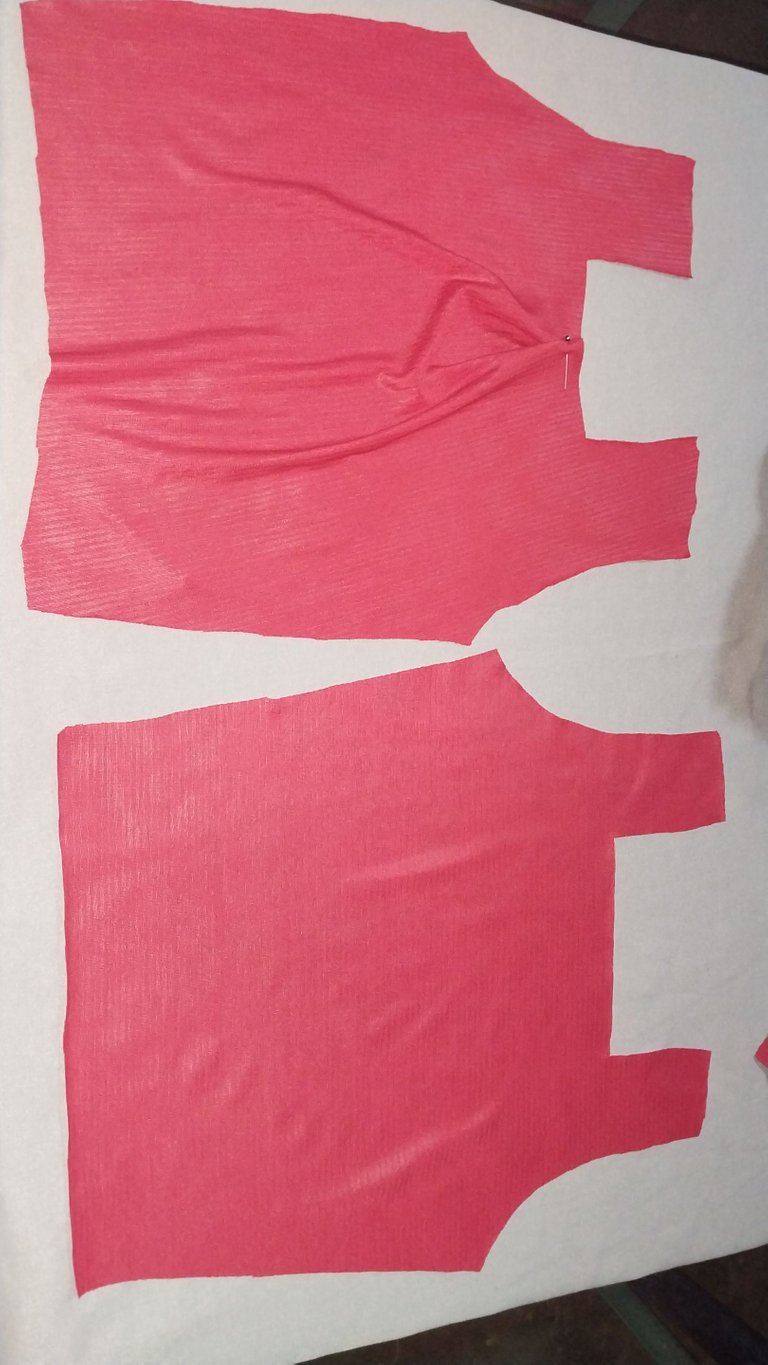
1
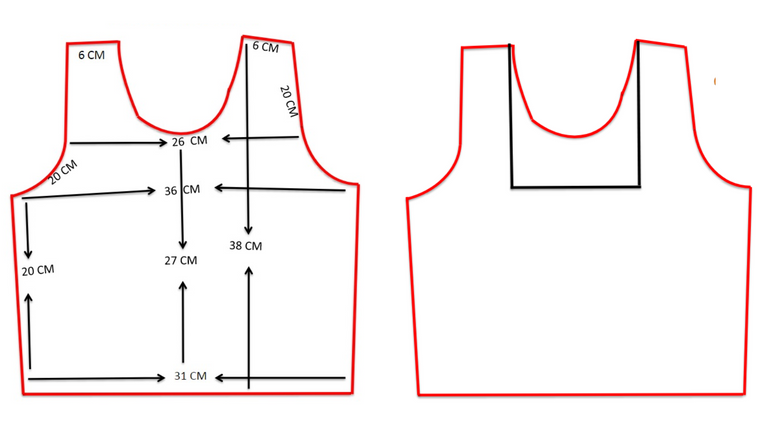
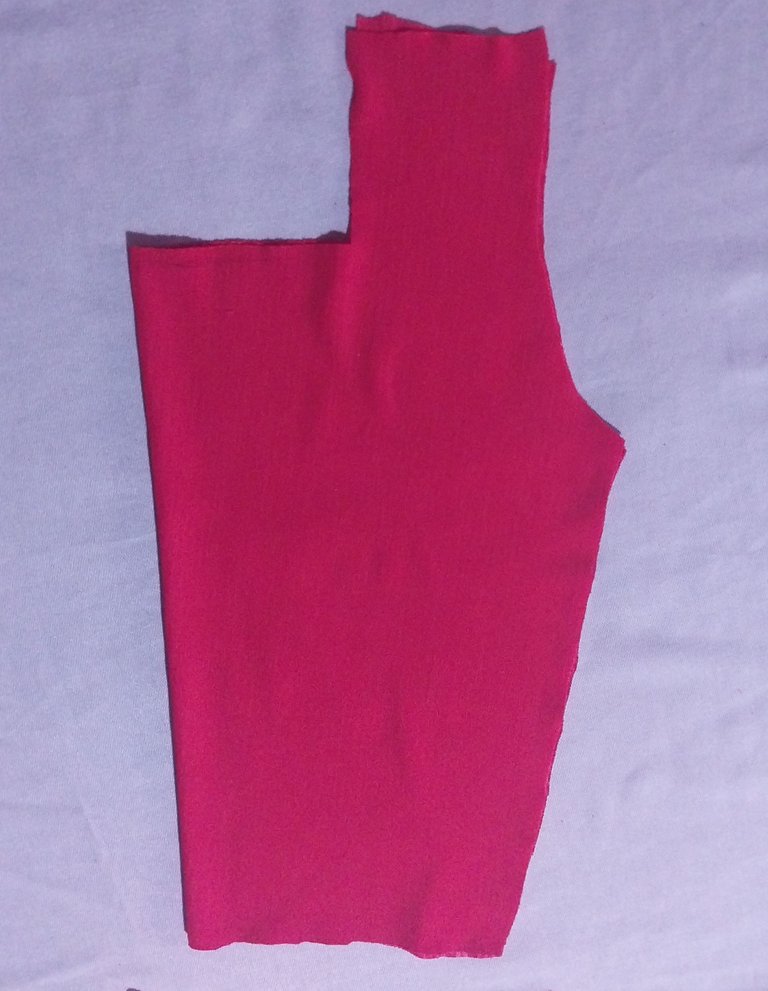
en este caso he tomado la mitad del patron que se ha diseñado y este se debe colocar en la tela roja, la cual debe estar doblada justa a la mitad.
De esta forma se hace el trazo en la tela y se recorta la misma con la tijera.
2
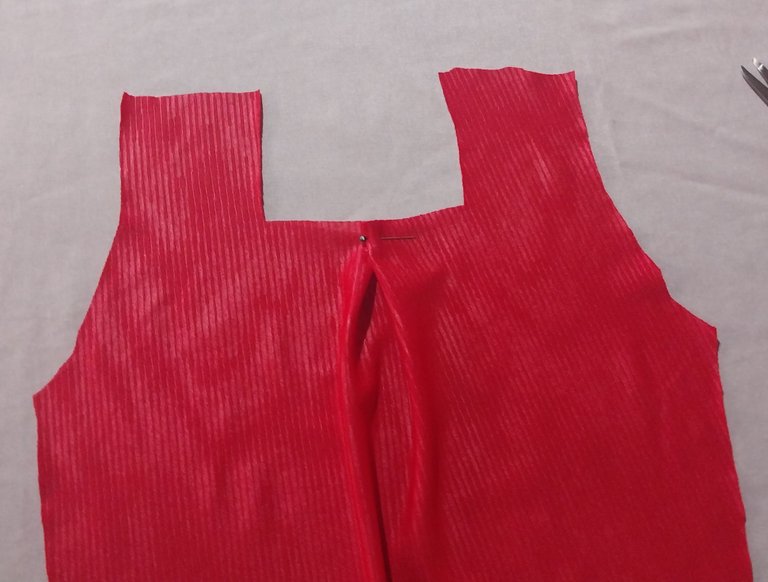
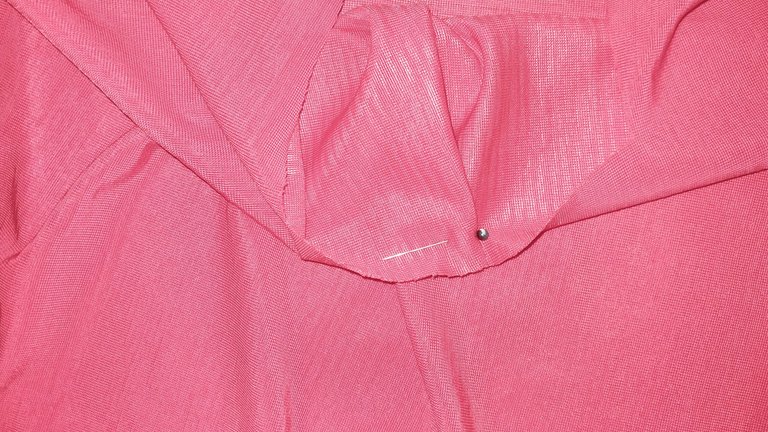
Seguidamente en la parte delantera del diseño de la blusa se debe tomar un alfiler y se hacen dos pliegues en la parte central y superiro del corte delantero de la blusa.
3
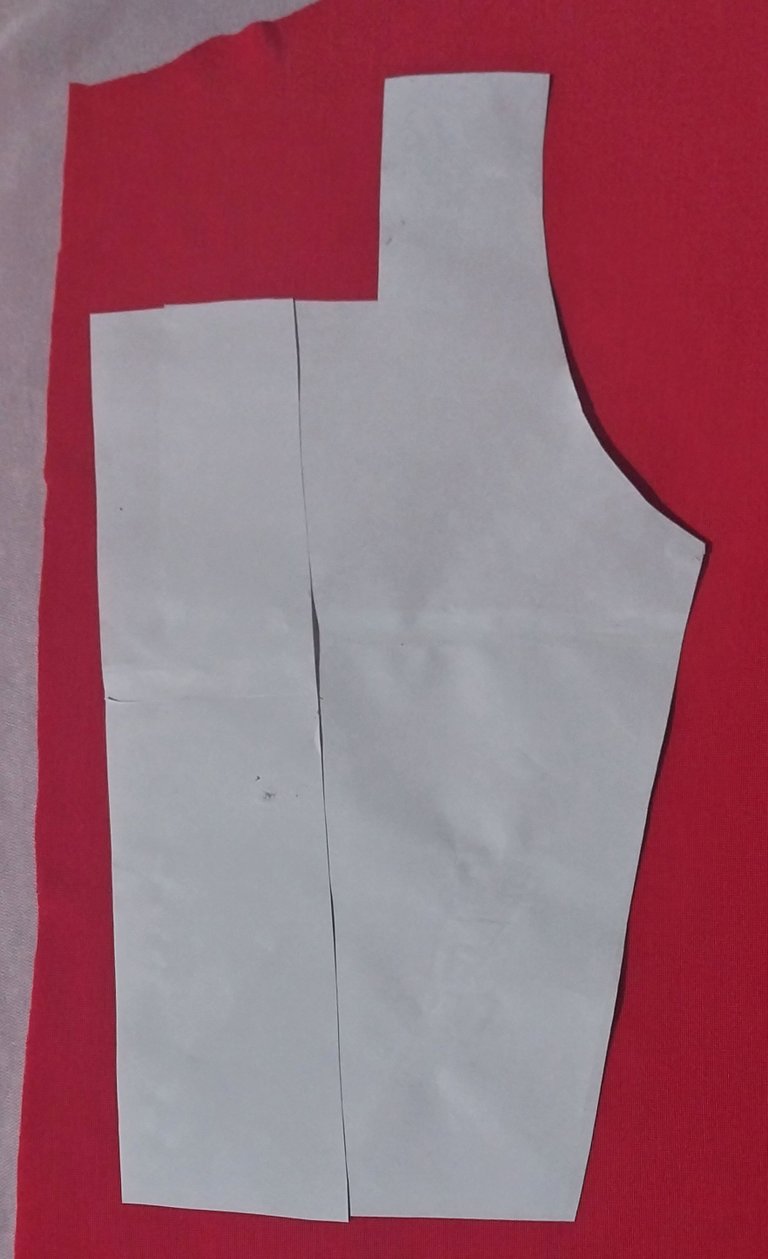
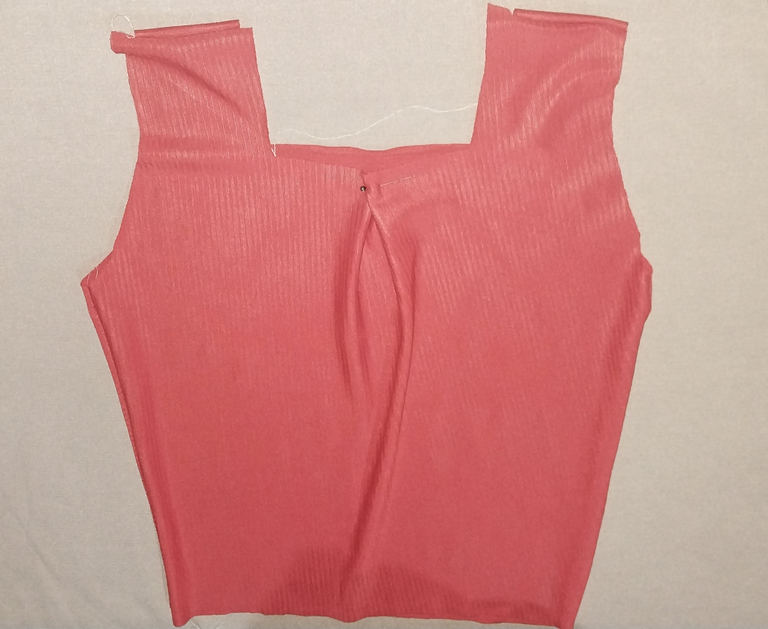
Una vez que se tenga el diseño delantero de nuestra blusa se procede a copar este molde para crear l aprate trasesra de la blusa.
Unión de las Piezas
1
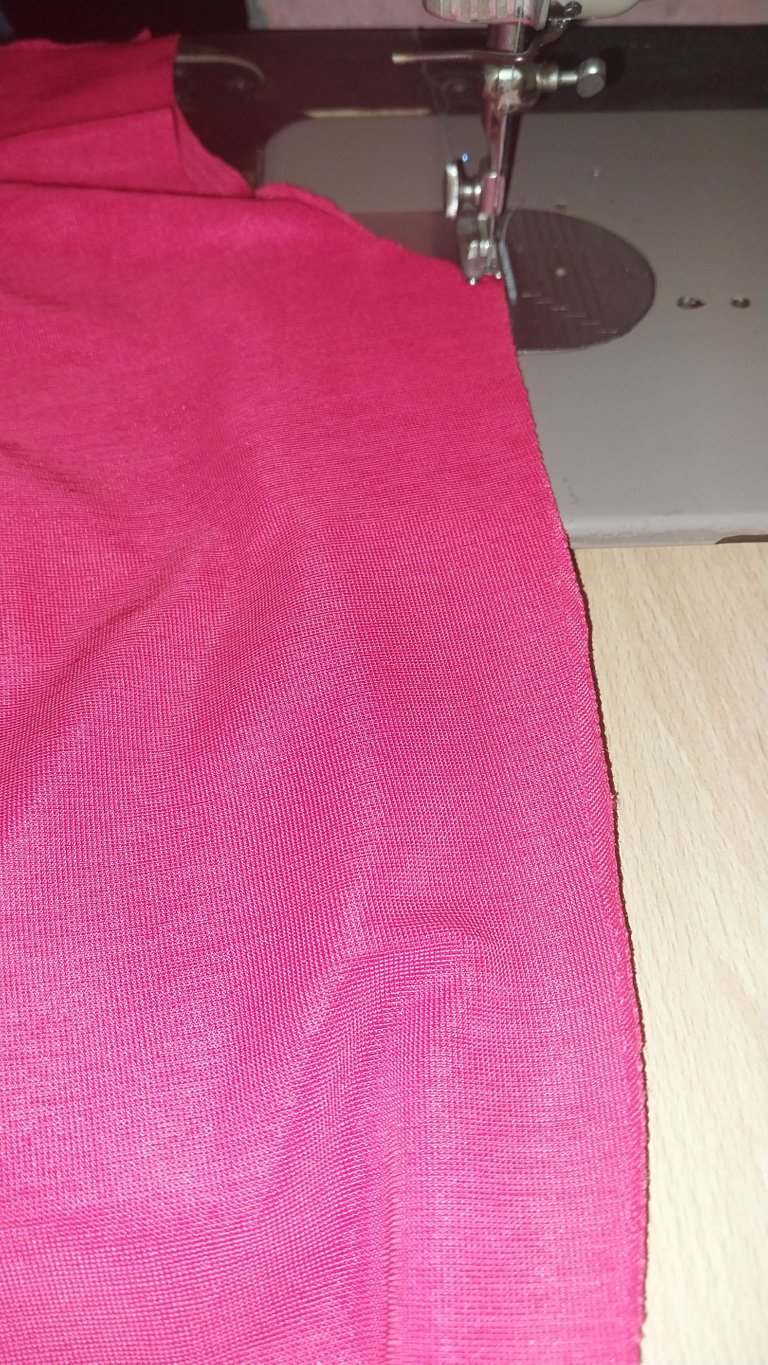
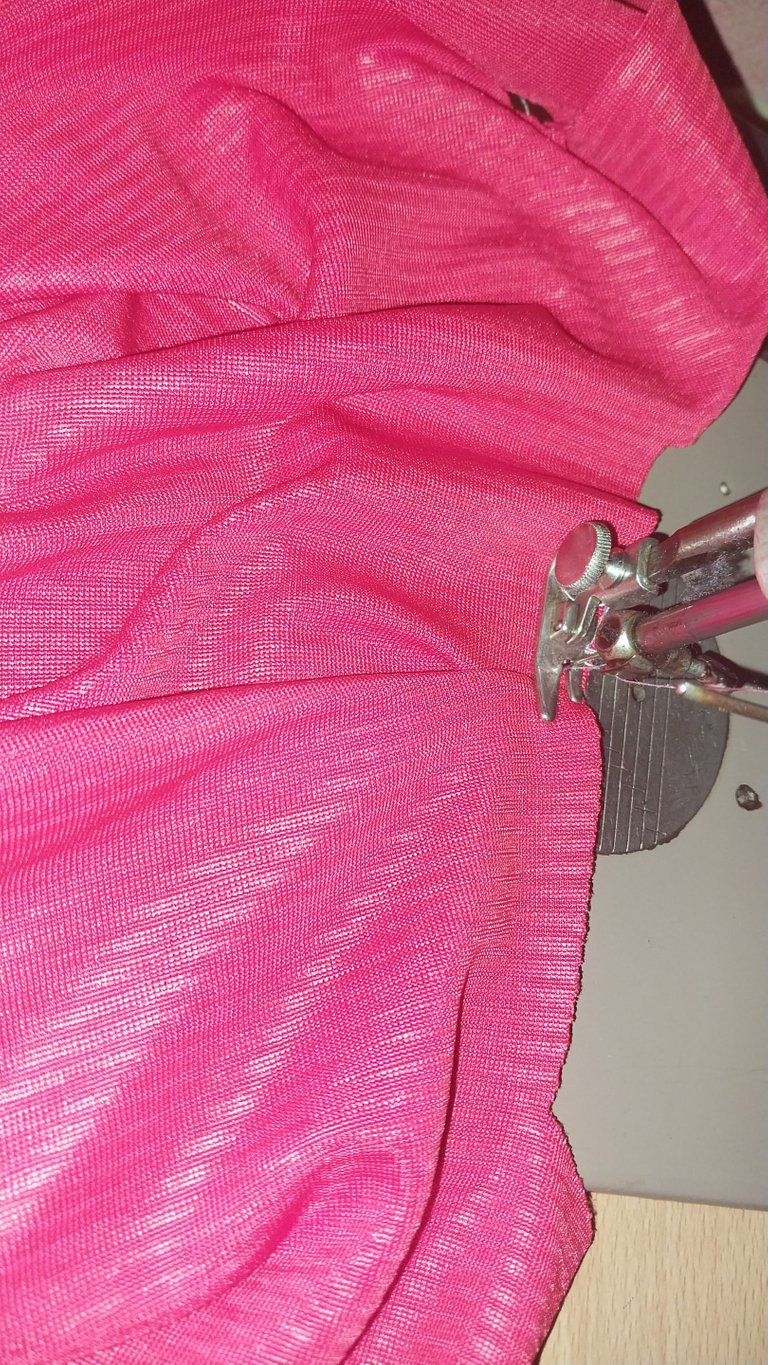
Seguidamente se debe unir las piezas a traves de la maquina dwe coser. De esta manera se inicia con los costados de ambas partes de la tela.
2
Luego se debe coser los tirantes con la ayuda de la maquina de coser.
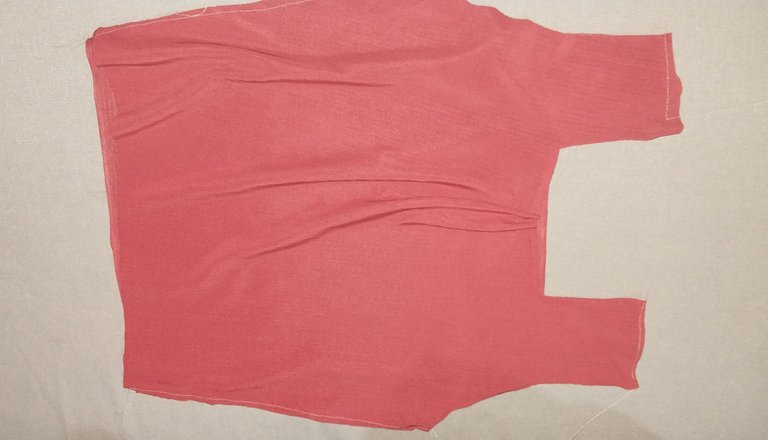
3
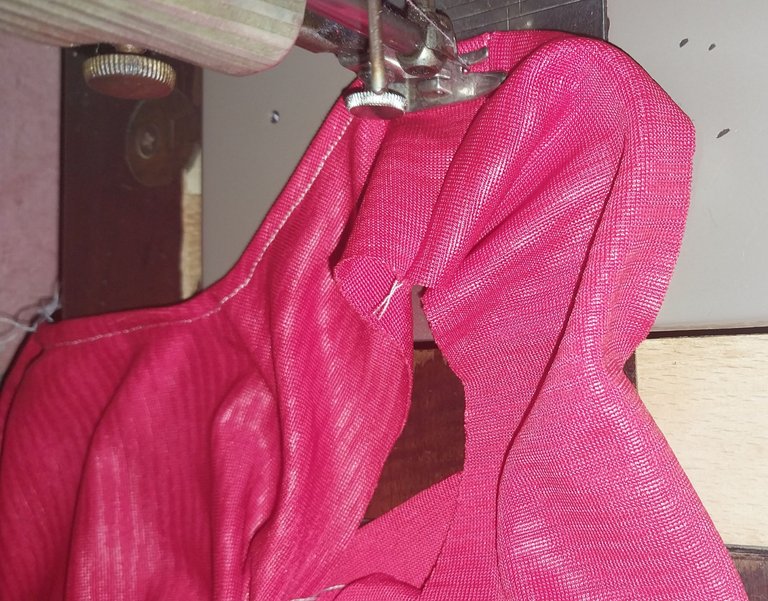
El diseño central de la blusa que hemos creado se debe coser teniendo mucho cuidado con el alfiler no se meuva al momento de fijar la tela.
Costura de los bordes
Luego se debe coser los brodes de las mangas, sona del pecho y de la sisa.
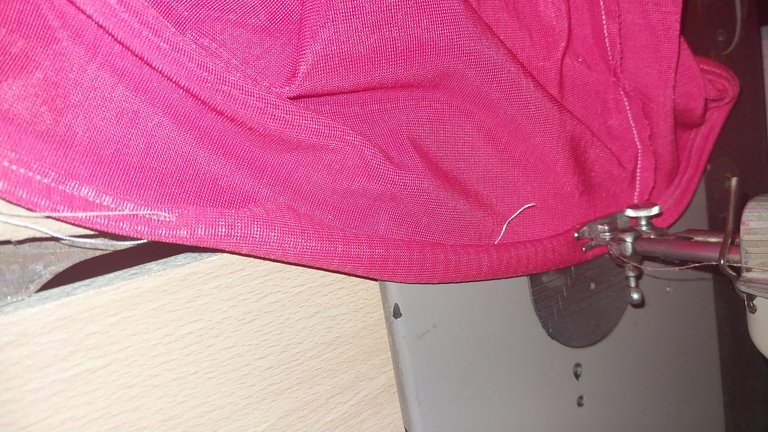
Finalmente tambien se cose el ruedo de la blusa.
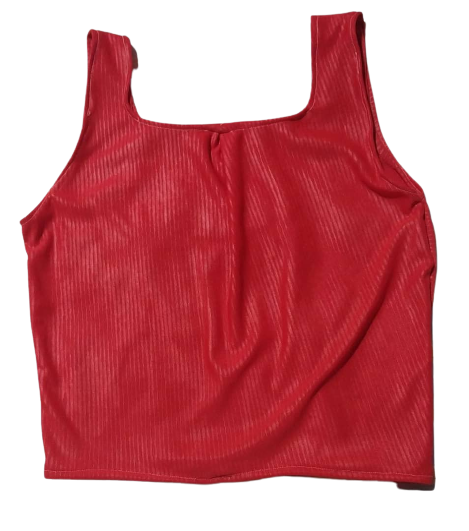
AL terminar de coser todos los brodes de nuestro top este ya esta listo para lucirlo con la mejor actitud!
Saludos y gracias por leer.

Créditos
- Las imagenes me pertenenecen
- Traductor: Deepl Traslator
- Edición: Canva

English
Hello dear friends of Hive, it is a pleasure to be able to greet you again. Being able to design and create is one of my favorite habits. This time I want to show you a square cut top, starting from a design.
**Materials
- Square Cut Pattern
- Scissors
- 1 Meter of Red Fabric
Step by Step
1
In this case I have taken half of the pattern that has been designed and this should be placed on the red fabric, which should be folded just in half.
This way you make the outline on the fabric and cut it out with the scissors.
2
Next on the front of the blouse design take a pin and make two pleats in the center and top of the front cut of the blouse.
3
Once we have the front design of our blouse we proceed to copy this mold to create the back section of the blouse.
**Piece Joining
1
Next, join the pieces together using the sewing machine. This way you start with the sides of both parts of the fabric.
2
Then sew the straps with the help of the sewing machine.
3
The central design of the blouse that we have created must be sewn taking care that the pin does not get wet when fixing the fabric.
Edge stitching !
Then sew the sleeve, chest and armhole edges.
Finally you also sew the hem of the blouse.
When you finish sewing all the broderies of our top, it is ready to wear it with the best attitude!
Greetings and thanks for reading!
Credits
- The images belong to me
- Translator: Deepl Traslator
- Editing: Canva
Wow. The dress looks absolutely amazing.
thank you
Beautiful sewing work with an excellent step by step. Your design looks great. Thank you for presenting your work in our community @divergente1 : ) // Bello trabajo de costura con un excelente paso a paso. Quedo muy bien tu diseño. Gracias por presentar su trabajo en nuestra comunidad @divergente1 : )
Muchas gracias. Gracias por siempre estar al pendiente de cada publicacion de todos los usuarios que hacen vida en Diy-Hub y en Hiove en general. Siempre sus comentarios nos impulsan a mejorar.
Trabajar con patrones es genial. Recuerdo que hace un tiempo hice un títere siguiendo unos patrones. No ws fácil pero queda genial.
A usted su top le quedo muy lindo, buen uso de los patrones.
Muchas gracias amigo! 😚
Tu lo haces parecer muy fácil amiga, te quedó muy lindo y coqueto, me encantó.
vaya! muchas gracias querida amiga, espero que sea de ayuda el material. Saludos.
Ha quedado bellísima amiga 👍