Design and sewing of casual pants

Hello Hive family, I hope this week begins with many blessings for each of us. From Hive we continue betting on art and design from the various communities in this beloved 3.0 network.
The design that I present to you today is the design of a casual style jumpsuit made of latex peach skin fabric. It is a sequence of very easy steps I explain the procedure. I hope you like it!
Step by Step
1

On a yard of fabric we will divide the fabric into two rectangles, the rectangles should measure 13" wide X 44" long.
2
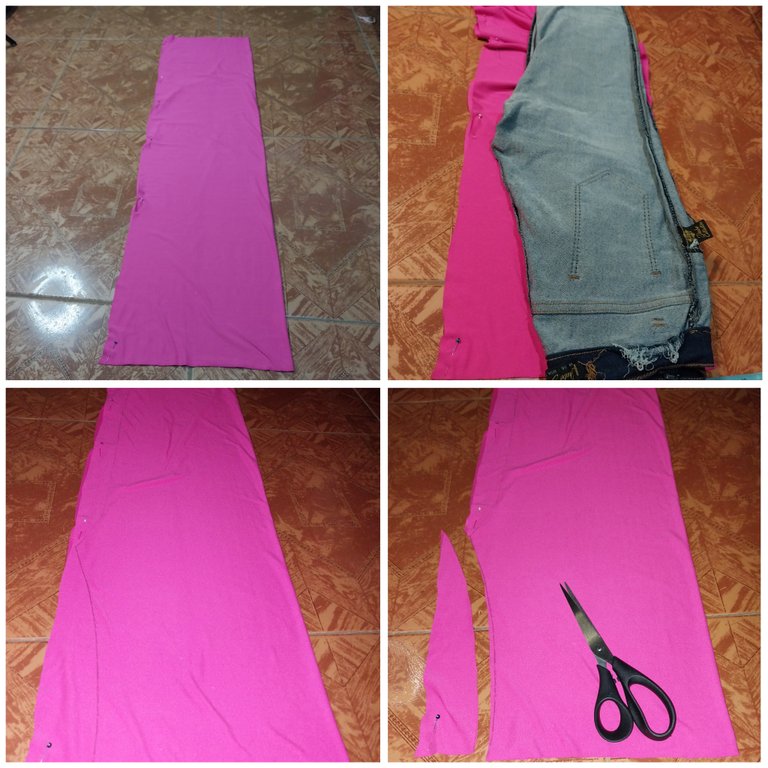
Then we fold one of the rectangles in half with respect to its width and then we place as a pattern some pants of our size.
We follow the outline of this mold and cut it out.
3
Then we place the design that we have cut out on the fabric and we cut it following the same design of the fabric of the mold.
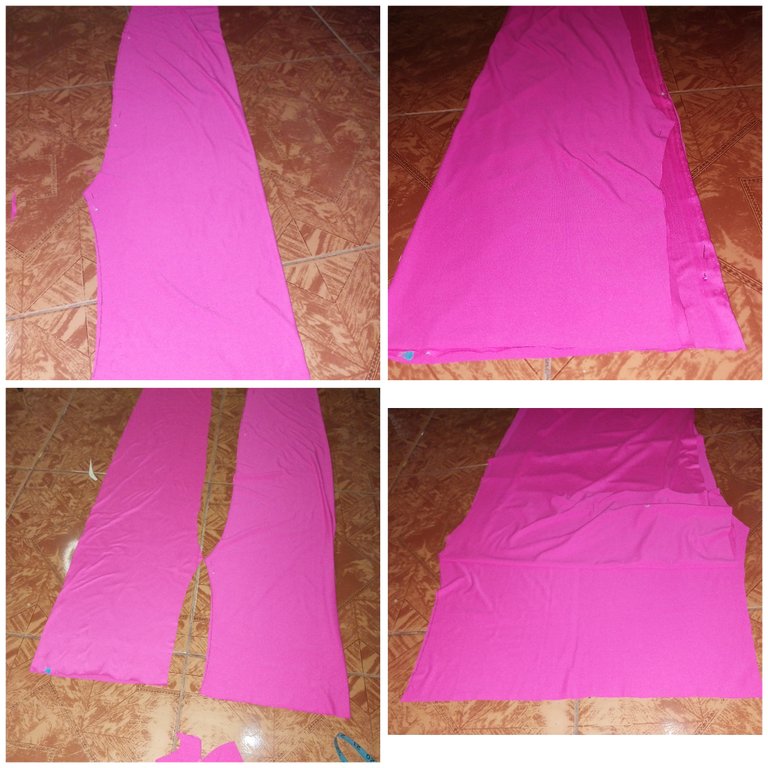
We open the fabric and join tip to tip.
4
Then we must sew only until we reach the apex of the curve.
5
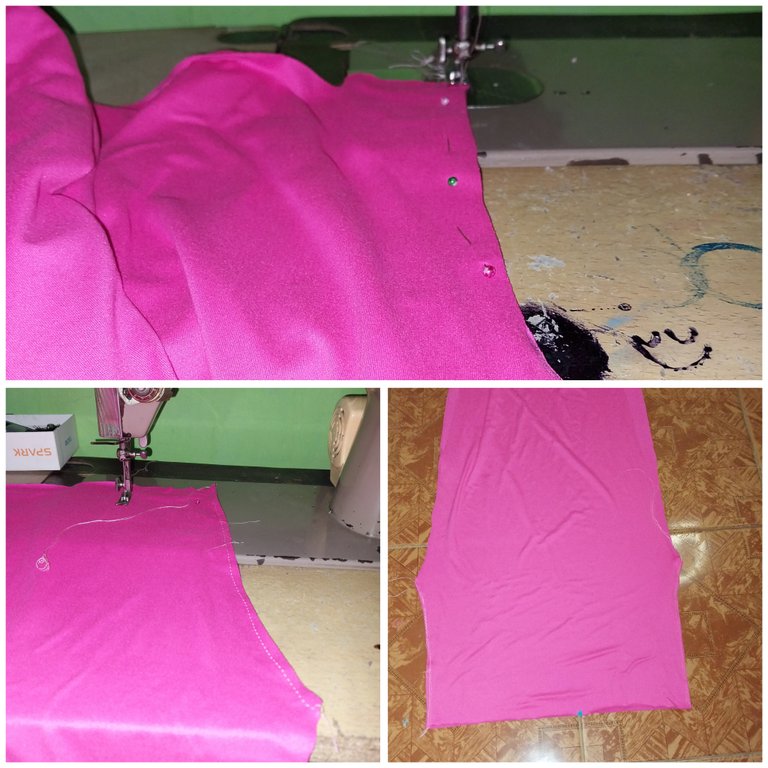
Then we join tip to tip of the two vertices that we have sewn. And in this way the silhouette of the pants is already formed. We sew along the right leg and the left leg.
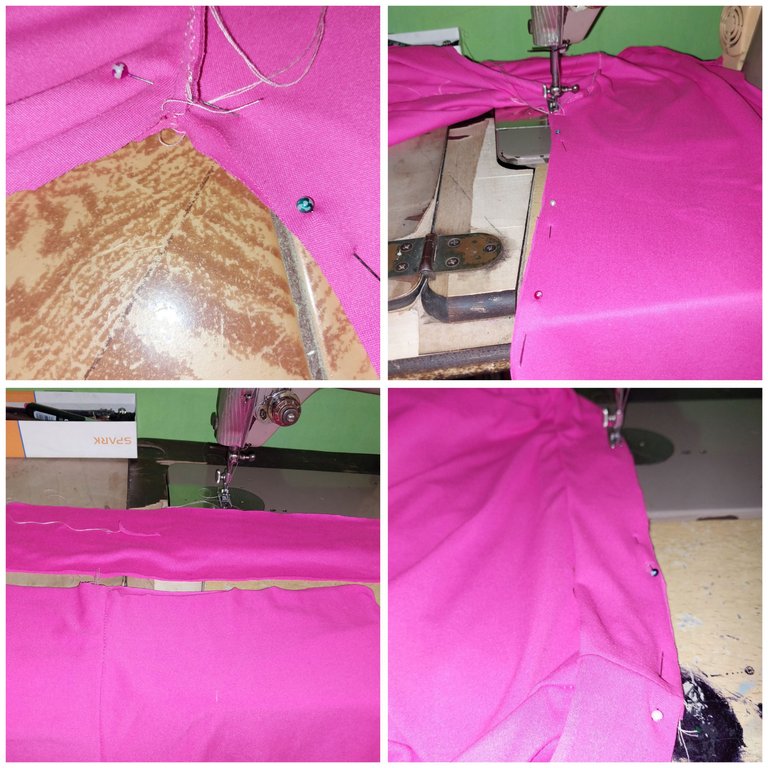
Next we cut a rectangle of the fabric that we have left of 4" wide by 34" long and then fold it in half, this will be the waistband, we sew it in the hip area.
6
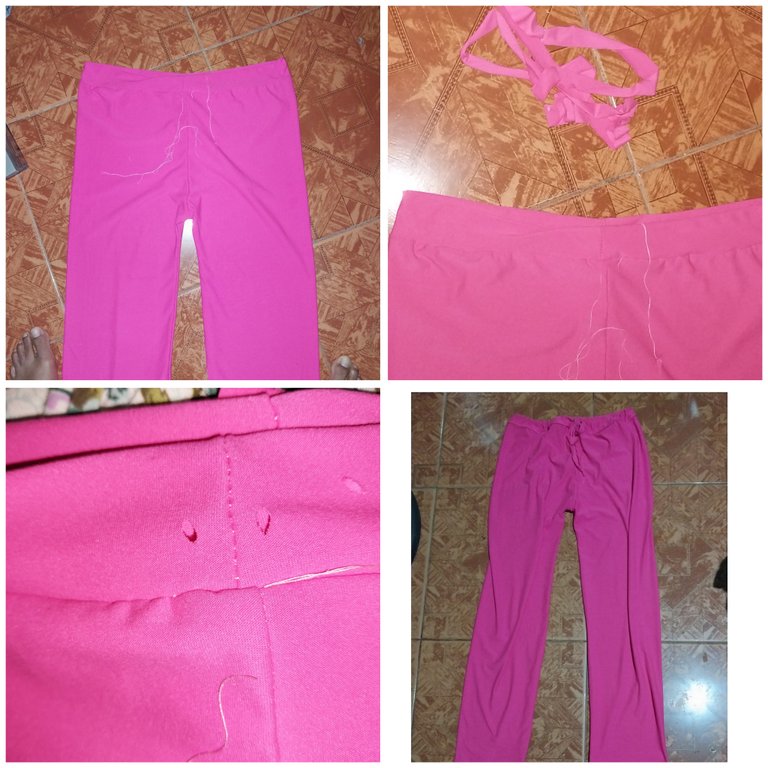
Then we take a 42" ribbon, open two holes in the Petrina and insert the braid.
This way we would be left with a nice casual pant.
Thank you very much!
Hola familia de Hive, espero que esta semana inicie con muchas bendiciones para cada uno de nosotros. Desde Hive seguimos apostando al arte y el diseño desde las diversas comunidades en esta querida red 3.0
El diseño que les presento hoy es el diseño de un mono de estilo casual de tela de piel de durazno látex. Es una secuencia de pasos muy fáciles les explico el procedimiento. Espero les guste!
Paso a Paso
1
En un metro de tela dividiremos la tela en dos rectángulos, los rectángulo deben medir 13" de ancho X 44" de largo.
2
Luego doblamos uno de los rectángulo a la mitad con respecto a su ancho y luego colocamos de patrón algún pantalón de nuestra medida.
Seguimos el trazo de este molde y recortamos.
3
Luego colocamos el diseño que hemos recortado sobre la tela y recortamos este siguiendo el mismo diseño de la tela del molde.
Abrimos la tela y unimos punta con punta.
4
Luego debemos coser solo hasta llegar al vértice de la curva.
5
Luego juntamos punta con punta de los dos vértice que hemos cosido. Y de esta manera se forma ya la silueta del pantalón. Cosemos a lo largo de la pierna derecha y la pierna izquierda.
Seguidamente recortamos un rectángulo de la tela que nos ha quedado de 4" de ancho por 34" de largo y y la doblamos luego a la mitad, esta será la peetrina, la cosemos en la zona de la cadera.
6
Luego tomamos una cinta de 42", abrimos dos orificios en la Petrina e introducimos la trenza.
De esta manera nos quedaría un lindo pantalón casual.
Muchas gracias!
- Images belong to me
- Translator: Deepl Traslator
- Editing: Canva
- Las imágenes me pertenecen
- Traductor: Deelp traslator
- Edicion: Canva

It looks pretty cool. Love its design. Nice work! Keep it up!
Thanks Diyhub
The fitting is perfect as it looks beautiful on you, good job and thanks for sharing the process with us.
!diy
You can query your personal balance by
!DIYSTATSI like the fabric and how the trouser fits your body contour. It’s lovely thanks for sharing the process with us.
muy bueno el diseño.
very good design.
The fabric and your choice of color makes it so unique
Your pants is so beautiful and the color pink made me love it even more. 🥰
Hola @divergente1, has hecho un lindo trabajo, el pantalón quedó hermoso, el color me encanta al igual que la tela es suave y muy apropiada para los climas cálidos. 🌼🌺🌸🌻🤗
Que tengas un lindo día!
Muchas gracias amiga por tus buenos deseos. Feliz día tambien
Such a nice piece of fabric you have shown us, it seems that you are a fashionista cause the way you came about this cloth is really amazing and mind blowing, I love it and keep up the nice work. Thanks once again for sharing the step by step process it has really been helpful.
Have a nice day