LETRAS 3D HECHAS DE CARTÓN//3D LETTERS MADE OF CARDBOARD
Español
English

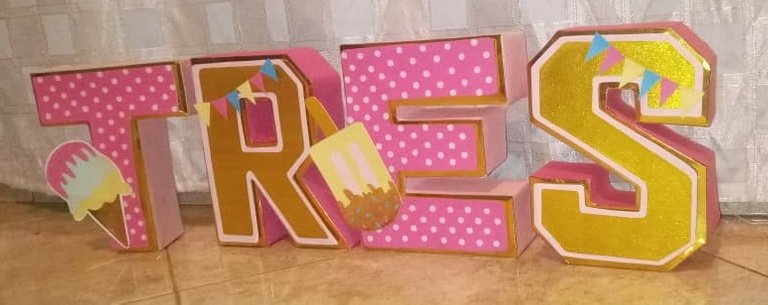
Hola mi gente lida de Hive, hoy les traigo una manualidad que hice para el cumpleaños de mi hija, unas letras en cartón decoradas.
Hello my dear people from Hive, today I bring you a craft I made for my daughter's birthday, some decorated cardboard letters.

MATERIALES
MATERIALS
- Cartón
- Cartulina de colores
- Cartulina metalizada
- Pega
- Tijeras
- Exacto
- Lápiz
- Regla
- Cardboard
- Colored cardboard
- Metallic cardboard
- Glue
- Scissors
- Scissors
- Pencil
- Ruler
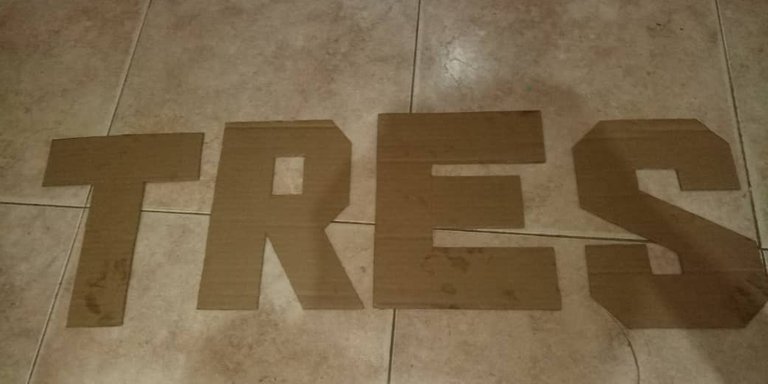
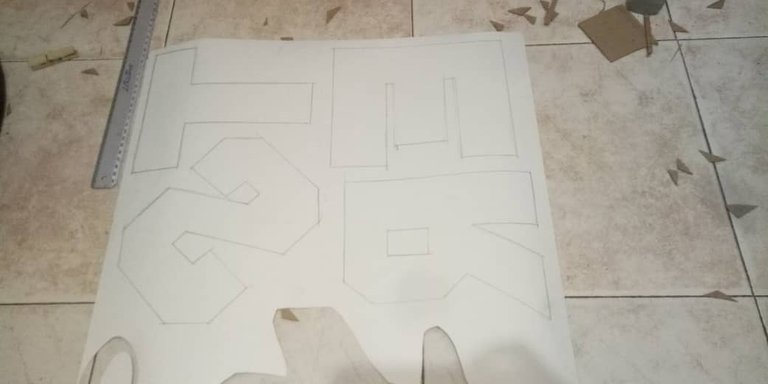
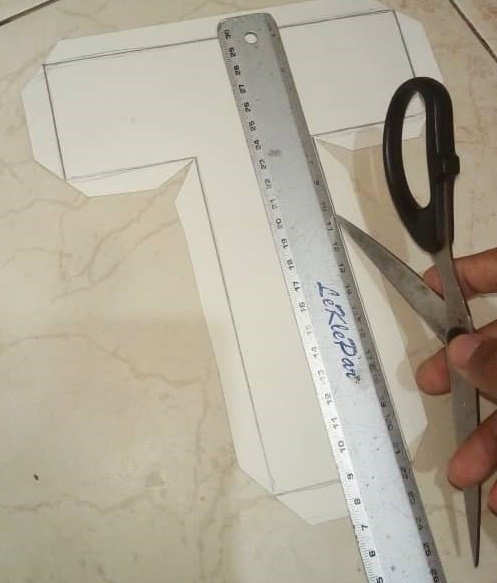
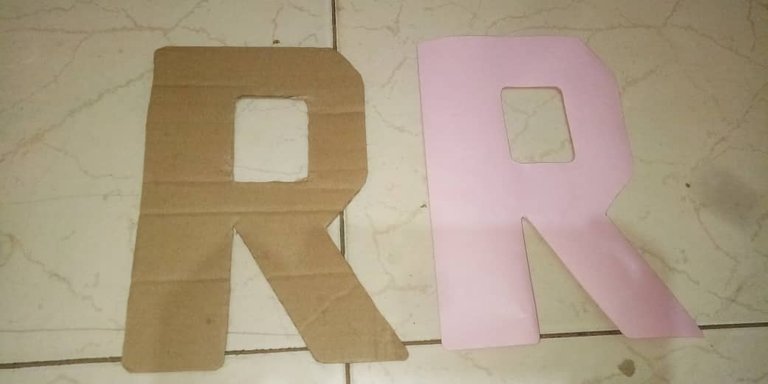
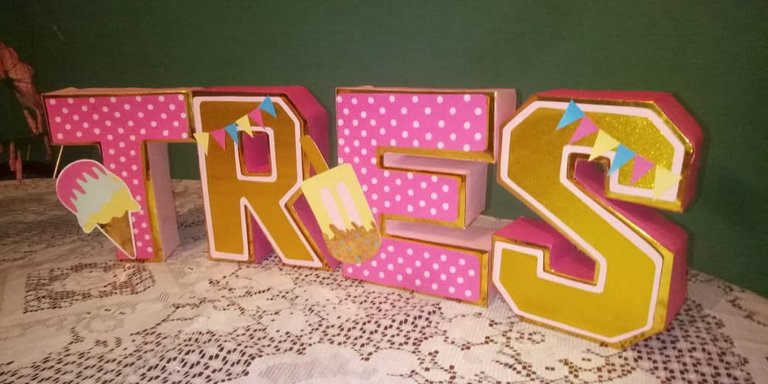
Lo primero que hice fue sacar los moldes de las letras, en este caso yo hice la palabra TRES, porque no tenia mucho cartón ni cartulina.
The first thing I did was to make the molds of the letters, in this case I made the word THREE, because I didn't have much cardboard or cardboard.
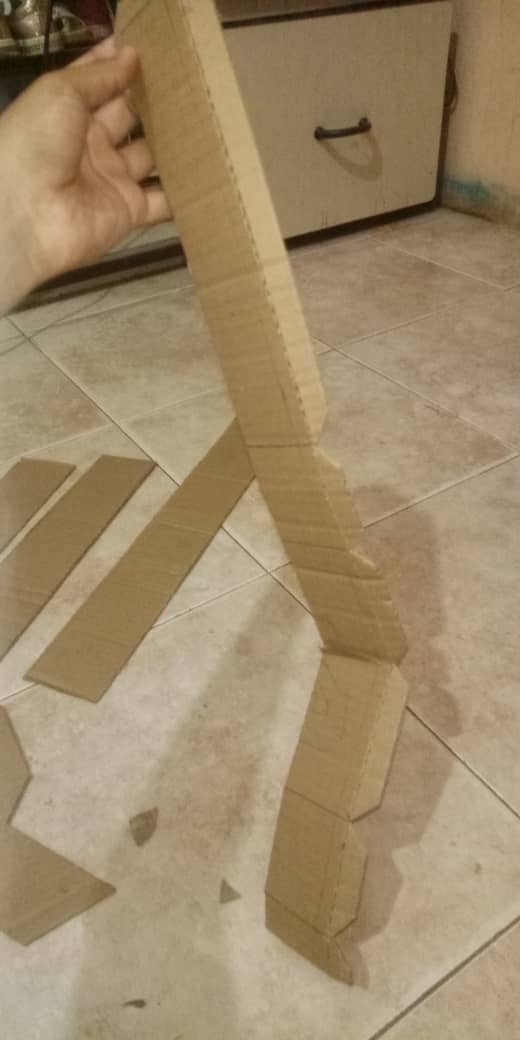
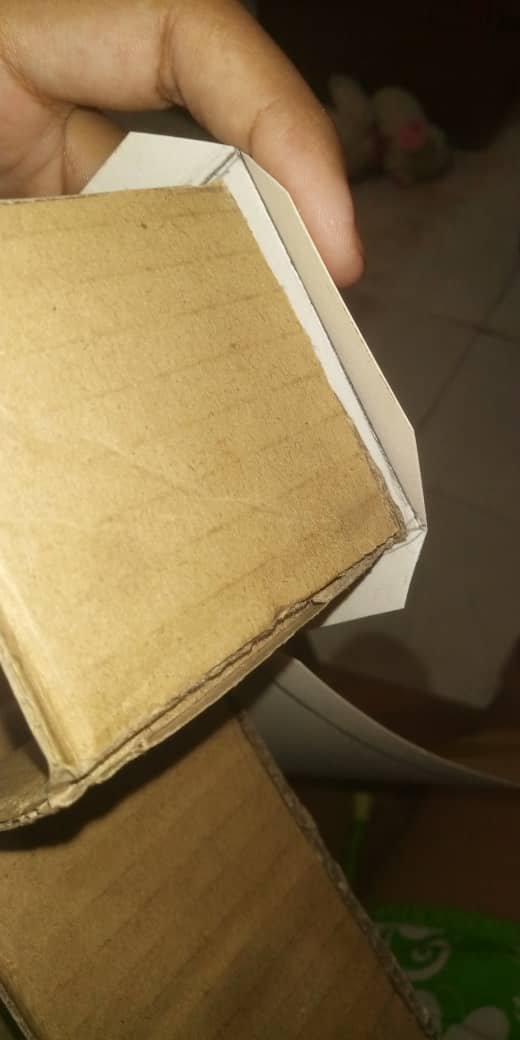
Luego de esto saque las tiras que le iba a colocar a las letras, para darles la forma de 3D, en este caso para que se puedan sostener.
After this I took out the strips that I was going to put on the letters, to give them the 3D shape, in this case so that they could be held.
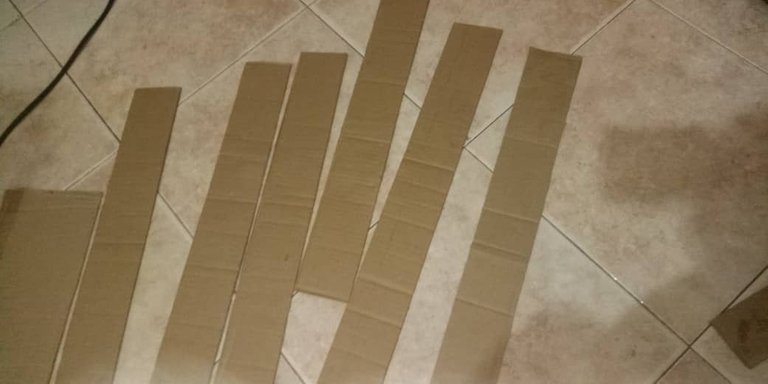
Luego medí 1,5cm en la orilla de la tira, para poder pegar la tira a la letra, lo que debes hacer es marcar toda la orilla y luego marcarla con la tijera o exacto para que se pueda doblar más fácil, pero sin cortar.
Then I measured 1.5cm on the edge of the strip, to be able to glue the strip to the letter, what you should do is to mark the entire edge and then mark it with the scissors or exact so that it can be folded more easily, but without cutting.
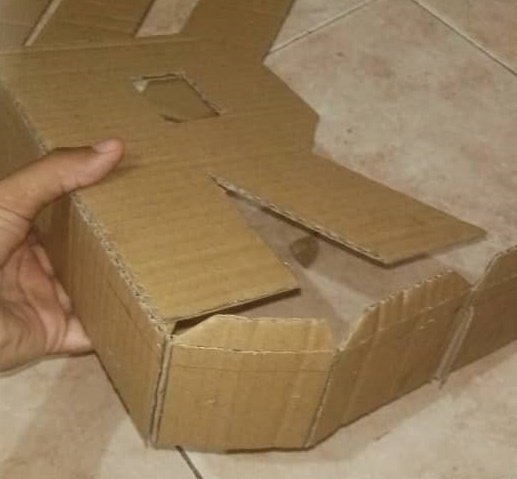
Después comenzamos a pegar las tiras a la letras, para poder hacer los dobles de las esquinas, puedes guiarte con las esquinas y marcar con un lápiz, porque si lo haces con la regla es probable que no te quede bien, yo lo hice y no me quedo la medida exacta. El secreto esta en marcar la esquina con el lápiz y doblar y así sucesivamente con cada esquina.
Then we begin to glue the strips to the letters, to be able to make the folds of the corners, you can guide yourself with the corners and mark with a pencil, because if you do it with the ruler it is likely that it will not fit well, I did it and I did not get the exact measurement. The secret is to mark the corner with the pencil and fold and so on with each corner.
Luego agarras la cartulina que vas a utilizar para decorar y colocas la letras encima del lado contrario y remarcas la forma, y luego le dejas 1,5 cm de pestaña para doblar y pegar.
Then you take the cardboard that you are going to use to decorate and place the letters on top of it on the opposite side and mark the shape, and then leave 1.5 cm of flange to fold and glue.
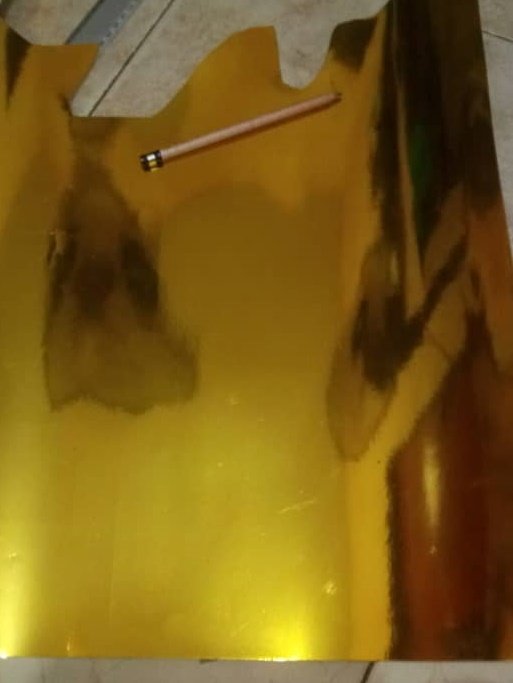
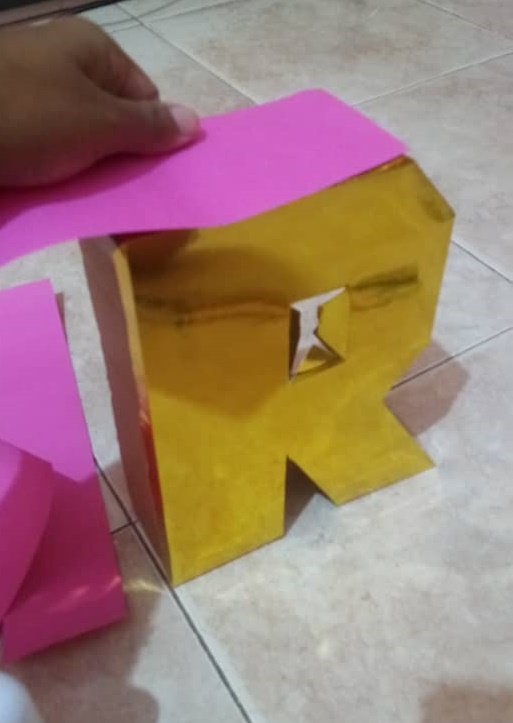
Como yo utilice cartulina metalizada, lo que hice fue remarcar las líneas de dobles por la parte de atrás con la tijera, para que fuera más fácil doblar.
Since I used metallic cardboard, what I did was to mark the folding lines on the back with the scissors, so that it would be easier to fold.
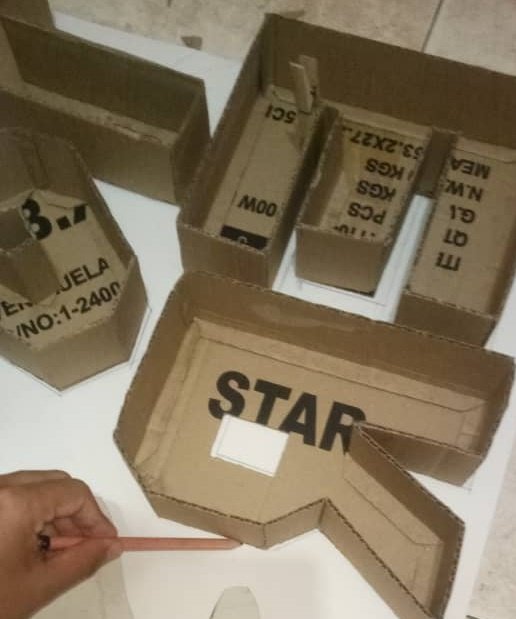
Luego pegamos por la orilla a la letra cada figura o cada letra.
Then we glue along the edge of the letter each figure or letter.
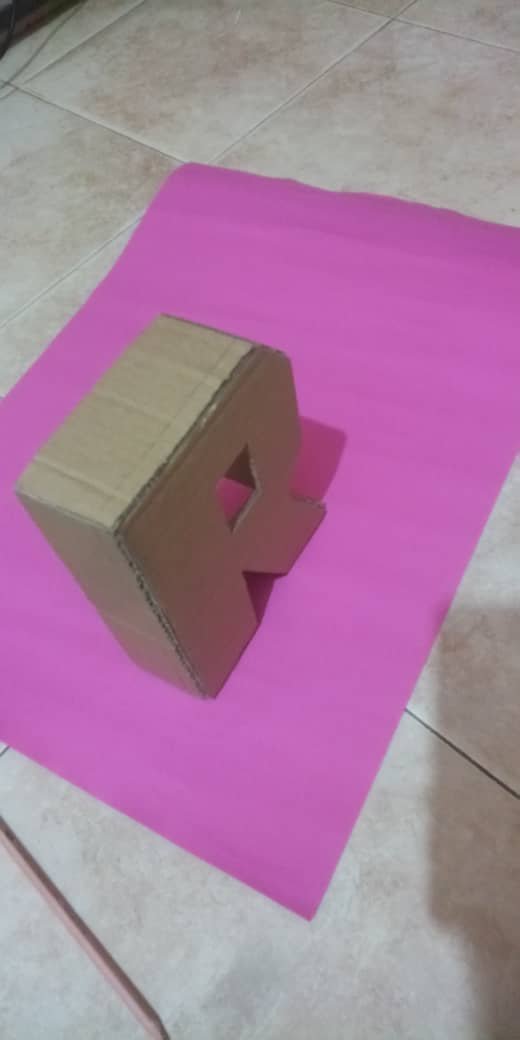
Vamos hacer las tiras para las líneas de las letras, las que le dan la forma de 3D, medimos con la tijera el ancho de las tiras y luego recortamos y pegamos.
We are going to make the strips for the lines of the letters, the ones that give the 3D shape, we measure with the scissors the width of the strips and then we cut and glue them.
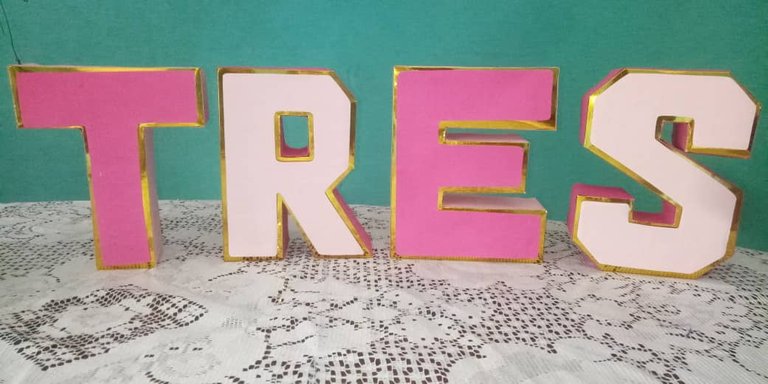
Ahora lo que viene después va a quedar a tu gusto, que es decorar las letras, aquí deja volar tu imaginación. Yo lo que hice fue recortar nuevamente la letra en cartulina de colores, y en la parte de atrás le coloque un pedazo de cartón para hacerla más dura, porque quería darle un efecto con profundidad, como si estuviera flotando, solo le pude unos cartoncitos en el fondo para que no se viera.
Now what comes next is up to you, which is to decorate the letters, here let your imagination run wild. What I did was to cut out the letter again in colored cardboard, and on the back I put a piece of cardboard to make it harder, because I wanted to give it an effect with depth, as if it were floating, I could only put some cardboard at the bottom so that it would not be seen.

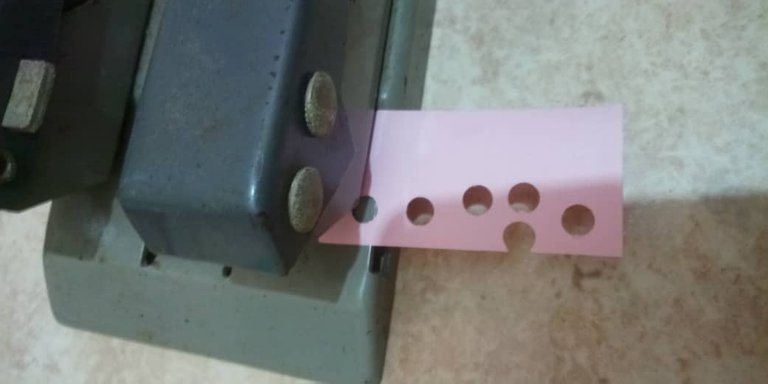
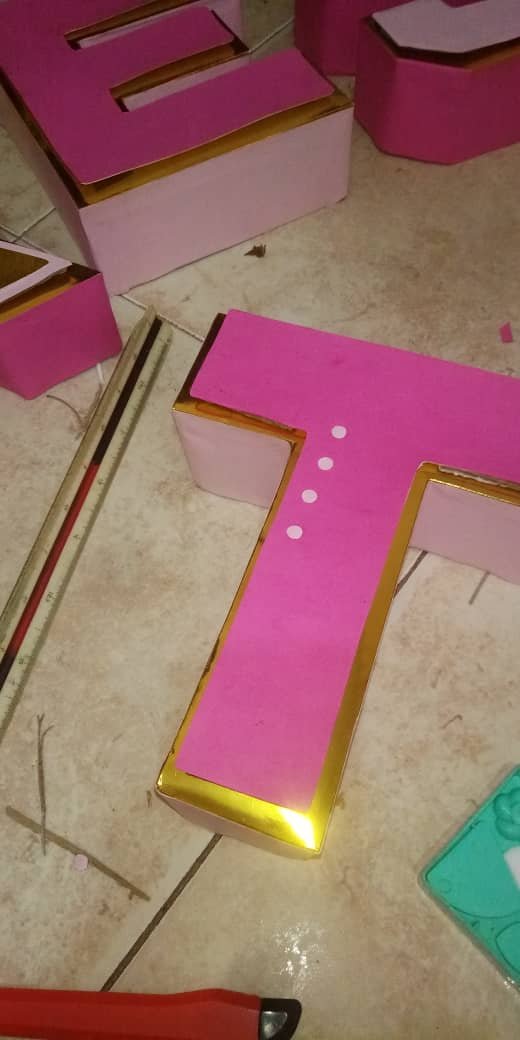
Yo lo que utilizo para darle un diseño diferente, es con un abre huecos, hacer muchos papelillos e irlos pegando como puntos, para darle más textura y un diseño de relieve, y después hice una figuras de helados en cartulina, con cartón de fondo para hacerlas más resistentes y listo.
What I use to give it a different design is to use a hole opener to make many small pieces of paper and glue them as dots, to give it more texture and a relief design, and then I made a cardboard ice cream figures, with cardboard on the bottom to make them more resistant and that's it.
Espero les haya gustado esta idea.
Espero les haya gustado esta idea.
I hope you liked this idea.
I hope you liked this idea.

** Los separadores y cintillo son de mi autoria, para uso exclusivo de Hive.
** Para la traducción utilice https://www.deepl.com/
¡Gracias por su apoyo, por leerme y votar, GRACIAS!
Thank you for your support, for reading and voting, THANK YOU!
0
0
0.000
Wooow! Amiga te han quedado fabulosas, imagino lo feliz que estará muy feliz con esta hermosa manualidad! Exitos! <3 <3
Muchas gracias amiga @yetsimar y siii estoy muy feliz, porque sabes son para el cumpleaños de mi bebé y me gusto mucho como quedaron para su decoración, muchas gracias por tu visita linda, besos y bendiciones!
Congratulations @dayna199019! You have completed the following achievement on the Hive blockchain and have been rewarded with new badge(s):
Your next target is to reach 700 comments.
You can view your badges on your board and compare yourself to others in the Ranking
If you no longer want to receive notifications, reply to this comment with the word
STOPTo support your work, I also upvoted your post!
Check out the last post from @hivebuzz:
Support the HiveBuzz project. Vote for our proposal!
Te han quedado muy bien esas letras amiga, felicitaciones por ese excelente trabajo.
Muchas graciiias amigo @israel.art quede muy feliz por el resultado, gracias por el apoyo, por tu visita y comentario.