Creating a Big Book [ESP/ENG]
Hola familia de Hive, hoy les quiero compartir una manualidad hecha por mi, espero les guste.😊
Hola familia de Hive, hoy les quiero compartir una manualidad hecha por mi, espero les guste.😊
Hello Hive family, today I want to share with you a craft made by me, I hope you like it.😊
Debido a que estoy aprendiendo sobre creación de recursos que me permitan enseñar algún idioma, debí desarrollar un libro grande, al principio no sabía por donde empezar pero luego planifiqué con calma mi trabajo.
Because I am learning about creating resources that allow me to teach a language, I had to develop a big book, at first I did not know where to start but then I calmly planned my work.
Pasos para realizar mi primer Big Book Didáctico
- Tome en cuenta la edad del grupo al que estaría dirigido el recurso.
- Pensé en un tema adecuado al grupo.
- Como se trata de un libro, invente un cuento sencillo.(Se me ocurrió que podía ser interactivo, así que planifique que por cada página podría plantearse la interacción entre la historia y el estudiante).
- Una vez planificada la historia, Busqué los materiales con los que contaba para realizar mi Book:
- Cartón.
- Tela.
- Pintura al frio.
- Foami.
- Marcadores.
- Hojas blancas.
- Pega.
- Belcron
- Aros de metal
Steps to make my first Big Book Didactic .
- Take into account the age of the group to which the resource would be addressed.
- I thought of a topic suitable for the group.
- Since it is a book, I invented a simple story (it occurred to me that it could be interactive, so I planned that for each page there could be interaction between the story and the student.)
- Once the story was planned, I looked for the materials I had to make my Book:
- Cardboard.
- Canvas.
- Cold paint.
- Foami.
- Markers.
- White sheets.
- Glue.
- Belcron
- Metal rings
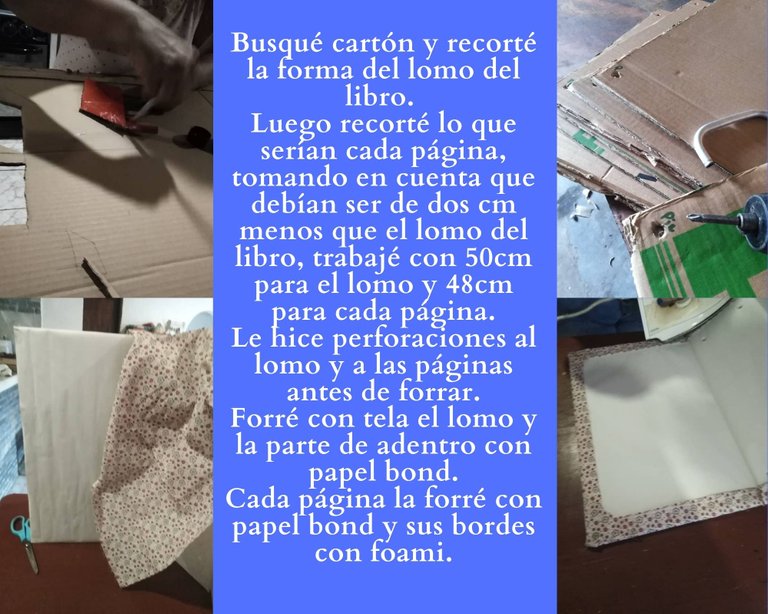
I looked for cardboard and cut out the shape of the spine of the book.
Then I cut out what each page would be, taking into account that they should be two centimeters less than the spine of the book, I worked with 50cm for the spine and 48cm for each page.
I perforated the spine and the pages before lining.
I lined the spine with fabric and the inside with bond paper.
Each page was lined with bond paper and the edges with foami.
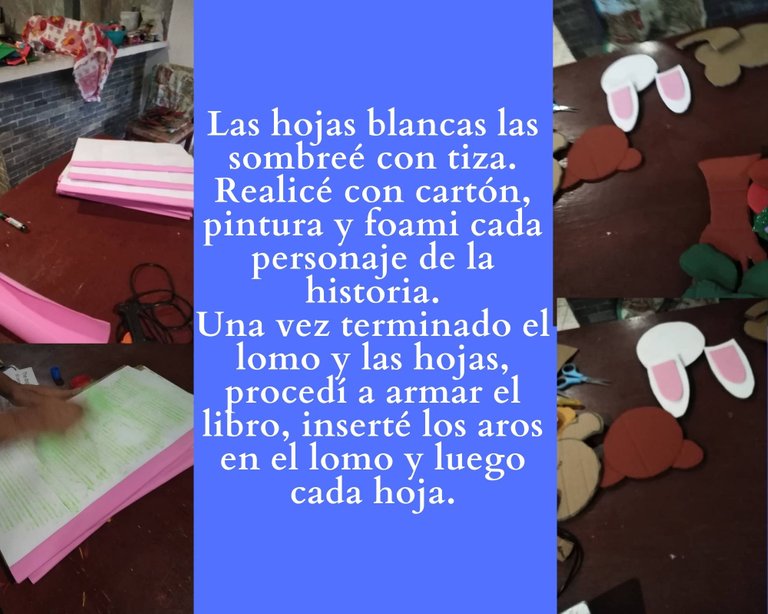
I shaded the white sheets with chalk.
I made each character of the story with cardboard, paint and foami.
Once the spine and the pages were finished, I proceeded to assemble the book, inserting the rings in the spine and then each page.
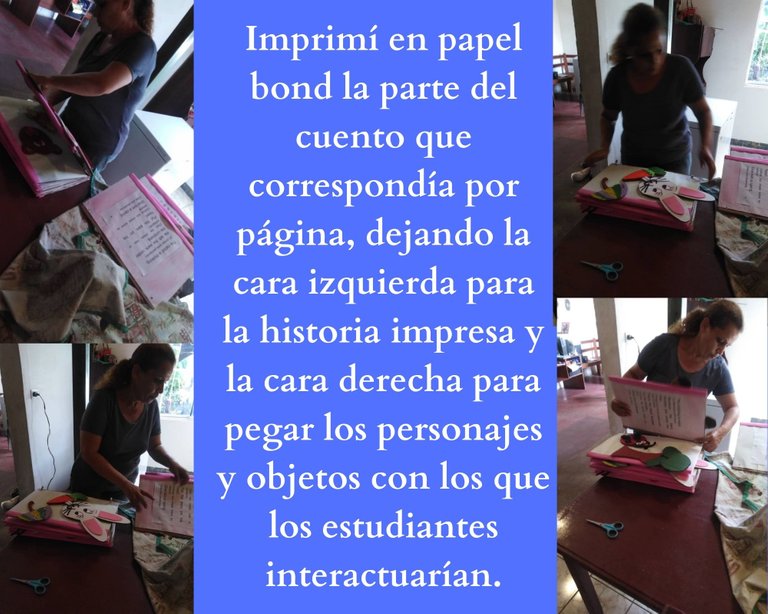
I printed on bond paper the part of the story that corresponded to each page, leaving the left side for the printed story and the right side to paste the characters and objects with which the students would interact.
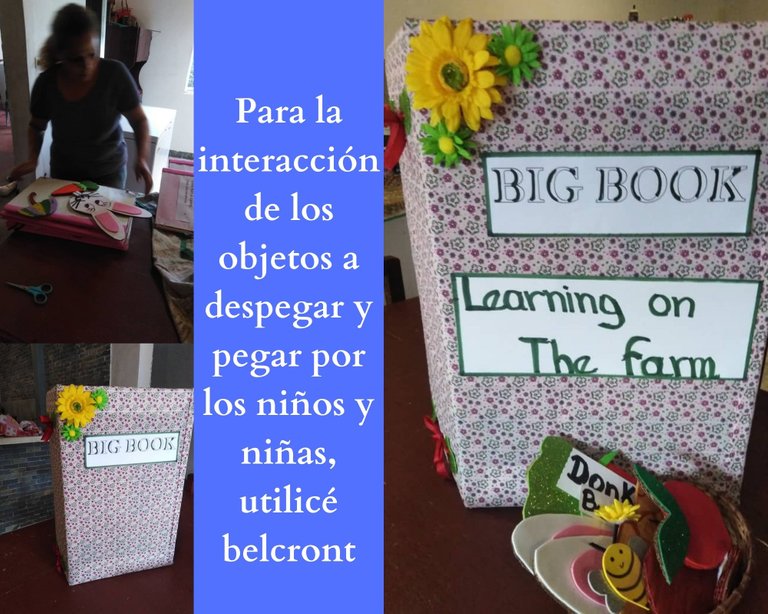
For the interaction of the objects to be peeled off and glued by the children, I used belcront.
Here is my presentation on my youtube channel, I hope you can see it to the end.
Aquí les dejo mi presentación en mi canal de youtube, espero puedan verla hasta el final. :)
All photos are taken by me, and the collages were made by me on Canva
Congratulations @dayanamerelia! You have completed the following achievement on the Hive blockchain and have been rewarded with new badge(s):
Your next target is to reach 500 upvotes.
You can view your badges on your board and compare yourself to others in the Ranking
If you no longer want to receive notifications, reply to this comment with the word
STOPCheck out the last post from @hivebuzz:
Support the HiveBuzz project. Vote for our proposal!