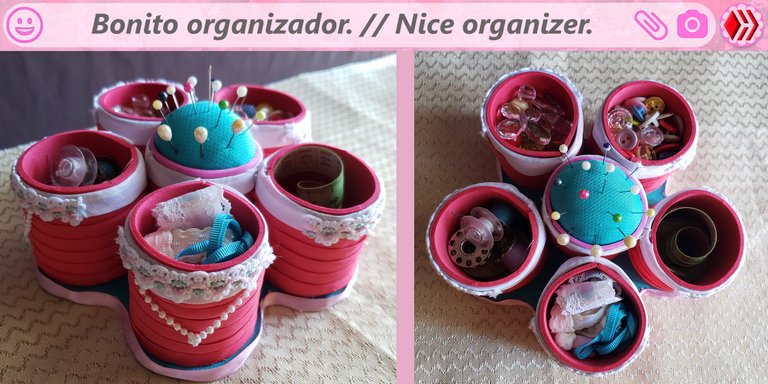
[ES-EN] Organiza tus materiales de costura. // Organize your sewing supplies.


¡Hola gente linda! de esta gran comunidad de HIVE, mis mejores deseos para ustedes, que este día este cargado de muchísimas bendiciones y con las mejores de las energías.
Para hoy quiero compartir con ustedes un paso a paso de una súper idea, para todas las personas que son amantes de las costura, como lo es un práctico y lindo organizador, ya que para las que trabajamos en este ámbito es súper necesario porque siempre estas herramientas suelen perderse cuando no la tenemos en un lugar en específico, así que aquí te muestro como podemos mantener siempre estas cositas que son pequeñas, ordenadas y siempre a disposición cuando la necesitemos.
Este organizador es súper sencillo de crear, estoy segura que todos estos materiales los tenemos en casa, a parte sé que se van a divertir muchísimo como yo, el diseño que le di fue una linda flor ya que me encantan, espero disfruten de este paso a paso, ahora bien manos a la obra.
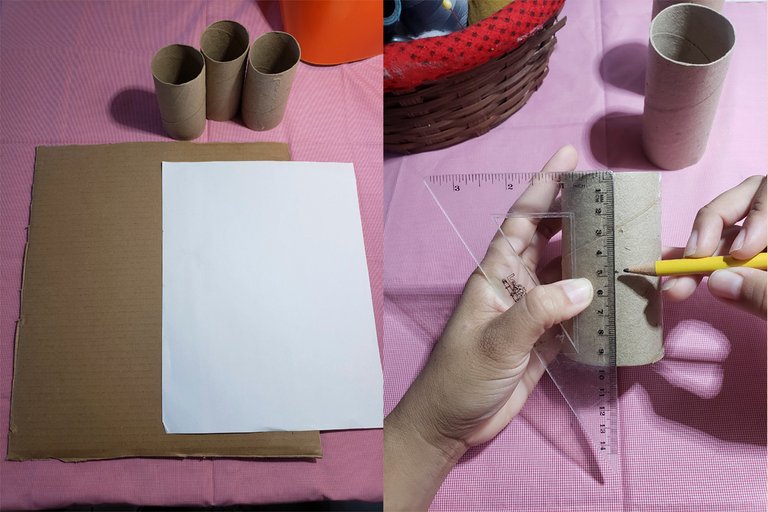
Materiales:
• Para la base de nuestro organizador utilice; una lámina de cartón.
• Para lo que será los pétalos utilice; los cilindros de cartón del papel higiénico.
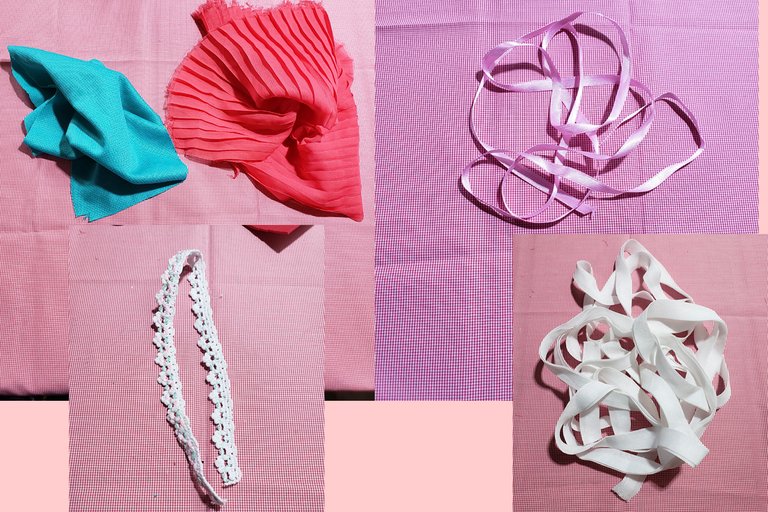
• Tela de diversos colores reciclados.
• Cintas rosa, blanca y encaje; para los detalles de decoración.
• Foami o goma Eva; para cubrir el interior de cartón de los cilindros.
• Pega de silicón.
• Aguja.
• Hilo.
• Lápiz.
• Hoja.
• Tijera.
• Regla.
• Felpa.
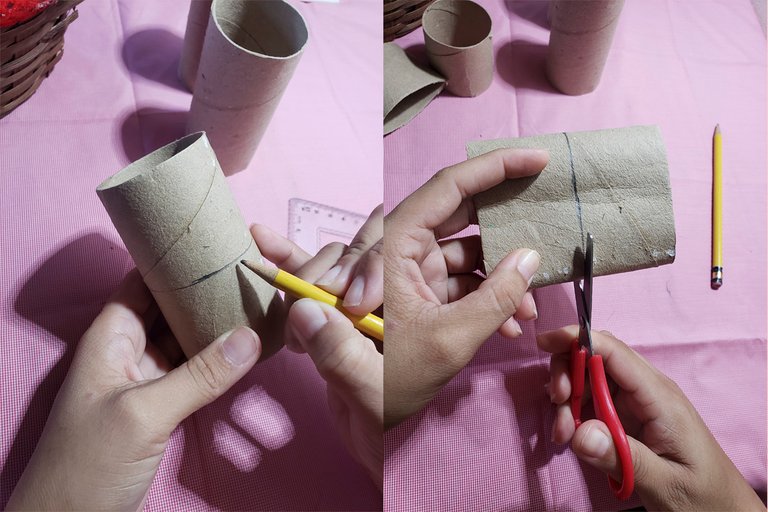
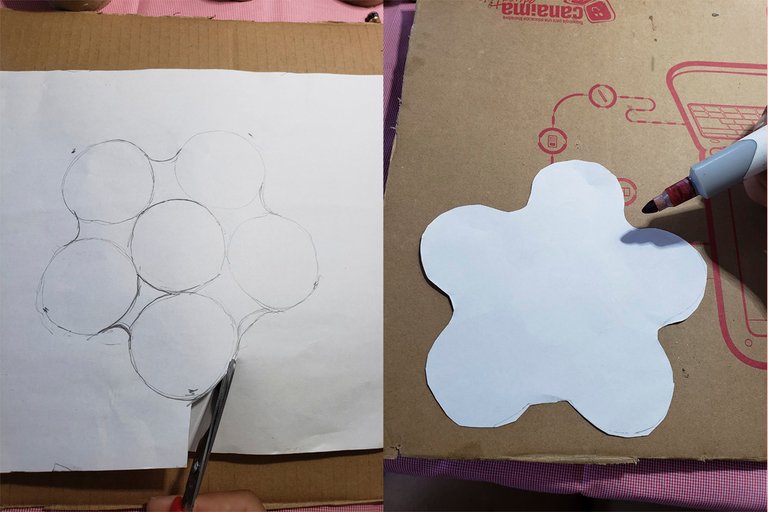
Paso 1
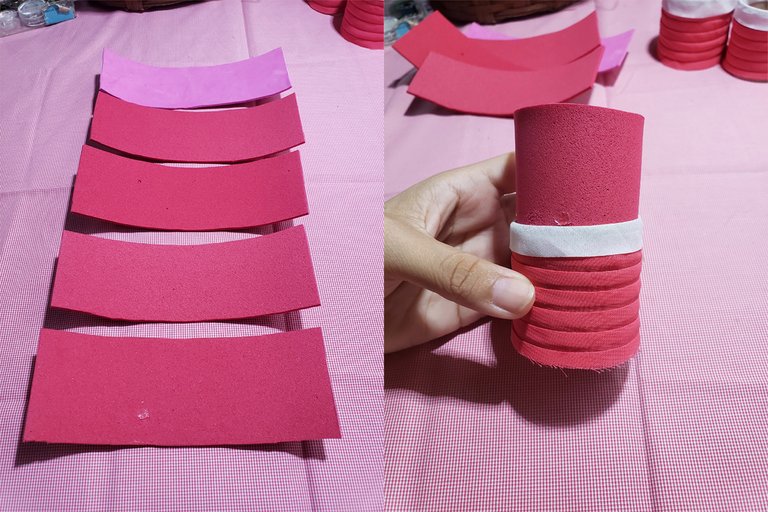
Marcamos la mitad de los cilindros de cartón del papel higiénico para crear los pétalos que será nuestra flor.
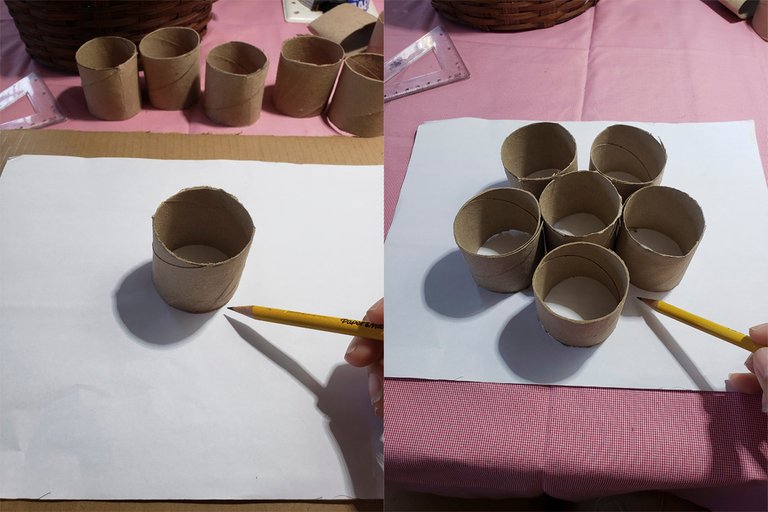
Cortados los cilindros lo ubicamos sobre la hoja que nos servirá de patrón para nuestra base.
Una vez sacado el patrón marcamos sobre el cartón y cortamos.

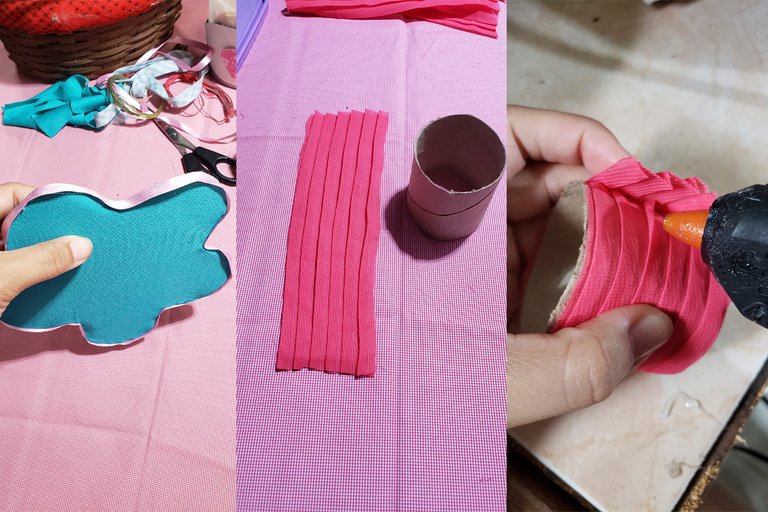
Paso 2
Utilizamos el cartón con la forma elegida para sacar de nuevo un patrón sobre la tela que nos servirá para forrar la misma.
Pegamos con silicón tanto la tela como la cinta que ira ubicada en los bordes del cartón.
La tela rosa la utilizaremos para forrar los bordes de los cilindros, elegí esta tela de pliegues para darle forma y textura a esta hermosa utilidad.
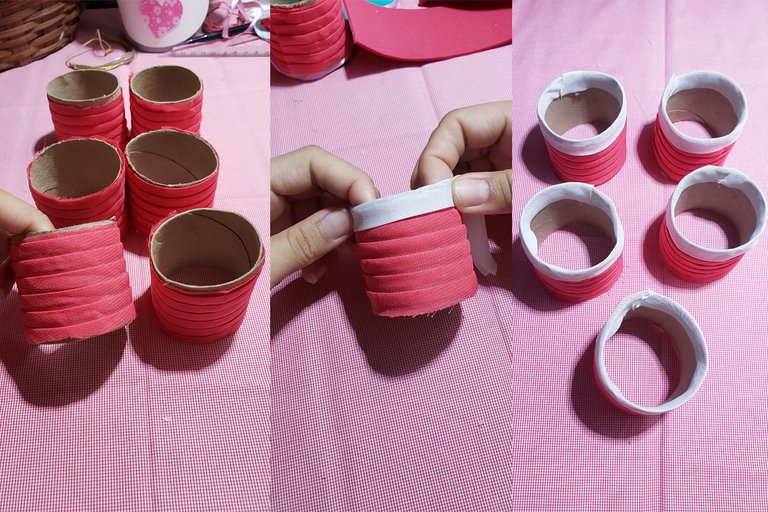
Luego con una cinta blanca cubrimos los bordes del cilindro de cartón.

Paso 3
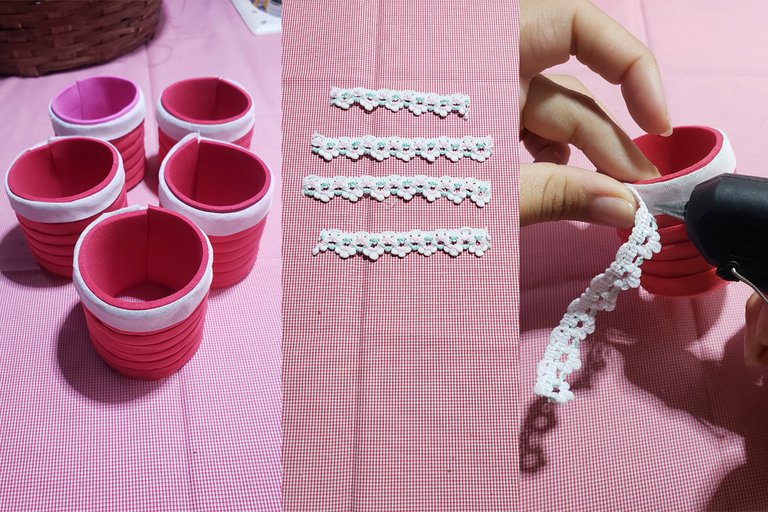
El interior de los cilindros de cartón lo forre con goma Eva para darle un mejor acabado y durabilidad a nuestra utilidad.
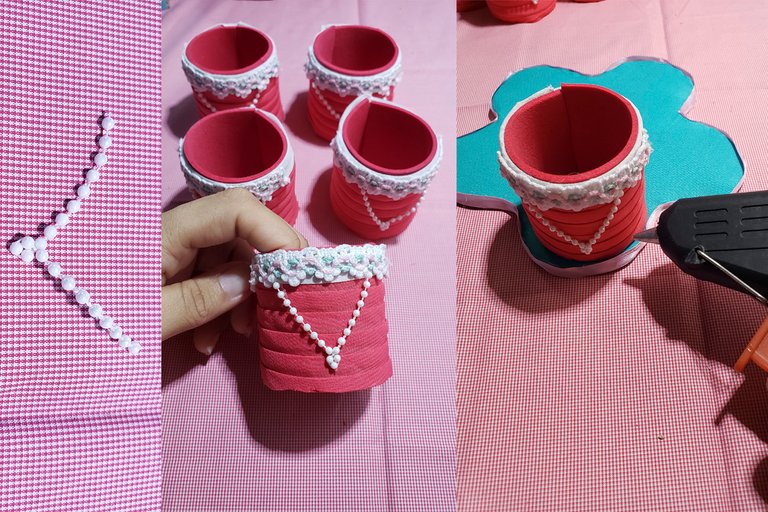
Para decorar nuestros cilindros utilizamos cinta de encajes con un diseño delicado, lo pegamos en el borde superior y le colocamos un colgante de perlitas plásticas.
Pegamos los cilindros ya decorados a nuestra base.
Paso 4
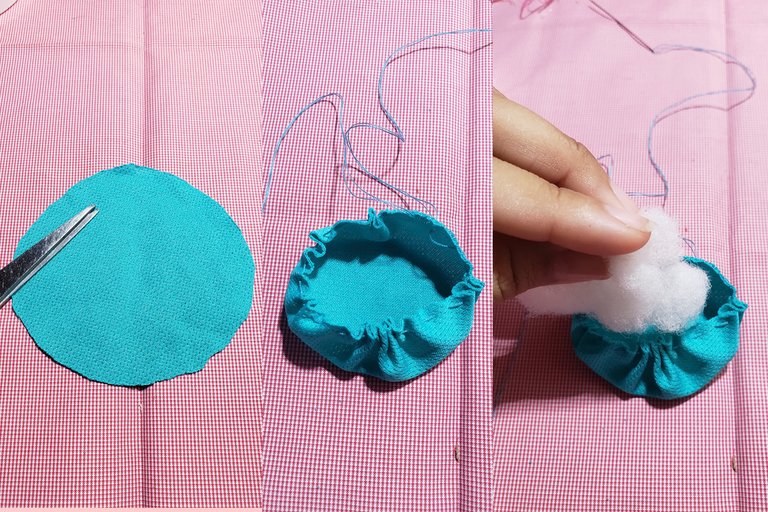
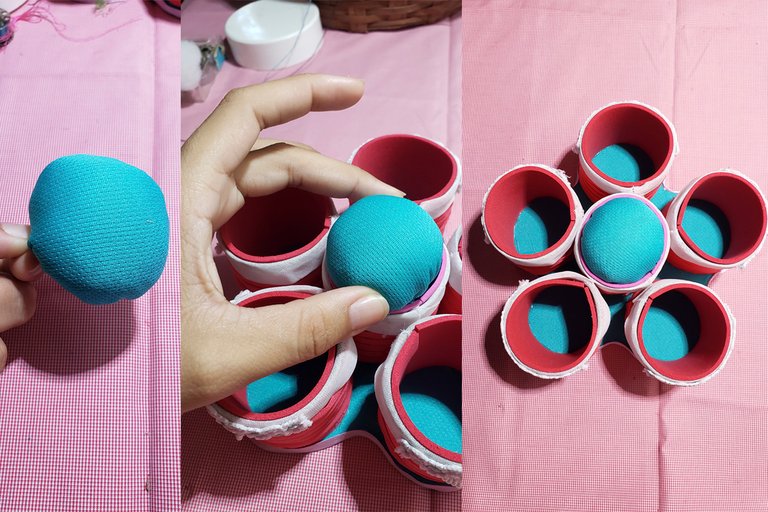
Con la misma tela que utilizamos para forrar nuestra base, sacamos un círculo lo cosemos por los bordes para crear una esfera contenedora, procedemos a colocarle la felpa y listo lo fijamos en el centro de nuestra flor donde iran nuestros alfileres y agujas.
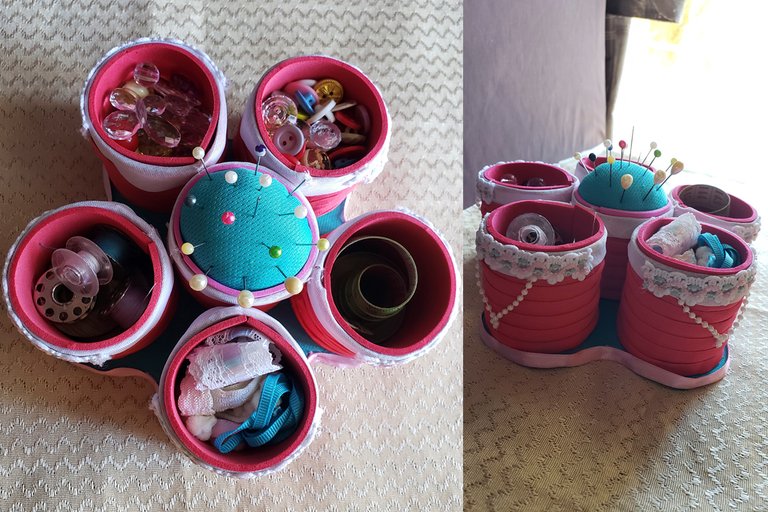
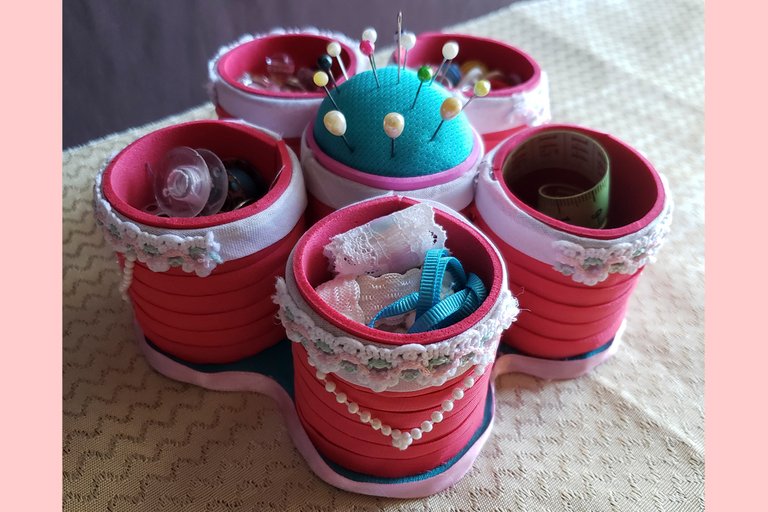
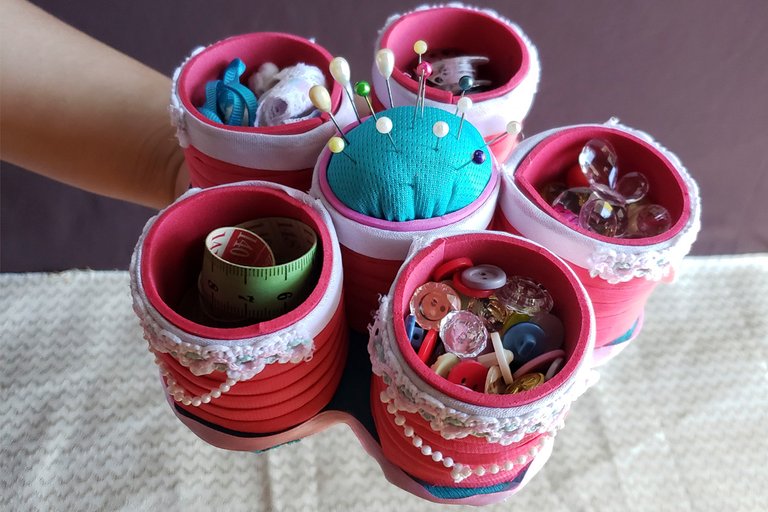
Listo amigos así queda nuestro lindo organizador.
Bueno guapuras, esto ha sido todo por hoy, espero que les haya gustado mucho este post, muchísimas gracias por pasar por aquí, leerme y comentar, saluditos a todos chao chao.

Hello beautiful people! From this great HIVE community, my best wishes to you, may this day be full of many blessings and with the best of energies.
For today I want to share with you a step by step of a super idea, for all the people who are lovers of sewing, such as a practical and cute organizer, since for those of us who work in this field it is super necessary because you are always Tools tend to get lost when we have them in a specific place, so here I show you how we can always keep these little things that are small, tidy and always available when we need them.
This organizer is super simple to create, I am sure that we have all these materials at home, apart from that I know that you are going to have a lot of fun as I did, the design that I gave you was a beautiful flower since I love them, I hope you enjoy this step step by step, now let's get to work.
Materials:
• For the base of our organizer use; a sheet of cardboard.
• For what will be the petals use; cardboard cylinders of toilet paper.
• Fabric of various recycled colors.
• Pink, white and lace ribbons; for decoration details.
• Foami or Eva rubber; to cover the cardboard interior of the cylinders.
• Silicone glue.
• Needle.
• Thread.
• Pencil.
• Sheet.
• Scissors.
• Ruler.
• Plush.
Step 1
We mark the middle of the toilet paper cardboard cylinders to create the petals that will be our flower.
Once the cylinders have been cut, we place them on the sheet that will serve as a pattern for our base.
Once the pattern is out, we mark on the cardboard and cut.
Step 2
We use the cardboard with the chosen shape to again draw a pattern on the fabric that will serve to cover it.
We glue both the fabric and the tape that will be located on the edges of the cardboard with silicone.
We will use the pink fabric to line the edges of the cylinders, I chose this pleated fabric to give shape and texture to this beautiful utility.
Then with a white tape we cover the edges of the cardboard cylinder.
Step 3
I lined the interior of the cardboard cylinders with Eva rubber to give our utility a better finish and durability.
To decorate our cylinders we use lace tape with a delicate design, we glue it on the upper edge and we place a pendant of plastic pearls.
We glue the already decorated cylinders to our base.
Step 4
With the same fabric that we use to cover our base, we take out a circle, we sew it along the edges to create a containing sphere, we proceed to place the plush on it and, ready, we fix it in the center of our flower where our pins and needles will go.
Ready friends this is how our cute organizer looks.
Well cuties, that's all for today, I hope you liked this post a lot, thank you very much for stopping by, reading me and commenting, hello everyone bye bye.
Recursos:
Todas las imágenes son de mi propiedad.
Fueron editadas por psp 6
Imágenes tomadas por Samsun A20
Traducido por traductor de google.
Means:
All images are my property.
They were edited by psp 6
Pictures taken by Samsun A20
Translated by google translator.
Congratulations @cutiepink26! You have completed the following achievement on the Hive blockchain and have been rewarded with new badge(s):
Your next target is to reach 500 upvotes.
You can view your badges on your board and compare yourself to others in the Ranking
If you no longer want to receive notifications, reply to this comment with the word
STOPCheck out the last post from @hivebuzz:
Support the HiveBuzz project. Vote for our proposal!
Que hermoso me encanto es mu útil ,compartiré su idea con mis compañeras del curso de costura seguro les fascinaran como a mi, gracias por compartir.
Hola @yilmagari 🤗❤️ muchísimas gracias, me alegra mucho que le haya gustado, siempre es un placer hacer este tipo de manualidades y claro que sí, espero que a ellas también les guste mucho y lo pongan en práctica, 😀 me gustaría ver sus creaciones y también aprender de ustedes 🤗, saludos y bendiciones. ❤️