REALIZANDO UN BLOQUE ARMABLE // CREATING AN ASSEMBLY BLOCK [ES-EN]


Bloque armable impreso / Printed assembly block
¡Holxs a todos!
Hello everyone!
El lenguaje de inclusión es raro...
The language of inclusion is unusual...
Volviendo a mi mismo, tenia varios dias sin publicar. Se me dificulta un poco pero estoy como dije anteriormente tratando a organizarme con esto de los tiempos y dedicarme a el blog.
Coming back to myself, I hadn't posted for several days. It's a bit challenging for me, but as I mentioned before, I'm trying to organize myself with managing time and dedicating myself to the blog.
Siguiendo con mi pequeño aprendizaje con la impresión 3d que es muy útil para todo actualmente; quise hoy dedicarme un reto a fabricar un bloque armable, para no mencionar marcas al respecto lo denomine así: "BLOQUE ARMABLE". Si así mismo, estos bloques son los que siempre de pequeños nos daban y hacíamos figuras, edificaciones, entre otras cosas.
Continuing with my little learning with 3D printing, which is very useful for everything nowadays, I decided to take on a challenge today and create an assembly block. Without mentioning any specific brands, I simply named it "ASSEMBLY BLOCK." Yes, these are the blocks that we used to receive as kids and would use them to create figures, buildings, and other things.

Vista inferior del bloque impreso / Bottom view of the printed block
Para realizar los bloques se requieren unos programas los cuales estoy aprendiendo a usar un programa de "Autodesk" que son los mismos dueños o fabricantes de "Autocad" pero este programa es para modelar piezas y llevarlas a imprimir en 3d. Les redactare algo muy generalizado de lo que es el paso a paso.
To create the assembly blocks, you need specific software. I am currently learning to use a program from "Autodesk," the same company that owns and manufactures "Autocad." This program is designed for modeling parts and preparing them for 3D printing. Let me give you a very generalized overview of the step-by-step process.

PARA COMENZAR EL DISEÑO
To start the design
Lo primero fue buscar ideas o planos en internet con respecto a las medidas de como realizarlo; por consiguiente me pareció uno como el mas amigable y le puse manos a la obra.
The first thing I did was to search for ideas or plans on the internet regarding the measurements and how to make it. Consequently, I found one that seemed the most user-friendly, and I got to work on it.

Boceto superior / Top view sketch
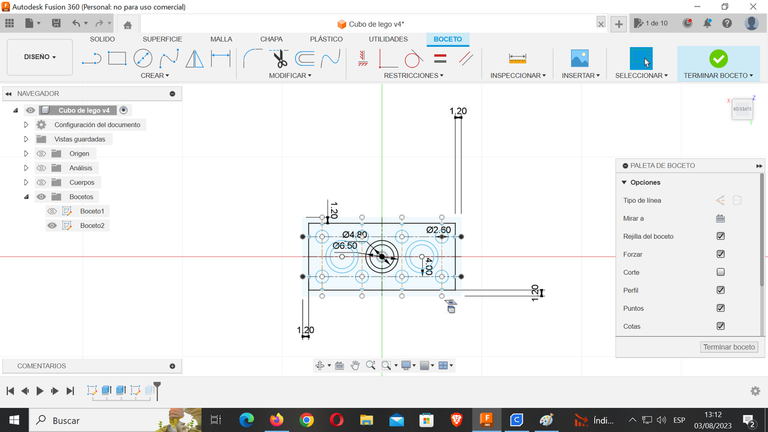
Boceto inferior / Bottom view sketch.
Comencé a realizar el boceto en el programa "fusion360" de verdad el software es muy amigable y no tan difícil usarlo. Luego de tener el boceto casi terminado de vista superior; se debe realizar una extrusión para ir determinando como va quedando la pieza.
I began sketching the design in the "Fusion 360" program, and indeed, the software is very user-friendly and not too difficult to use. After nearly completing the top view sketch, the next step is to perform an extrusion to start determining how the piece will look.
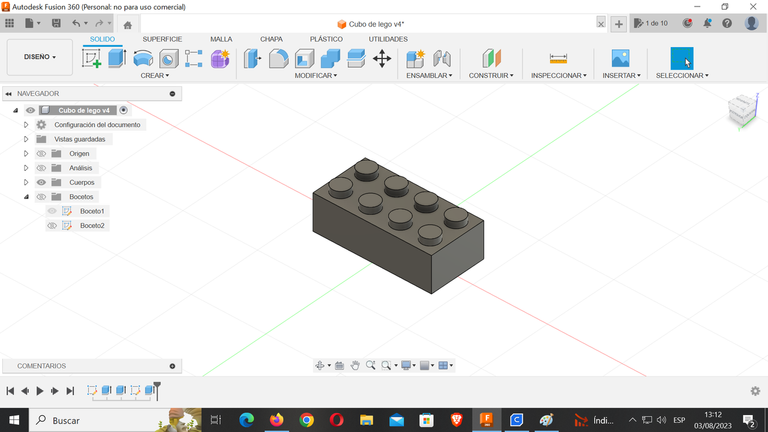
Bloque armable ya desarrollado en el programa / Fully developed assembly block in the program
La vista inferior también se debía realizar y extrudir de forma inversa para generar el orificio donde encajar las piezas, de tal modo que quedara de forma uniforme y correcta.
The bottom view also needed to be created, and then extruded in the opposite direction to generate the hole where the pieces would fit. This ensured that it would be uniform and accurate in shape.

Vista interna del bloque en el programa / Internal view of the block in the program
ALGO AVANZADO EL DISEÑO
SOMETHING ADVANCED IN DESIGN
El diseño ya construido procedí a llevarlo a el software de donde realizo los retoques y veo como quedara en la impresora distribuido, quise agregarle 4 (cuatro) piezas adicionales para se pudiese realizar el armado; así mismo que en el mismo plato de impresión se realizaran todas por el tiempo.
Once the design was complete, I proceeded to import it into the slicing software. In this software, I made final adjustments and previewed how the design would look when distributed on the printer's bed. Additionally, I decided to add four additional pieces to enable the assembly process. By arranging all the pieces on the same print bed, I could save time and print them together simultaneously.
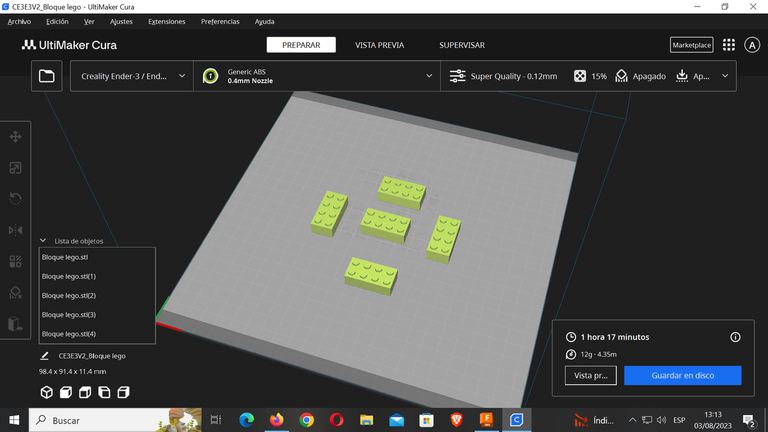
Ya preparados para imprimir los bloques armables / Ready for printing the assembly blocks
EL FINAL DEL DISEÑO
THE FINAL DESIGN
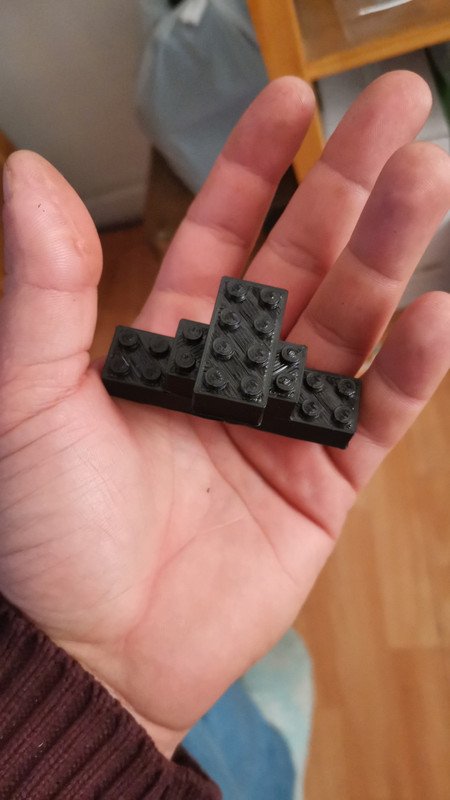
Al finalizar la impresión quedan unos espectaculares bloques de forma rectangular que se pueden apilar o organizar de forma diferente. Se pueden realizar varios y regalar o en su defecto vender.
At the end of the printing process, there are spectacular rectangular blocks that can be stacked or arranged in different ways. You can create several of them to give as gifts or, alternatively, sell them.
Vista superior del bloque impreso / Top view of the printed block
Vista inferior del bloque impreso / Bottom view of the printed block
Bloques armados uno encima de otro / AAssembled blocks stacked on top of each other

