Restaurando una linda silla plegable[Esp-Eng]
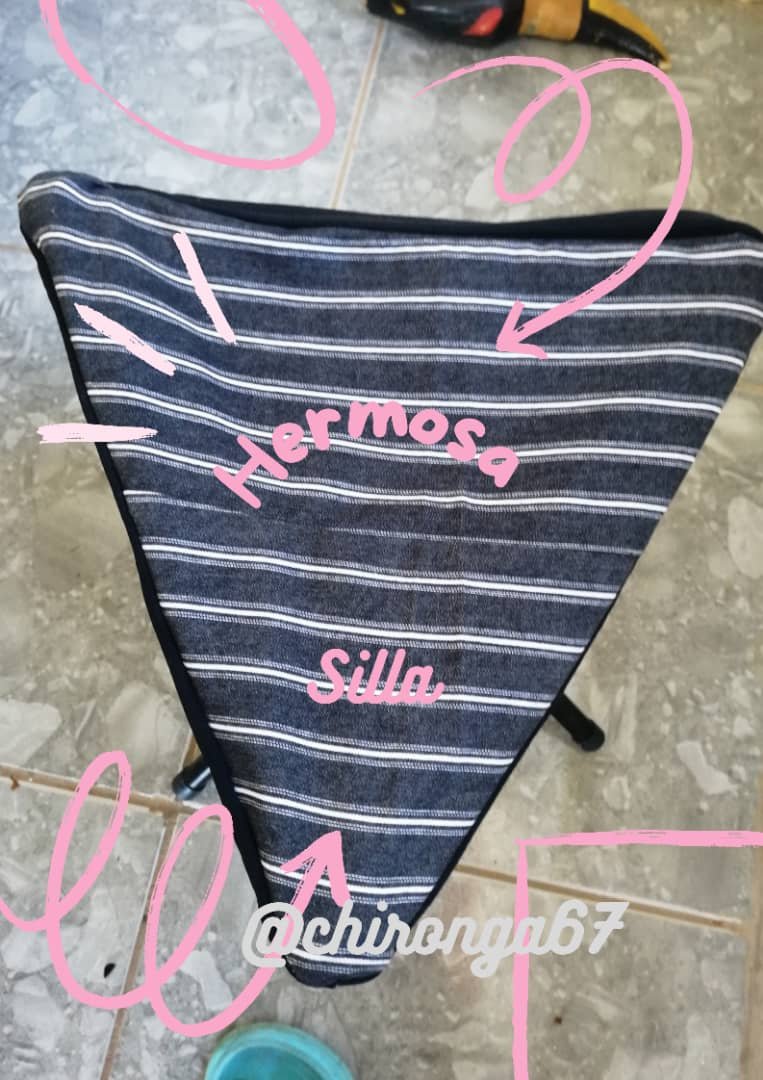
Feliz noche amigos de esta hermosa comunidad de Hive Diy, primera vez que publico en esta comunidad, hoy me dedique a reparar una silla que hace años me regalo mi mamá, la silla es de esas plegables que se usa mucho para llevar a las colas, mi hermana la iba a botar y como ella sabe que a mi me gusta darle una segunda oportunidad a las cosas me la regalo pero yo ni idea de como repararla porque me la regalo sin la parte donde uno se sienta.
Hace días saque unas piernas de pantalones y las tenia arriba de una cama y escogí una negra de rayas para la parte de arriba y una negra para los laterales porque la otra no alcanzaba porque la puse doble. Sin más que decir paso al paso a paso.
Happy night friends of this beautiful Hive Diy community,first time posting in this community, today I dedicated myself to repairing a chair that my mother gave me years ago, the chair is one of those folding ones that is used a lot to take to queues, my sister was going to throw it away and as she knows I like to give things a second chance as a gift but I have no idea how to repair it because I give it to myself without the part where one sits. A few days ago I took out some pants legs and I had them on top of a bed and I chose a black striped one for the top and a black one for the sides because the other one wasn't enough because I put it double. Without more to say step by step.
Materiales
Tela
Maquina de coser
Hilo
Un pedazo de plástico
Tijera
3 remaches
1 marcador
Alfileres
Regla
Materials
Fabric Sewing machine Thread a piece of plastic Scissors 3 rivets 1 bookmark pins

Procedimiento.
Pongo los 2 pedazos de tela derecho con derecho, y con una regla y un marcador hago el patrón de la silla, esto lo hago con el esqueleto de la silla.
Procedure
I put the 2 pieces of fabric right side up, and with a ruler and a marker I make the pattern for the chair, I do this with the skeleton of the chair.

Después que hago el patrón que resulto ser un triangulo lo fijo en cada esquina con un alfiler para que no se mueva, le hice otra ralla para dejar un centímetro de costura y lo recorte, deje a un lado y con la tiza de costura y la regla recorte 3 rectángulos del tamaño de cada lado del triangulo, los uní los tres y los pegue alrededor del triangulo.
After I make the pattern that turned out to be a triangle, I fix them in each corner with a pin so that it does not move, I made another scratch to leave a centimeter of seam and I cut it, put it aside and with the sewing chalk and the ruler cut 3 rectangles the size of each side of the triangle, I joined the three and glue them around the triangle.

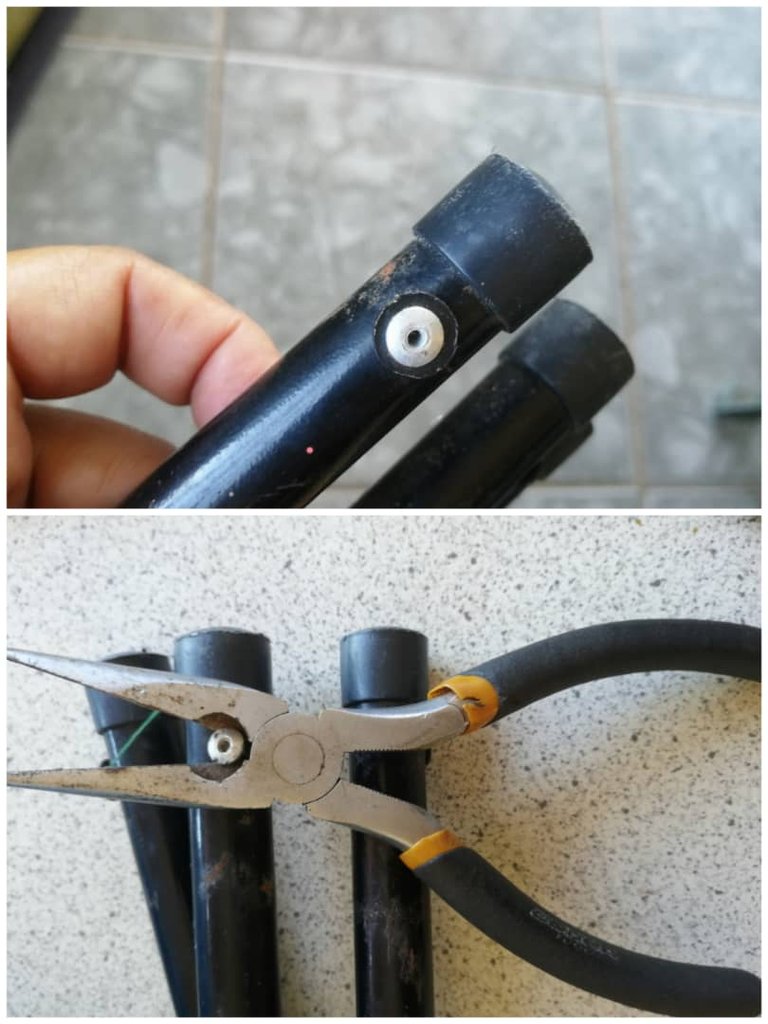
Luego con una pinza le quite los remaches a la silla.
Then with a pliers I removed the rivets from the chair.
Le quedo un poco grande en la parte de abajo pero nada que no tenga solución, le metí 2 dedos en cada esquina y quedo como yo quería.
Mi esposo hizo como unas arandelas con el plástico para los remaches y le abrió un hueco a la tela con una tijera para fijar la tela al tubo y listo quedo terminada.
It's a little big at the bottom but nothing that can't be solved, I put 2 fingers in each corner and it turned out the way I wanted. My husband made some washers with the plastic for the rivets and opened a hole in the fabric with scissors to fix the fabric to the tube and that's it, it was finished.

Anímense a darle una, segunda oportunidad a las cosas que se nos dañen, restauremos y saquemos provecho de lo que tenemos
Gracias por visitar mi blog, espero les guste mi trabajo de hoy.
Las fotos aquí utilizadas fueron tomadas por mi con mi celular huawei mate lite20 y use google traductor, edite en canva.
Be encouraged to give a second chance to things that are damaged, let's Let's restore and take advantage of what we have
Thank you for visiting my blog, I hope you like my work today. The photos used here were taken by me with my huawei mate lite20 cell phone and I used google translator, edited in canva.
