Practicing with Sweet Home 3D Making a House [ENG/ESP]
For this design, use version 4.5 on the Linux operating system, this program is also available on operating systems such as Windows, MacOs, Solaris, it can be downloaded at this address https://www.sweethome3d.com/es/download.jsp
Next, I will present each of the steps I used to create this design:
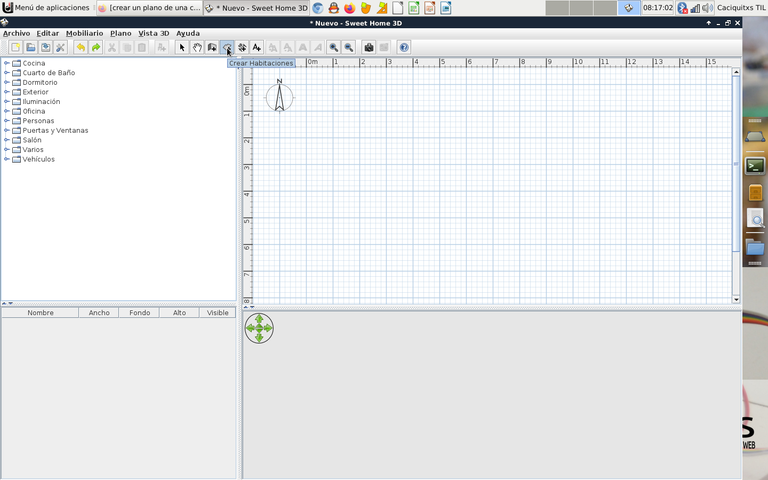
Step 1:
We open the Sweet Home 3D application, click on the create room icon to display the plan that our house will have.
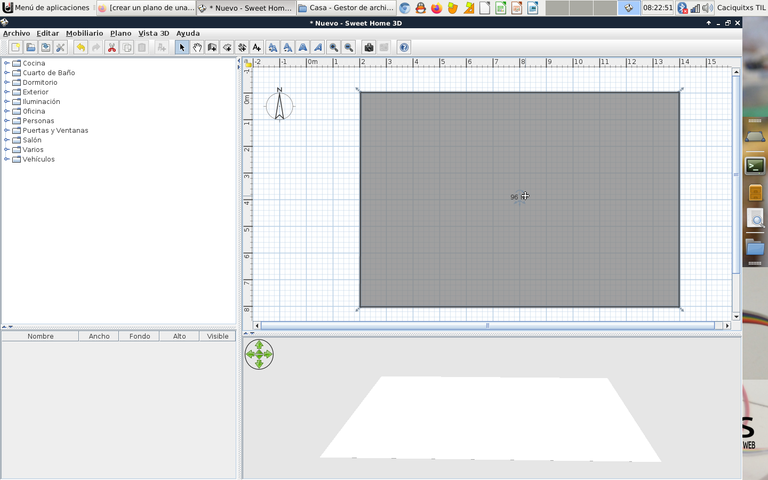
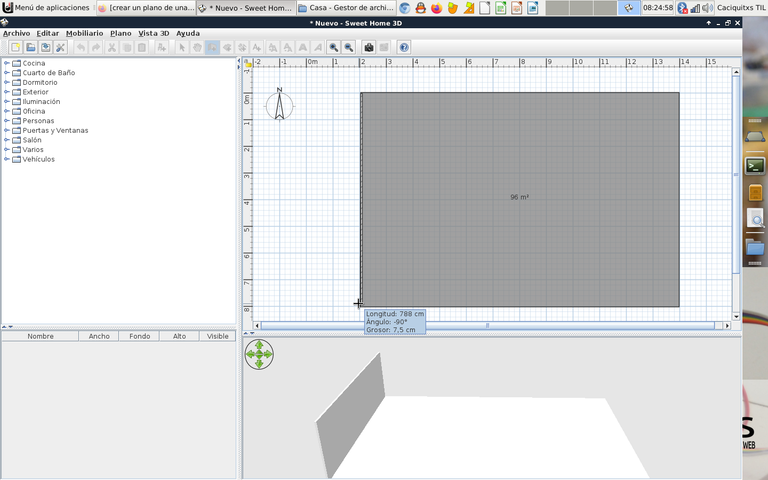
Step 2:
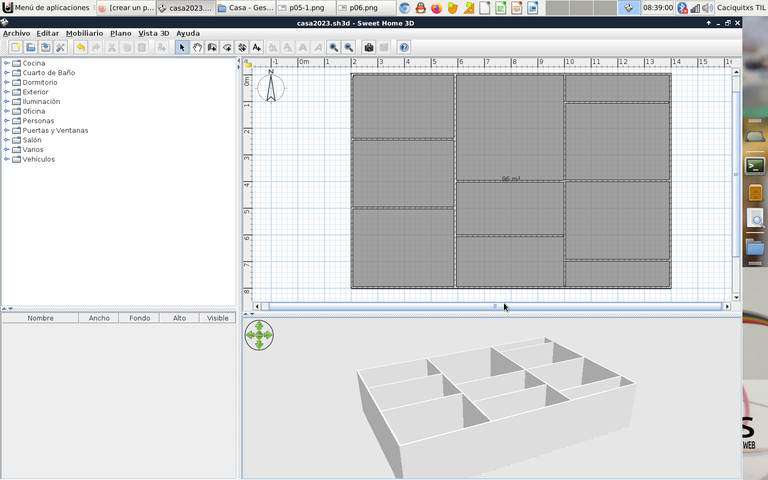
With a sustained click of the left mouse button, the plane that will have 96 m2 is displayed.
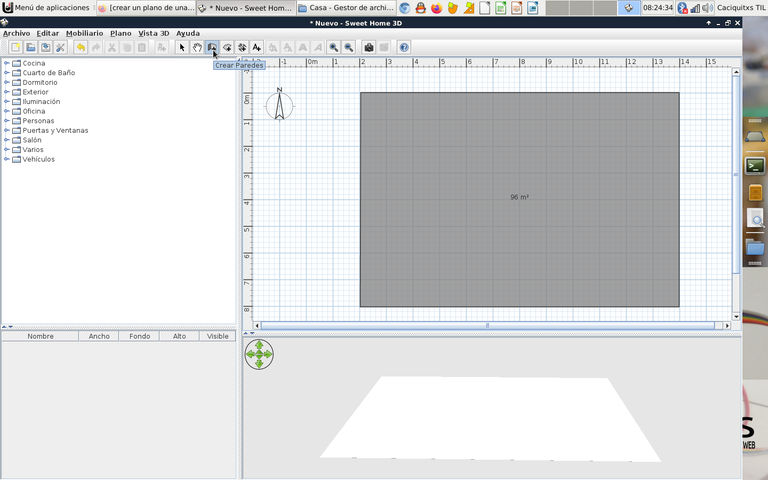
Step 3:
We proceed to click again on the icon to create walls and holding the left button, we trace the walls of the house.
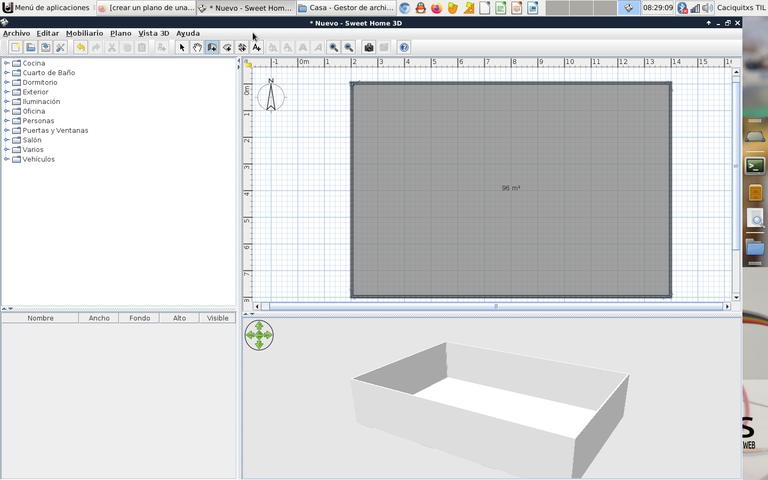
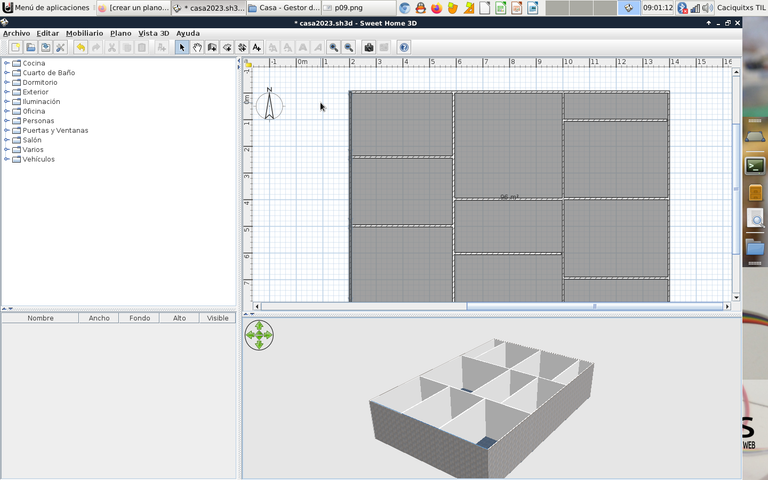
Step 4:
In this way we are drawing the three walls to complete the entire area of the house. In the lower part we can have a 3D view of how the structure of the house is looking, this can be moved to see from other angles.

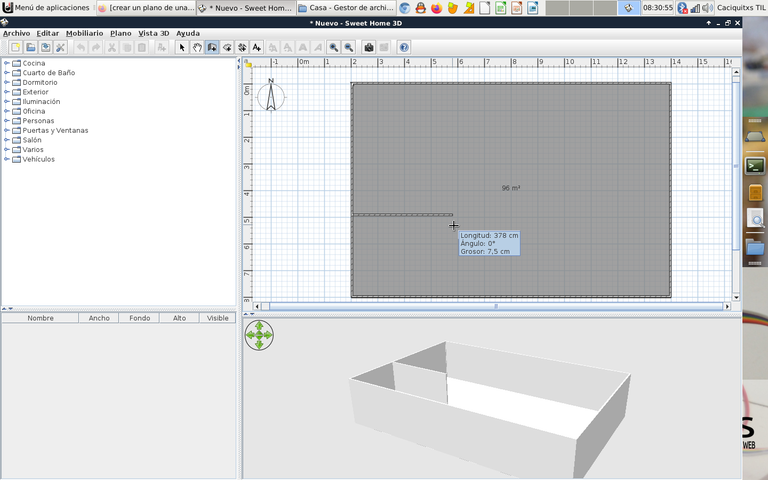
Step 5:
Now we proceed to create the interior walls to complete the first room.
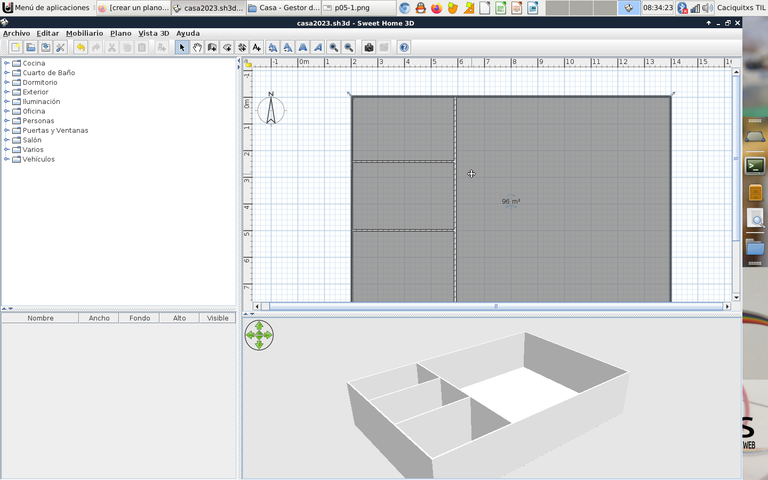
Step 6:
Next we draw two more rooms with the option of creating walls.
Step 7:
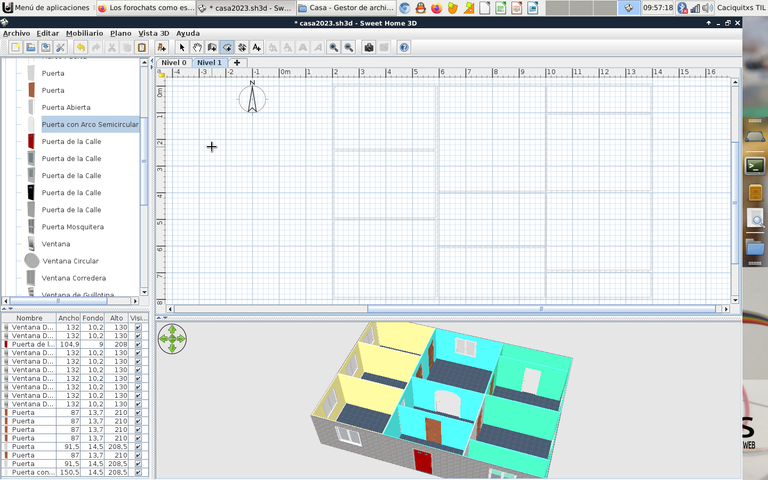
Then the layouts of the other walls are made to define the bedrooms, the living room, kitchen, bathroom, and the main entrance of the house.
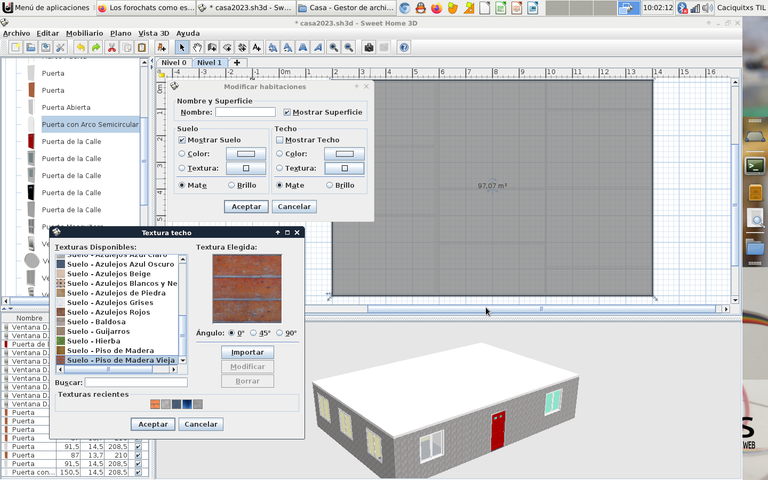
Step 8:
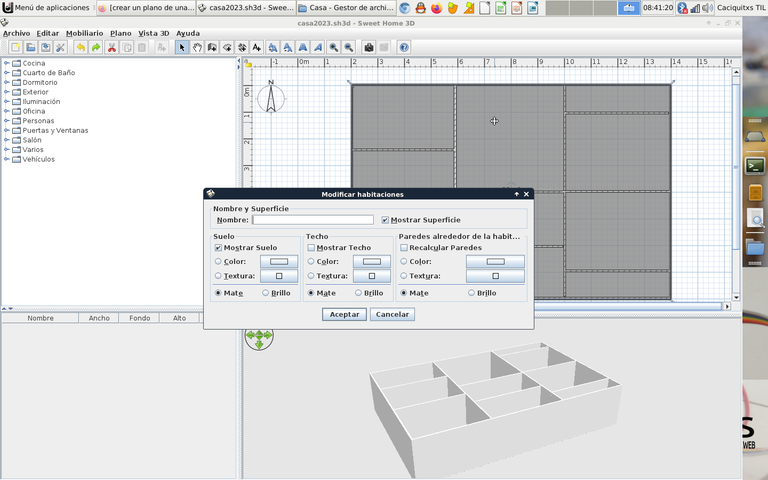
We proceed to configure the color that the floor of the house will have, for this we double click on it, an options box will be displayed where the texture of the floor will be.
Step 9:
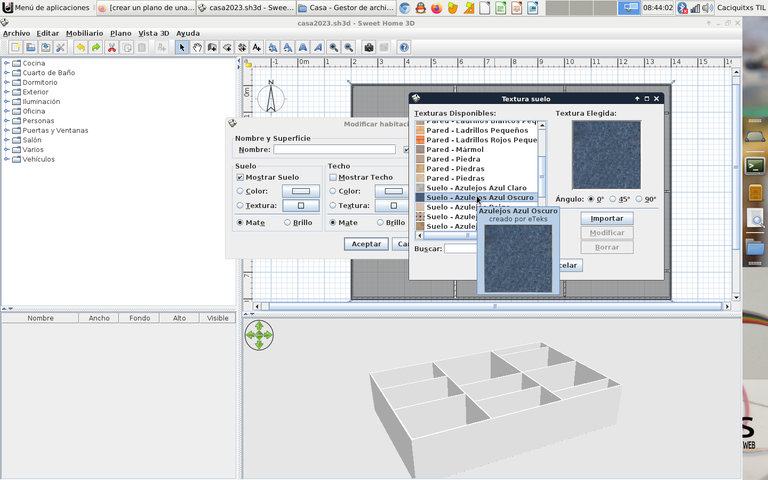
In texture we select the floor we want, in this case I chose the blue tile floor.
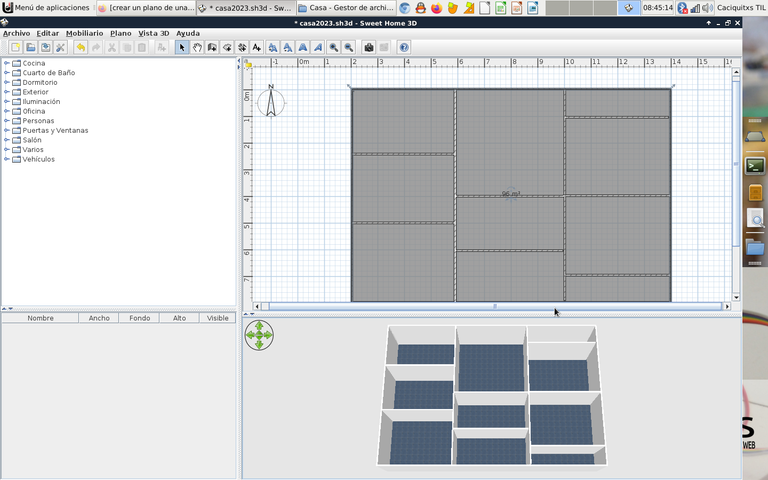
Staying this way.
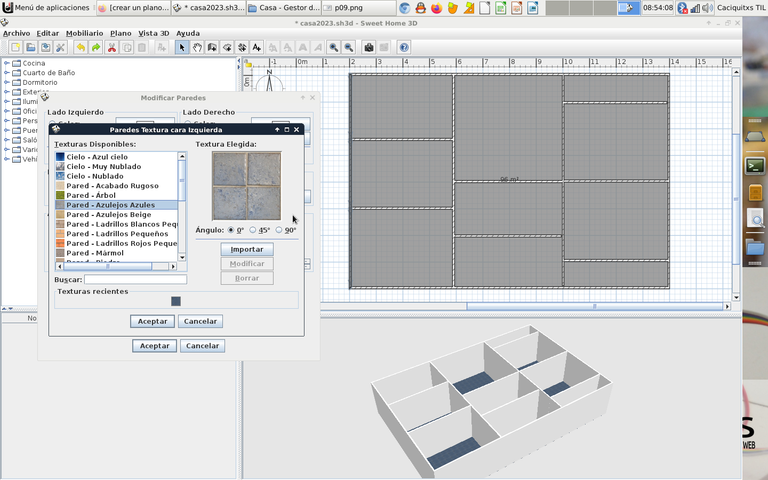
Step 10:
Now we begin to change the color or texture of each of the external walls of the house, we click on the wall, where the left and right sides are displayed, in this case we select the right side and there we choose the color or texture .
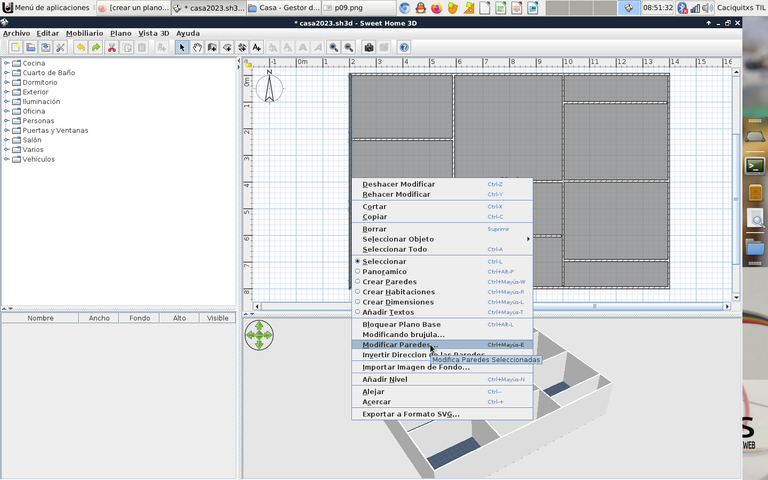
The Blue Wall texture is selected.
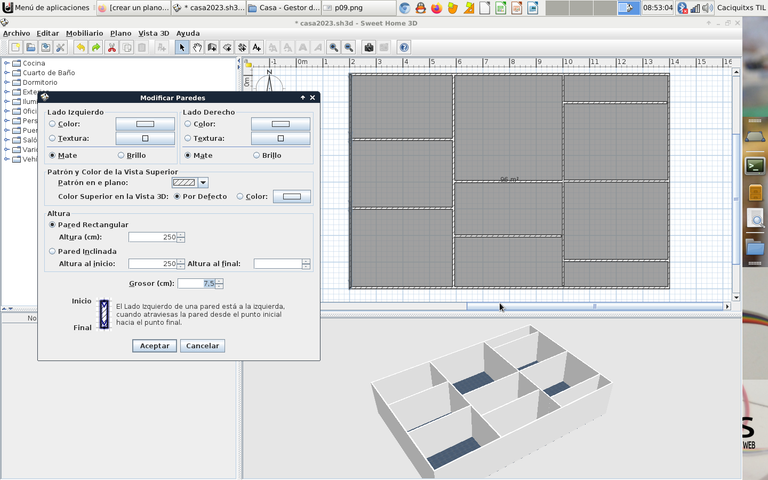
We apply this same texture to all the external walls of the house.
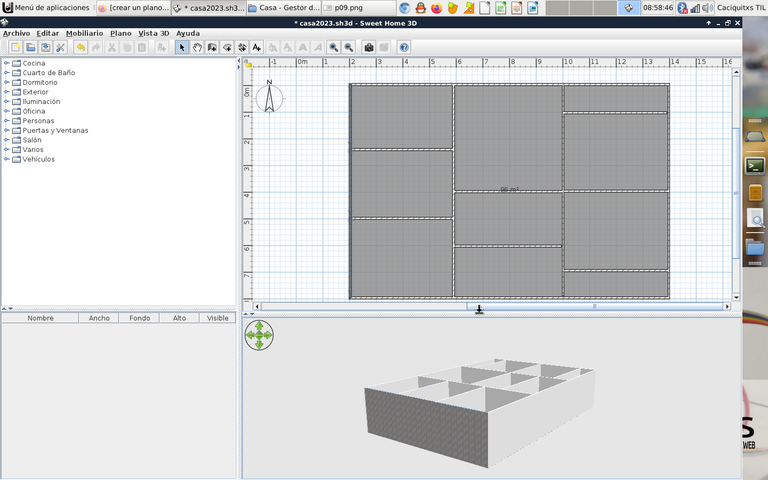
Step 11:
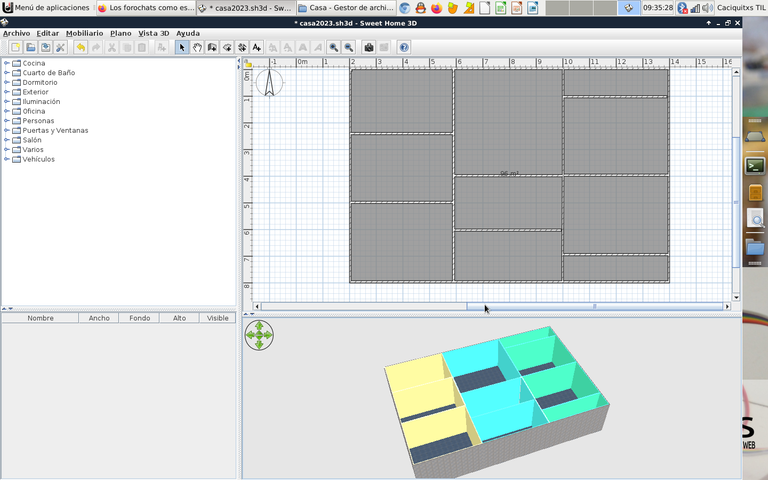
Once the external part of the walls is finished, we proceed is to select the colors of the walls inside, in the same option to modify the walls. There we can visualize both the colors and the texture, everything will depend on our tastes for the design.

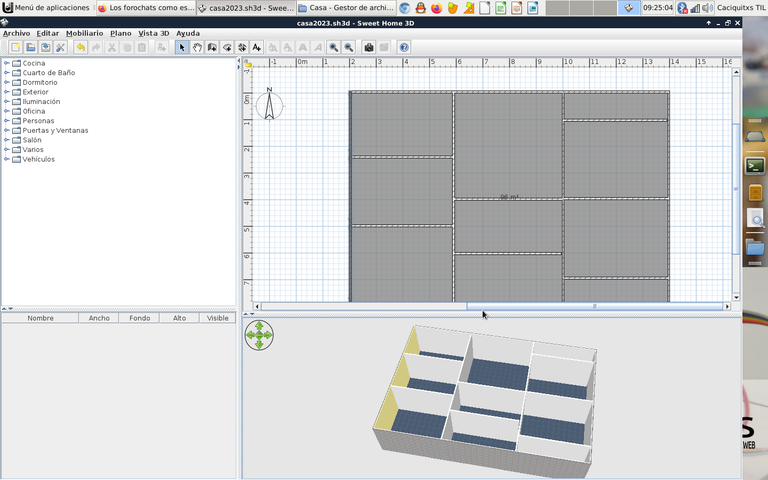
Step 12:
The colors are applied to the rest of the walls of the house.
Step 13:
We begin to place the windows of the house, on the left side we have a menu, we click on doors and windows to insert the windows of our choice.
With a sustained click we will move the window in the front part of the house, we release it and it will be fixed in this part, then we make the step for the other window on the other side.
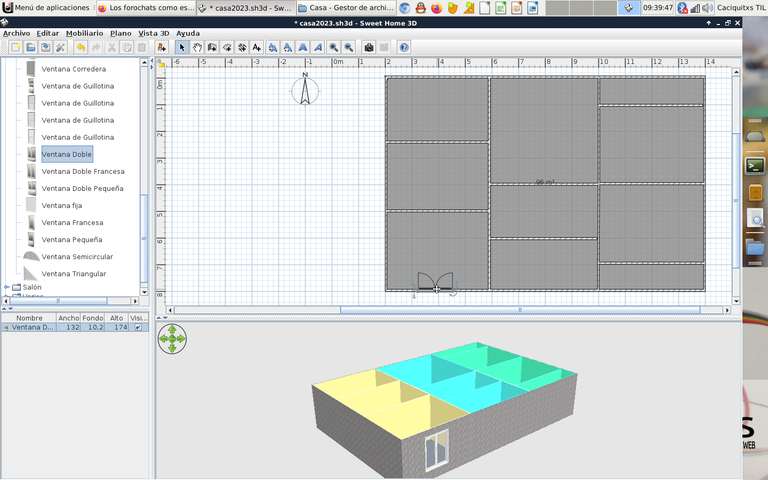
Step 14:
Once the two windows are finished, we insert the main door from the same options, choose the door with a sustained click and move it to that location.
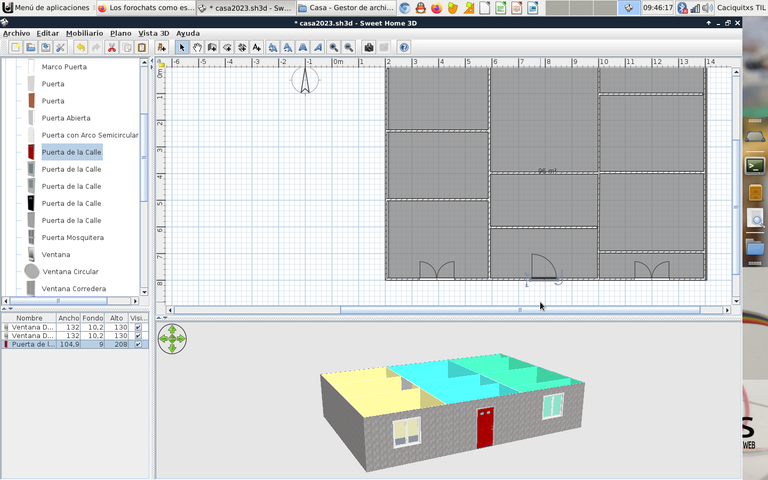
Step 15:
We proceed to place all the windows and doors in each of the rooms of the house, kitchen, bathrooms, living room and bedroom, with the same procedure applied previously.
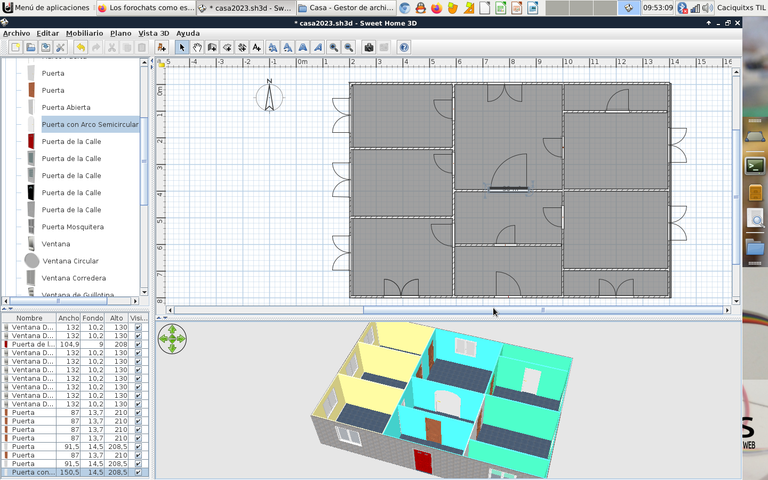
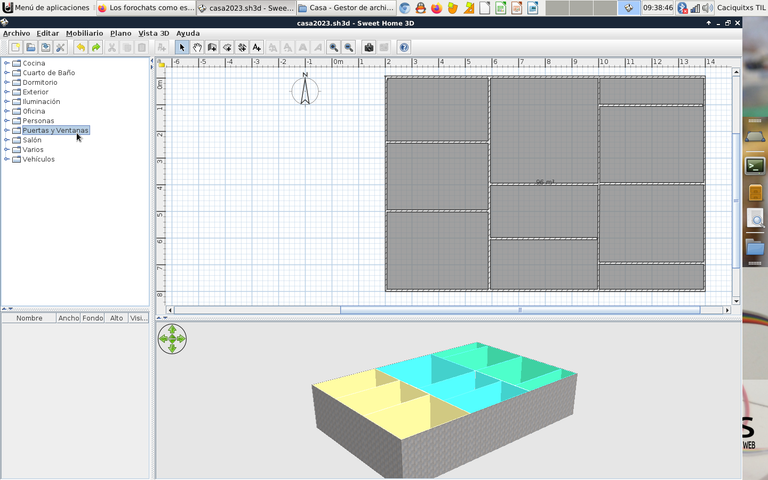
Step 16:
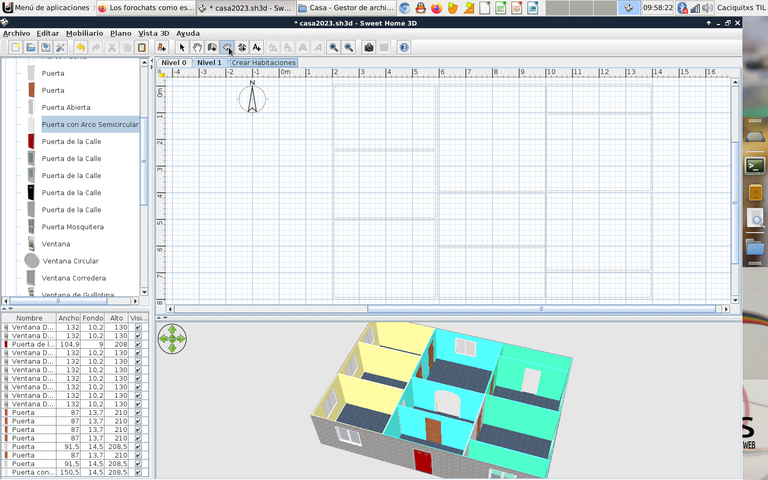
Once all this part of the windows and doors is finished, we would be missing the roof, for this we right-click on the floor, and click on add level.
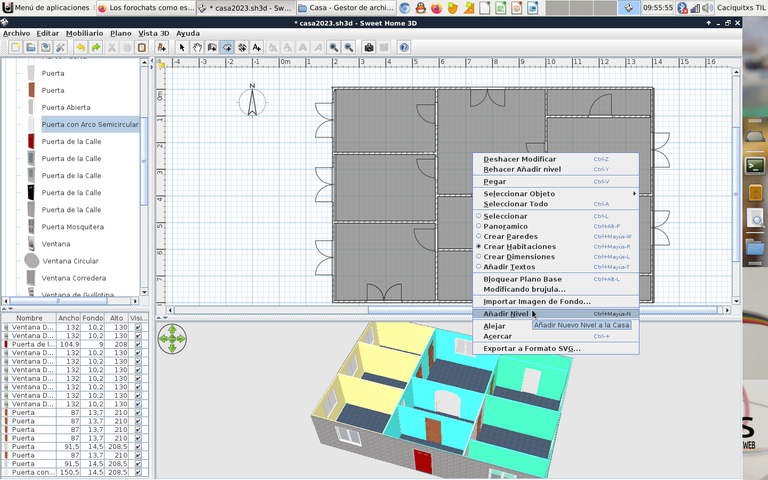
Here we can see level 0 and level 1.
Step 17:
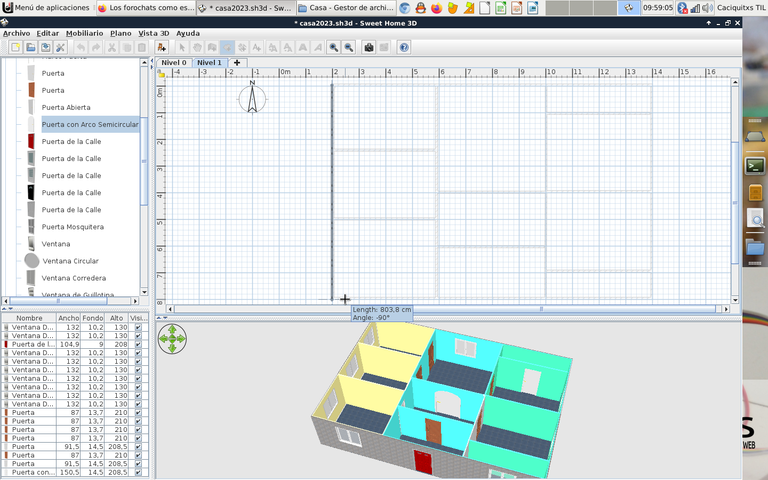
To insert the roof, we click on create rooms again and with a sustained click we trace the entire roof area of the house.
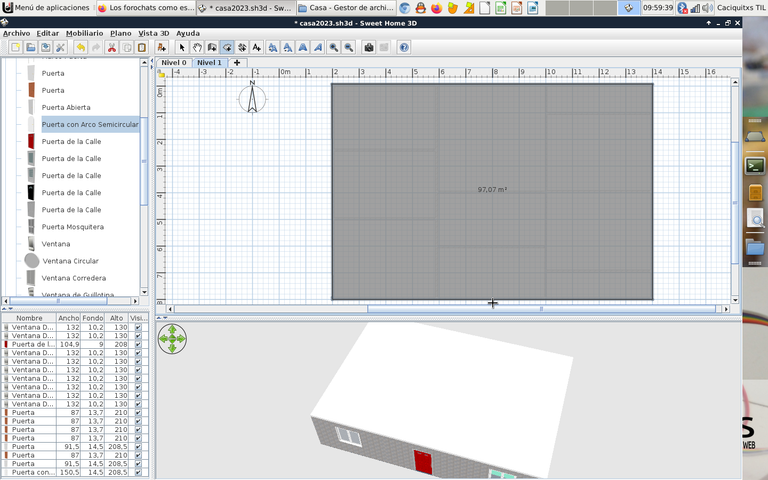

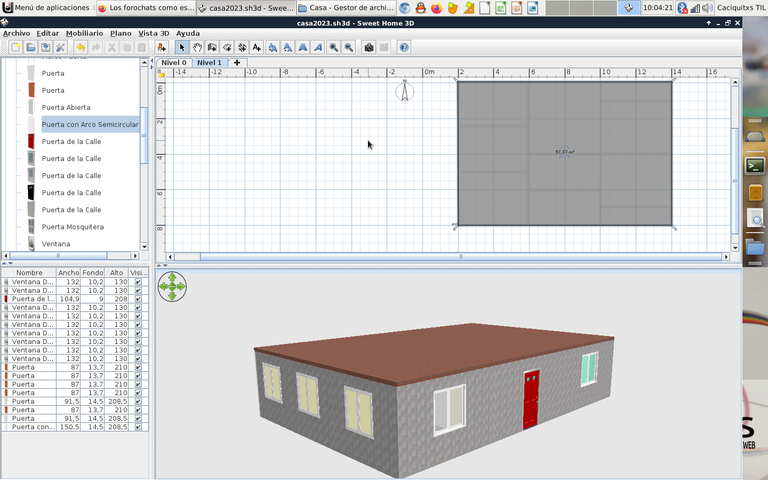
Step 18:
Finally, the color of the roof texture is changed, and this will be the final result of our house.
I hope you liked this practice that I did with the Sweet Home 3D program, if you want to know more here is a link https://www.sweethome3d.com
Spanish
Para este diseño utilice la versión 4.5 en el sistema operativo Linux, este programa también está disponible en sistemas operativos como Windows, MacOs, Solaris, se puede descargar en esta dirección https://www.sweethome3d.com/es/download.jsp
A continuación les voy a presentar cada uno de los pasos que utilice para elaborar este diseño:
Paso 1:
Abrimos la aplicación Sweet Home 3D, hacemos clic en el icono de crear habitación para desplegar el plano que tendrá nuestra casa.
Paso 2:
Con clic sostenido del botón izquierdo del ratón se despliega el plano que tendrá 96 m2.
Paso 3:
Procedemos a dar clic nuevamente al icono de crear paredes y sosteniendo el botón izquierdo, vamos trazando las paredes de la casa.
Paso 4:
De esta forma estamos trazando las tres paredes para completar todo el área de la casa. En la parte inferior podemos tener una vista 3D de como va quedando la estructura de la casa, esto se puede ir moviendo para ver desde otros ángulos.
Paso 5:
Ahora procedemos a crear las paredes de adentro para completar la primera habitación.
Paso 6:
Seguidamente trazamos dos habitaciones más con la opción de crear paredes.
Paso 7:
Luego se hacen los trazados de las demás paredes para definir los dormitorios, la sala, cocina, baño, y la entrada principal de la casa.
Paso 8:
Procedemos a configurar el color que tendrá el piso de la casa, para esto damos doble clic en este, desplegándose un cuadro de opciones donde estará la textura del suelo.
Paso 9:
En textura seleccionamos el suelo que deseamos, en este caso escogí el suelo azulejo azul.
Quedando de esta forma.
Paso 10:
Ahora comenzamos a cambiar el color o textura de cada una de las paredes externas de la casa, hacemos clic encima de la pared, donde se visualiza lado izquierdo y lado derecho, en este caso seleccionamos el lado derecho y allí escogemos el color o la textura.
Se selecciona la textura Pared azul.
Colocamos esta misma textura a todas las paredes externas de la casa.
Paso 11:
Una vez terminada la parte externa de las paredes, procedemos es seleccionar los colores de las paredes de adentro, en la misma opción de modificar las paredes. Allí podemos visualizar tanto los colores como la textura, todo va depender de nuestros gustos para el diseño.
Paso 12:
Se aplica los colores en resto de las paredes de la casa.
Paso 13:
Comenzamos a colocar las ventanas de la casa, del lado izquierdo tenemos un menú , le damos clic en puertas y ventanas para ir insertando las ventanas de nuestra preferencia.
Con clic sostenido vamos desplazamos la ventana en la parte del frente de la casa, lo soltamos y esta quedará fijada en esta parte, luego hacemos el paso para la otra ventana del otro lado.
Paso 14:
Una vez finalizada las dos ventanas, insertamos la puerta principal desde la misma opciones escogemos la puerta con clic sostenido y la desplazamos en esa ubicación.
Paso 15:
Procedemos a colocar todas las ventanas y puertas en cada una de las habitaciones de la casa, cocina, baños, sala y cuarto, con el mismo procedimiento aplicado anteriormente.
Paso 16:
Una vez terminado toda esta parte de las ventanas y puertas, nos faltaría el techo, para esto presionamos clic derecho sobre el piso, y le damos clic en añadir nivel.
Aquí podremos ver el nivel 0 y nivel 1.
Paso 17:
Para insertar el techo, le damos clic en crear habitaciones nuevamente y con clic sostenidos trazamos toda el área del techo de la casa.
Paso 18:
Para finalizar se cambia el color de la textura del techo, y este va ser el resultado final de nuestra casa.
Espero que les haya gustado, esta práctica que realicé con el programa Sweet Home 3D, si deseas saber más aquí te dejo un enlace https://www.sweethome3d.com

https://twitter.com/491703210/status/1632772632637497344
https://twitter.com/144659833/status/1633059232151896064
The rewards earned on this comment will go directly to the people( @cetb2008, @lisbethseijas ) sharing the post on Twitter as long as they are registered with @poshtoken. Sign up at https://hiveposh.com.
This is one of the programs I would love to learn when I get my computer back. I find it very useful for design creations. Nice work
Hello that vyquevte liked , thank you for commenting on my blog.
Congratulations @cetb2008! We are delighted to inform you that your outstanding publication was specially selected to be part of our Curated Content Catalog and was awarded RUNNER-UP in Architecture Anthology™ 19. More power!
Thank you for subscribing to Architecture+Design, an OCD incubated community on the Hive Blockchain.
Greetings friends, thank you very much for the mention, grateful for your support
You are most welcome dear @cetb2008. Cheers! 😀