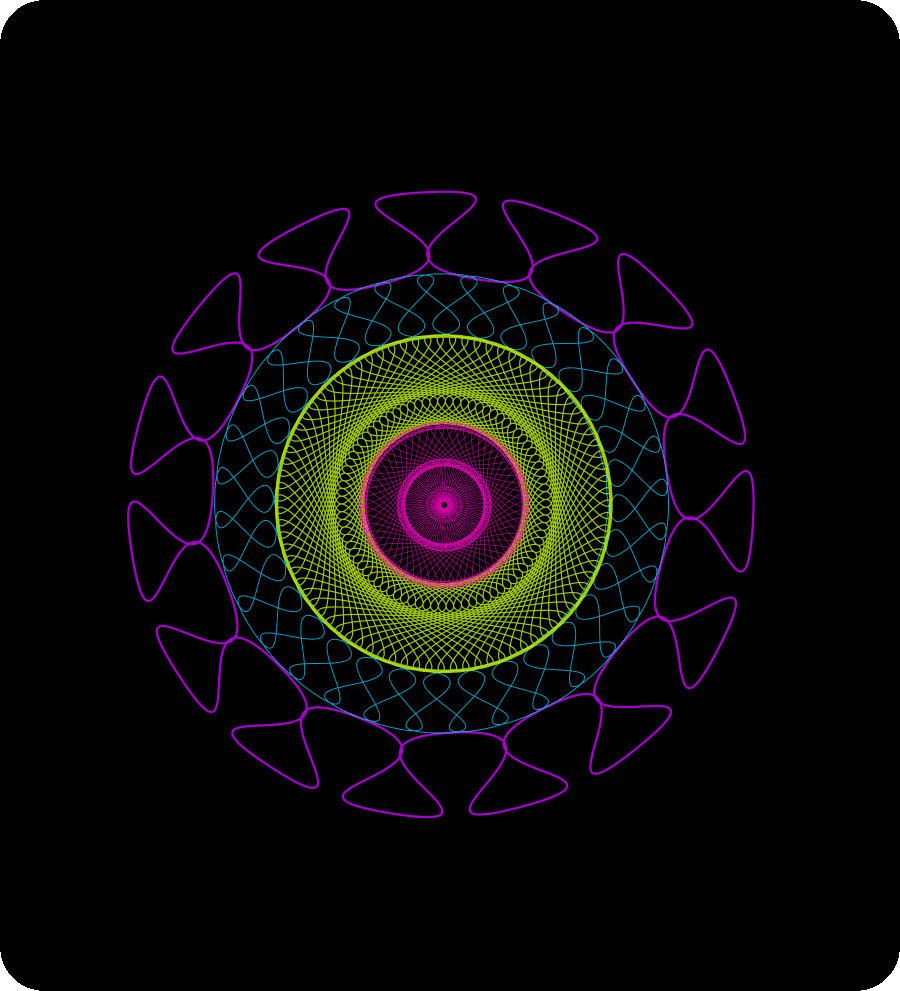
Drawing my Mandala - Qurator's Art Walk! | Mandala | Art competition
Greetings Hive friends, today I am participating in the @qurator contest, whose theme is Mandala, this design was made in the Inkscape program and the animation in the Gimp program.
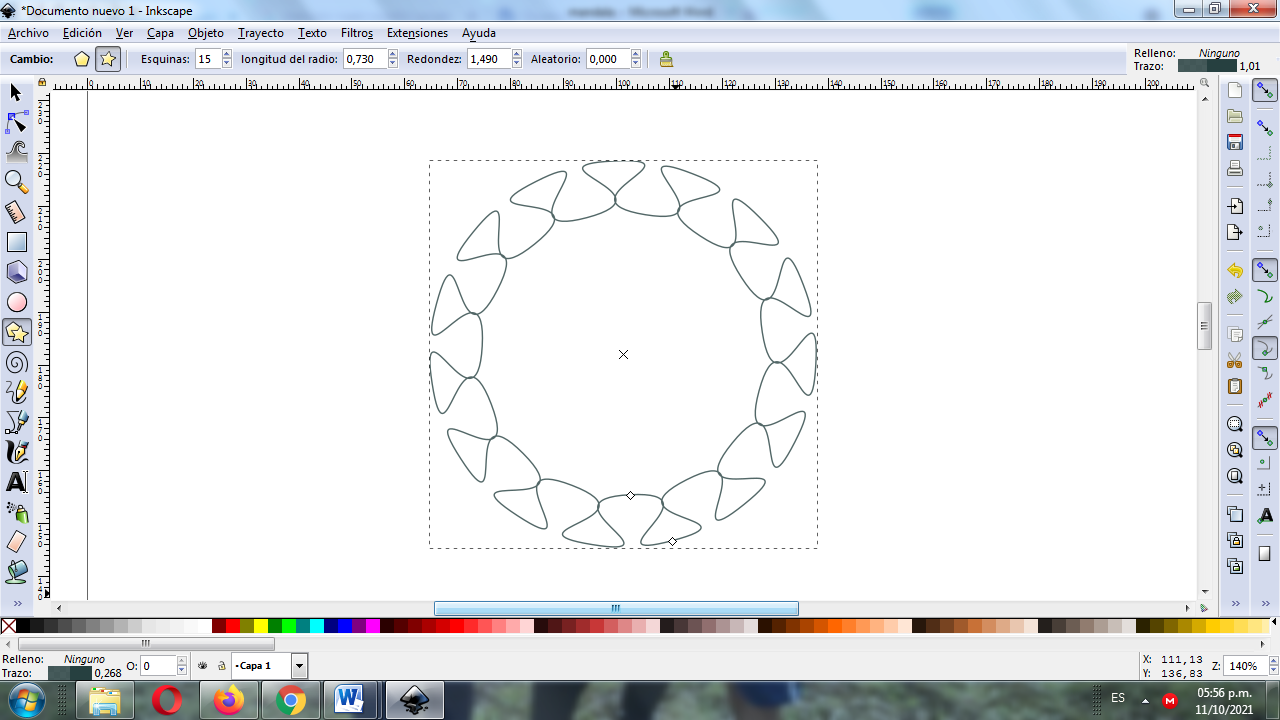
Paso 1/Step 1:
Abrimos el programa Inkscape, se inserta la figura tipo estrella en la opción crea estrella barra de herramientas, configurándola con 15 esquinas, 0,730 longitud de radio, con una redondez de 1490.
We open the Inkscape program, the star shape is inserted in the option create star toolbar, configuring it with 15 corners, 0.730 radius length, with a roundness of 1490.
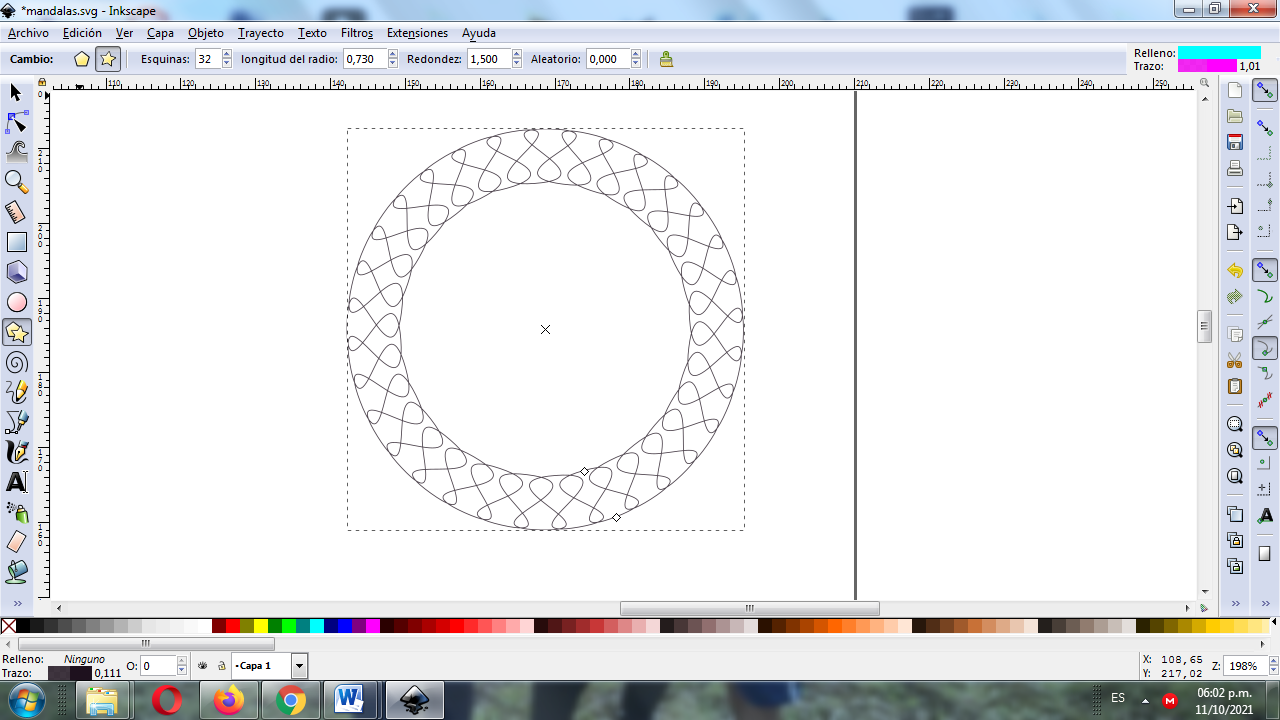
Paso 2/Step 2:
Insertamos otra igual, pero aumentamos el número de esquinas a 32, manteniendo la misma longitud de radio, y la redondez a 1500.
We insert another equal, but we increase the number of corners to 32, keeping the same radius length, and the roundness to 1500.
Paso 3 /Step 3:
La desplazamos al centro y nos va quedando de esta forma.
We move it to the center and it stays that way.

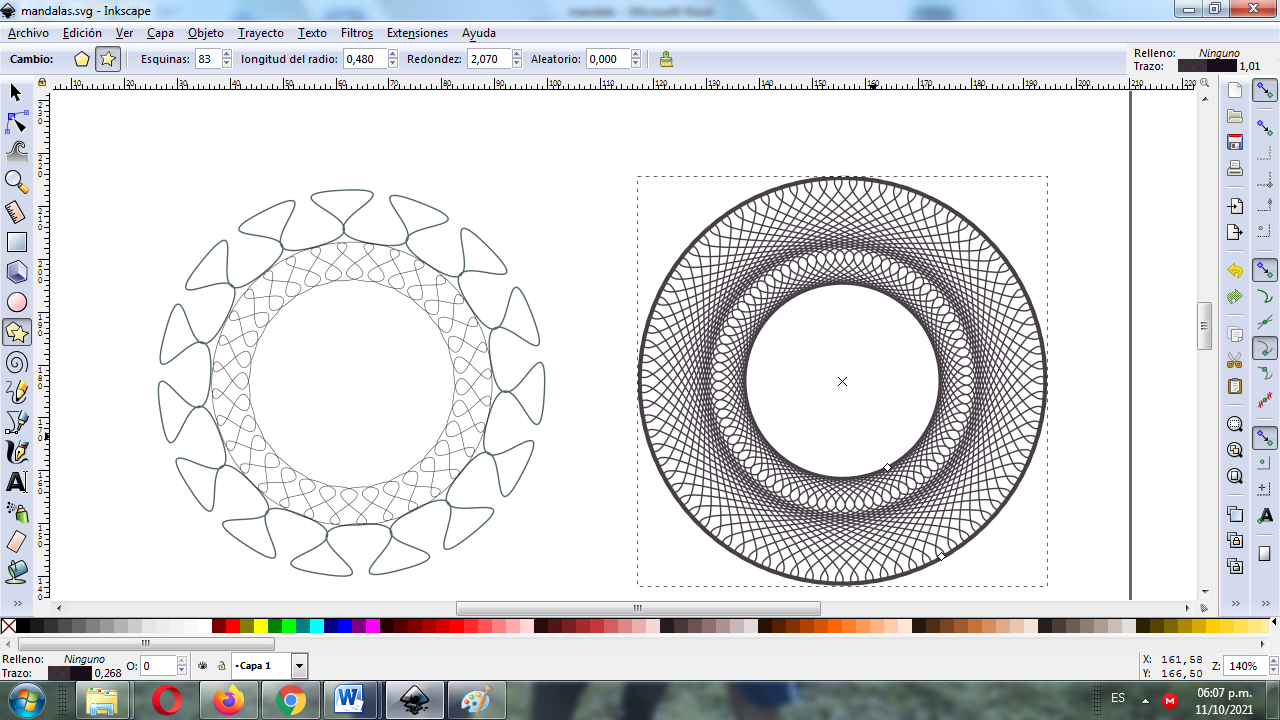
Paso 4 /Step 4:
Continuamos insertando otra figura de 83 esquinas, 0,480 longitud de radio y redondez 2,07, este sería el resultado.
We continue inserting another figure of 83 corners, 0.480 radius length and 2.07 roundness, this would be the result.
Paso 5 /Step 5:
La figura anterior se reduce y la desplazamos al centro.
The previous figure is reduced and we move it to the center.

Paso 6 /Step 6:
Duplicamos la figura del centro y cambiamos las esquinas en 59, longitud de radio 0,04 y redondez en 2,07
We duplicate the center figure and change the corners to 59, radius length 0.04 and roundness to 2.07
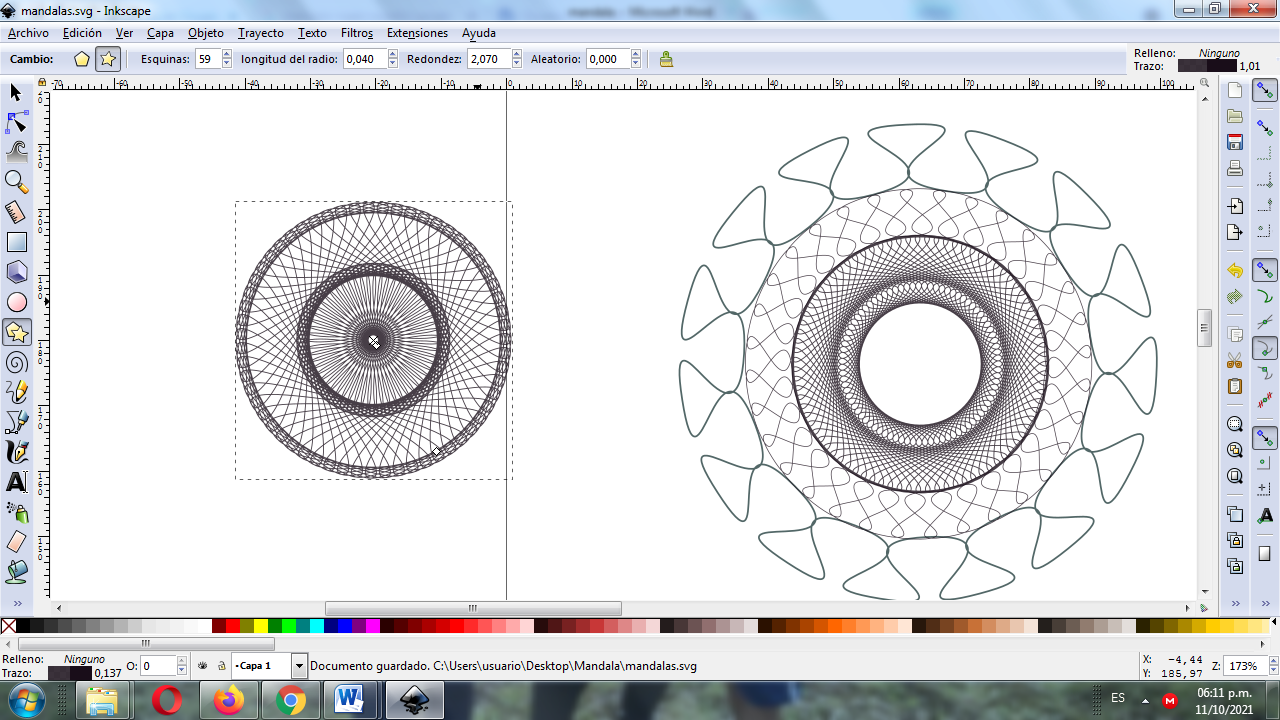
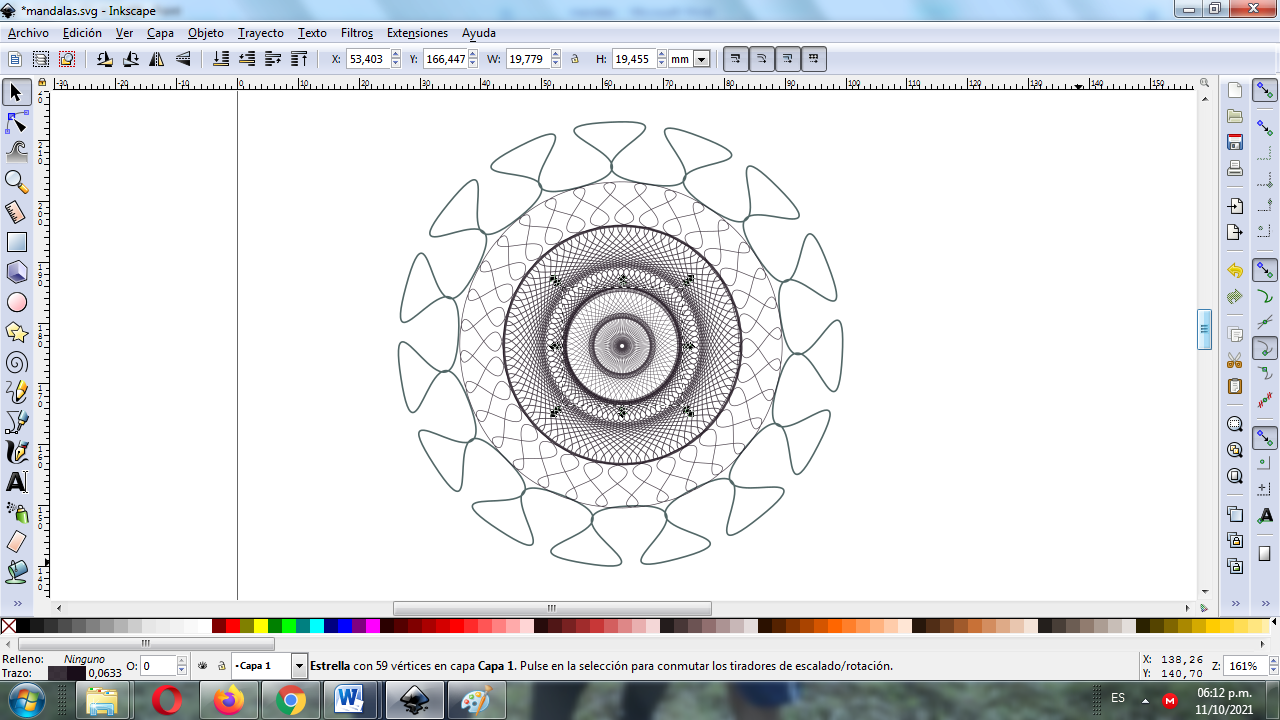
Paso 7 / Step 7:
Se desplaza la figura anterior al centro y nos va quedando de esta forma.
The previous figure is moved to the center and we are left in this way.
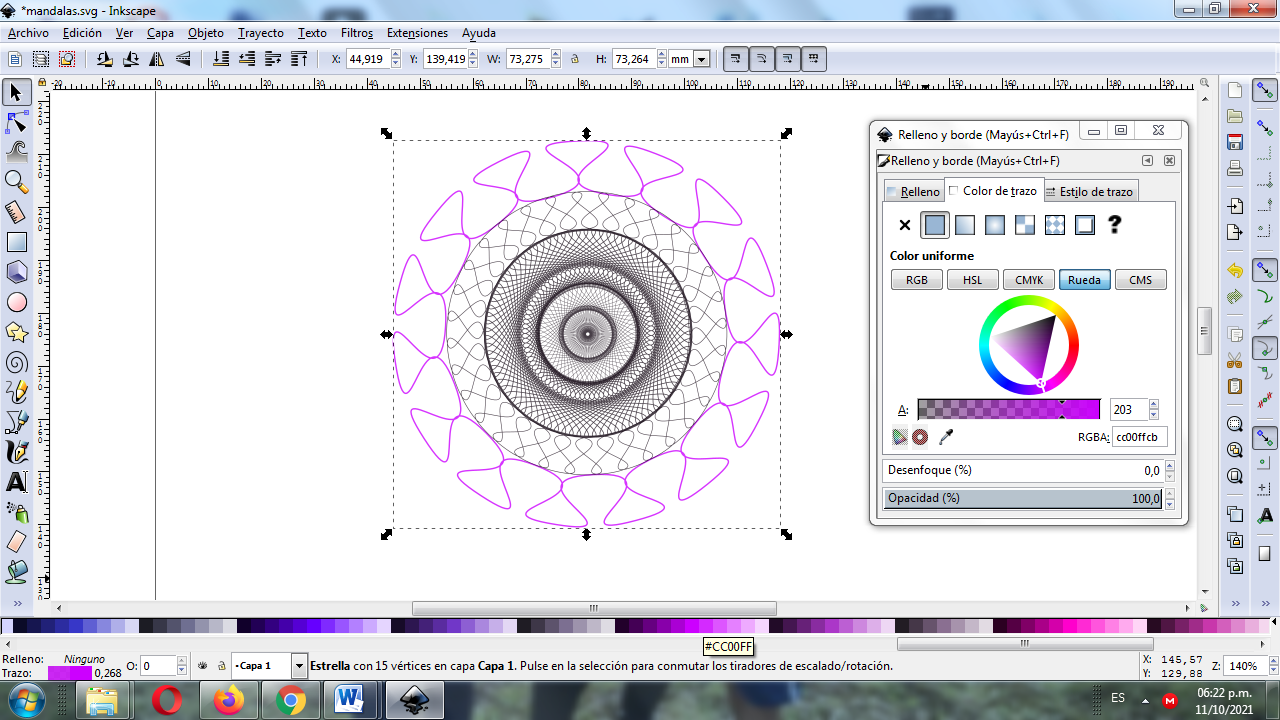
Paso 8 / Step 8:
Ahora procedemos a darle color a cada uno de los bordes de la figura y este va ser el resultado final al crear una animación con diferentes colores.
Now we proceed to color each of the edges of the figure and this will be the final result when creating an animation with different colors
Paso 9 / Step 8:
Se inserta un fondo color negro para apreciar mejor los efectos de los colores de la mandala
A black background is inserted to better appreciate the effects of the colors of the mandala
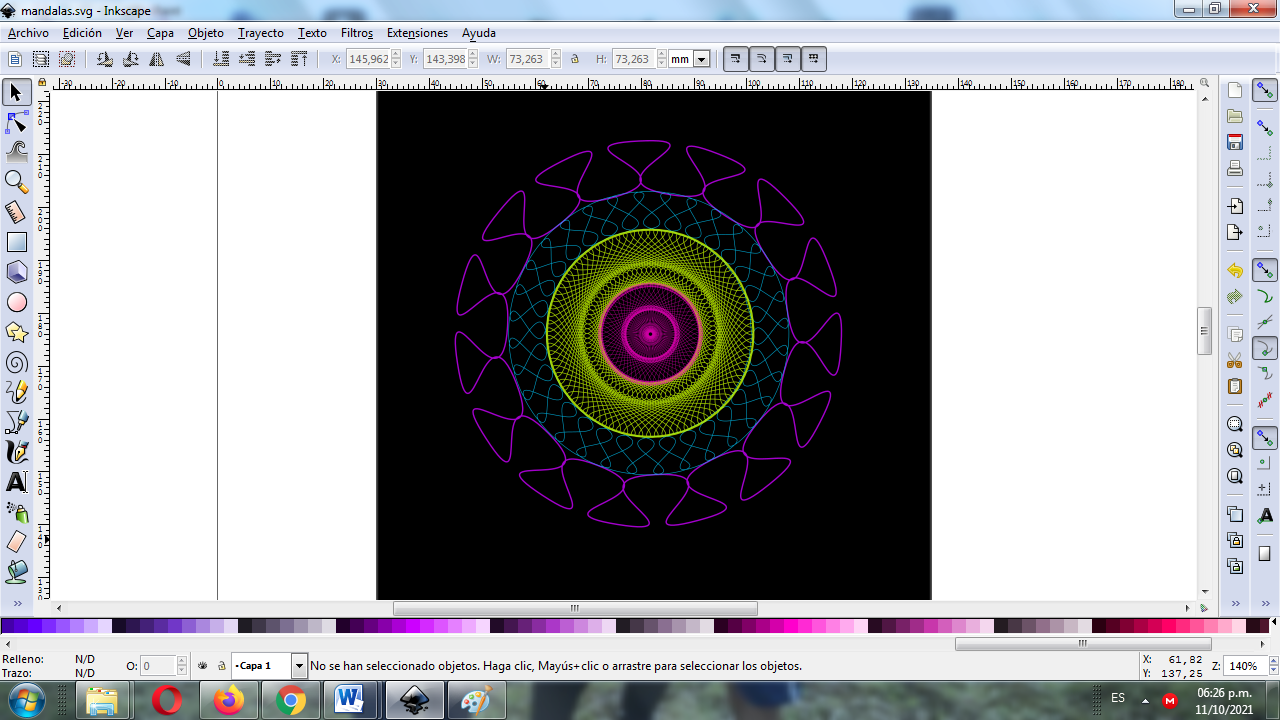
Paso 9 / Step 8:
Se cambian los colores de cada unos de los bordes y hacemos la animación en el programa Gimp
The colors of each of the edges are changed and we make the animation in the Gimp program
Si deseas participar estas son las bases del concurso:
If you want to participate, these are the bases of the contest

https://twitter.com/cbit_roxana_mdh/status/1447744504874864640
The rewards earned on this comment will go directly to the person sharing the post on Twitter as long as they are registered with @poshtoken. Sign up at https://hiveposh.com.
Saludos amigo @sancho.panza del Proyecto @cervantes muchas gracias por valorar mi publicación.
Love the blinky changing lights!
Reminds me of Christmas💡💡💡
Hello friend, that's good, thank you very much