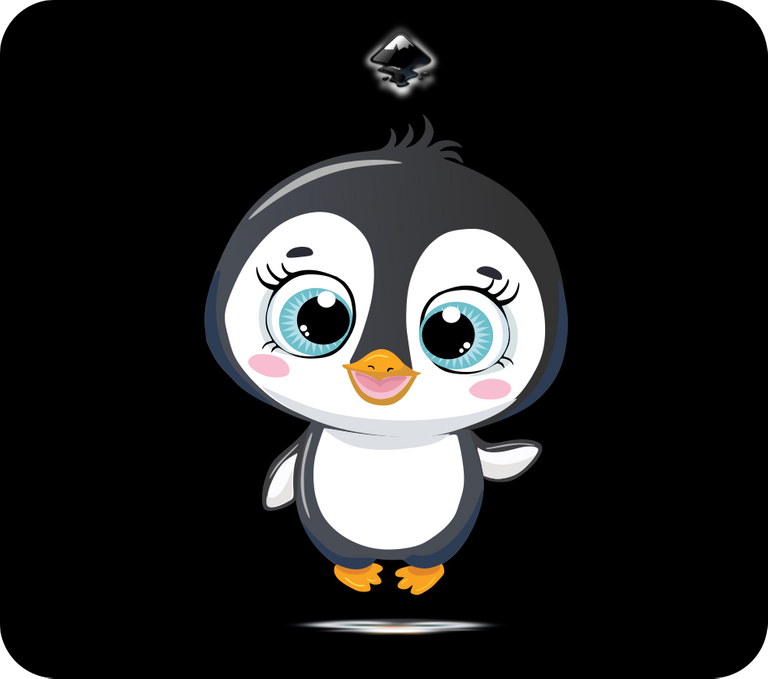
Diseño de un Pinguinito Kawaii en Inkscape [ESP/ENG]
Diseño de un Pinguinito Kawaii en Inkscape:
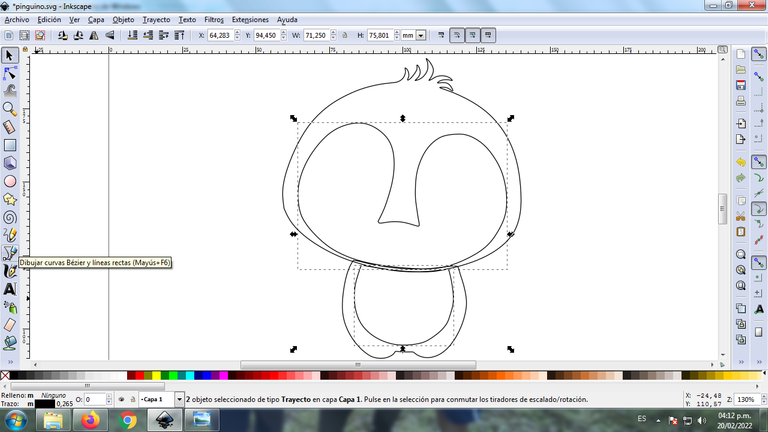
Paso 1:
Abrimos el programa Inkscape, y desde la barra de herramienta que está en el lado izquierdo presionamos clic en la opción de dibujar curvas Bézier y trazamos una figura ovalada y otra en la parte de abajo, que van a serán la cabeza y el cuerpo del pinguinito.

En esta parte de curvas Bézier se selecciona la opción de Crear Trayecto Modo Trayecto BSpline, para que las forma queden de forma curvas.
Paso 2:
Luego se traza esta figura en el centro de la cabeza donde estarán los ojos y la nariz del pingüino, también continuamos dibujando en la parte de abajo del cuerpo, utilizando la misma herramienta.
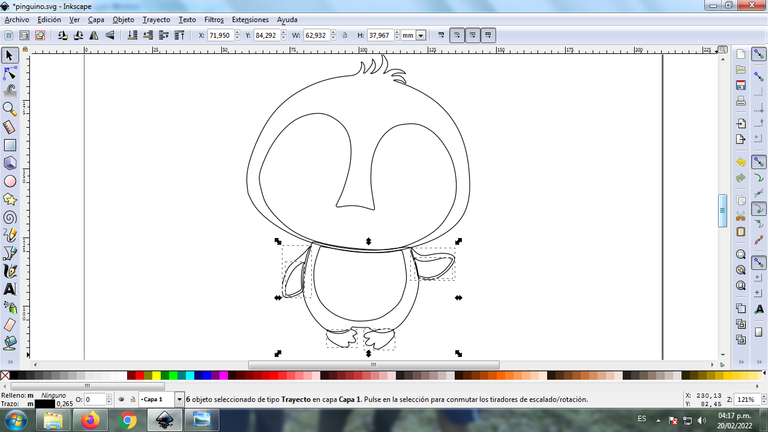
Paso 3:
Continuamos dibujando las patas en la parte inferior y las dos manos del pingüino, con la herramienta de curvas Bézier.
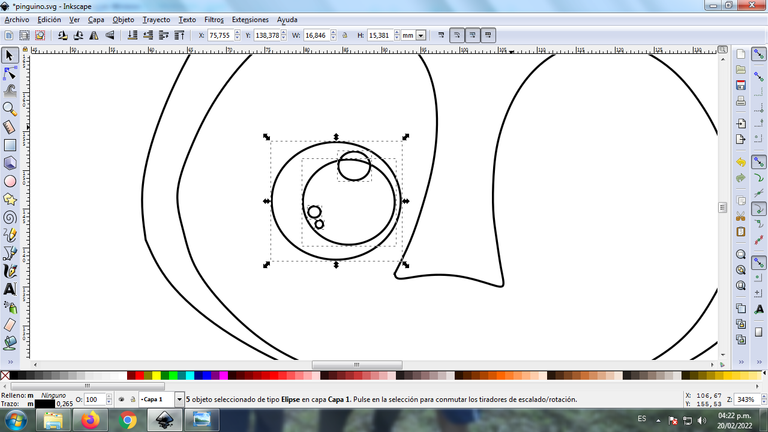
Paso 4:
Comenzamos a dibujar el ojo del pingüinito, para esto se dibujan cinco círculos de diferentes tamaños, con la opción de crear círculos de la barra de herramientas.
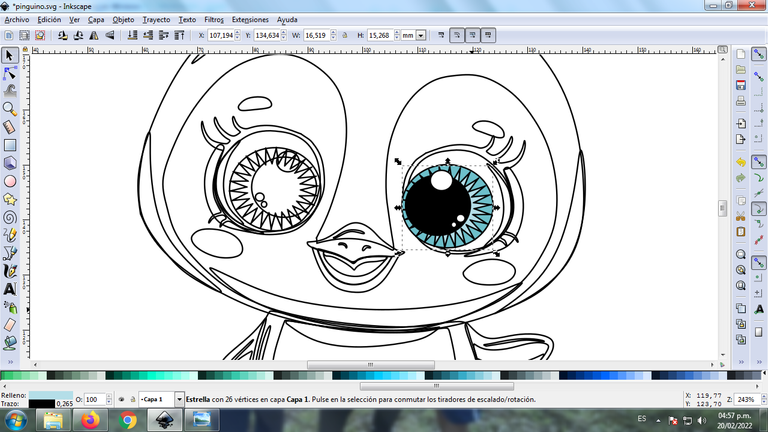
Paso 5:
En esta parte de ojo, tiene como características una figura tipo estrella en el fondo, para crearla le damos clic en la opción crear estrellas y polígonos con 20 esquinas, longitud de radio 0,590 y redondez 0,030.
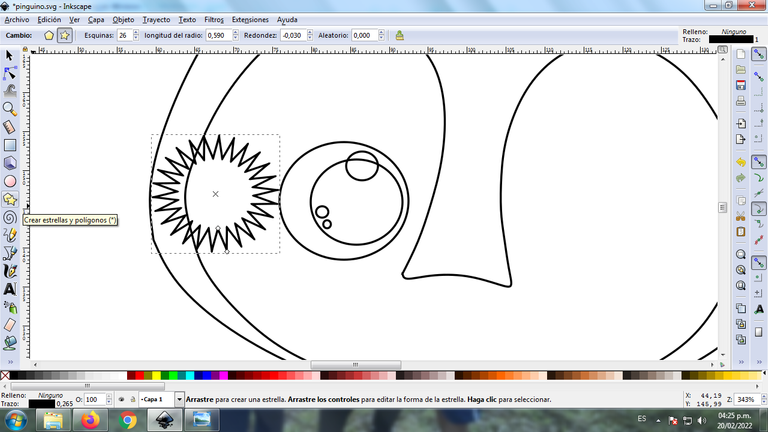
Paso 6:
Se desplaza la figura tipo estrella en la siguiente posición y después se trazan las pestañas con las herramientas de curvas Bézier, y dos figuras de medialuna en la siguiente posición.
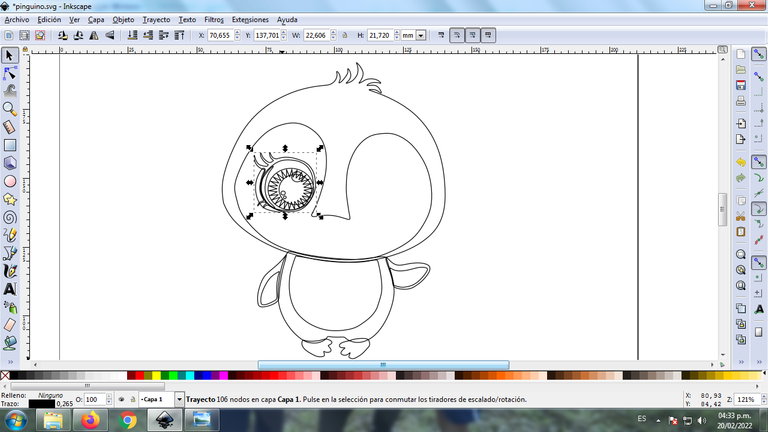
Paso 7:
Se selecciona todo la figura del ojo, lo duplicamos con la combinación de teclas Ctrl + D y esta figura duplicada la colocamos en el lado derecho, después cambiamos la posición de los círculos y de la otra figura. Se trazan también con la herramienta de curvas Bézier la boca, la nariz y dos figuras ovaladas en ambos lados de la cara del pingüino.
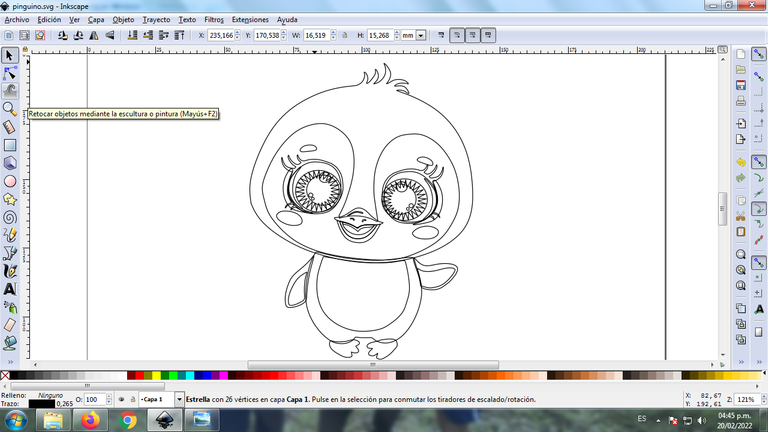
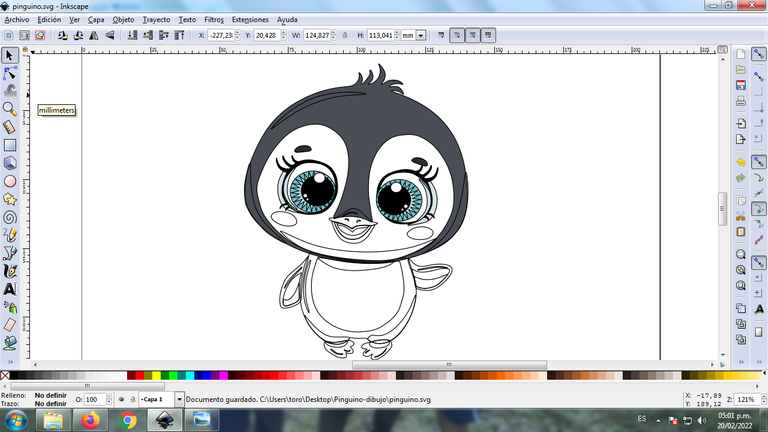
Paso 8:
Se trazan diferentes formas en la cabeza y el cuerpo, para darle un mejor efecto al diseño del pingüino
Paso 9
Se selecciona el color comenzando por los ojos del pingüino, para esto hacemos clic en la figura y luego el color de la paleta de colores, que está en la parte inferior del programa.
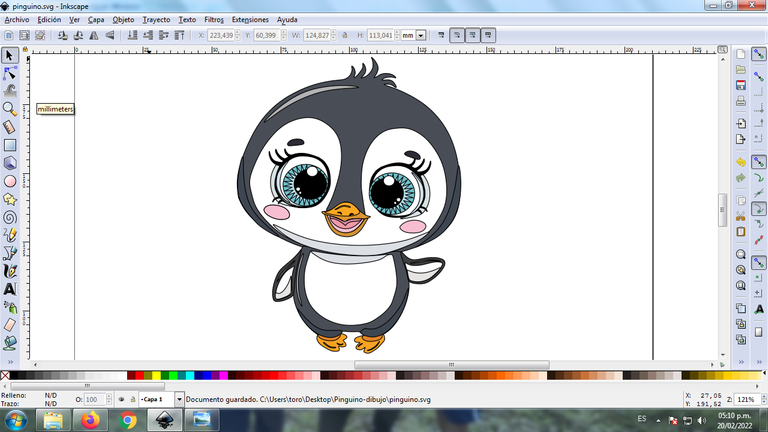
Paso 10:
Continuamos aplicando el color en el ojo izquierdo y en la cabeza, seleccionando un color gris.
Paso 11:
Se aplica el color en el resto del cuerpo y terminamos de pintar el pingüinito.
Paso 12:
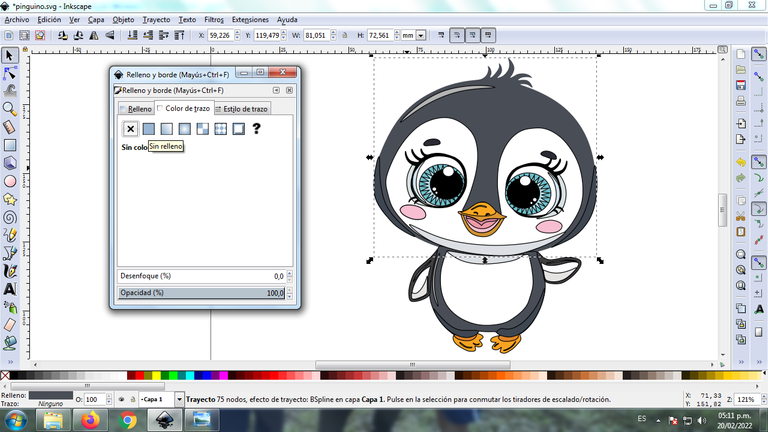
Se eliminan los bordes de cada una de las figuras del pingüino, para esto se seleccionamos la cabeza y luego nos vamos a la barra de menú Objeto – Rellenos y Bordes.
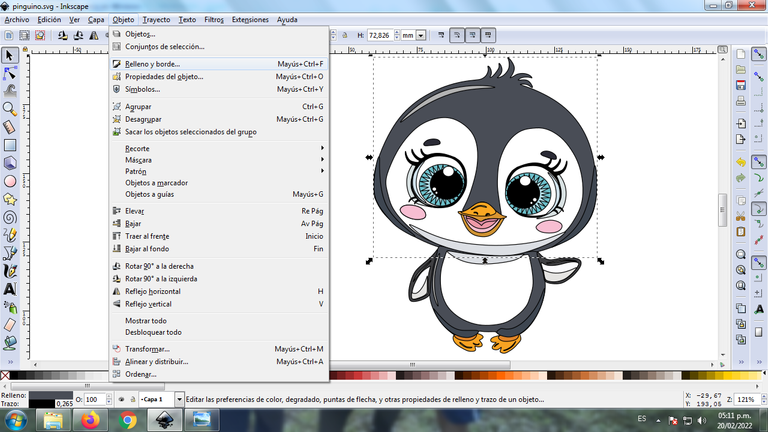
Se visualizará un recuadro, donde vamos a cliquear en la pestaña color de trazo y luego para poder borrar el borde le damos clic en la X para eliminarlo.
Paso 13:
Se aplica el procedimiento del paso 12 para borrar cada uno de los bordes de la figura.
Paso 14:
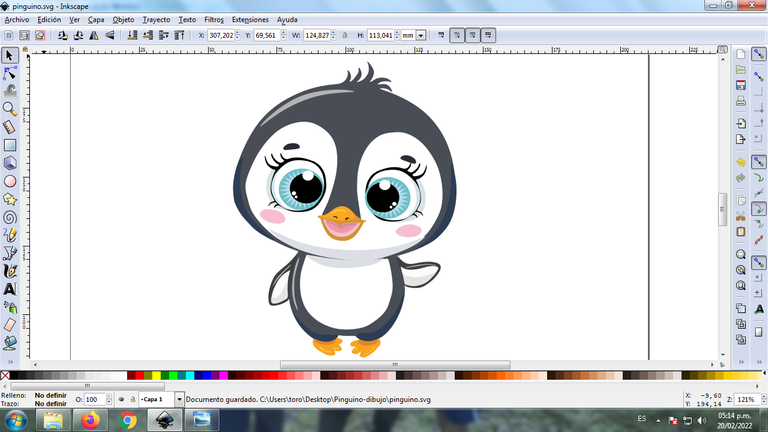
Se inserta un fondo color negro, luego se agrupa toda la figura del ciervo, lo duplicamos con la combinación de teclas Control + G, se reduce el tamaño, se coloca en la parte inferior del pingüino y se aplica un desenfoque de 10%, quedando como una sombra.
Imagen de Referencia Fuente
Espero que les haya gustado mi tutorial, nos vemos en el próximo.
English
Design of a Kawaii Little Penguin in Inkscape:
Step 1:
We open the Inkscape program, and from the toolbar that is on the left side we click on the option to draw Bézier curves and draw an oval figure and another at the bottom, which will be the head and body of the little penguin .
In this part of Bézier curves, the Create Path BSpline Path Mode option is selected, so that the shapes are curved.
Step 2:
Then this figure is traced in the center of the head where the eyes and nose of the penguin will be, we also continue drawing in the lower part of the body, using the same tool.
Step 3:
We continue drawing the legs at the bottom and the two hands of the penguin, with the Bézier curves tool.
Step 4:
We begin to draw the eye of the little penguin, for this five circles of different sizes are drawn, with the option to create circles from the toolbar.
Step 5:
In this part of the eye, it has as characteristics a star-like figure in the background, to create it we click on the option to create stars and polygons with 20 corners, radius length 0.590 and roundness 0.030.
Step 6:
Move the star shape to the next position and then trace the tabs with the Bézier curve tools, and two crescent shapes to the next position.
Step 7:
The entire figure of the eye is selected, we duplicate it with the key combination Ctrl + D and we place this duplicated figure on the right side, then we change the position of the circles and of the other figure. The mouth, nose and two oval figures on both sides of the penguin's face are also traced with the Bézier curves tool.
Step 8:
Different shapes are traced on the head and body, to give a better effect to the penguin design
Step 9
The color is selected starting with the penguin's eyes, for this we click on the figure and then the color from the color palette, which is at the bottom of the program.
Step 10:
We continue to apply the color on the left eye and on the head, selecting a gray color.
Step 11:
The color is applied to the rest of the body and we finish painting the little penguin.
Step 12:
The borders of each one of the figures of the penguin are eliminated, for this we select the head and then we go to the menu bar Object – Fills and Borders.
A box will be displayed, where we are going to click on the stroke color tab and then, in order to erase the border, we click on the X to eliminate it.
Step 13:
The procedure of step 12 is applied to erase each of the edges of the figure.
Step 14:
A black background is inserted, then the entire figure of the deer is grouped, we duplicate it with the Control + G key combination, the size is reduced, it is placed in the lower part of the penguin and a 10% blur is applied, leaving like a shadow
Reference Image Source
I hope you liked my tutorial, see you in the next one.
Translated with Traductor de Google

https://twitter.com/cbit_roxana_mdh/status/1495725865497501698
The rewards earned on this comment will go directly to the person sharing the post on Twitter as long as they are registered with @poshtoken. Sign up at https://hiveposh.com.
Genial dibujo amigo, y transmite la ternura de este estilo que tanto les gusta a los mas pequeños.
Que hermosura.💕 No había visto tu trabajo, Soy nueva por estos lares. Espero seguir apreciando mas de lo que haces. Felicidades.💙
Hola @dayadam muchas gracias por pasar por mi blog.
Realmente hermoso y los ojitos ni se diga 🥺🥺 me encantó el pingüinito.
Hola @mayi04 que bueno que te gusto, muchas gracias por pasar por mi blog.
Aww que hermoso te quedó el pingüinito! sobre todo los ojos, creo que es lo que mas detalle lleva. Que bien manejas esta herramienta. 👍
Hola amiga @mballesteros muchas gracias, agradecido por tu visita en mi blog.