Cómo crear una Casa de Tres Piso en Sweet Home 3D con su Mobiliario [ESP/ENG]
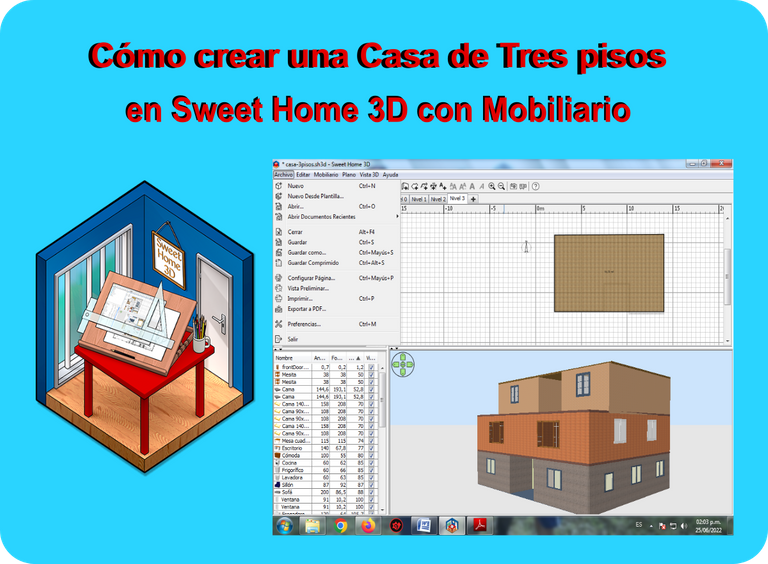
Cómo crear una Casa de Tres Piso en Sweet Home 3D con su Mobiliario:
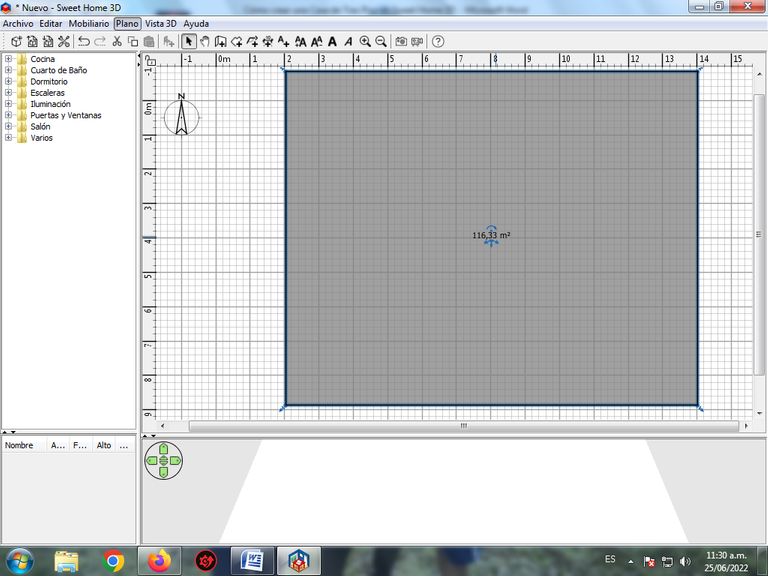
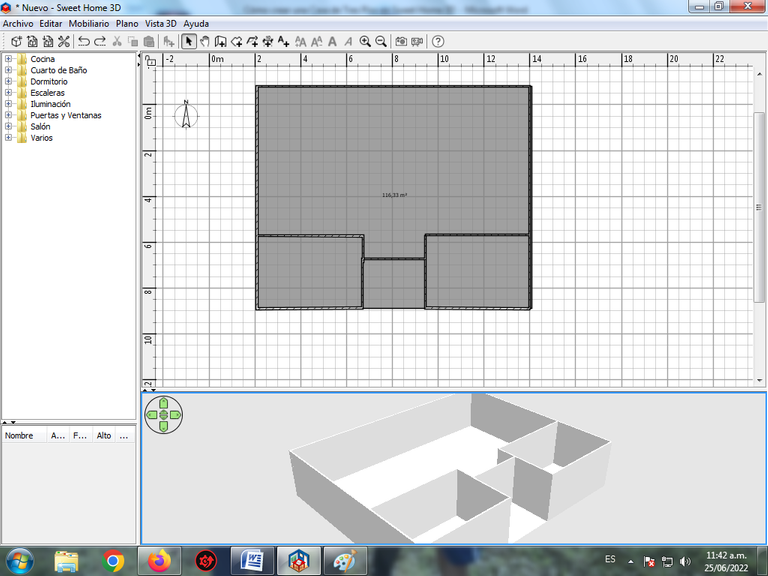
Paso 1:
Abrimos el programa Sweet Home 3D, se traza el plano que tendrá la construcción de nuestra casa de 116,33 metros cuadrados. .
Paso 2:
Comenzamos a crear las paredes que va tener la casa, desde la barra de menú Plano, crear Paredes.
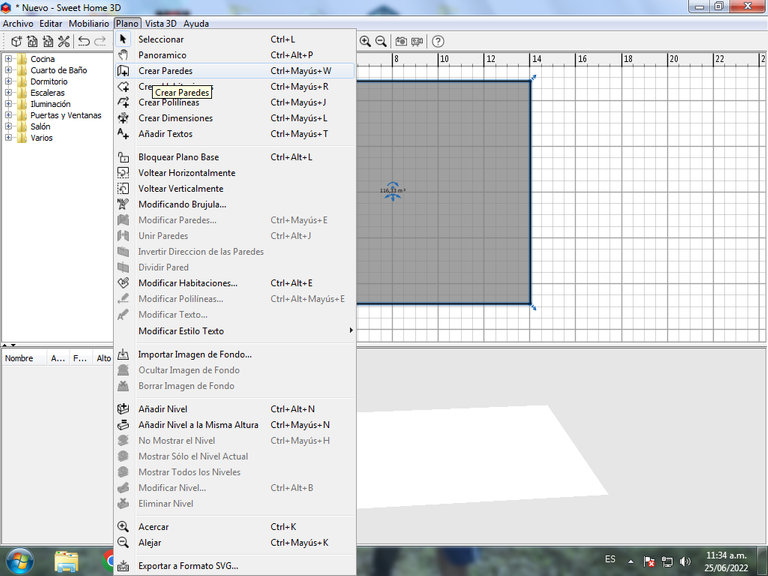
Aquí ya tenemos lista las paredes de la casa.
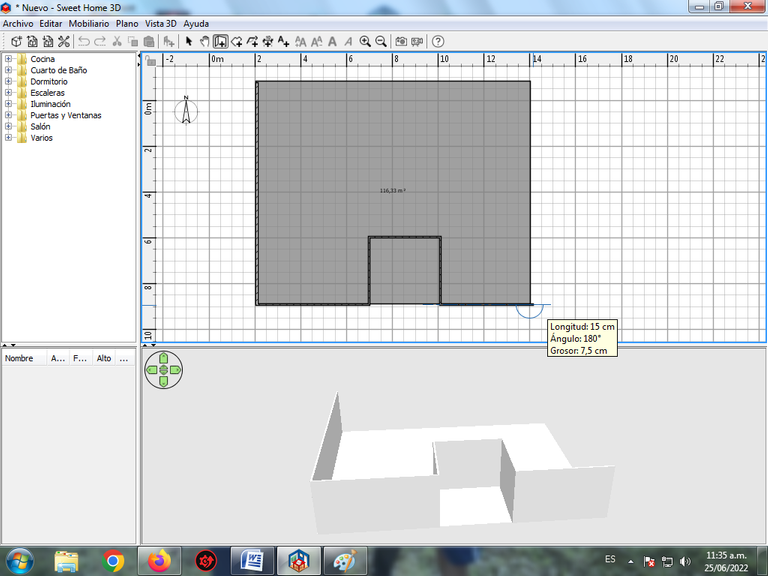
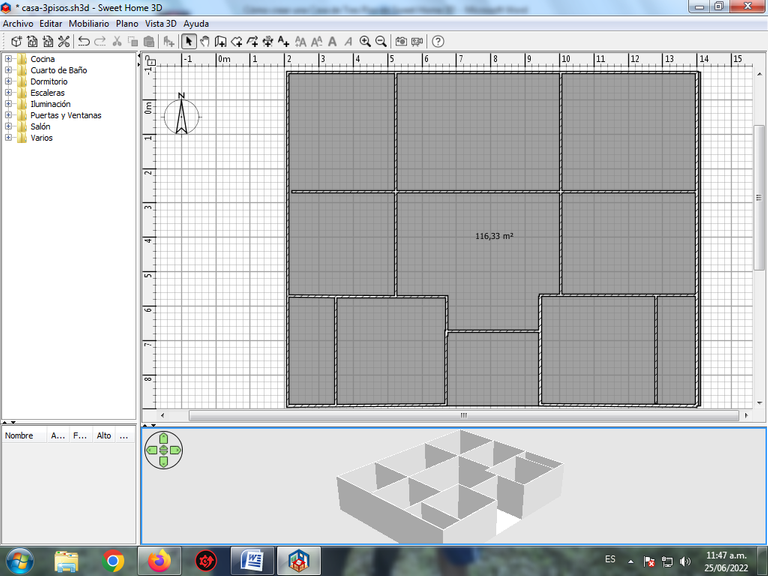
Paso 3:
Ahora continuamos colocando las paredes en cada una de las habitaciones, comedor, baños de la casa.
De esta forma hemos trazado todas las paredes que va tener la casa.
Paso 4:
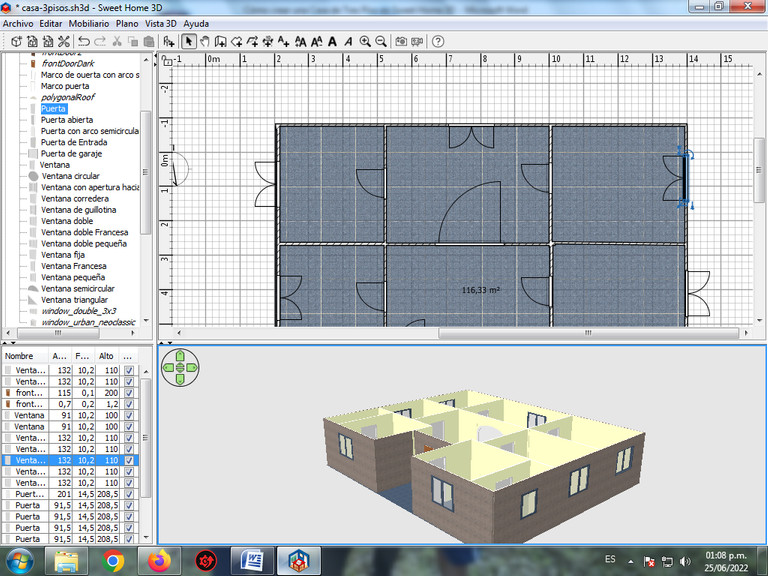
Le damos clic en la pestaña de puertas y ventanas, para ir colocándolas en los lugares correspondientes en nuestra construcción. Con clic sostenido se selecciona la ventana y lo desplazamos en el lugar donde estarán nuestras ventanas.
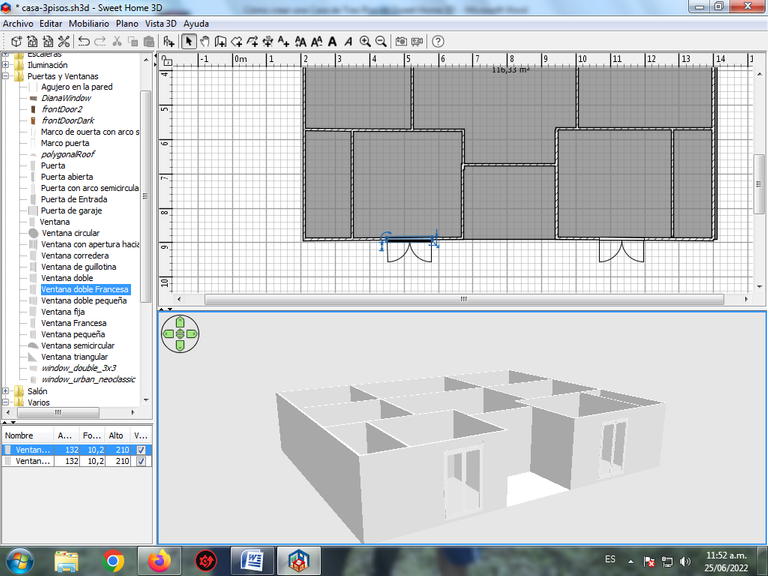
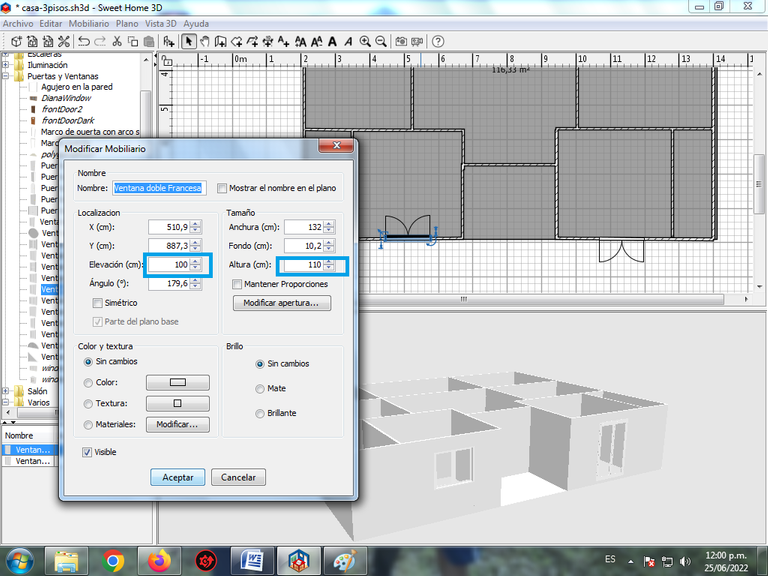
Paso 5:
Se modifica el tamaño de la ventana, para esto le damos doble clic encima de la ventana y colocamos en altura 110 cm y en elevación en 100 cm. De esta forma se ve que la ventana ya no está pegada en el suelo.
Aplicamos el mismo procedimiento con la otra ventana y no quedaría así.
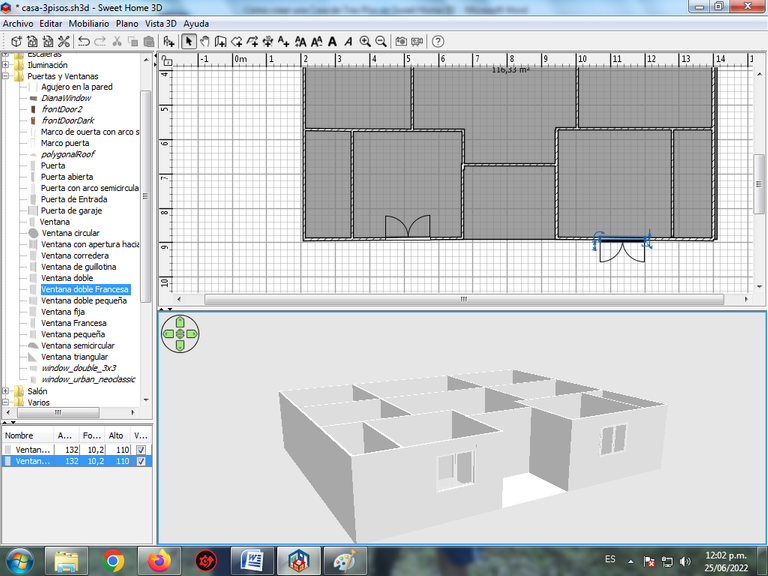
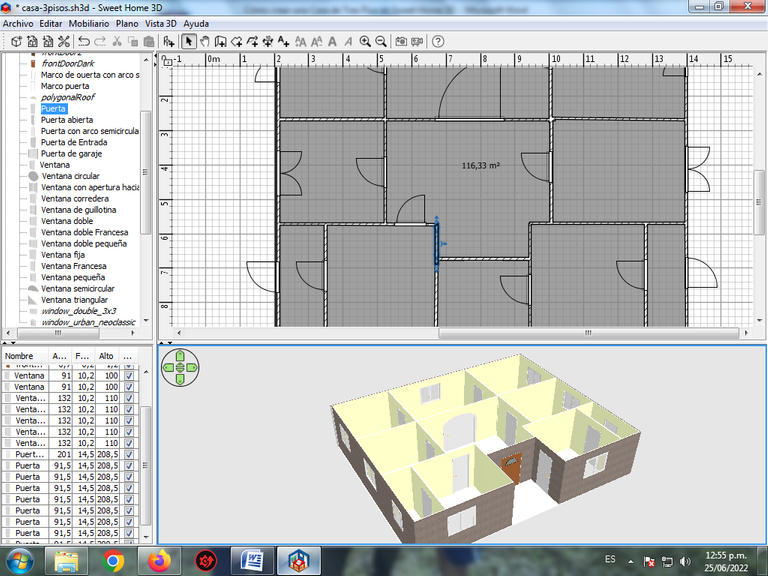
Paso 6:
Seguimos ahora se coloca la puerta en el centro, haciendo clic nuevamente en donde dice puerta de frente, quedando así.
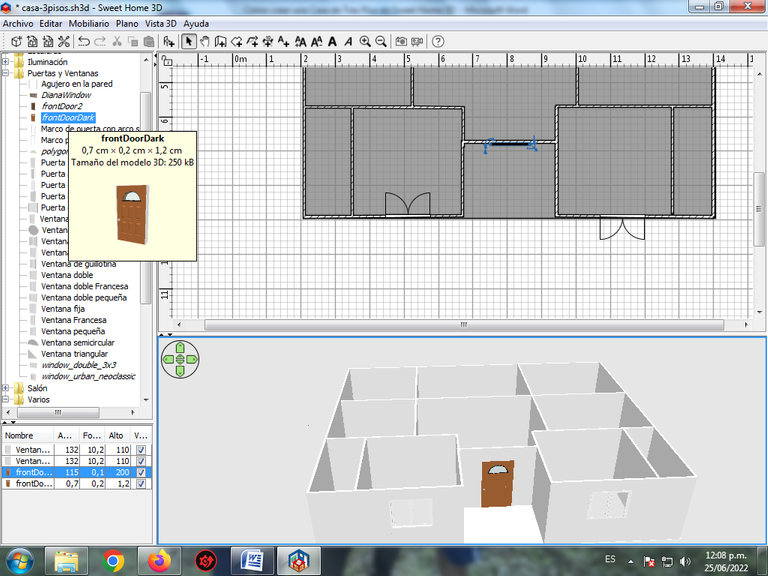
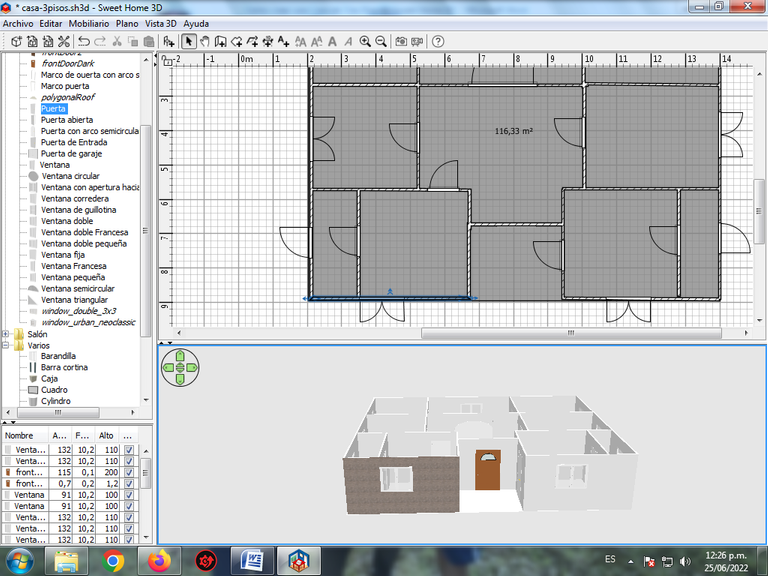
Paso 7:
Continuamos colocando las ventanas en cada una de las habitaciones, baños y las puertas dentro de la casa.
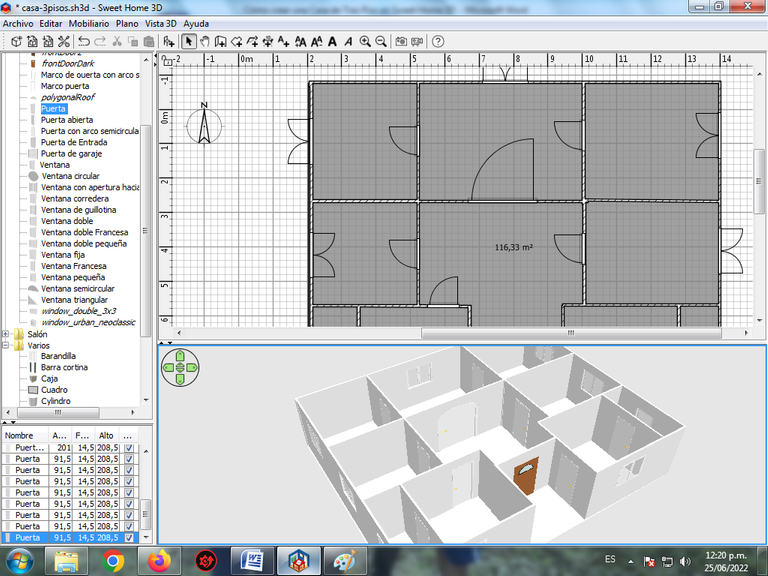
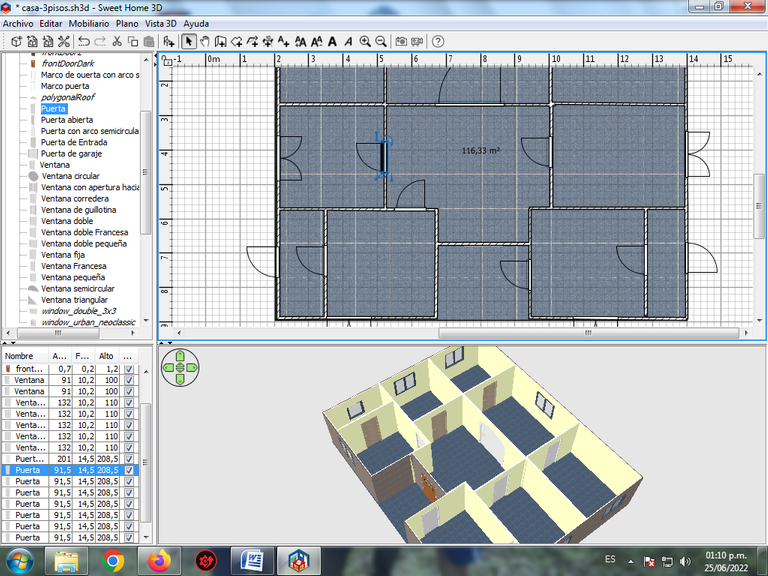
Paso 8:
En las paredes del frente de la casa se le coloca una textura, presionando doble clic en la modificación de paredes.
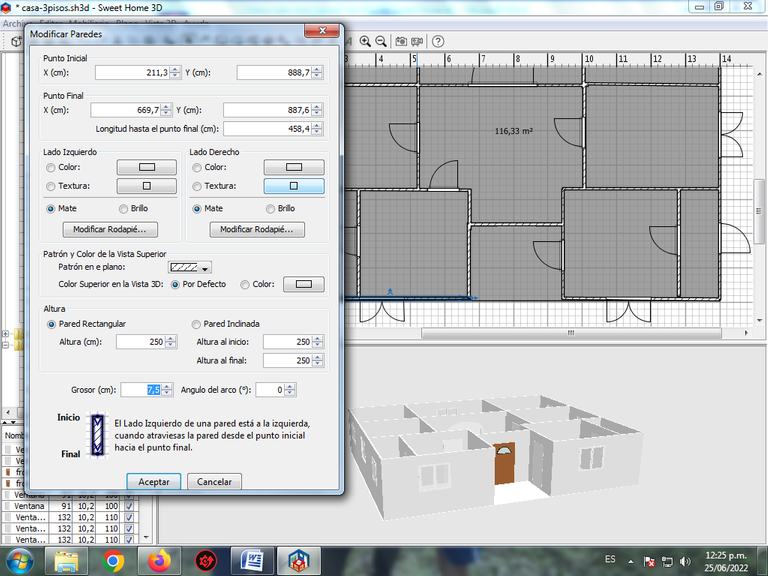
Clic en el lado derecho, textura y escogemos Pared de Mármol.
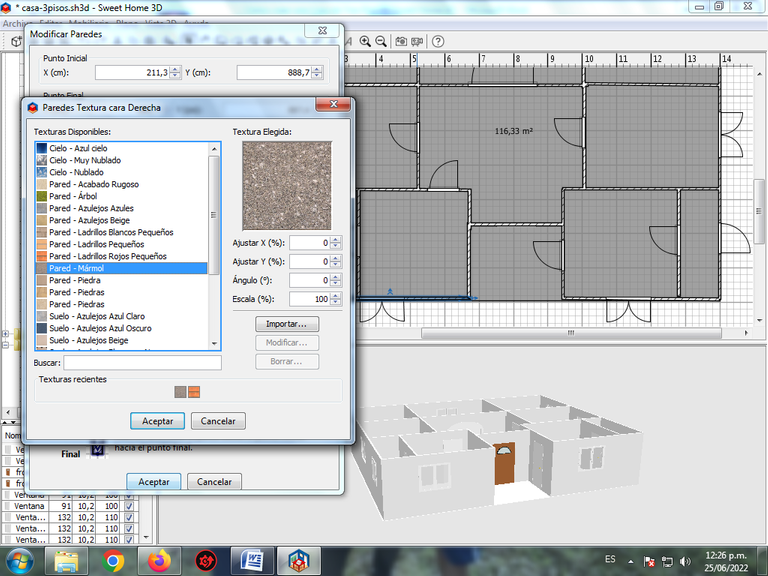
Seguimos colocando la pared de Mármol, en toda la parte de afuera de la casa.
Paso 9:
Luego comenzamos a colocar el color o la textura a las paredes de adentro de la casa, hacemos clic nuevamente en la pared, se selecciona el lado derecho – Color.

En las demás paredes se coloca el color del lado derecho y el lado izquierdo, colocando el color amarillo claro en las habitaciones, salas y baños.
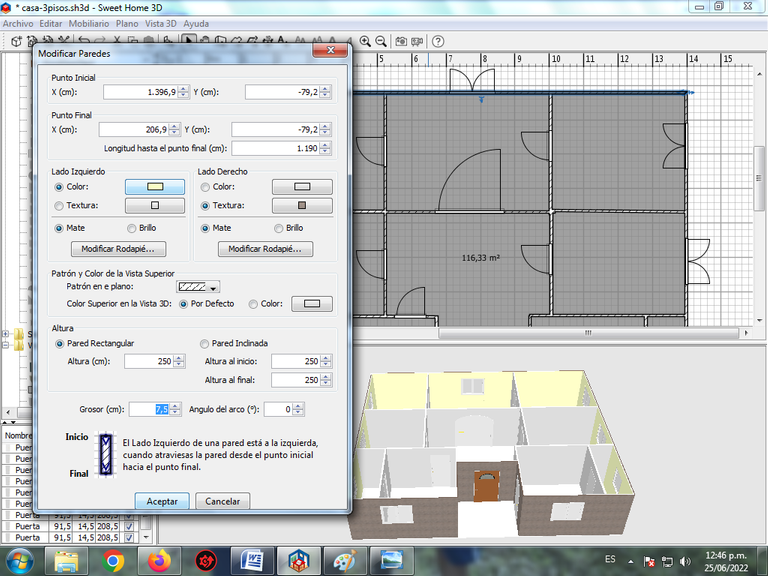
Ya tenemos lista todas las paredes.
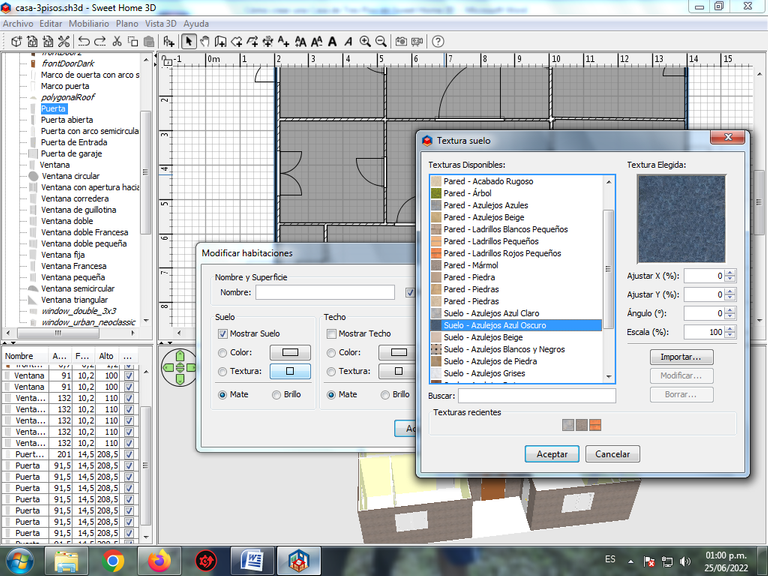
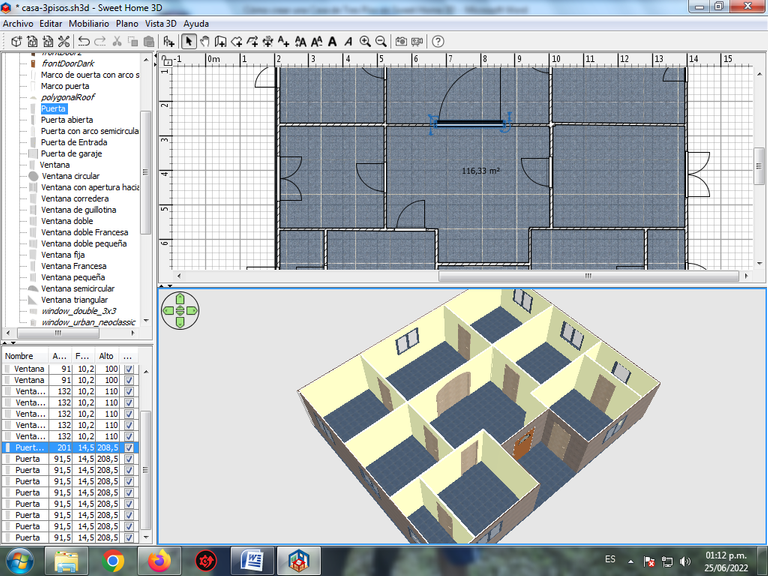
Paso 10:
En el suelo se le coloca una textura, para eso le damos clic en la superficie.
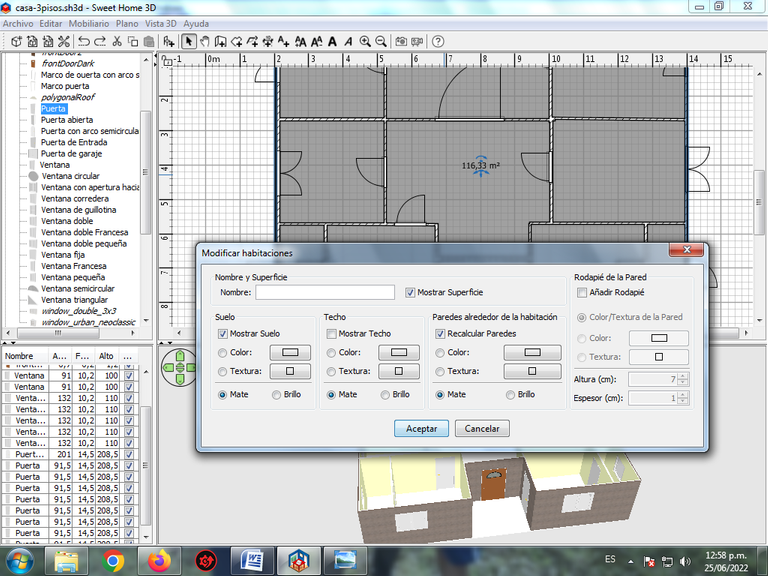
En Textura seleccionamos Suelo azulejo claro.
Paso 11:
Como las ventanas que se colocaron tienen un color gris, procedemos a cambiar colocando una textura, para esto le damos doble clic en la ventana.
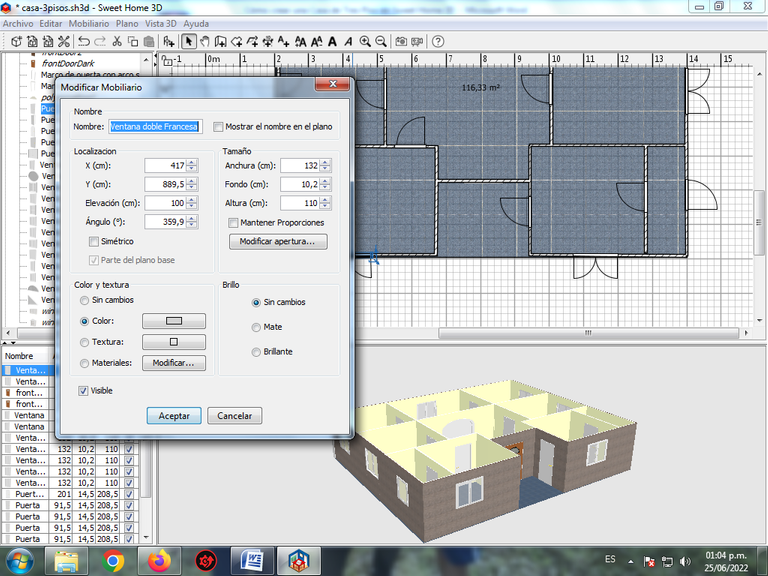
En textura escogemos Azulejo claro.
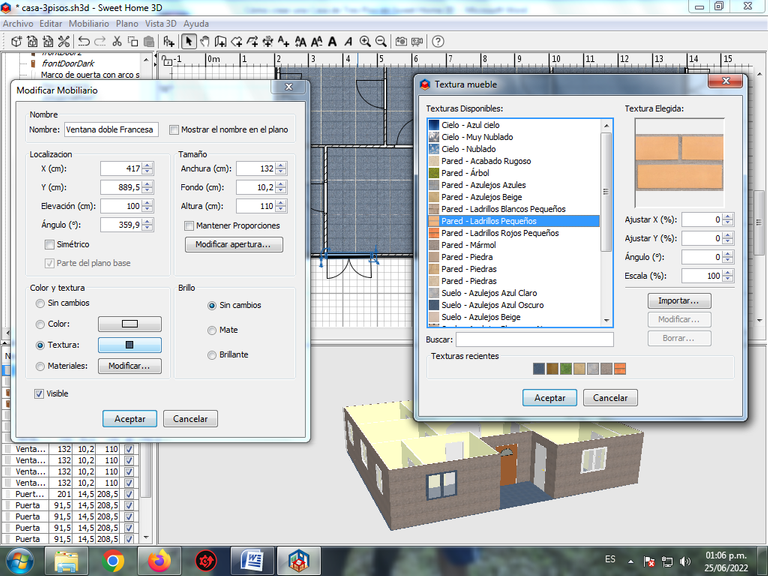
Así nos quedan todas las ventanas.
Continuamos con las puertas, aplicando los mismos pasos.
Paso 12:
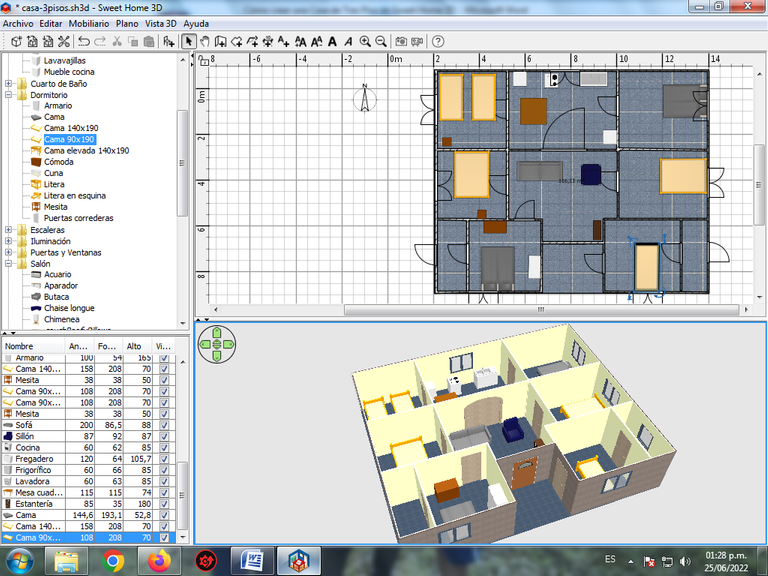
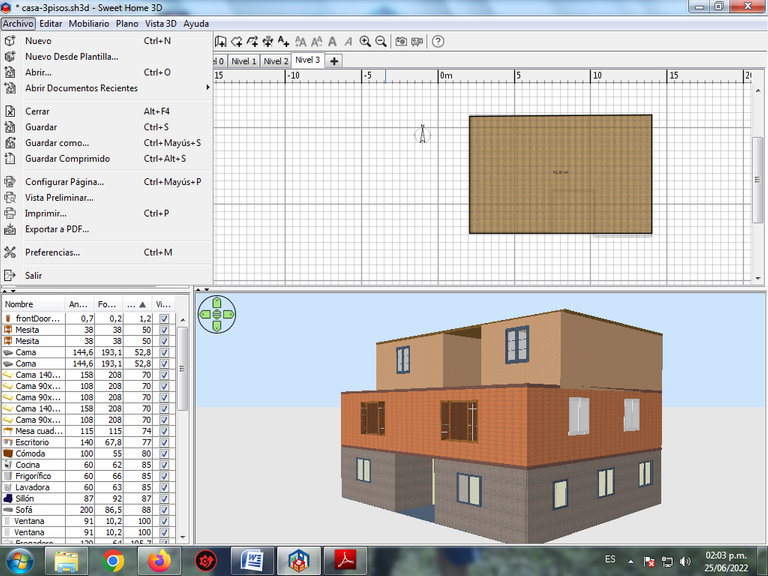
Una vez lista nuestra casa, comenzamos a colocar la decoración que tendrá, cabe destacar que esto va depender de la cantidad de mobiliario que tengamos dentro del programa. Comenzamos por las habitaciones, le damos clic en dormitorio.
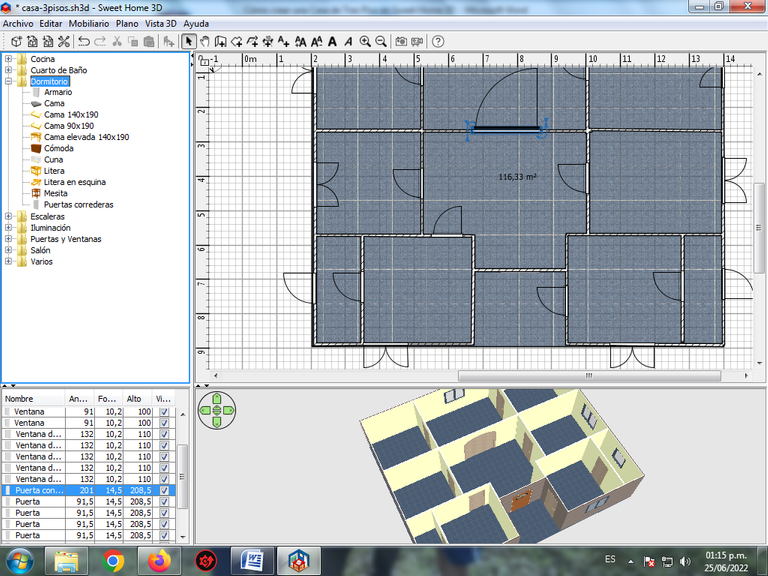
Insertamos una cama en la primera habitación.

Luego se van colocando las mesas, camas, cocinas, neveras dentro de las diferentes partes de la casa.
Paso 13:
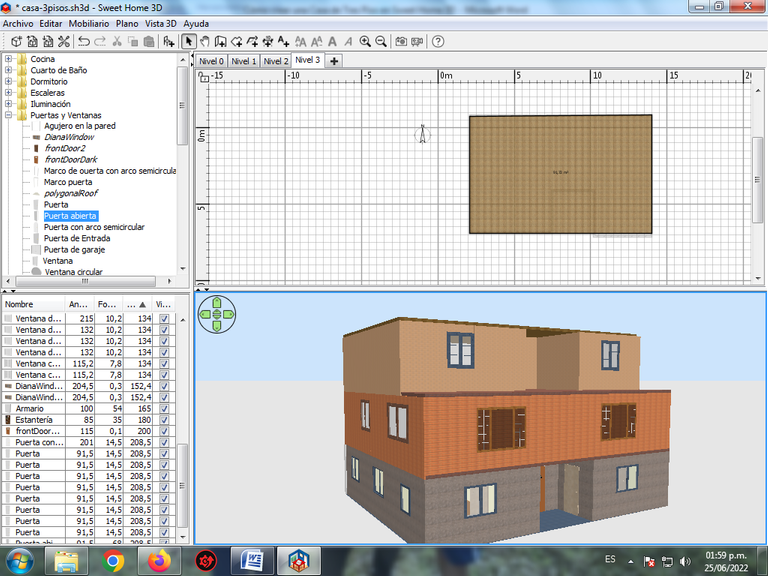
Ahora colocamos el Techo, en la opción del la barra de Menú Plano – Añadir Nivel.
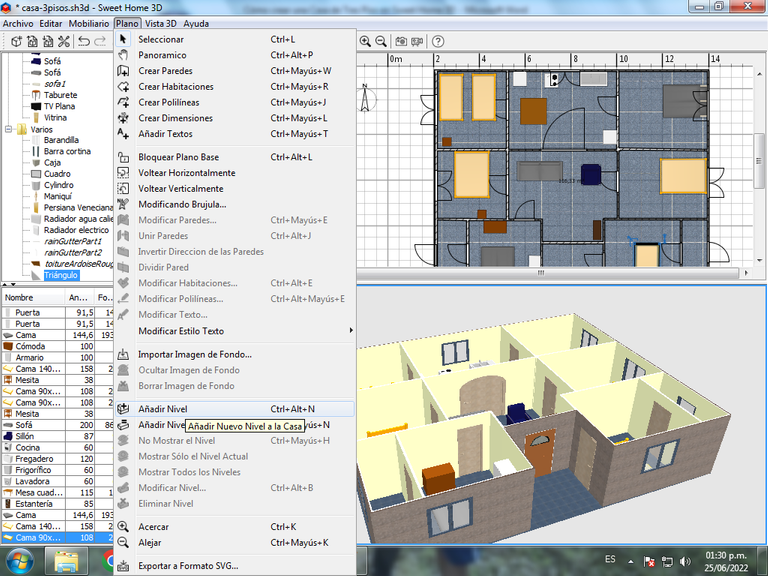
Se visualiza Nivel 1, que es donde se va a colocar el techo que va tener la casa.
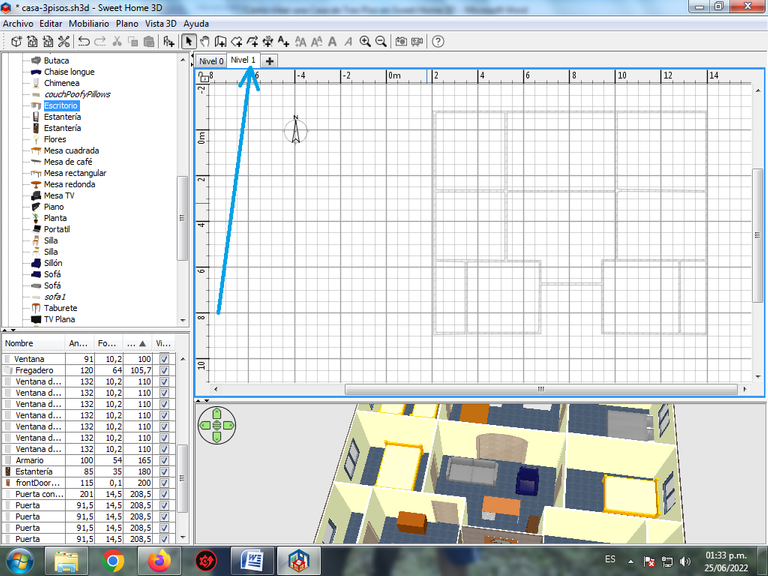
Le damos clic en crear habitaciones, y lo desplazamos encima de toda la casa, quedando de esta forma.
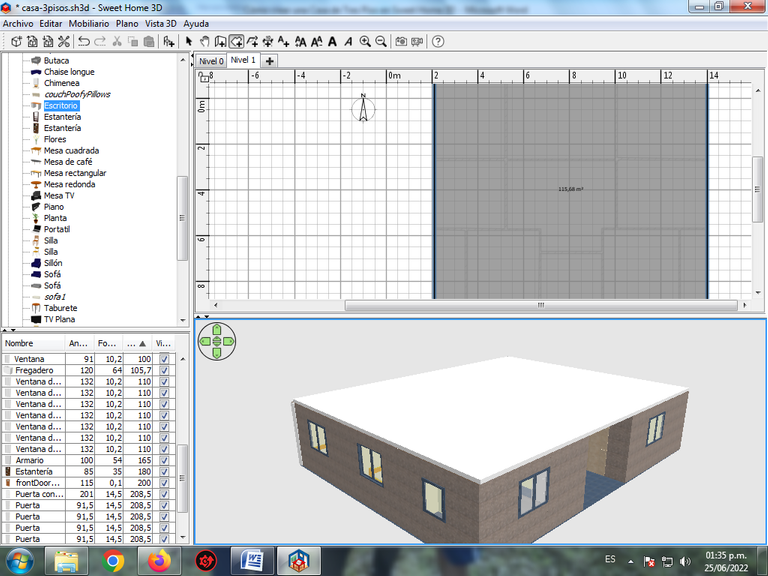
Paso 14:
Le colocamos la textura del techo.
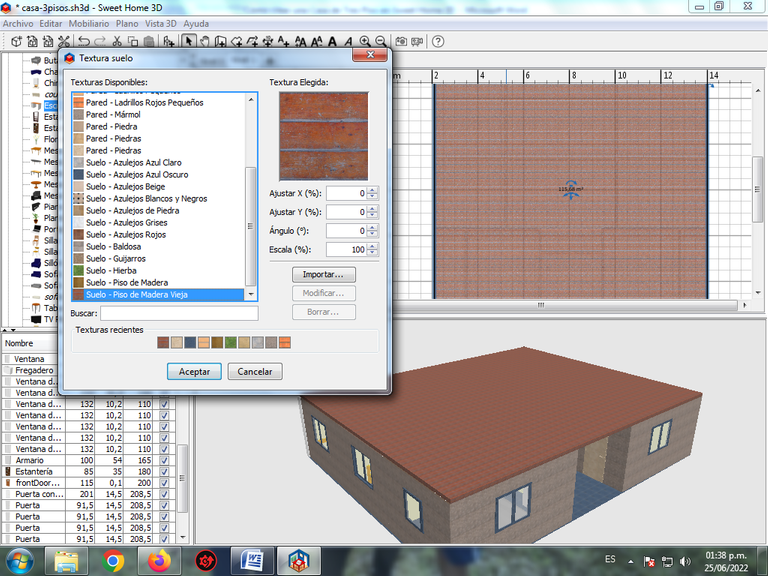
Que es Piso de madera vieja.
Paso 15:
Para culminar vamos colocando las paredes, las ventanas en este primer nivel, aplicando los pasos descriptos anteriormente.
Portada realizada en Inkscape.
Logo de Sweet Home 3D Fuente
Espero que les haya gustado, nos vemos en una próxima publicación.
English
How to create a Three Story House in Sweet Home 3D with its Furniture:
Step 1:
We open the Sweet Home 3D program, the plan that will have the construction of our house of 116.33 square meters is drawn. .
Step 2:
We begin to create the walls that the house will have, from the Plan menu bar, create Walls.
Here we already have the walls of the house ready.
Step 3:
Now we continue placing the walls in each of the rooms, dining room, bathrooms of the house.
In this way we have traced all the walls that the house will have.
Step 4:
We click on the doors and windows tab, to place them in the corresponding places in our construction. With a sustained click the window is selected and we move it to the place where our windows will be.
Step 5:
The size of the window is modified, for this we double click on the window and place the height at 110 cm and the elevation at 100 cm. This way you can see that the window is no longer glued to the ground.
We apply the same procedure with the other window and it would not look like this.
Step 6:
We continue now placing the door in the center, clicking again where it says front door, staying like this.
Step 7:
We continue to place the windows in each of the rooms, bathrooms and the doors inside the house.
Step 8:
A texture is placed on the front walls of the house by double-clicking on the wall modification.
Click on the right side, texture and choose Marble Wall.
We continue placing the marble wall, throughout the outside of the house.
Step 9:
Then we begin to apply the color or texture to the walls inside the house, we click on the wall again, the right side is selected – Color.
In the other walls the color of the right side and the left side are placed, placing the light yellow color in the rooms, halls and bathrooms.
We already have all the walls ready.
Step 10:
A texture is placed on the ground, for that we click on the surface.
In Texture we select Light tile floor.
Step 11:
As the windows that were placed have a gray color, we proceed to change by placing a texture, for this we double click on the window.
In texture we choose Light Tile.
So we have all the windows.
We continue with the doors, applying the same steps.
Step 12:
Once our house is ready, we begin to place the decoration that it will have, it should be noted that this will depend on the amount of furniture that we have within the program. We start with the rooms, we click on bedroom.
We inserted a bed in the first room.
Then the tables, beds, kitchens, refrigerators are placed in the different parts of the house.
Step 13:
Now we place the Roof, in the option of the Flat Menu bar – Add Level.
Level 1 is displayed, which is where the roof of the house will be placed.
We click on create rooms, and we move it over the entire house, being this way.
Step 14:
We put the texture of the ceiling.
What is Old wooden floor.
Step 15:
To finish we are placing the walls, the windows in this first level, applying the steps described above.

Cover made in Inkscape.
Sweet Home 3D Logo Source
I hope you liked it, see you in a next publication.

Se ve muy didactico. Para nada comparado a herramientas de CAD.
Agradezco la info. Saludos :)
Dear @xefex. Kindly add/provide the English language translations to your comments/replies for the reading convenience of our international Hive audience. Thank you for your consideration.
sorry for the inconvenience
Dear @xefex, just add the English translation to your comment above, please.
Thank you!
Greetings friend, thank you very much for your comment and thank you for visiting my blog.
https://twitter.com/cbit_roxana_mdh/status/1540874938873266176
The rewards earned on this comment will go directly to the people( @cetb2008 ) sharing the post on Twitter as long as they are registered with @poshtoken. Sign up at https://hiveposh.com.
Hello dear friend @ cetb2008 good day
I love this show, you do amazing things on it
I admire the knowledge you have
I appreciate that you let us know the step by step of work you have done
have a great day
Greetings friend, it's good that you like it, grateful for your visit to my blog.
Excellent work @cetb2008, this post is the proof that you can publish very good works in this Community without being necessarily mandatory images in photos.
If I remember correctly, Sweet Home 3D is a free interior design application released under GNU GPL v2+ a feature of Linux applications. And besides it has the advantage, like most of the free software applications, of being available in many languages.
Regards.
Saludos amigo si en una herramienta donde podemos crear planos, construcciones e incluso objetos de algún mobiliario, es basado en Sotware Libre Linux, y también en sistemas operativo como Windows, agradecido por tu comentario amigo.
Congratulations @cetb2008! You have completed the following achievement on the Hive blockchain and have been rewarded with new badge(s):
Your next target is to reach 9500 comments.
You can view your badges on your board and compare yourself to others in the Ranking
If you no longer want to receive notifications, reply to this comment with the word
STOPTo support your work, I also upvoted your post!
Check out the last post from @hivebuzz:
Saludos amigo muchas gracias por la insignia.
De nada @cetb2008, es merecido 😊👍 ¡Felicidades por ser tan activo en Hive!
Agradecido
Congratulations @cetb2008! We're delighted to specially curate your awesome publication and award it RUNNER-UP in Architecture Brew #73. More power!
Thank you for subscribing to Architecture+Design, an OCD incubated community on the Hive Blockchain.
Greetings, thank you very much for valuing my publication.