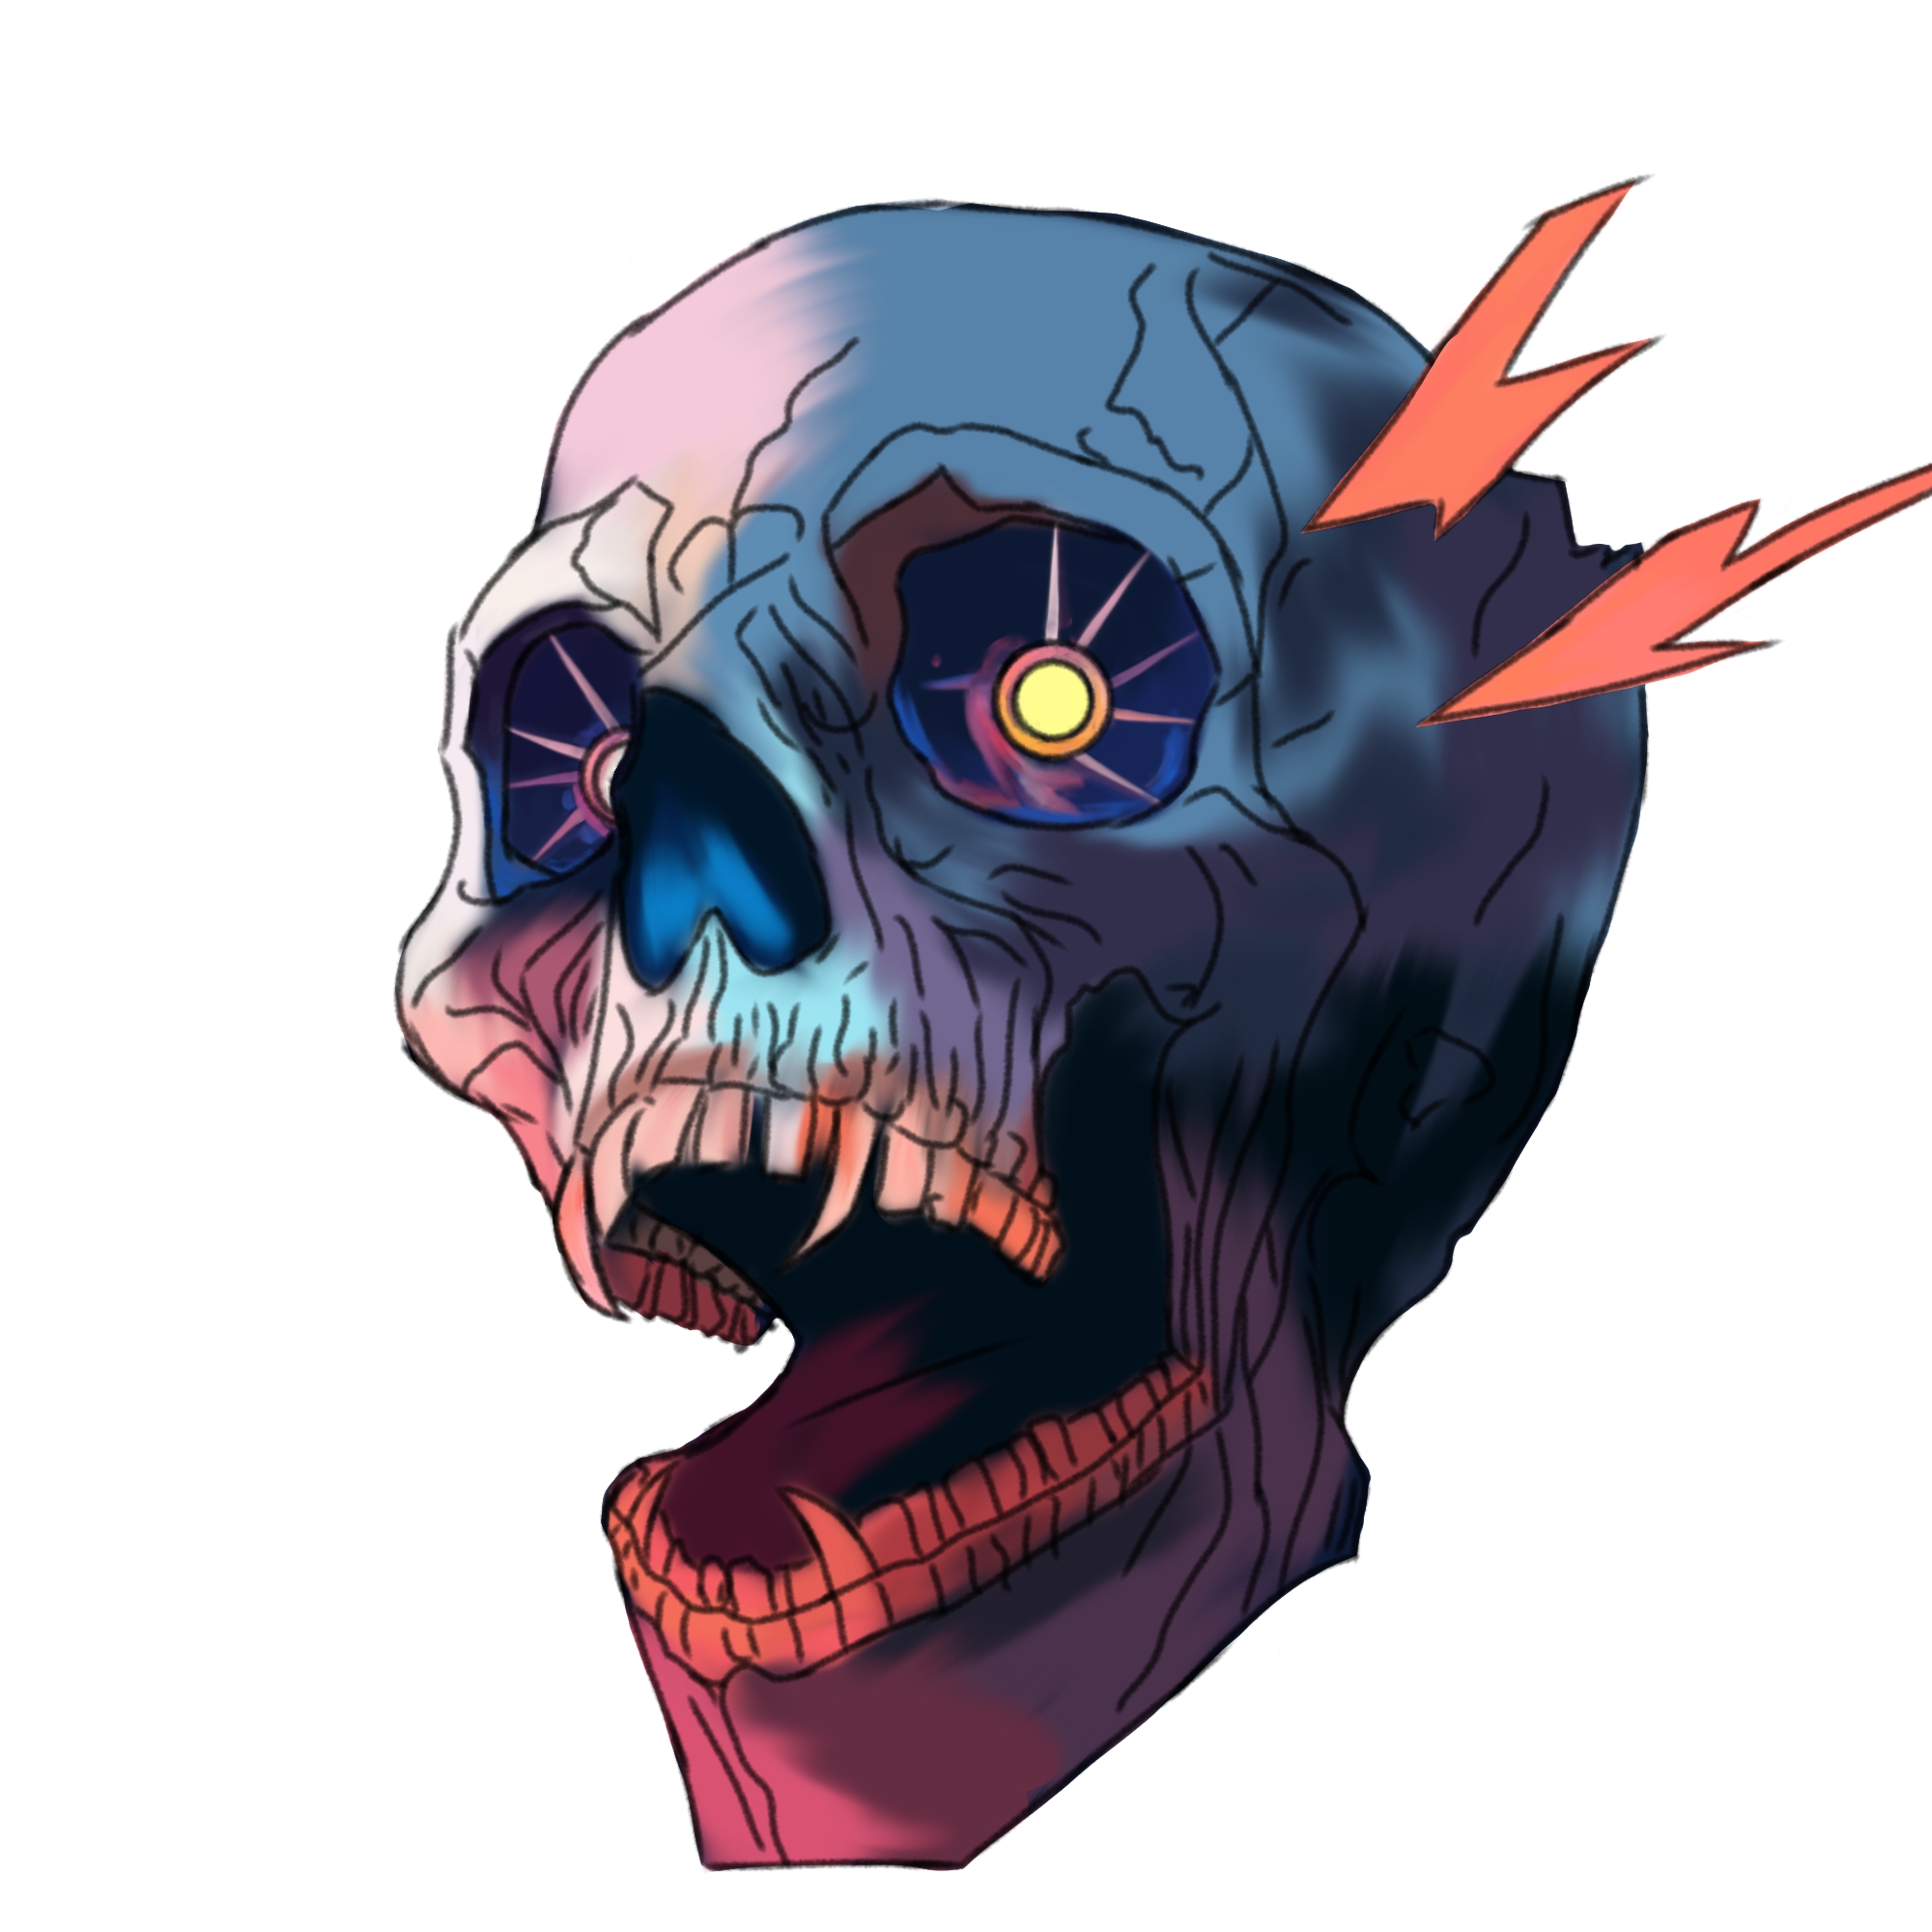
EVER-HUNGRY SKULL🔮 Social Media Challenge Splinterlands SPT
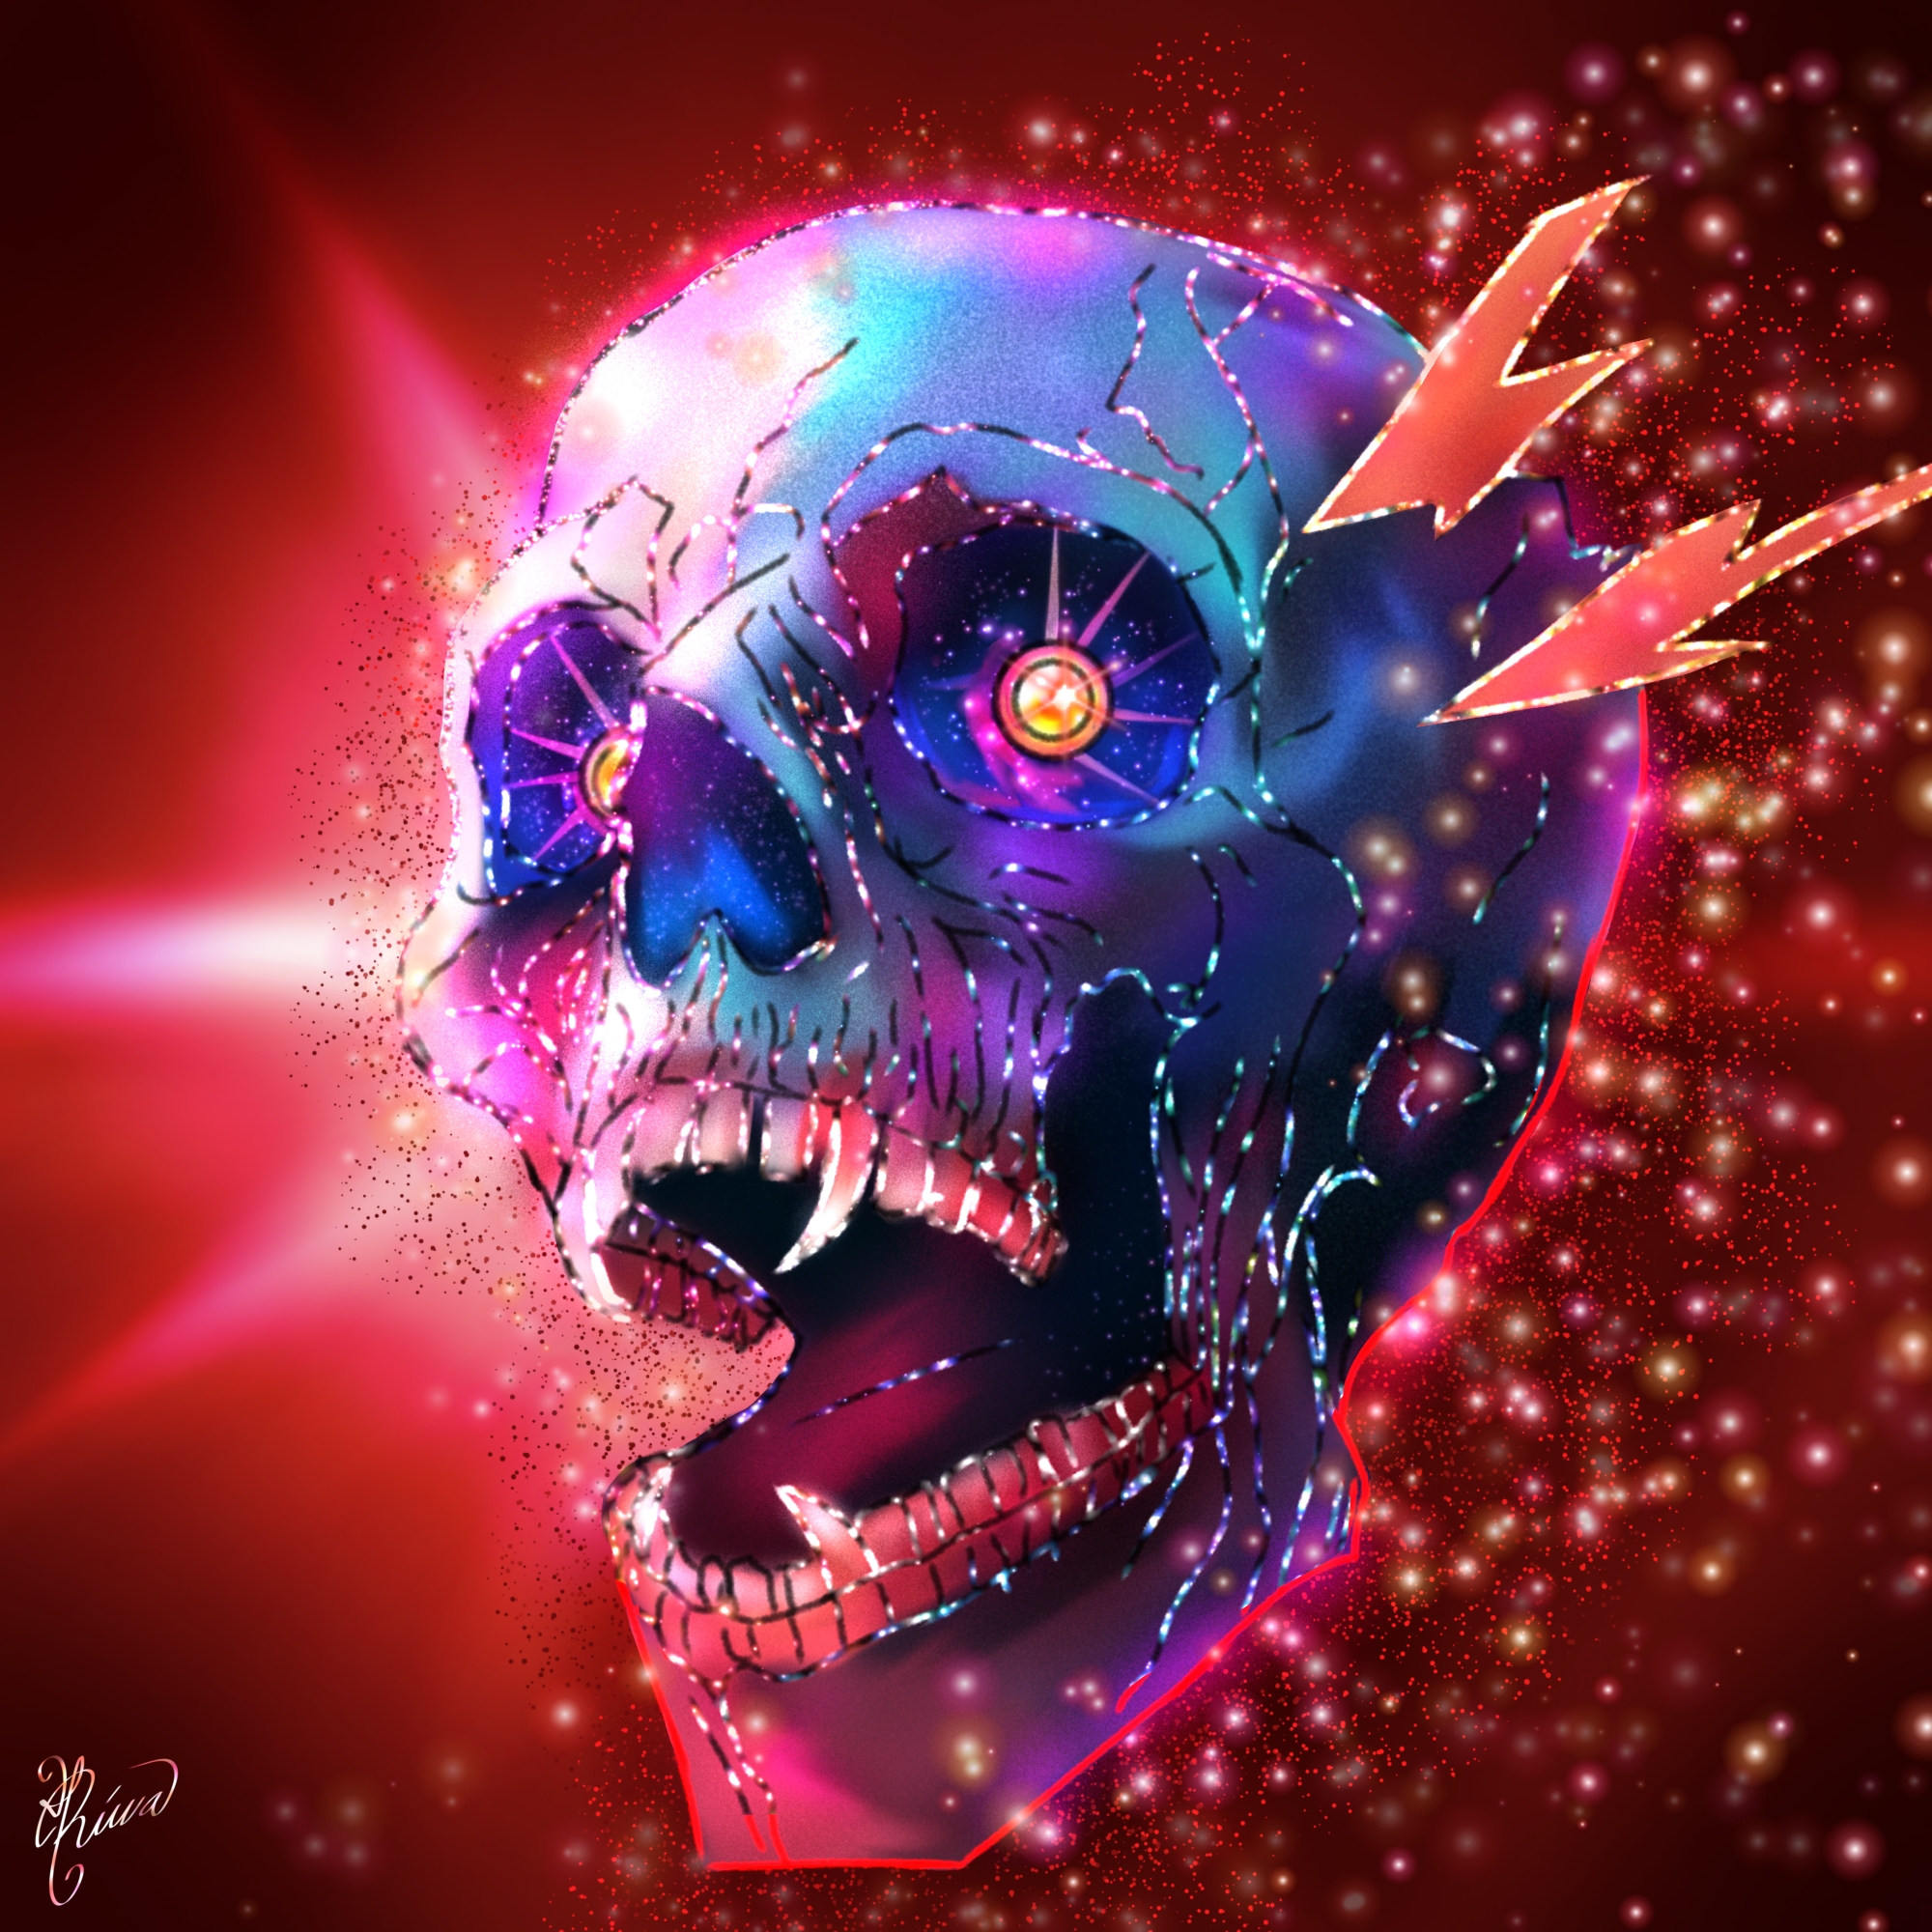
Mis saludos a todos ustedes en este día estimada gran comunidad de Hive! 😄👋 Esperando se encuentren muy bien en este día donde quiera que se encuentren. En esta tarde les comparto esta participación de la semana para social Media Challenge de Splinterlands, para la cual escogí la carta de EVER-HUNGRY SKULL, una macabra calavera vampírica dándole una representación un poco más vibrante y colorida, y como siempre utilizando mi pincel favorito de Punto de Brillo para un acabado aún más resaltante para nuestro paladar ocular. Deseo que les guste esta representación y me comenten aquí que les ha parecido? 😉🙌💞
My greetings to all of you on this day dear great Hive community! 😄👋 Hoping you are feeling great on this day wherever you are. This afternoon I share with you this week's entry for Splinterlands social Media Challenge, for which I chose the EVER-HUNGRY SKULL card, a ghoulish vampire skull giving it a little more vibrant and colorful rendering, and as always using my favorite Glitter Dot brush for an even more highlighting finish for our eye palate. I wish you like this rendering and let me know here what you thought of it 😉🙌💞


Etapas del Dibujo/Drawing Stages
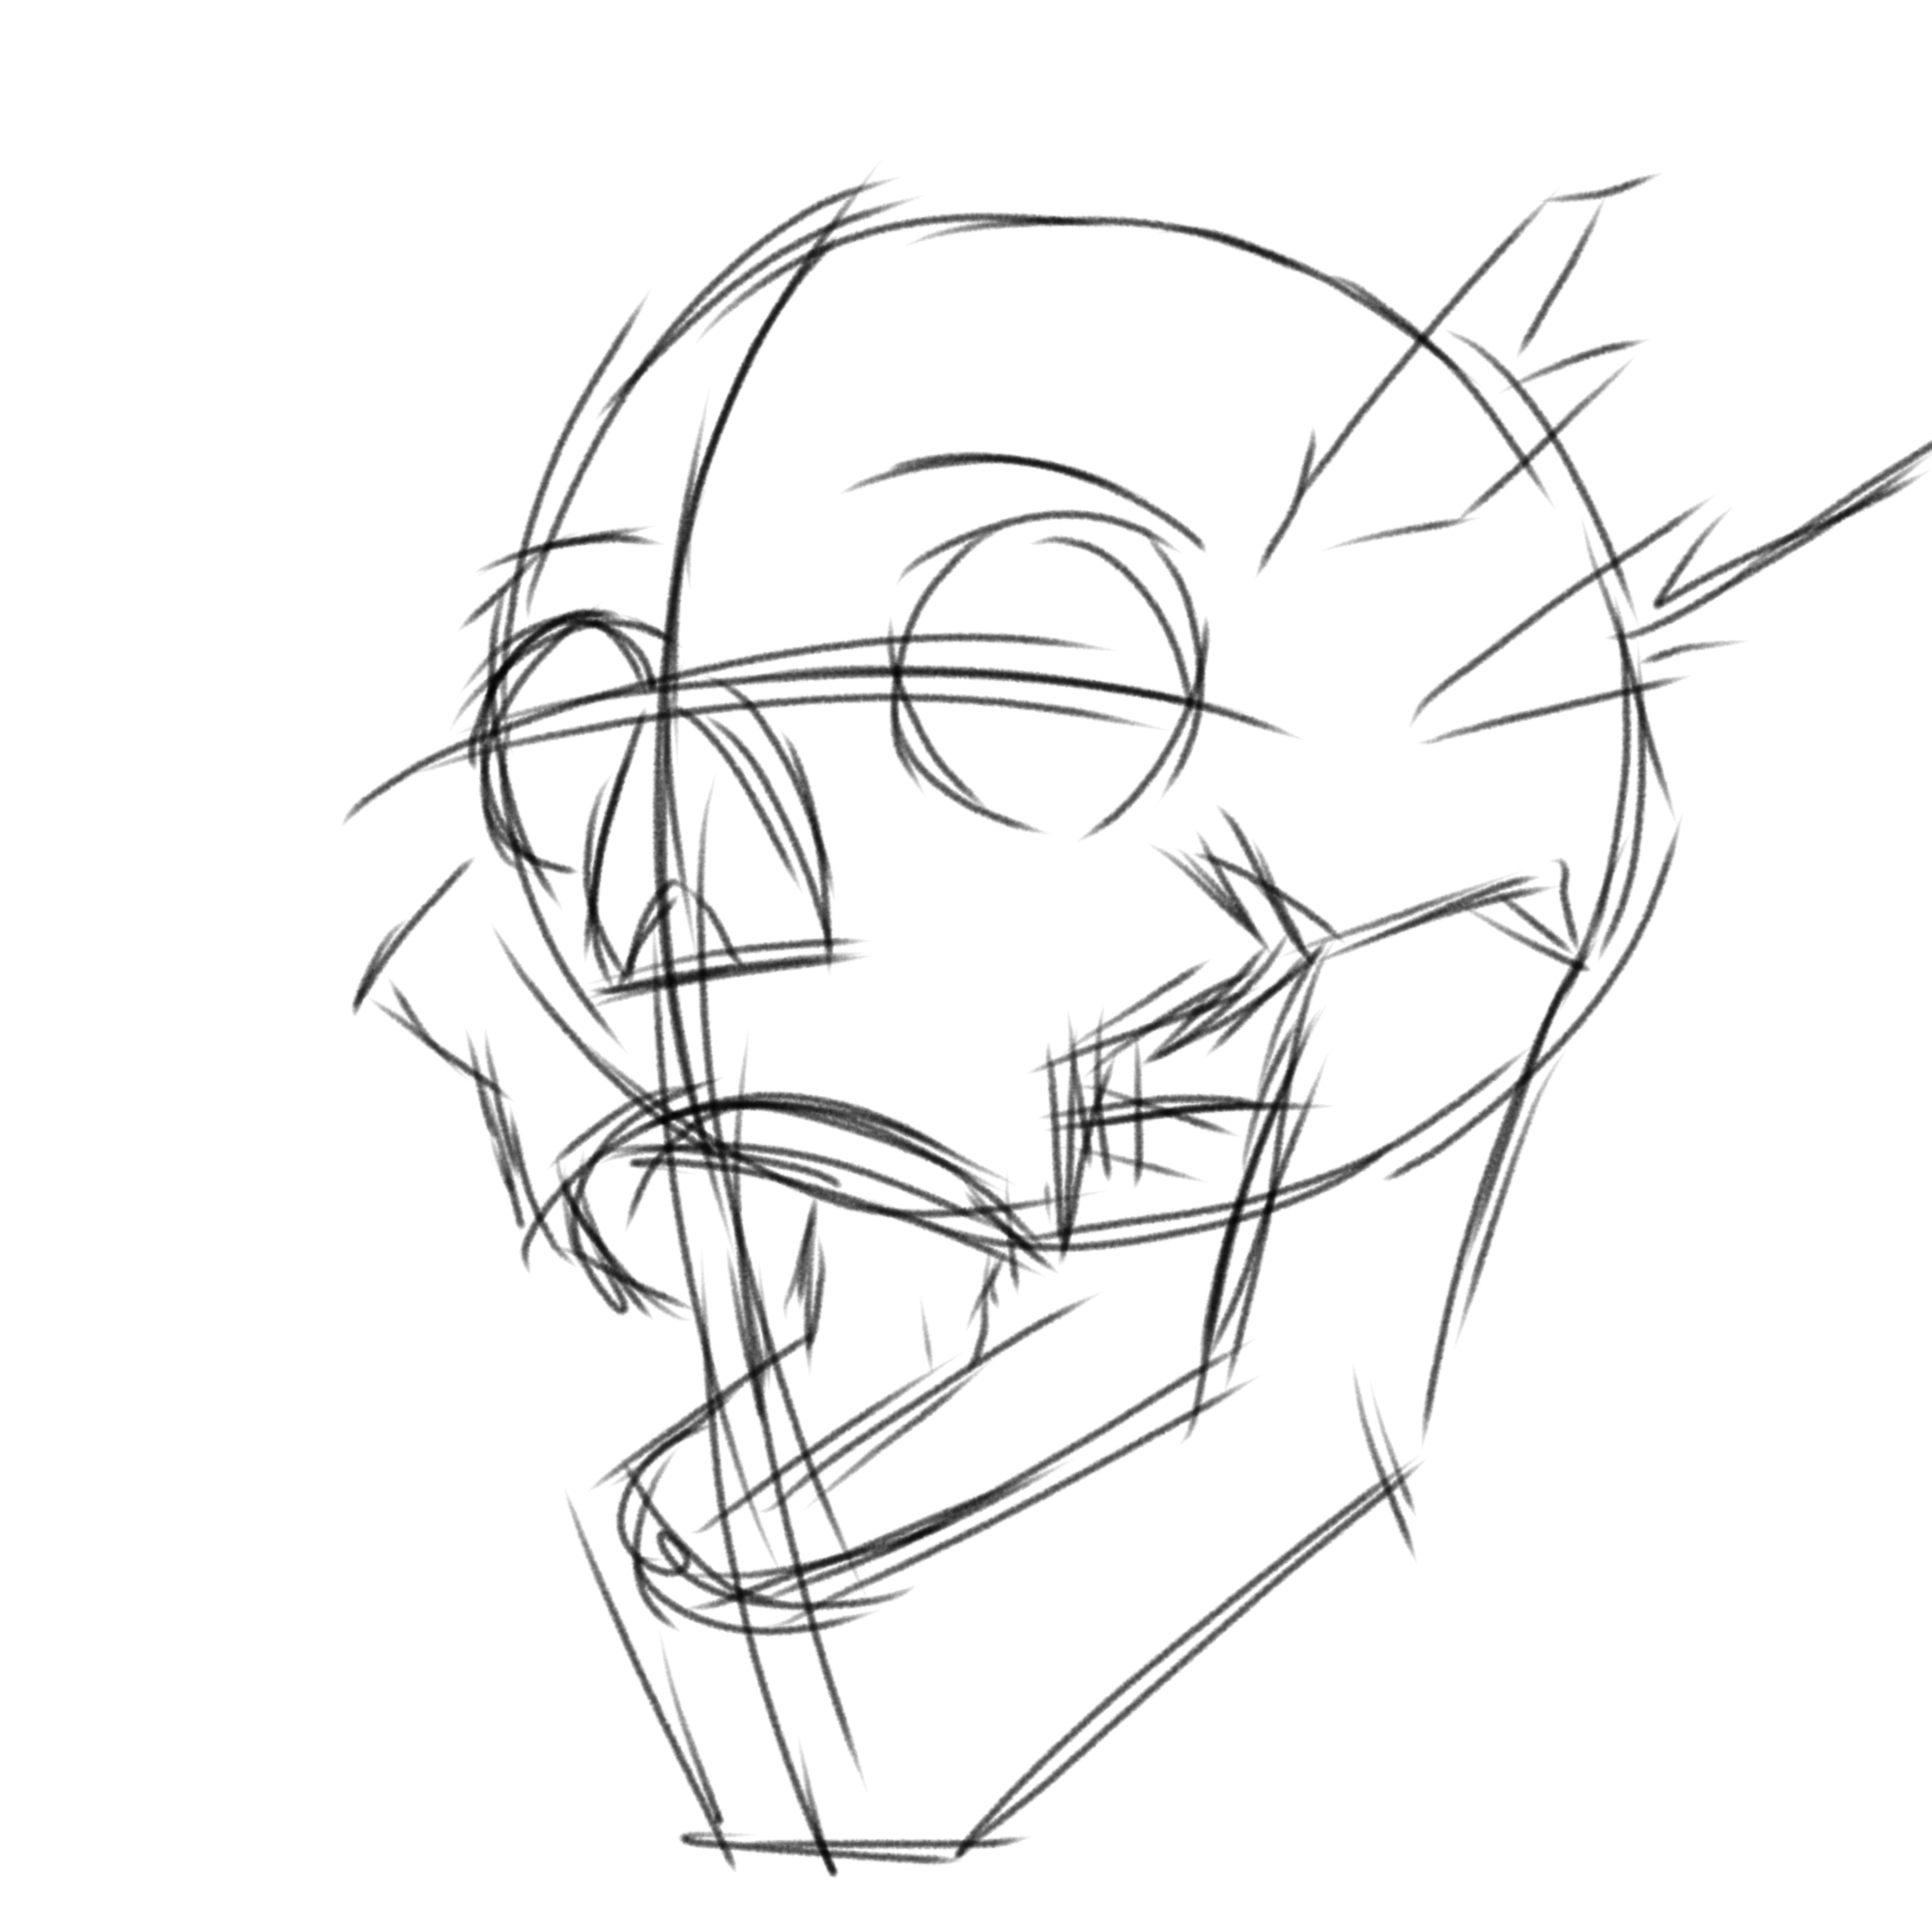
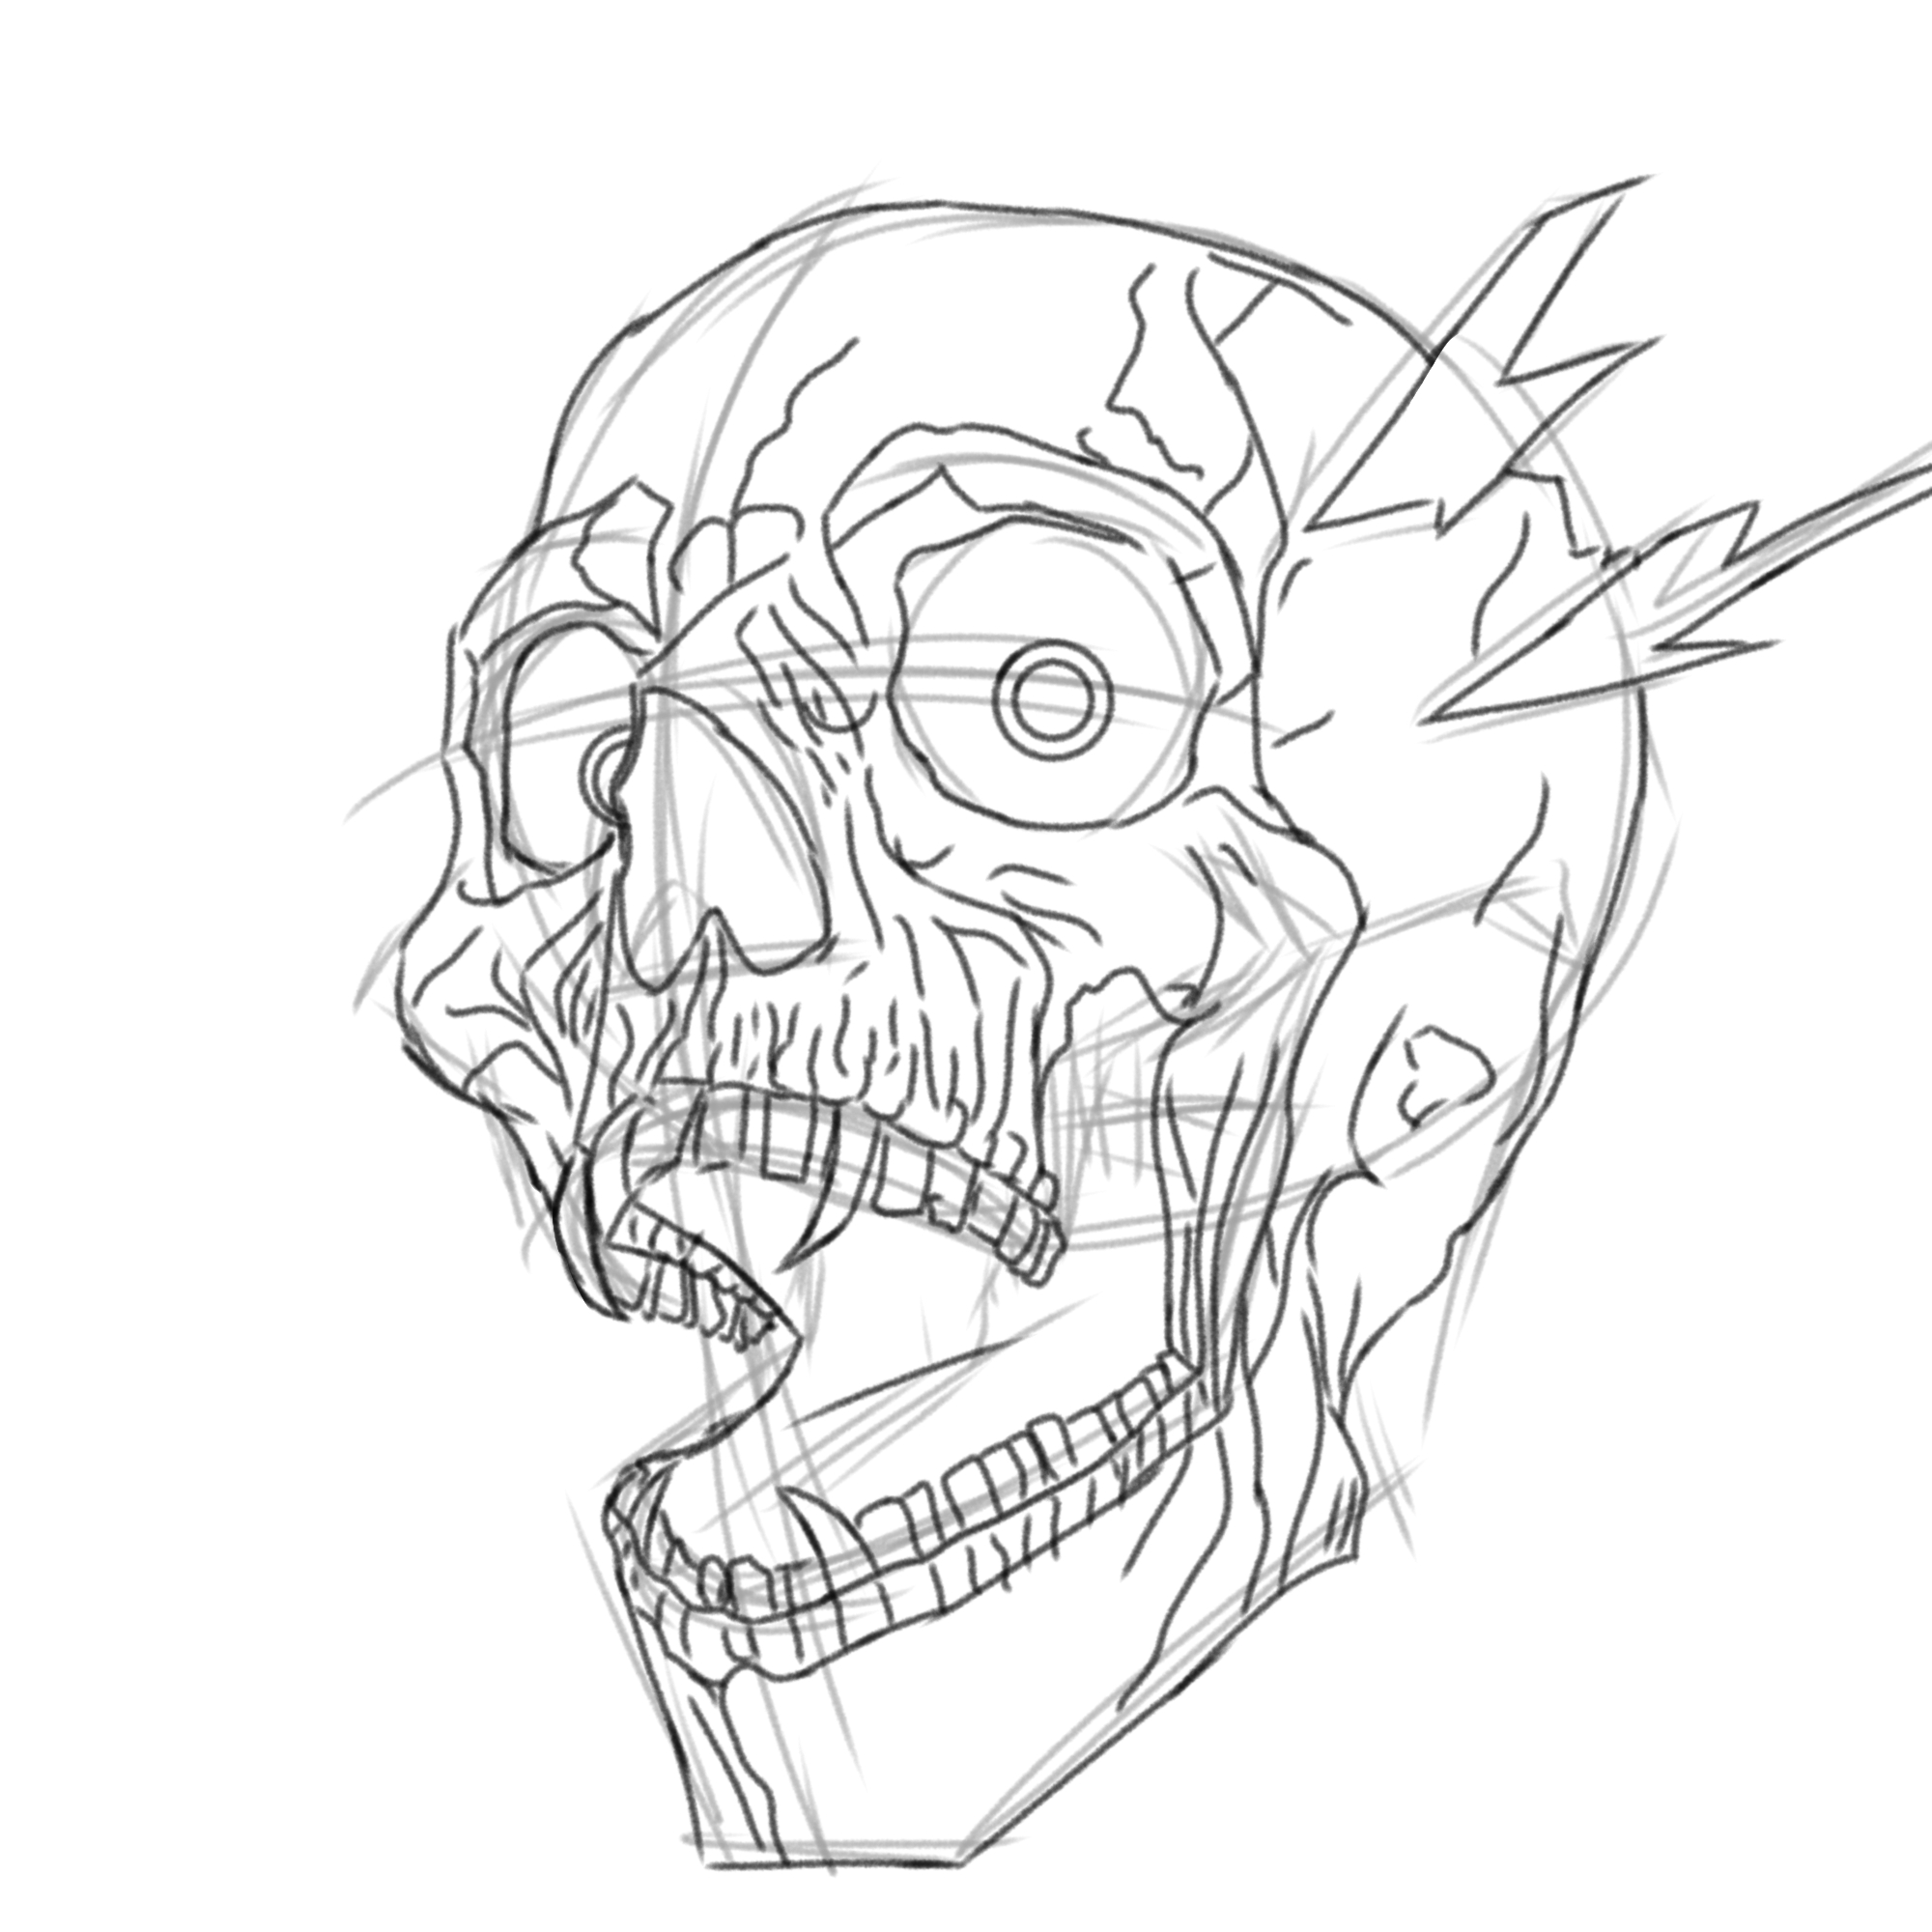
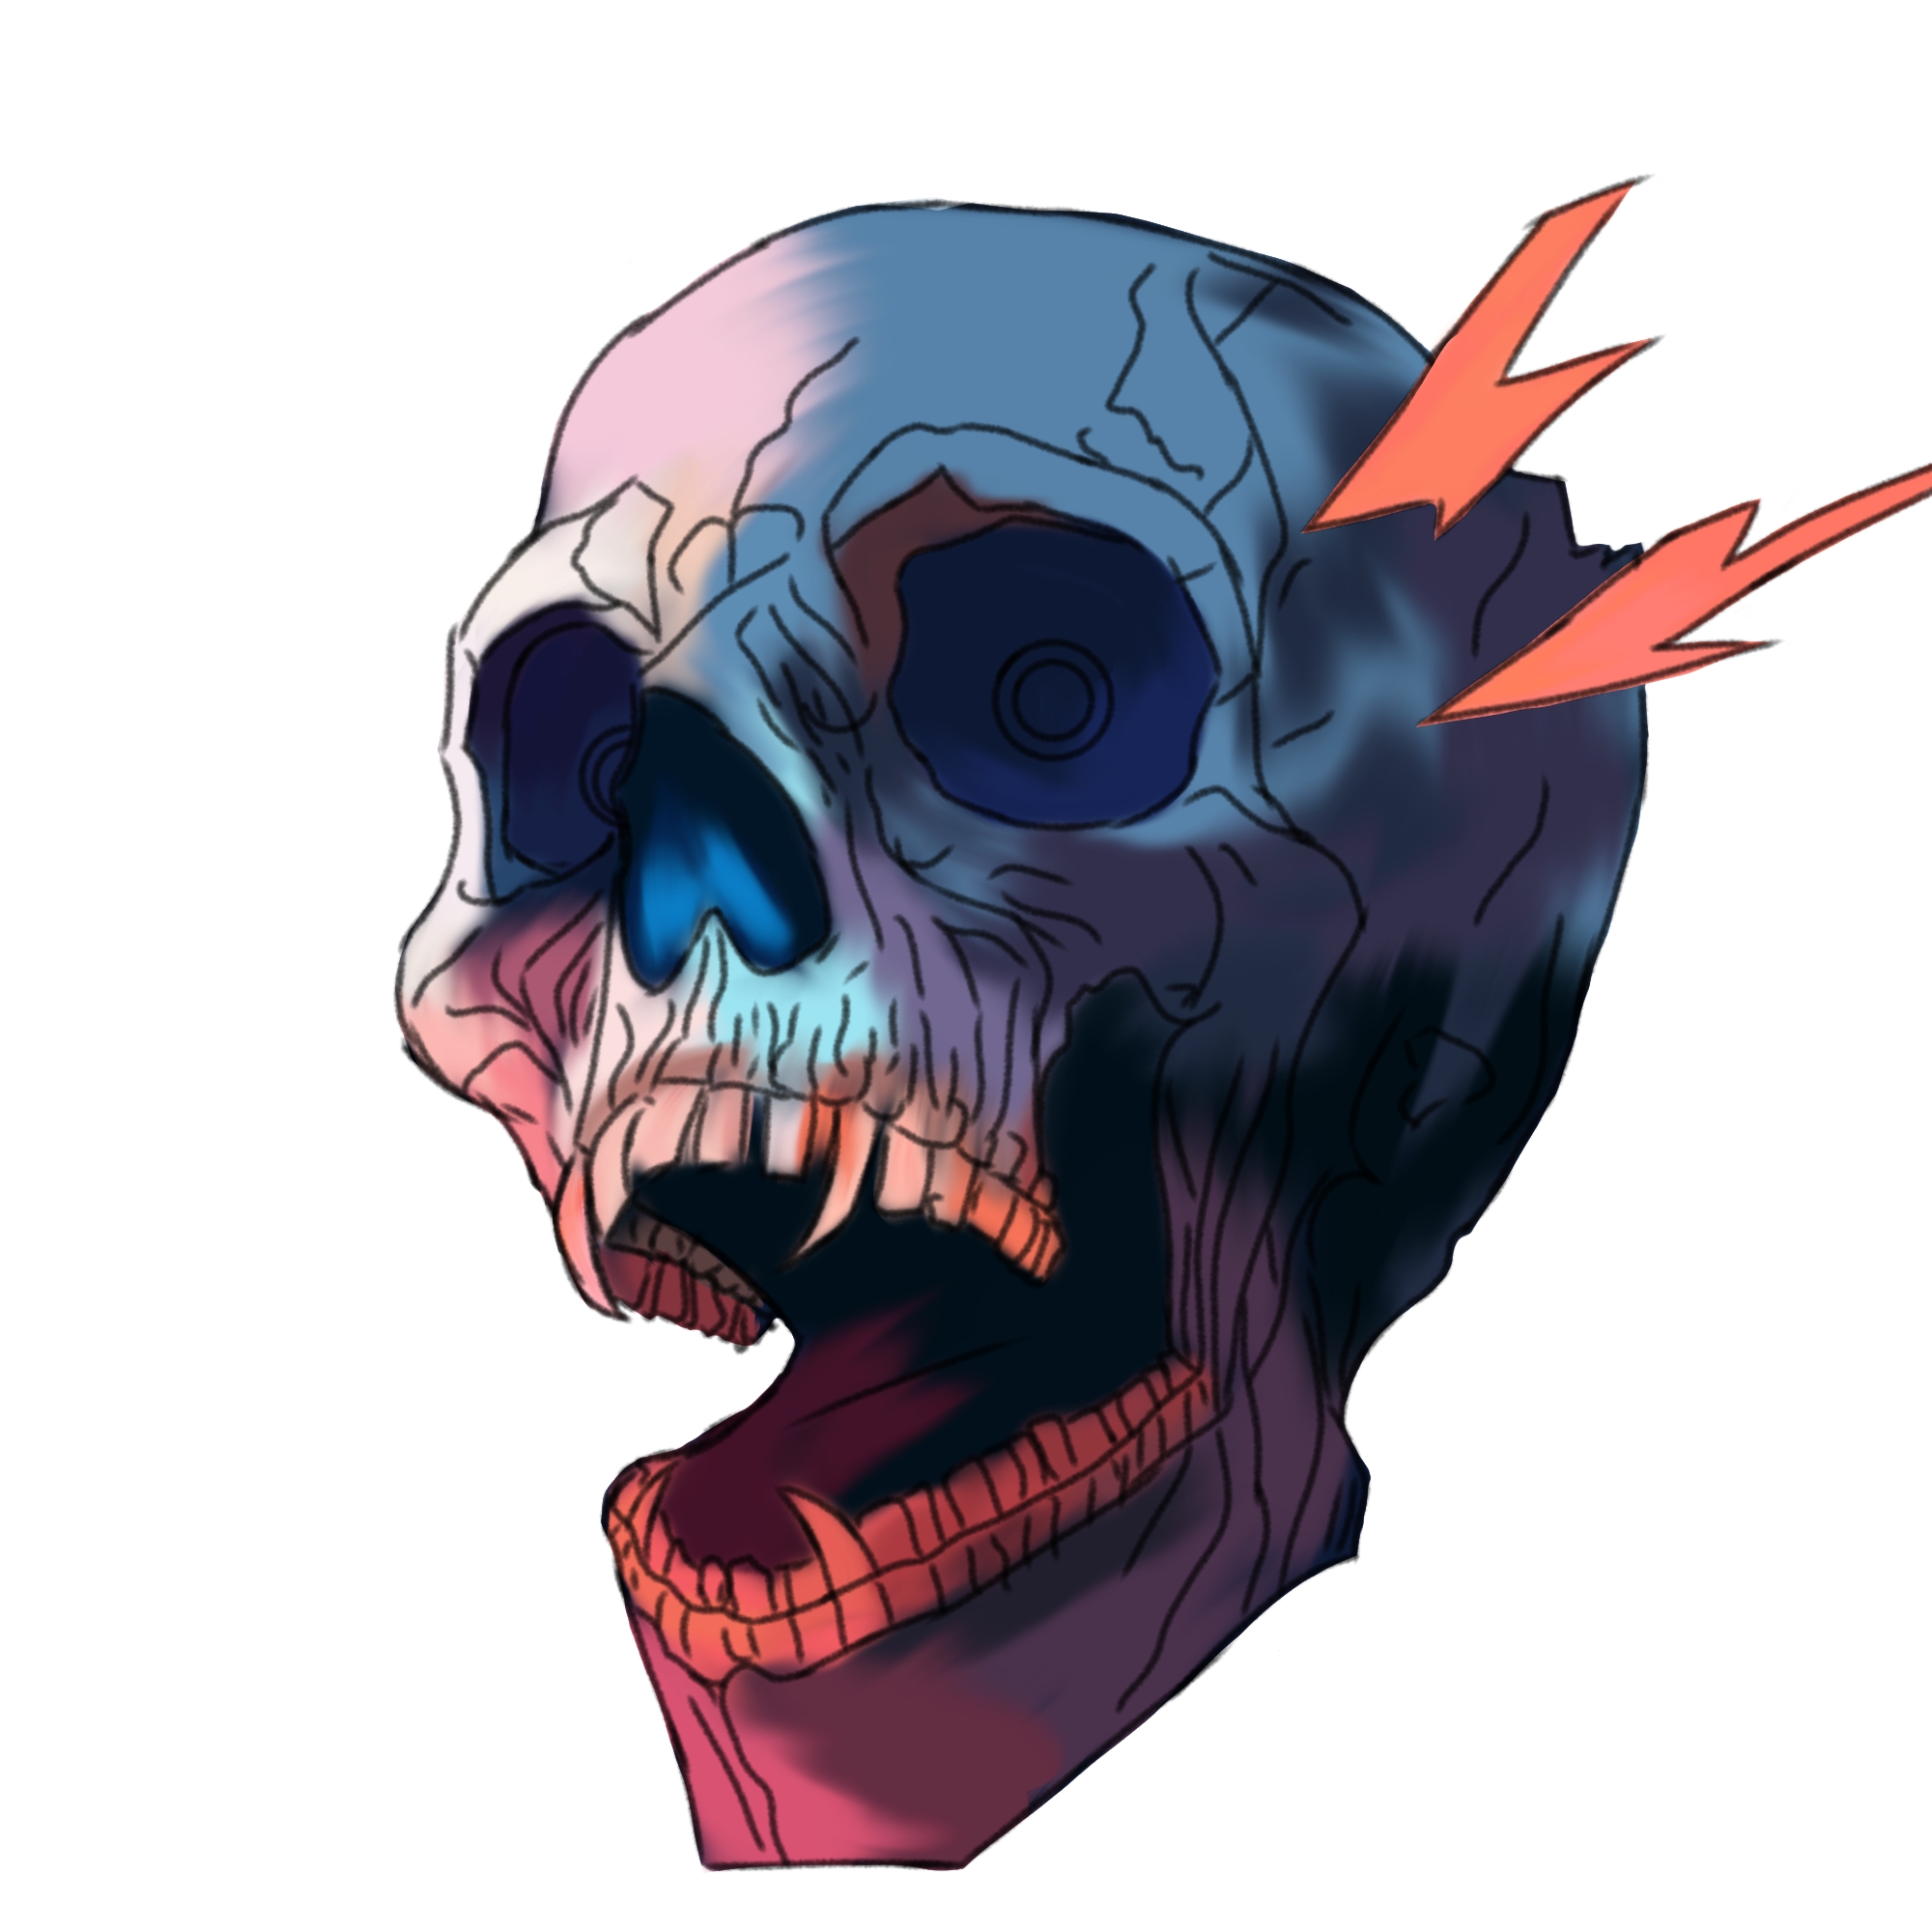
Para comenzar abrí la capa para realizar el boceto guía e ir luego a otra capa para realizar el delineado utilizando un lápiz #1 para hacer tanto el boceto como el delineado. Después en una nueva capa pase a aplicar una base de colores de diferentes matices que luego pase a difuminar para suavizar y mezclar los trazos, de manera que me gustó el resultado de estos colores logrando en algunos transiciones armónicas. Después pase a borrar el excedente del color sobresaliente del delineado.
To start I opened the layer to make the guide sketch and then go to another layer to make the outline using a #1 pencil to make both the sketch and the outline. Then in a new layer I applied a base of colors of different shades that I then blurred to soften and blend the strokes, so that I liked the result of these colors achieving in some harmonic transitions. Then I erased the surplus of the outlining color.
Luego, en esta fase empecé a trabajar el brillo interno que emana de adentro de la cuenca ocular utilizando el mismo pincel brillo de cabello 2, que es el que me gusta utilizar para aplicar los colores por su trazo suave y fluido. Luego, pase a difuminar con un aerógrafo para suavizar y mezclar, utilizando para las capas de color el método de mezcla normal. De seguido, en una nueva con el mismo método de mezcla coloque un fondo negro y luego con un aerógrafo normal fui agregando un color rojizo con opacidad media, después agregue color blanco que fui difuminando con todo fucsia y lila para crear un matiz entre el rojo y el blanco, difumine. Agregue brillos con el pincel punto de brillo en una capa normal.
Then, at this stage I started to work on the inner shimmer emanating from inside the eye socket using the same hair shimmer brush 2, which is the one I like to use to apply the colors because of its soft and fluid stroke. Then, blend with an airbrush to soften and blend, using the normal blending method for the color layers. Then, in a new one with the same blending method I placed a black background and then with a normal airbrush I added a reddish color with medium opacity, then I added white color that I blended with all fuchsia and lilac to create a shade between red and white, I blended. I added glitters with the glitter point brush in a normal layer.
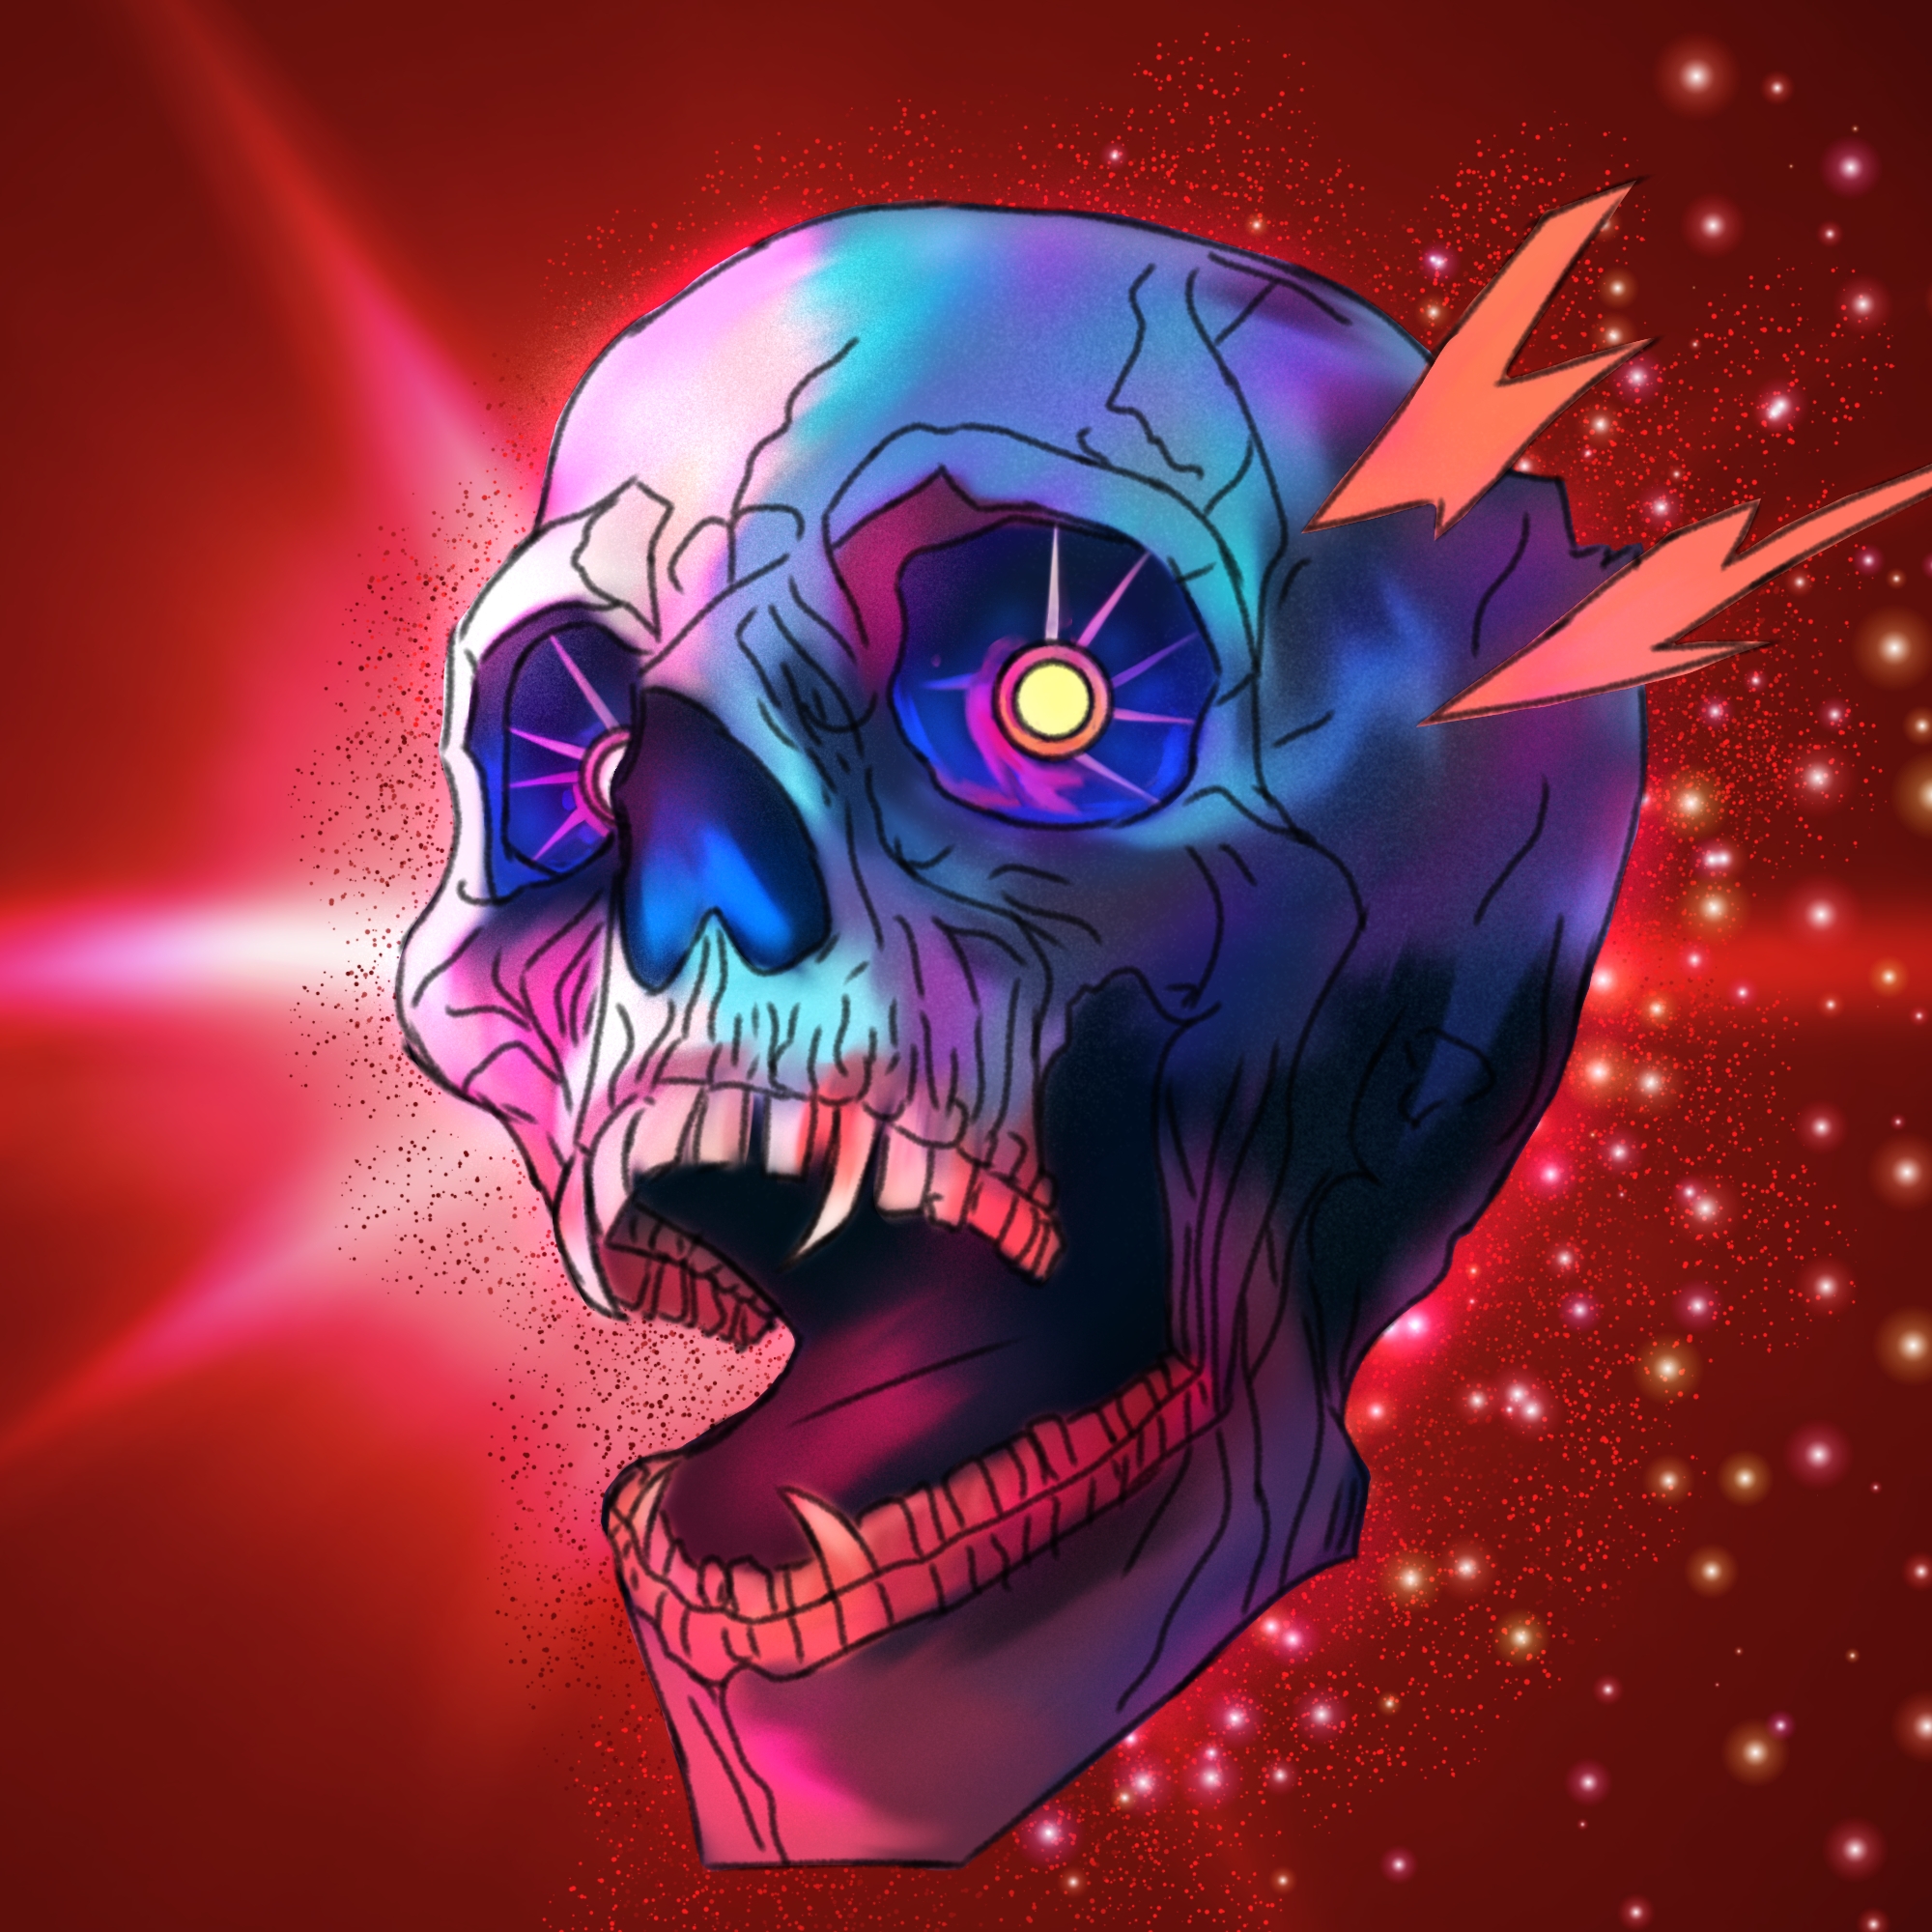
Finalmente, agregue detalles de brillos con Puntillismo cambiando los tonos de rojos entre claro y oscuro usando un método de mezcla normal alrededor del cráneo calaverico, texturice un poco con un aerografo de partículas con opacidad baja y color azul y lila, todo el cráneo. Resalte algunos colores con una capa de superposición y un aerógrafo y seguidamente pase en otra capa de añadir a aplicar brillos con la brocha punto de brillo. Resalte alguna sombras con aerógrafo en una capa de Multiplicar, y de esta forma resultó esta calavera vampírica! Espero les haya gustado! Gracias a todos ! 😄😚💖🙂🌷
Finally, add glitter details with Pointillism by changing the shades of reds between light and dark using a normal blending method around the calaveric skull, texturize a little with a particle airbrush with low opacity and blue and lilac color, all over the skull. Highlight some colors with an overlay layer and an airbrush and then move on to another layer of adding glitters with the glitter dot brush. Highlight some shadows with airbrush on a layer of Multiply, and this is how this vampire skull turned out! I hope you liked it! Thank you all ! 😄😚💖🙂🌷
Redes Sociales/ Social Networks
Sigueme en/ Follow me in:
👉Instagram: @catrynart
👉 Twitter: @catrynart
Herramientas Usadas/Used Tools
- Tablet Android/ Android Tablet
- Programa Ibis Paint X/ Ibis Paint X Program
- Traductor Deepl/ Deelp Translator
- Servidor de Imagenes Imgbb/ Imgbb Image Server
- Dactilopintura Digital/ Digital Fingerprint Painting
🌺¡HASTA EL PRÓXIMO POST!🌺

Detenerse es Retroceder
To Stop is to go Backwards
Damn like this is amazing I didn't have any idea i could turn the lineart as glitter too.Im taking a part in the contest too but this seriously had me in an awe 😍❤️
Glad you liked this technique @biyaawnur ! Thanks for sharing it! 😊👋
Do you know you can win a Chaos Legion pack and many other things just by following some simple steps ?? Check out our Latest Daily Showcase and Participate our latest Giveaway. Thanks
I love this interpretation, very colorful and sparkly :D
Thank you very much @juliakponsford I really love that you liked this style.❤️😊
Congratulations @catrynart! You have completed the following achievement on the Hive blockchain And have been rewarded with New badge(s)
Your next target is to reach 8000 upvotes.
You can view your badges on your board and compare yourself to others in the Ranking
If you no longer want to receive notifications, reply to this comment with the word
STOPCheck out our last posts:
Support the HiveBuzz project. Vote for our proposal!
Thanks for sharing! - @mango-juice

amazing skill you have, very improssed and thanks for sharing thhe process
Thank you so @mango-juice ❤️😌
Welcome 🙏🏻