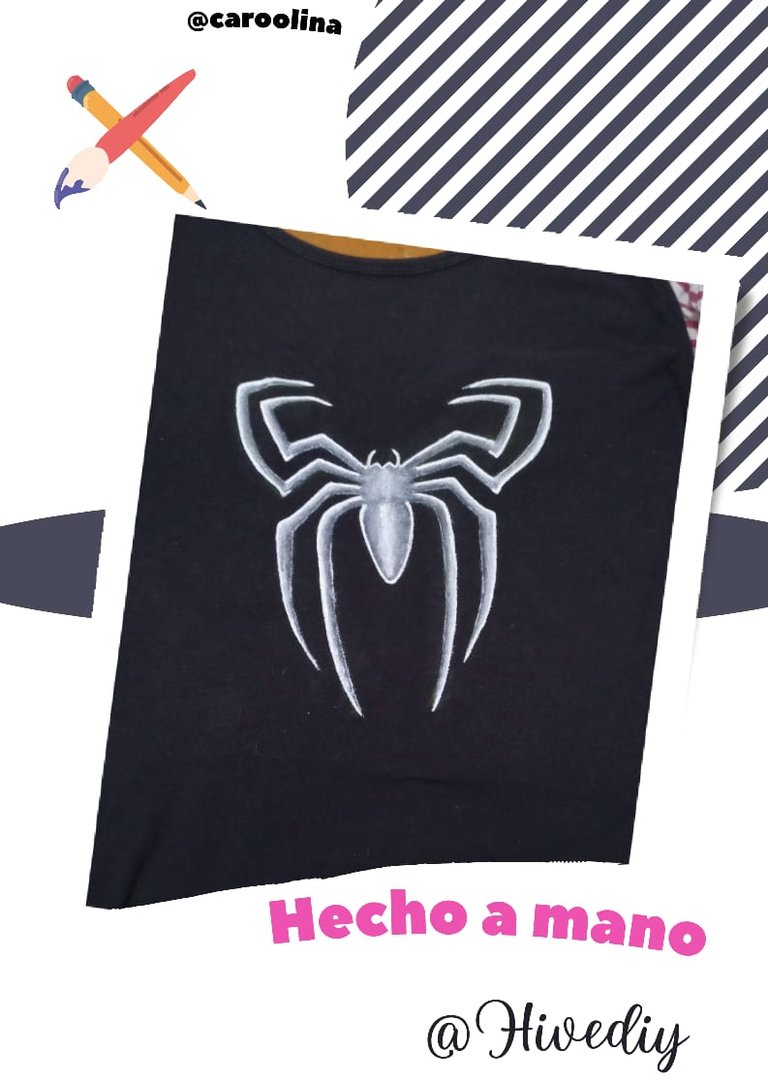
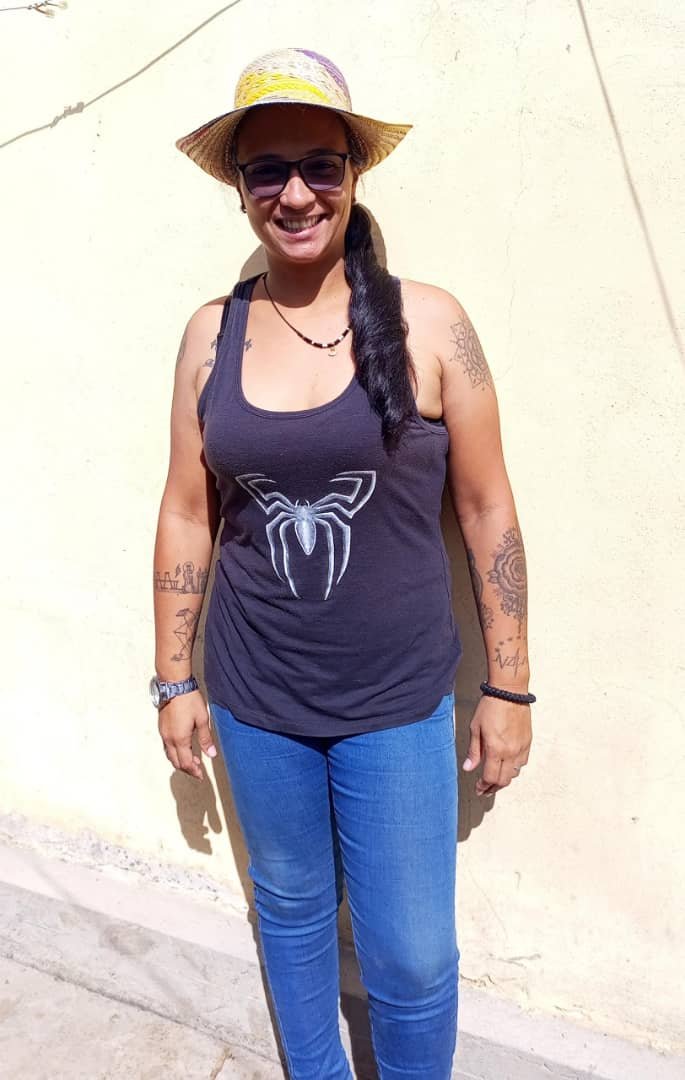
Franelilla pintada con el logo del Hombre araña./ Spiderman logo painted flannelette.
Hola, hola mis queridísimos hivers de @hivediy.
Hoy les traigo esta franelilla, que como andamos en modo playero, aproveche de hacerle un diseño de araña, como me encanta marvel, aproveche y le dibuje el logo del hombre araña, como siempre con mis toques de luz y sombra.
Hello, hello my dearest @hivediy hivers.
Today I bring you this flannel, as we are in beach mode, I took the opportunity to make a spider design, as I love marvel, I took the opportunity and drew the spiderman logo, as always with my touches of light and shadow.

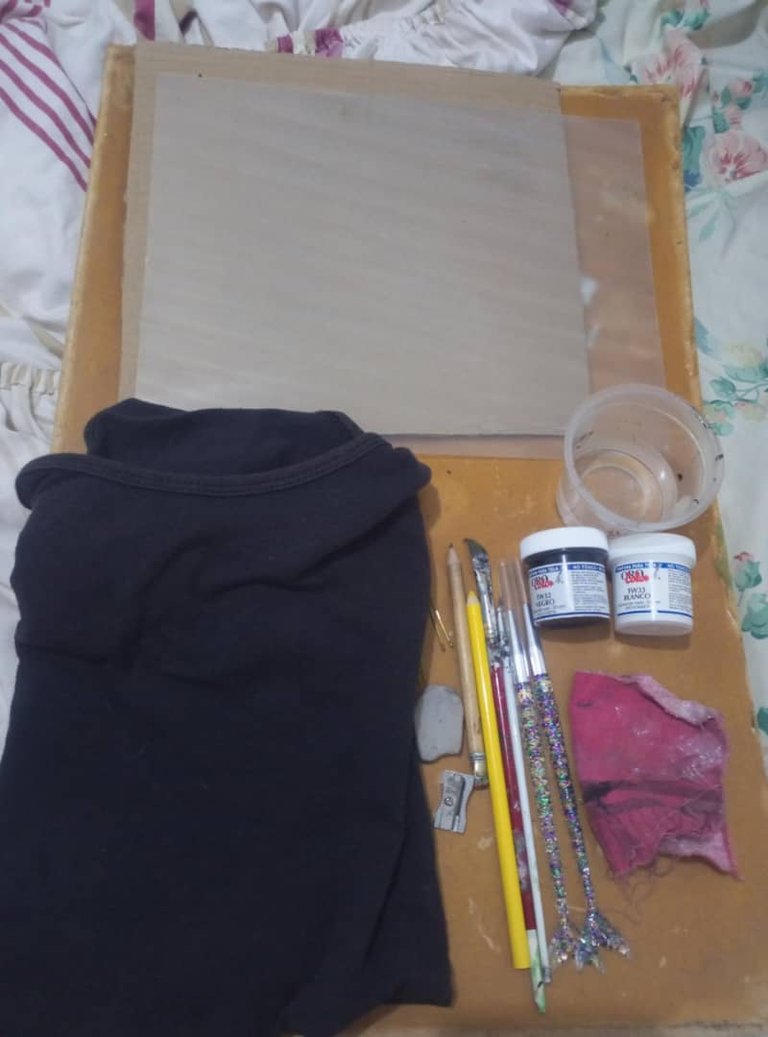
Los materiales que use son:
-Franelilla negra.
- Pinceles De varios tamaños.
-pintura de tela Blanco y Negro.
-lapiz y creyón amarillo.
-Goma de borrar y un sacapuntas.
- Vaso con agua.
-Ganchitos de cabello.
-Cartón.
-Tabla de madera.
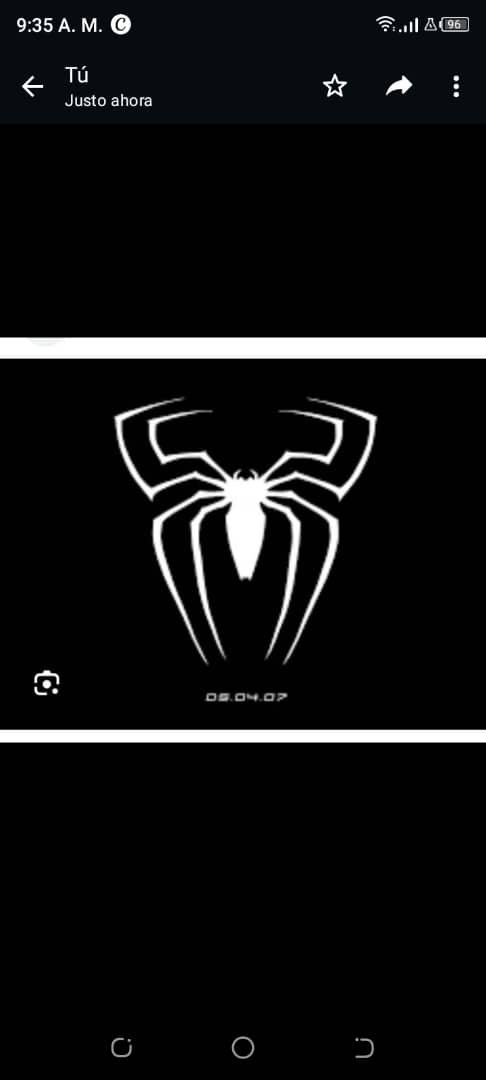
-Dibujo seleccionado.
The materials I used are:
-Black flannel.
- Brushes of various sizes.
-Black and white fabric paint.
-Yellow crayon and pencil.
-Eraser and pencil sharpener.
- Glass with water.
-Hair clips.
-Cardboard.
-Wooden board.
-Selected drawing.
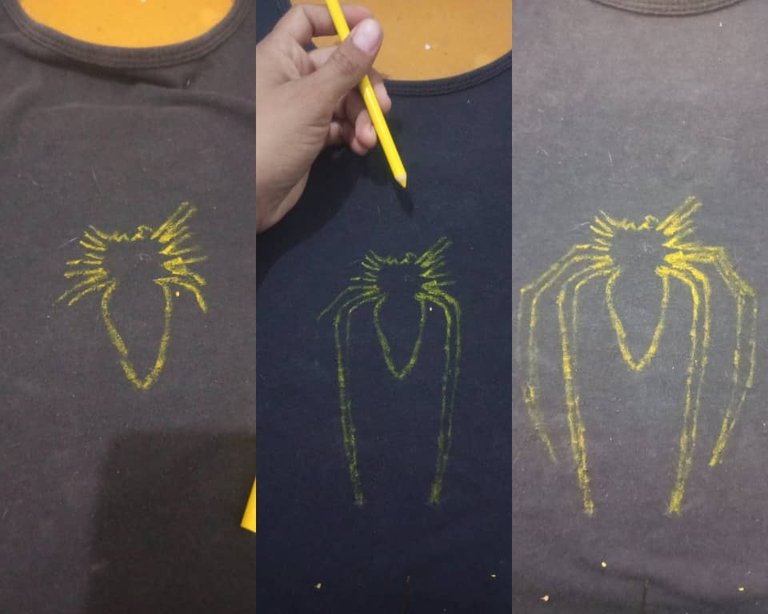
PASO1.
Empezamos colocando la franelilla dentro de la madera.
Al estirarla bien, le colocamos el cartón en la parte de adentro, entre la franelilla y la madera.
Luego con los ganchos de pelo, apretamos la franelilla previamente estirada para poder trabajar mejor.
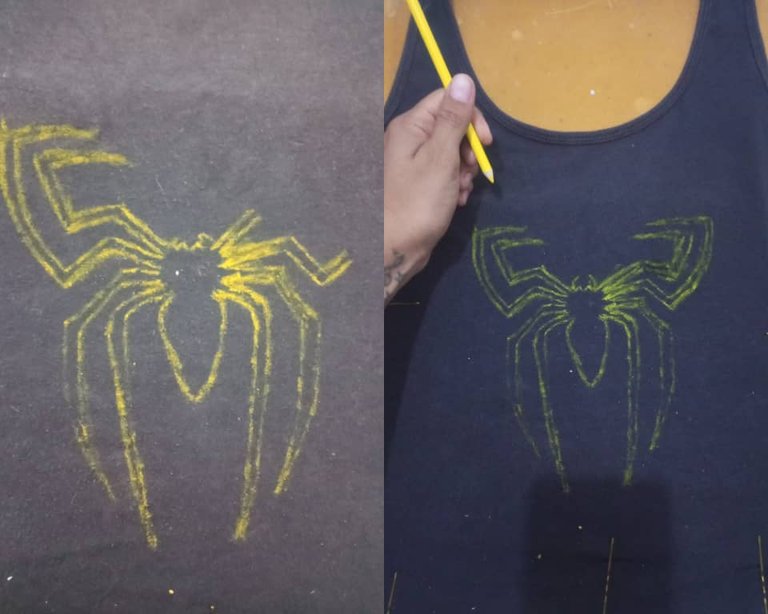
PASO2.
Debemos tener el diseño ya seleccionado, debemos tener la punta del creyón fina para poder manejar el dibujo mejor.
Comenzamos hacer el diseño de la araña, yo elegí la parte del cuerpo primero, para poder así tener control del tamaña de las patas.
Empecé con las 4 patas de abajo y luego las 4 de arriba.
STEP1.
We start by placing the flannel inside the wood.
After stretching it well, we place the cardboard on the inside, between the flannel and the wood.
Then with the hairpins, we tighten the previously stretched flannel to be able to work better.
STEP 2.
We must have the design already selected, we must have a thin crayon tip to be able to handle the drawing better.
We start making the spider design, I chose the body part first, so I can control the size of the legs.
I started with the 4 bottom legs and then the 4 top legs.
PASO3.
Al tener el boceto listo en la franelilla a creyón amarillo, batí bien la pintura blanca, moje un poco la punta del pincel y comencé a pintar lo que es la cabeza de la araña y sus dos pata de arriba.
STEP 3.
Once I had the sketch ready on the yellow crayon flannel, I mixed the white paint well, wet the tip of the brush a little and began to paint what is the head of the spider and its two upper legs.
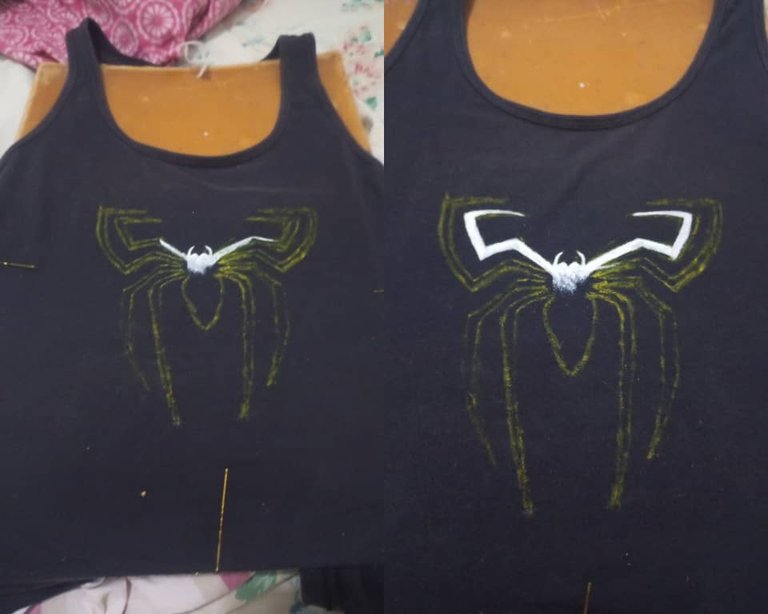
PASO4.
Seguí pintado luego las dos patas restantes de arriba, y pase a pintar las 4 patas de abajo con lo que restaba del cuerpo.
STEP 4.
I continued painting the two remaining legs on the top, and then painted the 4 legs on the bottom with what was left of the body.

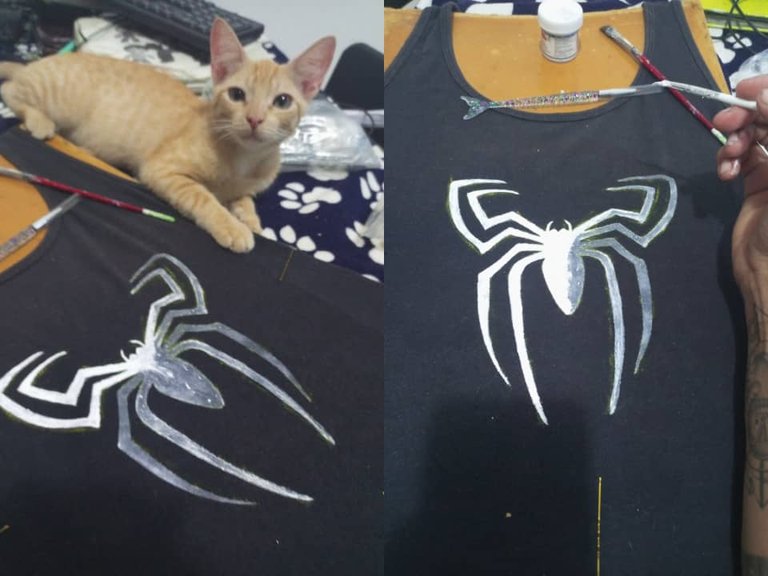
PASO5.
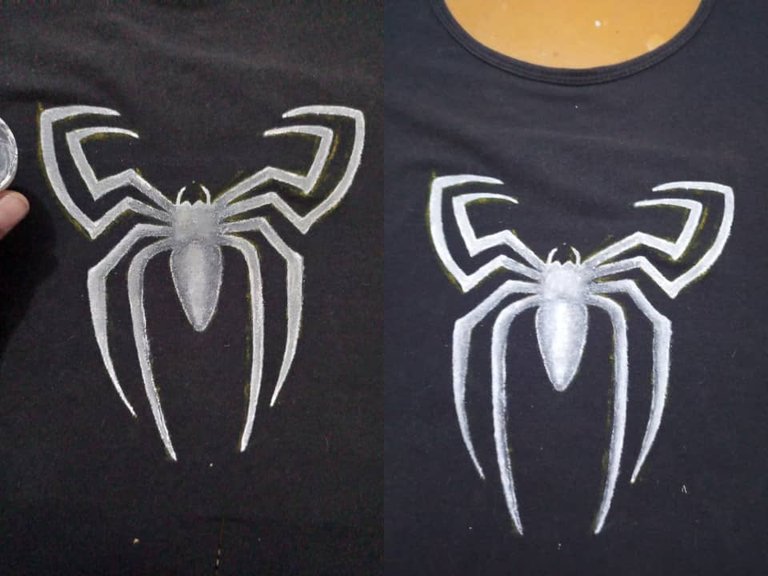
Esperamos que seque bien la primera mano, como pueden ver en la imagen ella tiende a ponerse muy clarita al secarse y tenemos que darle otra mano para que su calidad sea más duradera y fuerte.
En mi casa me ayuda a mi hermoso nene peludo BAN BAN, que no me desampara y le encanta verme pintar, es su manera de darme apoyo ánimos jajaja.
STEP5.
We wait for the first coat to dry well, as you can see in the image it tends to get very light when it dries and we have to give it another coat to make its quality more durable and strong.
In my house I am helped by my beautiful hairy baby BAN BAN, who does not let me down and loves to watch me paint, it is his way of giving me support and encouragement hahaha.
PASO6.
En lo particular cuando pinto a blanco y negro, me gusta mucho darle detalles a mis dibujos con luz y sombra, en este caso utilice varios tonos de gris mezclando blanco con negro.
Pinte ahora una capa de gris toda la raña para empezar a darle un poco de profundidad.
STEP 6.
In particular when I paint in black and white, I like to give details to my drawings with light and shadow, in this case I used several shades of gray mixing black and white.
Now paint a layer of gray all over the entire line to start giving it some depth.
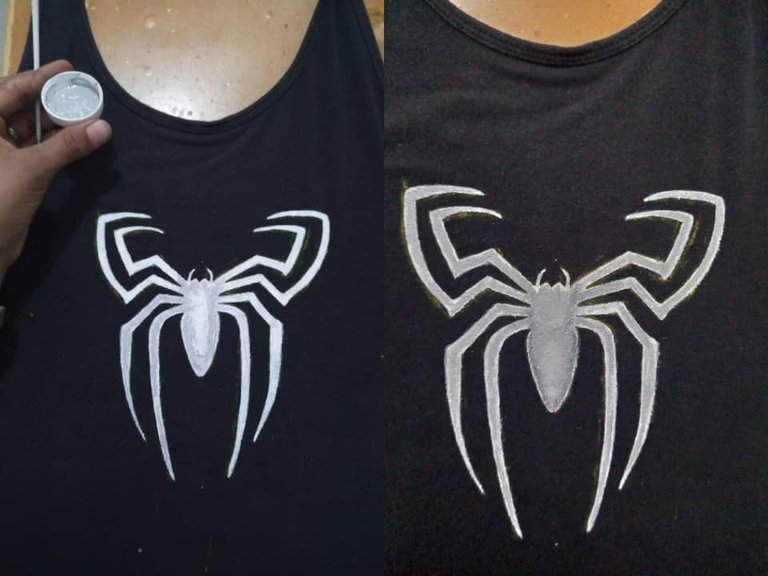
PASO7.
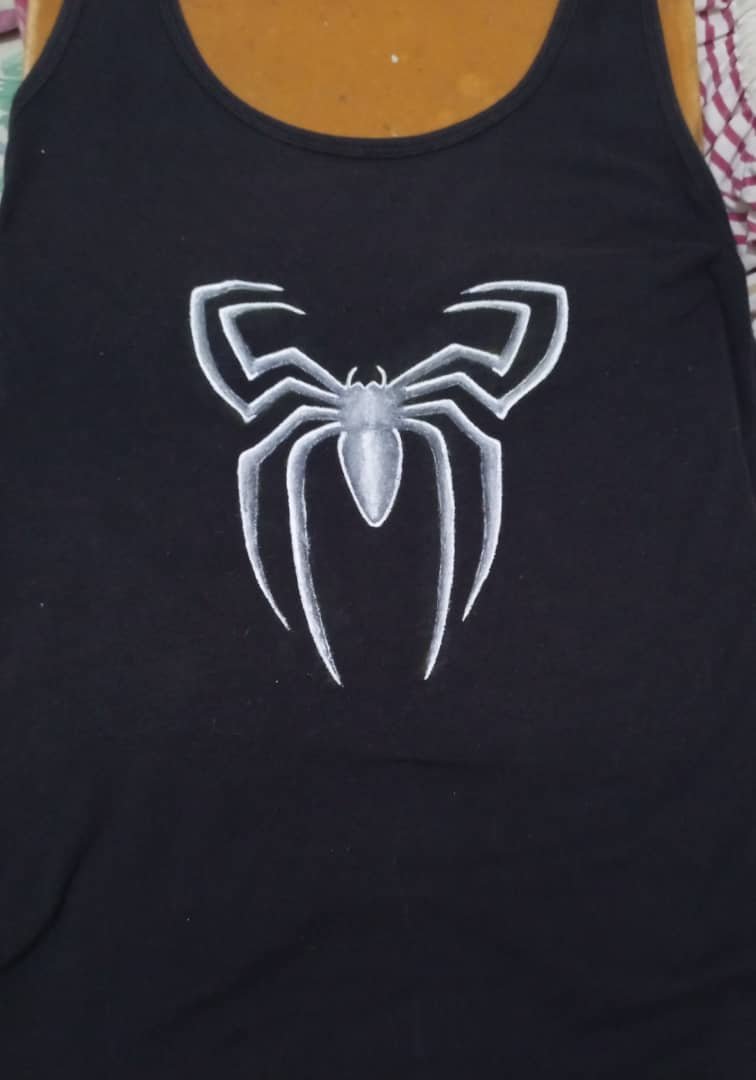
Después de aplicar el gris, mezcle ese mismo gris con un poco de blanco y con tonos más claros de gris empecé a darle por el centro, y así hice con el negro y le di a la parte de adentro de las patas más oscuridad, hasta obtener el resultado que quería.
Para finalizar le di un borde de luz que el blanco par que tuviera un poco de brillo el diseño y listo, obtuve el resultado que quería.
Espero lo disfruten tanto como yo.
STEP 7.
After applying the gray, I mixed that same gray with a little white and with lighter shades of gray I started to give it through the center, and so I did with the black and gave the inside of the legs more darkness, until I got the result I wanted.
Finally I gave a light edge to the white to give a little brightness to the design and that's it, I got the result I wanted.
**I hope you enjoy it as much as I do.

Esta muy lindo el resultado, es una técnica sencilla que podemos hacer en casa con diferentes modelos. Sin duda es una pieza ideal para playear! Bendiciones
Si totalmente, gracias por leerme.
https://twitter.com/hivediy47901/status/1774308165288333407
Gracias por el apoyo.