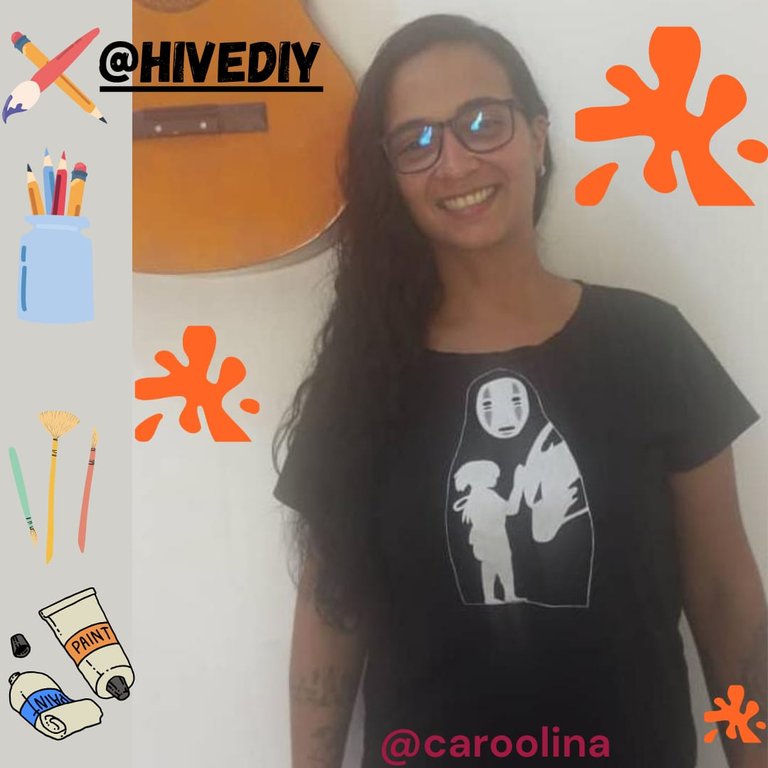
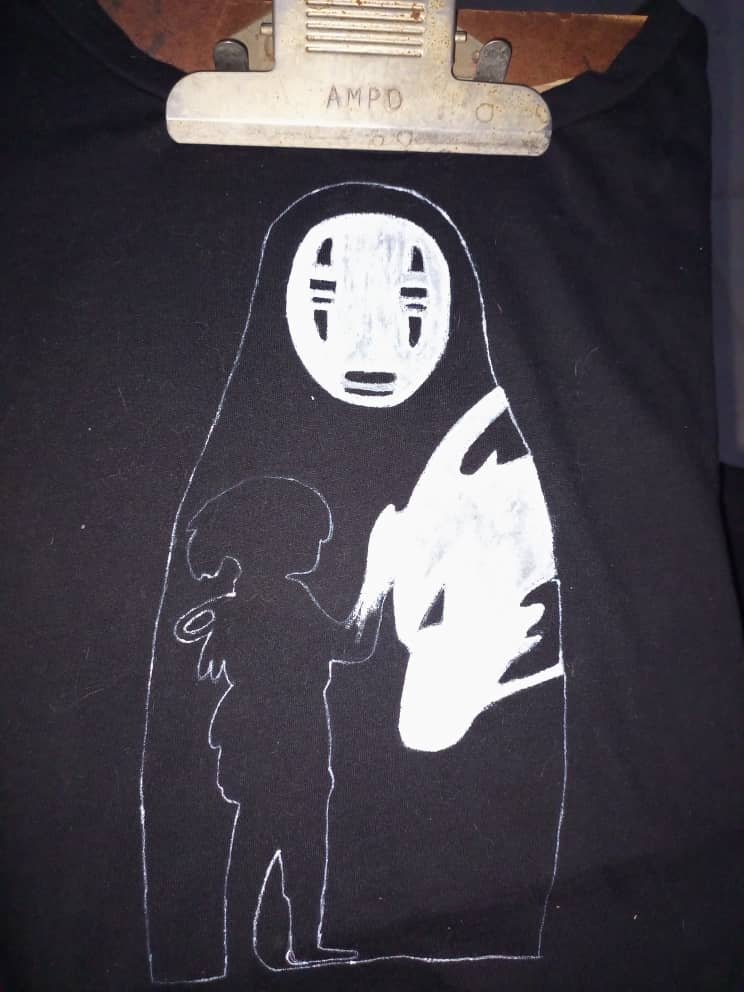
Franela pintada a mano perzonalizada de CHIHIRO./ CHIHIRO hand-painted and hand-zoned flannel.
HOLA mi bella comunidad de @hivediy, un grato saludos a todos, y un fuerte abrazo.
Hoy les vengo a traer un diseño pintado a mano en una franela negra que hice de una película que me encanta, es una de mis películas animadas favoritas y es EL VIAJE DE CHIHIRO, película la cual nos deja una buena enseñanza a mi parecer.
Si aún no la han visto, se las recomiendo, sin más que decir les cuento el proceso.
HELLO my beautiful @hivediy community, greetings to all, and a big hug.
Today I come to bring you a hand painted design on a black flannel that I made from a movie that I love, it is one of my favorite animated movies and it is THE JOURNEY OF CHIHIRO, movie which leaves us a good teaching in my opinion.
If you haven't seen it yet, I recommend it, without further ado, I'll tell you the process.

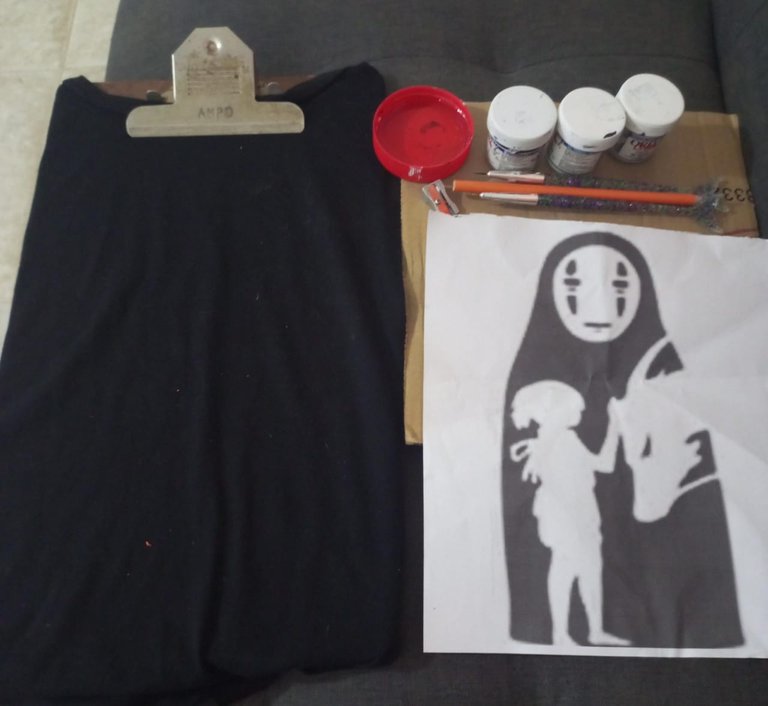
Los materiales que use fueron:
-FRANELA NEGRA.
-cartoné.
-TABLA PARA AFINCARME.
-PINTURAS DE TELA.
-LAPIZ.
-EMBASE CON AGUA.
-PINCELES.
-SACAPUNTA.
-DISEÑO A REALIZAR.
The materials I used were:
-BLACK FRANNEL.
-CARDBOARD.
-BOARD TO FIX ME.
-FABRIC PAINTS.
-PENCIL.
-WATER BOTTLE.
-PENCILS.
-SACAPUNTA.
-DESIGN TO BE MADE
PASO1.
Empezamos colocándole adentro de la franela la madera donde nos vamos a afincar.
Luego en medio de la franela y la madera le colocamos el cartón para que no se vaya a manchar la franela.
PASO2.
Estiramos bien la franela de manera que nos quede bien estirada y bien centrada, para así poder trabajar mejor, le colocamos los ganchitos que tengamos en casa que nos puedan ayudar a mantenerla en esa posición.
STEP1.
We start by placing inside the flannel the wood where we are going to fix the flannel.
Then in the middle of the flannel and the wood we place the cardboard so that it will not stain the flannel.
STEP2.
Stretch the flannel so that it is well stretched and well centered, so we can work better, we place the hooks that we have at home that can help us to keep it in that position.
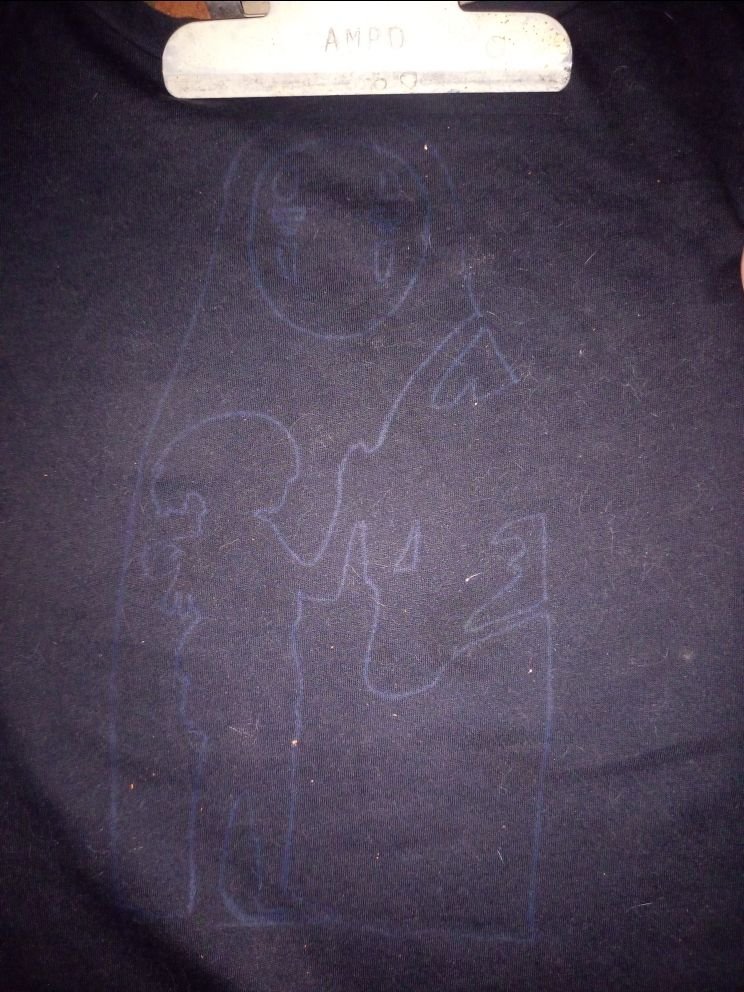
PASO3.
Dibujamos con el lápiz o creyón con mucho cuidado nuestro diseño seleccionado, esta vez fue el de EL VIAJE DE CHIHIRO.
STEP3.
We draw with the pencil or crayon very carefully our selected design, this time it was the CHIHIRO'S JOURNEY.
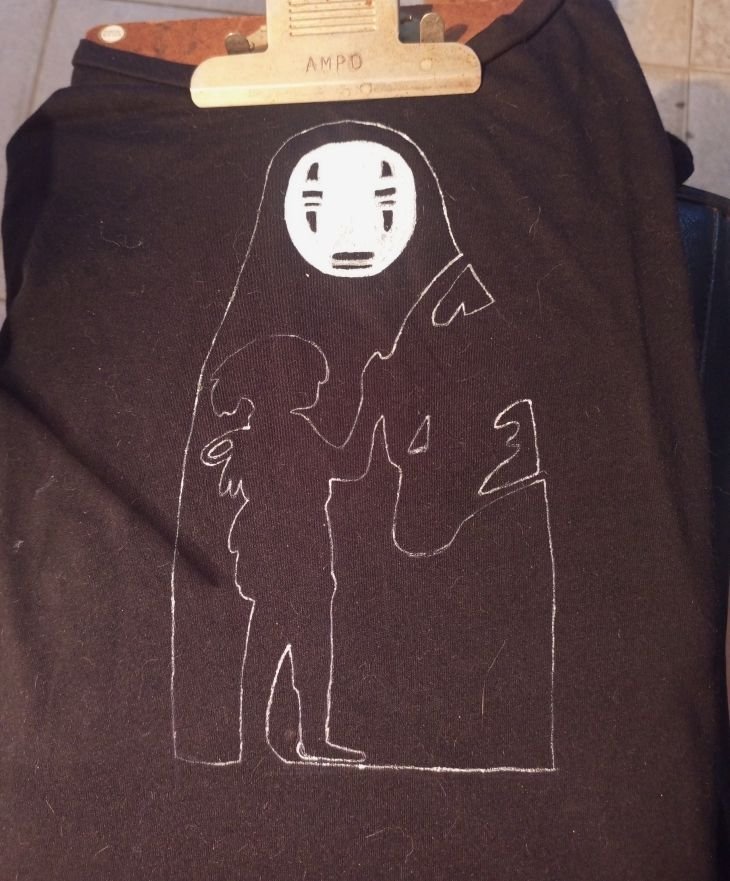
PASO4.
Procedemos a empezar a delinear todo lo que es el contorno del dibujo, tanto por fuera como por dentro con el color blanco.
STEP4.
We proceed to start outlining the outline of the drawing, both outside and inside with the white color.
PASO5.
Con el contorno listo, empezamos a rellenar la máscara del personaje de sin cara.
Así pasamos luego a la cabeza del dragón y luego al cuerpo de chihiro hasta darle su primera mano de pintura.
STEP5.
With the outline ready, we start filling in the mask of the faceless character.
Then we move on to the dragon's head and then to Chihiro's body until we give him his first coat of paint.
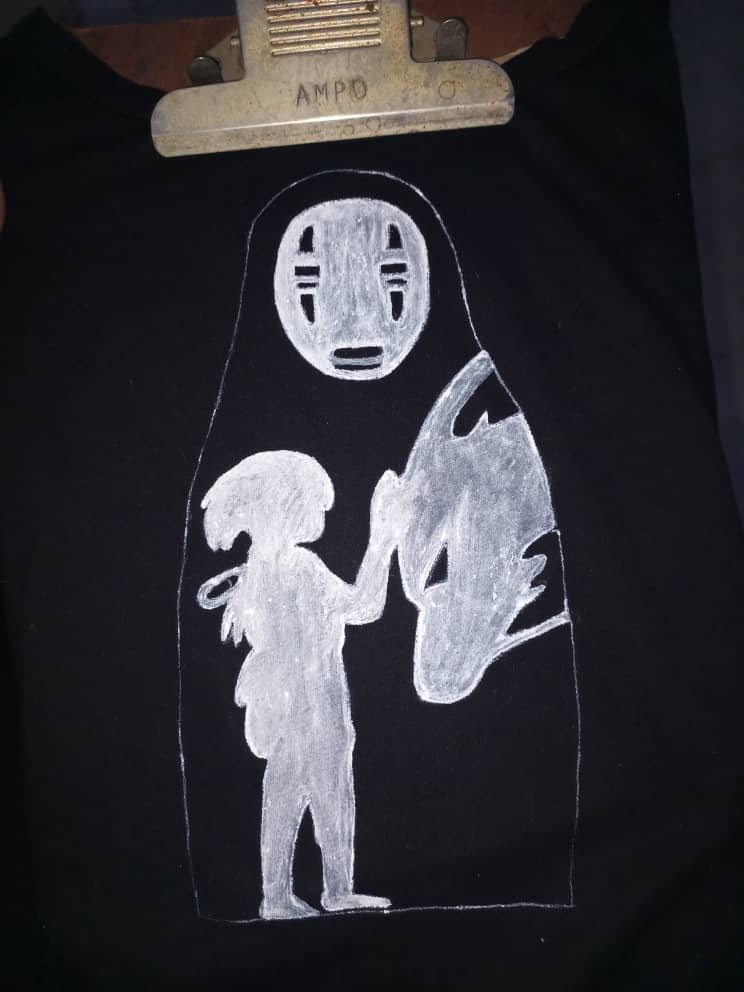
PASO6.
Al estar completamente seca la primera capa de pintura, pasamos a darle la segunda y la tercera mano a todo el dibujo para que cubra bien.
Si se pueden fijar con la primera capa de pintura ella se ve bastante opaca al secar, por eso siempre recomiendo dar dos o tres capaz.
STEP6.
When the first coat of paint is completely dry, we give the second and third coat to the whole drawing so that it covers well.
If you can fix with the first coat of paint it looks quite opaque when it dries, that's why I always recommend to give two or three coats.

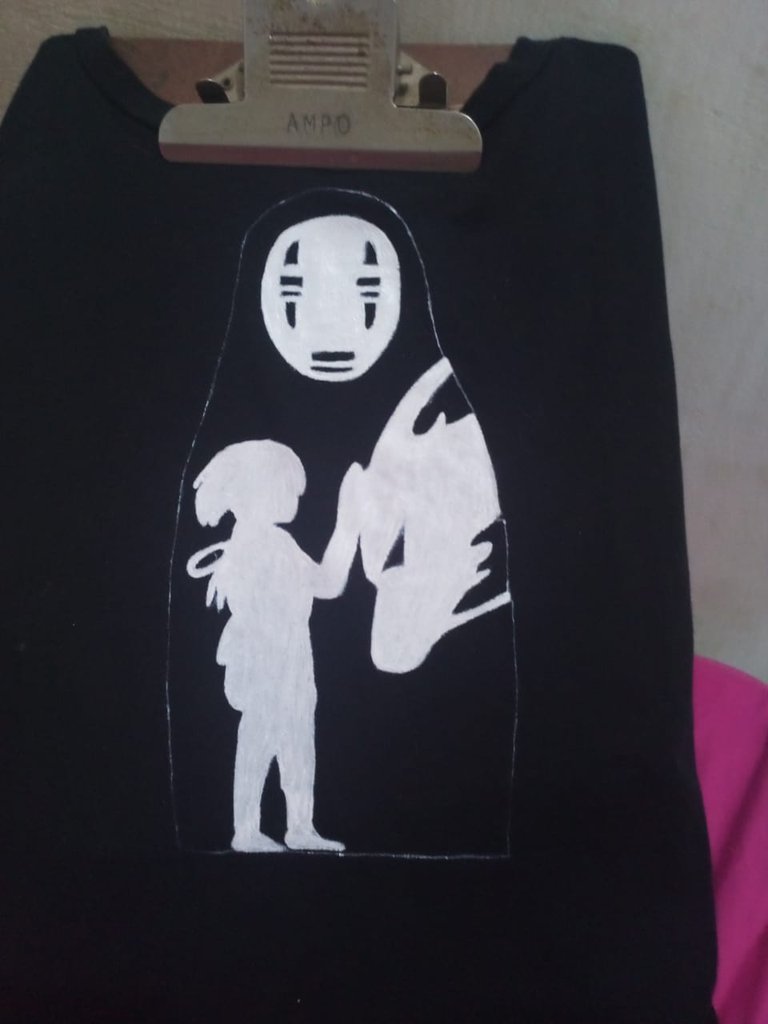
PASO7.
Le damos ahora los detalles con el color negro de los ojos y la boca, y un poco de gris.
Podemos darle otro retoque al delineado blanco si se ven que se ve muy opaco y listo, hemos terminado nuestro diseño.
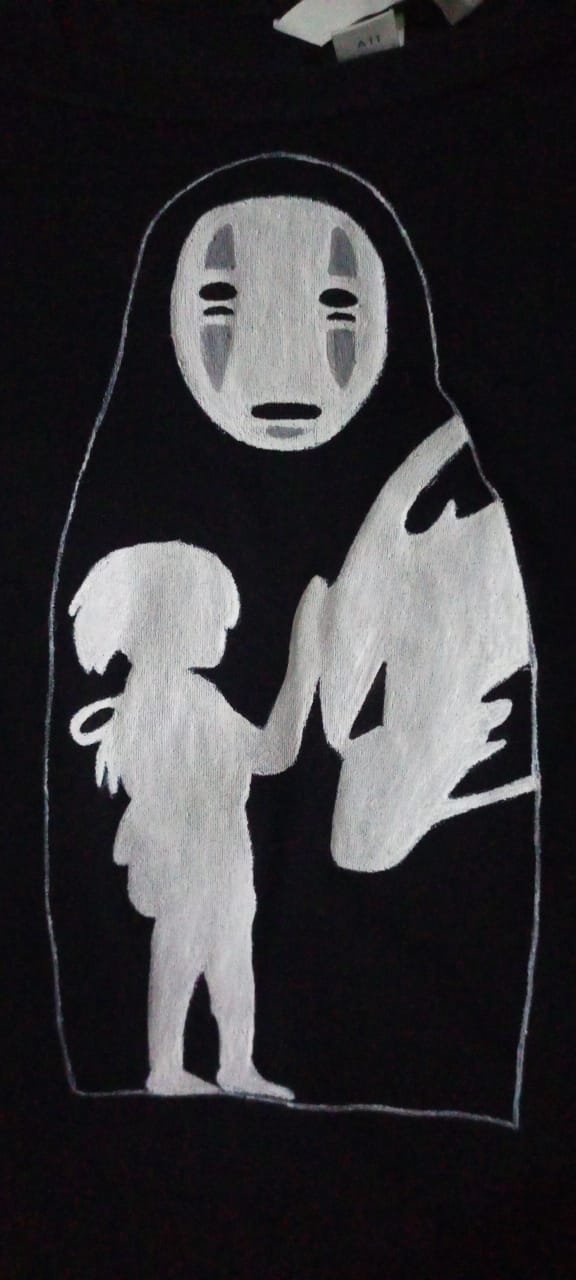
Espero lo disfruten tanto como yo, y se animen a personalizar sus franelas.
STEP7.
We give now the details with the black color of the eyes and the mouth, and a little gray.
We can give another touch up to the white outline if it looks too opaque and that's it, we have finished our design.
I hope you enjoy it as much as I do, and I encourage you to customize your flannels.

It's lovely to see craft like this being done. I used to do a lot of this kind of thing when I was a little girl. I don't have the space for craft, but I wish more people would engage in this kind of thing instead of spending so much time on computers:)
Have a nice weekend!
Thank you very much @millycf1976, if it would be good to apply more art and this type of work, one de-stresses, and detoxes a little from the digital world.
Thank you very much @millycf1976, if it would be good to apply more art and this type of work, one de-stresses, and detoxes a little from the digital world.
Absolutely!
Happy Monday and have a wonderful week ahead:)
Congratulations @caroolina! You have completed the following achievement on the Hive blockchain And have been rewarded with New badge(s)
Your next target is to reach 500 replies.
You can view your badges on your board and compare yourself to others in the Ranking
If you no longer want to receive notifications, reply to this comment with the word
STOPCheck out our last posts:
https://twitter.com/hivediy47901/status/1784130767766818880
¡Quedó demasiado hermosa! El diseño es genial y pintaste con mucha delicadeza para que quedara bien. Hiciste un trabajo increíble.
!DIY
Muchas gracias, le puse mucho amor.
You can query your personal balance by
!DIYSTATSGracias.
Wow, ha quedado fabulosa!
Muchas gracias.
Que hermoso resultado, me encantó 😍
What a beautiful result, I loved it 😍.
Gracias @yaslenysofia
Te quedó muy bonita. Es genial poder personalizar nuestras prendas y accesorios
Gracias @rlathulerie, te invito a que lo intentes.
¡¡¡Buen trabajo!!! Gracias por publicar tu excelente contenido en Hive Diy, me gusta mucho la idea de pintar camisas con estas pinturas especiales para tela, se pueden hacer muchas cosas con ellas
Tu comunidad artesana ahora es testigo

Muchas gracias por todo el apoyo brindado, me encanta compartirlo, por que siento que es algo que todos podemos intentar hacer alguna vez.
Congratulations @caroolina! You received a personal badge!
You can view your badges on your board and compare yourself to others in the Ranking
Check out our last posts:
Thanks
Wow, congratulations @caroolina! You're on fire with your Hive achievements! Keep up the great work.
BTW, we noticed we miss your support for our proposal. Mays we ask you to check it out and consider supporting it?
All you need to do is to click on the "support" button on this page: https://peakd.com/proposals/248.
Thank you!