[EN-ES] Security viewer for Dremel, I show you the step by step of how to create it. // Visor de seguridad para Dremel, te muestro el paso a paso de cómo crearlo.

Happy start to the week for all of us who do life in this community! My regards to all.
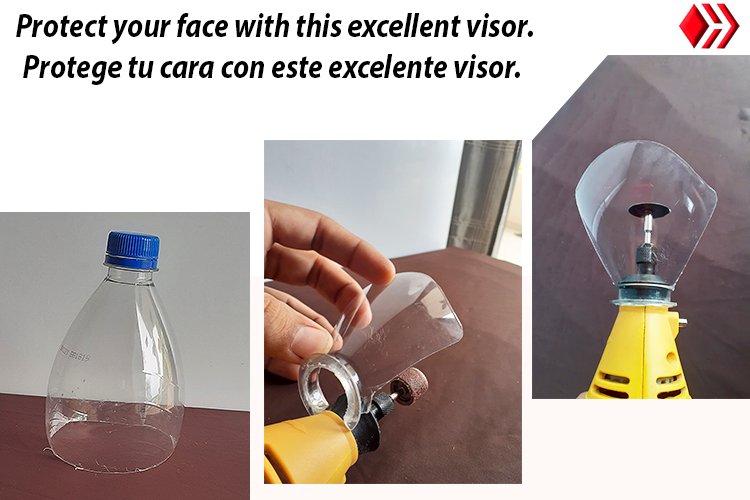
For this occasion I bring you an essential accessory for those who work with a Dremel (mini lathe), it is a protective visor so that you can carry out your work in complete safety, since this tool works with many revolutions and requires protection for your person If you do not have this security protector, here I show you an idea of how we can easily create it with recycled material.
This protector generally does not come with these equipment but in a separate pack for purchase, in my country there is almost no sale of these accessories, it is very difficult to get them.
That is why I decided to show them in this post on how to make it, I used a carbonated drink container that I had recycled from a previous project, this material fulfills its function for this utility, it allows you to clearly see your work and at the same time protect yourself for being from a resistant material.
I hope you like it and take advantage of it.
Materials:
• 1/2 plastic container. (Half Bottle of carbonated drink)
Tools:
• Scissor.
• marker.
• Razor.
¡Feliz inicio de semana para todos lo que hacemos vida en esta comunidad! Mis saludos a todos.
Para esta ocasión les traigo un accesorio indispensable para aquellos que trabajan con un Dremel (mini torno), se trata de un visor protector para que realices tus trabajos con toda seguridad, ya que esta herramienta trabaja con muchas revoluciones y precisa la protección para tu persona, si no posees este protector de seguridad acá te muestro una idea de cómo podemos crearla fácilmente con material reciclado.
Este protector generalmente no viene con estos equipos si no en un pack aparte para su compra, en mi país casi no existe la venta de estos accesorios es muy difícil conseguirlos.
Es por esto que decidí mostrárselos en este post de cómo fabricarlo, yo utilicé un recipiente de bebida carbonatada que tenía reciclado de un proyecto anterior, este material cumple su función para esta utilidad, te permite ver nítidamente tu trabajo y a la vez protegerte por ser de un material resistente.
Espero les guste y le saquen provecho.
Materiales:
• 1/2 recipiente plástico. (Mitad de Botella de bebida carbonatada)
Herramientas:
• Tijera.
• marcador.
• Navaja.
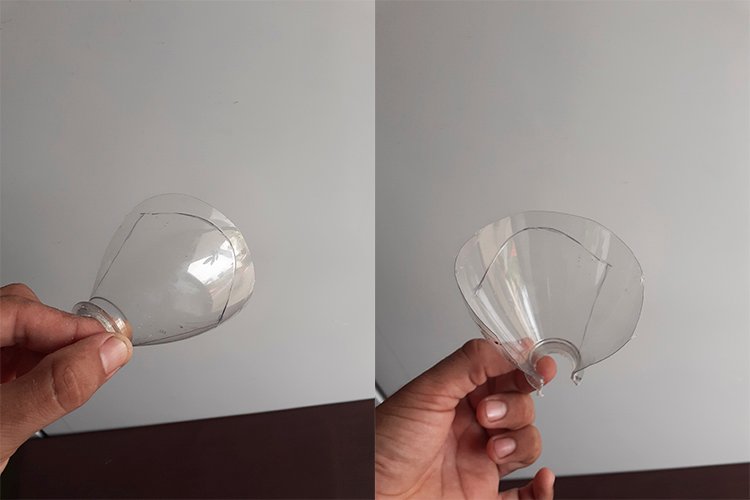
Step 1
• We collected materials and tools mentioned above to get started.
• From this half container we will use the tip of the bottle cap to make our safety protector.
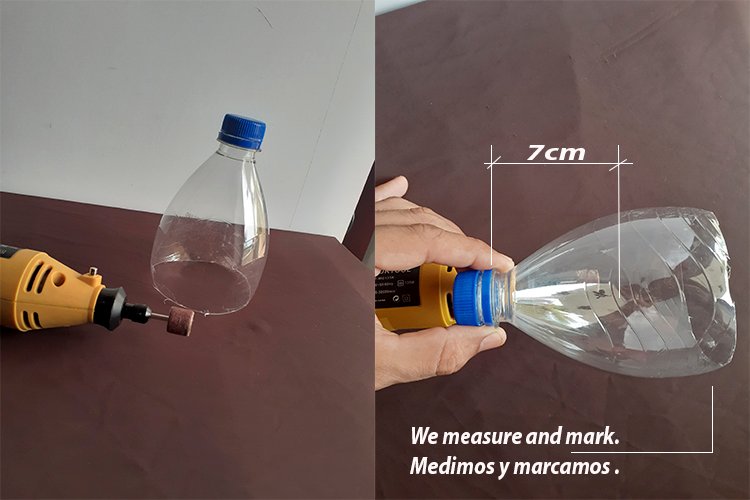
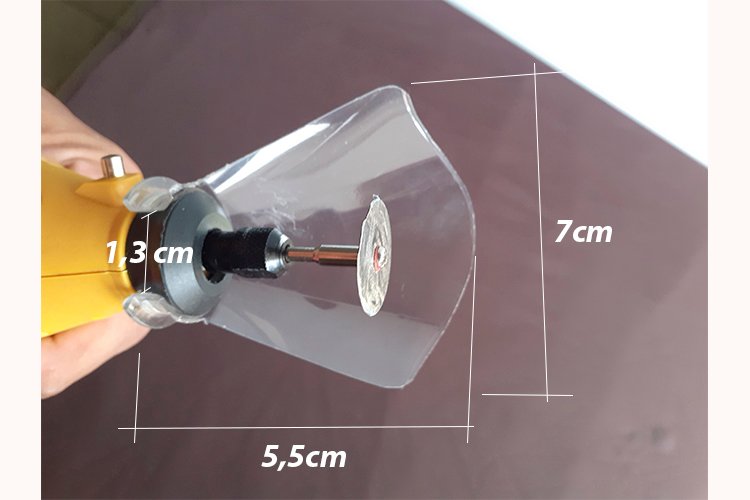
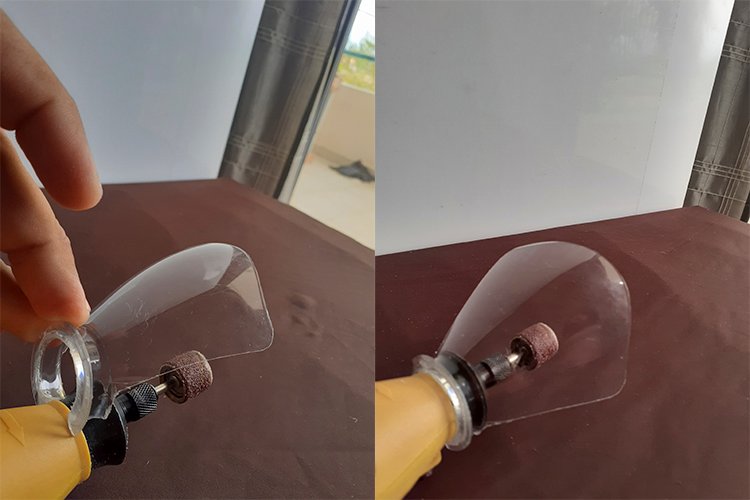
• We measure the container together with our Dremel with a cutting or sanding piece installed on its tip to know how much we will have to cut (I leave a 1cm margin approximately after the accessory).
• Use 7 cm leaving a suitable margin after the sanding accessory.
• And I proceeded to cut with a hacksaw at the point I show you.
Paso 1
• Recolectamos materiales y herramientas antes mencionados para empezar.
• De este medio recipiente utilizaremos la punta de la tapa de la botella para hacer nuestro protector de seguridad.
• Medimos el recipiente junto con nuestro Dremel con una pieza de corte o lijado instalado en su punta para saber cuento tendremos que cortar (yo deje un marguen 1cm aproximadamente luego del accesorio).
• Utilice 7 cm dejando un margen conveniente después del accesorio de lijado.
• Y procedí a cortar con una segueta en el punto que le muestro.

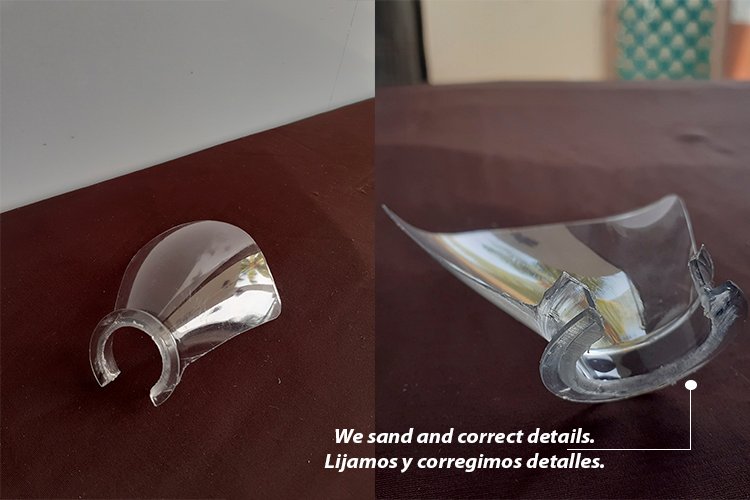
Step 2
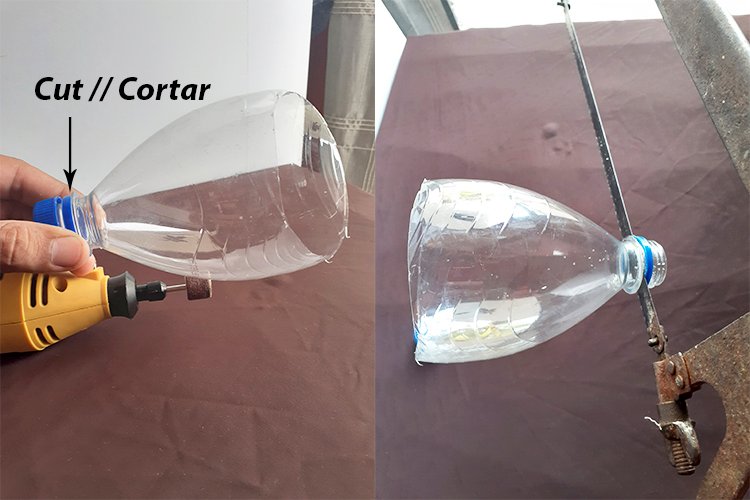
• After cutting the tip of the bottle, we proceed to cut the selected part in red.
• With the help of a hacksaw blade and scissors we cut the plastic.
• Take advantage of the same design of the bottle to make the outline with a marker and in turn cut with scissors.
Paso 2
• Luego de cortar la punta de la botella, procedemos a cortar la parte seleccionada en rojo.
• Con la ayuda de una hoja de segueta y una tijera cortamos el plástico.
• Aproveché el mismo diseño de la botella para hacer el contorno con un marcador y a su vez cortar con tijera.


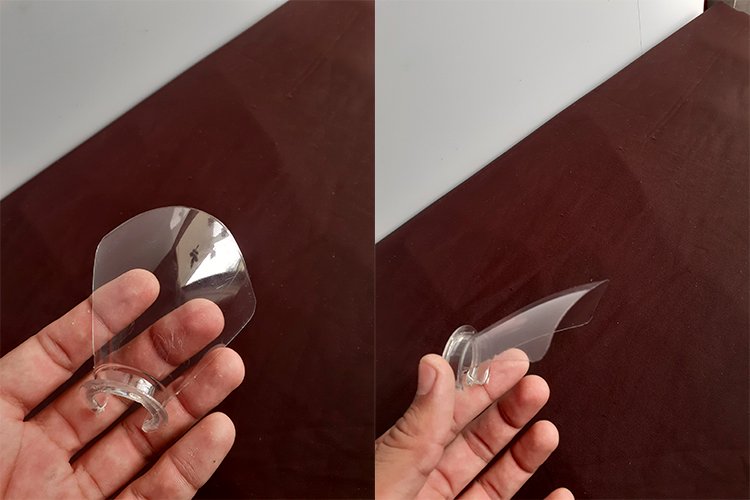
Step 3
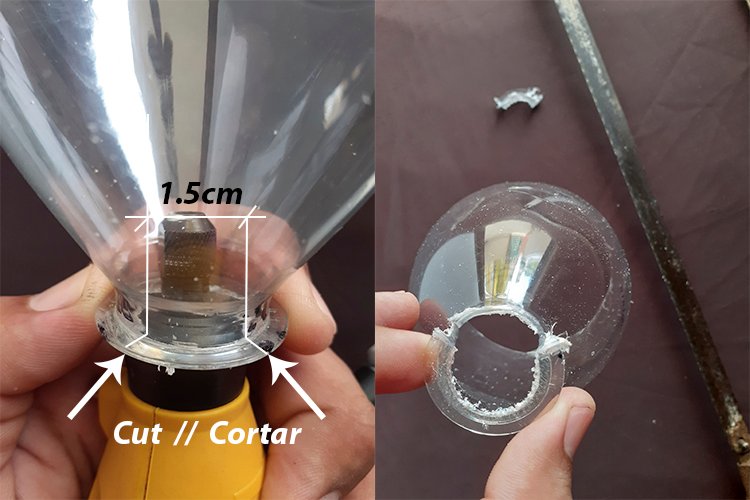
• After having cut the contour, we can perfect our element as much as you want to give it a better finish, with the same scissors.
• And ready to use our accessory.
Paso 3
• Luego de haber cortado el contorno, a nuestro elemento podemos perfeccionarlo tanto como quieras para darle un mejor acabado, Con la misma tijera.
• Y listo a usar nuestro accesorio.


Thank you for reading my post dear reader, I hope it has been useful to you, it is my intention, greetings, see you soon.
Espero tengan un día excelente, saludos, agradecido por su tiempo de ver mi post, nos vemos.

Excelente @carlossteele que buen trabajo. Felicidades
Muchas gracias @floreudys79
me encanto. 20 punto en la boleta!!!!
Muchas gracias! 👍
Congratulations @carlossteele! You have completed the following achievement on the Hive blockchain and have been rewarded with new badge(s):
Your next target is to reach 400 upvotes.
You can view your badges on your board and compare yourself to others in the Ranking
If you no longer want to receive notifications, reply to this comment with the word
STOPTo support your work, I also upvoted your post!
Check out the last post from @hivebuzz: