[EN-ES] Diseño de una guitarra rockstar. // Unique design of a rockstar guitar.
En este tutorial te mostraré como elaboré un diseño original de una guitarra eléctrica, agregándole efectos al estilo rockstar, utilizando la técnica de dibujo tradicional para crear un contorno único de lo que será nuestra guitarra soñada.
In this tutorial I will show you how I made an original design of an electric guitar, adding rockstar style effects, using the traditional drawing technique to create a unique outline of what our dream guitar will be.

Feliz día, mis queridos amigos. ¡Deseo que estén bien!, me complace estar hoy nuevamente con ustedes y poder compartirles otras de mis creaciones, espero les guste.
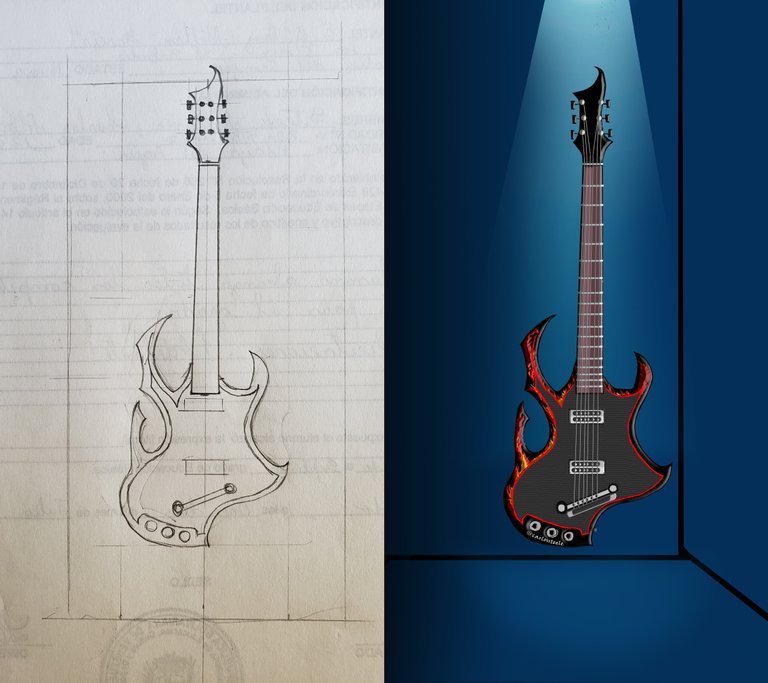
Para crear el diseño del dibujo de esta guitarra me inspiré en el amor que le tengo a estas obras musicales y a su sonido característico. Siempre soñé crearles estos diseños a mis guitarras, es por eso que se me ocurrió representar una guitarra soñada en un dibujo, espero les gusten.
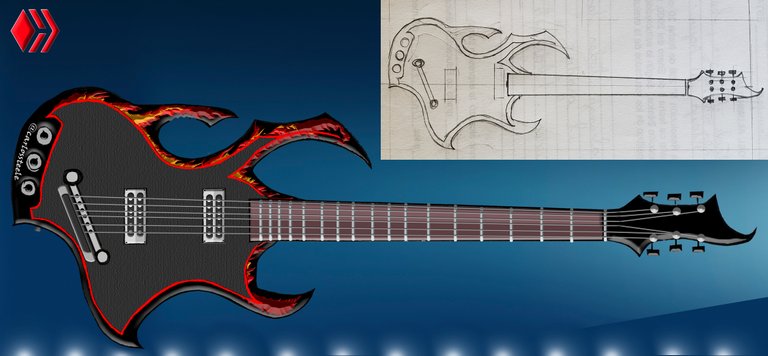
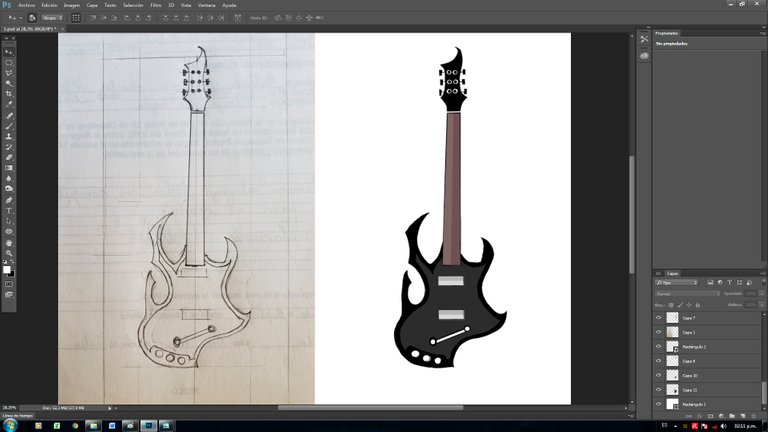
Al momento de crear un diseño, me la imagino, como seria, que forma tendría, y como luciría, es por eso que al darle forma sobre el papel, lo primero que hago es utilizar el método que más me favorezca y poder replicar el objeto de la manera más fiel, tomando como ejemplo una guitarra real, luego que obtengo mis cuadriculas o secciones simplemente doy rienda suelta a las curvas y moldes según tenga pensado, como en este caso quería representar el cuerpo de la guitarra como una llama ardiente, gustándome 100% mi resultado.
Comenzamos:
Para el dibujo a mano alzada; Utilice una libreta, hoja reciclada blanca, lápiz, borrador.
Para el dibujo digital; Capturamos el dibujo en el papel con una cámara de teléfono y transfiriendo el archivo al ordenador y posteriormente editándolo con Photoshop o cualquier otro editor de su preferencia.
Happy day, my dear friends. I wish you are well! I am pleased to be with you again today and to be able to share other of my creations, I hope you like it.
To create the drawing design of this guitar I was inspired by the love I have for these musical works and their characteristic sound. I always dreamed of creating these designs for my guitars, that's why it occurred to me to represent a dream guitar in a drawing, I hope you like them.
When creating a design, I imagine it, how it would be, what shape it would have, and what it would look like, that is why when giving it shape on paper, the first thing I do is use the method that best suits me and be able to replicate the object in the most faithful way, taking a real guitar as an example, after I get my grids or sections I simply give free rein to the curves and molds as I have in mind, as in this case I wanted to represent the body of the guitar as a burning flame, liking it 100% my result.
We start:
For freehand drawing; Use a notebook, recycled white sheet, pencil, eraser.
For digital drawing; We capture the drawing on paper with a phone camera and transferring the file to the computer and later editing it with Photoshop or any other editor of your choice.
Pasos de elaboración:
Preparation steps:
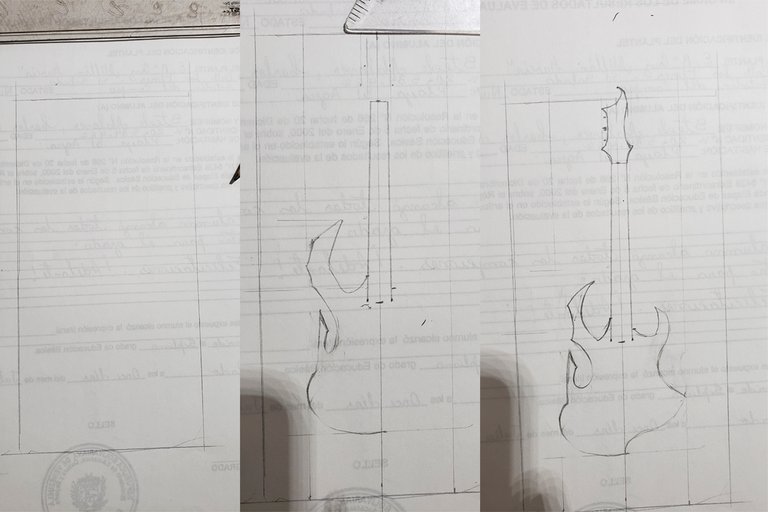
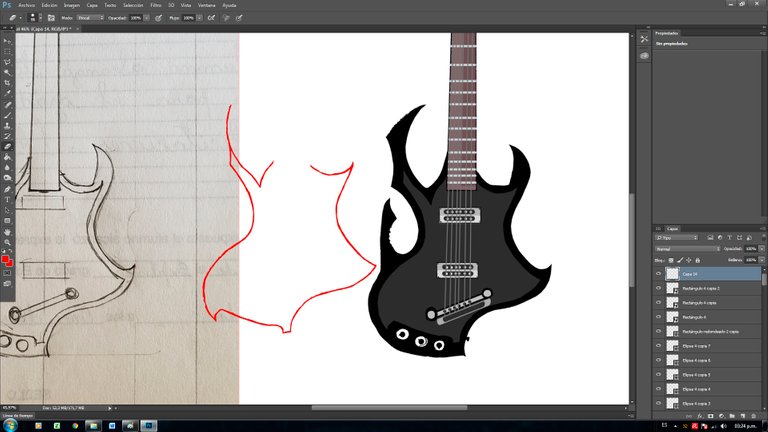
En una hoja de reciclaje, comienzo trazando mi rectángulo, y trazando líneas verticales y horizontales estimando las proporciones de mi guitarra.
On a recycling sheet, I start by tracing my rectangle, and tracing vertical and horizontal lines estimating the proportions of my guitar.

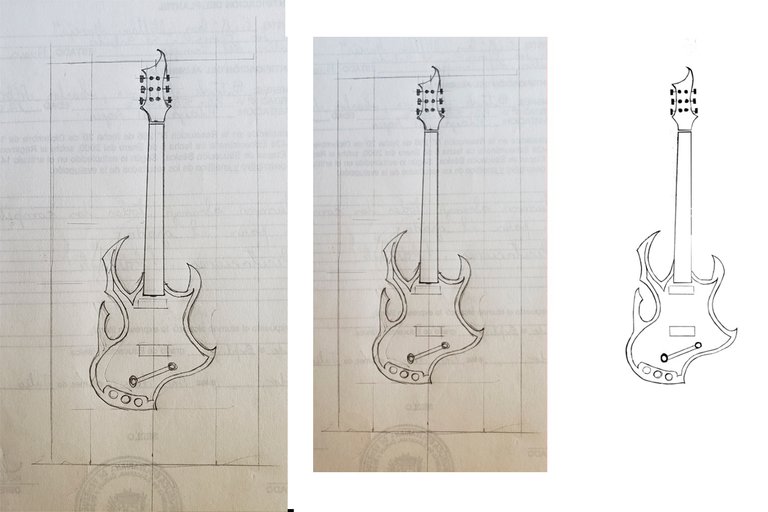
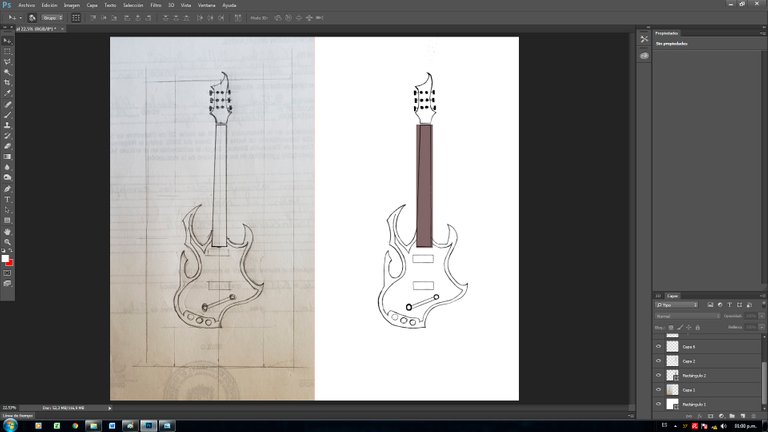
Al momento de Transferir el archivo al editor, hago una copia del dibujo original, esto con la finalidad de ir viendo los cambios.
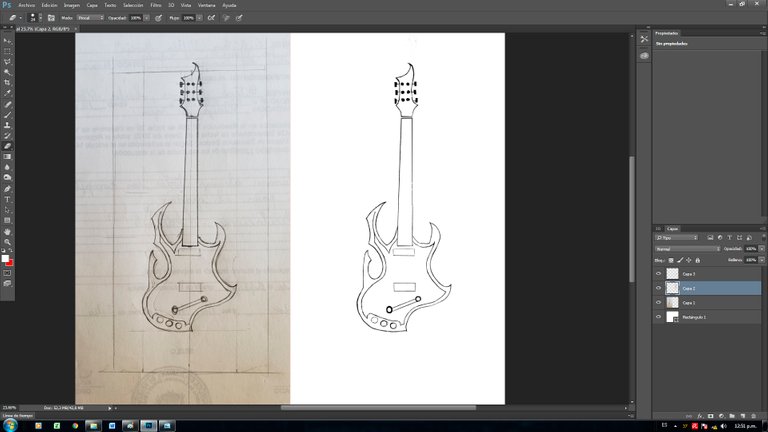
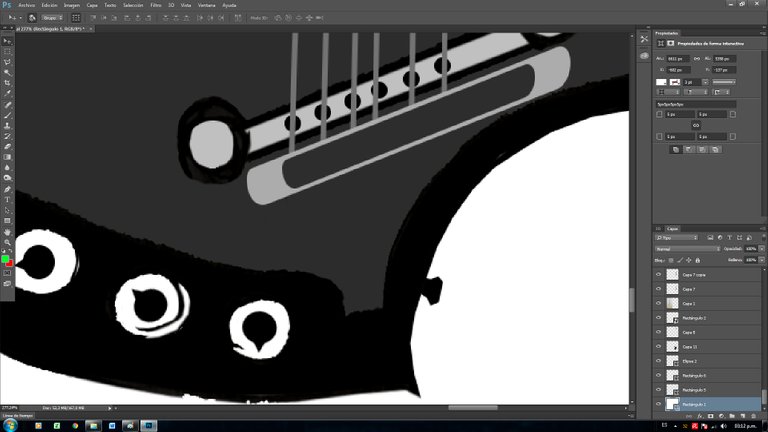
Borramos el contorno y su interior con la herramienta que más les facilite esta tarea, yo uso un conjunto de herramientas; borrador mágico y líneas poligonales de corte.
At the time of transferring the file to the editor, I make a copy of the original drawing, this in order to see the changes.
We erase the outline and its interior with the tool that facilitates this task the most, I use a set of tools; magic eraser and cut polygonal lines.
Coloco mi primer rectángulo de color marrón asemejando la madera del puente de la guitarra y así la distribución de mis colores elegidos a todas las secciones de la guitarra.
I place my first brown rectangle resembling the wood of the guitar bridge and thus the distribution of my chosen colors to all the sections of the guitar.
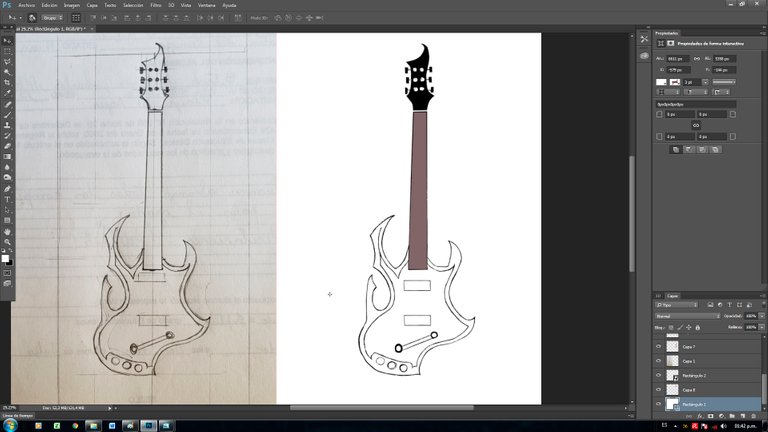
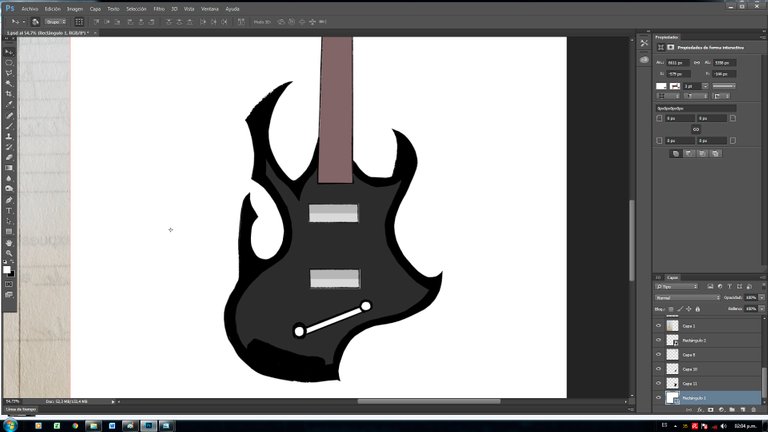
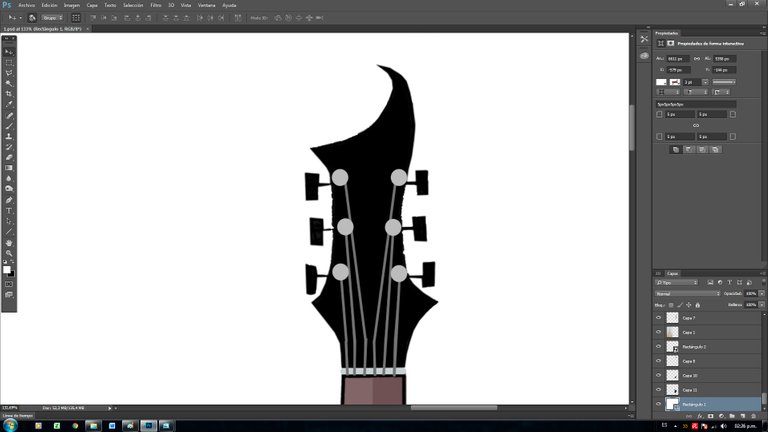
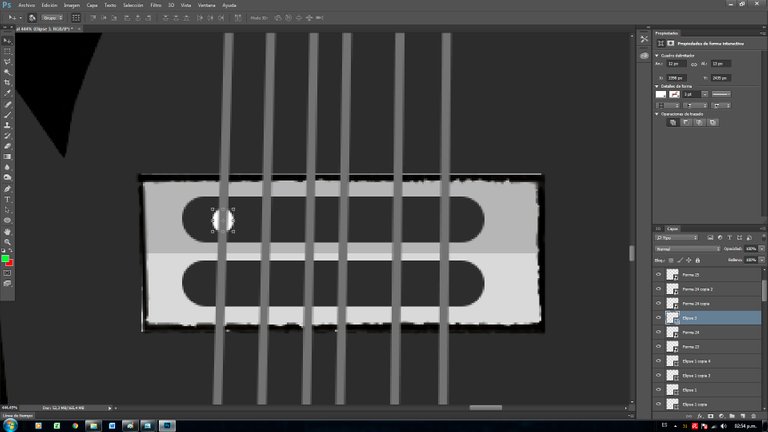
Para agregar las cuerdas de la guitarra utilice líneas y le di su color original que sería el plateado.
Para los componentes que conforman la guitarra le fui dando sus formas características, cuidando cada detalle de lo que conforma una guitarra y volver nuestro trabajo una obra de cuidado.
To add the guitar strings I used lines and gave it its original color which would be silver.
For the components that make up the guitar, I gave it its characteristic shapes, taking care of every detail of what makes up a guitar and turning our work into a work of care.
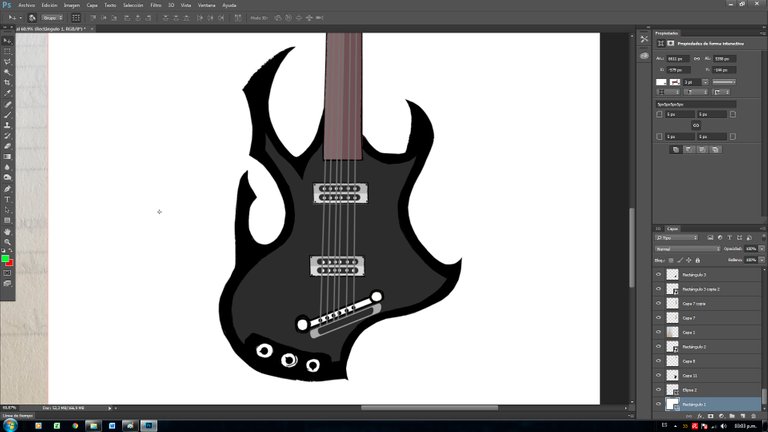
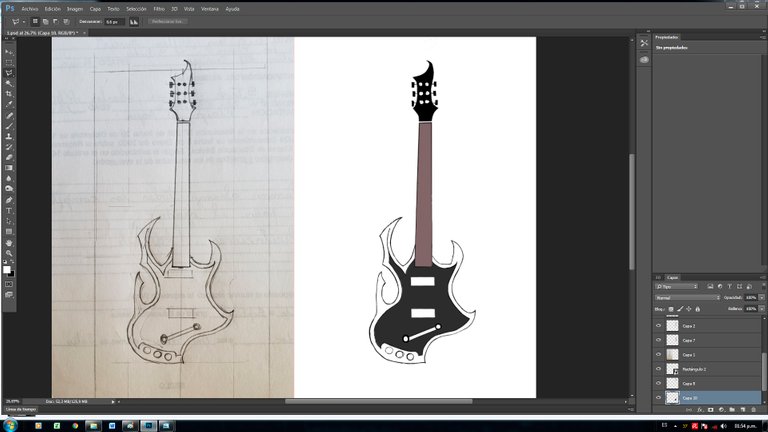
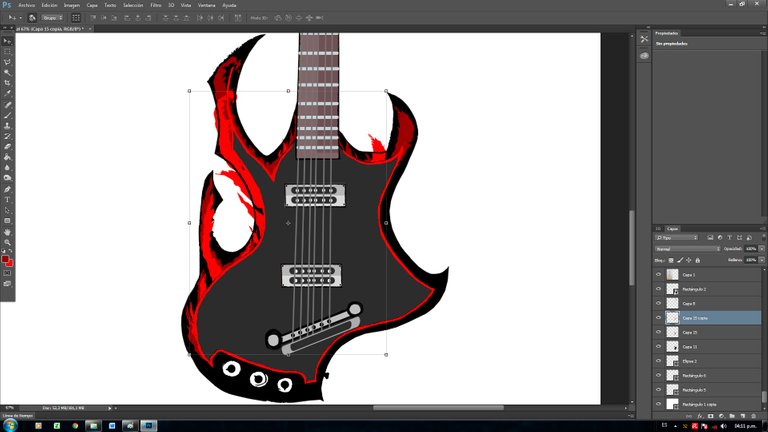
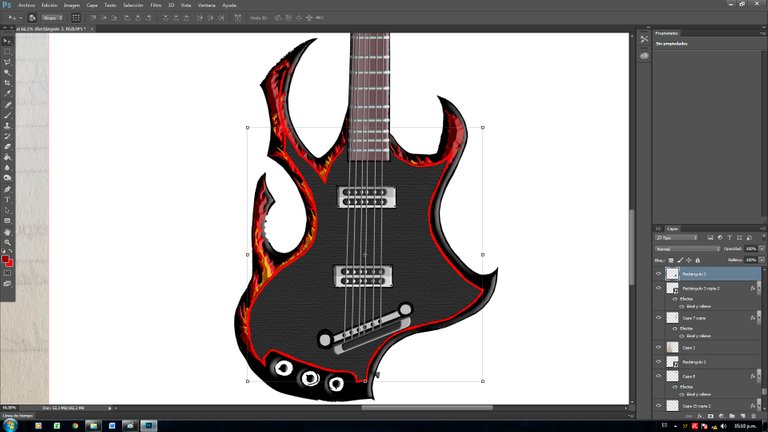
En esta parte de la guitarra, les comento que para mí fue una excelente idea agregarle al diseño del cuerpo una llamarada que cumple una función aparte de darle un toque visual o decorativa serviría como una agarradera.
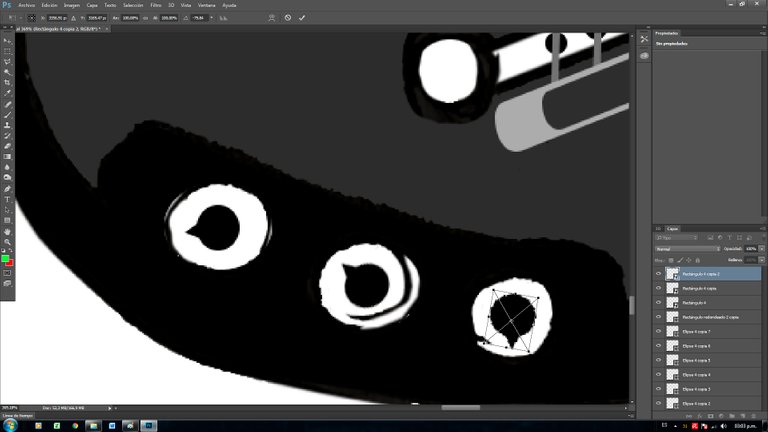
Las perillas se las coloque en diversas posiciones, como así también agragarle el botón de soporte de la correa.
In this part of the guitar, I tell you that for me it was an excellent idea to add a flare to the body design that fulfills a function apart from giving it a visual or decorative touch, it would serve as a handle.
The knobs are placed in various positions, as well as adding the strap support button.
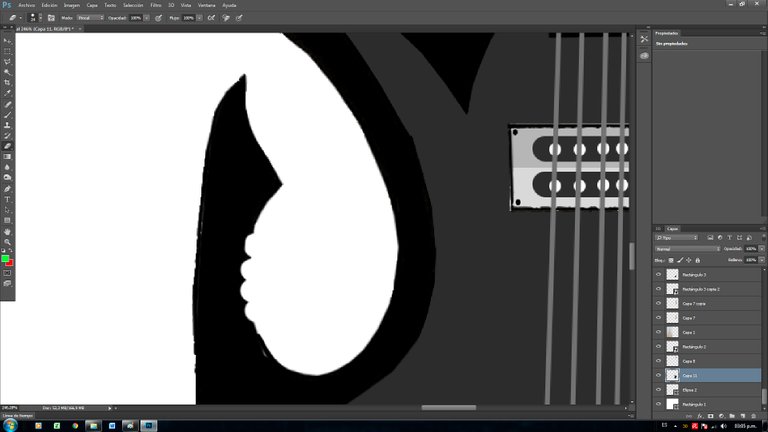
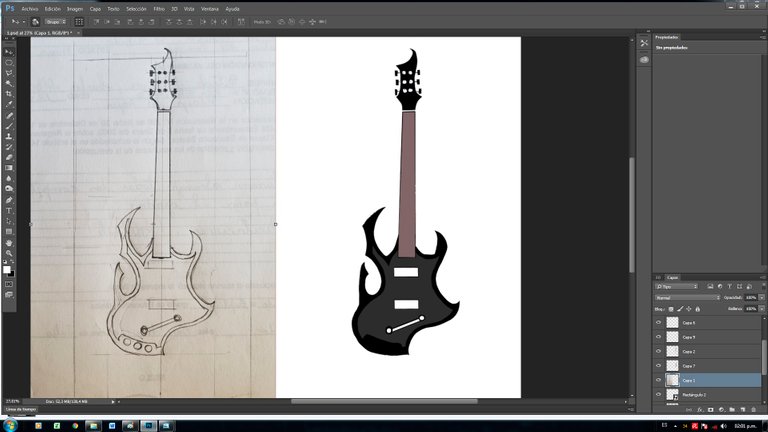
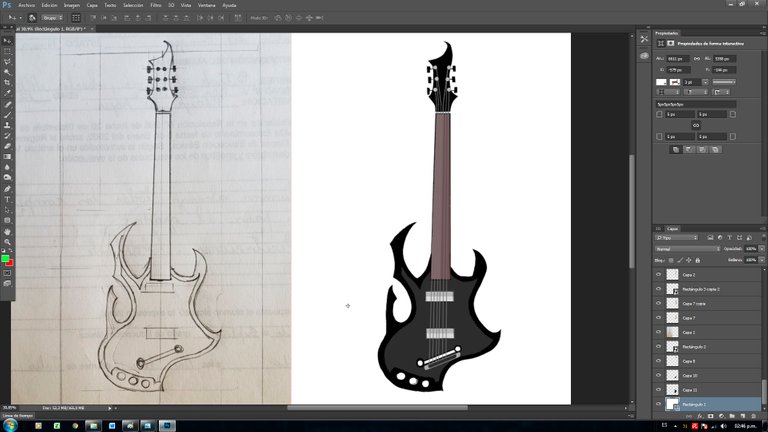
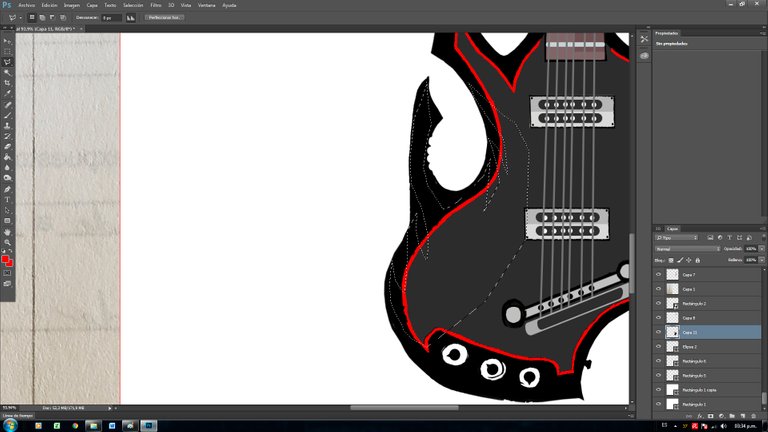
Hacemos una copia de la sección de la línea del cuerpo de la guitarra, la pintamos de rojo y volvemos a colocarlo en su lugar para darle una división dramática.
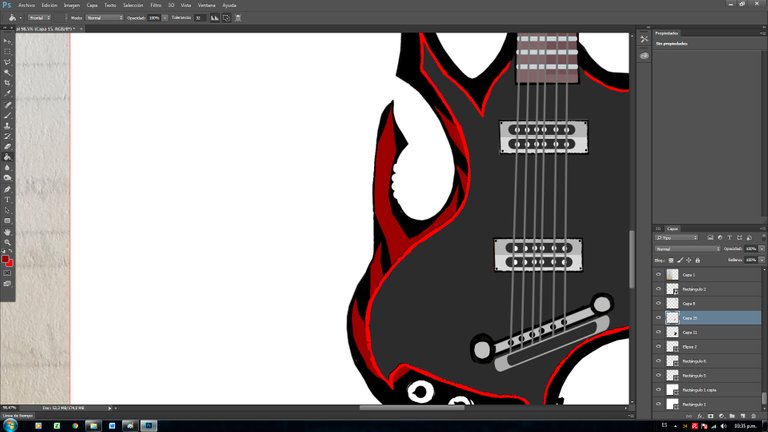
Realice un corte con el diseño de las llamas, luego pintándolo con la herramienta de pintura sólida lo coloree de rojo.
Con la herramienta del borrador numero 28 le di ese efecto de fuego, con muy poca presión, y rápido en los bordes, haciendo 3 capas una más pequeñas que la otra.
We make a copy of the section of the guitar body line, paint it red, and snap it back into place to give it a dramatic split.
Make a cut out of the flame design, then paint it with the solid paint tool to color it red.
With the eraser tool number 28 I gave it that fire effect, with very little pressure, and quickly on the edges, making 3 layers, one smaller than the other.
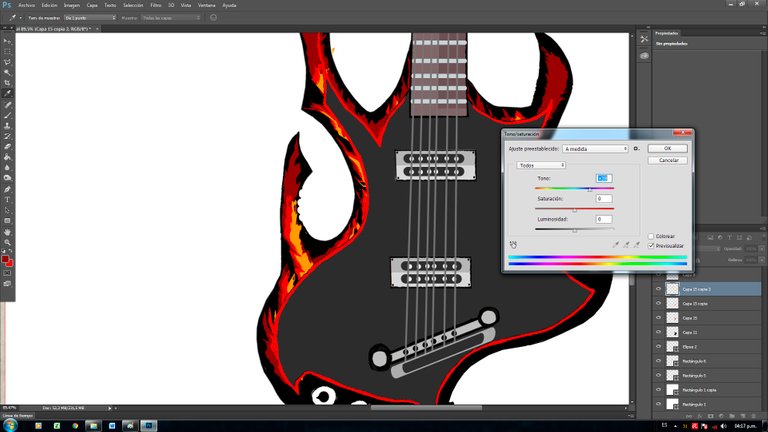
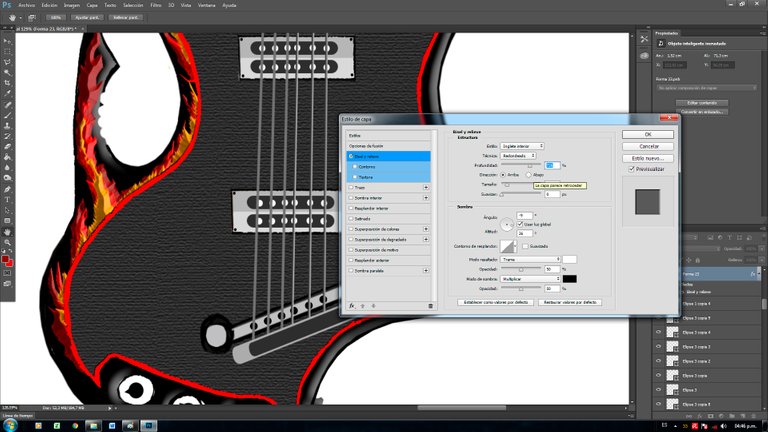
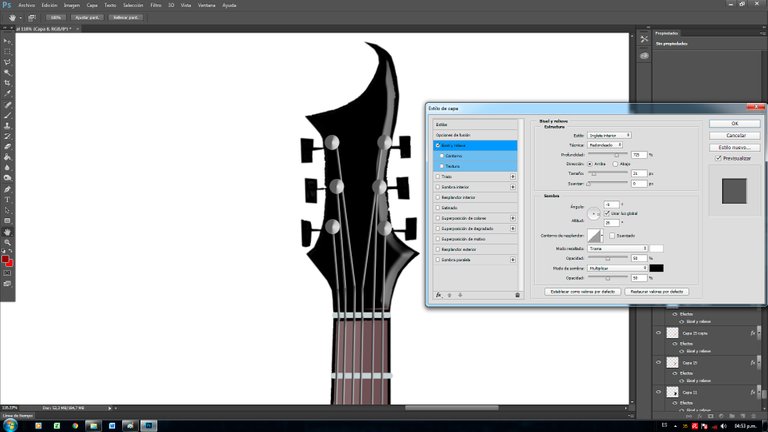
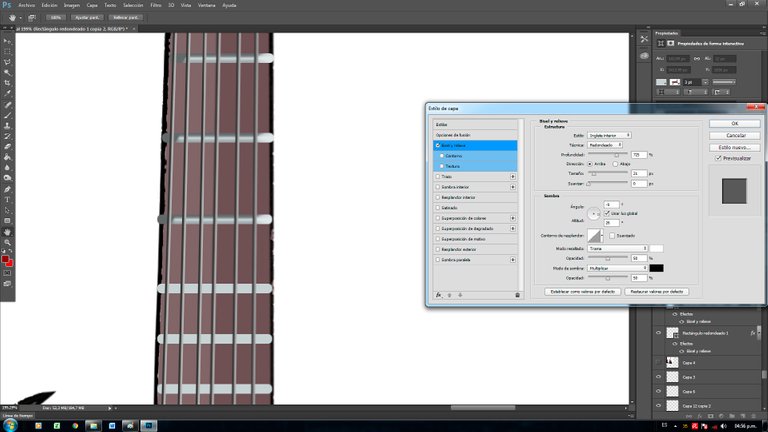
En el apartado de difusión que se encuentra al presionar el botón derecho sobre la capa a modificar podemos agregarle las texturas y profundidades que más nos gusten.
In the diffusion section that is found when pressing the right button on the layer to be modified, we can add the textures and depths that we like the most.
Éxitos mis queridos amigos, espero la pasen de lo mejor, se les quiere, un abrazo.
Success my dear friends, I hope you have the best time, I love you, a hug.

Acercar los sueños a la realidad es una forma de alegrar la vida y darle sentido. Es un diseño muy atractivo, espero que pueda usted en algún momento tallarla o tal vez imprimirla en 3D. Y terminar de darle vida a su sueño. Mucho animo y suerte.
Muchísimas gracias amigo @soltecno por su comentario, si tiene razón, realmente me gustaría algún día poder recrearla o imprimirla y tenerla como parte de mi colección, gracias por comentar saludos. 👍🏼