[EN-ES] Create a tripod base for your selfies. // Crea una base trípode para tus selfies.
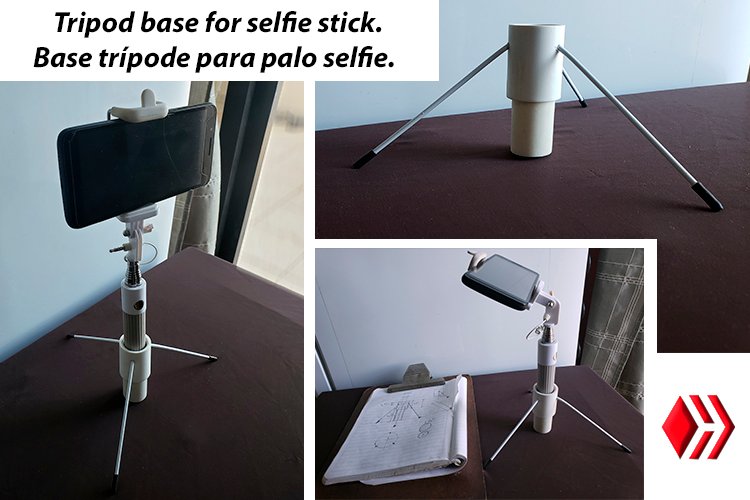
Hello friends of HIVE, happy Sunday everyone!
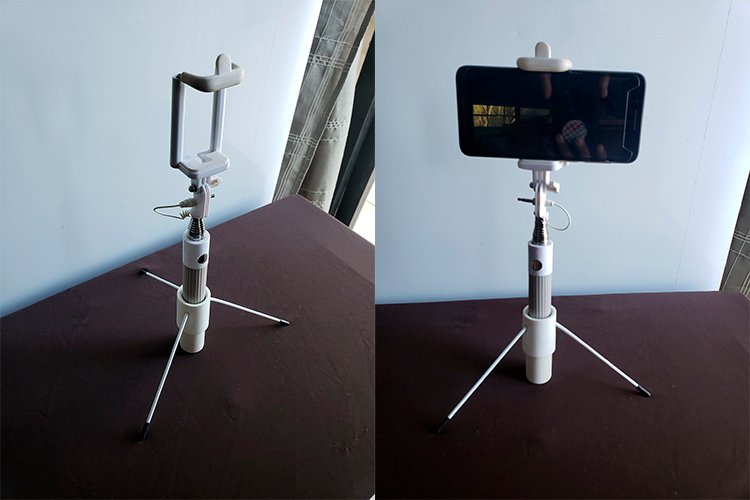
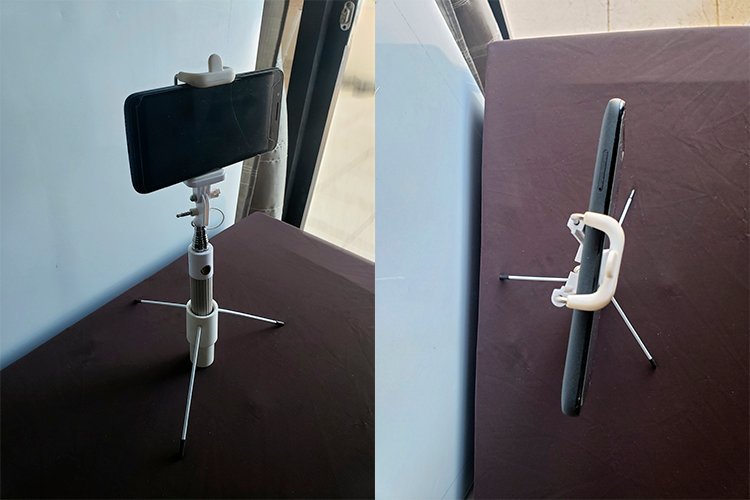
This time I will share with you how to make a very useful accessory for the common selfie stick.
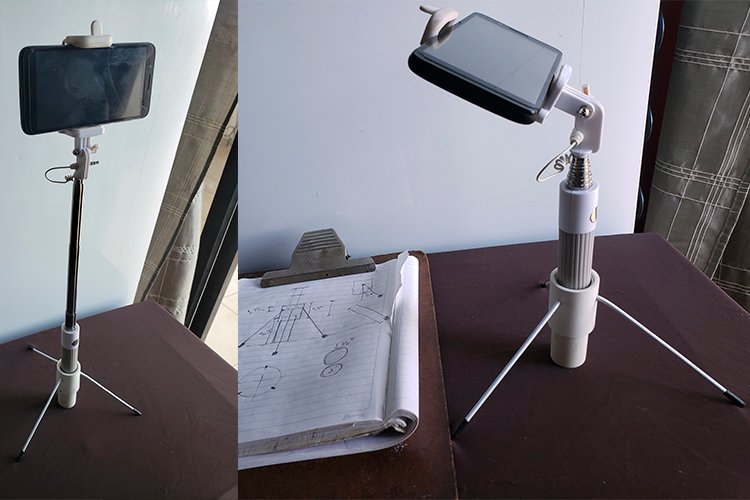
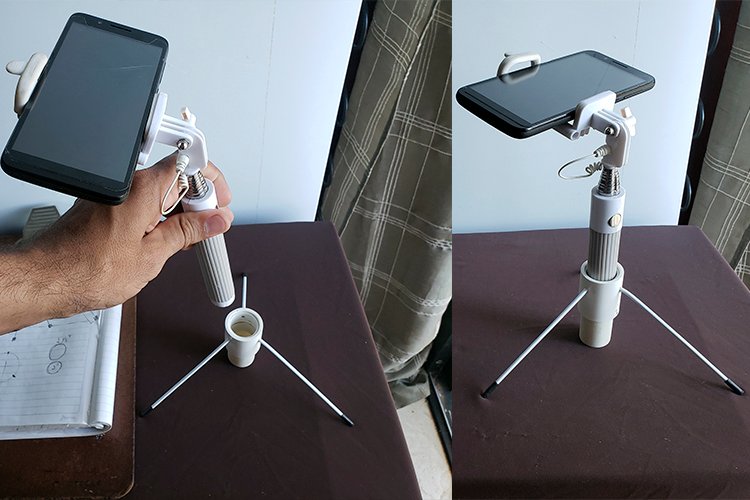
It is a tripod base that works by holding the selfie stick to take remote shots.
This idea came to me due to the need to use a selfie stick with this built-in dock, and I wondered why I didn't do it, since I had a selfie stick stored unused.
This supplement works very well, I used pure recycled elements joined by friction, making sure that all the elements were very strong for this task of holding our phone.
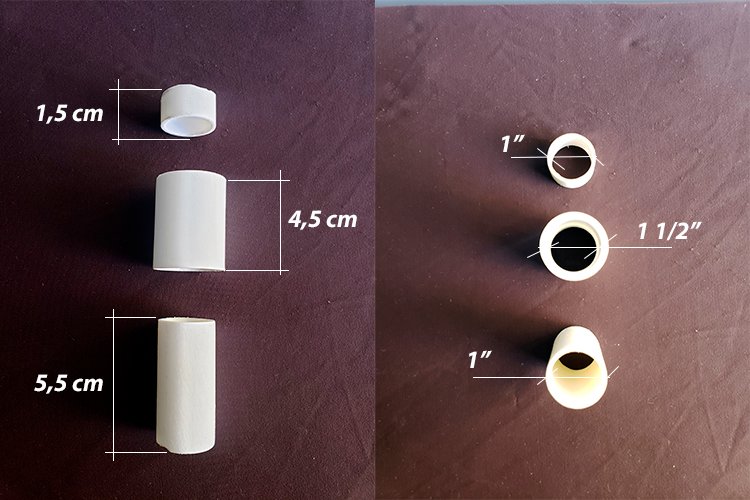
For this tripod base use pieces of 1 "and 1 ½" pvc pipes, 3 recycled steel rods. I hope this post is a guide for those who dare to do it, let's start to see the step by step.
Materials:
Recycled scraps of:
• PVC pipes; 1 "and 1 ½"; base structure.
• Three steel rods; base legs.
• Thick plastic; bottom cover of the base.
• Coverage of a cable, non-slip rubbers on the feet of the base.
Tools:
• Notebook, pencil and eraser.
• Square.
• Conveyor
• Pliers.
• Dremel.
¡Hola amigos de HIVE, feliz domingo para todos!
En esta ocasión les compartiré como hacer un accesorio muy útil para el palo selfie común.
Se trata de una base trípode que funciona sujetando el palo selfie para realizar tomas remotas.
Esta idea se me ocurrió debido a la necesidad de utilizar un palo selfie con esta base integrada, y me pregunte por qué no hacerla, ya que tenía un palo selfie guardado sin uso.
Este suplemento funciona muy bien, utilice puros elementos reciclado unidos por fricción, asegurándome que todos los elementos fueran muy fuertes para esta tarea de sujetar nuestro teléfono.
Para esta base trípode utilice retazos de tubos de pvc de 1” y 1 ½”, 3 varillas de acero reciclado. Espero este post sea una guía para quien se anime a realizarlo comencemos a ver el paso a paso.
Materiales:
Retazos reciclados de:
• Tubos pvc; 1” y 1 ½”; estructura de la base.
• Tres varillas de acero; patas de la base.
• Plástico grueso; tapa inferior de la base.
• Cobertura de un cable, gomas antideslizantes de las patas de la base.
Herramientas:
• Libreta, lápiz y borrador.
• Escuadra.
• Transportador
• Alicate.
• Dremel.

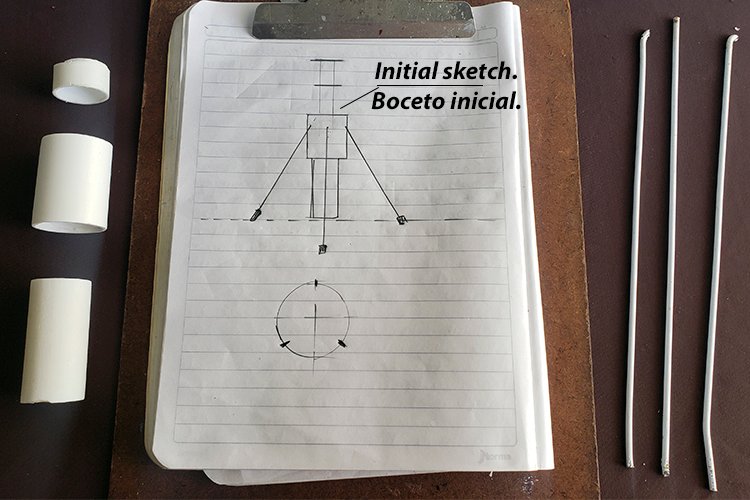
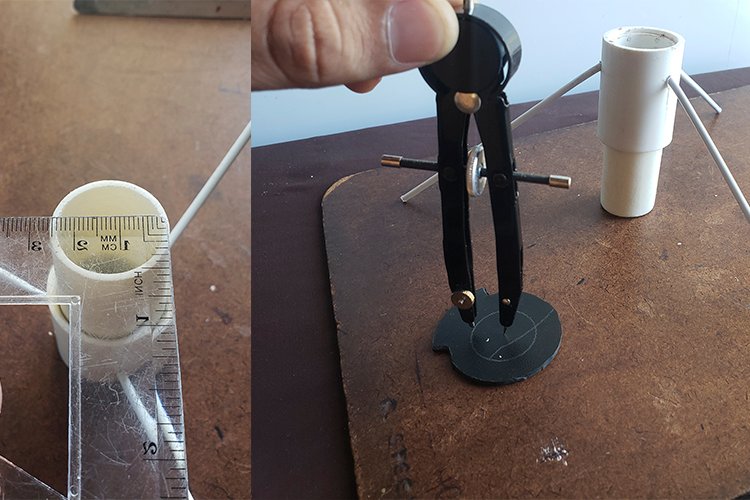
Step 1
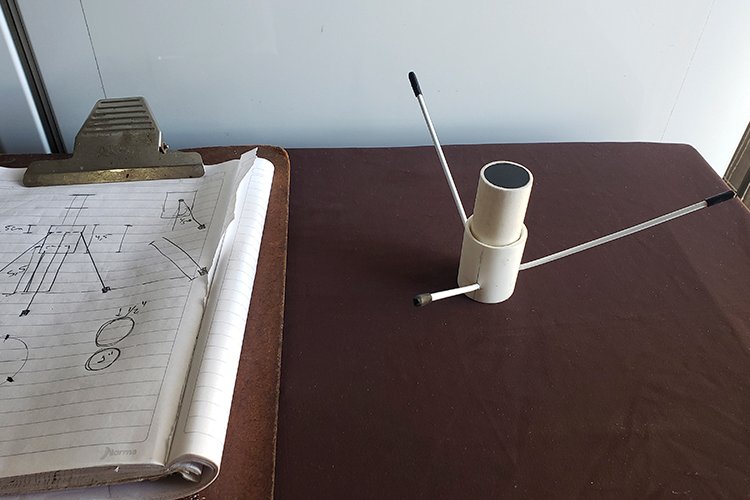
• Obtained my initial sketch, I collect the materials for this purpose.
It consists of 6 elements:
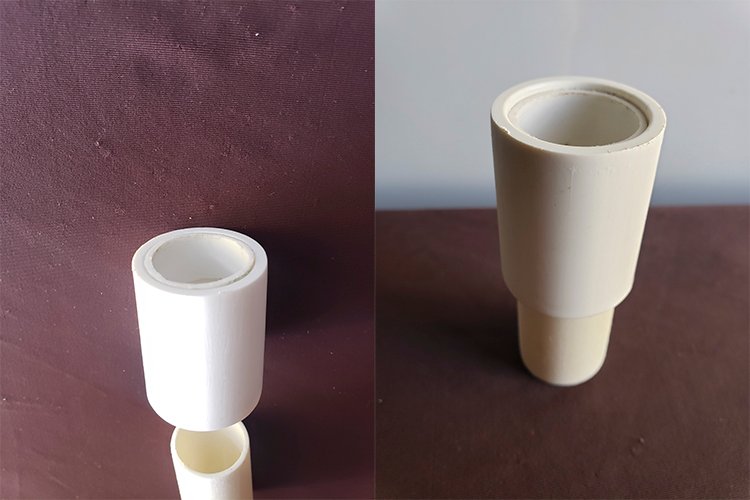
• The central base with three parts; 1 union of 1 ½ ”, 1 piece of pipe of 1” 7cm in length.
• The lower base with three parts that would be the three supports with recycled steel rods.
Paso 1
• Obtenido mi boceto inicial, recolecto los materiales para este fin.
Consta de 6 elementos:
• La base central con tres partes; 1 unión de 1 ½”, 1 retazo de tubo de 1” 7cm de longitud.
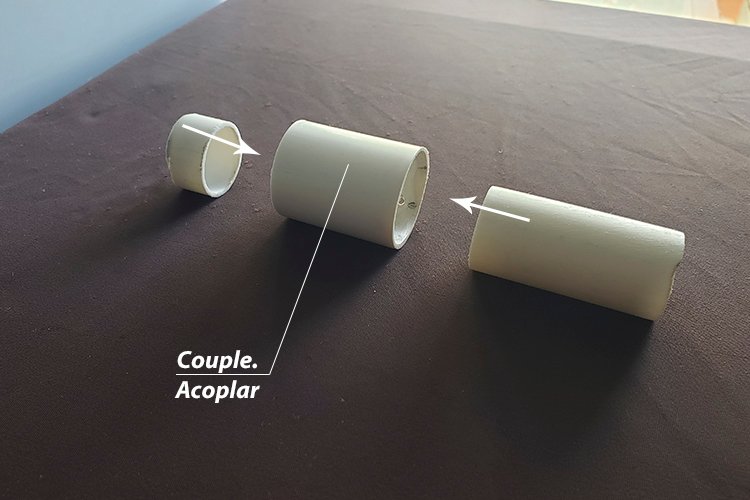
Step 2
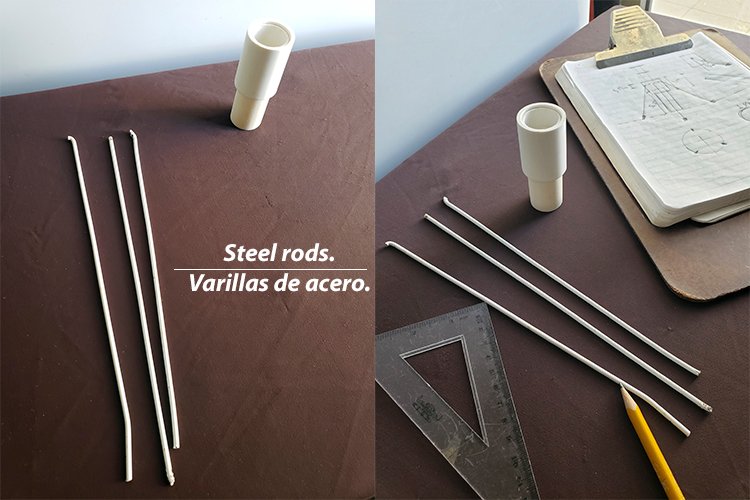
• Cut the elements we couple.
• I recycled the steel rods from a closet shelf; They are made of steel and very resistant.
Paso 2
• Cortados los elementos acoplamos.
• Las varillas de acero las recicle de un estante de closet; son de acero y muy resistentes.
Step 3
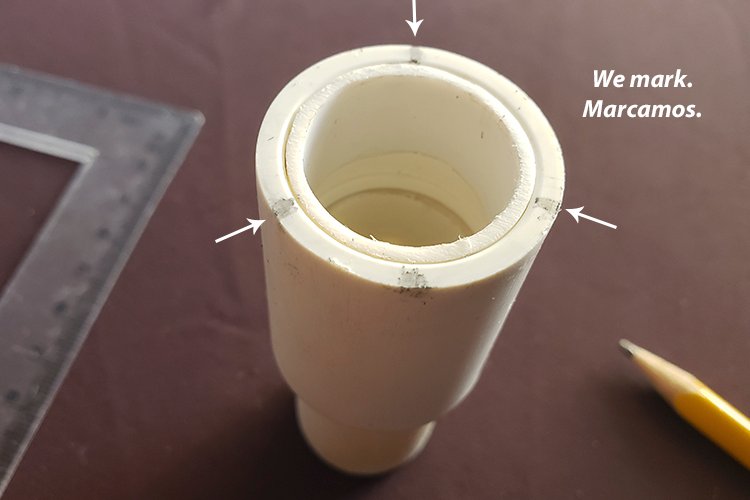
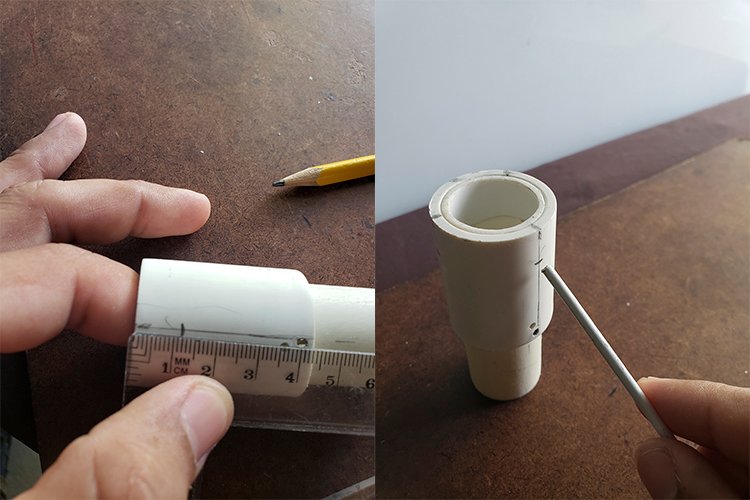
• We mark three points on the central base, from where the base legs will be located.
• With the help of a square, we arc the guide lines.
• We mark 1.2cm from the top down. And we drill with the help of a dremel or drill.
Paso 3
• Marcamos tres puntos en la base central, de donde irán ubicados las patas de la base.
• Con la ayuda de una escuadra arcamos las líneas guías.
• Marcamos 1,2cm de la parte superior hacia abajo. Y perforamos con la ayuda de un dremel o taladro.
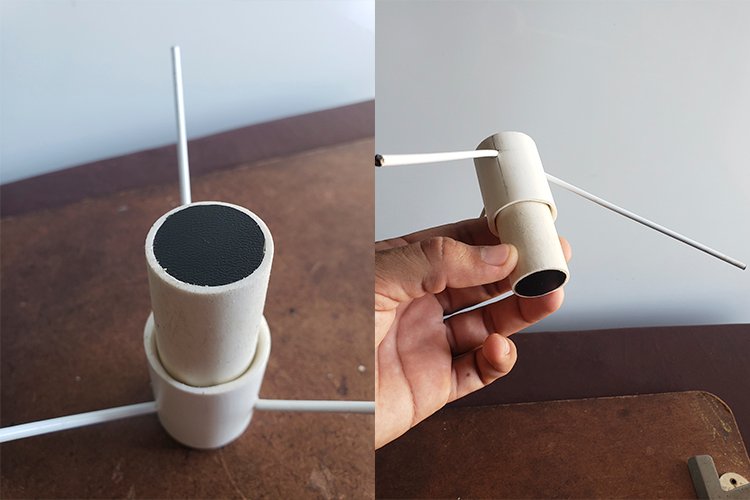
Step 4
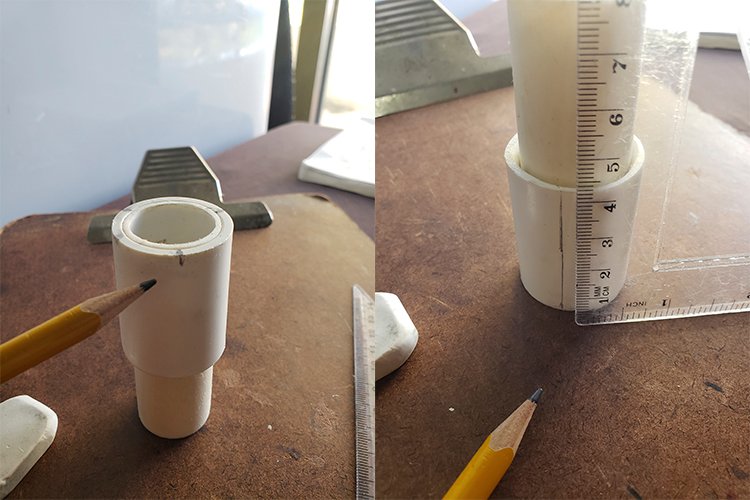
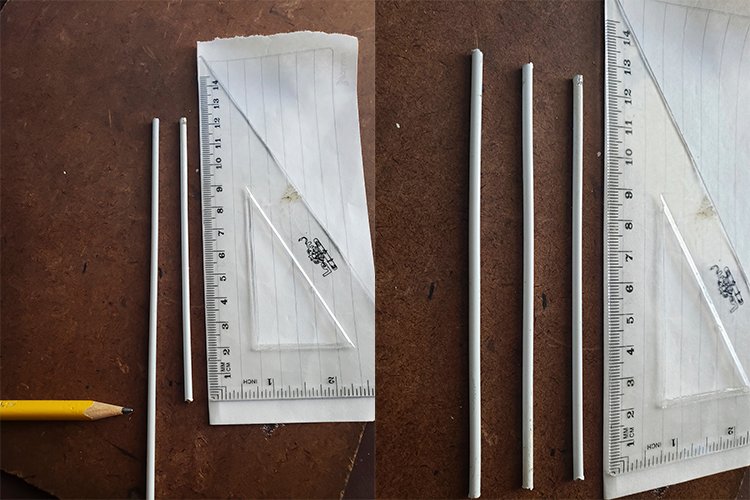
• We cut the steel rods to 12cm.
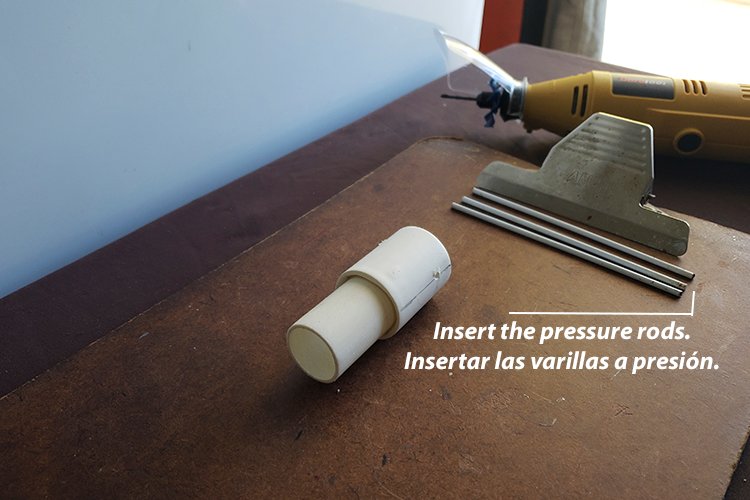
• When drilling, we will use a smaller bit diameter of the steel element; This is so that it enters under pressure and without any type of movement.
• To put it under pressure we can help us with the pliers.
Paso 4
• Cortamos las varillas de acero a 12cm.
• A la hora de perforar, utilizaremos un diámetro de mecha inferior del elemento de acero; esto es para que entre a presión y sin ningún tipo de movimiento.
• Para meterlo a presión podemos ayudarnos con el alicate.

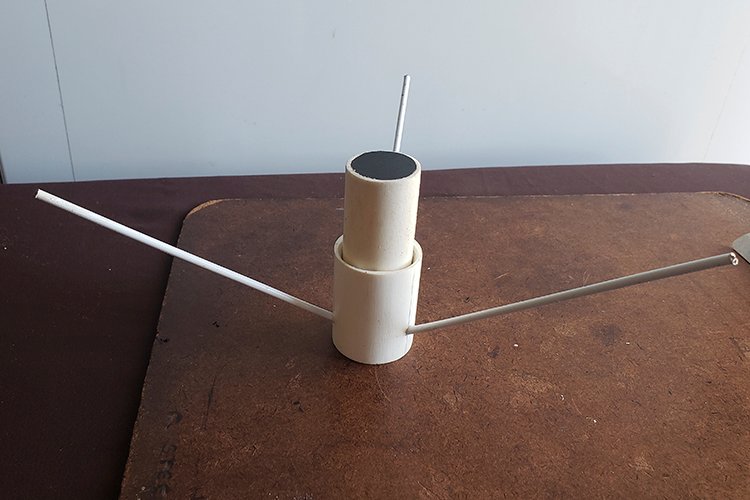
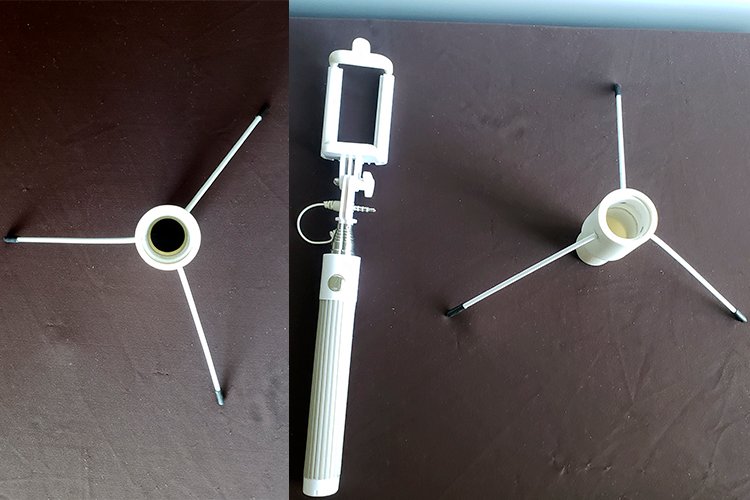
Step 5
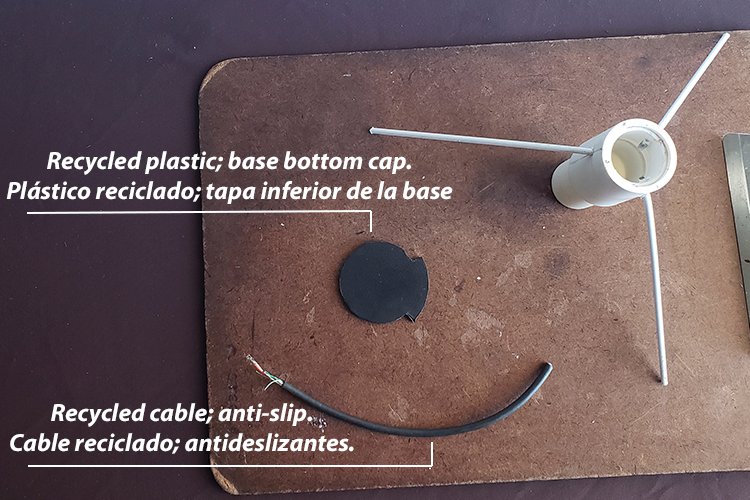
• To make the bottom cover, and the rubbers of the non-slip legs, we recycle with plastic from other previous projects and a piece of cable thick enough to cover the metal element.
• We take the measure of the lid, cut and sand.
• This cover is pressed in and is held in position thanks to the friction of the elements.
Paso 5
• Para hacerle la tapa inferior, y las gomas de las patas anti deslizantes reciclamos con plástico de otros proyectos anteriores y un pedazo de cable con el espesor suficiente para cubrir el elemento metálico.
• Tomamos la medida de la tapa, cortamos y lijamos.
• Esta tapa entra a presión y se mantiene en su posición gracias a la fricción de los elementos.


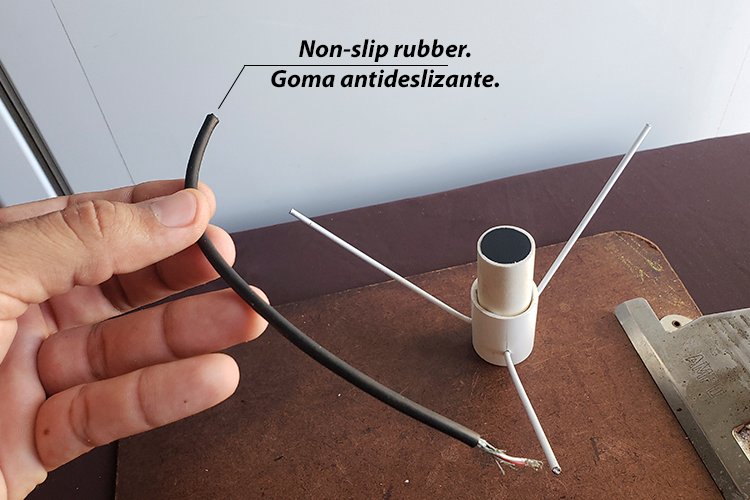
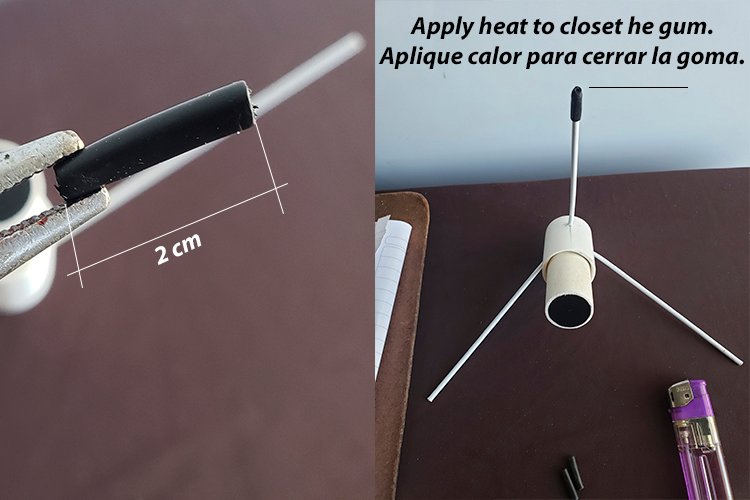
Step 6
• To make the non-slip rubbers, we will use a cable thick enough to fit into the legs of the base.
• Apply a little heat with a lighter so that the plastic closes at the tip.
Paso 6
• Para hacer las gomas antideslizantes utilizaremos un cable con el grosor suficiente para encajarlo en las patas de la base.
• Aplique un poco de calor con un encendedor para que el plástico se cerrara en la punta.

Recommendations: you can use other elements that fulfill the same purpose, the important thing is to innovate with what you have and exploit the imagination of the elements that surround us.
Recomendaciones: puede utilizar otros elementos, que cumplan este mísmo fin, lo importante es innovar con lo que se tiene y explotar la imaginación de los elementos que nos rodean.
Thank you all very much, I hope you like it, greetings!
¡Muchas gracias a todos, espero sea de su agrado, saludos!
Resource // Recursos
Teléfono Samsung A10
Edition // Edición
Photoshop S6
Translator // Traductor;
https://translate.google.com/?hl=es&sl=auto&tl=en&op=translate

Espectacular trabajo, felicitaciones. Muy creativo
Gracias, que bueno que le haya gustado 👍🏼
Wow, this looks cool and quite easy to make. Nothing beats the satisfaction of having to do things yourself
Thank you, that's right, it's always rewarding to use your own creations. greetings 👍
Congratulations @carlossteele! You have completed the following achievement on the Hive blockchain and have been rewarded with new badge(s):
Your next payout target is 500 HP.
The unit is Hive Power equivalent because your rewards can be split into HP and HBD
You can view your badges on your board and compare yourself to others in the Ranking
If you no longer want to receive notifications, reply to this comment with the word
STOPTo support your work, I also upvoted your post!
Check out the last post from @hivebuzz:
Oh wow. This is cool, smart and creative.
Also, how clean it looks. Does the job for many content creators.👏
Thank you very much, I am glad that you like it, if it is a very useful tool for everyone, I am happy to share it 👍