[ESP-ENG]- Marco de fotos para fiesta de cumpleaños. // A photo frame for a birthday party.
Hola queridos Hiverianos, espero se encuentren muy bien en este día. Quiero compartirles una manualidad que realice con mucho amor para la fiesta de cumpleaños de mi bebé.
Hello dear Hiverians, I hope you are very well on this day. I want to share with you a craft that I made with a lot of love for my baby's birthday party.
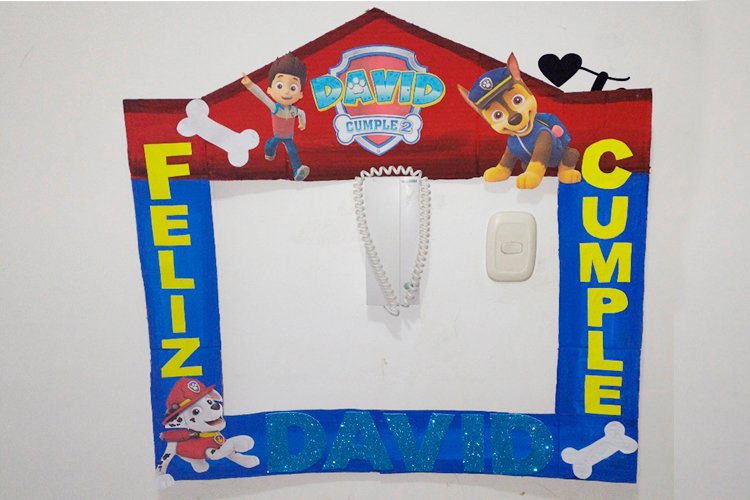
Se trata de un marco para fotos o un portaretrato. Lo elaboré con materiales que tenía a la mano, ya que estoy pasando por dificultades económicas, pero aún así no quise dejar pasar la oportunidad de hacerle algo especial a mi hijo el día de su cumpleaños. Por eso utilice todo lo que tenía en casa y con un poco de creatividad y esfuerzo le hice está decoración.El marco para las fotos llevó el motivo de la patrulla canina de Paw Patrol. Una comiquita muy conocida y popular para los niños. Cada vez que mi hijo la ve se emociona mucho y le gusta describir cada perrito de la patrulla canina. A continuación los materiales y los procedimientos necesarios que utilice:
It is a photo frame or a picture frame. I made it with materials that I had on hand, since I am going through financial difficulties, but still I did not want to miss the opportunity to make something special for my son on his birthday. That's why I used everything I had at home and with a little creativity and effort I made this decoration.
The frame for the photos carried the motif of the Paw Patrol dog patrol. A well-known and popular cartoon for children. Every time my son sees it she gets very excited and likes to describe each puppy in the paw patrol. Here are the necessary materials and procedures that he uses:

Materiales:
• Cartón
• Silicón
• Tijeras
• Hojas
• Pinturas roja y azul
• Pincel grueso
• Cartulina amarilla
• Foami escarchado azul
• Material impreso de los personajes de la Patrulla canina Paw Patrol.
Materials:
• Paperboard
• Silicone
• Pair of scissors
• Leaves
• Red and blue paints
• Thick brush
• Yellow cardboard
• Blue frosted foami
• Printed material of the Paw Patrol characters.
Procedimiento // Process.
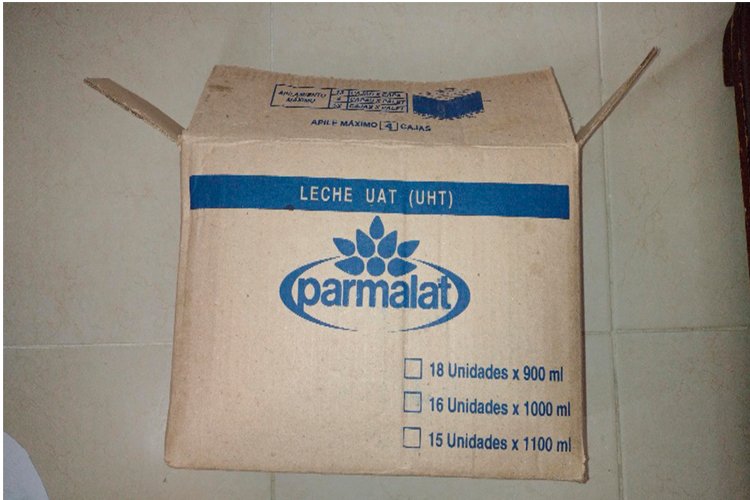
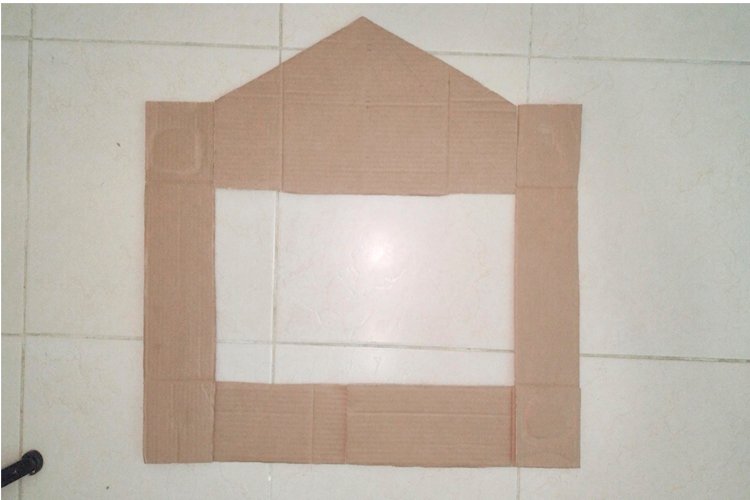
Tomaremos una caja de cartón o cualquier cartón que encontremos que sea firme y grueso. La limpiaremos quitándole cualquier resto de etiquetas o cinta que pueda tener adheridos
• We will take a cardboard box or any cardboard that we find to be firm and thick. We will clean it by removing any remaining labels or tape that may be attached to it.
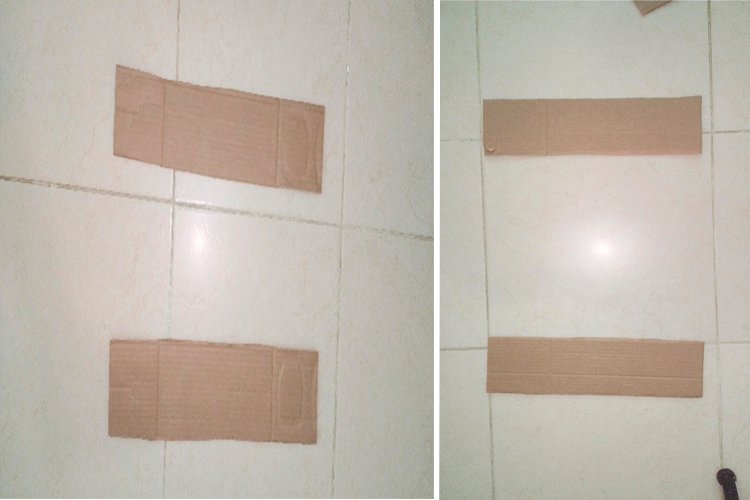
• Cortamos el cartón para hacer las tiras de nuestro marco, aproximadamente con tiras de 80 cm de ancho por 70 cm de alto, con un grosor 12 cm en todas las tiras.
• We cut the cardboard to make the strips of our frame, approximately with strips 80 cm wide by 70 cm high, with a thickness of 12 cm in all the strips.
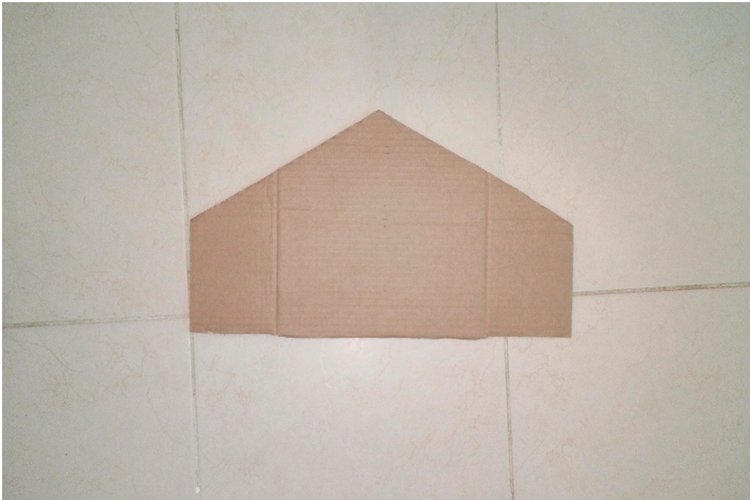
• Para el diseño de la estación de Paw Patrol, le hice un techo en forma de triángulo, para resaltar el motivo y darle más altura.
For the design of the Paw Patrol station, I made a roof in the shape of a triangle, to highlight the motif and give it more height.
• Luego de tener todas las piezas listas y cortadas, procedemos a pegar con el silicón. Es necesario aplicar suficiente cantidad para dar firmeza a nuestro marco.
After having all the pieces ready and cut, we proceed to paste with the silicone. It is necessary to apply enough quantity to give firmness to our framework.
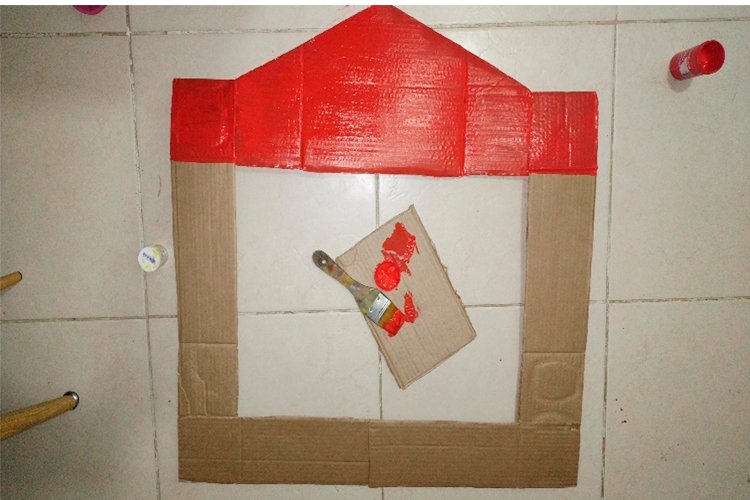
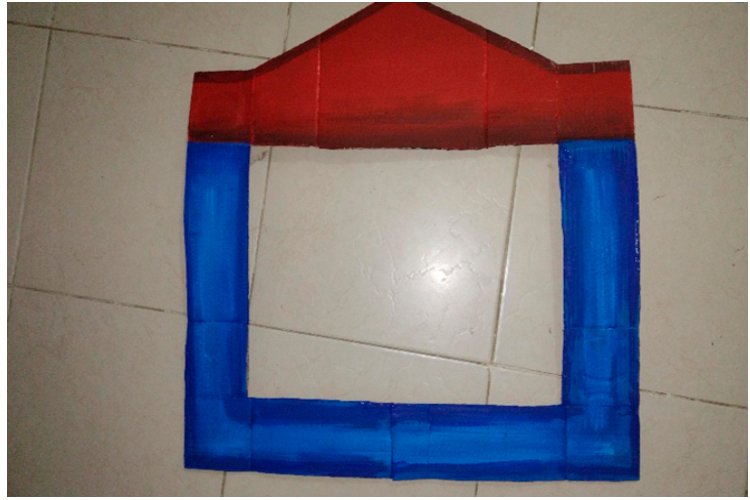
• Una vez armado, vamos a pintar con los colores azul y rojo. Rojo para el techo y azul para el resto del marco.
• Once armed, we are going to paint with the colors blue and red. Red for the roof and blue for the rest of the frame.
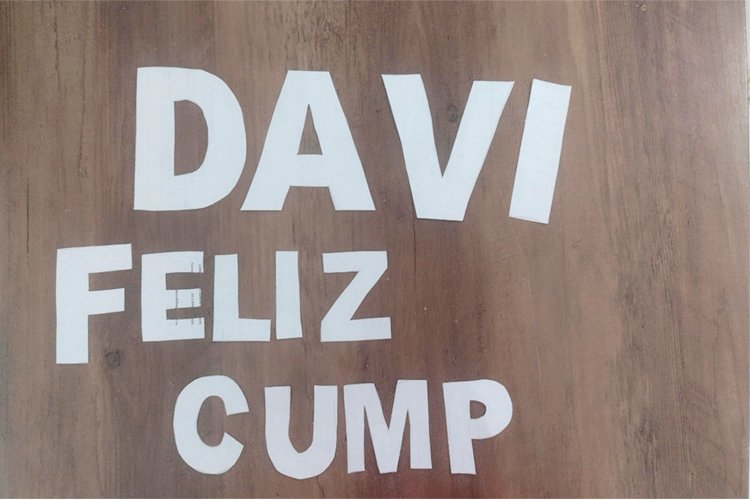
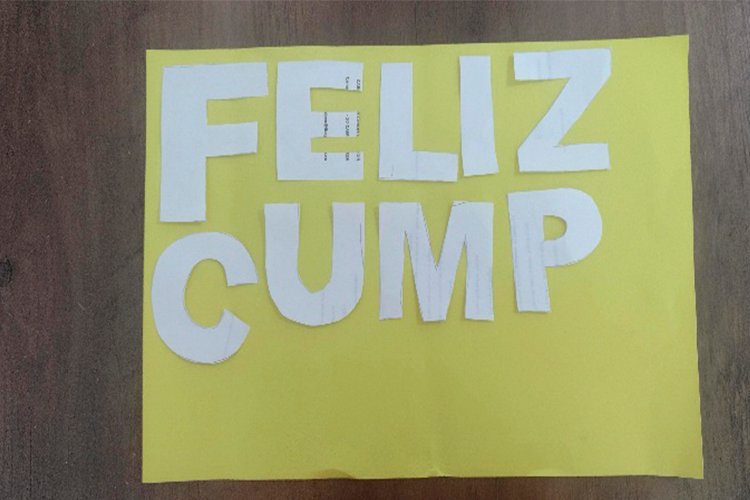
• Con las hojas blancas vamos a realizar los moldes de la letras para el FELIZ CUMPLE y el nombre de mi hijo DAVID. Las letras que se repiten no es necesario hacerlas dos veces, ya que esos moldes serán copiados.
With the white sheets we are going to make the molds of the letters for HAPPY BIRTHDAY and the name of my son DAVID. The letters that are repeated do not need to be done twice, since those patterns will be copied.
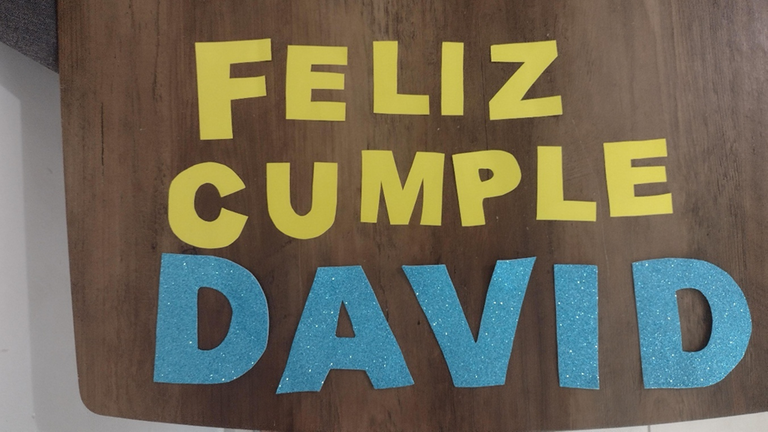
• Luego de tener los moldes listos, los recortó y los copio en la cartulina amarilla y el foami azúl.
After having the molds ready, he cut them out and copied them on the yellow cardboard and the blue foami.

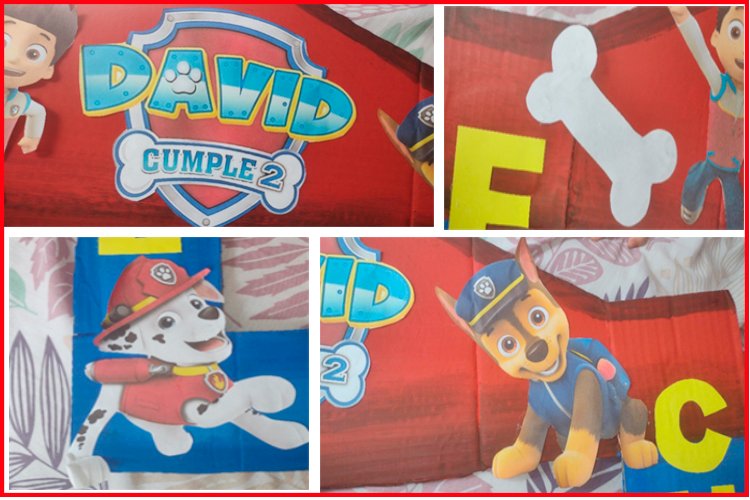
• Con las hojas blancas hacemos los huesos de perritos decorativos y con el material impreso de igual manera lo recortamos por toda la figura de los personajes.
With the white sheets we make the bones of decorative puppies and with the printed material in the same way we cut it out for the whole figure of the characters.
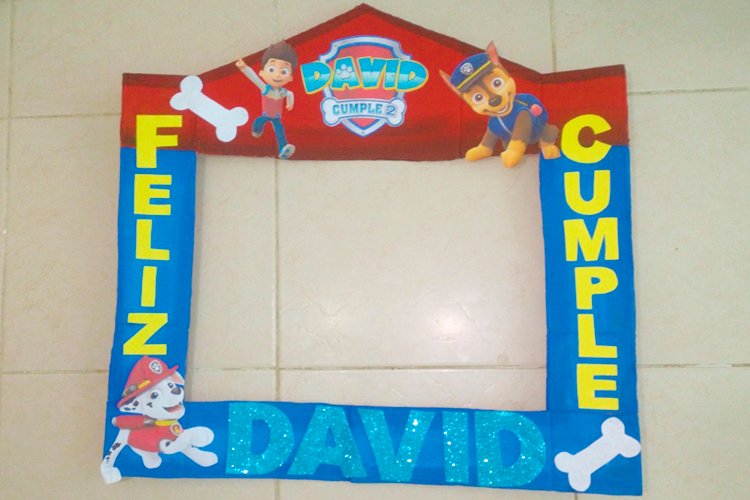
• Finalmente cuadramos y pegamos todo como más nos guste en el cuadro de fotos.
Finally we square and paste everything as we like in the photo box.
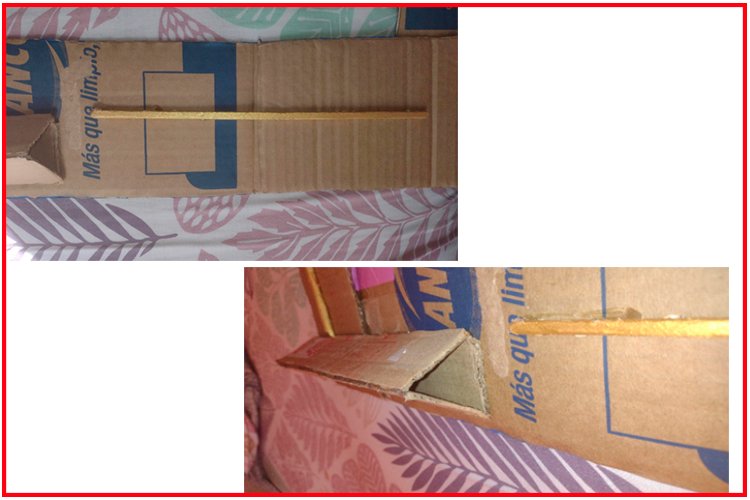
*Tips: el secreto para que nuestro marco sea firme, es utilizar un cartón que sea grueso y duro, en caso que tengamos un cartón que se doble con facilidad lo importante es reforzar aquellos puntos críticos que se doblen con alguna varilla de madera o plástico. Si no por la parte de atrás pegarle más pedazos de cartón en forma de triángulo para generar soportes firmes y evitar que nuestro marco se doble al momento de tomar las fotos.
*Tips: the secret for our frame to be firm is to use a thick and hard cardboard, in case we have a cardboard that bends easily, the important thing is to reinforce those critical points that bend with a wooden or plastic rod . If not, on the back, glue more pieces of cardboard in the shape of a triangle to generate firm supports and prevent our frame from bending when taking the photos.
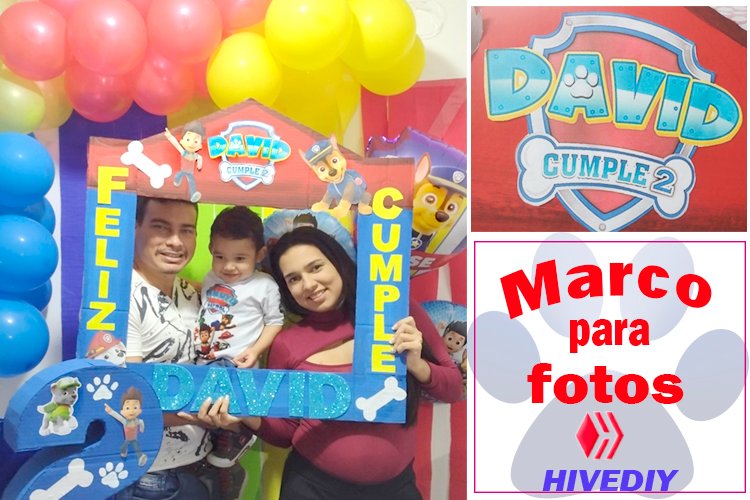
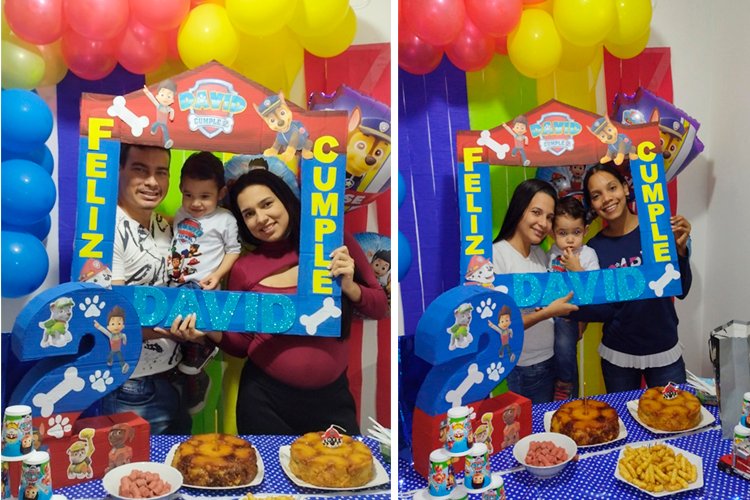
Eso es todo amigos de Hive, espero les haya gustado mi idea y como lo plasme. Con pocos materiales pero con muchas ganas le hice este portaretrato a mi hijo en su cumpleaños. Les muestro algunas fotos finales de cómo quedo el cuadro de fotos para su reunión. Gracias por sus comentarios y el apoyo que me brindan. Agradecida de corazón. Saludos
That's all Hive friends, I hope you liked my idea and how I reflected it. With few materials but with great enthusiasm I made this photo frame for my son on his birthday. I show you some final photos of how the photo frame turned out for his meeting. Thank you for your comments and the support you give me. Heartfelt grateful. Greetings

Fotos de autoría propia. Tomadas de mi Móvil Motorola G9 play.
Photos of own authorship. Taken from my Mobile Motorola G9 play.
Thanks friends for reading my post. I hope to share other ideas with you again. Until a next meeting. With love @ Blue1701Ocean. Author: Karen Steele
Congratulations @blue1701ocean! You have completed the following achievement on the Hive blockchain and have been rewarded with new badge(s):
Your next target is to reach 1500 upvotes.
You can view your badges on your board and compare yourself to others in the Ranking
If you no longer want to receive notifications, reply to this comment with the word
STOPCheck out the last post from @hivebuzz:
Support the HiveBuzz project. Vote for our proposal!