[ESP-ENG ] Beautiful and practical cap to wear after smoothing the hair | Precioso y práctico gorro para usar luego de alisar el cabello
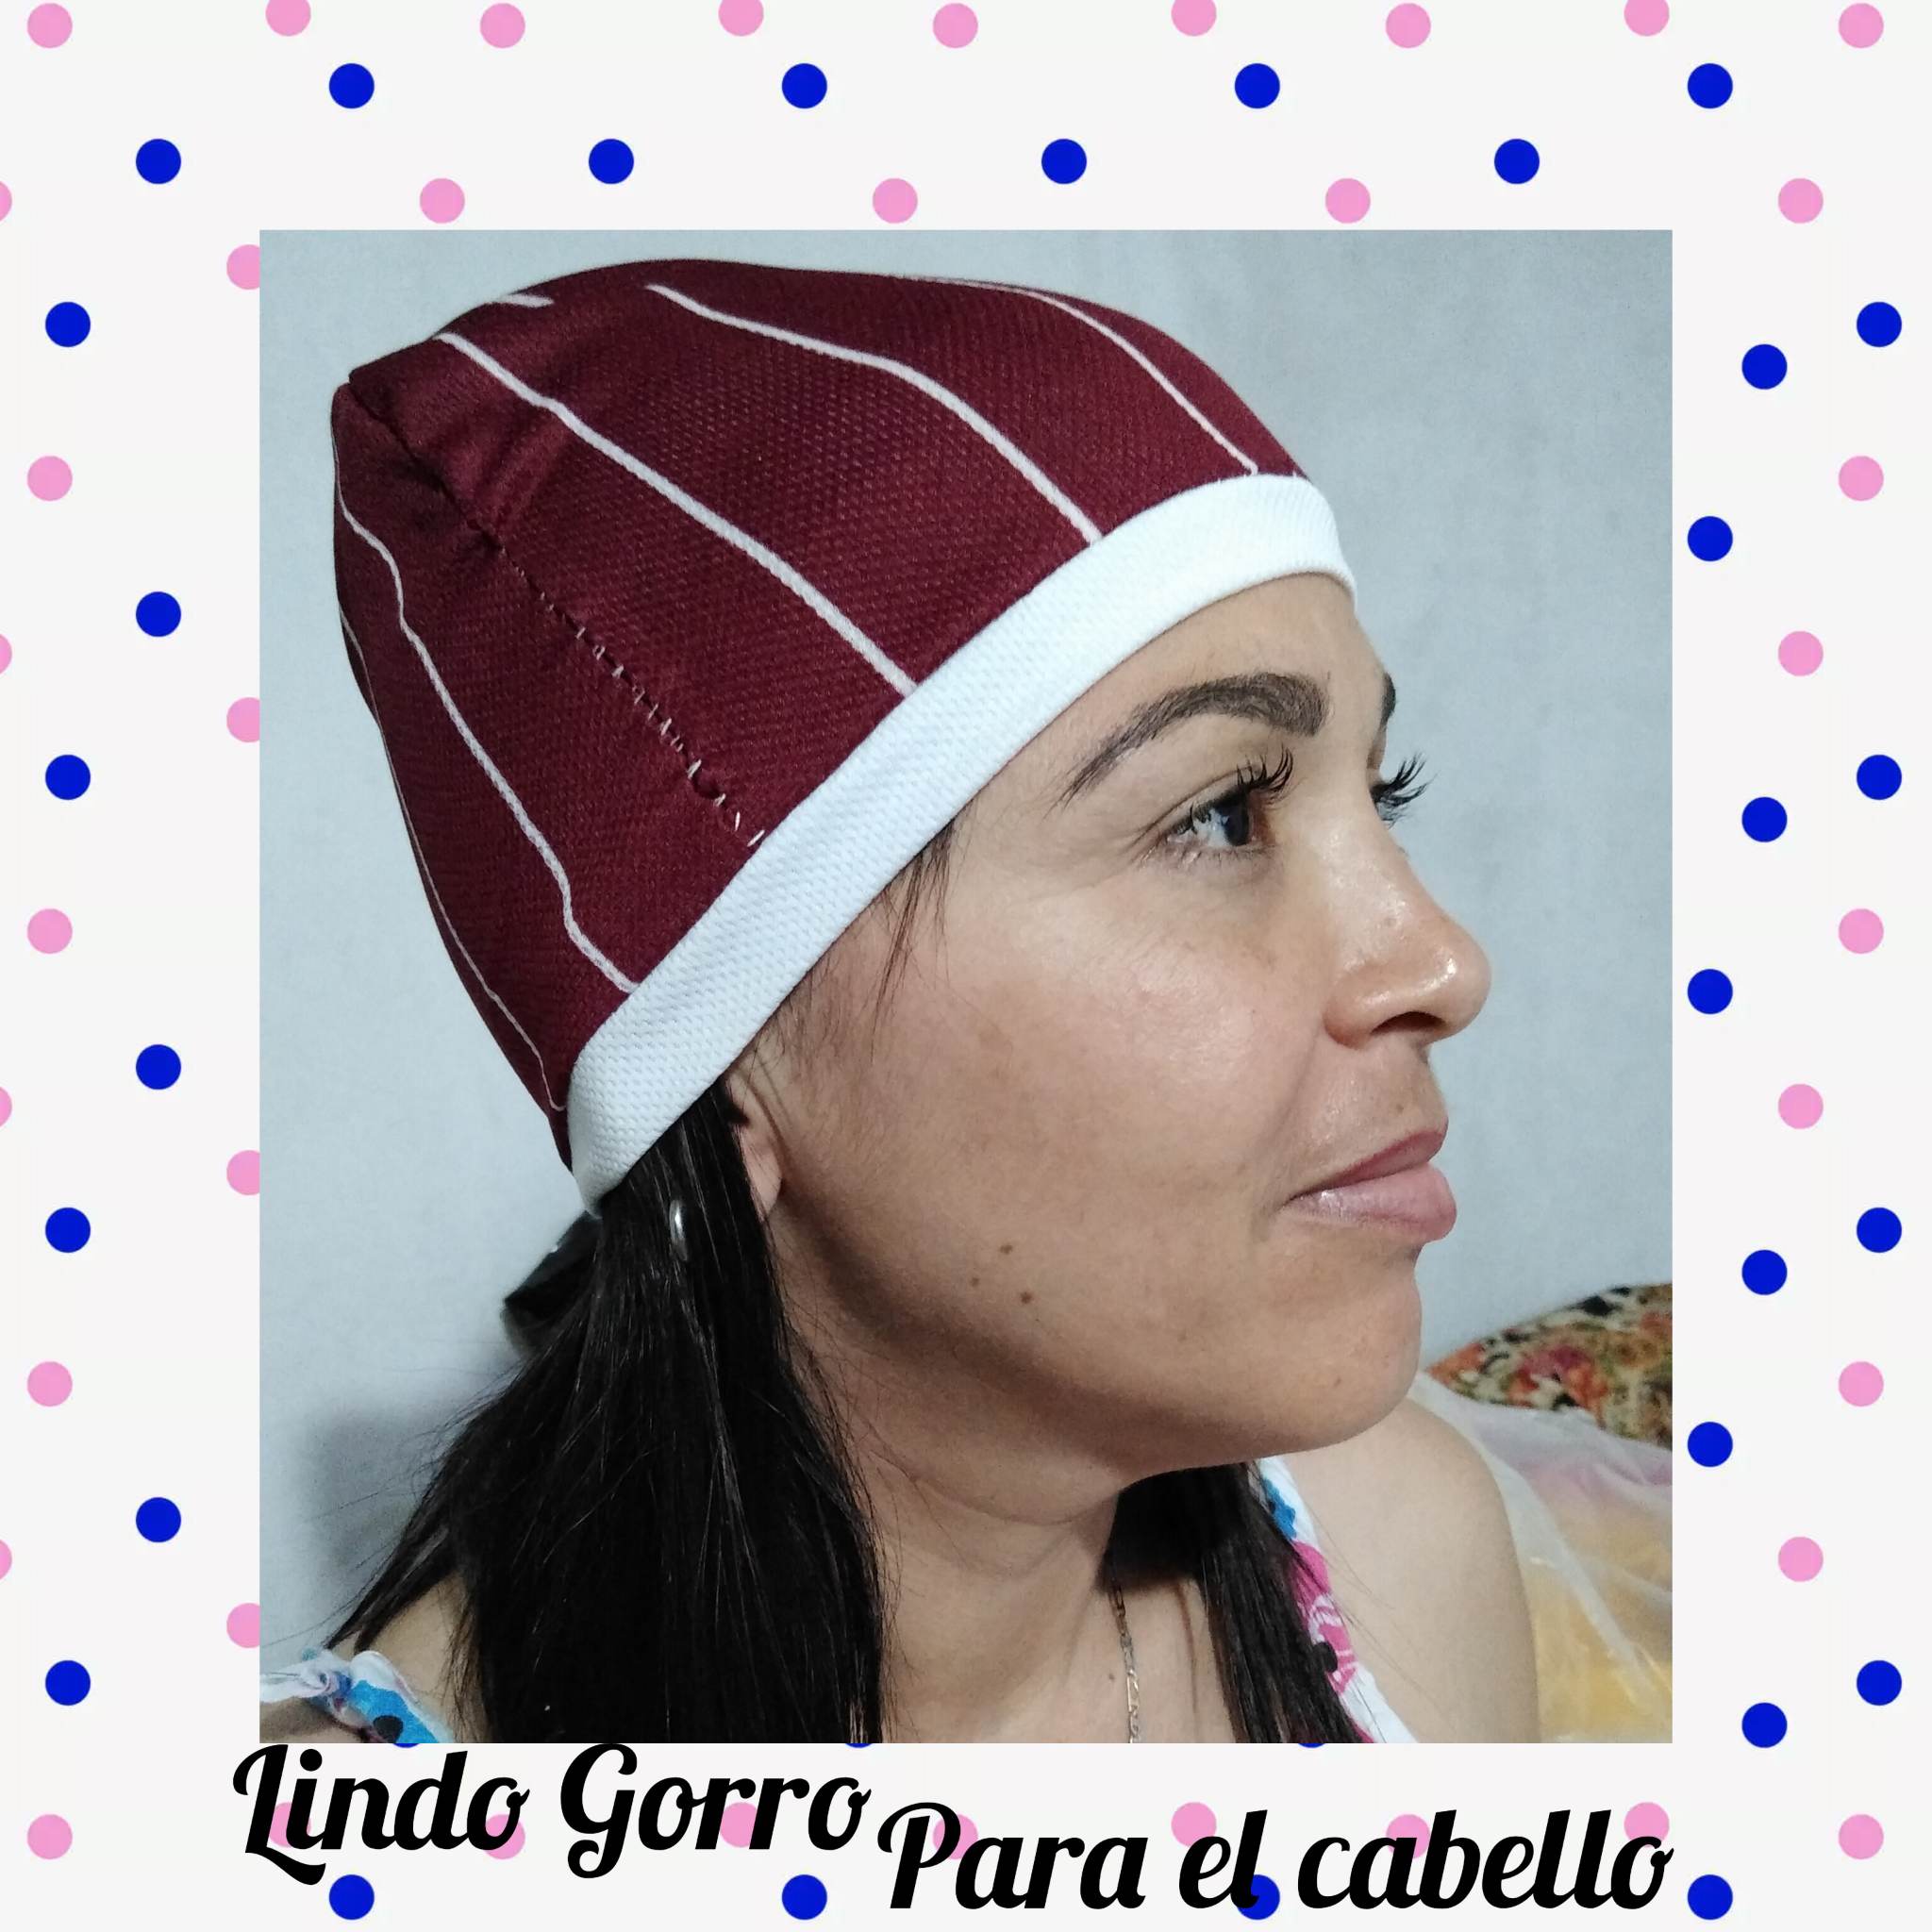
Friends of hive, welcome to my blog. I am happy to share with all of you my creation of today, for all those women who straighten their hair and know that we must pick it up on certain occasions to avoid getting it wet, at least when cooking, bathing, we need a cap that helps us to hold our hair because it will not leave our hair marked as a tail will, and then it is much better for our day to day at home. This helped me a lot with my hair after straightening it, since the cap protects me a lot in terms of that. So I want to share this with each of you, let's get started.
.jpg)
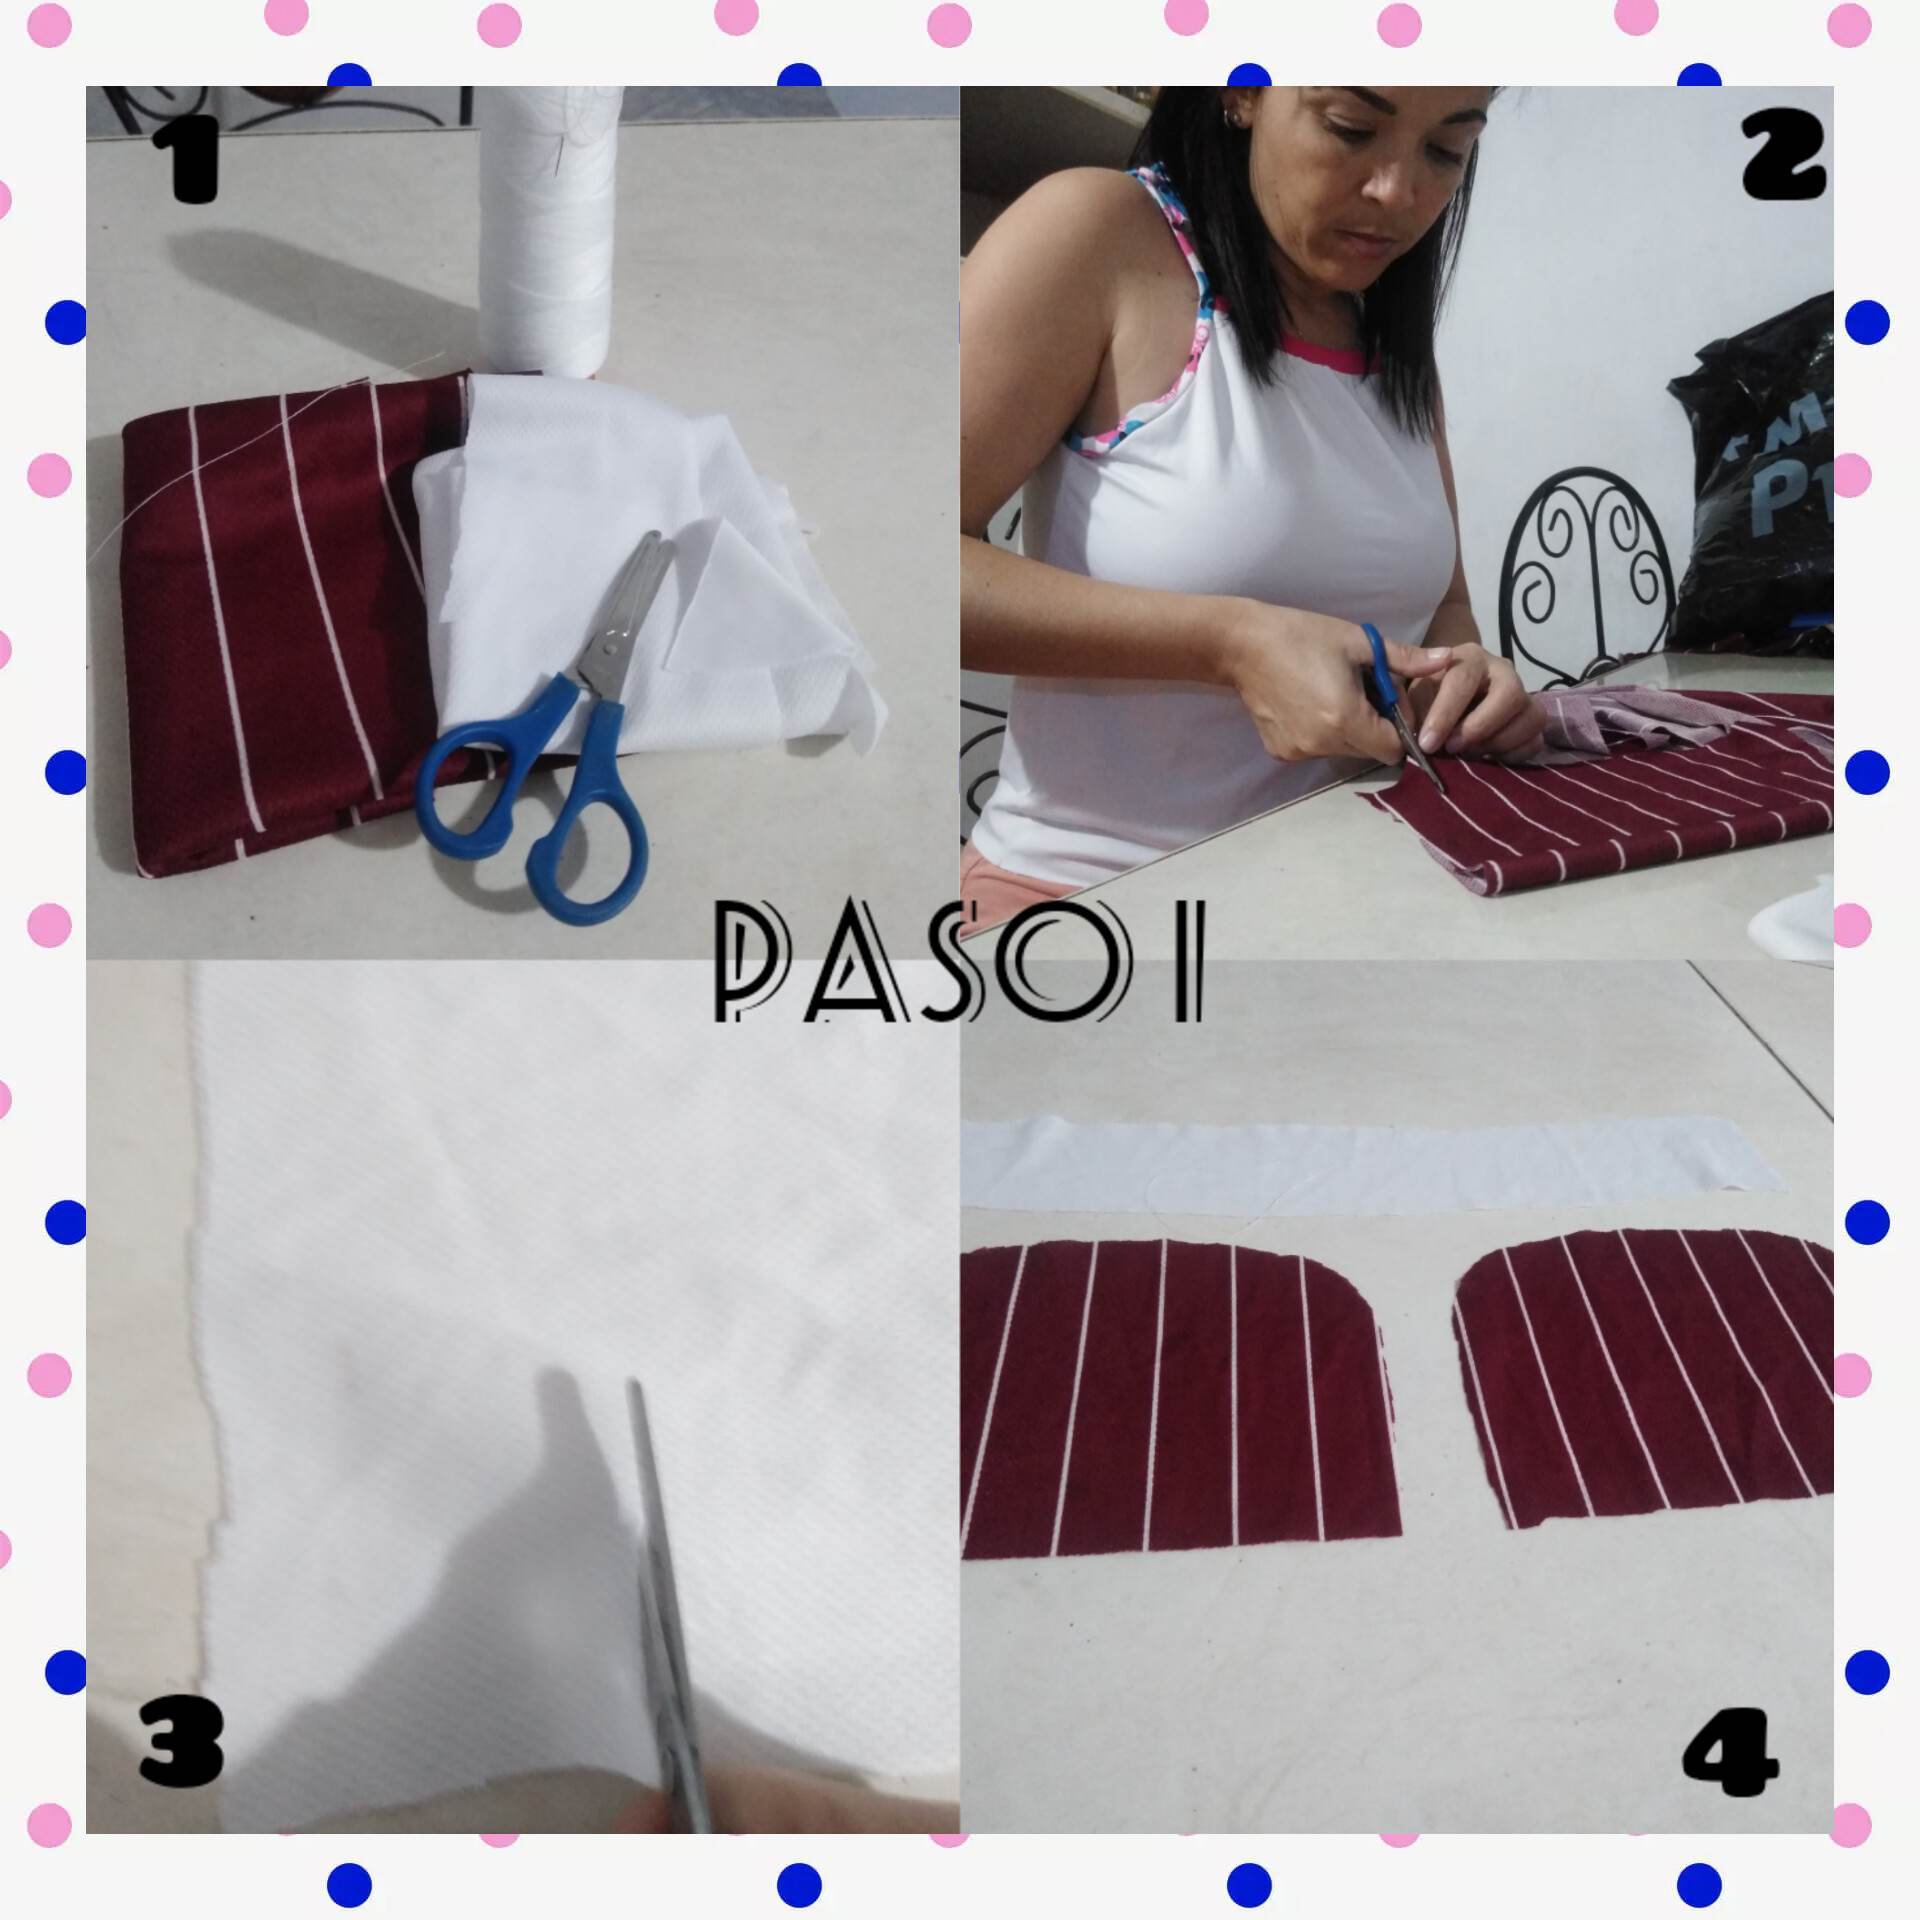
Paso 1: vamos a necesitar una tela suave, una tela que no sea tan gruesa, en éste caso elegí dos, una lata el gorro y otra para la pretina del gorro. Entonces lo primero que haremos será calcular o medir nuestra cabeza para hacer la medida más aproximada a eso, y procurando que la tela del gorro estire también, lo que haremos será cortar dos piezas, la delantera y la trasera así como en la imagen se muestra, y la tira que será la pretina del gorro.
Step 1: we are going to need a soft fabric, a fabric that is not so thick, in this case I chose two, one can the hat and another for the waistband of the hat. Then the first thing we will do will be to calculate or measure our head to make the most approximate measure to that, and trying that the fabric of the hat stretches too, what we will do is to cut two pieces, the front and the back as shown in the picture, and the strip that will be the waistband of the hat.
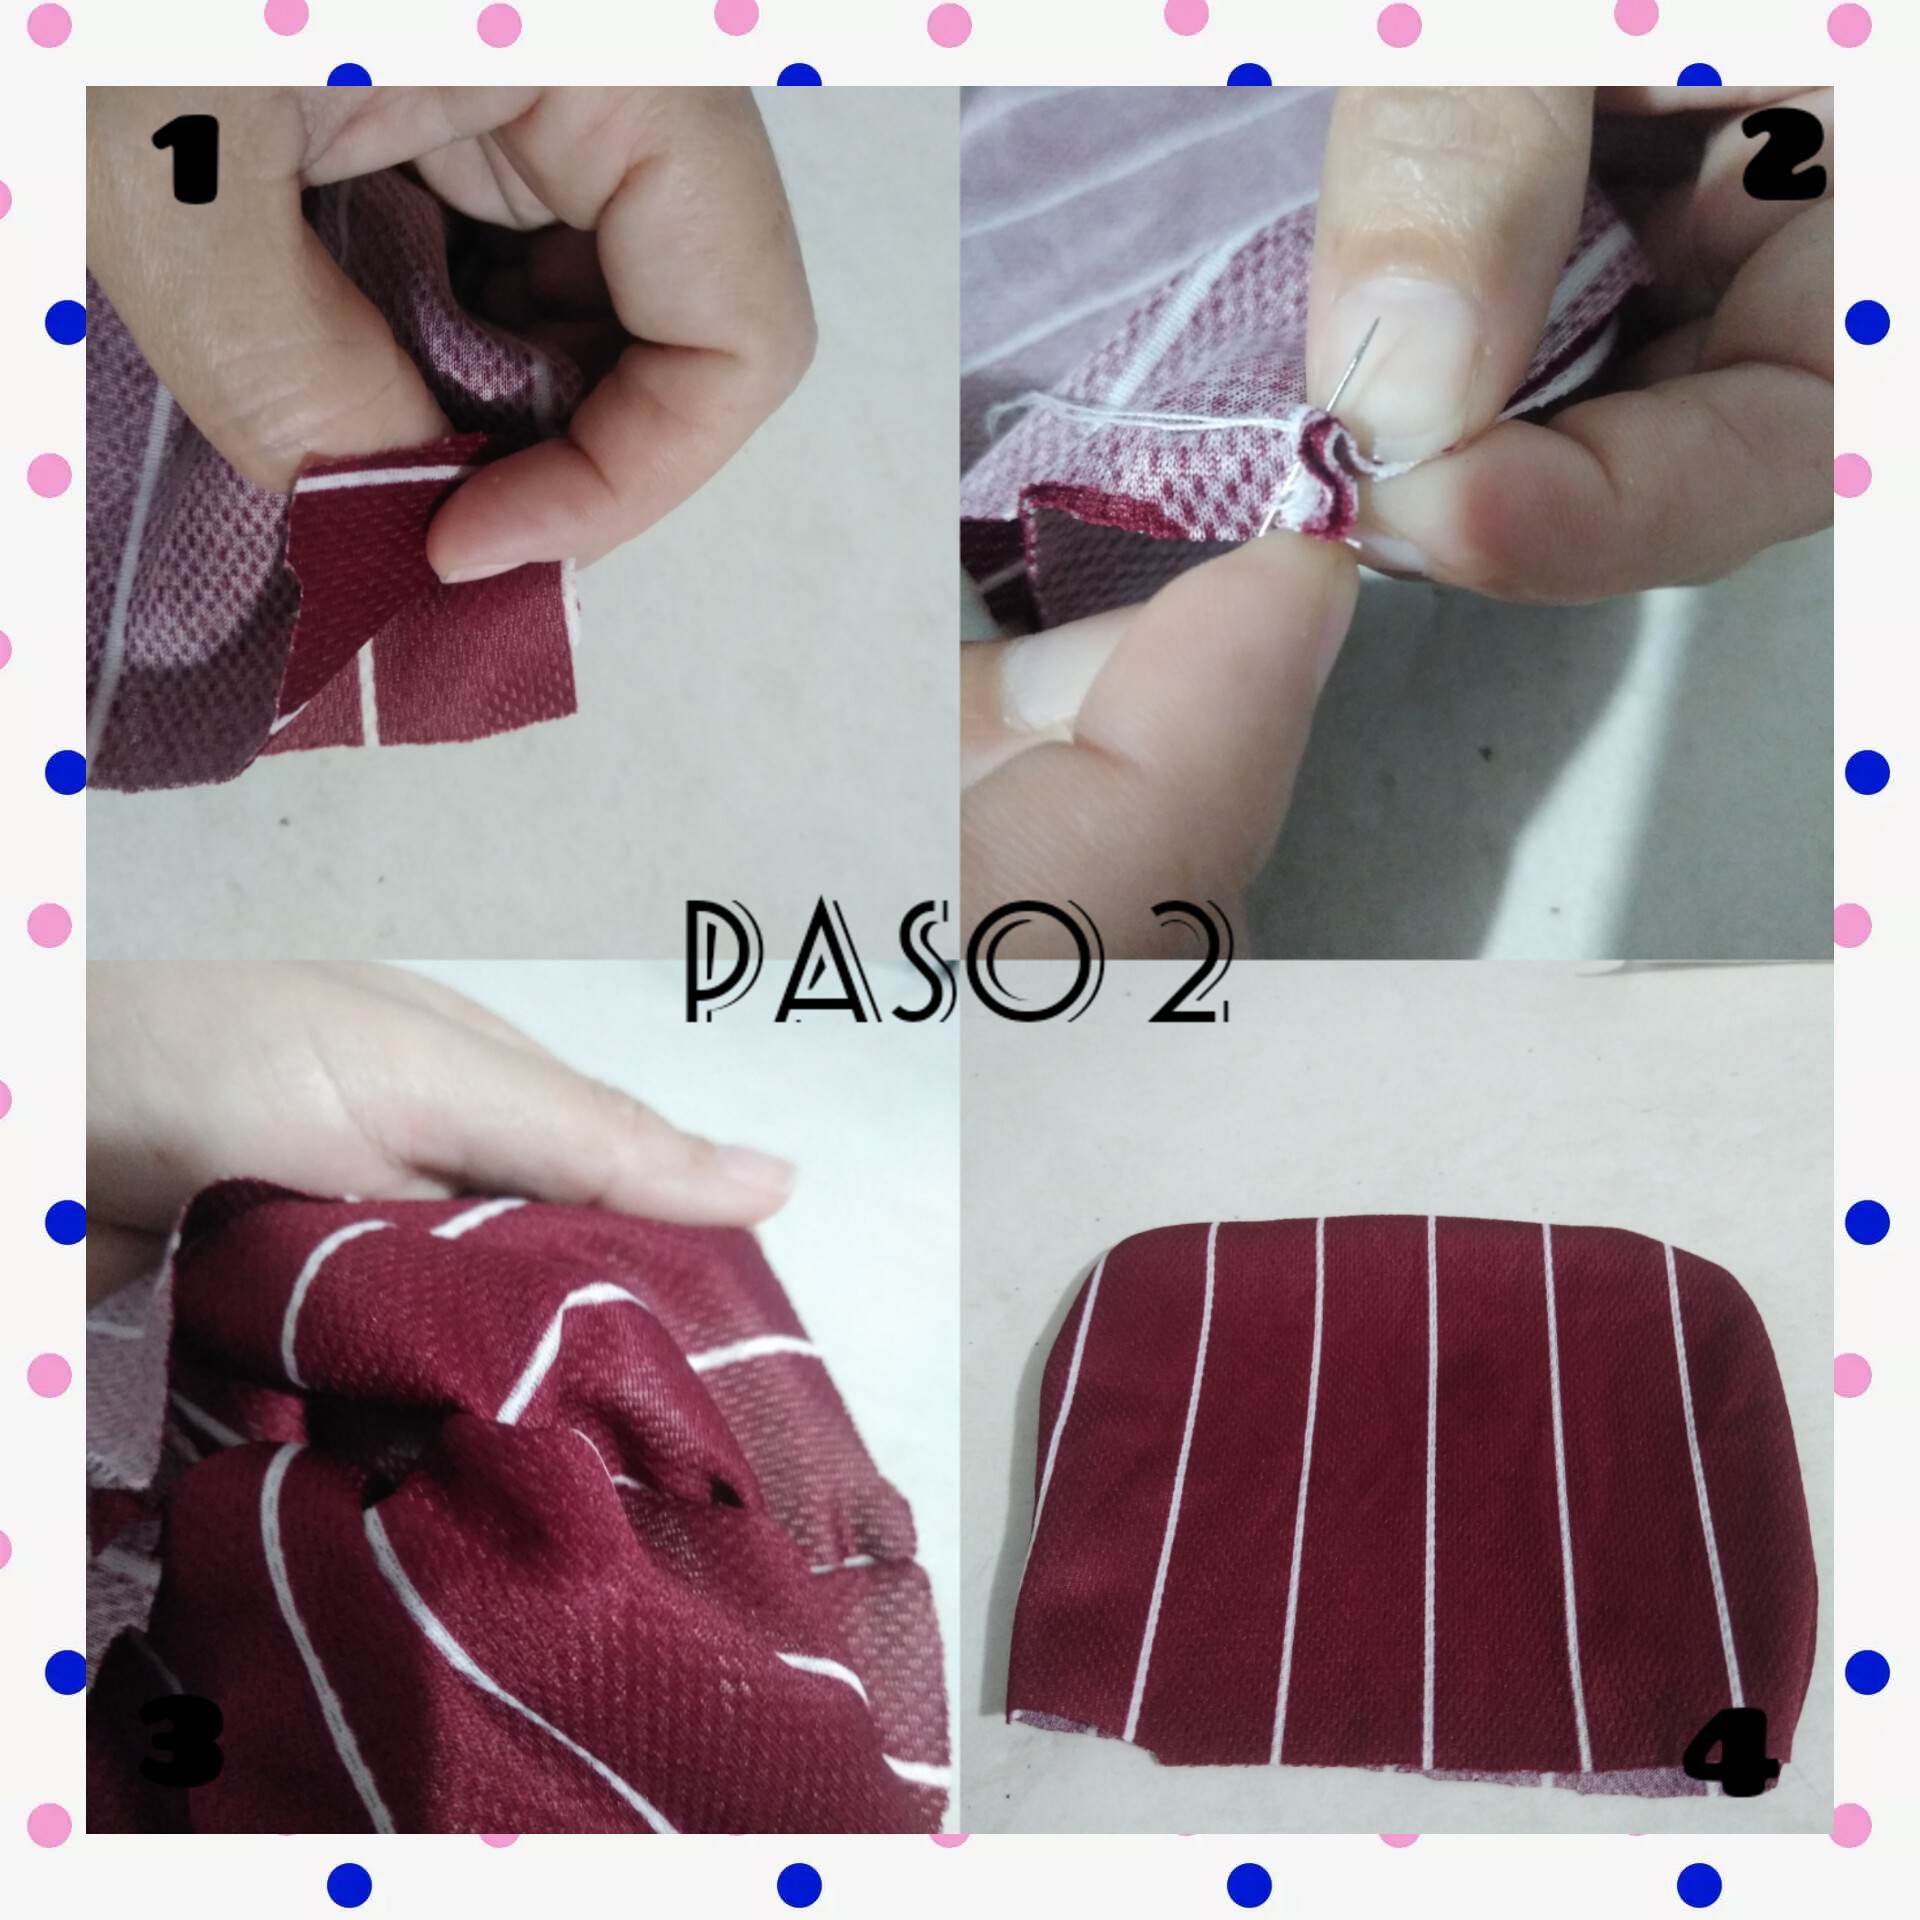
Paso 2: lo que haremos ahora será colocar encima de una pieza, la otra pieza, eso sí, al revés para que al momento de voltear el lado original de la tela quede hacia afuera y no hacia adentro, entonces colocamos las piezas así como se los muestro en la imagen, y Procederemos a coser por todo el borde dejamos la abertura de la cabeza por supuesto, luego de haber cosido todo el borde lo que haremos será voltear nuestro gorro y quedará de la manera en la que lo muestra éste paso 2.
Step 2: what we will do now is to place on top of a piece, the other piece, yes, upside down so that when flipping the original side of the fabric is outward and not inward, then we place the pieces as shown in the image, and proceed to sew around the edge leaving the opening of the head of course, after having sewn the entire edge what we will do is flip our hat and will be the way it shows this step 2.
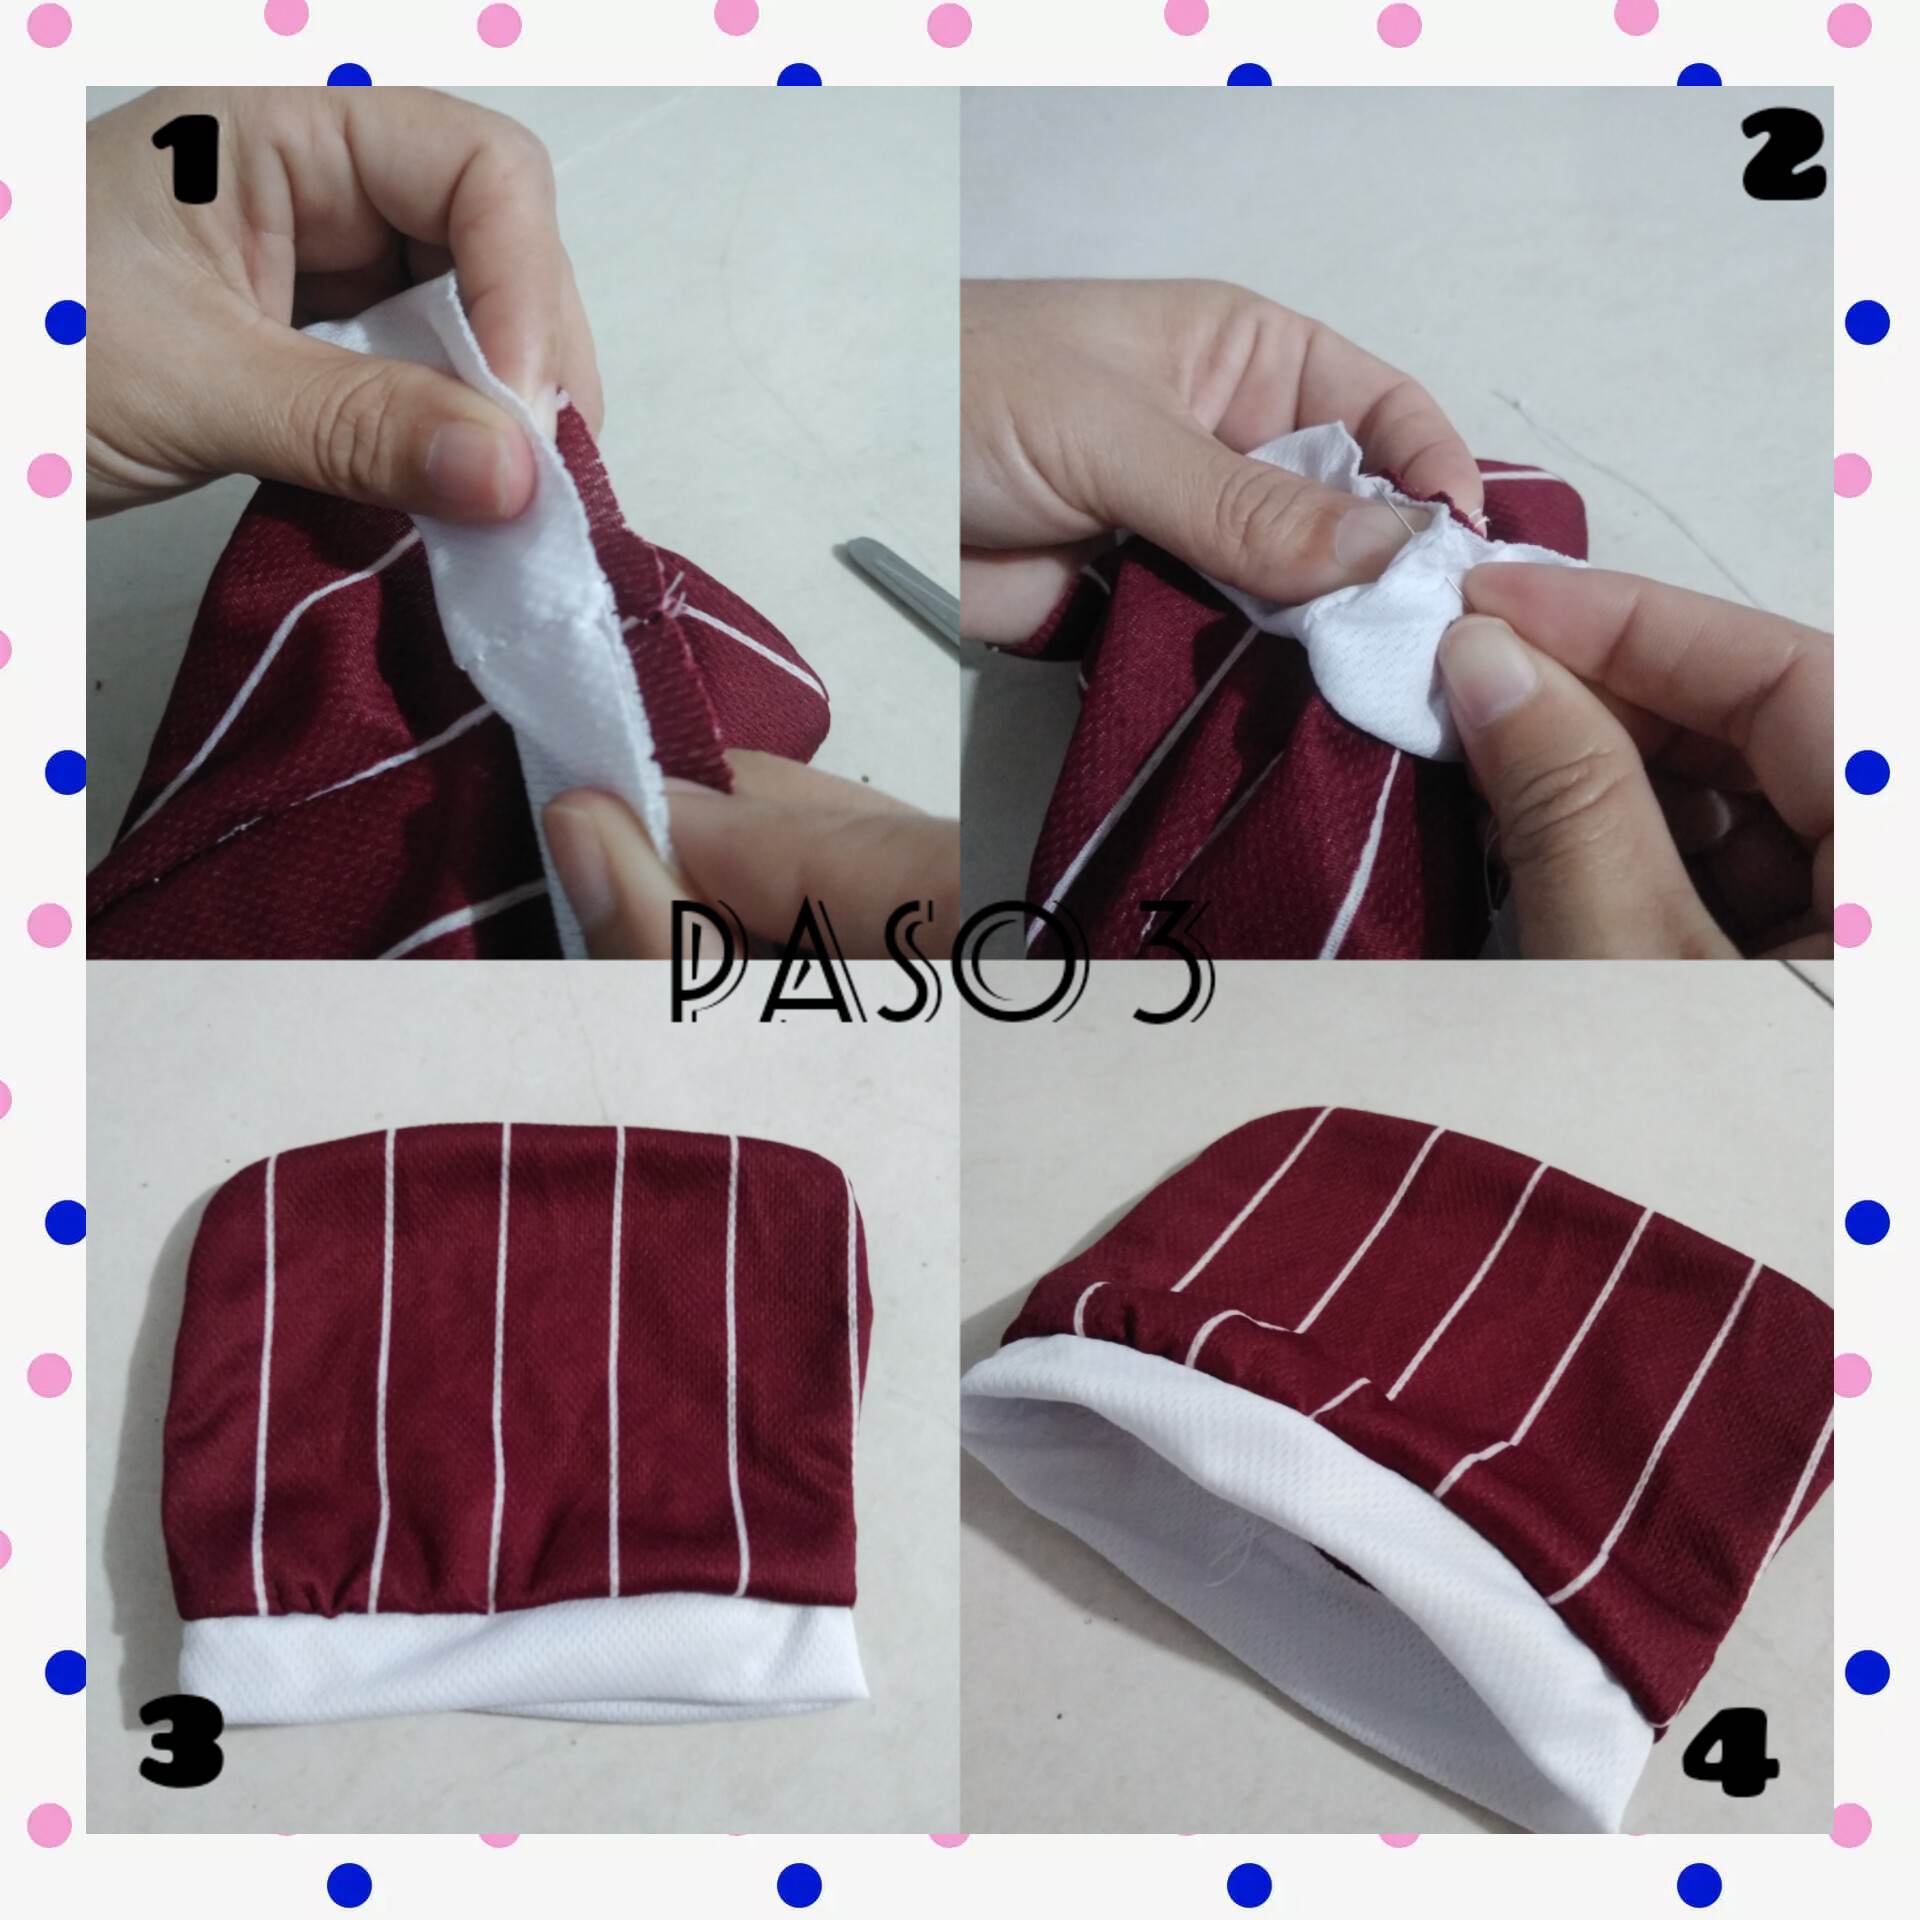
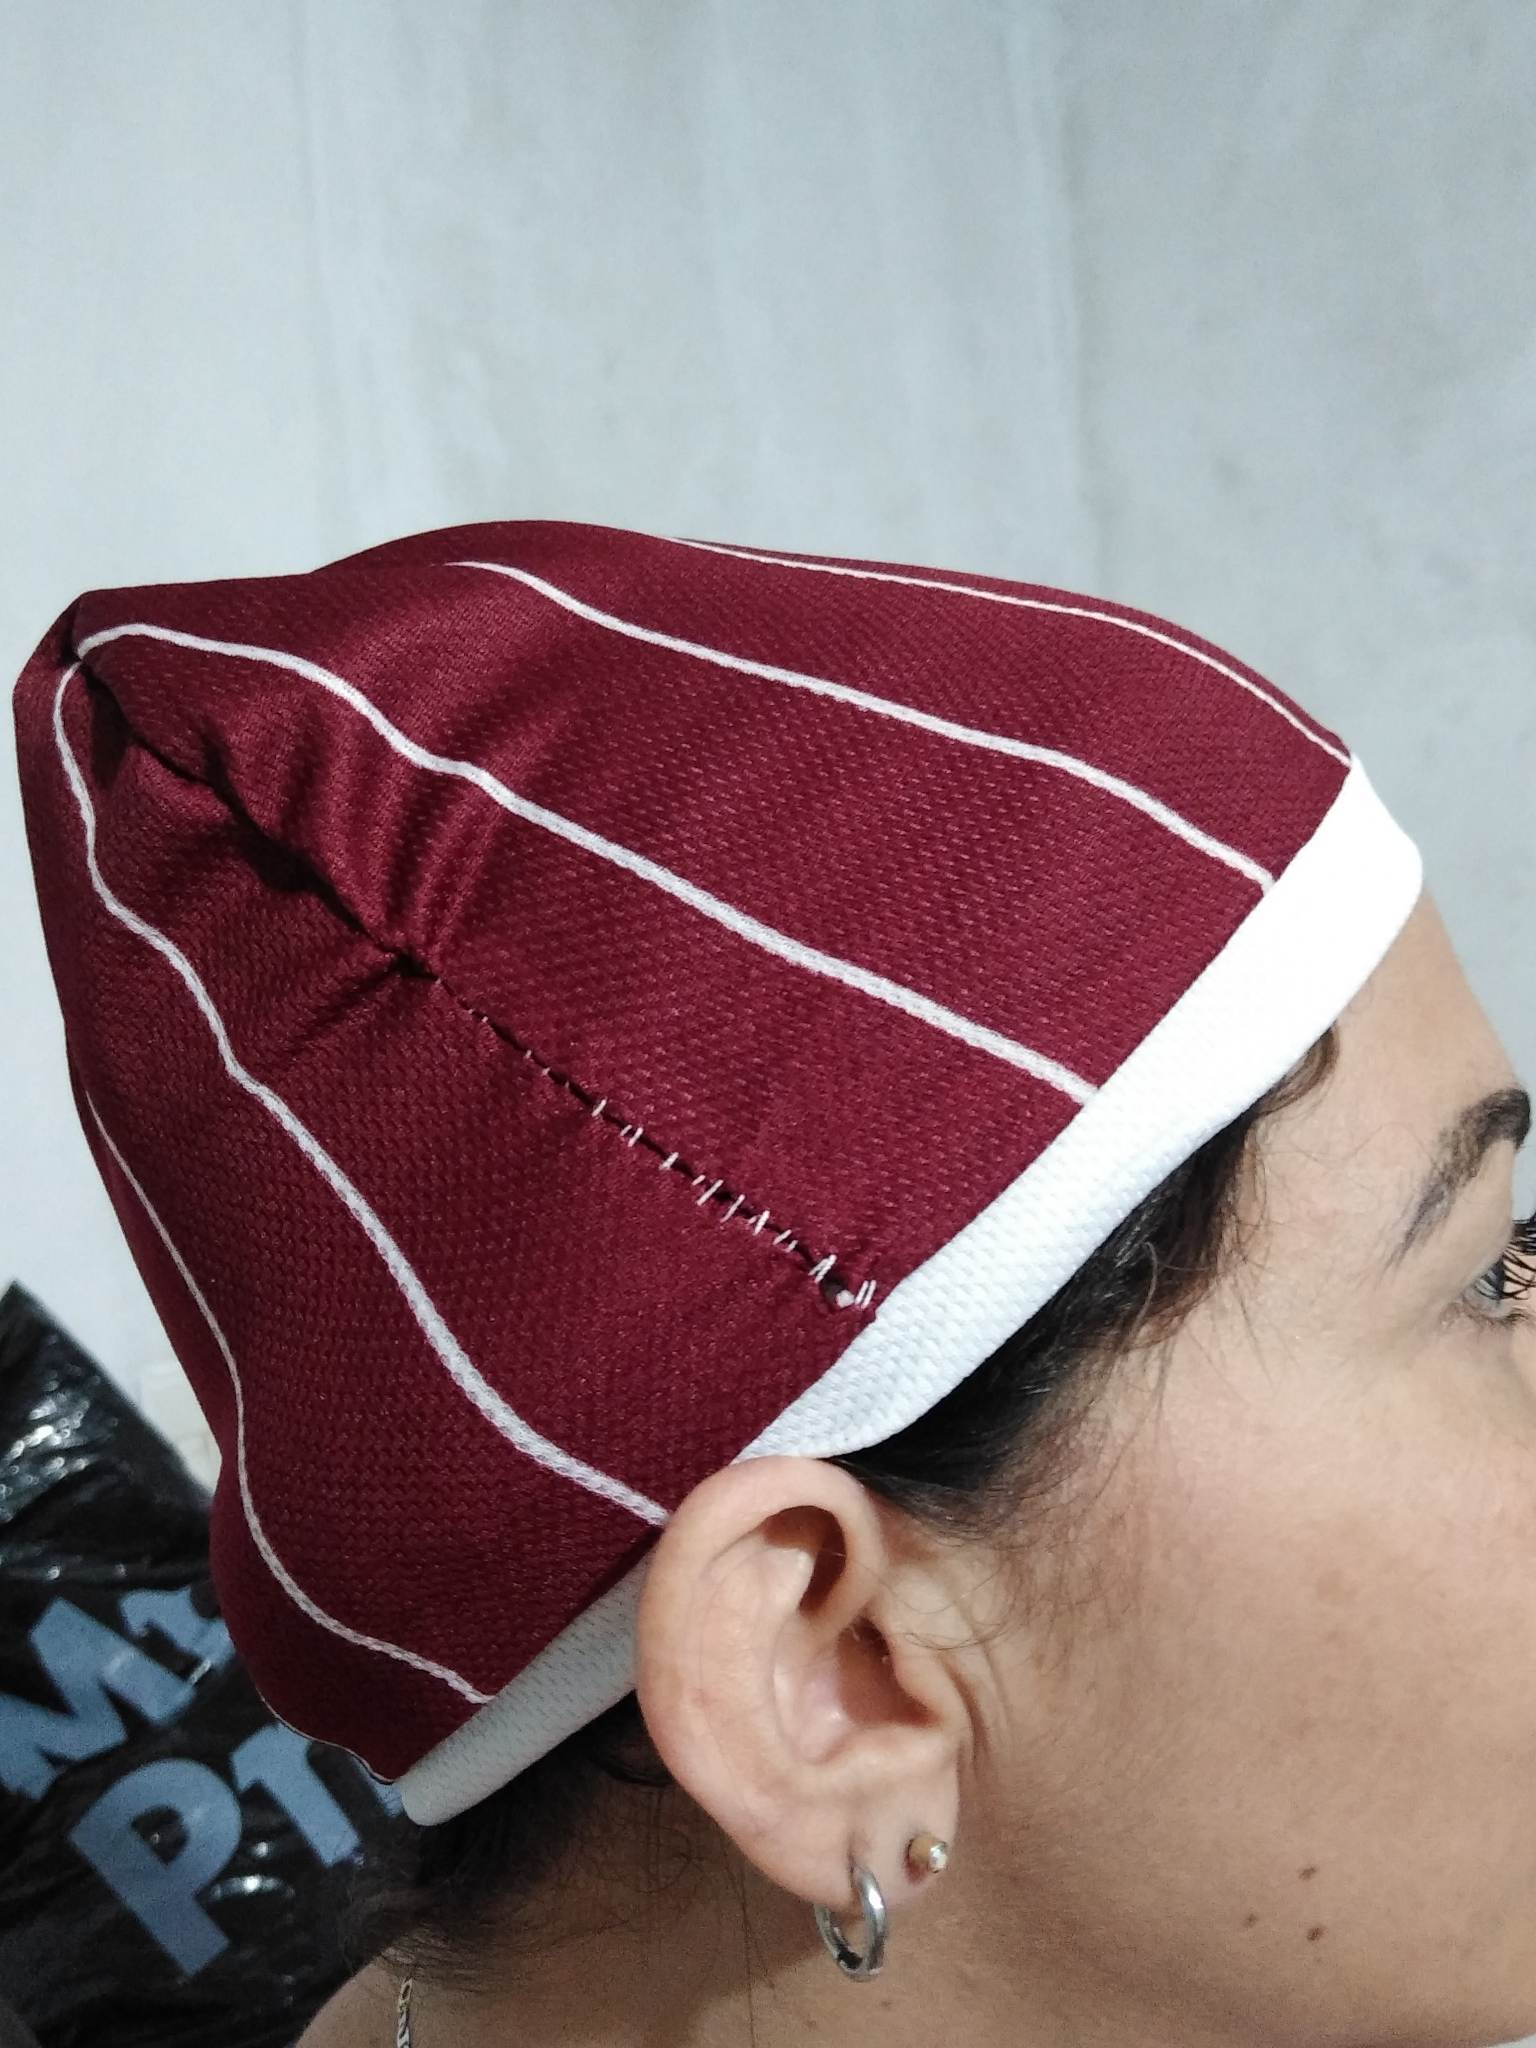
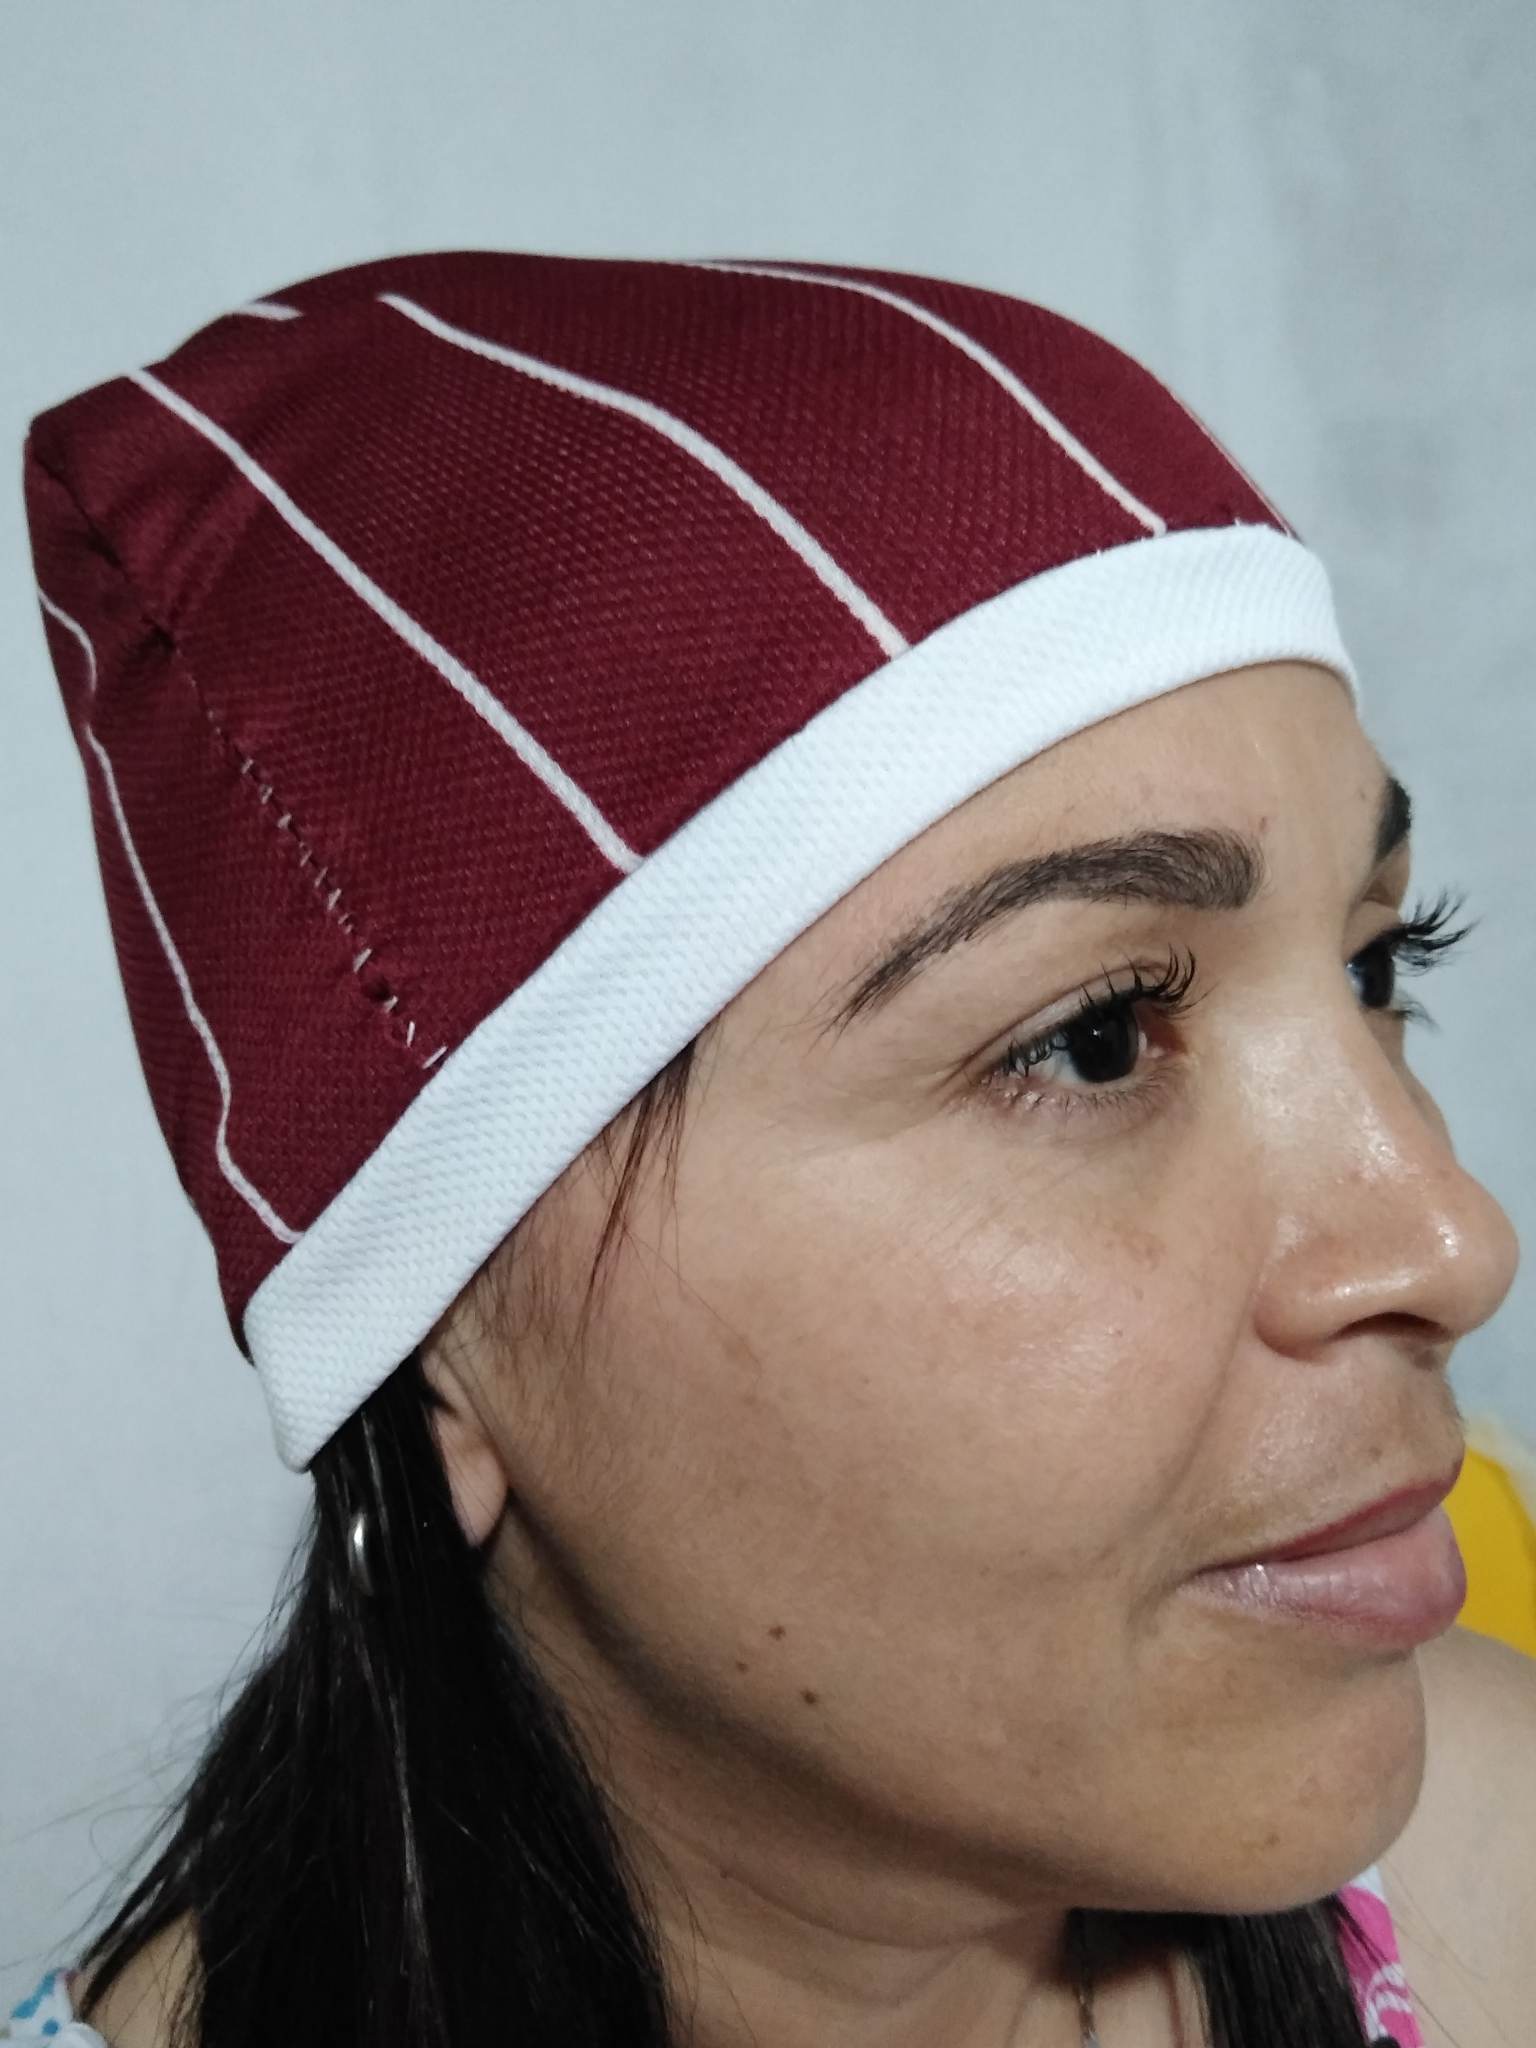
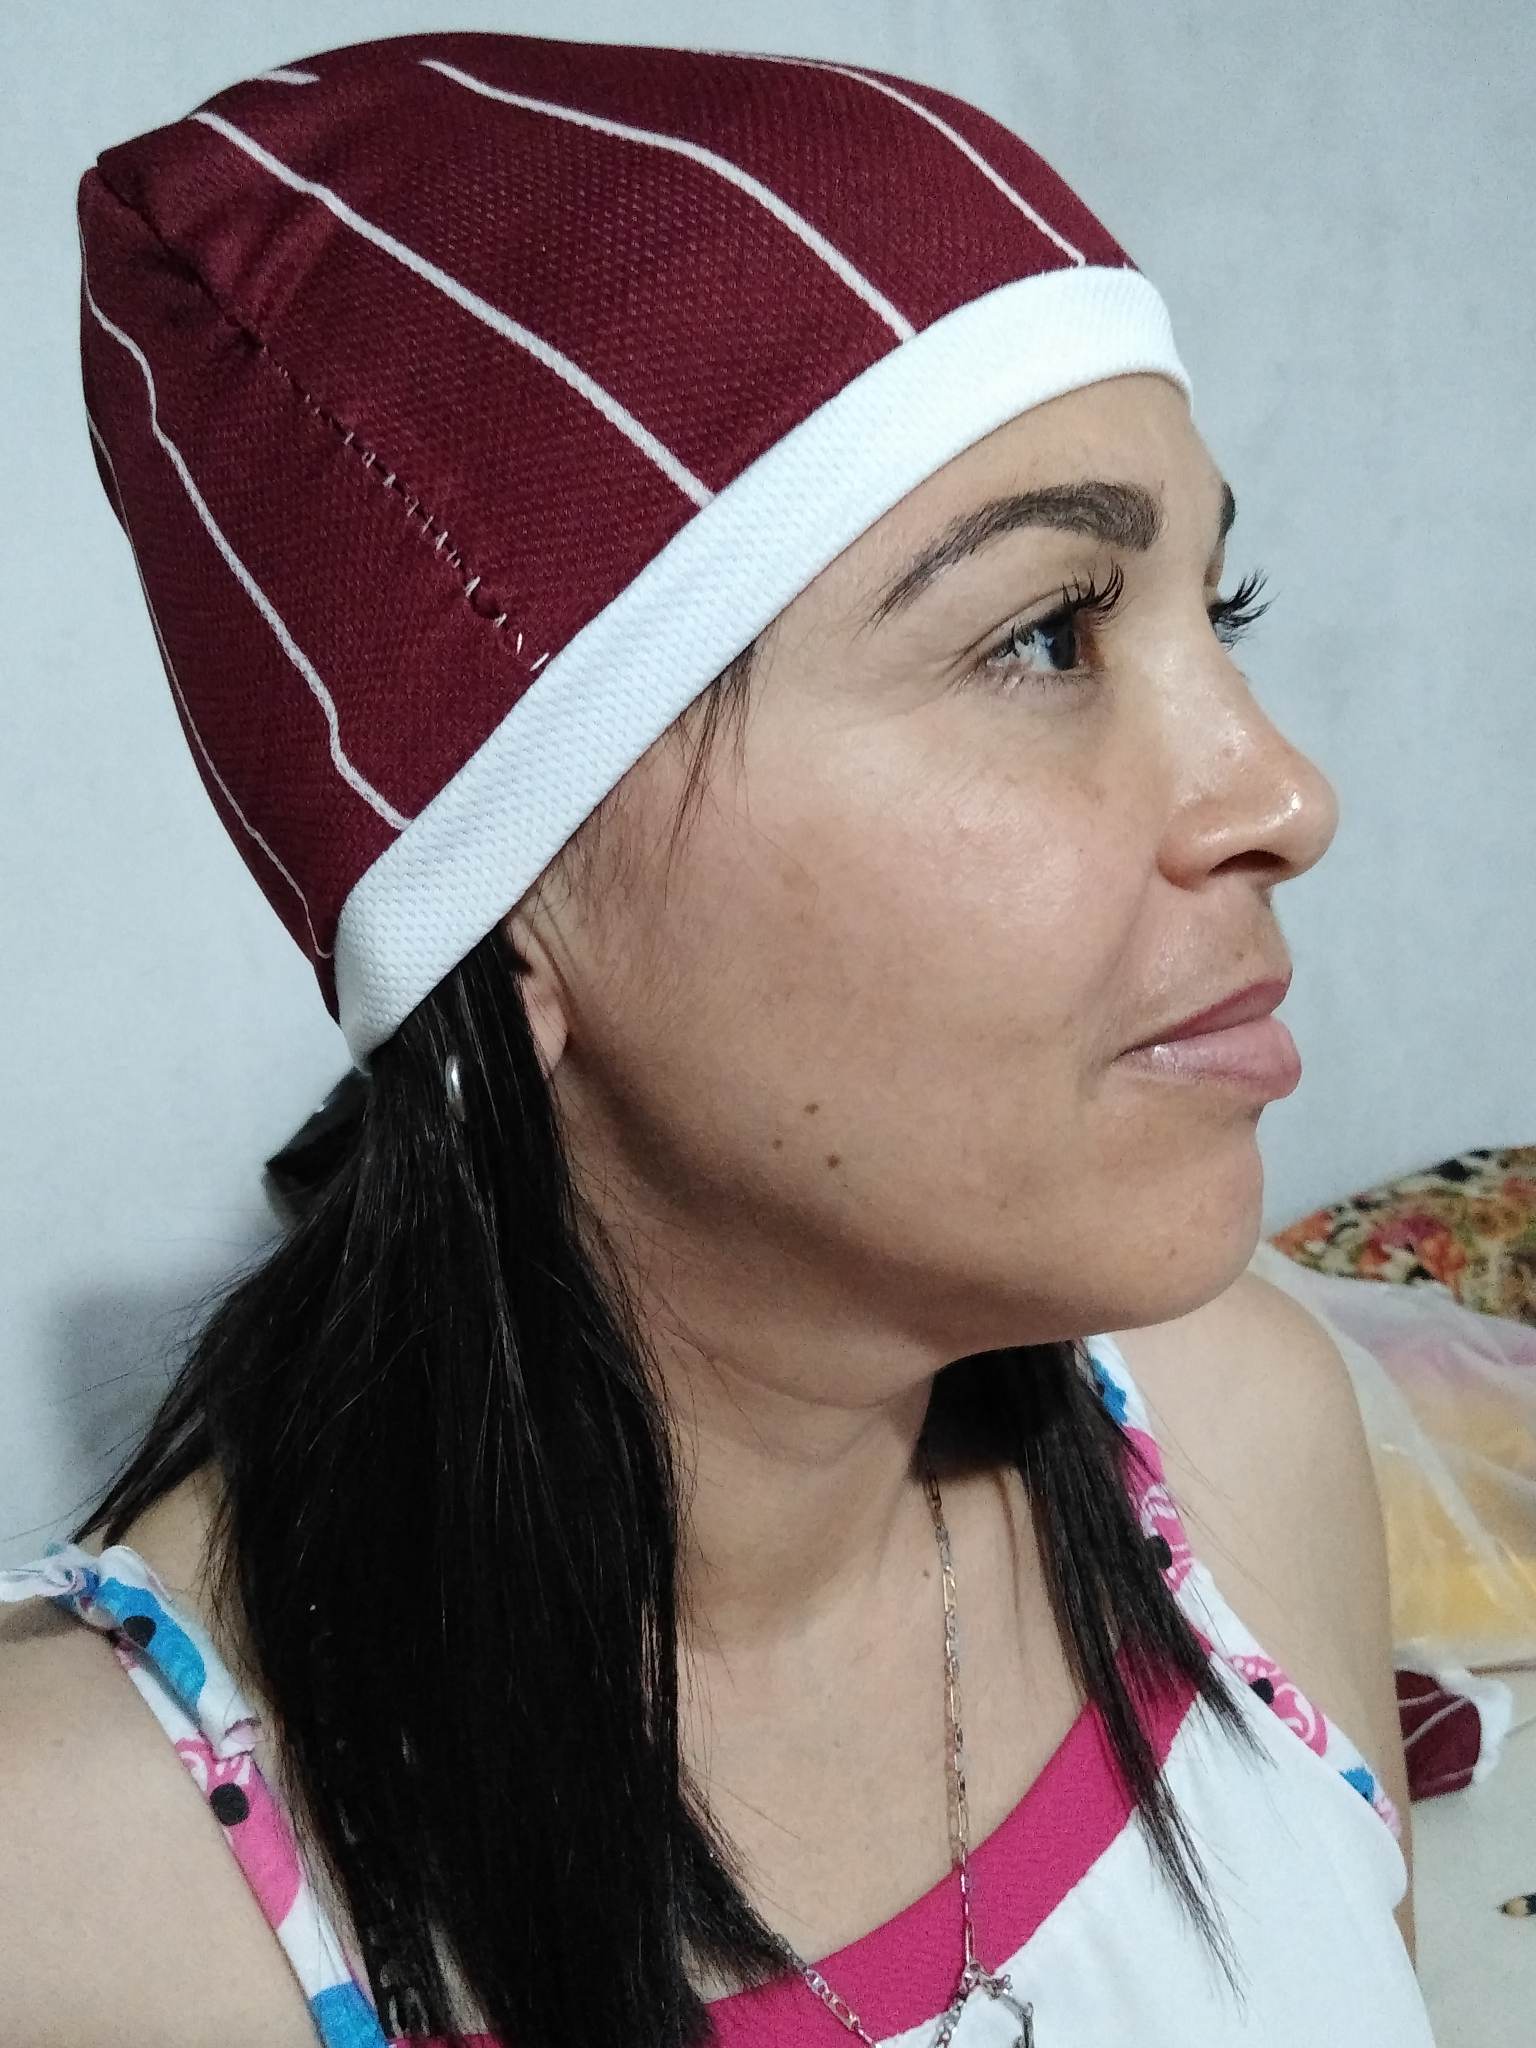
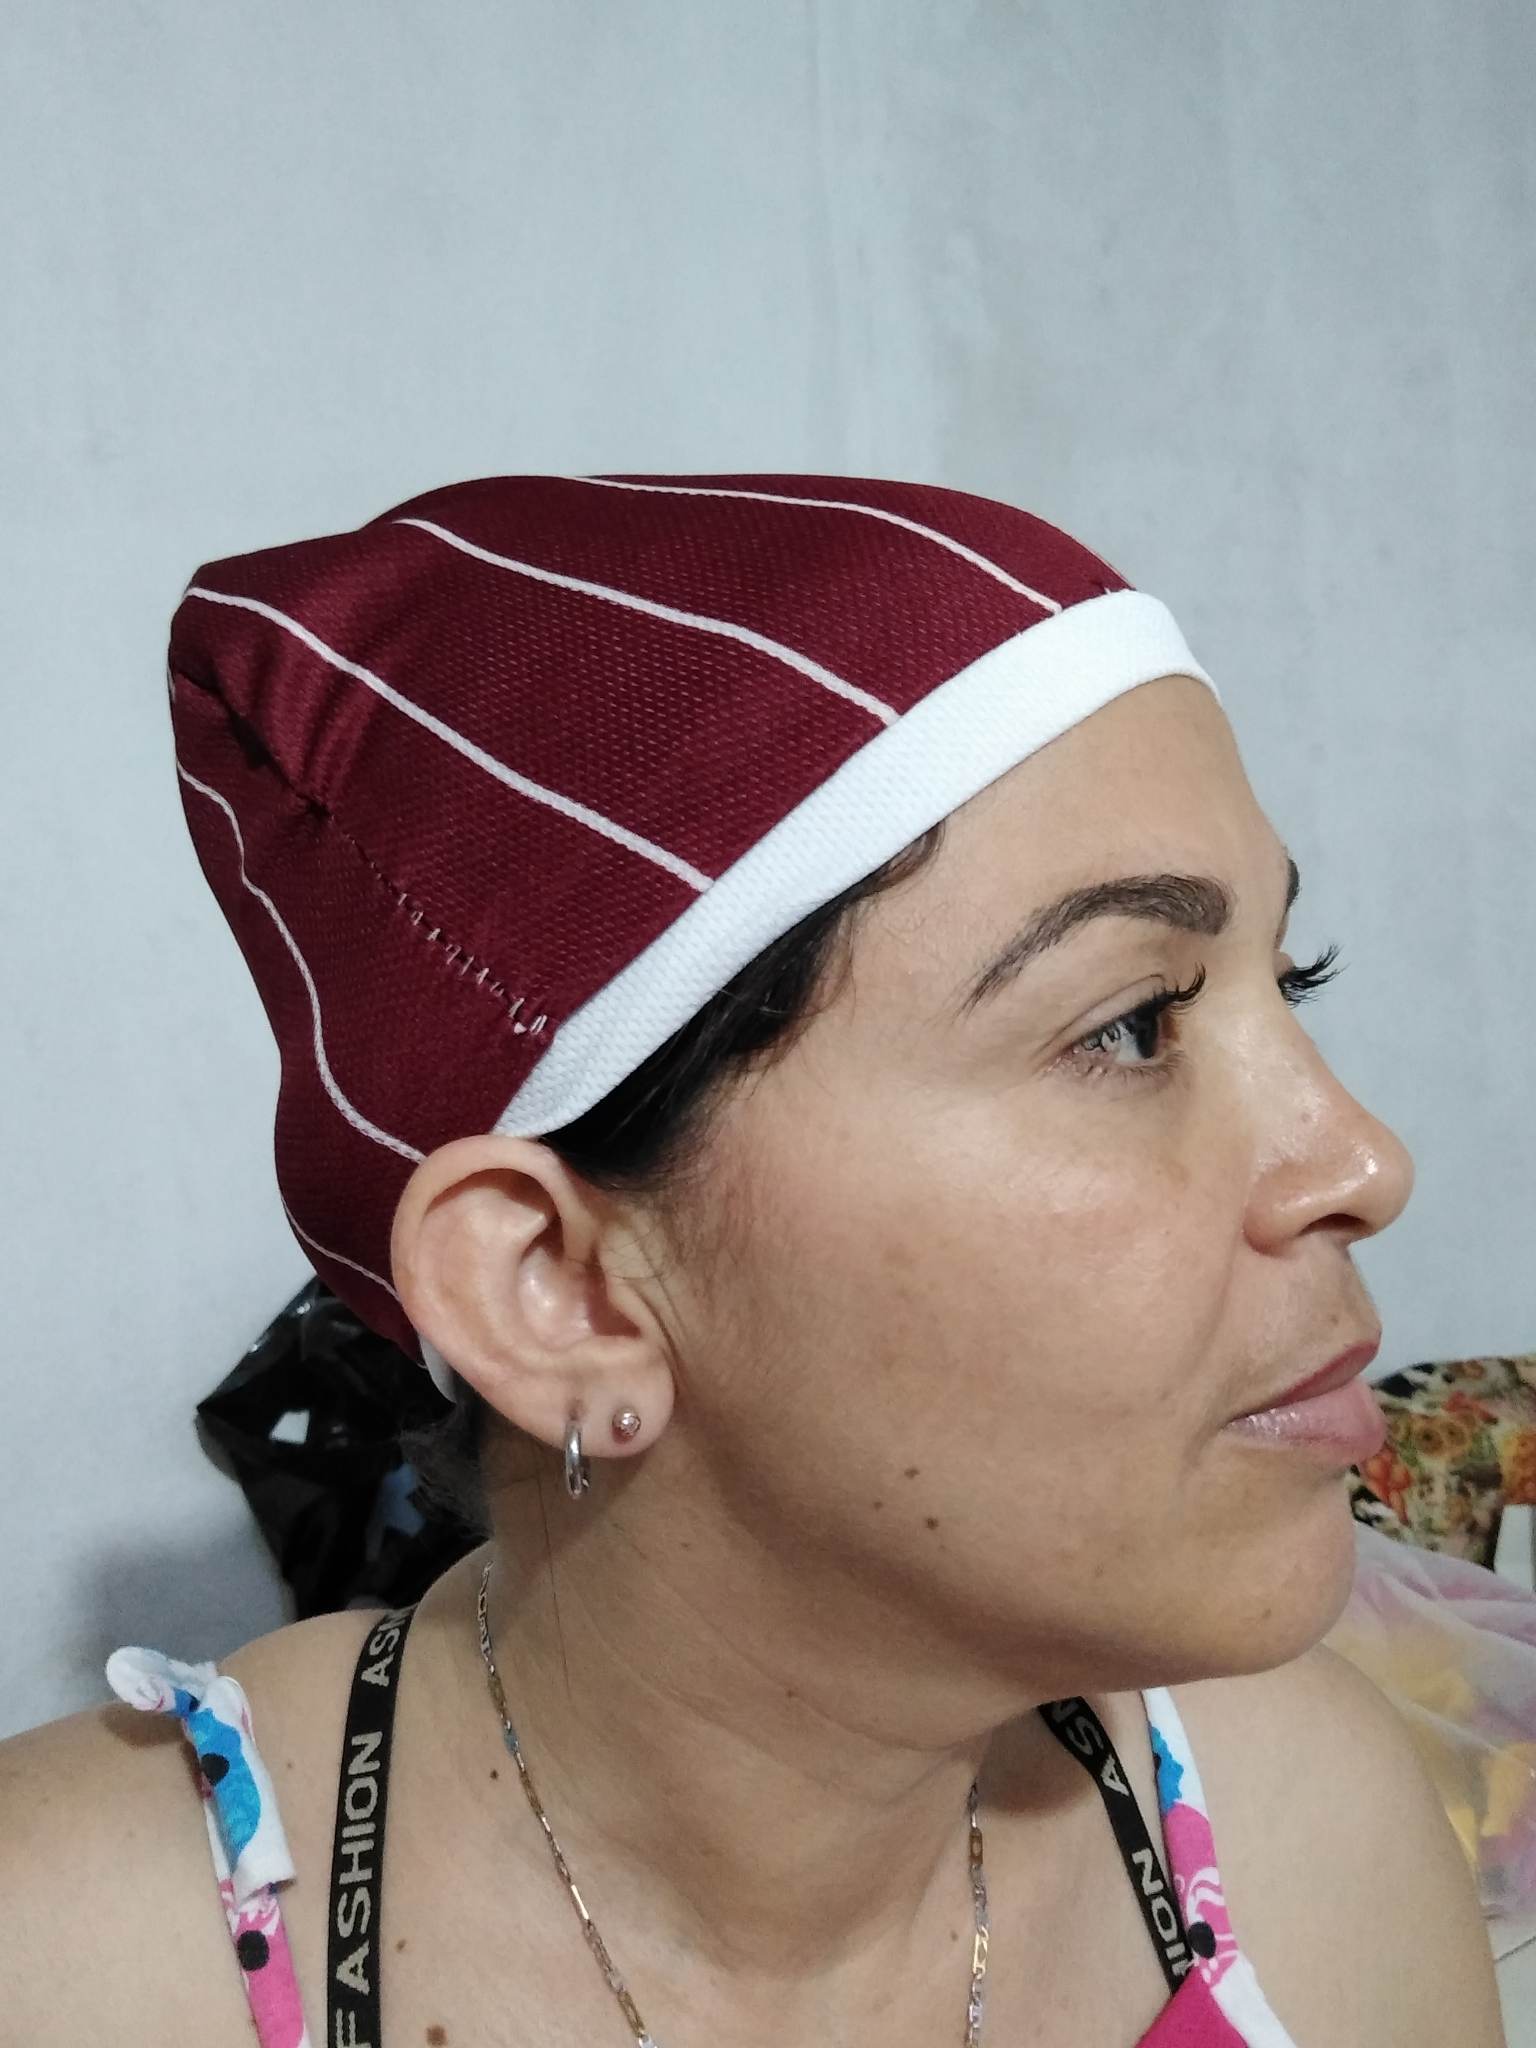
Paso 3: coseremos a parte la tira del gorro, o la pretina, y luego de haberla cosido lo que haremos será coserla a la parte final del gorro para que cumpla la función de pretina, la coseremos por dentro muy bien, procuramos que la costura quede bien ajustada para que no se vaya a soltar, y quedará nuestro gorro como aparece en la imagen, de verdad espero que les haya gustado mucho.
Step 3: we will sew apart the strip of the hat, or the waistband, and after having sewn it what we will do is sew it to the end of the hat to fulfill the function of waistband, we will sew it inside very well, we try that the seam is well adjusted so that it will not come loose, and our hat will be as shown in the image, I really hope you liked it a lot.
Final Result.