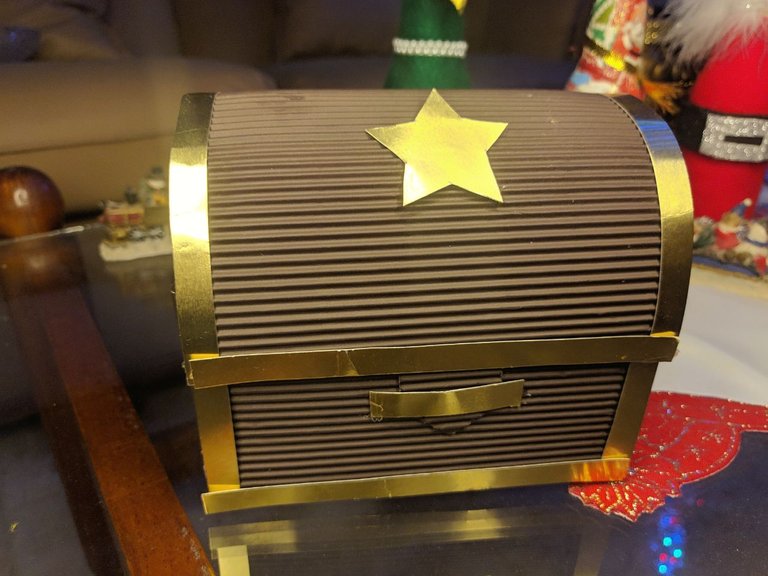
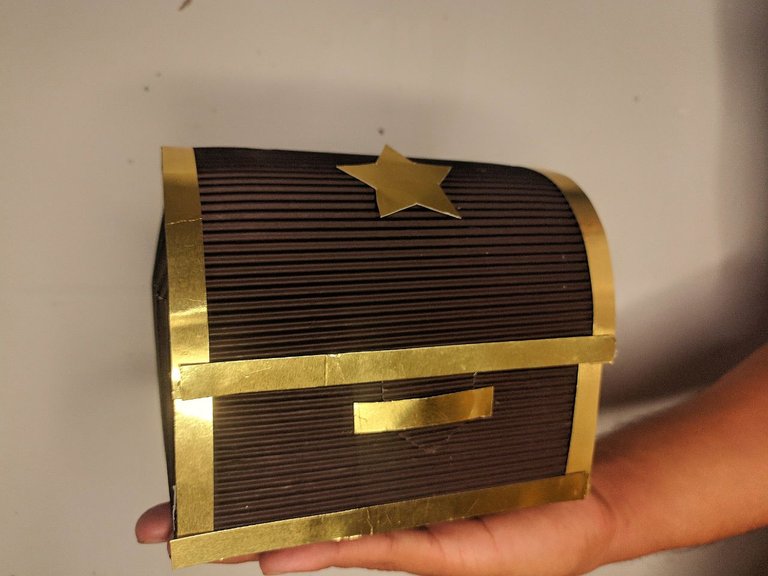
Cofre de cartulina corrugada - Corrugated cardboard box 👌🏻
Hola amigos de hive, hoy quiero compartir con ustedes este cofre de cartulina que hice para mi vecinito, en el pais dónde vivo se acostumbra de hacer nacimientos vivientes en la épocas navideñas, y a mí vecinito le tocó ser el rey Baltazar y este lleva un cofre, cómo no conseguimos uno tuvimos que hacerlo, pero no fue nada complicado además que el estuvo en todo momento en la realización de la manualidad tratando de ayudar lo más que pueda, claro está que podía hacer cosas simples nada más, pero me gusta que se interese en sus cosas, en estos días estaré haciendo cosas de navidad para la comunidad.
Hello friends of hive, today I want to share with you this cardboard chest that I made for my little neighbor, in the country where I live it is customary to make living nativity scenes at Christmas time, and my neighbor had to be King Baltazar and this takes a chest, as we did not get one we had to do it, but it wasn't complicated at all, besides he was all the time in the making of the craft trying to help as much as he could, of course he could do simple things, but I like that he is interested in his things, these days I will be doing Christmas things for the community.
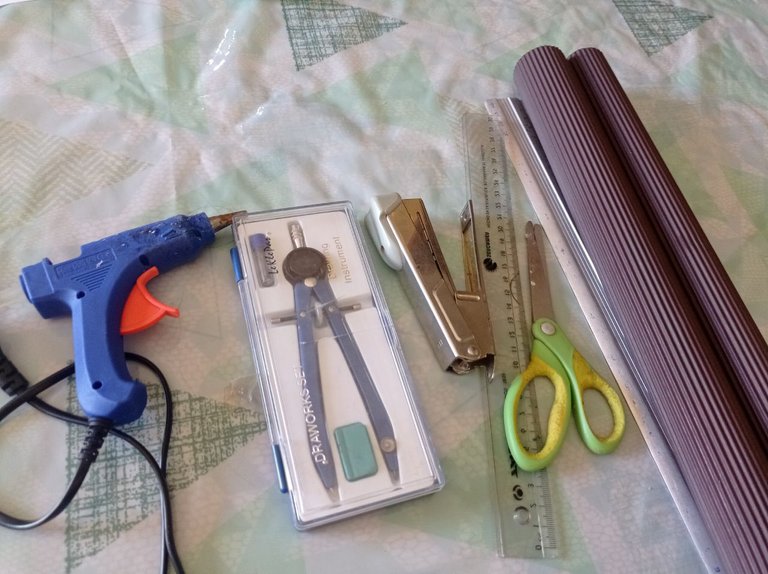
Materiales/ Materials
- Cartulina corrugada
- Tijera
- Silicon
- Regla
- Lápiz
- Papel
- Cartulina dorada
- Compas
- Corrugated cardboard
- Scissors
- Silicon
- Ruler
- Pencil
- Paper
- Gold cardboard
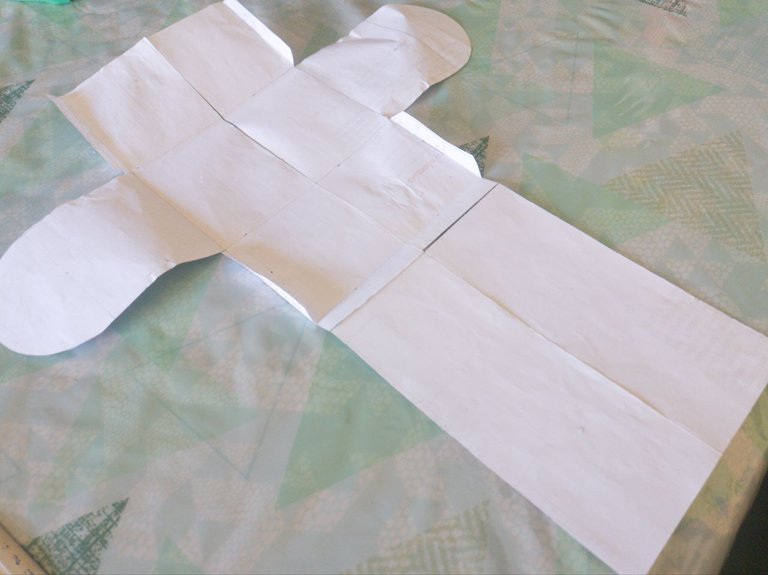
Lo que empezamos hacer es pegando hojas blancas para poder hacer el molde del cofre, si tenemos un papel bond a la mano bien si no esta idea es la mas rápida, pegamos varias hojas recicladas y ahi vamos realizar nuestro molde asi será mas sencillo ya que podemos cometer errores y arreglar algo si no nos gusta.
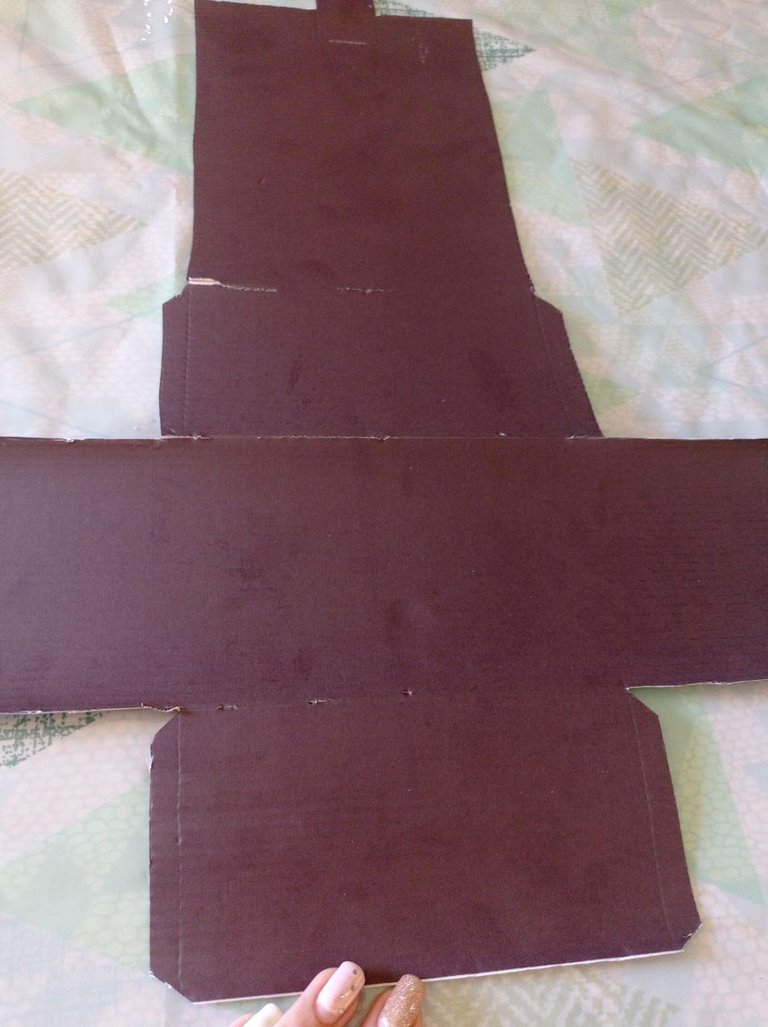
Definimos las medidas, agarramos la regla para así comenzar a marcar el ancho de la base será 10 cm, lo largo será de 15 cm y la altura de 8 cm por cada cara, más 18 cm que será la tapa de nuestro cofre todo esto con sus respectivas pestañas, con la ayuda del compas hacemos el semicírculo en la parte de la base así agarrara la forma, ya cuando tengamos todo listo lo recortamos con una tijera muy cuidadosamente.
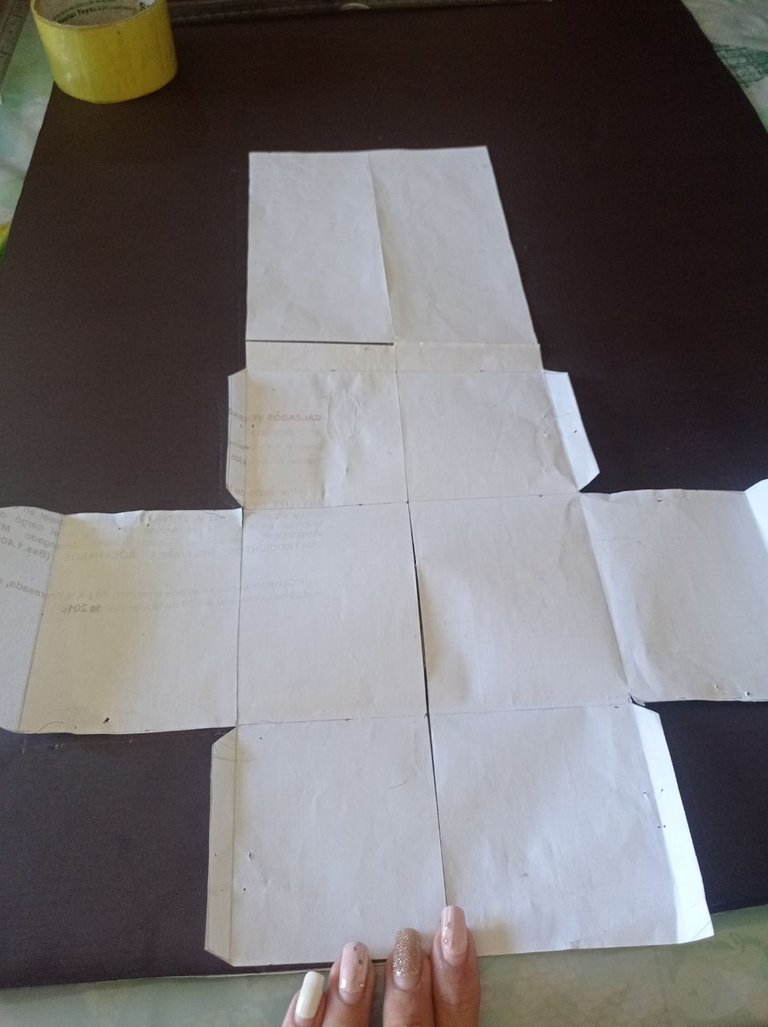
We define the measures, we take the ruler to start marking the width of the base will be 10 cm, the length will be 15 cm and the height of 8 cm on each side, plus 18 cm which will be the lid of our chest all this with their respective tabs, with the help of the compass we make the semicircle in the part of the base and grab the form, and when we have everything ready we cut it with scissors very carefully. Ya con el molde listo marcamos esto en la cartulina corrugada, cualquier cosa trazamos con algo de otro color para no forzar la vista, recordemos que tenemos que trazar todas las caras y pestañas que nos facilitaran el trabajo a la hora de armar, cuando tengamos todo marcado agarramos la tijera nuevamente y recortamos todo.
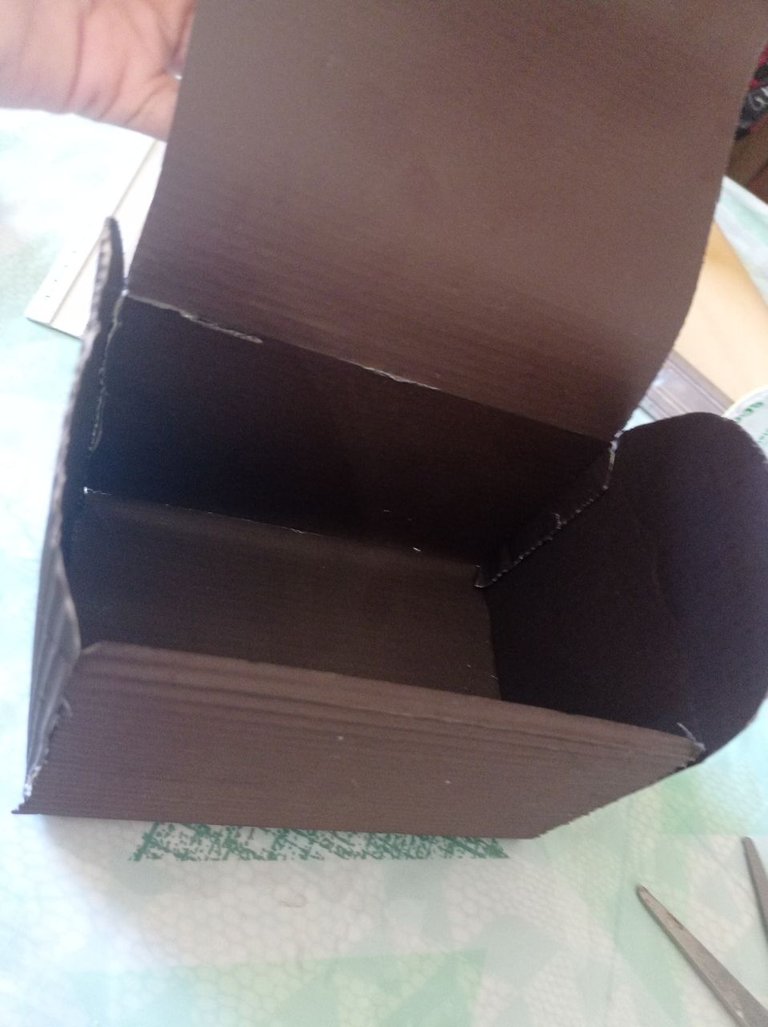
Already with the mold ready we mark this on the corrugated cardboard, anything we trace with something of another color so as not to force the view, remember that we have to trace all the faces and tabs that will facilitate the work at the time of assembly, when we have everything marked we grab the scissors again and cut everything. Ahora hacemos los dobleces correspondientes a la cartulina esto es sencillo y rápido, ya que tenemos todo marcado nos podemos ayudar con la regla para más facilidad, cuando tengamos todos lo que hacemos es ir pegando con silicón caliente o frío, prefiero el caliente porque es más rápido, vamos pegando pestaña por pestaña y así toma forma el cofre.
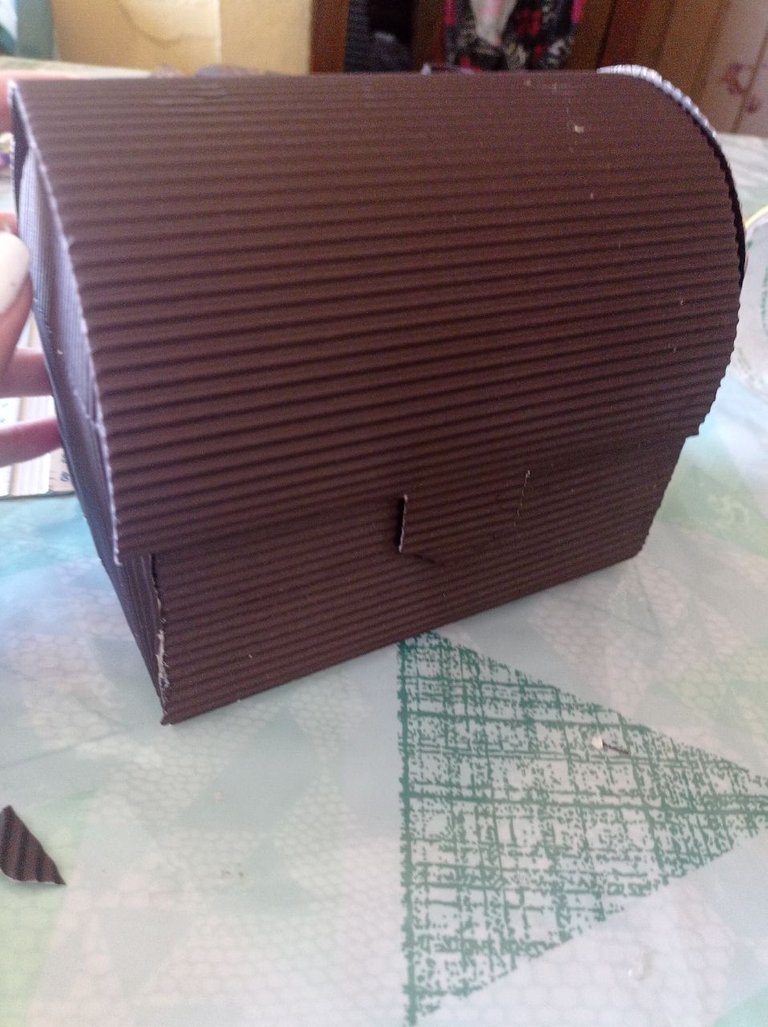
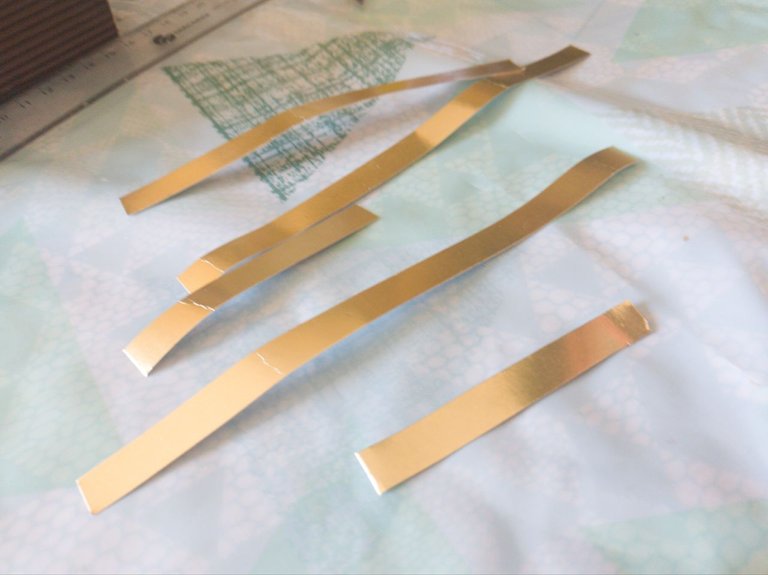
Now we make the folds corresponding to the cardboard this is simple and fast, since we have everything marked we can help us with the ruler for ease, when we have all what we do is to go sticking with hot or cold silicone, I prefer the hot because it is faster, we are sticking tab by tab and thus takes shape the chest. Ya con el cofre armado vamos a resaltarlo con cartulina espejo dorada, medimos y cortamos tiras delgadas de 1 cm que abarquenos todos los bordes ya cuando hayamos cortado todas las pegamos al cofre así tendremos el cofre más llamativo y no tan opaco.
Ya con todo eso listo como toque final colocamos una estrella de la misma cartulina espejo un toque adicional que quisimos colocar, le hacemos algo para que se mantenga el cofre cerrado y tendremos nuestro cofre listo, es algo sencillo y rápido y como se necesitaba para alla, lo hicimos lo más sencillo posible.
Espero les guste. I hope you like it. Fotos de mi propiedad. Fotos tomadas por Teléfono Xiaomi Redmi note 9📱 Edición realizada en Canva
What we start doing is gluing white sheets to make the mold of the chest, if we have a bond paper at hand well if not this idea is the fastest, we glue several recycled sheets and there we will make our mold so it will be easier because we can make mistakes and fix something if we do not like.

Once the chest is assembled we are going to highlight it with gold mirror cardboard, measure and cut thin strips of 1 cm that cover all the edges and when we have cut all of them we glue them to the chest so we will have a more striking and not so opaque chest.
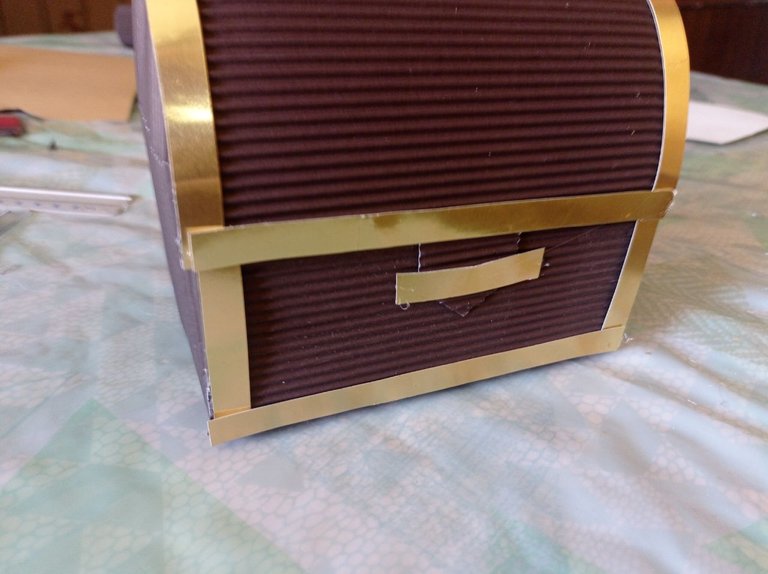
With all that ready as a final touch we place a star of the same cardboard mirror an additional touch that we wanted to place, we do something to keep the chest closed and we will have our chest ready, it is something simple and fast and as it was needed for there, we did it as simple as possible.

Thank you for sharing this post on HIVE!
Your content got selected by our fellow curator semarekha & you just received a little thank you upvote from us for your great work! Your post will be featured in one of our recurring compilations which are aiming to offer you a stage to widen your audience within the DIY scene of Hive. Stay creative & HIVE ON!
Please vote for our hive witness <3
Hermoso cofre, y muy sencillo de hacer
Si lo mejor es lo sencillo y lo bonito
Quedo super hermoso el cofre. y un buen paso a paso para guiarnos. Felicidades!
Que bueno que te haya gustado y que te sirva amiga, Gracias.
Hola Anyelit, me ha encantado el cofre, es espectacular. Gracias por enseñarnos a recrearlo nosotros mismos
Hola amiga, que bueno que te gustó, y me alegro que el paso a paso sea útil. Saludos
Dear @anyelit,
May we ask you to review and support the our proposal renewal so our team can continue its work?
You can support the new proposal (#248) on Peakd, Ecency, Hive.blog or using HiveSigner.
https://peakd.com/me/proposals/248
Thank you!
La cartulina corrugada me encanta para hacer este tipo de manualidades, no necesitamos hacer muchas decoraciones porque la simple forma corrugada le da un toque especial y hermoso.
Si le da un toque diferente a la manualidad, es diferente y bonita
Congratulations, your post has been upvoted by @dsc-r2cornell, which is a curating account for @R2cornell's Discord Community. We can also be found on our hive community & peakd as well as on my Discord Server
Felicitaciones, su publication ha sido votado por @dsc-r2cornell. También puedo ser encontrado en nuestra comunidad de colmena y Peakd así como en mi servidor de discordia
No sabia que existía ese tipo de cartulina, siempre que veía algo hecho así pensaba que esa parte la extraían de las cajas de cartón.. El cofre quedo perfecto!