1 Original libreta de notas Hive / 1 Original Hive notebook [ESP – ENG]


Un saludo cordial a todos.
Bienvenidos a mi blog.
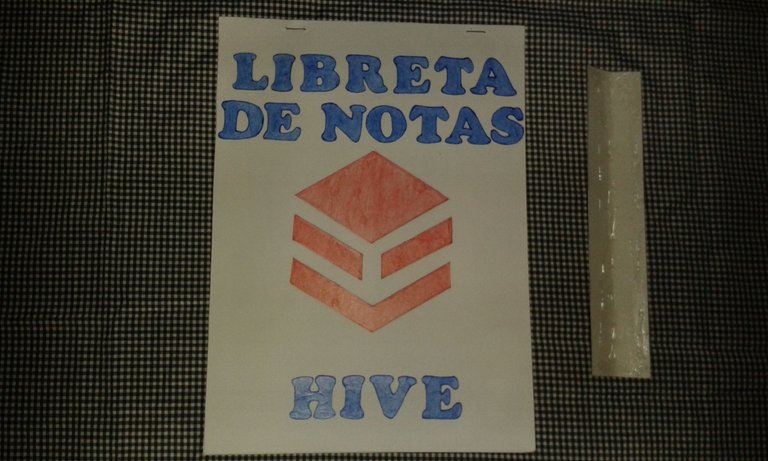
En la publicación anterior presenté la elaboración de la portada, ahora comparto con la comunidad el diseño de mi libreta de notas Hive. Esta es de gran utilidad para mí, porque allí voy a transcribir todos los apuntes que tenía anotado en hojas de reciclaje, con el propósito de tener todo bien organizado para trabajar con mayor facilidad y obtener resultados óptimos.
Seguidamente hago la descripción del proceso de elaboración:
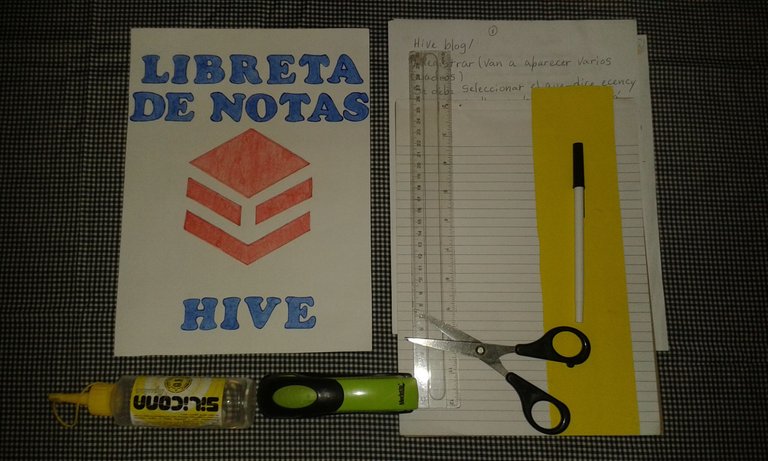
- Portada
- Apuntes en hojas de reciclaje
- Libreta de notas reciclada
- Cartulina amarilla
- Regla
- Bolígrafo
- tijera
- Engrapadora
- Silicona
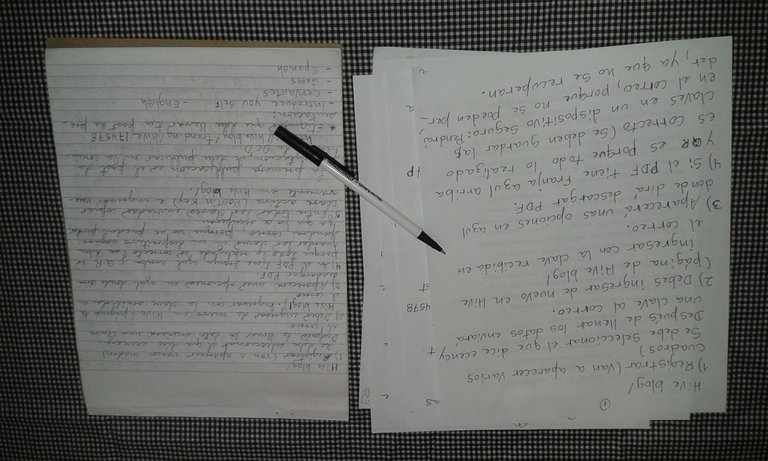
Transcribir los apuntes de las hojas de reciclaje a la libreta de notas reciclada.

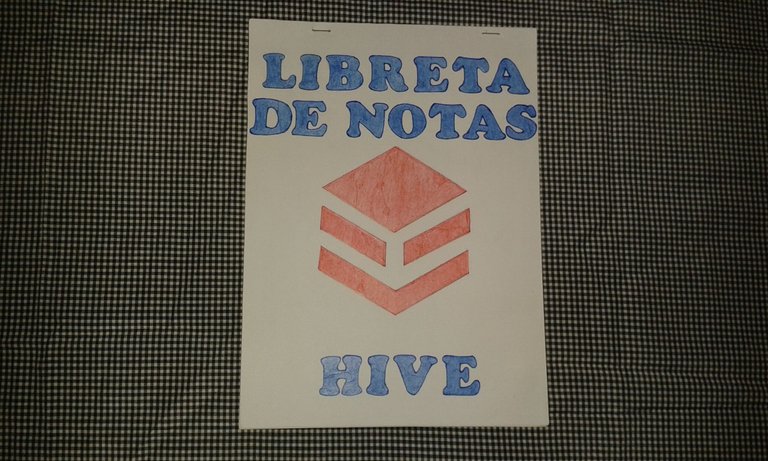
Engrapar la portada a la libreta de nota una vez pasado los apuntes.
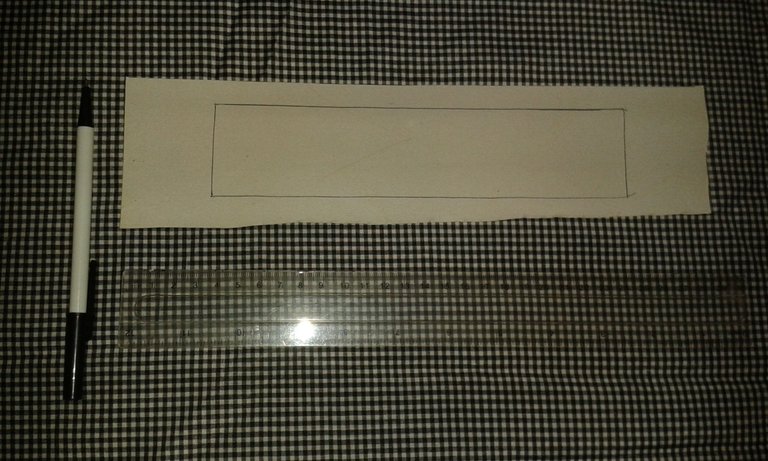
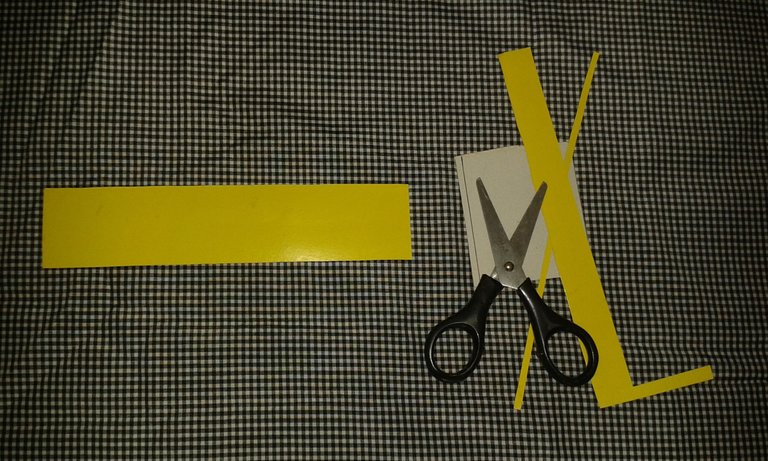
Trazar en la cartulina amarilla un rectángulo que mida 21 centímetros de largo por 5 centímetros de ancho.
Recortar y pegar el rectángulo amarillo para cubrir las grapas en la parte posterior de la libreta, con la finalidad de que el producto se vea más estético.
El resultado final ha sido satisfactorio para mí, espero sea de su agrado y se entusiasmen a hacer su propia libreta de notas Hive.

Best regards to all.
Welcome to my blog.
In the previous publication I presented the elaboration of the cover, now I share with the community the design of my Hive notebook. This is very useful for me, because there I will transcribe all the notes that I had written down on recycled sheets, in order to have everything well organized to work more easily and get optimal results.
The following is a description of the elaboration process:
- Cover page
- Notes on recycled sheets
- Recycled notebook
- Yellow cardboard
- Ruler
- Ballpoint pen
- Scissors
- Stapler
- Silicone
Transcribe the notes from the recycled sheets to the recycled notebook.
Staple the cover page to the notebook after passing the notes.
Draw on the yellow cardboard a rectangle measuring 21 centimeters long by 5 centimeters wide.
Cut out and glue the yellow rectangle to cover the staples on the back of the notebook, in order to make the product look more aesthetically pleasing.
The final result has been satisfactory for me, I hope you like it and get excited to make your own Hive notebook.
Las fotos publicadas en este proyecto fueron tomadas con mi celular Samsung.
El separador de texto utilizado es de uso y distribución libre.
La traducción del texto se hizo mediante la página web https://www.deepl.com/translator.
The photos published in this project were taken with my Samsung cell phone.
The text separator used is free to use and distribute.
The translation of the text was done through the website https://www.deepl.com/translator.
Si te gustó mi publicación, responde libremente. ¿Qué opinas sobre tener una libreta de notas Hive?
Muchas bendiciones y gracias por leer.
If you liked my post, please respond freely. What do you think about having a Hive notebook?
Many blessings and thank you for reading.
Congratulations @anyboadas! You have completed the following achievement on the Hive blockchain and have been rewarded with new badge(s) :
You can view your badges on your board and compare yourself to others in the Ranking
If you no longer want to receive notifications, reply to this comment with the word
STOPTo support your work, I also upvoted your post!
Check out the last post from @hivebuzz: