(ESP/ENG) HOY LE TRAIGO; UNA LINDA GARGANTILLA DE CUENCAS CON CADENAS PARA LUCIR ELEGANTE EN CON CUALQUIER OCASION// TODAY I BRING YOU; A NICE CHOKER WITH CHAINS TO LOOK ELEGANT IN ANY OCCASION.
Mi versión español.
¡Bienvenido a mi blog!
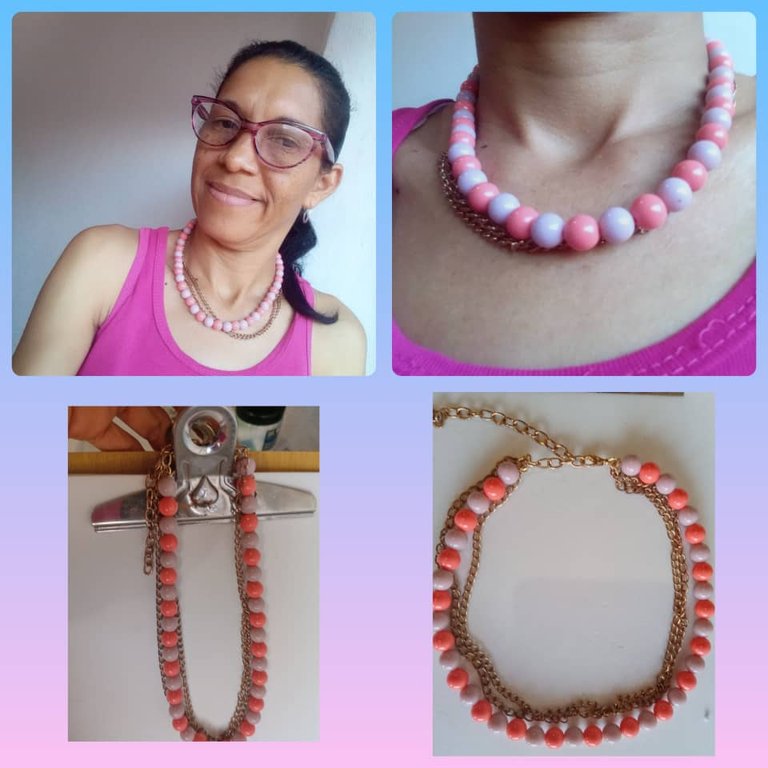
Hola a toda mi gente de esta comunidad, @jewelry, es un placer y un gusto de esta de nuevo con ustedes compartiendo mi creatividades, esta ocasión le traigo, una linda gargantilla de cuenca con cadena para lucir elegante con cualquier atuendo, para realizar este linda gargantilla se utilizó, cuenca de color naranja y guayaba, cadena de color dorada, tijera, pinza, naylo, broche, argolla. Este accesorios son ideales para ir a una fiesta, un regalo especial para una amiga o usarla con un atuendo adecuado las cuencas con las cadenas le da un toque delicado y elegante, esta gargantilla la realice para una amiga que me viene a visitar la quiero sorprender con este lindo detalle espero que lo disfrute mucho.

Empecemos a mostrarle los materiales y el paso a paso de este lindo accesorios.
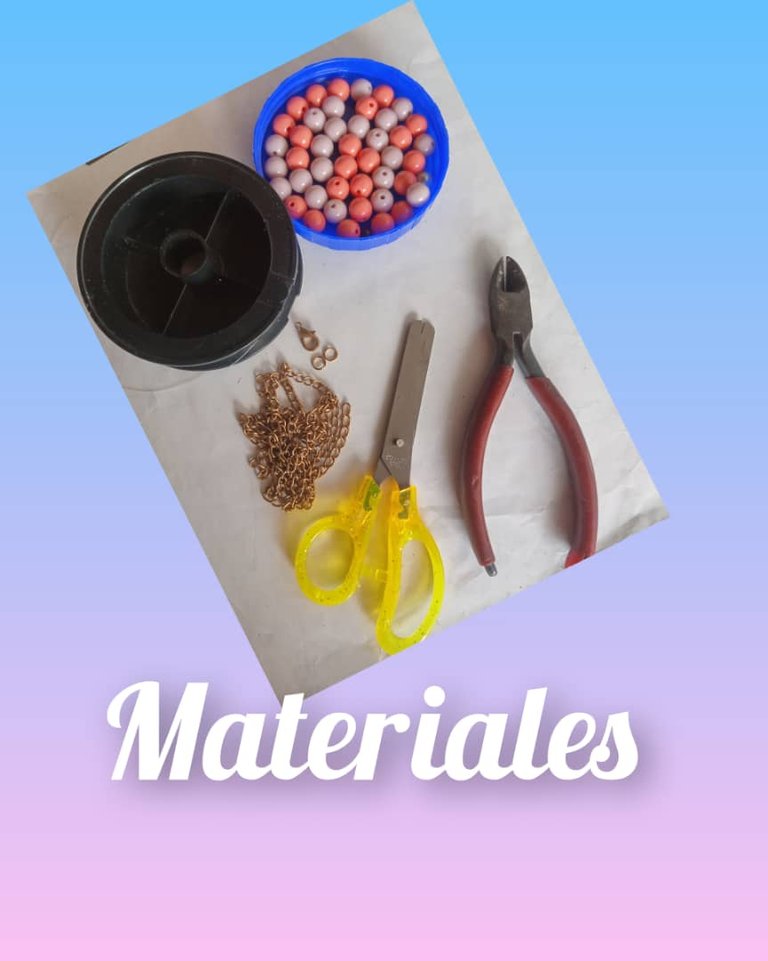
Materiales.
- 45 centímetro de naylo.
- 39 cuencas.
- 2 pedazos de cadena de 40 centímetro.
- 1 pedazo de cadena de 10 centímetro.
- 1 broche.
- 2 argolla.
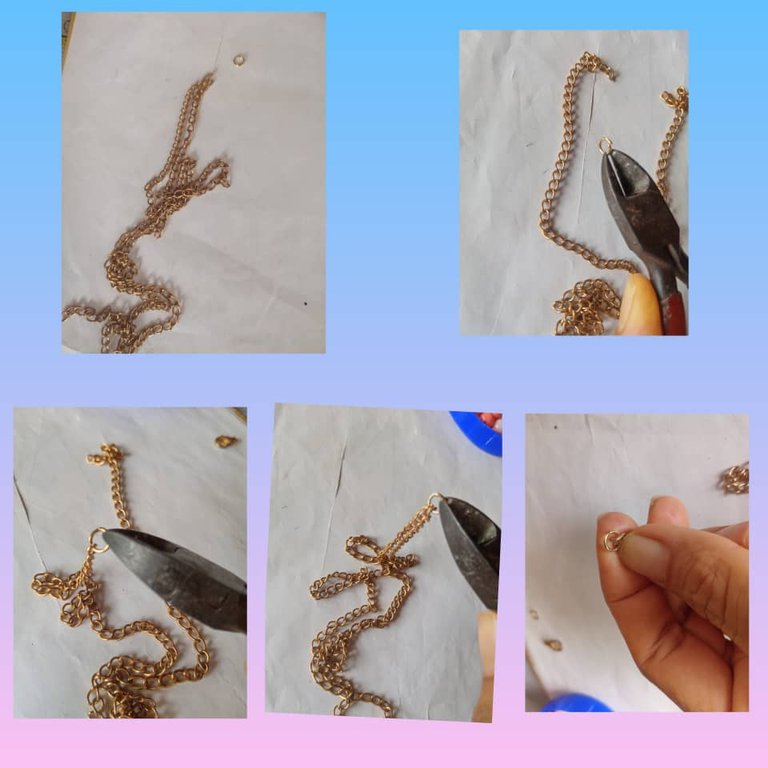
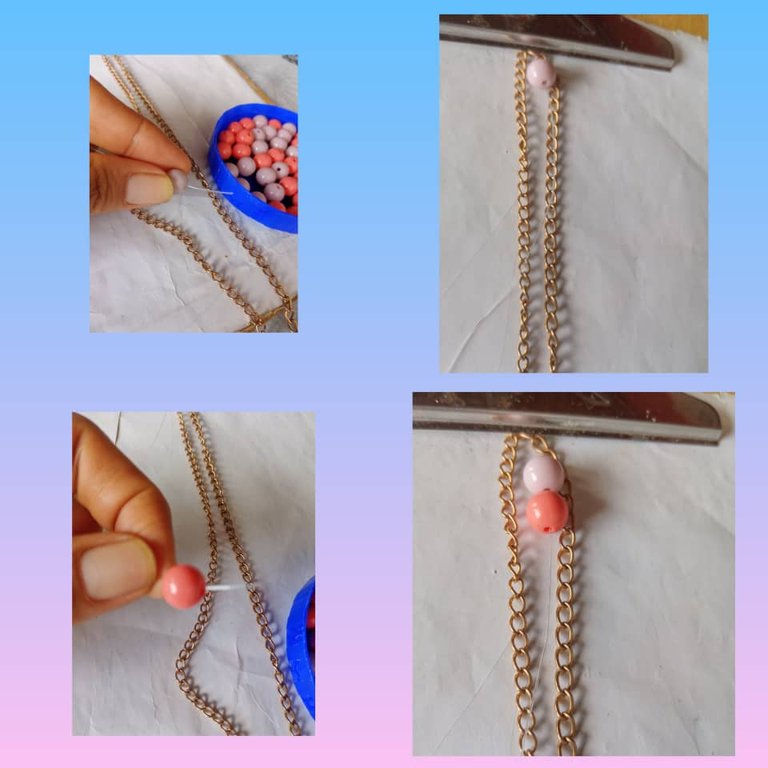
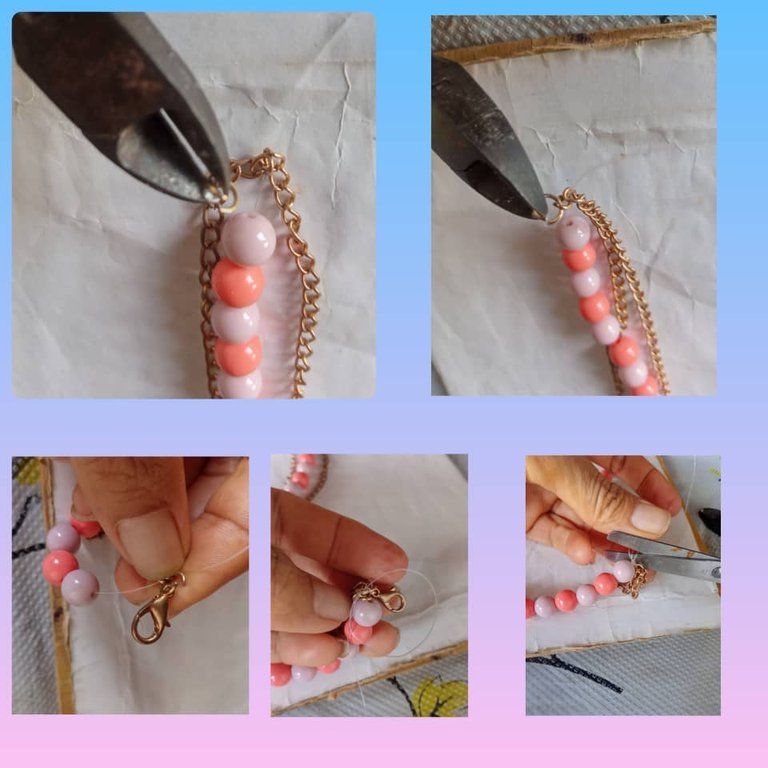
Paso 1.
Tomo las dos cadenas, abrimos la argolla con la ayuda de la pinza, introducimos las dos puntas de la cadena luego cerramos la argolla con la pinza.
Ahora picamos 45 centímetros de naylo lo ajustamos en la argolla le hacemos varios nudos para que no se desasga, ajusto las cadenas en la tabla para poder introducir las cuencas.
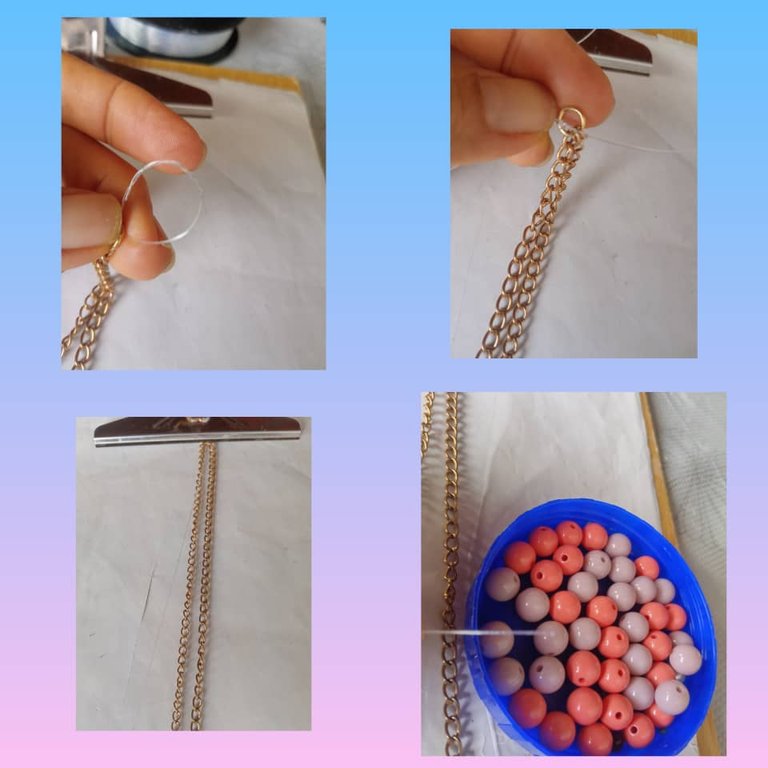
Paso 2.
Agarramos la punta del naylo e introducimos la primera cuenca de color guayaba y la llevamos al final entre en el medio de las cadenas, después introducimos la segunda cuenca de color naranja lo llevamos al lado de la primera cuenca.
Después introducimos las cuencas número 3 y 4 la vamos llevándo al lado de las otras cuencas, siempre usando los colores intercalado.
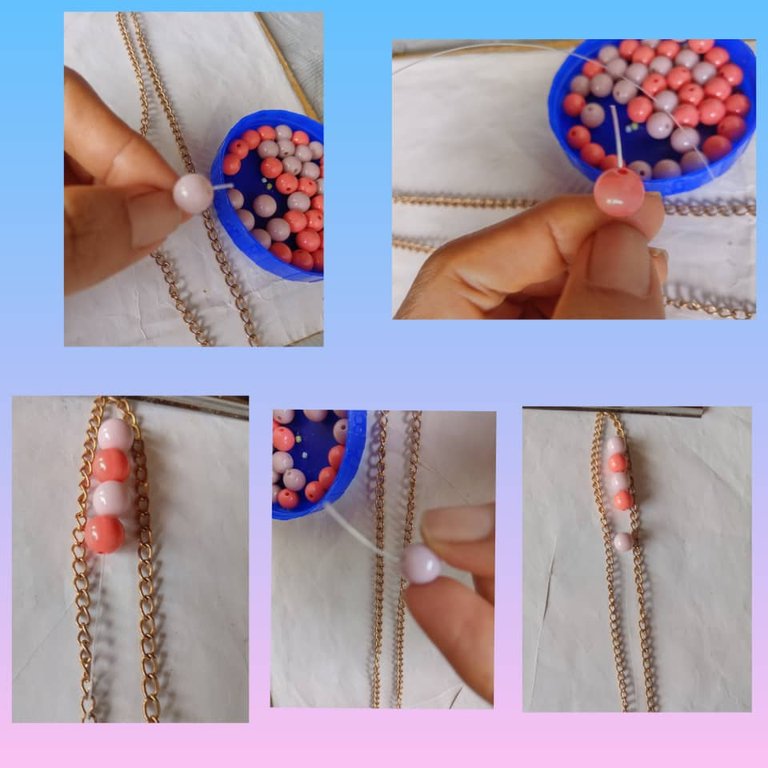
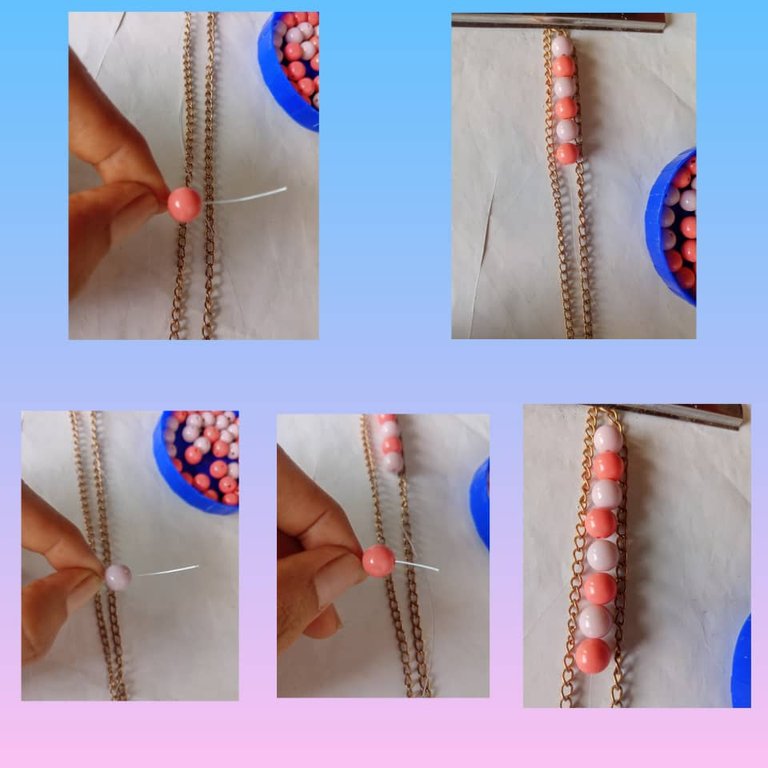
Paso 3.
Luego introduzco en el naylo la cuenca número 5 y la llevamos al lado de la cuenca número 4, después introducimos la cuenca número 6 y la llevamo al lado de la cuenca de la numero 5. Vea cómo se va formando.
Seguimos introduciendo cuenca hasta tener un total de 39 cuencas con color intercalado. Vea que ya se formó la linda gargantilla.
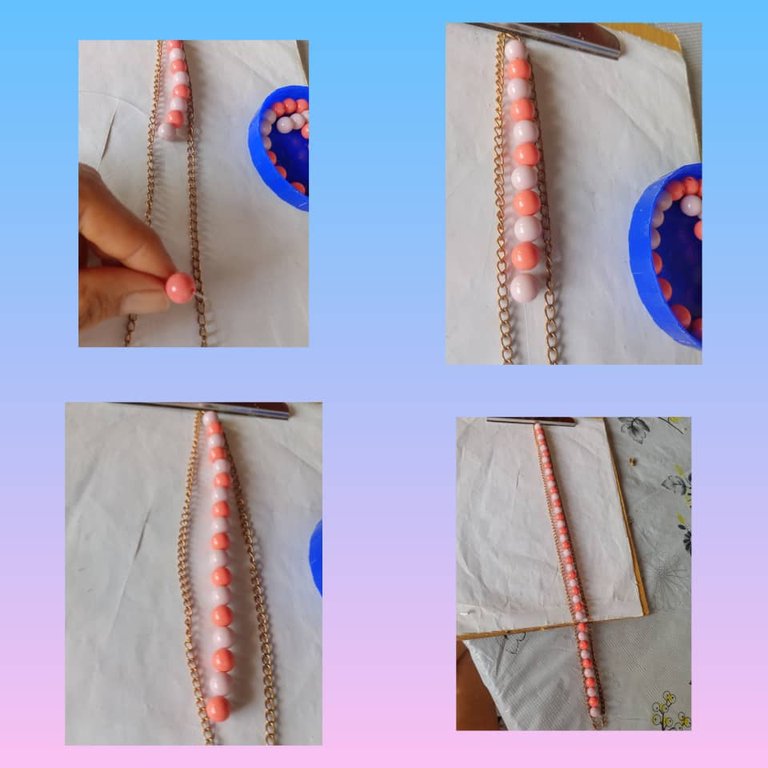
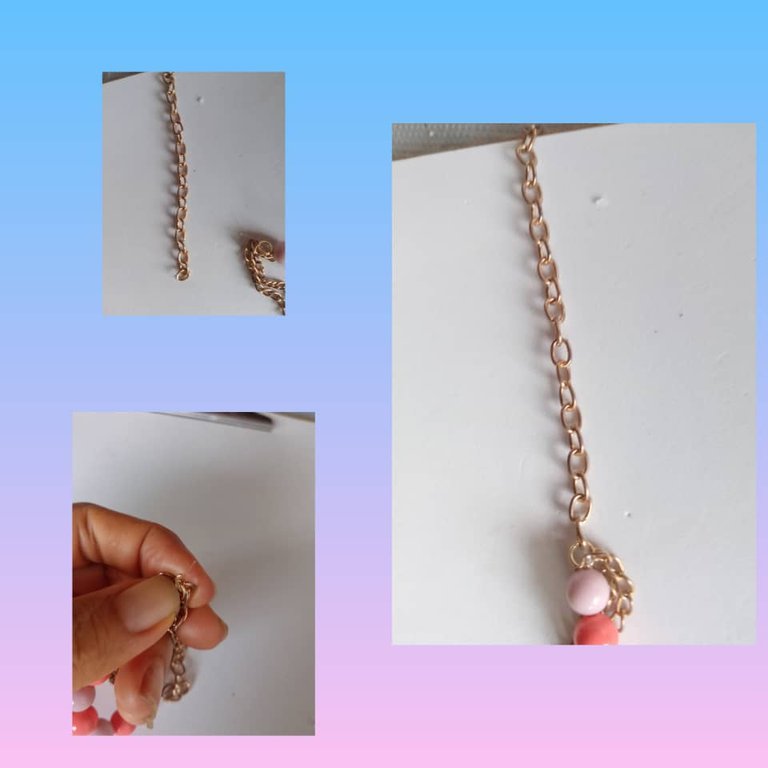
Paso 4.
Procedemos hacer el cierre de la gargantilla con la ayuda de la pinza abrimos la argolla introduzco la 2 puntas de la cadena, el broche, cerramos la argolla con la ayuda de la pinza.
Ahora tomo el naylo le hacemos varios nudos en la argolla y cortamos el naylo sobrante.
Tomo un pedazo de cadena de 10 centimetro y abrimos un aro de la cadena y lo introducimos en la argolla de la parte izquierda de la gargantilla. Vea que ya tengo lista mi gargantilla me quedo muy bella. con esa cadena al final ajustamos la gargantilla si la queremos mas ajustada en el cuello o desahogada.
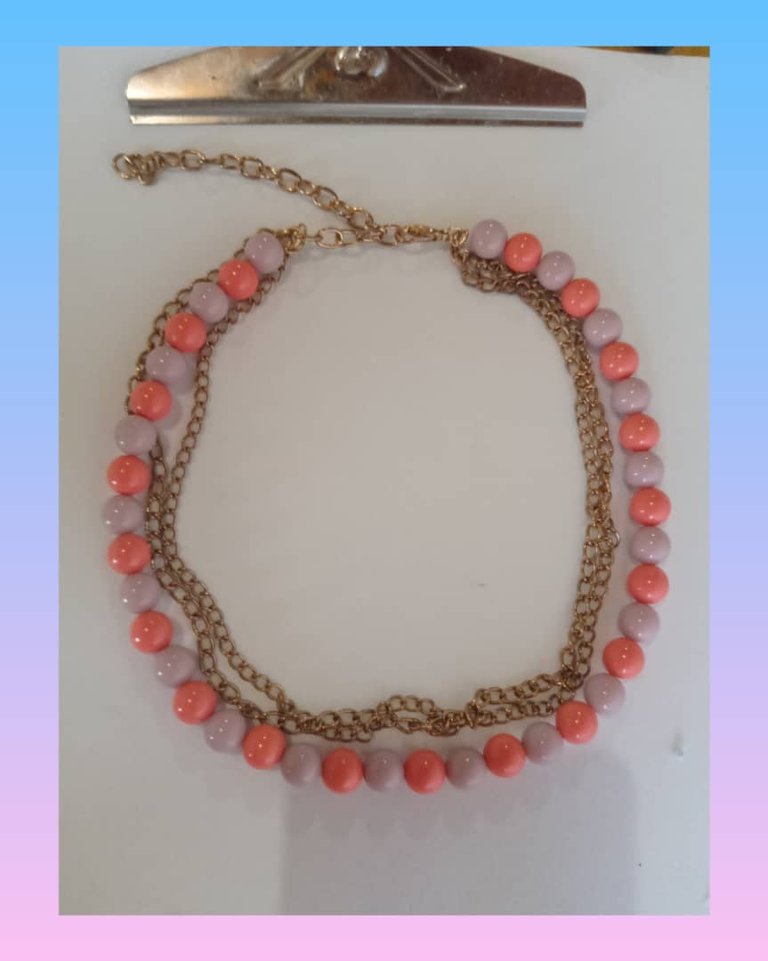
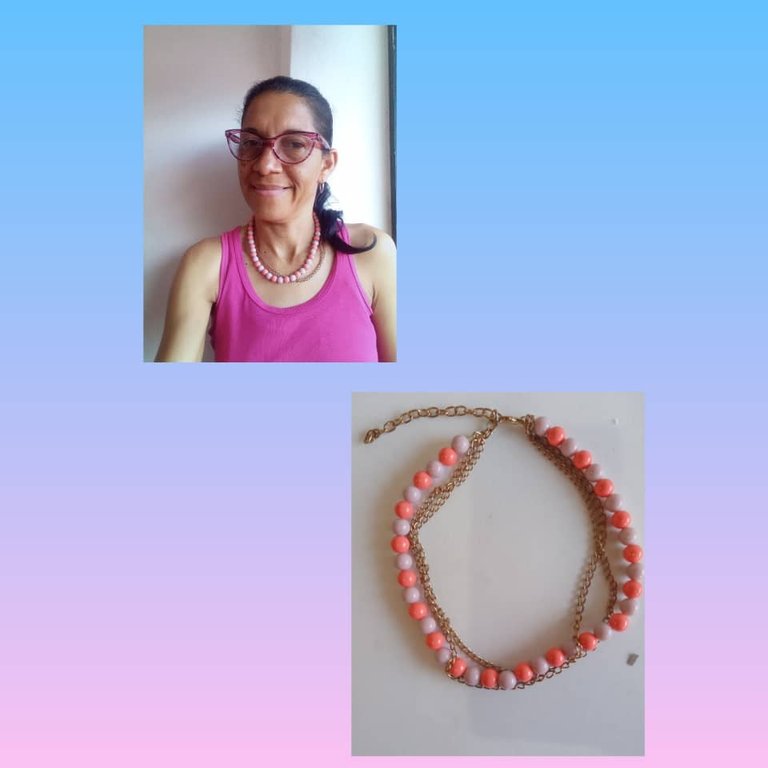
- Vea el proceso final de mi linda gargantilla con cuencas y cadenas para usar en cualquier ocasión muy elegante y coqueta.
Tenga un feliz días y bendecidos para todos muchas gracias por leer mi post.
Las fotos son mías, tomadas con teléfono alcatel , editadas con incollage y traducidas con Deepl.
Mi versión ingles.
¡Bienvenido a mi blog!
Hello to all my people of this community, @jewelry, it is a pleasure and a pleasure to be again with you sharing my creativities, this time I bring you, a nice basin choker with chain to look elegant with any outfit, to make this cute choker was used, orange and guava color basin, gold color chain, scissors, clamp, naylo, brooch, ring. This accessories are ideal to go to a party, a special gift for a friend or use it with a suitable attire the basins with the chains gives a delicate and elegant touch, this choker I made it for a friend who comes to visit me I want to surprise her with this nice detail I hope she enjoys it very much.
- Let's start showing you the materials and step by step of this cute accessory.
Materials.
- 45 centimeter of naylo.
- 39 basins.
- 2 pieces of 40 centimeter chain.
- 1 piece of chain of 10 centimeter.
- 1 brooch.
- 2 rings.
Step 1.
I take the two chains, open the ring with the help of the pliers, insert the two ends of the chain then close the ring with the pliers.
Now we chop 45 centimeters of naylo we adjust it in the ring we make several knots so that it does not come unstuck, I adjust the chains on the table to be able to introduce the basins.
Step 2.
We grab the tip of the naylo and introduce the first basin of guava color and take it to the end between in the middle of the chains, then we introduce the second basin of orange color we take it next to the first basin.
Then we introduce the basins number 3 and 4 we take it next to the other basins, always using the interspersed colors.
Step 3.
Then I introduce in the naylo the basin number 5 and we take it next to the basin number 4, then we introduce the basin number 6 and we take it next to the basin of the number 5. See how it is forming.
We continue to introduce basin until we have a total of 39 basins with interleaved color. See that the pretty choker is already formed.
Step 4.
We proceed to make the closure of the choker with the help of the pliers we open the ring I introduce the 2 ends of the chain, the clasp, we close the ring with the help of the pliers.
Now I take the naylo I tie several knots in the ring and cut the excess naylo.
I take a 10 centimeter piece of chain and open a ring of the chain and insert it into the ring on the left side of the choker. With that chain at the end we adjust the choker if we want it tighter or looser on the neck.
- See the final process of my cute choker with bowls and chains to wear in any occasion very elegant and flirty.
Have a happy day and blessed to all thank you very much for reading my post.
The photos are mine, taken with alcatel phone , edited with incollage and translated with Deepl.
Realmente hermosa, sus colores son perfectos. Gracias por compartir
Gracias amiga por comentar si la combinación me quedo muy linda. Saludos
Hermoso diseño, a mi igual me encanta hacer manualidades, y tener la oportunidad de diseñar tus propias prendas es maravilloso . Gracias por compartir tu talento …
Gracias me alegra que te guste, gracias por visitar mi blog. Saludos
Amiga está increíble
Gracias por tu comentario y visita. Saludos
Te quedó muy linda amiga.
Gracias amiga por leer mi Post. Saludos
De nada . ¡Saludos!