[ENG- ESP] Beautiful bracelet with many charms 😉👌😁👍🍓🌹☺️ / Hermosa pulsera con muchos dijes 😉👌😁👍🍓🌹☺️ /@alexanderflx
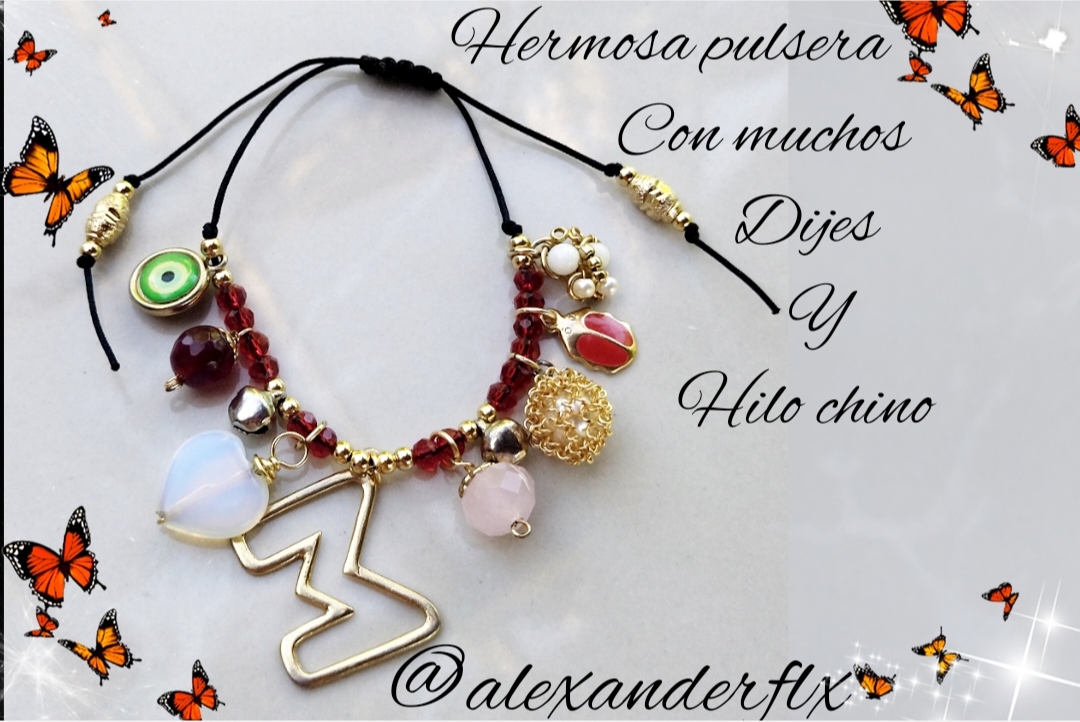
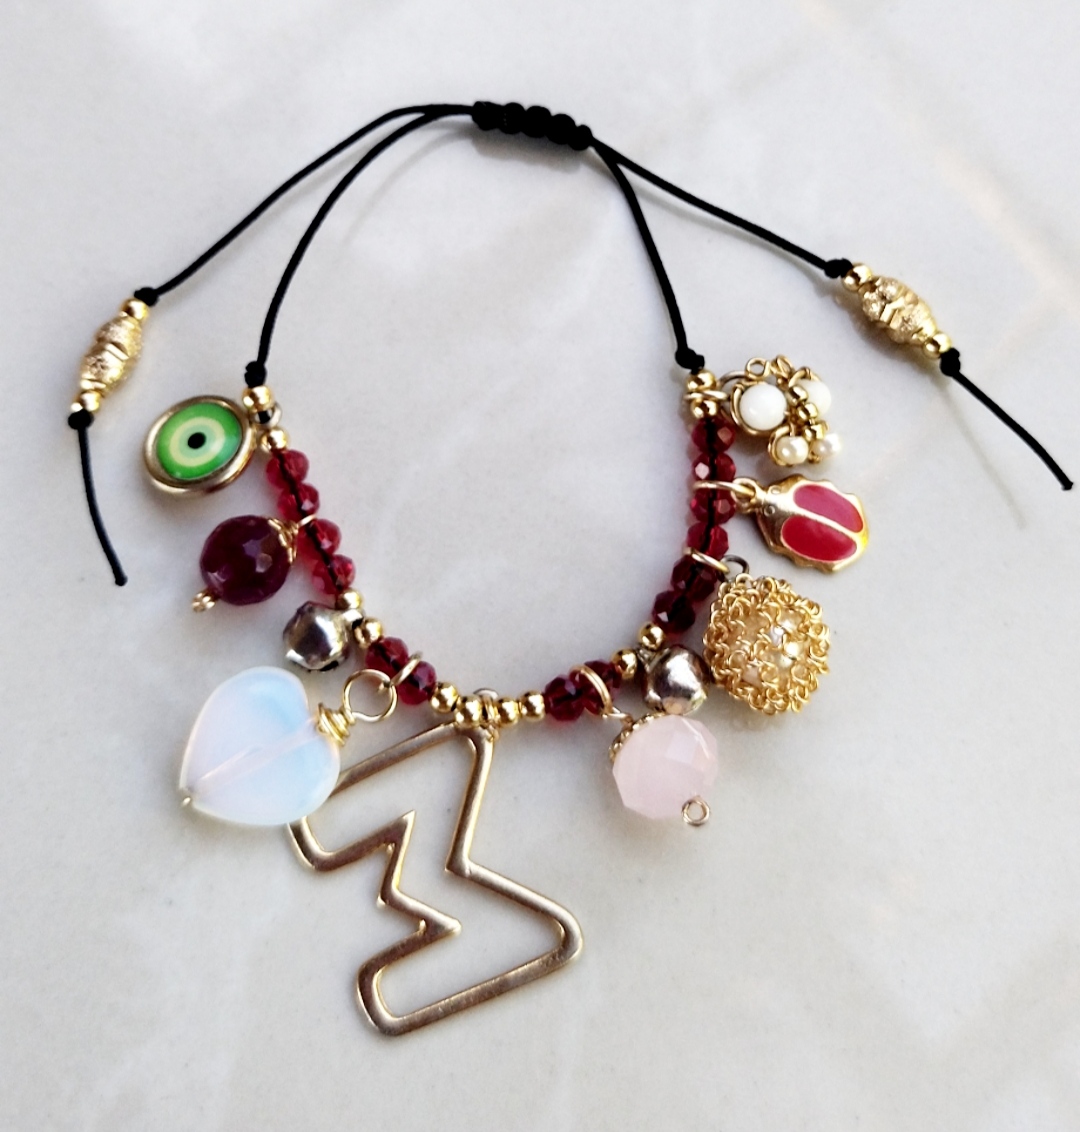
Hello, happy night, I hope you are well tonight, I want to share with you a beautiful bracelet with many charms like, this beautiful bracelet is made with Chinese thread crystals and many charms. I made this bracelet because a client made an order for me, she wanted a bracelet with many charms and something that will sound, as you can see, it also has two rattlesnakes, also some of its ends are made with the wire rope technique, I hope you like it, it is made with love, the client liked it very much.👍👍😁😉
Hola feliz noche espero se encuentren bien la noche de hoy quiero compartir con ustedes unas hermosa pulsera con muchos dijes como, esta hermosa pulsera esta echa con cristales hilo chino y muchos dijes está pulsera la hice ya que una cliente me hizo el pedido ella quería una pulsera con muchos dijes y algo que sonara como pueden ver también tiene dos cascabel también algunos de sus fines tan echo con la técnica de alambrismo espero les guste esta hecha con mucho cariño a la cliente le gustó mucho.👍👍😁😉
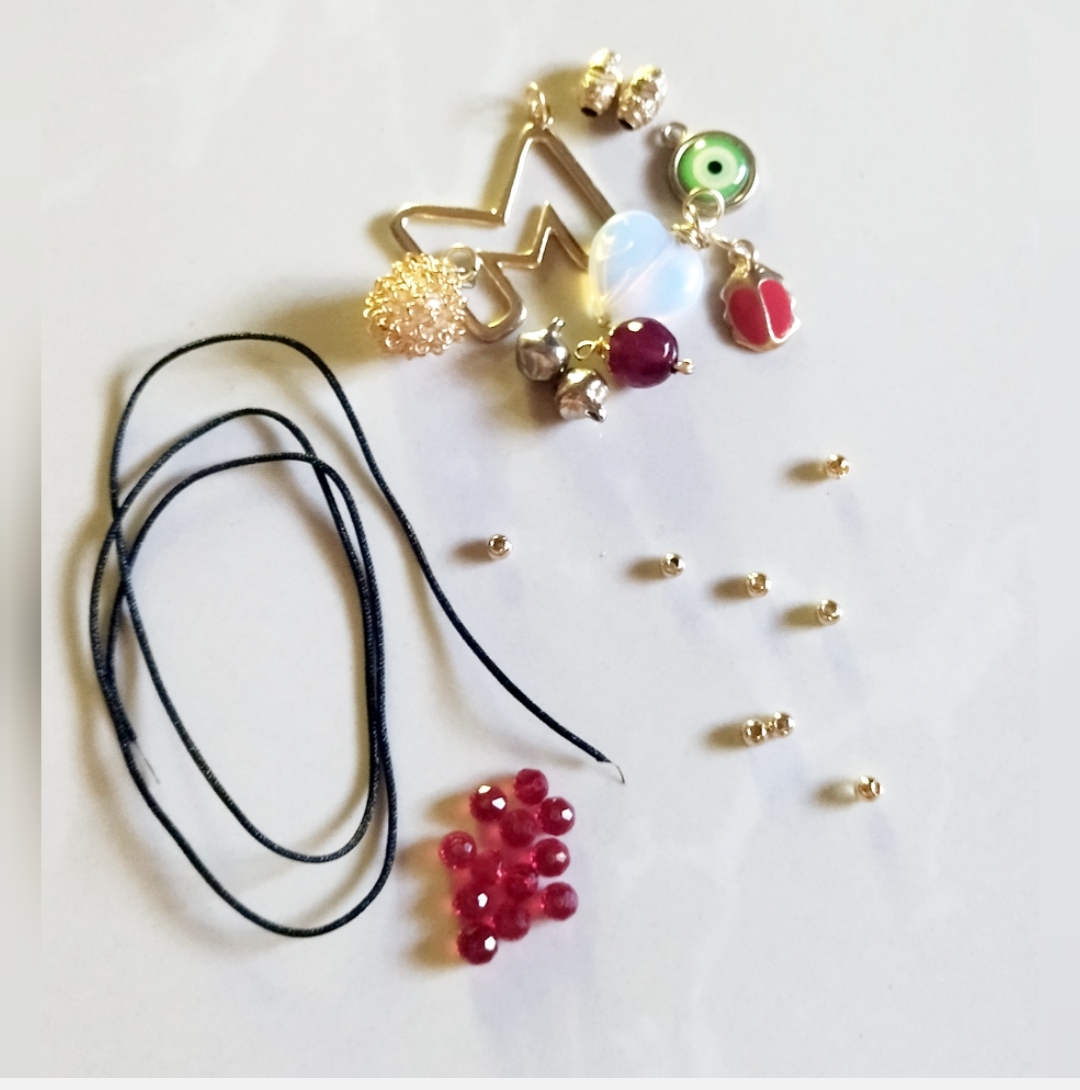
- Chinese thread
- charms
- Crystals
Que necesitamos .
Hilo chino
Dijes
Cristales
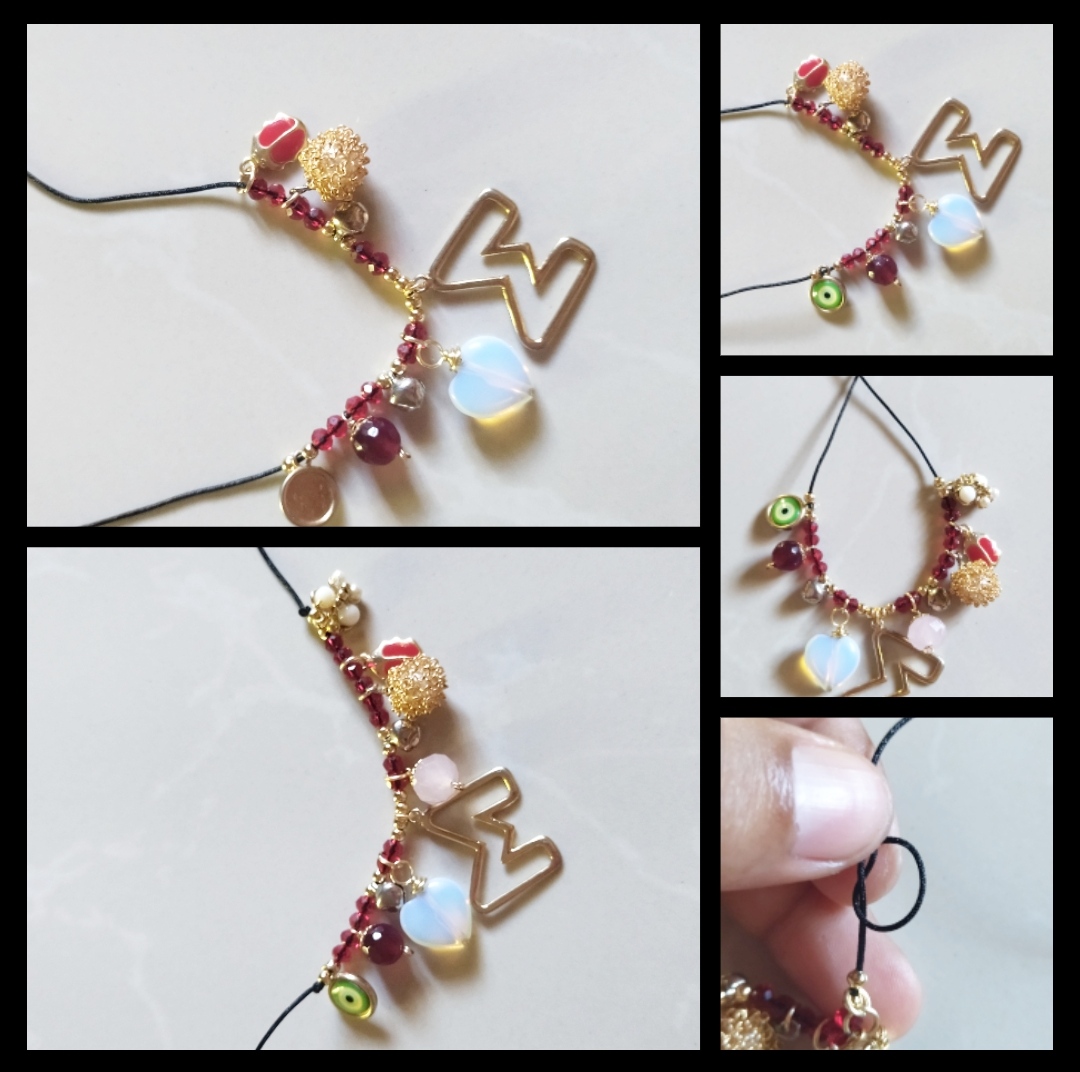
Step 1: To start with our first step we will take an M-shaped pendant we will also take some pellets to decorate with a beautiful golden color first we will put two pellets then m We have the letter followed by two more pellets then we put two red crystals in each side then we put a ball on each side and then we will put the bells as you can see we will put one on each side from here we can do it as we want but we must always have the same sequence on the sides we continue lying the charms until we have them on the Chinese thread.
Paso 1: Para empezar con nuestro primer paso tomaremos un dije que tiene forma de M también tomaremos unos balines para ir adornando con hermoso color dorado primero meteremos dos balines luego m Temos la letra seguida de dos balines más luego metemos dos cristales rojos en cada lado luego metemos un balín de cada lado y luego meteremos los cascabeles como pueden ver meteremos uno de cada lado desde aquí podemos hacerlo como queramos pero siempre debemos tener la misma secuencia a los lado seguimos mintiendo los dijes asta tenelos en el hilo chino.
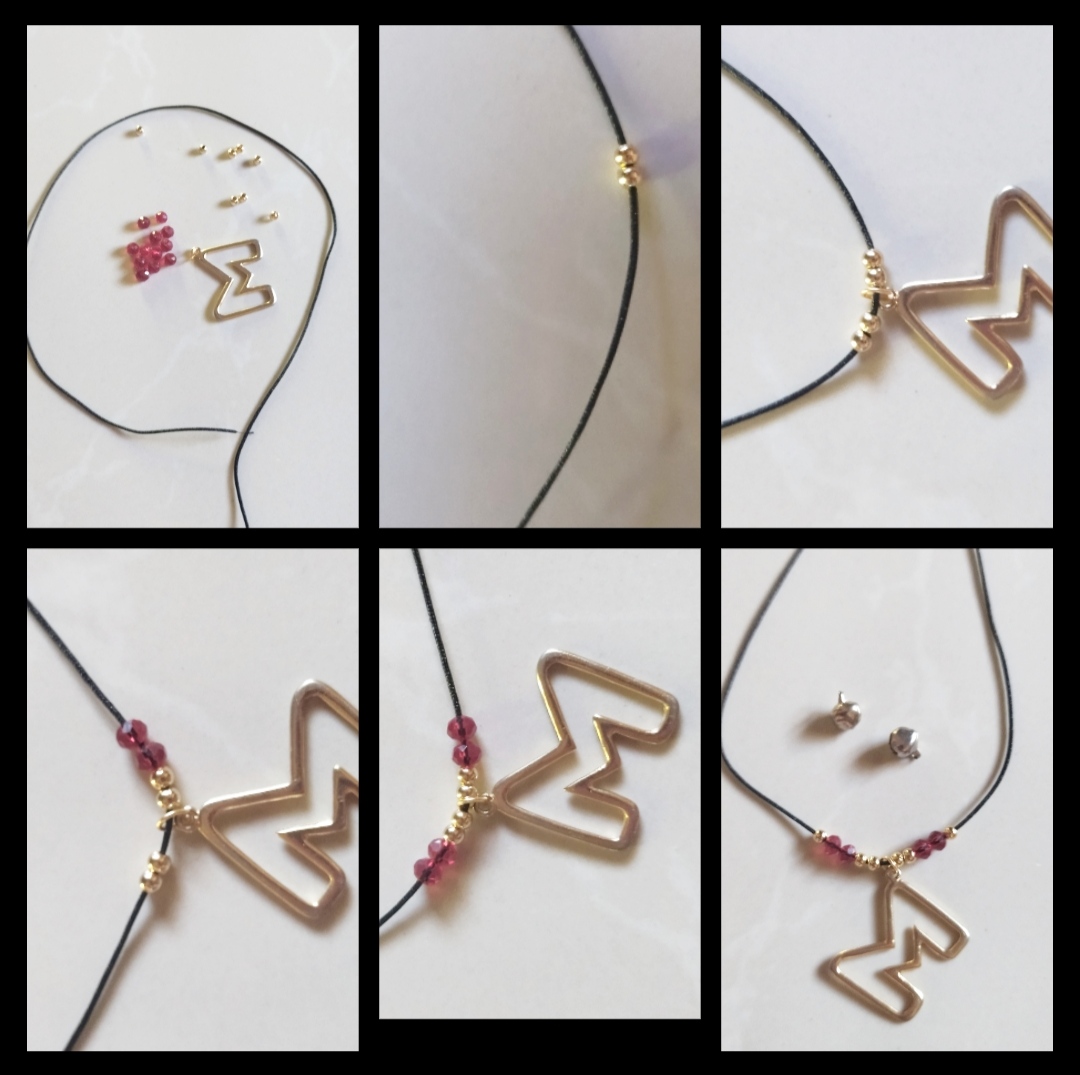
Step 2: Second step for this step we will make sure that the charms do not come out they will wonder how we are going to do it but it is very easy it sounded like we must make a normal knot as we are doing a common knot in first we can leave it a little loose but we must adjust the knot on the other side enough and that's it we already have all the stones and pendants secured.
Paso 2: Segundo paso para este paso nos aseguraremos de que los dijes no se salgan se preguntarán como lo aremos pero es muy fácil sonó debemos hacen un nudo normal como estamos echo de hacerlo un nudo común y corriente en primero lo podemos dejar un poco suelto pero el nudo del otro lado lo debemos de ajustar bastante y listo ya tenemos aseguradas todas las piedras y los dijes.
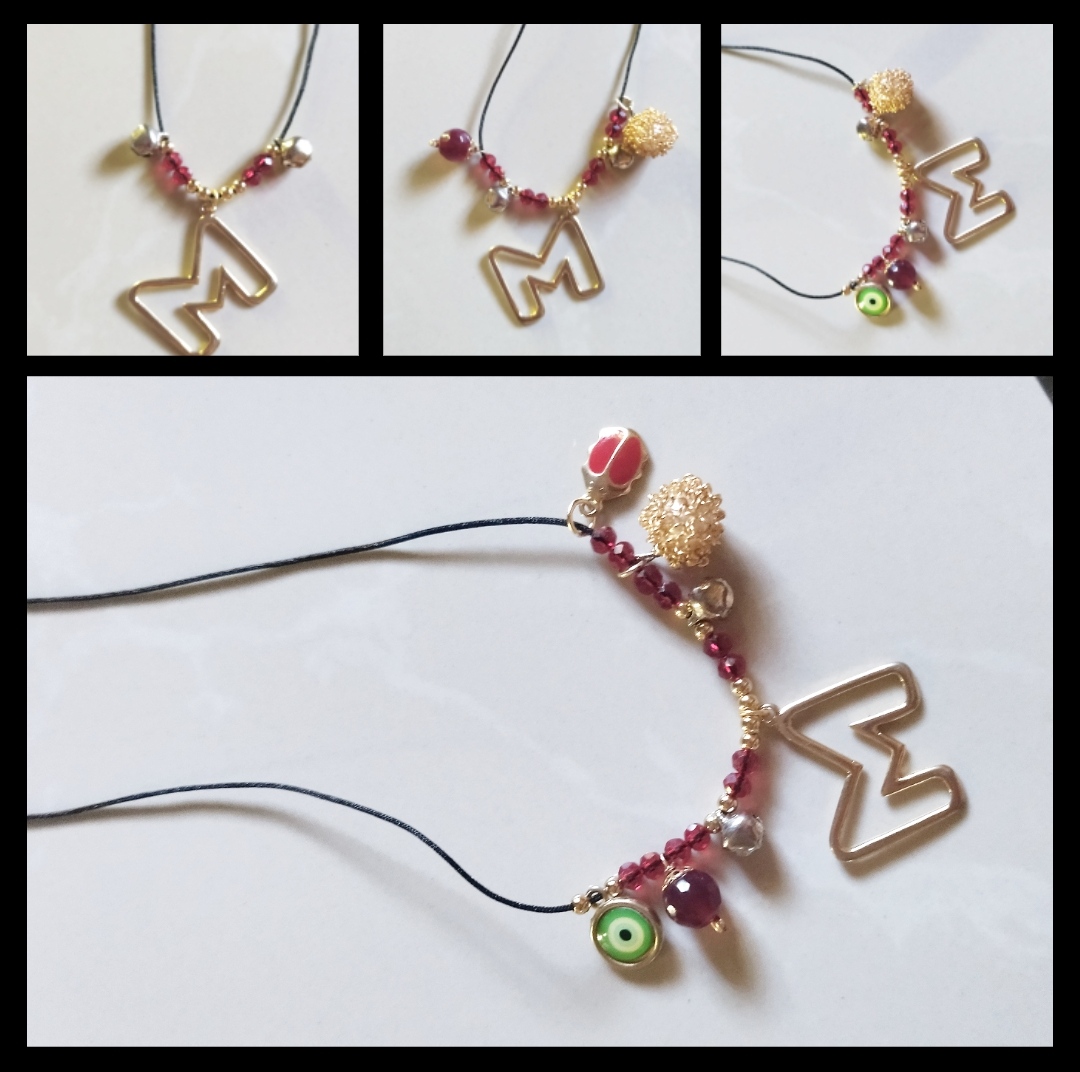
Step 3: In this step we will decorate the end of the thread as we make it in the same way that we secure the charms, we will make a new one at the end, leaving a free space, we must measure or take into account the size of the stone that will decorate the end of the thread After making the new one we put a lampiedra pellet and again another pellet saves to secure we will tie a new knot and that's it we already have the tip of the thread decorated .
Paso 3: En este paso adornaremos la punta del hilo como lo aremos de igual manera que aseguramos los dije aremos un nuevo en la punta dejando un espacio libre debemos de medir o tomar en cuenta el tamaño de la piedra que adornará la punta del hilo luego de hacer el nuevo metemos un balín lampiedra y nuevamente otro balín ahorra para asegurar aremos un nuevo nudo y listo ya tenemos la punta del hilo adornada
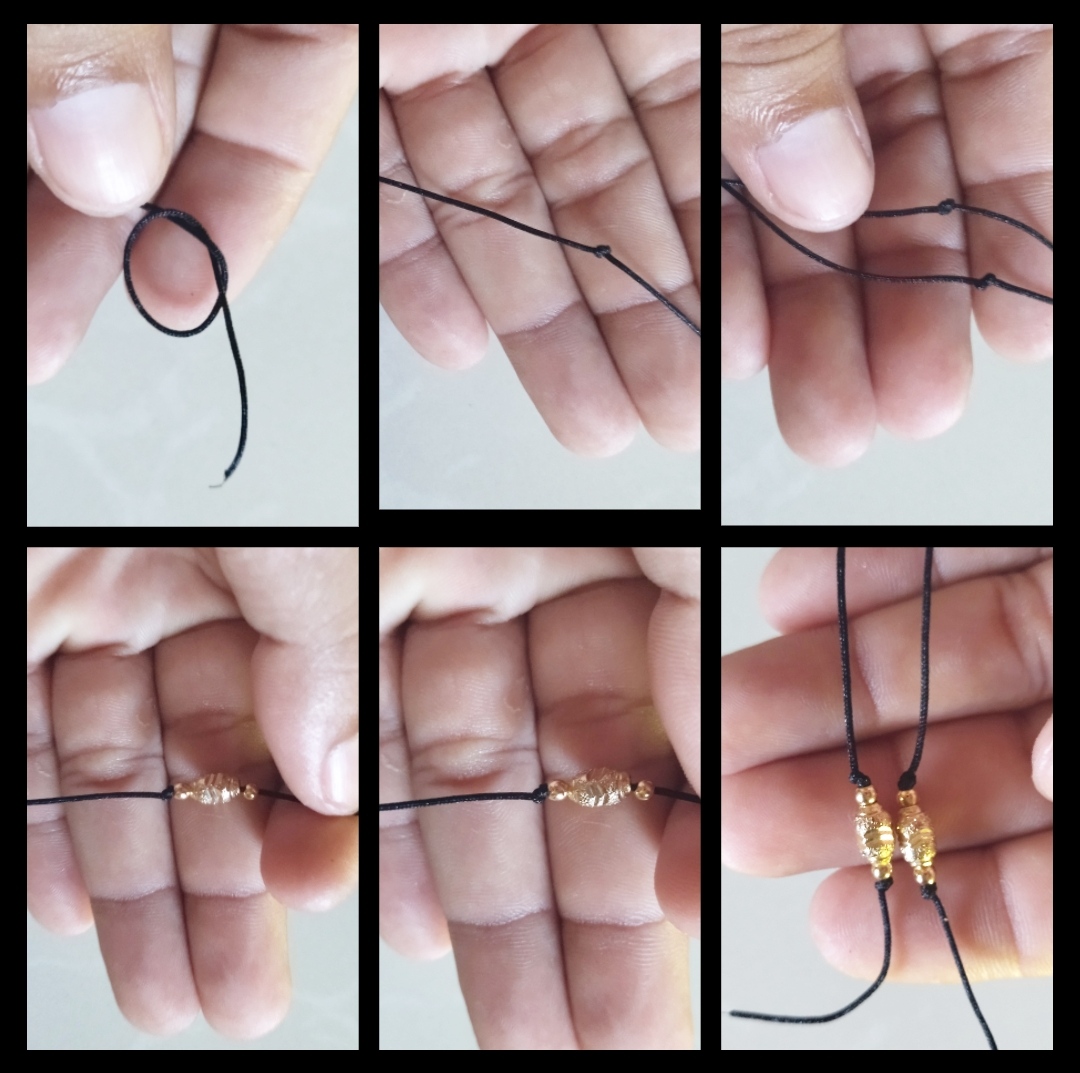
Step 4: For our last step we will tie a knot to secure the bracelet this knot is a sliding knot so we can make the bracelet bigger or smaller I don't really know its name but I will show you how to do it to start we take a piece of thread later we take the bracelet and we will put the two ends together then we put the piece of Chinese thread under the thread of the bracelet then we pass the tip of the right side under the thread of the bracelet then we pass the left end over the thread and we put the end of the thread in the round that made the right part and we press with the hands and thus we will continue doing until we have the bracelet very secure finally we burn the end of the thread so that it does not get damaged and that's it I hope you like it there.
Paso 4: Para nuestro último paso aremos un nudo para asegurar la pulsera este nudo es un nudo corredizo así podremos poner más grande o más pequeña la pulsera la verdad no sé su nombre pero les enseñaré como hacerlo para empezar tomamos un pedazo de hilo luego tomamos la pulsera y pondremos los las dos puntas unida luego ponemos el trozo de hilo chino por debajo de los hilo de la pulsera luego pasamos la punta del lado derecho por debajo del hilo de la pulsera luego pasamos la punta izquierda por arriba del hilo y metemos la punta del hilo en el redondo que hizo la parte derecha y apretamos con las manos y así seguiremos haciendo asta tener la pulsera bien segura por último quemamos la punta del hilo para que no se dañe y listo espero les allá gustado.

.
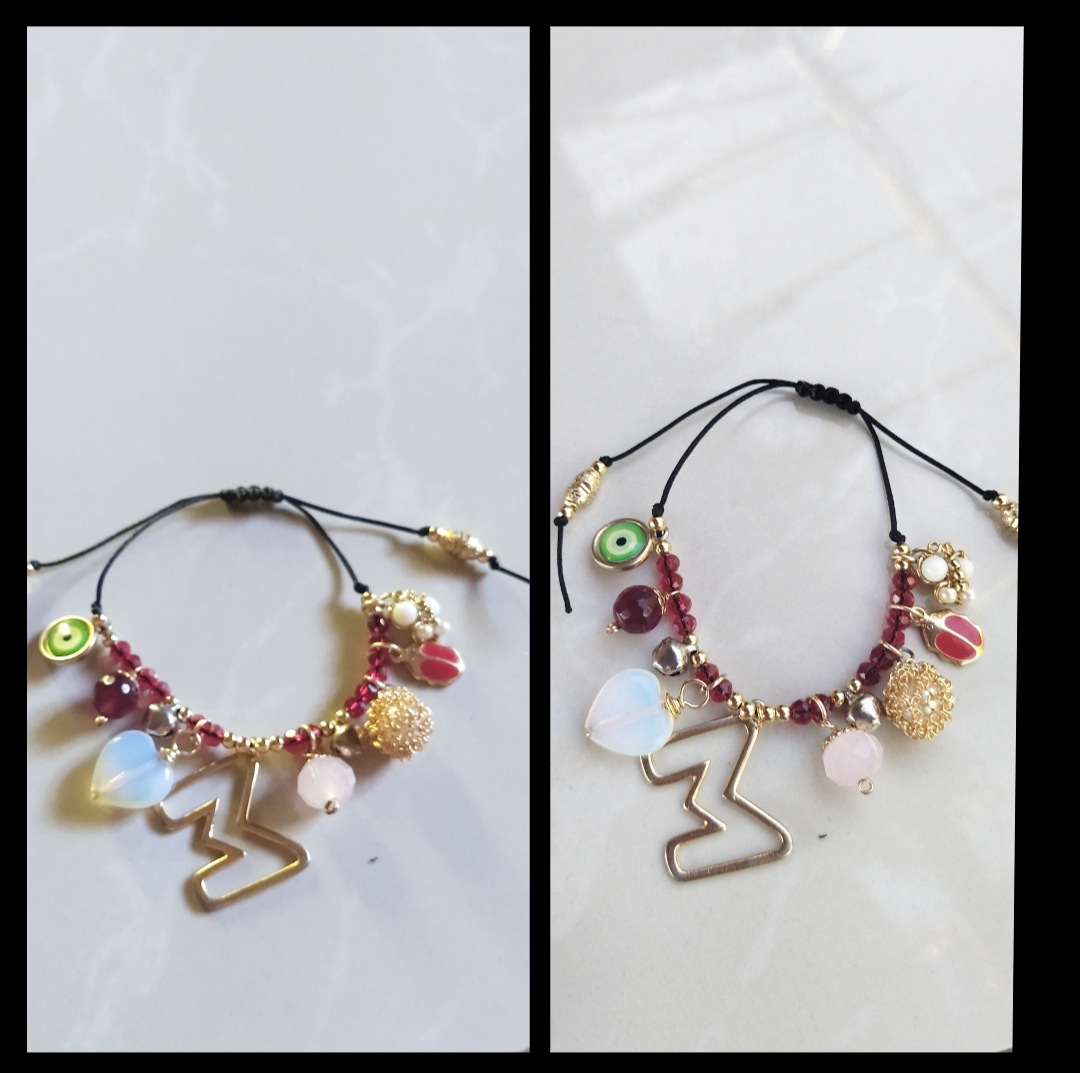
<. beautiful bracelet
<Hermosa pulsera
Todas las Fotos son de mi autoría y fueron tomadas con mi Celular Redmi 9T
https://twitter.com/1484196455719915527/status/1613757585408024576
https://twitter.com/1422413915275812864/status/1613899012457005057
The rewards earned on this comment will go directly to the people( @mariajcastro28 ) sharing the post on Twitter as long as they are registered with @poshtoken. Sign up at https://hiveposh.com.
Dear @alexanderflx,
Our previous proposal expired end of December and the Hivebuzz project is not funded anymore. May we ask you to review and support our new proposal (https://peakd.com/me/proposals/248)?
Thank you for your help!
Thank you for sharing this post in the DIYHUB Community!
Your content got selected by our fellow curator tibfox & you just received a little thank you upvote from us for your great work! Your post will be featured in one of our recurring compilations which are aiming to offer you a stage to widen your audience within the DIY scene of Hive. Stay creative & HIVE ON!
Please vote for our hive witness <3
Bellísima como todas tus creaciones y lo mejor es que tiene mi inicial ✨
Hola jajajajaja claro especial para ti 😁😉👍☺️🌹🍓🍓🍓🍓🍓🍓🍓🍓🌹🌹🍓🍓🍓🍓👌
Hola te quedo preciosa amo las pulseras 😍, quiero una jajaja
Hola feliz noche, jajajaja muchas gracias que bueno saber que le gustó 👍 feliz noche.
🤗
🤗🥰😉