[ENG|ESP] Elaboration of a beautiful didactic game to develop the stimuli of our little ones.
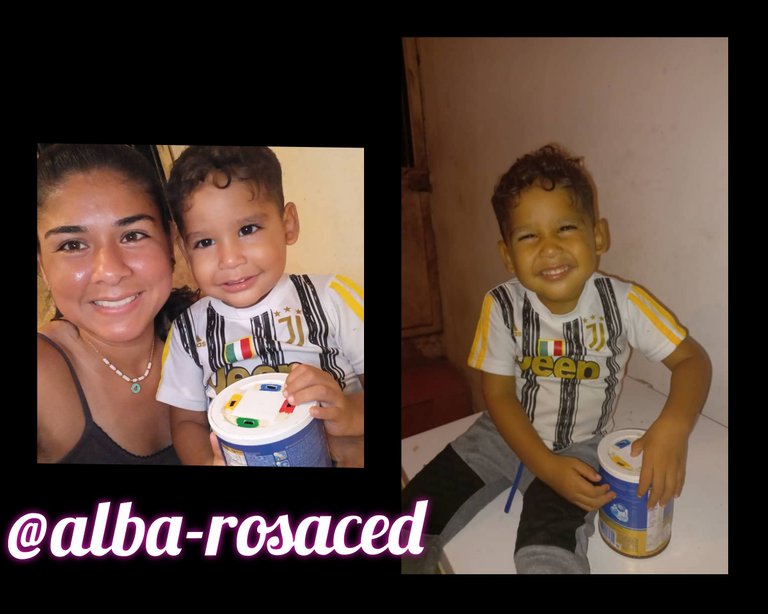
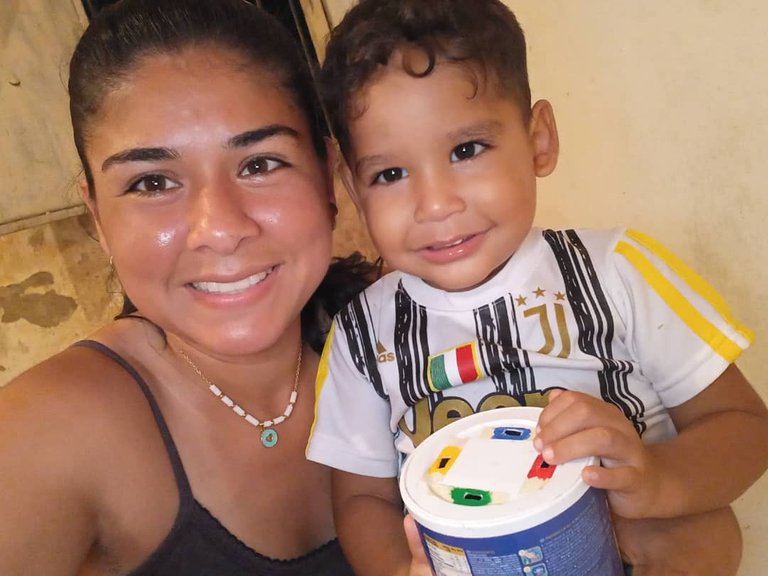
Hello my friends of this wonderful community @motherhood, I hope you are well with the most precious thing we have our children, today I want to share with you this beautiful educational game for our little ones to develop their stimuli, for better performance in the day to day, very easy to do just follow me and see how simple it is .. the good thing is that you will love it and more, if they already know the colors.in my case my son Rodrigo of 2 years old already knows some colors and has a lot of fun with this game ...
Hola mis amig@s de esta maravillosa comunidad de @motherhood, espero se encuentren bien con lo mas preciado que tenemos nuestro hijos, hoy quiero compartir con ustedes este bello juego didáctico para que nuestros pequeños desarrollen sus estímulos,para un mejor rendimiento en el día a día, muy fácil de hacer solo sígueme y verás que sencillo es .. lo bueno es que le va a encantar y más, si ya saben los colores.en mi caso mi hijo Rodrigo de 2 añitos ya se sabe algunos colores y se divierte bastante con este juego..
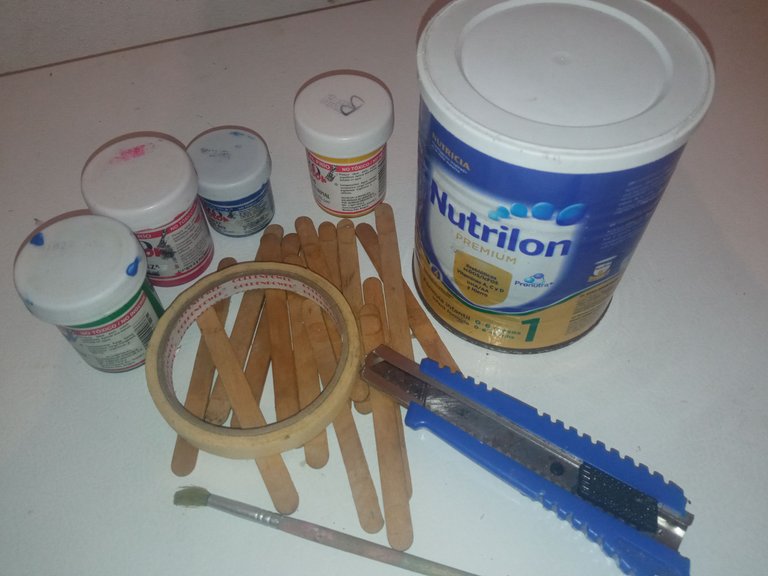
Materials:
-milk pot
-ice cream scoops.
-brush.
-cold paint color: red, yellow, green and blue.
-cuter.
-pull.
Materiales:
-pote de leche
-paletas de helado.
-pincel.
-pintura al frío color:rojo, amarillo, verde y azul.
-cuter.
-tirro.
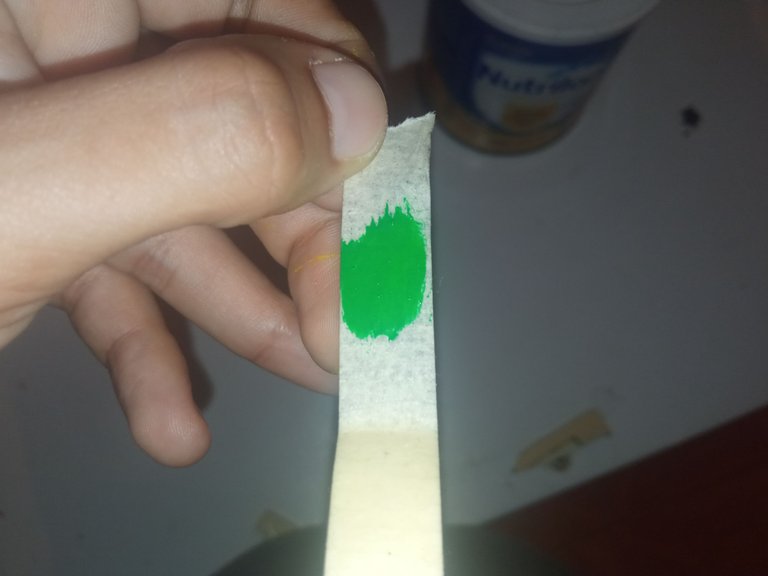
Step 1
First, we take the strip and with the brush, we place the four colors that we are going to use one by one, the first one that I painted was the green color, as you can see, and so we continue painting the other three colors on the strip.
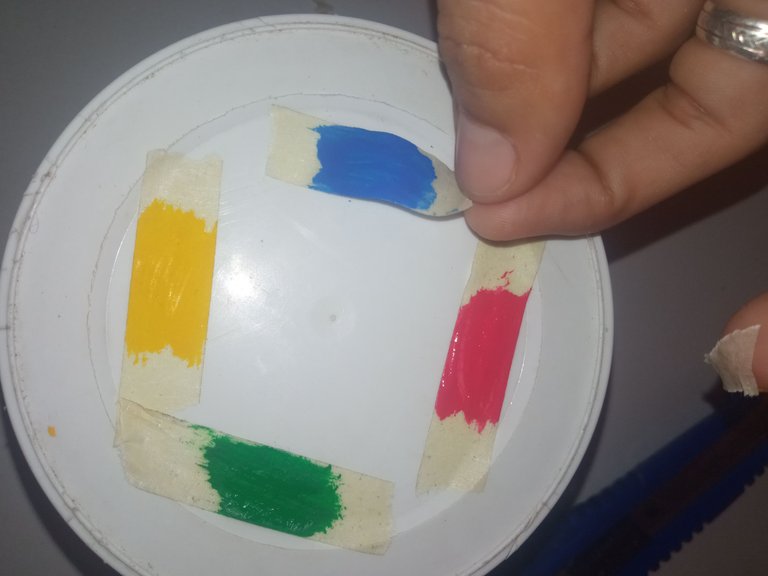
Paso 1
Primero agarramos el tirro y con el pincel,se va colocando los cuatro colores, que vamos a utilizar uno por uno, el primero que pinte fue el color verde, cómo pueden observar y así seguimos pintando los otros tres colores en el tirro.
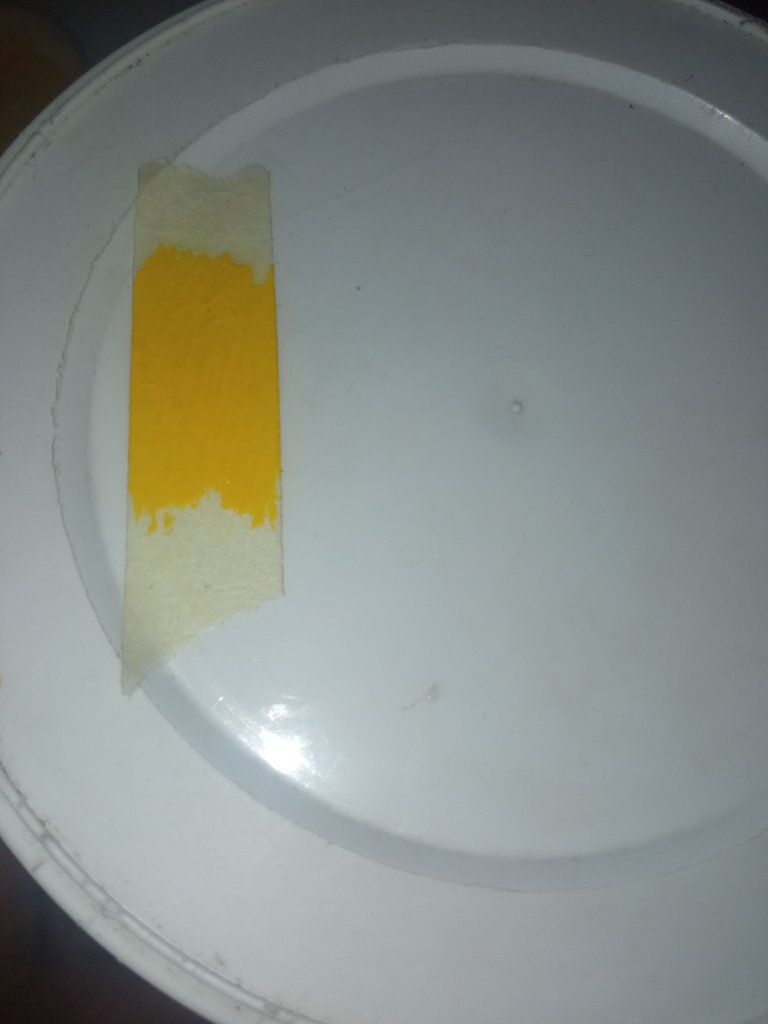
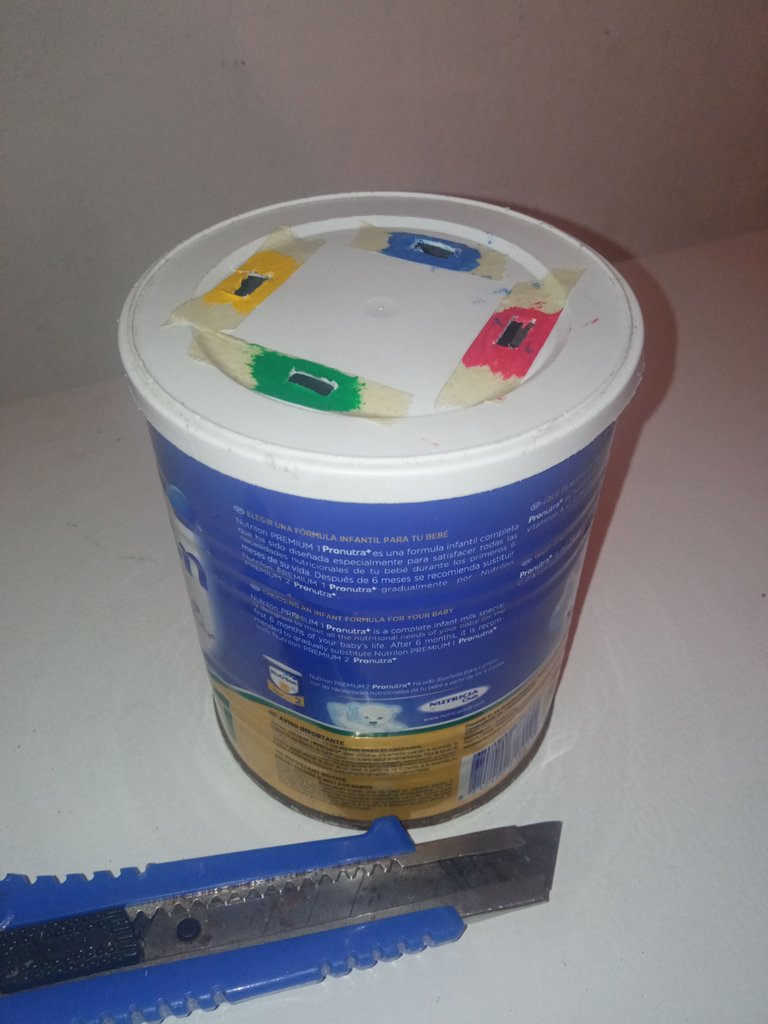
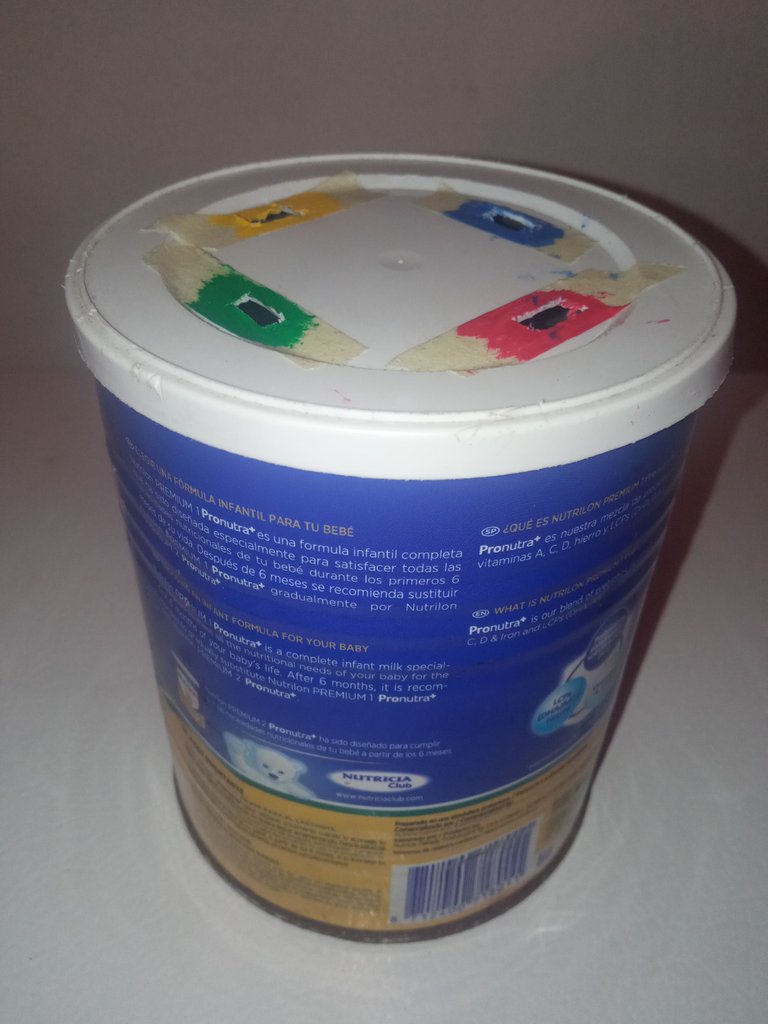
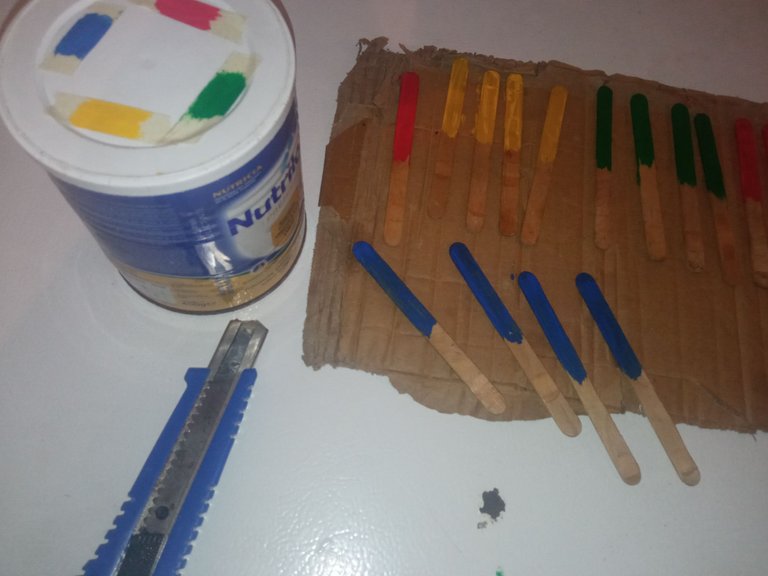
Step 2
We continue in this case we glue the strips that we painted previously and then we use the cutter to open a slot in each color where we calculate that the popsicle sticks will fit in.
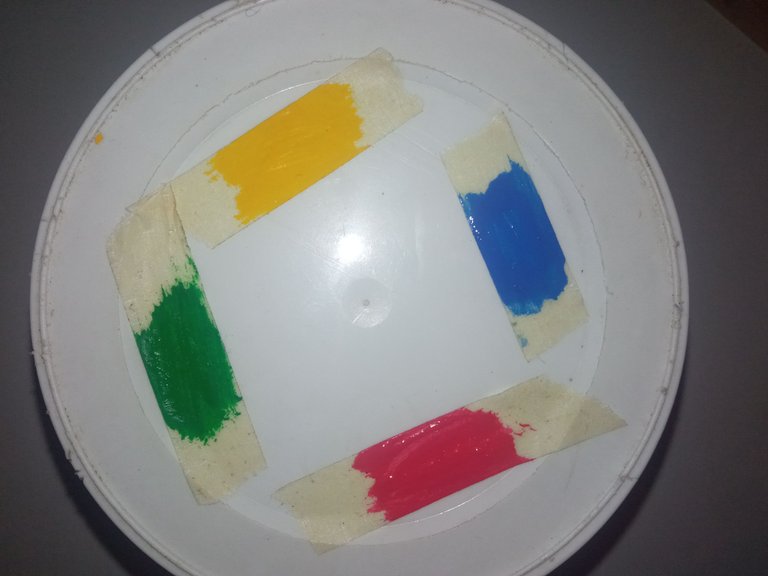
Paso 2
Seguimos en este caso pegamos los tirros que pintamos anteriormente y después utilizamos el cúter para abrir una ranura en cada color donde calculemos que entren las paletas de helado.Asi quedó nuestro envase.
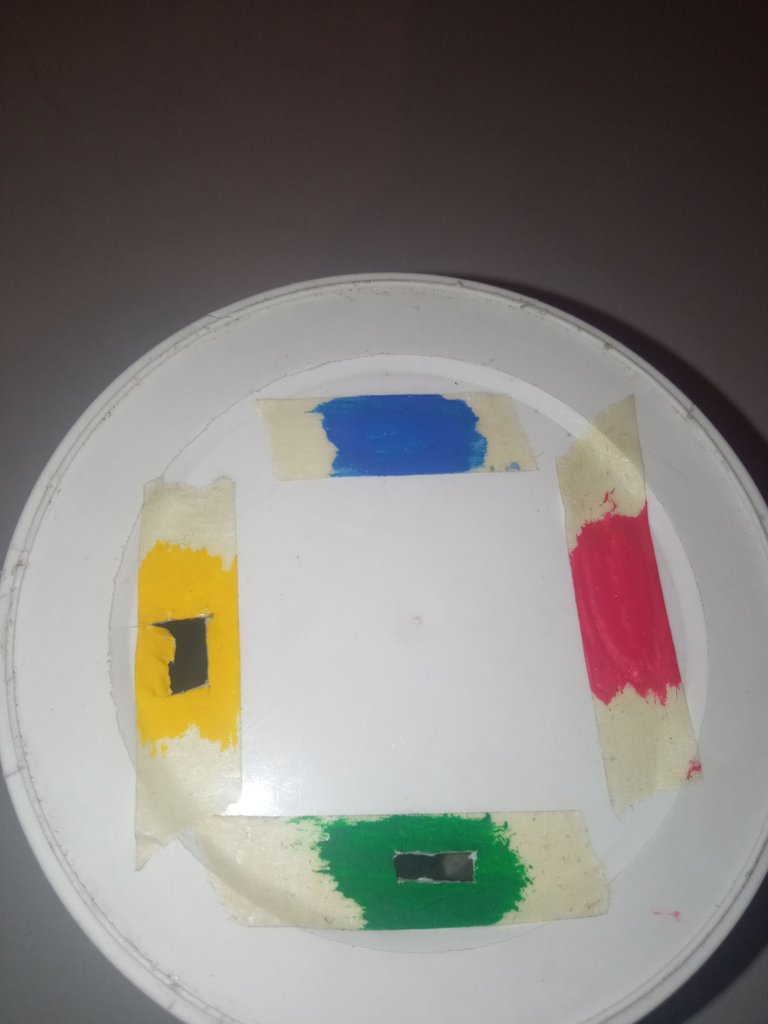

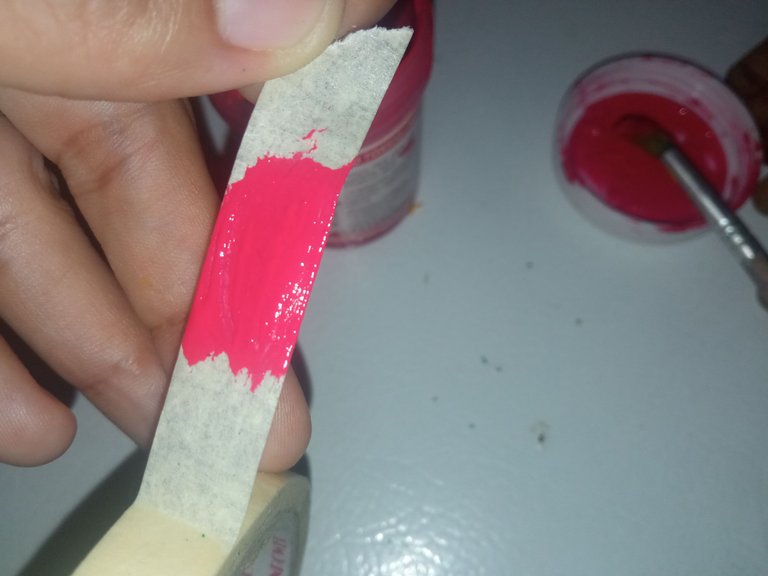
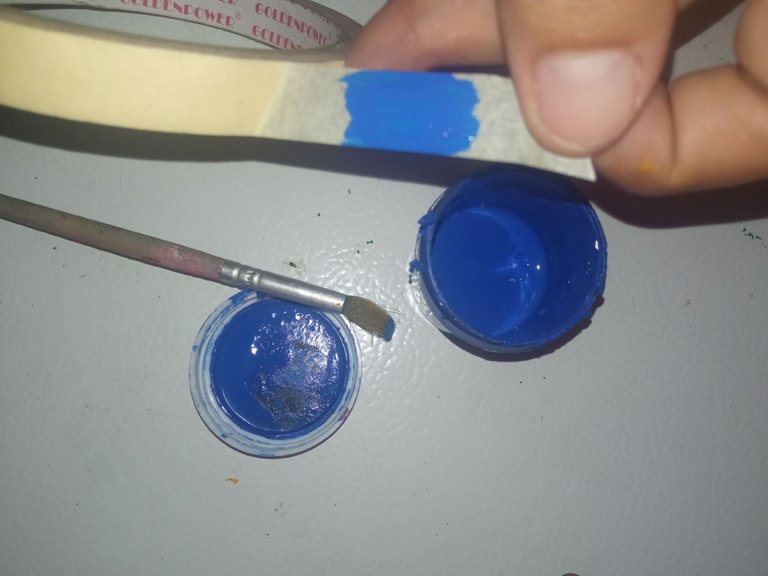
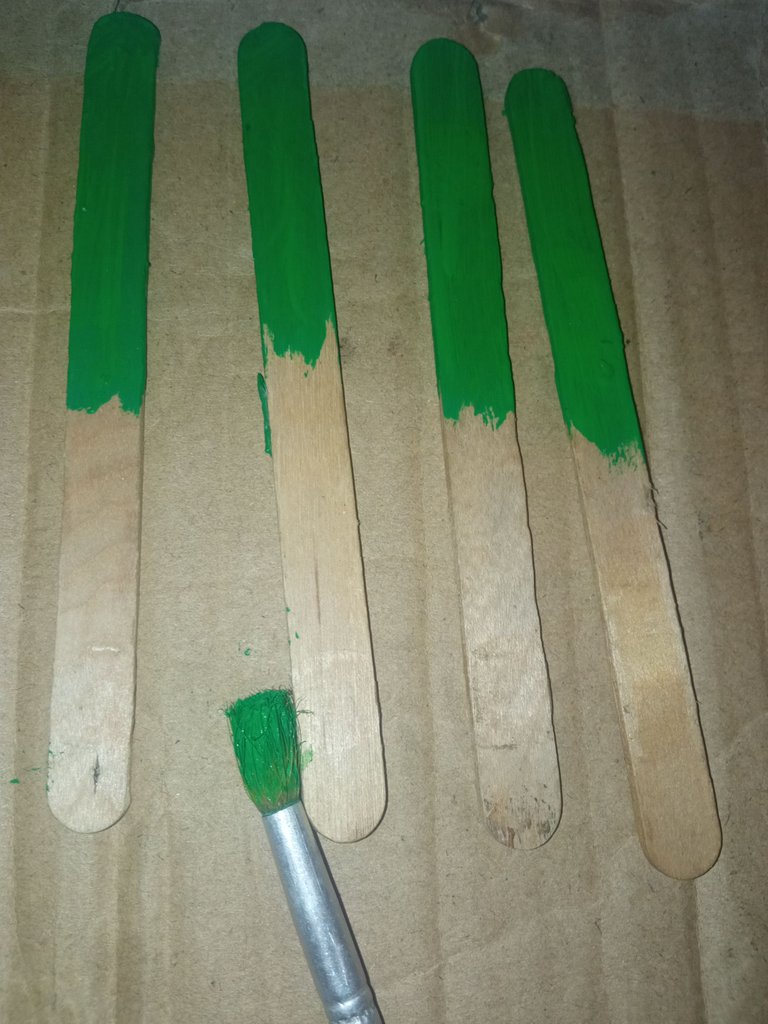
Step 3
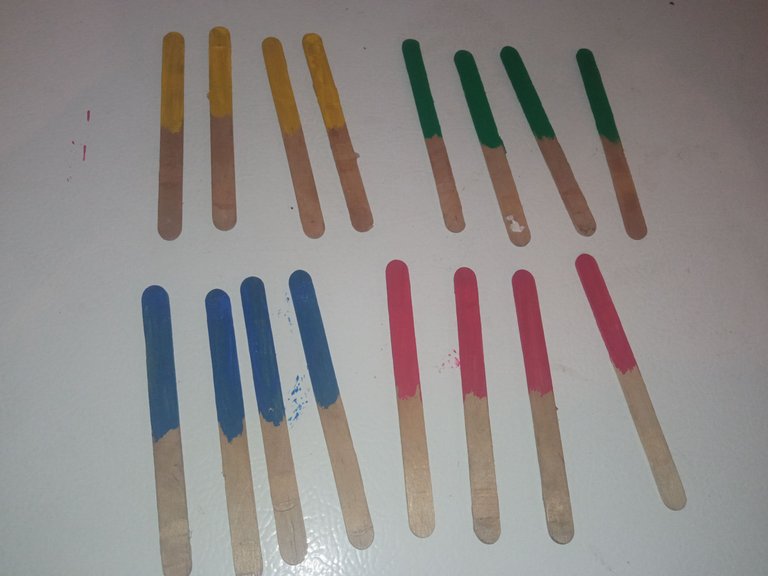
We continue painting with the brush 4 palettes of each of the colors as you can see there.
Paso 3
Continuamos pintando con el pincel 4 paletas de cada uno de los colores cómo pueden ver allí.

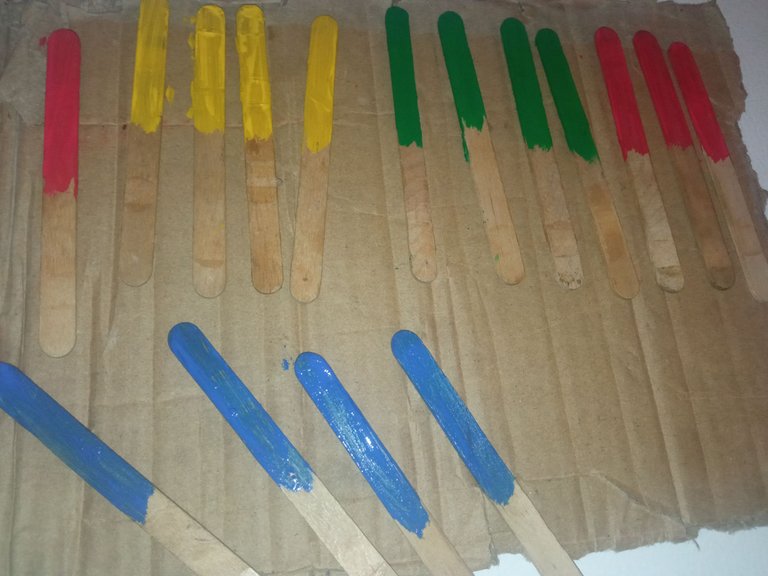
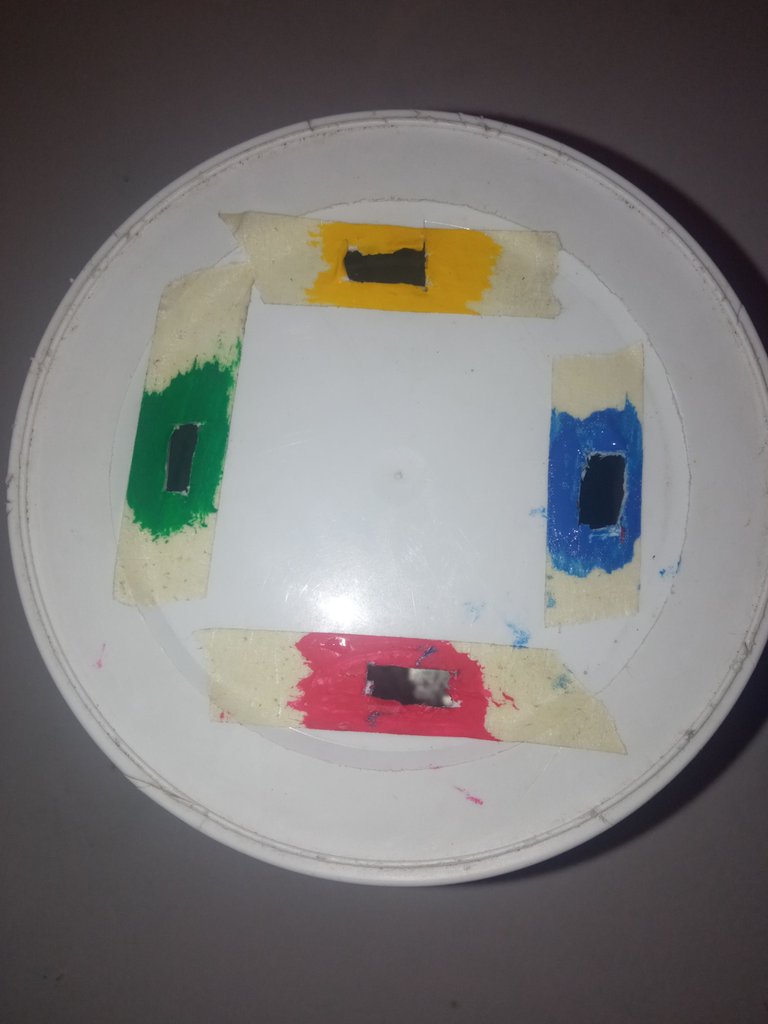
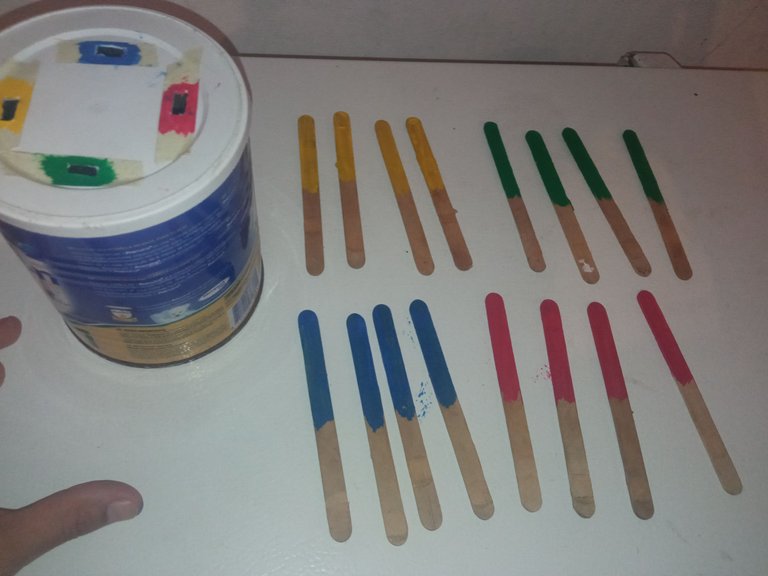
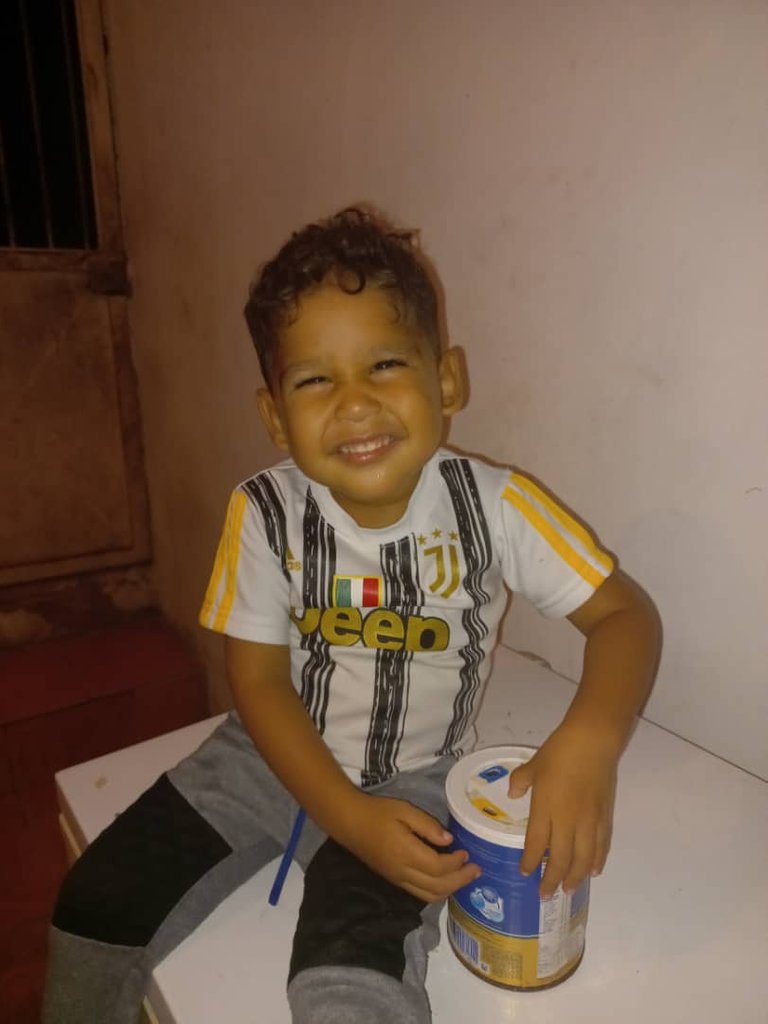
Step 4
The can and popsicle sticks are now ready for use.
Paso 4
Ya tenemos lista la lata y las paletas de helado para comenzar a usarlo.
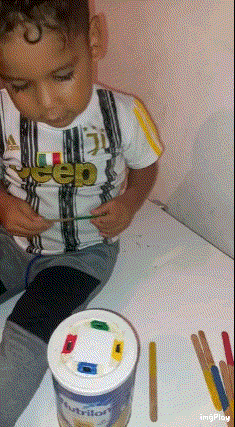
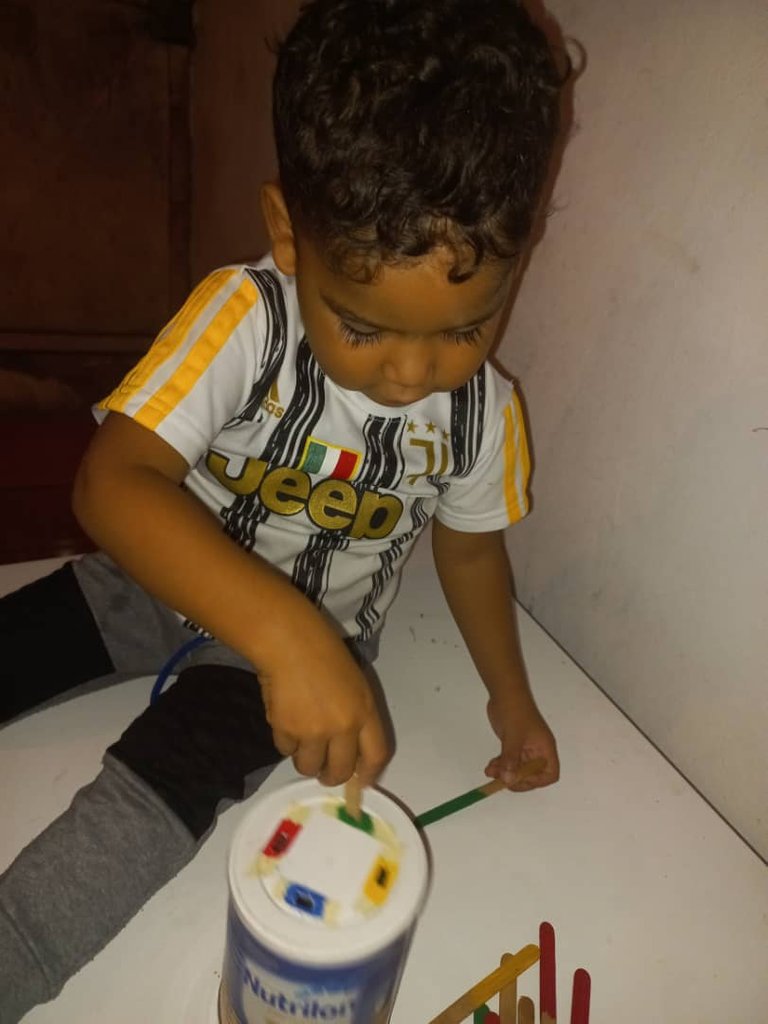
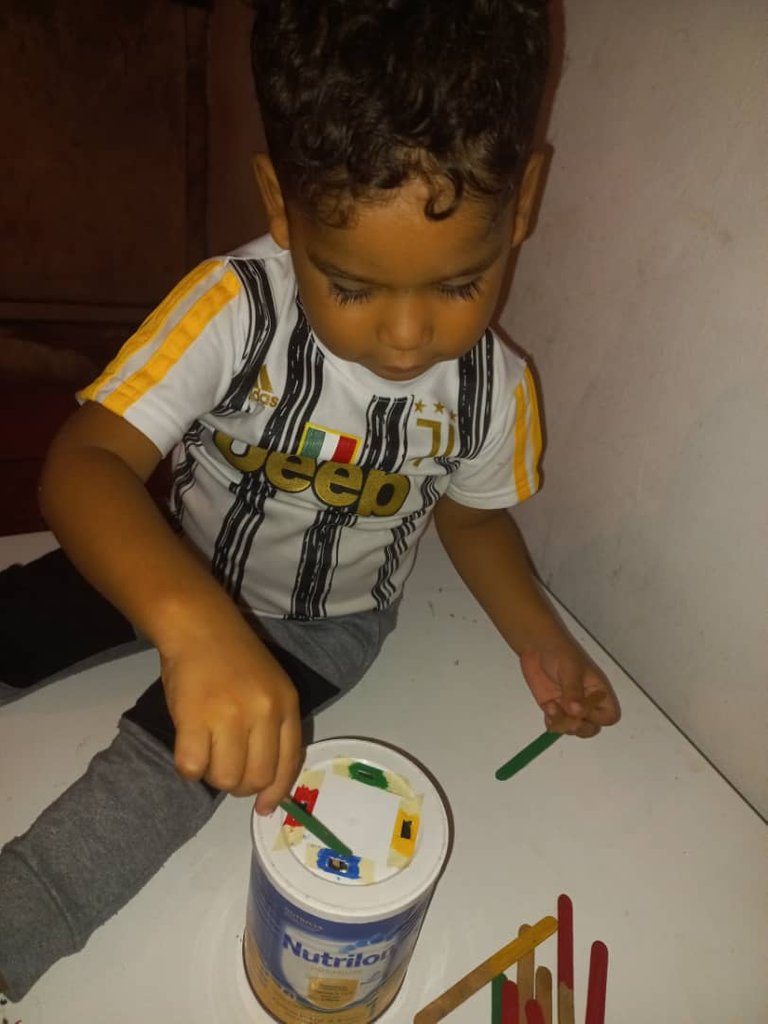
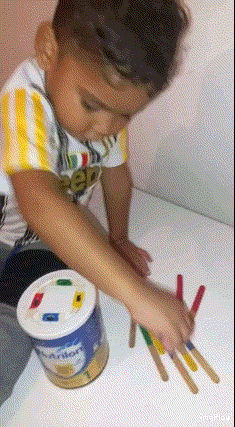
Step 5
Finally we have our didactic game ready and as you can see my son liked his prey very much as he says. Encourage them to do it, it is really very motivating for them.
Paso 5
Finalmente tenemos nuestro juego didáctico listo y cómo pueden ver mi hijo le agradó mucho su presa como dice el. Anímense a realizarlo en verdad es muy motivante para ellos.

RESOURCES USED / RECURSOS UTILIZADOS
• Incollage/ para unir y reducir las fotos.
• Photos taken by redmi 9. / Fotos tomadas por redmi 9.
• The translator is used www.Deepl.com / Se utiliza el traductor www.Deepl.com